Floor Sanding Near You
Can’t find what you are looking for?
How It Works
-
 Answer a few questions about your home project.
 -
 Within seconds, get matched with top-rated local pros.
 -
 Compare quotes and choose the best pro for the job.
Floor Sanding In Your Area
Floor Sanding: A Guide to Restoring Your Hardwood Floors
Meta Description: Discover the art of floor sanding to revive your hardwood floors. Learn techniques, tools, and tips for a professional finish in our comprehensive guide.
Hardwood floors can be sanded and refinished up to 10 times. This extends their lifespan significantly. Proper care and attention are key to achieving this longevity.
Hardwood floors are beautiful and durable but can get damaged over time. Scratches, sun exposure, and foot traffic can take their toll. Refinishing can revive their appearance and extend their life.
This guide will help you restore your hardwood floors step-by-step. You’ll learn about floor preparation, sanding techniques, and applying the final finish. With these tips, you can achieve a professional-looking result.
Key Takeaways
- Hardwood floors can be sanded and refinished up to 10 times, extending their lifespan.
- Proper preparation, including securing loose boards and nails, is crucial for a successful refinishing project.
- Sanding the floor in a specific sequence and using the right grit sandpaper is essential for achieving a smooth, even finish.
- Choosing the right floor stain and finish, whether water-based or oil-based, can make a significant difference in the final look and durability of your hardwood floors.
- Prioritizing safety, including wearing personal protective equipment and working in well-ventilated areas, is key during the refinishing process.
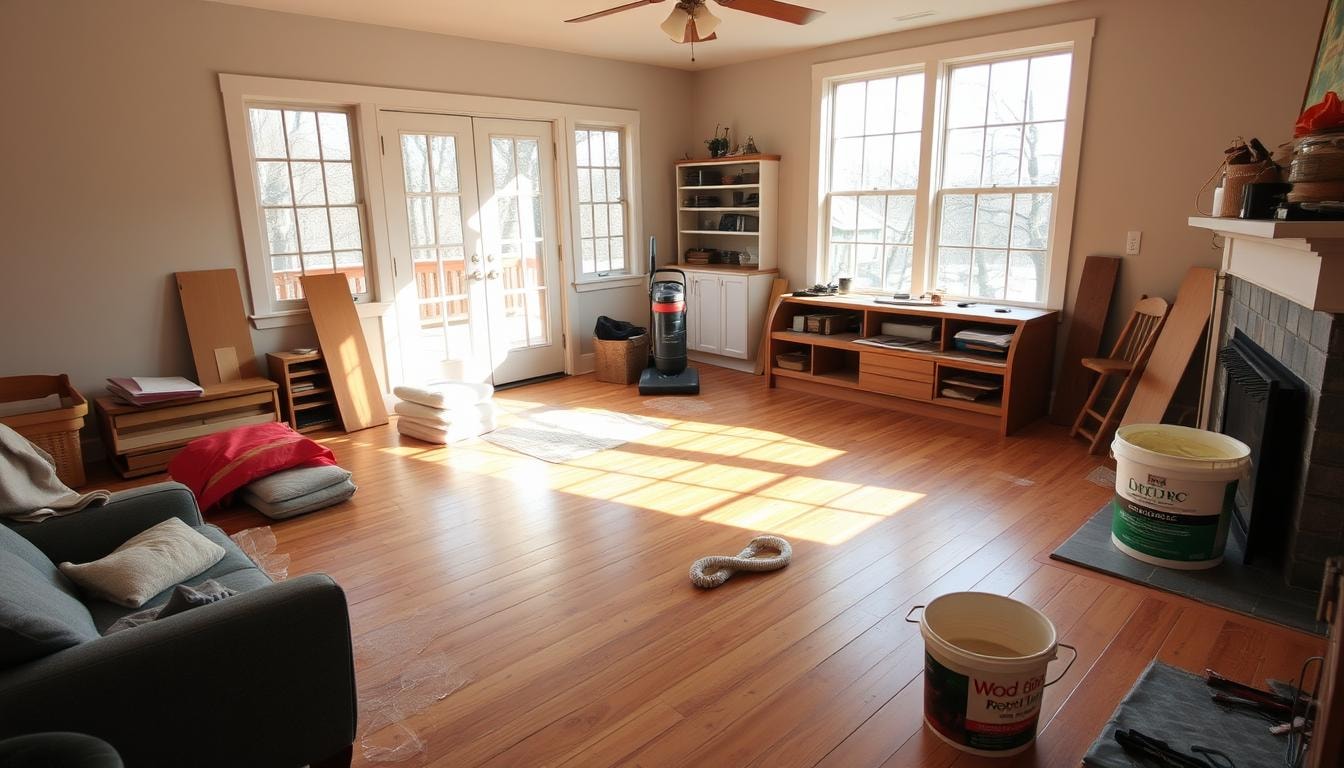
Preparing the Floor
Check your floor’s condition before sanding. Do a water droplet test to see if refinishing is needed. Clear the room of furniture and rugs for full access.
Inspect the floor for any issues. Use a putty knife to find loose boards or protruding nails. Fix these problems to prevent damage during sanding.
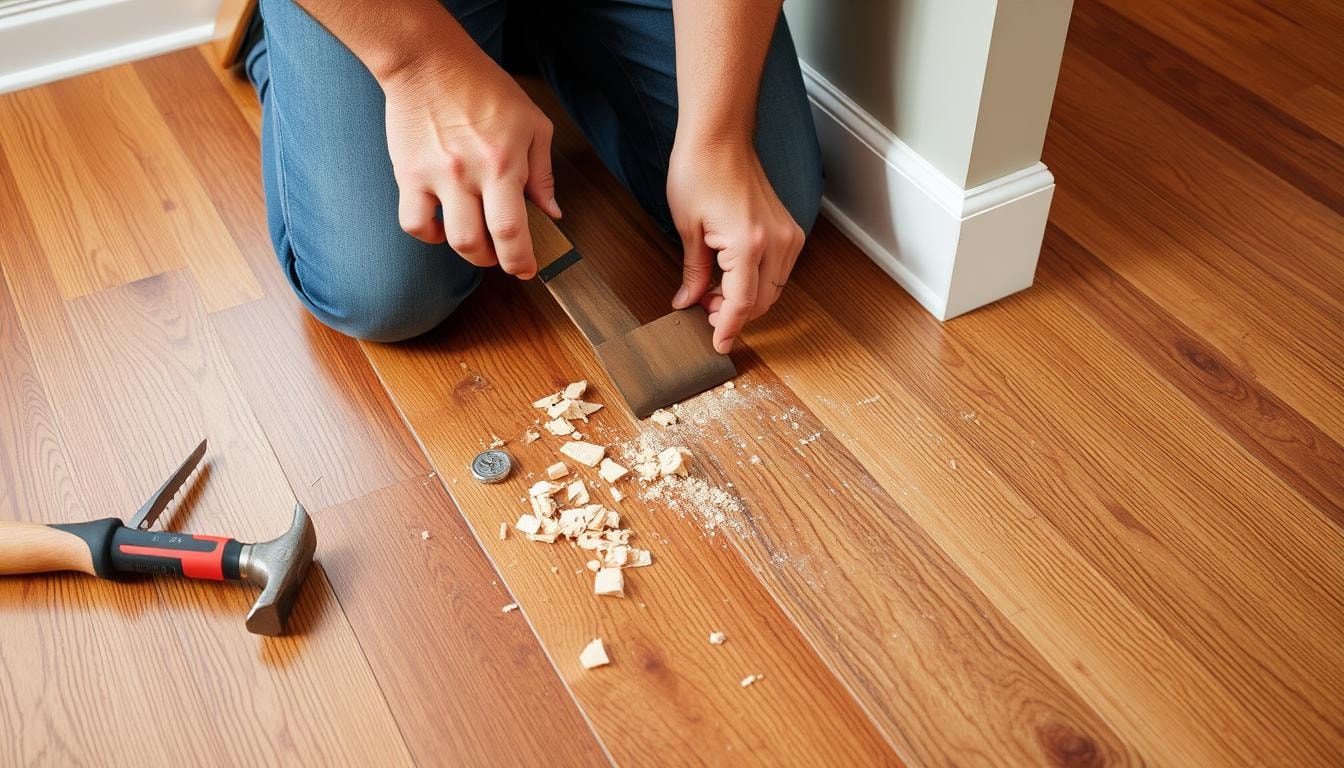
Securing Loose Boards and Nails
Hammer down loose nails and fill gaps with wood filler. This creates a smooth surface for sanding. It also prevents further damage to your floor.
Sealing Vents and Doors
Keep sanding dust contained by sealing air vents and doors. Use plastic sheeting and painters’ tape to cover openings. This makes cleanup easier and prevents dust from spreading.
Preparing for Dust Removal
Vacuum the floor to remove loose debris before sanding. This ensures a clean surface for the process. Set up a dust collection system or use a HEPA vacuum.
Removing Base Molding
Remove the base molding before sanding your hardwood floors. This step ensures a smooth, consistent finish. You’ll need a pry bar and scrap wood to protect the baseboards.
Gently pry the base molding away from the wall. Be careful not to damage the baseboards. Label each piece as you remove it for easier reinstallation later.
- Carefully insert the pry bar under the base molding and gently pry it away from the wall, taking care not to damage the baseboards.
- As you remove each piece of molding, label or number it to make reinstallation easier once the floor refinishing is complete.
- Set the removed base molding pieces aside, keeping them organized and labeled for easy reinstallation.
By following these steps, you’ll prepare your floor for sanding. This process helps achieve a professional-looking finish on your hardwood floors.
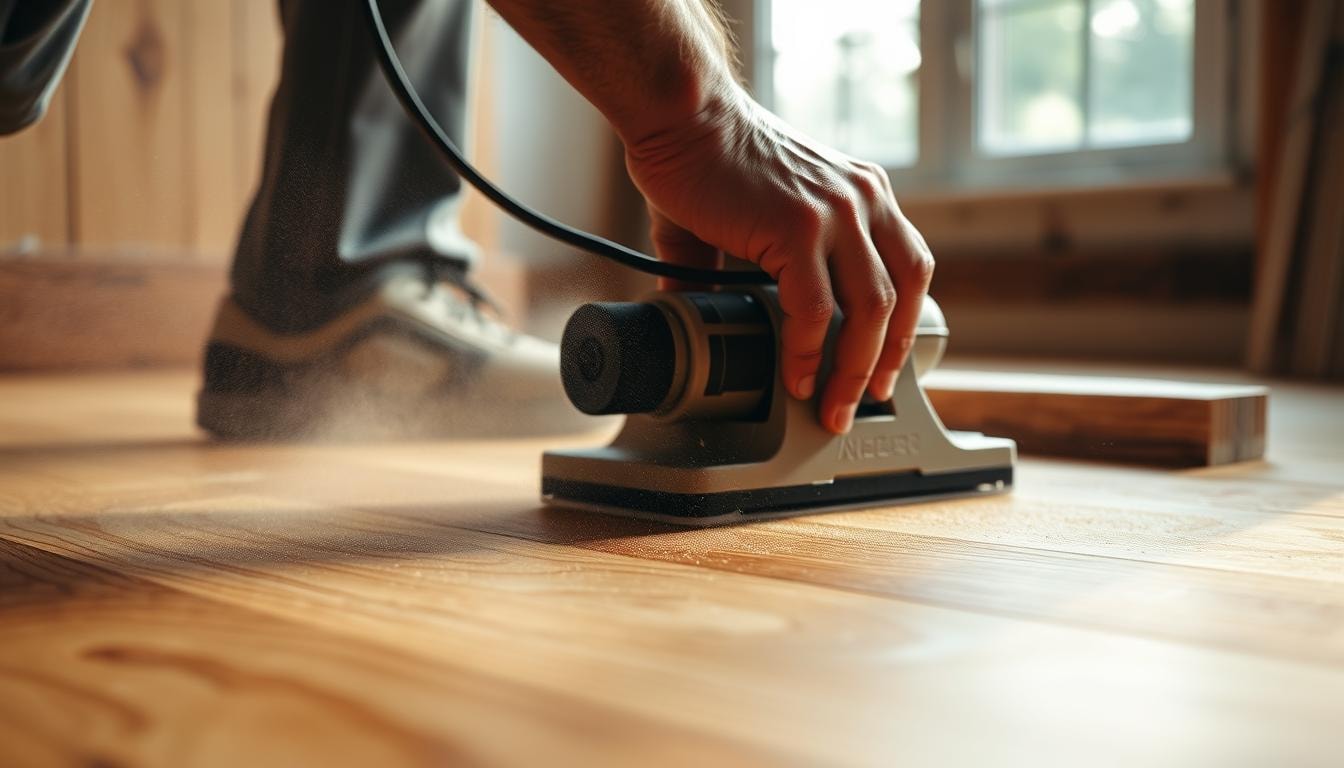
Rough Sanding
Rough sanding is a key step in refinishing hardwood floors. It creates a smooth base for the new finish. Let’s explore this important process.
Wielding the Drum or Belt Sander
Start by choosing a drum sander or belt sander. Drum sanders work well for large areas. Belt sanders are better for tight spaces.
Adjust your chosen tool carefully. Operate it with caution to protect the wood surface.
Sanding Sequence and Grit Progression
- Start with a coarse 36- or 40-grit sandpaper to aggressively remove old finishes, dents, and scratches, leveling the floor.
- Gradually progress to a 60-grit paper, followed by a 100-grit, refining the surface with each step.
- Be sure to replace the abrasive belt after sanding approximately 250 square feet to maintain optimal performance.
- Work the sander back and forth along the length of the boards, using overlapping strokes to ensure even coverage.
- Sweep and vacuum the floor between each grit change to remove dust and debris, preparing the surface for the next stage.
This sanding method strips away old layers. It reveals your floor’s true beauty. You’ll be ready for a perfect finish.
Sanding Edges and Corners
Drum or belt sanders handle most of your hardwood floor. But edges and corners need special attention. Edge and orbital sanders help achieve a smooth, uniform look.
Using an Edge Sander
Use an edge sander for walls and baseboards. Start with 80-grit sandpaper to remove old finish. Then switch to 100-grit for a smooth appearance.
Reaching Tight Spaces
- For closets, bathrooms, or tight stairways, use a handheld scraper and careful hand-sanding.
- Use a sanding block to maintain even pressure and prevent gouging the wood.
- Pay attention to edges and corners. The wood is most vulnerable to damage here during sanding.
Proper sanding of edges and corners ensures a professional-looking result. It seamlessly ties the entire room together.
Screen Sanding
After rough and edge sanding, it’s time to smooth your hardwood floors. Screen sanding brings a smooth, even finish. Use a floor buffer with a fine-grit screening pad to level minor unevenness.
Make broad, sweeping arcs with the buffer across the floor. This creates a seamless surface ready for staining and finishing. The open-weave nylon webbing removes old finishes without damaging the wood.
Sanding screens come in sizes from 17 to 20 inches. Edger screens are available for tight spaces along the edges. These tools help achieve a professional-grade, blemish-free finish.
Screen sanding is more efficient than traditional floor sanding. The webbing design makes screens waterproof and suitable for wet environments. You can rinse them between uses for longer life.
This cost-effective solution maintains hardwood floors in top condition. It reduces the need for extensive manual sanding. Screen sanding is a smart choice for floor care.
Dust Removal
Stunning hardwood floors start with thorough dust removal. After sanding, sweep and vacuum to eliminate lingering dust, hair, and imperfections. This step ensures a seamless, professional-grade result.
Sweeping and Vacuuming
Start by sweeping the floor to gather larger dust particles. Then, use a high-powered vacuum with specialized attachments for finer debris. Cover every inch of the floor, leaving no area untouched.
Using a Tack Cloth
After sweeping and vacuuming, use a tack cloth to catch remaining dust or hair. Gently wipe the surface to pick up even the smallest imperfections. This creates a smooth foundation for staining and finishing.
Leftover dust and hairs can cause blemishes in the final finish. A clean surface is crucial for flawless restoration. These steps set the stage for a professional-looking hardwood floor.
Floor Staining
Wood stain can transform your hardwood floors. The right stain greatly affects your floors’ final look. Some woods like maple and pine don’t take stains well.
Choosing the Right Stain
Wood stains offer various shades, from light to bold. Consider your floor’s current color and desired outcome. Light stains make subtle changes, while deep colors create dramatic transformations.
Applying the Stain
Use a foam applicator pad to apply stain along the wood grain. Wipe excess stain with clean cloths or paper towels. This ensures an even finish.
For unstained floors, use a sanding sealer before the final finish. This creates a smooth surface and enhances the wood’s natural beauty.
Proper preparation is key for professional-looking stained floors. Follow these steps to refresh your hardwood floors’ appearance.
Applying Floor Finish
The final step in restoring hardwood floors is applying a protective wood finish or oil. This seals and protects the freshly sanded surface. It ensures your floors look great for years to come.
Water-Based vs. Oil-Based Finishes
Floor finishes come in two main types: water-based and oil-based polyurethane. Water-based finishes dry fast and provide a clear, non-yellowing look. Oil-based polyurethane offers a richer finish but takes longer to dry.
Other popular wood oils include Danish, teak, tung, cedar, ipe, and mineral oil. Each oil has unique properties and aesthetics.
Application Techniques
- Apply the finish using a lamb’s wool applicator, working in smooth, even strokes to avoid drips and ensure consistent coverage.
- Depending on the product, you may need 3-4 coats, sanding lightly between each coat and thoroughly vacuuming up the dust before applying the next layer.
- Water-based polyurethane typically dries to the touch in about 2 hours and can be recoated in 4 hours, while oil-based finishes take twice as long to dry.
- Allow the recommended curing time, usually 8 hours, before allowing foot traffic on the newly finished floors.
Proper application of the right floor finish protects your hardwood investment. It results in a beautiful, long-lasting finish for your floors.
Floor Sanding Tips
Restoring hardwood floors requires a consistent sanding sequence for a flawless finish. Use the same grit paper on your edger and drum sander. This creates a uniform surface across the entire floor.
Dust is unavoidable during floor sanding. Most equipment has built-in dust collection systems. Sweep and vacuum often to reduce airborne particles and prevent respiratory issues.
Before applying stains or finishes, do a spot test on a small area. This helps you assess the color and finish. You can ensure it meets your expectations before treating the whole floor.
Floor Refinishing Safety
Safety is crucial when restoring hardwood floors. Proper precautions prevent accidents and ensure success. Follow these guidelines to protect yourself and your home.
Personal Protective Equipment
Wear a high-quality dust mask when using loud sanding equipment. Safety goggles and ear protection are vital. Read and follow manufacturer’s instructions carefully.
Ventilation and Dust Control
Make sure your work area has good airflow. Cover vents and grates to stop dust from spreading. Open windows and doors to improve ventilation.
Use proper dust control to reduce exposure to harmful wood particles. This helps keep your workspace safe and clean.
Handling Rags and Finishes
Store and dispose of oil-soaked rags properly. The heat they generate can cause fires. Be careful with solvent-based finishes, as they release harmful fumes.
Choose water-based or low-VOC options when possible. These alternatives are safer and reduce exposure risks.
These safety tips will protect you during floor refinishing. Taking precautions ensures a safe and successful project. Your newly restored floors will be worth the effort.
DIY vs. Professional Refinishing
Refinishing hardwood floors is a big job. Homeowners must choose between DIY and hiring pros. DIY saves money, but requires skills, time, and effort.
Cost Considerations
DIY floor sanding and refinishing costs 0 to ,000. Factors include area size and materials needed. Professionals charge ,150 to ,500 for the same job.
Hiring pros often pays off long-term. They have expertise to handle severe floor damage. Pros ensure a seamless, blended finish.
Skill Level and Time Commitment
- Professional crews can sand and refinish around 1,000 square feet of hardwood floors per day, while it can take homeowners 2 to 4 times longer to complete the same area.
- DIY sanding and refinishing may lead to common mistakes, such as uneven sanding, improper polyurethane adhesion, and floors needing to be redone due to poor initial application.
- The cost savings for DIY sanding increase as the floor size becomes larger, but hiring a professional generally results in a time-efficient and cost-effective outcome.
Consider cost, skill level, and time when deciding. DIY saves money but takes longer. Pros work faster and provide better results.
Hiring experts may be best for a lasting finish. They offer an efficient timeline and high-quality outcome.
FindPros: Your Hardwood Floor Sanding Partner
Embarking on a wood floor refinishing project can be a daunting DIY task. But you don’t have to go it alone. FindPros can connect you with experienced floor sanders who fit your personal preferences and home needs. Simply answer a few questions about your project, and we’ll match you with top-rated local professionals. Compare their quotes, availability, and reviews to find the perfect fit for your house, whether it’s the living room, bedroom, or even stairs. Take the guesswork out of your floor sanding job and let FindPros handle the legwork of finding the right machine, abrasives, and expert for the task. Get started on your hardwood floor refresh today.
Conclusion
Reviving hardwood floors is achievable with the right techniques and tools. This guide helps transform your floors, enhancing your home’s overall look. By following these steps, you’ll get professional-looking results.
The key is a methodical approach with proper preparation. Each step is crucial for ensuring your flooring’s longevity and beauty. From sanding to applying the final protective coating, every action matters.
Investing time in floor maintenance can increase your property’s value. It also helps reduce dust, allergens, and pests. This improvement boosts your home’s indoor air quality.
With the right approach, you’ll enjoy your hardwood floors for years. Their timeless charm will continue to enhance your living space. Regular care ensures your floors remain beautiful and functional.
Frequently Asked Questions (Floor Sanding)


MOST POPULAR CITIES
Browse by State- Alameda
- Costa Mesa
- Laguna Beach
- Orange
- Alhambra
- Culver City
- Lancaster
- Oroville
- Anaheim
- Daly City
- Livermore
- Oxnard
- Antioch
- Davis
- Lodi
- Pacific Grove
- Arcadia
- Downey
- Lompoc
- Palm Springs
- Bakersfield
- El Centro
- Long Beach
- Palmdale
- Barstow
- El Cerrito
- Los Angeles
- Palo Alto
- Belmont
- El Monte
- Malibu
- Pasadena
- Berkeley
- Escondido
- Martinez
- Petaluma
- Beverly Hills
- Eureka
- Marysville
- Pomona
- Brea
- Fairfield
- Menlo Park
- Port Hueneme
- Buena Park
- Fontana
- Merced
- Rancho Cucamonga
- Burbank
- Fremont
- Modesto
- Red Bluff
- Calexico
- Fresno
- Monterey
- Redding
- Calistoga
- Fullerton
- Mountain View
- Redlands
- Carlsbad
- Garden Grove
- Napa
- Redondo Beach
- Carmel
- Glendale
- Needles
- Redwood City
- Chico
- Hayward
- Newport Beach
- Richmond
- Chula Vista
- Hollywood
- Norwalk
- Riverside
- Claremont
- Huntington Beach
- Novato
- Roseville
- Compton
- Indio
- Oakland
- Sacramento
- Concord
- Inglewood
- Oceanside
- Salinas
- Corona
- Irvine
- Ojai
- San Bernardino
- Coronado
- La Habra
- Ontario
- San Clemente