Bathroom Tile Repair Near You
Can’t find what you are looking for?
How It Works
-
 Answer a few questions about your home project.
 -
 Within seconds, get matched with top-rated local pros.
 -
 Compare quotes and choose the best pro for the job.
Bathroom Tile Repair In Your Area
Bathroom Tile Repair 101: A Step-by-Step Guide
Meta Description: Learn how to repair bathroom tiles like a pro with our comprehensive guide. Fix cracks, chips, and broken tiles to restore your bathroom’s beauty and functionality.
Ever looked at your bathroom tiles and thought, “How do I fix that cracked or broken tile?” Don’t worry, this guide will show you how to repair your bathroom tiles. We’ll cover fixing cracks, chips, or even replacing a tile.

Ever thought about what it takes to make your bathroom tiles look new again? This article will show you the steps, tools, and techniques to do just that. Get ready to become a tile repair expert!
Key Takeaways
- Understand the types of tile damage and common tile materials used in bathrooms
- Learn the essential tools and materials needed for a successful tile repair project
- Discover the step-by-step process for removing damaged tiles and installing new ones
- Master the art of grouting and sealing repaired tiles for a professional finish
- Explore expert tips for maintaining your newly repaired bathroom tiles
Understanding Tile Repair Basics
Before you start fixing your bathroom tiles, get to know the usual damage types and tile materials. This info helps you pick the right repair methods for success.
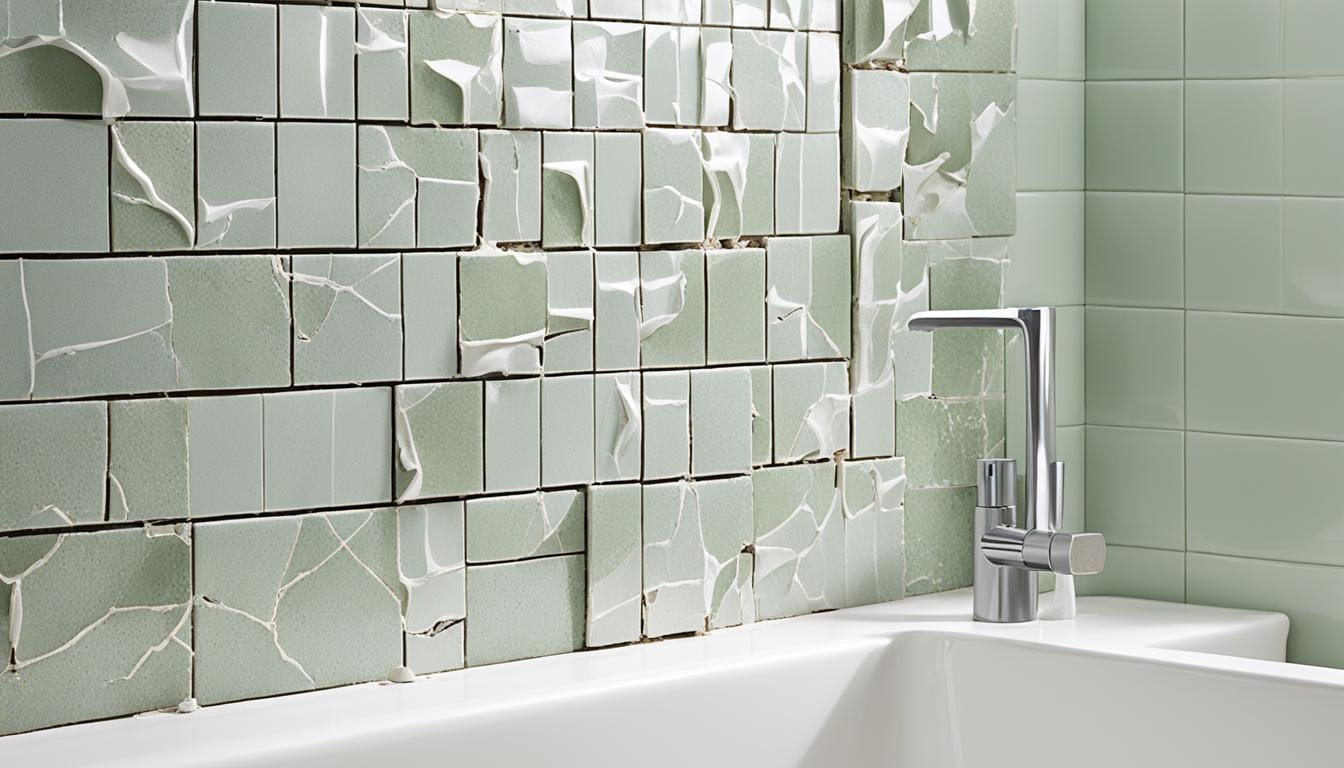
Types of Tile Damage
Tiles can face many problems, like water damage, cracks, chips, and breaks. Knowing the damage’s extent helps you decide how to fix it. Small scratches can be fixed with clear nail polish or fine-grit sandpaper.
Small chips might need epoxy resin or tile repair adhesive. Big cracks or missing pieces could require more work, like epoxy resin and re-grouting.
Common Tile Materials
- Ceramic tiles: Durable and affordable, ceramic tiles are a popular choice for bathrooms.
- Porcelain tiles: Hard and more water-resistant than ceramic, porcelain tiles are great for busy areas.
- Natural stone tiles: Luxurious and unique, natural stone tiles like marble or granite offer a premium look but require more maintenance.
It’s important to know your bathroom’s tile type. This affects the repair methods and tools you’ll need. For example, fixing a cracked natural stone tile is different from fixing a chipped ceramic one.
Understanding tile damage types and materials helps you handle repair challenges better.
Preparing for Tile Repair
Getting ready is key for fixing bathroom tiles right. Before you start, make sure you have the right tools and materials. This makes the repair go smoothly and saves you time and effort.
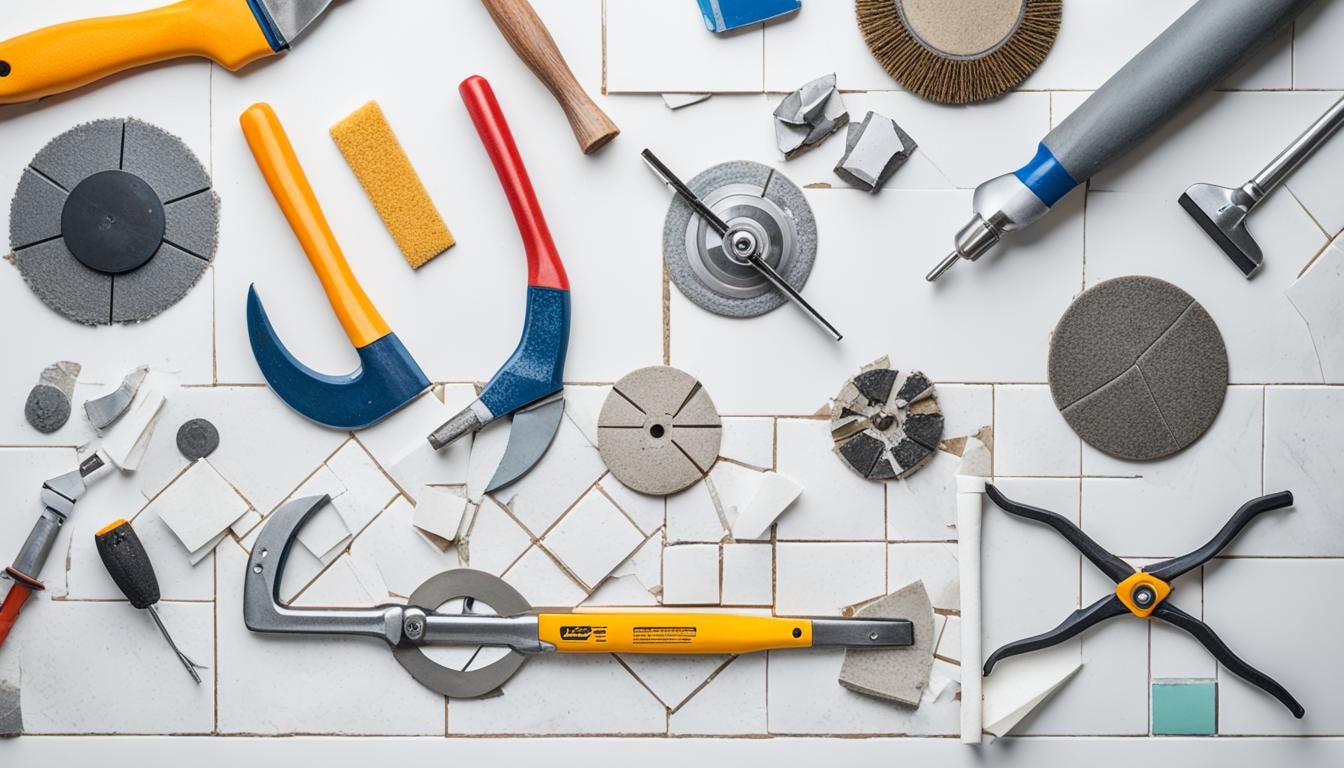
Tools and Materials Needed
For fixing tiles in your bathroom, you’ll need these tools and materials:
- Grout saw – for removing damaged grout
- Tile nippers – for cutting and shaping new tiles
- Notched trowel – for applying thin-set mortar evenly
- Spacers – to keep grout lines even
- Grout float – for spreading and smoothing grout
- Sponge – for cleaning up extra grout
- Wet saw (optional) – for precise tile cuts
- Safety gear – gloves and safety glasses
Having these tools and materials ready will help you fix any tile problem. You’ll be able to remove damaged tiles and install new ones correctly. Don’t forget to keep a first-aid kit and eyewash station close for safety.
Removing Damaged Tiles
The first step in fixing a bathroom tile is to remove the damaged ones. You need to scrape off old grout and carefully take out the tile pieces.
Begin by using a grout saw or a tool for removing grout to scrape away the old grout. This makes the tile easier to remove. Then, use a hammer and chisel to break the tile into smaller bits. Be careful not to damage the nearby tiles or the surface below.
- Wear protective glasses and a dust mask to prevent eye and breathing problems from tile bits.
- Put down a dust sheet to catch any broken tile pieces and make cleaning up easier.
- Vacuum the surface well to get rid of any leftover debris or old mortar before putting in the new tile.
After removing the damaged tile, clean the surface well for the new tile. This is key for a strong, lasting bond between the new tile and the surface.
Tile Repairing Process
Fixing damaged tile takes patience and care. First, a layer of thin-set mortar is applied to the surface. Then, a notched trowel spreads the mortar, making sure it has ridges for a strong bond.
Applying Thin-Set Mortar
The thin-set mortar is what holds the new tile down. It’s important to spread it evenly for a good grip. This part of the repair takes about 65% of the work, including cleaning and preparing the surface.
Cutting and Positioning New Tiles
For cutting the tile, use a tile cutter or wet saw. When putting in the new tile, drop it gently and press down evenly. This ensures a strong bond with the mortar. This part is about 35% of the repair work.
By following these steps, you can fix your tile well. With the right tools and techniques, even broken tiles can look new again.
Grouting and Sealing Repaired Tiles
After putting in new tiles and letting the thin-set dry, it’s time to grout. Use a rubber grout float to spread grout between the tiles. Make sure it fills the gaps well. Then, use a damp sponge to wipe off extra grout from the tiles.
Let the grout dry as the maker says. This drying time is key for a strong, lasting finish. Once dry, seal the area to keep stains and moisture out.
Use a good grout sealer with a brush or roller, covering the grout lines well. You can also seal the whole area for extra protection. This keeps the tiles and grout looking good and prevents stains and damage.
Grouting and sealing your tiles makes them look great and last longer. With the right grout and sealer, your bathroom’s tile work will stay in top shape for many years.
Tips for Successful Bathroom Tile Repair
Keeping your bathroom tiles in good shape is key to their lasting beauty and your space’s look. Here are some easy tips to keep your bathroom tiles looking great for a long time.
Maintaining Repaired Tiles
Cleaning your repaired bathroom tiles often is a must. Use a gentle, pH-neutral cleaner and a soft brush to clean them. Stay away from strong chemicals or rough stuff that could harm the tiles. Make sure to rinse well and dry the area to stop water spots or mineral deposits.
It’s also smart to protect your repaired tiles. Think about putting a sealant or grout sealer on them. This helps keep them safe from water, stains, and wear. Just reapply the sealant every one to two years to keep the tiles water-resistant.
- Clean tiles often with a mild, pH-neutral cleaner and a soft brush
- Put a sealant or grout sealer on the fixed areas to protect against water, stains, and wear
- Reapply sealant as needed, usually every 1-2 years
By doing these things, you can make sure your bathroom tile repair lasts a long time. And your space will always look its best.
Let the Experts at FindPros Handle Your Tile Repair
Finding the right professionals for your bathroom tile repair project is essential for achieving the best results. At FindPros, we connect you with top-rated local experts who can handle your tile repairs efficiently.
By filling out a simple survey about your home project, you can receive multiple quotes from competing pros, ensuring you get the best pricing and find someone you feel comfortable working with. Within seconds, you’ll be matched with professionals who understand your needs, allowing you to compare quotes and choose the best option for your tile repair. Let us help you restore your bathroom’s beauty with ease.
Conclusion
This guide has given you the key knowledge and steps for fixing bathroom tile repair like a pro. You learned the tile repair basics and how to get your workspace ready. You also learned how to remove, put back, and keep the fixed tiles in place.
Now, you’re ready to handle DIY tile repair or think about tile restoration services. This guide gave you the tools and methods for a top-notch result. By working on bathroom renovation projects, you make your home look better and protect your home improvement investments for a long time.
With the right steps and focus, you can save money and make your bathroom tiles look new again. So, go ahead with those tile repair projects and show off your DIY skills. The joy of a job well done is the best reward.
Frequently Asked Questions (Bathroom Tile Repair)


MOST POPULAR CITIES
Browse by State- Alameda
- Costa Mesa
- Laguna Beach
- Orange
- Alhambra
- Culver City
- Lancaster
- Oroville
- Anaheim
- Daly City
- Livermore
- Oxnard
- Antioch
- Davis
- Lodi
- Pacific Grove
- Arcadia
- Downey
- Lompoc
- Palm Springs
- Bakersfield
- El Centro
- Long Beach
- Palmdale
- Barstow
- El Cerrito
- Los Angeles
- Palo Alto
- Belmont
- El Monte
- Malibu
- Pasadena
- Berkeley
- Escondido
- Martinez
- Petaluma
- Beverly Hills
- Eureka
- Marysville
- Pomona
- Brea
- Fairfield
- Menlo Park
- Port Hueneme
- Buena Park
- Fontana
- Merced
- Rancho Cucamonga
- Burbank
- Fremont
- Modesto
- Red Bluff
- Calexico
- Fresno
- Monterey
- Redding
- Calistoga
- Fullerton
- Mountain View
- Redlands
- Carlsbad
- Garden Grove
- Napa
- Redondo Beach
- Carmel
- Glendale
- Needles
- Redwood City
- Chico
- Hayward
- Newport Beach
- Richmond
- Chula Vista
- Hollywood
- Norwalk
- Riverside
- Claremont
- Huntington Beach
- Novato
- Roseville
- Compton
- Indio
- Oakland
- Sacramento
- Concord
- Inglewood
- Oceanside
- Salinas
- Corona
- Irvine
- Ojai
- San Bernardino
- Coronado
- La Habra
- Ontario
- San Clemente