Bathtub Repair Near You
Can’t find what you are looking for?
How It Works
-
 Answer a few questions about your home project.
 -
 Within seconds, get matched with top-rated local pros.
 -
 Compare quotes and choose the best pro for the job.
Bathtub Repair In Your Area
Essential Tips for Bathtub Repair and Maintenance
Meta Description: Discover essential tips for bathtub repair and maintenance. Learn how to fix common issues, prevent damage, and extend the life of your tub with expert advice.
A chipped or damaged bathtub can make your bathroom look bad. But, you can fix it easily with the right steps. This guide will help you with porcelain, acrylic, or fiberglass tubs. We’ll show you how to fix chips, cracks, and other issues.
You’ll learn how to use the right repair compounds and techniques. This way, your bathtub will look great again.
Key Takeaways
- Most DIYers can repair bathtub chips smaller than a quarter with the right tools and techniques.
- Surface-level chips are generally easier to fix than deeper ones, but proper preparation and application are crucial.
- Assess your skill level before attempting bathtub repairs, and consider professional help for more complex issues near drains or faucets.
- Use fiberglass mesh patches for large chip repairs and repair compounds that match your tub’s color and material.
- Regularly clean your tub with non-abrasive cleaners to prevent future damage and monitor repaired areas for signs of deterioration.
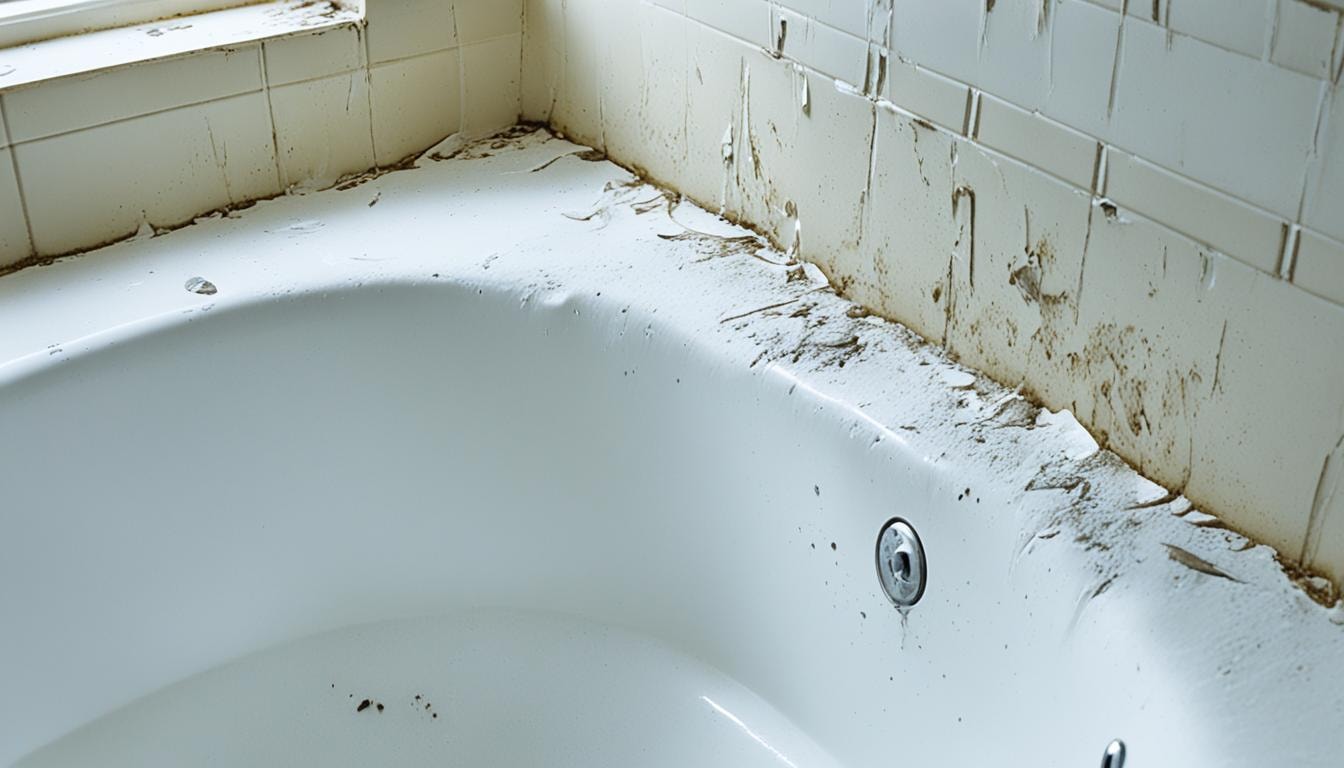
Understanding Bathtub Damage
Fixing a bathtub can make your bathroom look new again without costing a lot. But first, you need to check how bad the damage is. Small chips and cracks are usually easy to fix. But bigger damage needs more work.
Assessing the Extent of Damage
Bathtub damage can be small or big. Small chips, like those less than a quarter in size, are doable for DIY fans. But big or deep damage might need a pro.
When to Call a Professional
If your bathtub has more than just small chips, think about getting help. Deep chips or cracks near the drain or faucet are tricky. They might need special skills and tools. Think about your DIY skills before deciding to fix it yourself or hire a pro.
Preparing for Bathtub Repair
Fixing a bathtub needs the right tools and materials. It’s key to pick the best repair compounds and color matches. You must choose products made for your tub’s material and color.
Repair Compounds and Color Matching
Find repair kits with color matches for your bathtub. Companies like Multi-Tech Products have kits for common colors like white, biscuit, almond, and bone. These kits can fix cracks, air pockets, and deep damage.
Cleaning and Preparation Supplies
- Degreaser to clean the damaged area
- Lint-free cloths to wipe down the surface
- Painter’s tape to protect the surrounding area
Application and Finishing Tools
- Mixing stick to combine the repair compound
- Paintbrush or putty knife to apply the compound
- Spray bottle filled with water for misting the repaired area
- Ultra-fine sandpaper to smooth the surface
Getting ready is key to a great bathtub fix. Clean and degrease the area well. Use the right tools to spread the repair compound right. With the right stuff and care, you can make your tub look pro and last longer.
Step-by-Step Guide to Repairing Bathtub Chips
If you have a small chip or a big crack in your bathtub, fix it fast. You can make the area look new with a few easy steps.
Preparing the Damaged Area
Start by cleaning the damaged spot with a degreaser. This removes dirt, soap scum, or any other residue. Make sure it’s dry before you go on.
Use painter’s tape to protect the areas around it. This makes sure your repair looks clean and sharp.
Mixing and Applying the Repair Compound
You might need a one-part or two-part repair compound, depending on the chip size and depth. Always follow the instructions from the maker. Apply the compound in thin, even layers, letting each layer dry before adding more.
Sanding and Finishing the Repair
After the last layer dries, sand the area while it’s wet. This makes it blend in with the rest of the tub. If you see any bumps, add more compound to fix them.
By doing these steps, you can fix small bathtub chips and make your tub look new. Always let each step dry properly for the best look.
Tips for a Successful Bathtub Repair
Repairing a damaged bathtub needs careful attention and the right methods. You might face deep chips, big cracks, or small scratches. These tips will help make your repair last longer.
For deep chips or cracks, put on the repair compound in thin layers. This lets it cure right and stick well to the tub. If the chip or crack is big, add a fiberglass mesh patch first. This helps strengthen the area and stops future problems.
Sanding is key to making the repair look like new. Start with rough sandpaper and move to smoother ones. Keep sanding until it matches the tub perfectly. This progressive sanding method is vital for a pro-quality fix.
After the repair, use a kitchen and bath polish a few days later. It blends the repair area well and adds shine. This makes the repair almost invisible.
By using these tips, your bathtub repair will look great and last long. You’ll enjoy a tub that looks new for many years.
Preventive Measures for Future Damage
Take steps now to lower the chance of bathtub damage. Fix small chips or cracks right away to prevent bigger problems later. Don’t drop heavy things in the tub to avoid damage.
Cleaning your bathtub often is key to keeping it in good shape. Use cleaners that are gentle on the surface. Avoid harsh chemicals that can damage it. Also, put a non-slip bath mat in the tub to protect it from scratches and chips.
- Address small chips or cracks immediately
- Avoid dropping heavy objects in the tub
- Clean the tub regularly with non-abrasive cleaners
- Use a non-slip bath mat to protect the tub’s surface
By doing these things, you can greatly lower the chance of bathtub damage. This keeps your bathroom’s centerpiece looking great and working well for a long time.
Safety Precautions After Repair
After fixing your bathtub, it’s key to follow safety steps for a good fix that lasts. The repair compound needs up to 48 hours to fully cure and harden.
Don’t use harsh chemicals or bath oils during this time. They could harm the repair. Also, don’t wax the tub yet, as it becomes very slippery.
Watch the repaired spot closely. Look for any signs of lifting or peeling. If you see these, add a thin layer of repair compound to keep it strong.
By taking these steps, you help make sure your bathtub repair works well and lasts. This way, you avoid problems from using it too soon or not taking care of it.
Bathtub Refinishing: An Overview
Bathtub refinishing, or reglazing, makes old or damaged bathtubs look new again. It puts a strong epoxy coating over the tub. Homeowners can do it themselves or hire experts, each with their own benefits.
Cost Comparison: DIY vs Professional
DIY kits for refinishing bathtubs cost between 0 and 0. This is a good choice for those watching their budget. But, professional services cost 0 to 0, giving a better look that lasts longer. Refinishing is much cheaper than replacing a bathtub, which costs ,565 to ,420.
When to Refinish Your Bathtub
Refinish your tub if it has deep stains, rust, cracks, or an old style. It’s also a good idea if your tub is rare, valuable, or hard to move. Refinishing can make your bathroom look new without the high cost of a new tub.
Choosing to do it yourself or hiring a pro, bathtub refinishing is a smart way to update your bathroom. It makes your home look better without spending a lot.
Preparing for Bathtub Refinishing
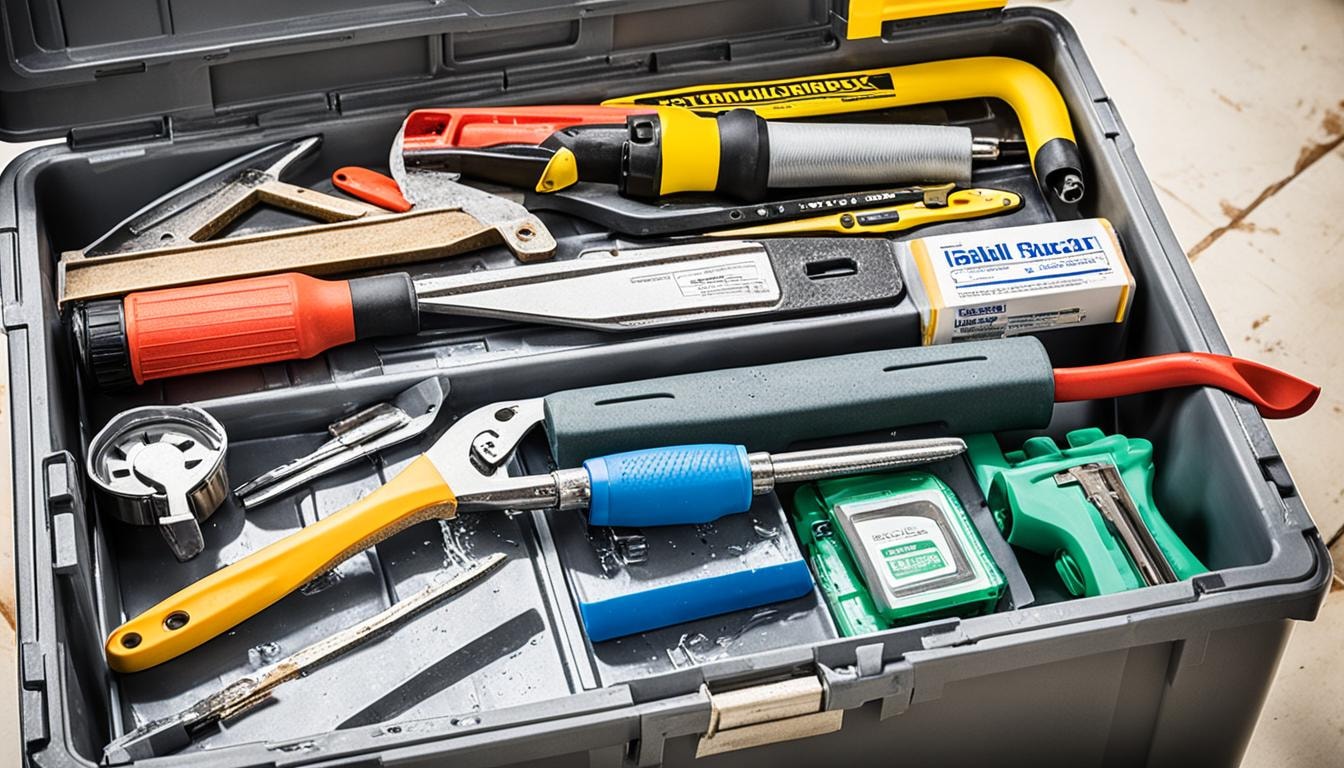
Getting your bathroom ready is key for a DIY bathtub refinishing job. First, collect all the refinishing supplies you need. This includes a refinishing kit, cleaning tools like a screwdriver and putty knife, and painting gear such as a paint roller and brush. Make sure you have rubber gloves and breathing masks for safety.
Supplies Needed
- Refinishing kit
- Caulk gun
- Chemical caulk remover
- Bleach
- Abrasive cleanser
- Bucket
- Sponge
- Wet/dry sandpaper
- Tack cloth
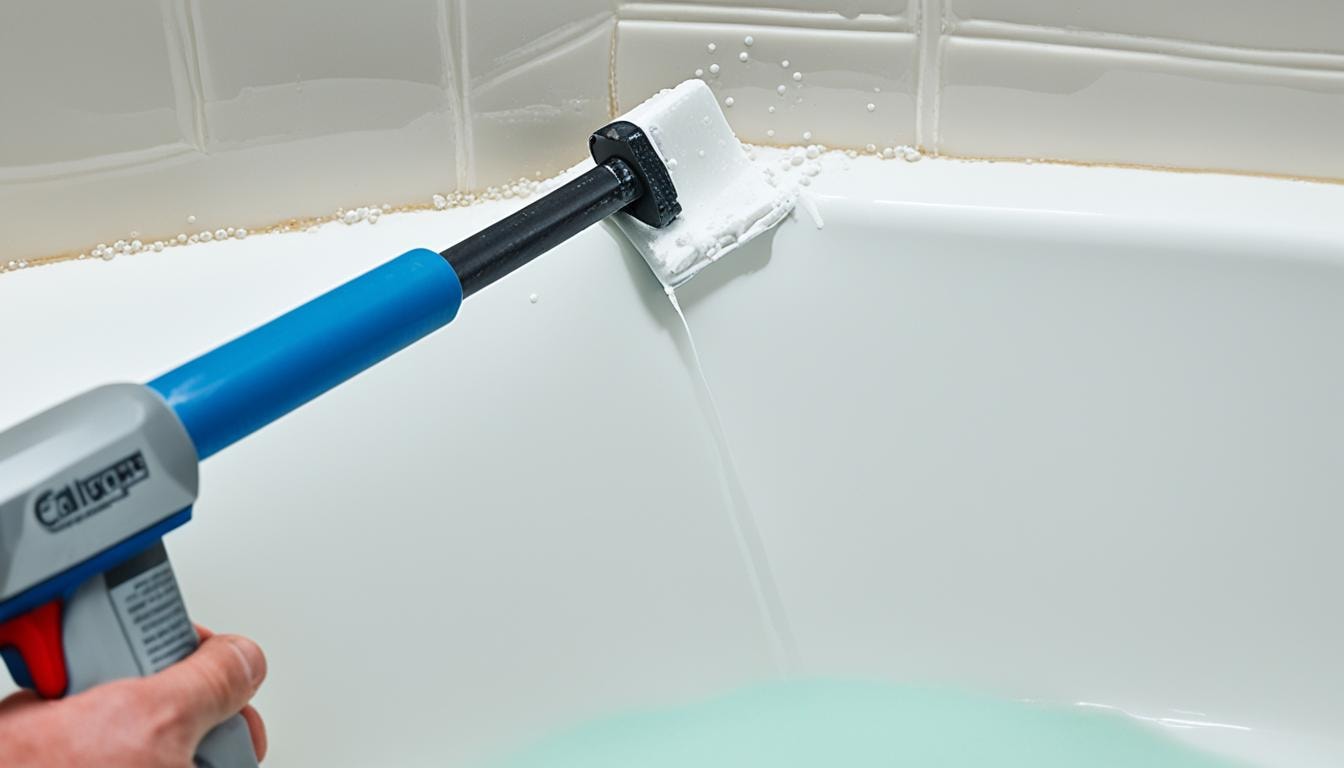
- Tub-and-tile caulk
Protecting the Surrounding Area
To keep your bathroom safe from spills, lay down a dropcloth. Use painter’s tape to cover other areas. It’s important to have good air flow when using strong chemicals. Open a window or use an exhaust fan to clear out fumes.
Step-by-Step Guide to Refinishing a Bathtub
Refinishing an old, stained bathtub is easy with the right steps. This guide will show you how to make your bathtub look new and last long.
Cleaning and Surface Preparation
Start by cleaning and getting the surface ready. Use chemical etching or sandpaper to make the tub’s surface rough. This helps the new coat stick better. Cleaning well and drying the area is key for a good finish.
Then, apply a primer coat. This step is important for a great finish. Make sure the area is clean before you start.
Applying the Primer and Epoxy Coating
Next, put on the primer and epoxy coating. Mix the epoxy resin and hardener as the instructions say. Use a roller and brush for even layers, letting each coat dry before adding more.
Keep the area well-ventilated to work safely. Let the final epoxy coat cure for 48 hours before using the tub. This time lets the coating harden and last longer.
With these steps and the right tools, your old bathtub can look new again. Remember, getting the surface ready and paying attention to details are key for a great finish.
Maintaining Your Refinished Bathtub
Keeping your refinished bathtub looking great is key. Follow these tips to make it last longer:
Use gentle cleaners like mild dish soap or products like Scrubbing Bubbles and Formula 409. Stay away from harsh cleaners like powdered cleansers and bleach. Clean with a soft sponge and rinse well to stop soap scum.
Check your refinished tub often for any damage. If needed, add a thin layer of refinishing compound every few years. This way, your bathtub can last 5-10 years or more with care.
Avoid using bath mats with suction cups on your refinished tub. They can harm the finish and might cancel your warranty. Fix any leaky faucets quickly to stop rust and damage around the drain.
By using non-abrasive cleaners and reapplying refinishing as needed, your refinished bathtub will stay beautiful. It will also last longer.
Get Matched with Top Pros for Bathtub Repair and Maintenance
Discovering the right professionals for your bathtub repair and maintenance needs is now easier with FindPros. Our service connects you with top-rated local experts who compete for your job, ensuring you get the best pricing and quality.
Simply fill out a quick survey about your home project, and within seconds, you’ll receive matched options tailored to your needs. Compare quotes from multiple pros and choose the one you feel most comfortable with. With FindPros, you can confidently tackle your bathtub repairs and enjoy a beautifully maintained bathroom without the stress.
Conclusion
This guide has given you the tips and steps to fix your bathtub. You can now repair or refinish your tub by yourself or know when to get help. It covers everything from small repairs to full refinishes.
By using the right methods and taking care of your tub, it can last longer and look great. You can make your tub look new with some effort and the right tools. But, if the damage is big or you want an expert’s touch, this guide tells you when to call a pro.
It doesn’t matter how you fix your bathtub, keeping it in good shape is key. Regular care stops problems before they start. This way, your bathtub stays beautiful and useful for many years.
Frequently Asked Questions (Bathtub Repair)


MOST POPULAR CITIES
Browse by State- Alameda
- Costa Mesa
- Laguna Beach
- Orange
- Alhambra
- Culver City
- Lancaster
- Oroville
- Anaheim
- Daly City
- Livermore
- Oxnard
- Antioch
- Davis
- Lodi
- Pacific Grove
- Arcadia
- Downey
- Lompoc
- Palm Springs
- Bakersfield
- El Centro
- Long Beach
- Palmdale
- Barstow
- El Cerrito
- Los Angeles
- Palo Alto
- Belmont
- El Monte
- Malibu
- Pasadena
- Berkeley
- Escondido
- Martinez
- Petaluma
- Beverly Hills
- Eureka
- Marysville
- Pomona
- Brea
- Fairfield
- Menlo Park
- Port Hueneme
- Buena Park
- Fontana
- Merced
- Rancho Cucamonga
- Burbank
- Fremont
- Modesto
- Red Bluff
- Calexico
- Fresno
- Monterey
- Redding
- Calistoga
- Fullerton
- Mountain View
- Redlands
- Carlsbad
- Garden Grove
- Napa
- Redondo Beach
- Carmel
- Glendale
- Needles
- Redwood City
- Chico
- Hayward
- Newport Beach
- Richmond
- Chula Vista
- Hollywood
- Norwalk
- Riverside
- Claremont
- Huntington Beach
- Novato
- Roseville
- Compton
- Indio
- Oakland
- Sacramento
- Concord
- Inglewood
- Oceanside
- Salinas
- Corona
- Irvine
- Ojai
- San Bernardino
- Coronado
- La Habra
- Ontario
- San Clemente