French Door Installation Near You
Can’t find what you are looking for?
How It Works
-
 Answer a few questions about your home project.
 -
 Within seconds, get matched with top-rated local pros.
 -
 Compare quotes and choose the best pro for the job.
French Door Installation In Your Area
French Door Installation: A Step-by-Step Guide
Meta Description: Discover the essential steps for French Door Installation: A Step-by-Step Guide. Learn how to enhance your home with elegance and natural light.
Have you thought about adding French doors to your home but didn’t know how? French doors can make your home look great and help you move easily between inside and outside. But, is it hard to put them in yourself? We’re here to guide you through the steps for a successful French door installation at home.
Key Takeaways
-
01
French doors usually don’t need a middle support, making the doorway wider.
-
02
Think about the space around the doorway to make sure the French doors fit and work well.
-
03
Clear glass on French doors lets you see outside, but textured or frosted glass gives you privacy.
-
04
Use magnetic or retractable screen doors instead of regular ones to avoid problems with French doors.
-
05
If a standard kit won’t fit your doorway, you might need custom-made French doors.
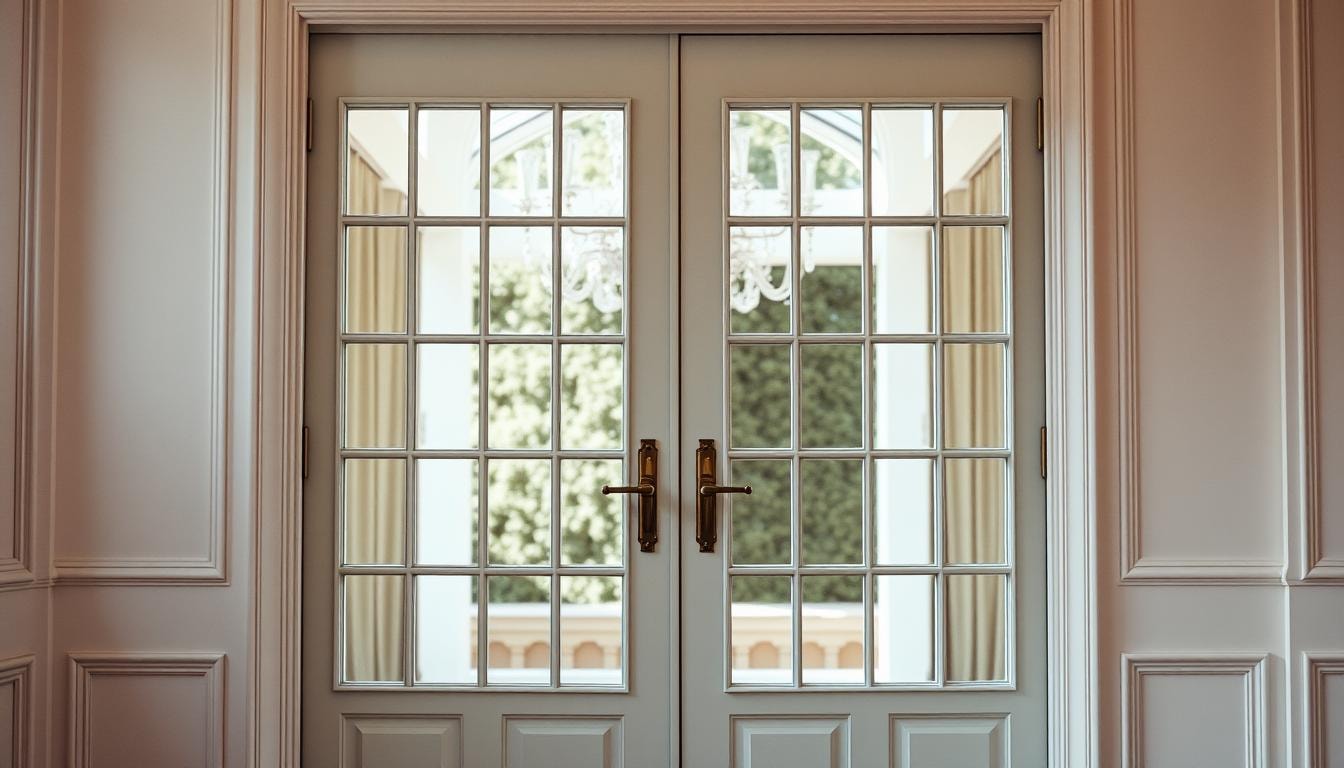
Understanding French Doors
French doors are a timeless and elegant choice for both inside and outside your home. They have a unique style with two hinged doors in a double frame. The glass lets in lots of natural light, making rooms bright and airy.
Defining French Doors
French doors can be inside or outside your home, connecting indoor and outdoor areas smoothly. They are made from wood, fiberglass, and engineered composites. Each type has its own durability and upkeep needs.
Benefits of French Doors
- They make your home look classic and sophisticated.
- They help save energy by having many glass panes for insulation.
- They let in lots of natural light, making rooms bright and open.
- They make moving between indoor and outdoor areas smooth.
Looking to update your home or make your outdoor area more welcoming? French doors are a great pick. They mix style, function, and save energy.
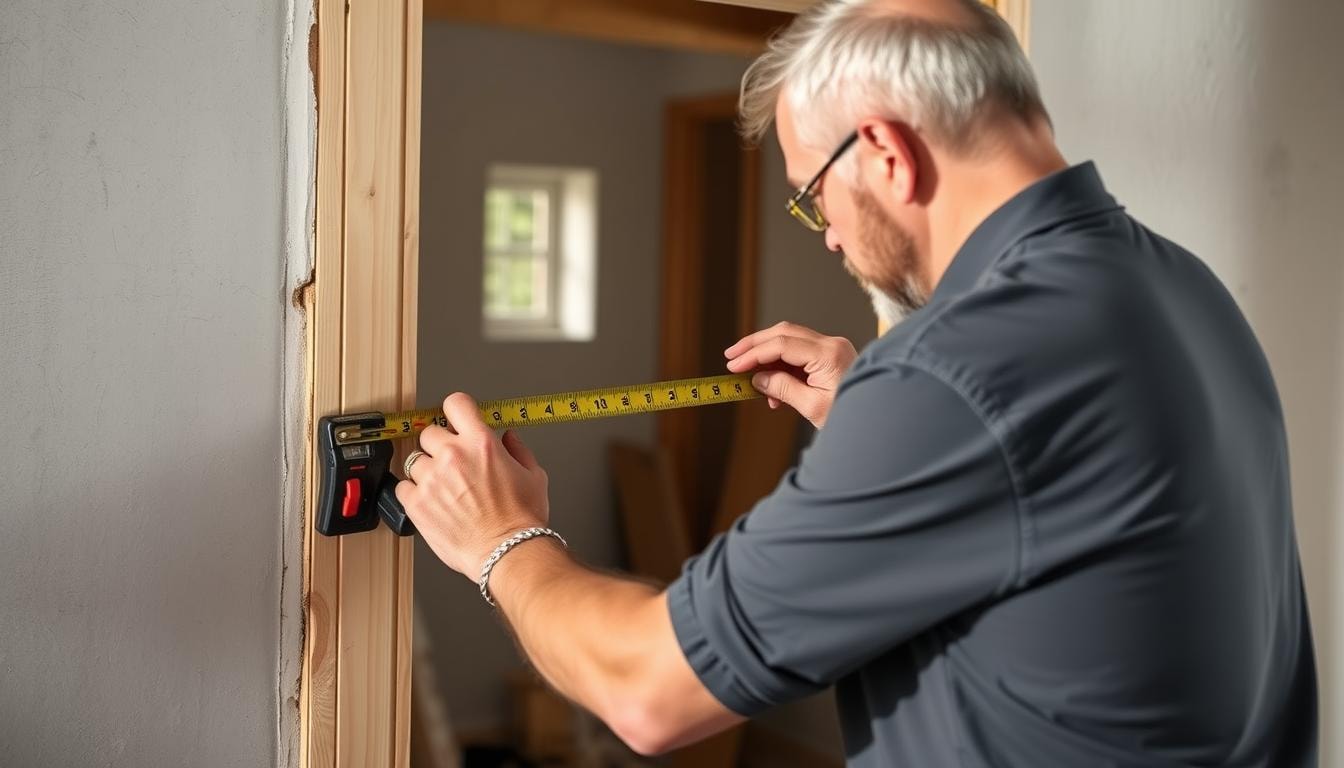
Preparation and Planning
Before you start, make sure to measure the space where the French doors will go. Use a tape measure to find the doorway’s height and width. Don’t forget to remove any door trim for accurate measurements. This will help you pick the right French door kit.
Measuring the Rough Opening
Pay close attention to the door frame size when measuring. The frame must fit well in the opening for a secure installation. Think about the room’s size and the look you want. Choose a French door kit that matches these needs.
Choosing the Right French Door
Think about the size of the opening, the door type, and the materials when picking French doors. Make sure the door kit fits the space and meets your style and needs. Look at all the options carefully to choose the best one for your project.
Necessary Tools and Materials
Getting the right tools for french door installation and materials for french door installation is key for a good project. You’ll need power tools and special hardware. This makes the installation easier and looks professional.
For installing French doors, you’ll need a power drill, saws (hand saw, jigsaw, or circular saw), screwdrivers, hammers, mallets, a pry bar, chisel, tape measure, carpenter’s square, and a bubble level. Don’t forget safety glasses to keep your eyes safe.
You’ll also need a French door kit with the door frame, knobs, and locks. It’s important to have insulation materials, sealing tape, and construction foam. These help make the door frame energy-efficient and airtight.
- Power drill
- Saws (hand saw, jigsaw, or circular saw)
- Screwdrivers
- Hammers and mallets
- Pry bar
- Chisel
- Tape measure
- Carpenter’s square
- Bubble level
- Safety glasses
- French door kit (frame, knobs, locks)
- Insulation materials
- Sealing tape
- Construction foam
With these tools for french door installation and materials for french door installation, you’re ready to start. You’ll be able to install French doors like a pro.
Removing Existing Doors and Trim
If you’re putting in French doors, start by taking out the old door and trim. Use a pry bar to remove the door trim without harming the wall. After removing the trim, you can take out the old door.
Be careful with the hardware and hinges when removing the door. Remove the hinges and save any screws or hardware for later. If the door came with a frame, you’ll need to take that down too. This makes room for your new French doors.
- Use a pry bar to carefully remove the door trim, taking care not to damage the surrounding wall.
- Disconnect the hinges and set aside any screws or hardware for potential future use.
- If the existing door is a pre-hung unit, remove the entire frame, including the jamb and threshold.
Getting rid of the old doors and trim is key to installing French doors. It helps you prepare for a smooth setup of your new French doors.
Installing the Sill Pan
Installing a sill pan is key when you put in exterior French doors. It acts as a water barrier to keep your home safe from water damage. Here’s how to install the sill pan for your French door project.
- Measure the Width: First, measure your door frame’s width. This tells you the sill pan size you need.
- Cut the Sill Pan: Use a hacksaw to cut the sill pan to fit your door frame’s width. This makes sure it fits perfectly.
- Apply Waterproof Caulk: Put waterproof caulk along the door frame’s base. This seals it tightly against water.
- Position the Sill Pan: Place the sill pan in its spot, making sure it lines up with the door frame. Press it down to lock it in place.
Installing the sill pan right is key to a successful French door setup. It keeps water out and helps your doors last longer. This step is very important for your new French doors.
The sill pan is just one part of French door installation. We’ll cover more steps in our guide, like setting the door frame and hanging the doors. With careful planning and detail, you’ll soon enjoy your new French doors.
Positioning the Door Frame
Now, let’s focus on placing the door frame right. This step is key for a good French door setup.
For outside French doors, begin by putting waterproof glue around the sill pan’s edge. This keeps water out. Then, tilt the door frame up and put it in the right spot, making sure it fits well.
For inside French doors, do things a bit differently. Just tilt the frame up and push the sides against the doorway’s edge. Make sure it fits tightly and evenly.
- Apply waterproof adhesive caulk along the sill pan perimeter for exterior French doors.
- Tilt the door frame up and position it securely within the opening.
- For interior French doors, tilt the frame up and slide the sides back against the doorway edge.
- Ensure a snug, flush fit is achieved to maintain the frame’s stability.
Getting the door frame in the right spot is key for a good door frame installation. Follow these steps for a smooth and lasting French door setup.
Hanging the French Doors
Installing french doors is a big step. You must hang them right for a good fit. If your doors come pre-hung, still pay close attention. Let’s look at the main things to think about for hanging french doors and attaching hinges and hardware.
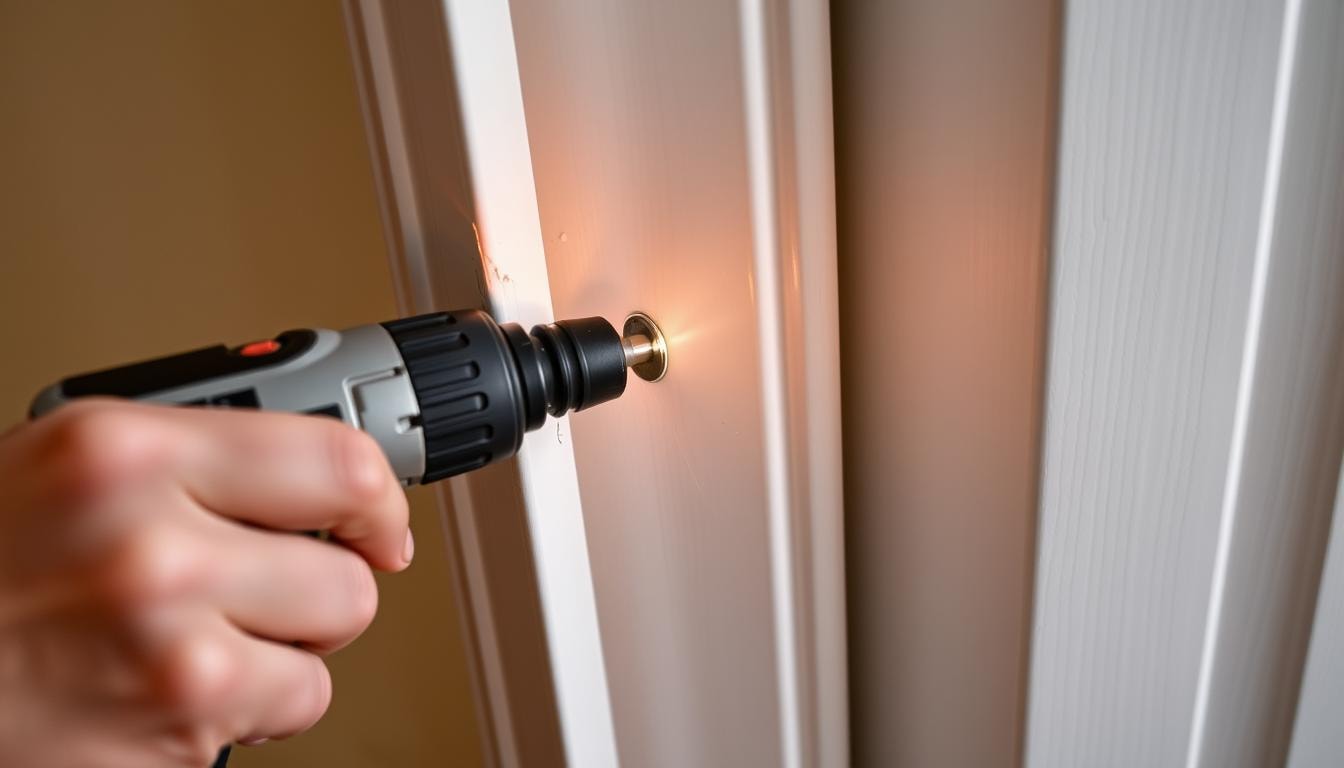
Attaching Hinges and Hardware
If your french doors aren’t pre-hung, you’ll need to attach hinges and hardware yourself. Make sure the door’s weight is supported during installation. This prevents damage or misalignment.
Once the doors are in place, use a drill to attach the hinges. Put 3-inch screws into both the frame and the door.
- Ensure the doors are properly aligned and supported.
- Use the provided hinges and attach them to the door and frame with 3-inch screws.
- Check that the doors are hanging securely and can open and close smoothly.
Properly hanging french doors and adding the right hardware is key. By following these steps, you’ll get a smooth and useful installation. This will make your home look better and work better too.
Securing the Door Frame
Securing the door frame is key for a stable French door installation. After hanging the doors, attach the frame to the doorway firmly. This step is very important.
Use a drill to screw each hinge with a 3-inch screw. This connects the doors and frame to the wall studs. It keeps the doors from moving or sagging. Also, use shims to make sure the frame is straight and level.
- Drive 3-inch screws through each hinge to secure the door frame to the wall studs.
- Use shims to level and plumb the door frame, making adjustments as necessary.
- Check for any gaps between the frame and the wall, and fill them with caulk or spray foam insulation to create a tight seal.
By following these steps to secure the door frame, you’re on your way to a lasting French door installation. A well-secured frame is the key to a smooth and lasting door system.
Installing Strike Plates
Securing your French doors is key to the installation. You need to put strike plates at the top and bottom of the door frame. This adds protection and keeps your door system strong over time.
Start by marking where the shoot bolt will hit the frame. This shows where to put the strike plates. Then, use a drill to attach the strike plates to the frame. Make sure they fit well and match your door’s needs.
- High-security strike plate options feature larger, thicker designs with steel housings for increased door security.
- Standard strike plates typically have two screws, while high-security models may have a four-screw configuration for a more secure attachment to the doorjamb.
- Longer screws are recommended for a more secure attachment to the doorjamb.
- The recommended pilot hole size for drilling is no bigger than 3/32nds of an inch for a precise fit.
After putting in the strike plates, check if the door latch fits well with the strike plate. It’s important for smooth door use and to avoid problems. A good fit means your French door will be more secure and give you peace of mind.
Sealing and Caulking
Sealing and caulking are key steps in French door installation. They stop moisture and air from getting through gaps. Use waterproof caulk on the door frame’s top and sides for a tight seal. This makes the installation more weatherproof.
Start by sealing the sill pan with the right sealant, following the maker’s guide. Then, put a lot of caulk around the door opening on both sides. This keeps air and water out, making your home comfy and saving energy.
- Use a high-quality, flexible caulk that is right for outside use.
- Make sure the caulk forms a continuous, smooth bead, without gaps or voids.
- Wait for the caulk to fully cure before moving on, as the product says.
Pay close attention to sealing and caulking. Doing it right makes your French doors look better and work better for a long time.
Follow these tips to seal and caulk your French doors well. This creates a weatherproof barrier that keeps your home safe from the weather and saves energy.
Finishing Touches
Now, it’s time to add the final touches to your French door installation. This includes putting on the door trim and attaching the doorknobs and locks. These steps will make your doors both work better and look great.
Installing Door Trim
After the caulk dries, you can put back the door trim or choose new, decorative trim that fits the French door style. The right door trim hides any gaps and makes the doors look better.
Attaching Doorknobs and Locks
The last step is to attach the doorknobs and locks to the French doors. If the kit didn’t include these, buy them and follow the instructions to install them correctly.
Adding these final touches makes sure your French doors work well and look good. Enjoy your new doors and the beauty they add to your home.
Consider FindPros For Your French Door Project
If you would like help finding experienced, professional installers for your French door project, consider using FindPros. By filling out a basic survey about your home and project details, FindPros can quickly match you with top-rated pros in your area. These pros will compete for your business by providing free quotes and work schedules.
You can then compare prices, warranties, and customer reviews to choose the installer that best fits your budget and timeline. Using FindPros ensures you only work with insured, background-checked pros. It also allows you to make an informed choice on who to hire—saving both time and money.
Conclusion
Installing French door installation can change your home for the better. It brings elegance, more light, and better functionality. This guide shows you how to do it right.
Just remember to be safe, use the right tools, and follow the instructions. This makes the installation smooth and easy.
French doors come with a 10 YEAR GUARANTEE against manufacturing defects. They cost between £499 to £999. Adding them to your interior design is a smart choice.
Professional installers charge £80 to £100 a day. Customers are very happy with the work, giving it a top rating of Excellent 4.7 / 5.
To start, you’ll need tools like a drill, tape measure, and a saw. Don’t forget safety gear like goggles and gloves. This guide will help you install French doors in about two to three hours with a friend’s help.
Frequently Asked Questions (French Door Installation)


MOST POPULAR CITIES
Browse by State- Alameda
- Costa Mesa
- Laguna Beach
- Orange
- Alhambra
- Culver City
- Lancaster
- Oroville
- Anaheim
- Daly City
- Livermore
- Oxnard
- Antioch
- Davis
- Lodi
- Pacific Grove
- Arcadia
- Downey
- Lompoc
- Palm Springs
- Bakersfield
- El Centro
- Long Beach
- Palmdale
- Barstow
- El Cerrito
- Los Angeles
- Palo Alto
- Belmont
- El Monte
- Malibu
- Pasadena
- Berkeley
- Escondido
- Martinez
- Petaluma
- Beverly Hills
- Eureka
- Marysville
- Pomona
- Brea
- Fairfield
- Menlo Park
- Port Hueneme
- Buena Park
- Fontana
- Merced
- Rancho Cucamonga
- Burbank
- Fremont
- Modesto
- Red Bluff
- Calexico
- Fresno
- Monterey
- Redding
- Calistoga
- Fullerton
- Mountain View
- Redlands
- Carlsbad
- Garden Grove
- Napa
- Redondo Beach
- Carmel
- Glendale
- Needles
- Redwood City
- Chico
- Hayward
- Newport Beach
- Richmond
- Chula Vista
- Hollywood
- Norwalk
- Riverside
- Claremont
- Huntington Beach
- Novato
- Roseville
- Compton
- Indio
- Oakland
- Sacramento
- Concord
- Inglewood
- Oceanside
- Salinas
- Corona
- Irvine
- Ojai
- San Bernardino
- Coronado
- La Habra
- Ontario
- San Clemente