Laminate Floor Installation Near You
Can’t find what you are looking for?
How It Works
-
 Answer a few questions about your home project.
 -
 Within seconds, get matched with top-rated local pros.
 -
 Compare quotes and choose the best pro for the job.
Laminate Floor Installation In Your Area
Laminate Floor Installation: A Step-by-Step Guide
Meta Description: Learn how to install laminate flooring with our comprehensive guide. From preparation to finishing touches, master Laminate Floor Installation for a beautiful new floor.

Laminate flooring can transform your home without breaking the bank. It’s affordable, durable, and versatile, making it a popular choice for many homeowners. Successful installation requires some know-how, which we’ll cover in this guide.
Key Takeaways
-
01
Laminate flooring is a cost-effective and durable option for home improvement projects.
-
02
Proper preparation, including acclimating the planks and checking the subfloor, is crucial for a successful installation.
-
03
Gathering the right tools and materials, such as a hammer, saw, and underlayment, can make the installation process easier.
-
04
Careful planning and layout, including staggering seams and measuring for the first and last rows, can ensure a professional-looking finish.
-
05
Attention to detail, like wearing protective gear and using a tapping block, can help you avoid common installation pitfalls.
Introduction to Laminate Floor Installation
Laminate flooring is a durable and budget-friendly alternative to hardwood or carpeted floors. It comes in various styles and colors to match any home aesthetic. Laminate is easy to install, making it a great DIY project for homeowners.
Benefits of Laminate Flooring
Laminate floors are affordable, costing between $2 to $8 per square foot. The installation process is straightforward and can be completed in a weekend. Laminate wood planks are made of MDF coated in plastic laminate.
This flooring provides a durable surface that can withstand daily wear and tear. It’s a cost-effective option for home renovations that looks great and lasts long.
Considerations for Laminate Flooring
Laminate floors may not suit every home. They can be slippery, which may be a concern for pet owners. These floors aren’t recommended for moisture-prone areas like bathrooms or basements.
Humidity can cause laminate planks to become uneven and damaged over time. Homes with small children might want to consider other options. Repeated spills can easily damage the laminate surface.
Evaluate your home’s unique needs before choosing laminate flooring. Consider both the benefits and drawbacks to make the best decision for your living space.
Laminate floors are popular for good reasons. They offer many advantages but have some potential drawbacks. Consider factors like slippery surfaces and moisture sensitivity before making your choice.
Tools and Materials Needed
Gather essential tools for your laminate flooring installation. You’ll need a hammer, rubber mallet, tape measure, pencil, and straightedge. A speed square, saw, utility knife, and chalk line are also crucial.
Don’t forget the pull bar, tapping block, and duct tape. Wear eye and ear protection while cutting laminate planks. These tools for laminate flooring are vital for a smooth installation.
Materials include laminate flooring, underlayment, and spacers. Underlayment creates a smooth surface for the planks. Spacers maintain expansion gaps around the room’s edges.
Choose a saw that fits your project needs. Options include circular, hand, miter, table, or jigsaw. A utility knife helps trim planks around obstacles.
Use a chalk line for straight, consistent lines during installation. With these tools and materials, you’re ready to transform your space with new laminate flooring.
Preparing the Room
Proper room preparation is key for laminate flooring installation. Let the laminate planks sit in the room for 48 hours. This helps them adjust to the room’s temperature and humidity.
Acclimation prevents issues during installation. It’s a crucial step in the process.
Checking the Subfloor
Make sure the subfloor is clean and level. Remove any mold, mildew, or protruding nails. For wood subfloors, check carefully for any nail heads sticking up.
If you have a cement backerboard subfloor, ensure it’s smooth and even. This will help your laminate floor lay flat.
In moisture-prone areas like basements, install a vapor barrier before the underlayment. This extra step helps protect your new floor.
If you spot an uneven or problematic subfloor, call a foundation specialist. They can inspect it before you start the installation.
- Acclimate laminate planks for at least 48 hours to the room’s temperature and humidity conditions.
- Ensure the subfloor is clean, level, and free from mold, mildew, and protruding nails.
- Install a vapor barrier in moisture-prone areas before laying the underlayment.
- Have a foundation specialist inspect the subfloor if you notice signs of uneven or problematic conditions.
Trimming Door Jambs
Trimming moulding around doorways is key for new laminate flooring. It ensures a flush fit against the wall. This process is simple and makes installation easier.
Place laminate flooring and underlayment against the moulding. Mark where the laminate reaches. Use an oscillating saw to cut the moulding to height. Do this for all entryways.
Trimming door jambs and trim is easier than cutting laminate planks to fit. An undercut saw works well for neat, accurate trimming. Measure the door jamb depth and surrounding areas carefully.
You may need to cut multiple pieces to fit around the door jamb. Use a jigsaw or coping saw for notches in the laminate flooring. Many laminates use a click-lock system for installation.
PVA Type 2 glue may be needed where the groove is removed. This helps the notched piece fit correctly around doorways.
Planning the Layout
Careful planning is key for a stunning laminate floor. Consider room size and plank width. Your goal is a balanced design with minimal plank trimming.
Measuring and Cutting the First and Last Rows
Measure the room’s width and divide by plank width. You’ll likely need to trim first and last rows. Leave a 3/8-inch expansion gap along walls for natural expansion and contraction.
Install planks parallel to the longest wall or room’s focal point. This looks better and reduces waste. Accurate measurements of room width and plank width are crucial.
These details help determine first row and last row sizes. This allows for effective layout planning and professional-looking results.
A well-planned layout creates a cohesive, appealing floor. It enhances your space’s overall design. Watch video tutorials and follow best practices for success.
Cutting Laminate Planks
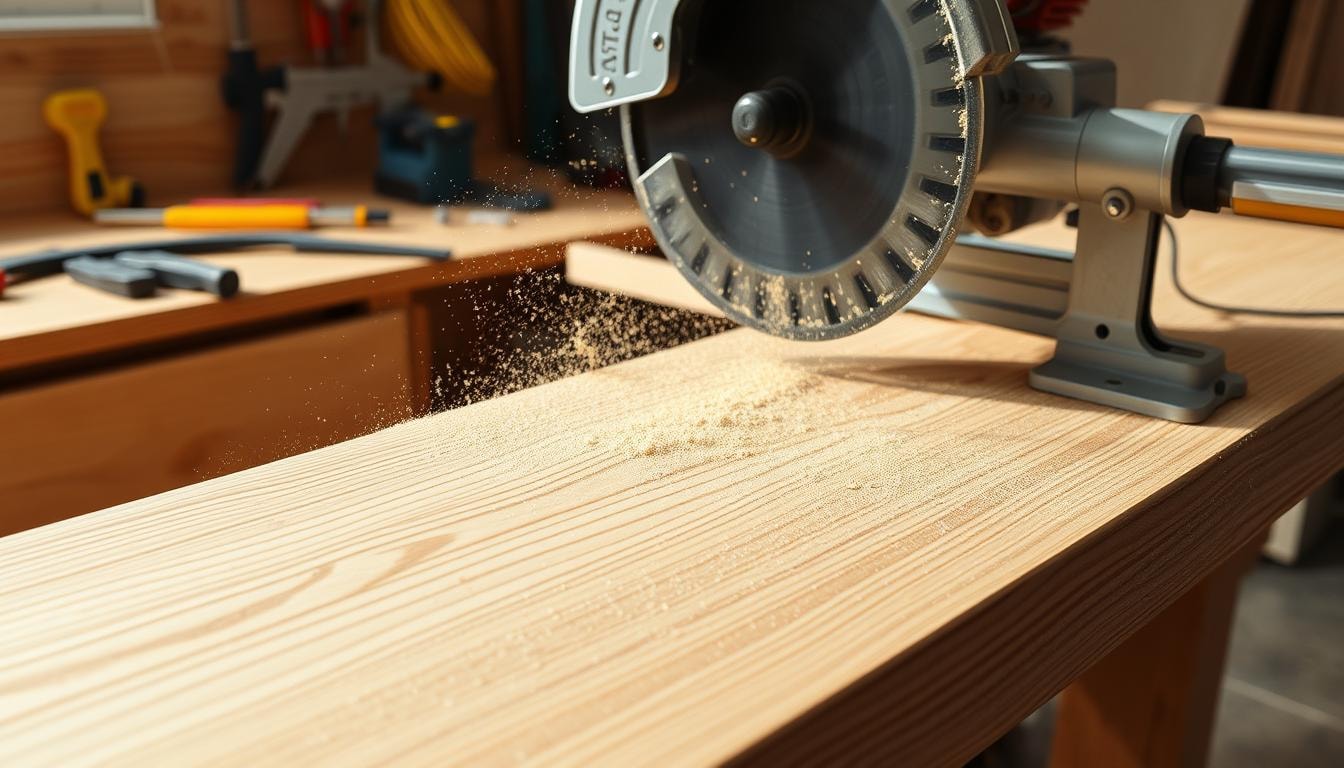
Cutting laminate planks is easy and doesn’t require special tools. You can use a table saw, miter saw, circular saw, hand saw, or laminate cutter. Use a diamond blade for best results, as laminate can be tough to cut.
Cutting Tips and Best Practices
Always cut with the finished side up to reduce splintering. Use duct tape to mark cut lines and clamp planks for clean, straight cuts.
A finishing blade gives the cleanest cut. Remember, moulding will cover cut edges after installation.
- Use a diamond blade for clean, accurate cuts on laminate flooring.
- Cut with the finished side of the plank facing up to minimize chipping and splintering.
- Secure the plank in place with clamps to ensure a straight, clean cut.
- Mark the cut lines using duct tape to help guide your saw and reduce splintering.
- A miter saw is an excellent tool for cutting laminate planks to length, providing precise, clean cuts.
- For curved or irregular cuts, a jigsaw with a high-TPI blade can be the best option.
Focus on making straight, clean cuts for a professional-looking installation. Perfect, chip-free cuts aren’t always needed since moulding will cover finished edges.
Installing the Underlayment
Installing underlayment is key before laying laminate flooring. This layer insulates, dampens noise, and protects against moisture. For basements, consider adding a vapor barrier first.
Ensure consecutive underlayment sheets meet without overlapping. Overlaps can create uncomfortable bumps in the flooring. Secure seams with duct tape to keep everything in place.
Underlayment thickness should be 2 to 3 millimeters. Felt underlayment absorbs sound better, while foam is budget-friendly. Follow the manufacturer’s instructions for proper installation.
Leave a 3/8-inch gap between underlayment and walls. This allows for laminate flooring expansion, preventing warping or buckling issues.
Proper underlayment installation ensures your laminate flooring’s longevity and performance. Take time to get it right. This step is crucial for a successful laminate floor installation.
Installing the First Row
The first row of laminate flooring sets the base for your entire floor. It’s crucial to get this step right. Start by cleaning and leveling the subfloor.
Leave a 3/8-inch expansion gap between the laminate and wall. Use 3/8-inch spacers along the wall, securing them with duct tape. Place the first plank with its tongue facing the wall.
Connect the second plank by aligning its tongue with the first plank’s groove. Press down to snap it in place. For the last plank, measure and cut to fit, ensuring a tight fit.
- Ensure the subfloor is clean, level, and prepared for the new flooring.
- Leave a 3/8-inch expansion gap between the first row of laminate and the wall.
- Use 3/8-inch spacers along the wall and secure them with duct tape to maintain the gap.
- Position the first plank with the tongue side facing the wall.
- Connect the second plank by aligning the tongue into the groove of the first plank and pressing it down to snap it into place.
- When you reach the end of the first row, measure and cut to fit the final plank to ensure a tight fit while still leaving the necessary expansion gap.
A well-installed first row makes the rest of the flooring project easier. Take your time and ensure it’s secure and level. This will help with installing the following rows.
Staggering and Installing Subsequent Rows

Staggering the seams of laminate planks is key for a stable, attractive floor. This method boosts stability and enhances visual appeal. The staggered layout is crucial for a strong, beautiful laminate floor.
Start the second row with a plank 12 inches longer than the first. This staggers seams by 12 inches, the ideal distance for stability. Keep this pattern for all rows.
- Hold the new plank’s long side at an angle. Feed its tongue into the installed row’s groove.
- Press down firmly to snap the plank in place. Use a tapping block if needed for a tight fit.
- Repeat for remaining rows, maintaining the staggered pattern throughout.
A well-executed staggered layout makes your floor look great. It also adds to its stability and longevity. Remember, proper staggering is key to a lasting laminate floor.
Tips for Hiring Laminate Floor Installers
Installing laminate flooring can be a DIY project, but many prefer professional installers. Experts offer a high-quality finish and industry knowledge. They may also provide warranty coverage for their work.
Here are some tips for finding a reliable laminate floor installer:
- Get multiple quotes: Reach out to several contractors and compare their installation costs to find the best value for your budget.
- Check reviews and references: Thoroughly vet potential installers by reading online reviews and reaching out to their previous clients.
- Discuss the project scope and timeline: Ensure the installer understands the full extent of your project and can provide a realistic timeline for completion.
Hiring a pro can save time and ensure quality results. This is especially true for larger or complex projects.
Industry data shows interesting trends in the laminate floor installation job market. Over 65% of workers are university students seeking extra income. Retirees make up 20% of the workforce.
The remaining 15% are professionals exploring new job experiences. Platforms like GigSmart offer access to many qualified candidates. Businesses can hire permanent employees or contract workers for specific projects.
These tips can help you find expert laminate floor installers. With their help, your home improvement project will be a success.
Find Your Perfect Pro with FindPros
Overwhelmed by the prospect of installing your new vinyl flooring or other flooring products? Let FindPros take the hassle out of the process. Simply answer a few quick questions about your home project, and we’ll match you with top-rated local professionals who can help. Get the best pricing when multiple pros compete for your job, and find the pros you’ll enjoy working with.
With FindPros, the purchase and installation of your new floors will be a breeze. Tap into our network of reliable, manufacturer-approved contractors to ensure a seamless and stress-free experience.
Conclusion
Installing laminate flooring can be a rewarding DIY project for homeowners. Proper preparation and attention to detail are crucial. Gather the right tools, prepare the room, and follow the installation steps carefully.
For complex projects, consider hiring a skilled installer. They can ensure a professional-grade finish. This option provides peace of mind for larger installations.
Understanding laminate flooring’s benefits is key to successful installation. These floors are exceptionally durable, perfect for high-traffic areas. They’re also great for homes with pets and children.
Laminate floors offer a wide variety of designs and colors. Advanced printing technology makes them look more realistic than ever. This versatility allows you to find the perfect match for your home.
A well-installed laminate floor enhances your home’s look and value. With the right approach, you’ll enjoy its benefits for years. Take your time to ensure a successful installation, whether DIY or professional.
Frequently Asked Questions (Laminate Floor Installation)


MOST POPULAR CITIES
Browse by State- Alameda
- Costa Mesa
- Laguna Beach
- Orange
- Alhambra
- Culver City
- Lancaster
- Oroville
- Anaheim
- Daly City
- Livermore
- Oxnard
- Antioch
- Davis
- Lodi
- Pacific Grove
- Arcadia
- Downey
- Lompoc
- Palm Springs
- Bakersfield
- El Centro
- Long Beach
- Palmdale
- Barstow
- El Cerrito
- Los Angeles
- Palo Alto
- Belmont
- El Monte
- Malibu
- Pasadena
- Berkeley
- Escondido
- Martinez
- Petaluma
- Beverly Hills
- Eureka
- Marysville
- Pomona
- Brea
- Fairfield
- Menlo Park
- Port Hueneme
- Buena Park
- Fontana
- Merced
- Rancho Cucamonga
- Burbank
- Fremont
- Modesto
- Red Bluff
- Calexico
- Fresno
- Monterey
- Redding
- Calistoga
- Fullerton
- Mountain View
- Redlands
- Carlsbad
- Garden Grove
- Napa
- Redondo Beach
- Carmel
- Glendale
- Needles
- Redwood City
- Chico
- Hayward
- Newport Beach
- Richmond
- Chula Vista
- Hollywood
- Norwalk
- Riverside
- Claremont
- Huntington Beach
- Novato
- Roseville
- Compton
- Indio
- Oakland
- Sacramento
- Concord
- Inglewood
- Oceanside
- Salinas
- Corona
- Irvine
- Ojai
- San Bernardino
- Coronado
- La Habra
- Ontario
- San Clemente