Light Fixture Installation Near You
Can’t find what you are looking for?
How It Works
-
 Answer a few questions about your home project.
 -
 Within seconds, get matched with top-rated local pros.
 -
 Compare quotes and choose the best pro for the job.
Light Fixture Installation In Your Area
Light Fixture Installation: A Step-by-Step Guide
Meta Description: Learn how to safely and efficiently install a new light fixture in your home with our comprehensive step-by-step guide to Light Fixture Installation. Illuminate your space like a pro!
Ready to refresh your home’s lighting? A new fixture can transform your space. This guide will help you install it yourself, even if you’re not an electrician.
I’ve installed many light fixtures in my home. The process gets easier with each project. This tutorial will give you the know-how to tackle your own installation confidently.
Key Takeaways
-
01
Gain confidence in your ability to install a new light fixture through step-by-step guidance.
-
02
Understand the importance of safety precautions and proper wiring techniques.
-
03
Discover the essential tools and materials needed for a successful light fixture installation.
-
04
Learn how to remove an existing fixture and prepare for the new one.
-
05
Explore tips and tricks for a seamless installation process, from wiring to mounting the fixture.
Preparation for Light Fixture Installation
Start by gathering the necessary tools and materials for your new light fixture installation. You’ll need a screwdriver, drill, wire cutters, and electrical tape. Wire nuts, a new fixture, ladder, and voltage tester are also essential.
Safety is crucial. Turn off the room’s power at the breaker box. Use a voltage tester to confirm there’s no electricity before beginning work.
Gather Necessary Tools and Materials
- Screwdriver
- Drill
- Wire cutters
- Electrical tape
- Wire nuts
- New light fixture
- Ladder or step stool
- Voltage tester
Ensure Power is Turned Off
Safety first: shut off power to the room at the breaker box. Double-check with a voltage tester to confirm no electricity is present. This step prevents electrical shock during installation.
Now you’re set to remove the old fixture and install the new one. Remember, safety always comes first when working with electrical systems.
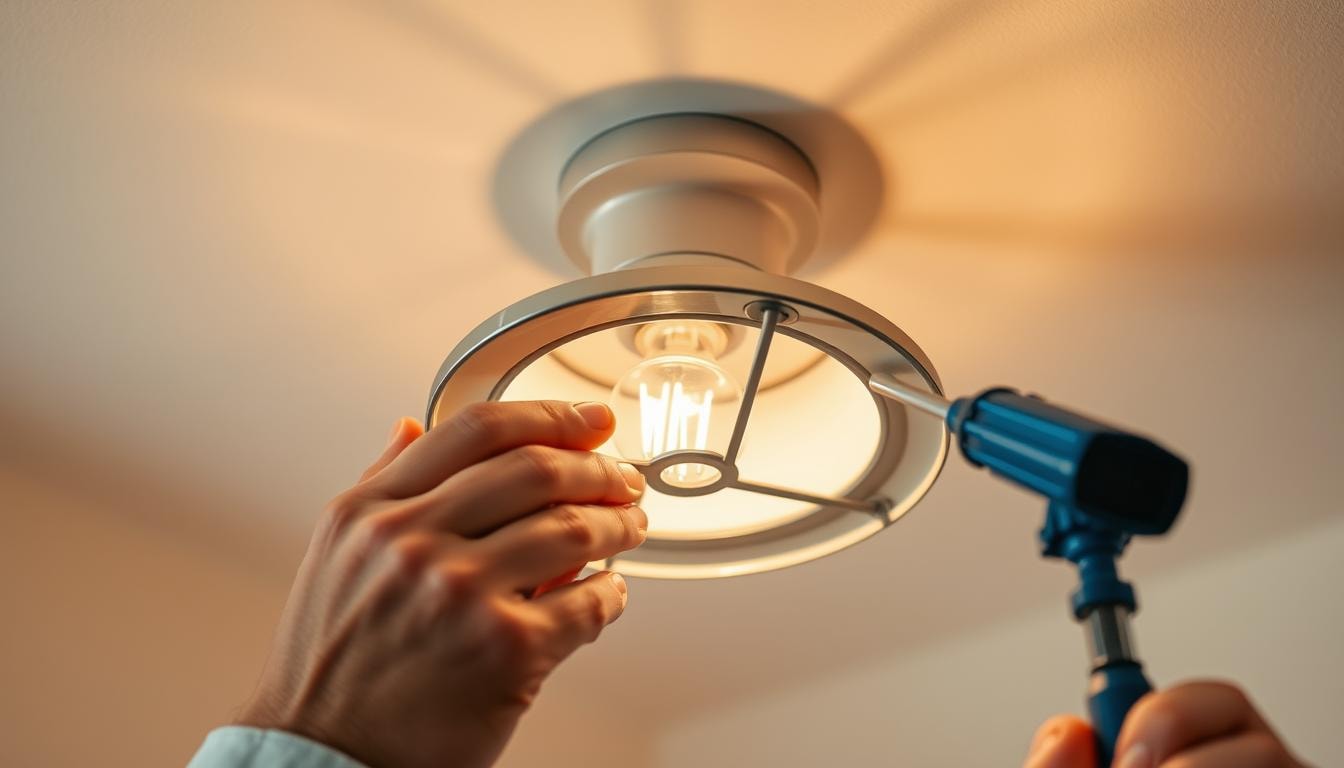
Removing the Existing Light Fixture
Safely removing your current light fixture is crucial before installing a new one. This involves supporting the fixture’s weight and disconnecting its wires. Follow these steps for a smooth transition to your new lighting.
Support the Weight and Disconnect Wires
First, turn off the circuit breaker controlling the light fixture’s power. Use a voltage tester to confirm the power is off. Support the existing light fixture and unscrew it from the mounting plate.
Carefully disconnect the wires, including the copper grounding wire, white neutral wires, and black wire. Take a photo of the wiring before removal for future reference.
- Turn off the power to the existing light fixture at the circuit breaker.
- Use a voltage tester to confirm the power is off.
- Support the weight of the existing light fixture and unscrew it from the mounting plate.
- Disconnect the copper grounding wire, white neutral wires, and the black wire.
- Take a photo of the wiring for reference during installation.
Now that you’ve safely removed the old fixture, you’re ready to install the new one. Always prioritize safety by turning off power before working on electrical components.
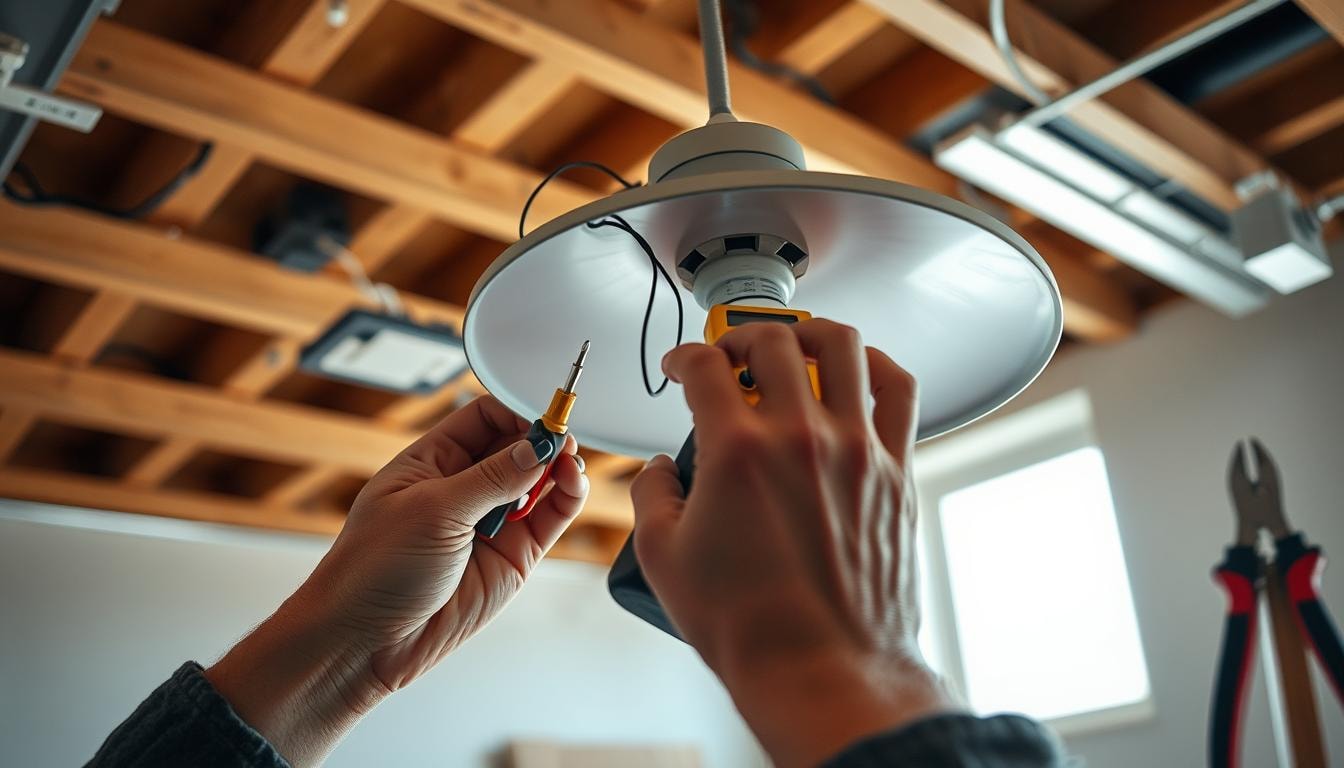
Understanding Wiring for New Light Fixture
Installing a new light fixture requires proper wiring. Pay attention to color-coded wires for safe connection. Different fixtures may have varying wiring needs.
New fixtures often have a black cord with three wires. These are black (hot), white (neutral), and green (ground). Use wire cutters to expose about an inch of each wire.
- The black wire (hot) needs to be connected to the black wire in the electrical box.
- The white wire (neutral) needs to be connected to the white wire in the electrical box.
- The green wire (ground) needs to be connected to the green or bare copper wire in the electrical box.
Follow color-coding for correct wiring. Always turn off power at the circuit breaker before starting. Your safety comes first.
Diagrams show different wiring setups for new light fixtures. These visuals help you understand the process. They ensure proper connection and code compliance.
Assembling the New Light Fixture
Assembling your new light fixture is crucial before installation. Follow the manufacturer’s instructions to ensure proper setup. This step prepares the fixture for wiring and mounting.
Follow Manufacturer’s Instructions
Unpack the light fixture and lay out all parts. Read the instructions carefully, noting specific assembly steps. These guidelines will help you connect the mounting bracket, canopy, and light bulb sockets.
Adjust Chain Length (if applicable)
For chain fixtures, adjust the length to your desired hanging height. Use pliers to open a link and attach it to the screw collar. Thread the fixture’s wires through every other chain link as you adjust.
Careful assembly ensures your light fixture is ready for installation. This preparation is key to a successful project outcome.
Wiring the New Light Fixture
Wiring your new light fixture safely is crucial. Follow the manufacturer’s instructions carefully. Connect the black fixture wire to the black ceiling wire.
Link the white fixture wire to the white ceiling wire. Attach the ground wire to the grounding screw or bar.
Connect Wires Correctly
Twist wires together firmly using wire nuts for a secure connection. Cover wire nuts with electrical tape for extra protection. This prevents exposed wiring and ensures safety.
Use Wire Nuts and Electrical Tape
Wire nuts create strong connections that support the fixture’s weight. Electrical tape insulates wire nuts and prevents short circuits. These tools are key for a safe installation.
Safety is the top priority when working with electrical wiring. Double-check all connections carefully. If you’re unsure, don’t hesitate to ask for professional help.
Mounting the New Light Fixture
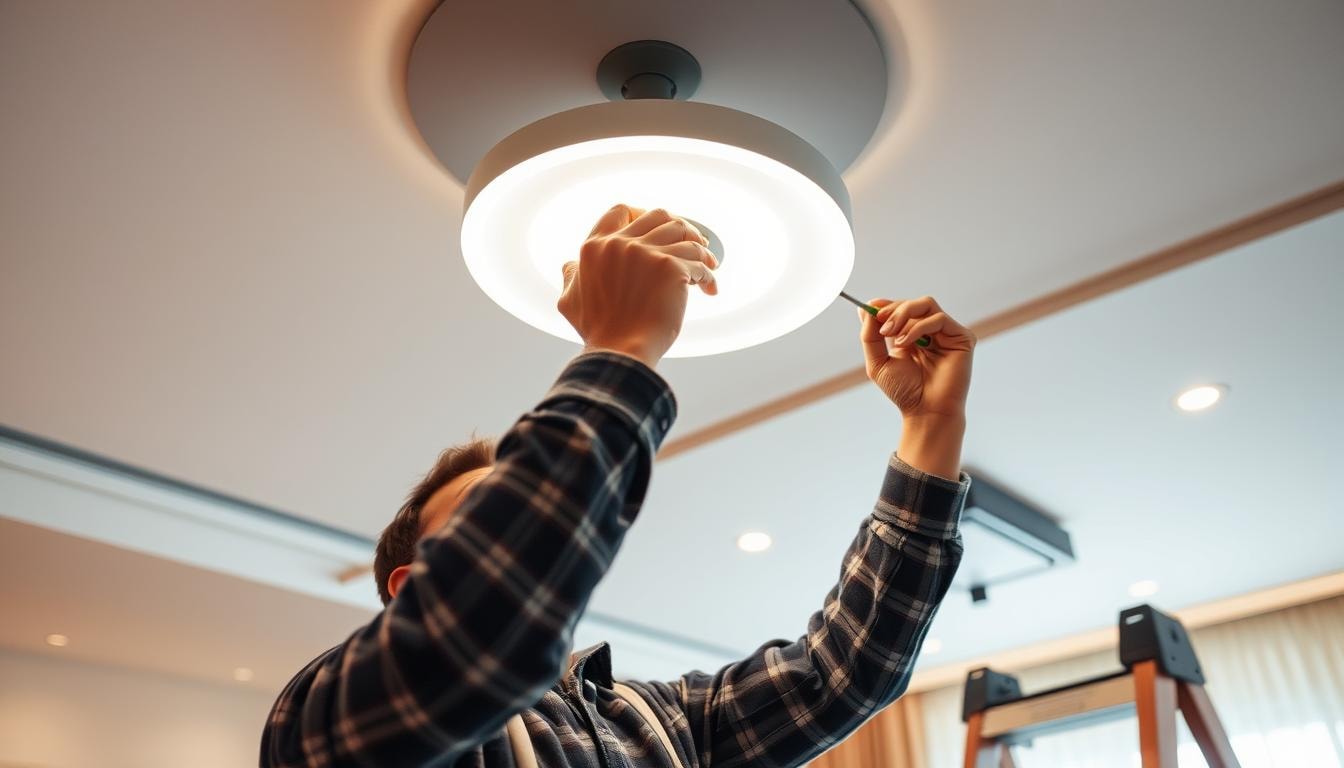
After wiring, it’s time to mount the new light fixture securely. This involves attaching the fixture’s mounting strap to the ceiling’s junction box. Replace any damaged or missing mounting straps with the new one provided.
Attach to Mounting Strap or Junction Box
Most light fixtures come with a mounting strap that screws into the junction box. Junction boxes typically support up to 50 pounds. For heavier fixtures, use a box designed for the extra weight.
- Secure the mounting strap to the junction box using screws.
- Carefully lift the light fixture and align it with the mounting strap.
- Attach the fixture to the mounting strap, ensuring it is firmly in place.
For safety, ask someone to stabilize the ladder while you mount the fixture. This makes the task easier, especially with heavier fixtures.
After mounting, install the canopy and light bulbs. Turn the power back on and test the new fixture. This ensures everything is working correctly.
Adding Finishing Touches
Now that your new light fixture is secure, let’s add the final touches. Slide the canopy against the ceiling to cover the mounting hardware. Tighten the locknut to secure it, giving a polished look.
Time to screw in the light bulbs. Use the right type and wattage as recommended by the manufacturer. This will boost the fixture’s look and performance.
Turn the power back on and test your new light fixture. Check if all connections work and the light shines as desired. If issues occur, review your wiring and check the instructions.
Install Canopy and Light Bulbs
- Slide the canopy up against the ceiling to cover the mounting hardware.
- Tighten the locknut to secure the canopy in place.
- Screw in the light bulbs, following the manufacturer’s recommendations.
- Restore power to the circuit and test the new light fixture.
These final steps ensure your light fixture looks great and works well. The canopy hides the hardware, creating a clean look. With the right bulbs, your space will shine beautifully.
Outdoor Light Fixture Installation
Choose a UL-rated outdoor light fixture for safe installation. These fixtures use weather-resistant materials and sealed electrical parts. They protect against moisture and harsh elements.
Choose Weather-Resistant Fixture
Pick outdoor lights with durable, corrosion-resistant finishes and hardware. These features help the fixture withstand rain, wind, and temperature changes. Ensure the fixture is UL-rated for wet or damp locations.
Take Moisture Precautions
- Position the outdoor light fixture in a dry area, away from direct exposure to rain or water.
- Use a weather-resistant sealant or caulk around the fixture’s mounting base to prevent moisture intrusion.
- Ensure all electrical connections are properly insulated and protected from the elements.
- Consider installing the fixture under an eave or porch overhang for added protection.
Pick a UL-rated, weather-resistant outdoor light fixture for safety. Take precautions to protect it from the elements. Your new outdoor lighting will be both beautiful and long-lasting.
Troubleshooting Tips
Having issues with your new light fixture? Don’t worry! Let’s explore some common troubleshooting tips to solve these problems quickly.
Start by checking the power supply. Make sure the circuit breaker is on and power flows to the fixture. If there’s no power, inspect the wiring connections.
Remove the fixture and check if all connections are secure. Use wire nuts and electrical tape to join them properly.
- Flickering lights often indicate bad switch contacts or loose wire connections, especially at the switch.
- Recessed canister lights may turn on and off due to a faulty limit switch triggered by excessive heat, so make sure the fixture has adequate air circulation.
- Improper wattage light bulbs can cause overheating in recessed light fixtures, so double-check the recommended bulb size.
If wiring is fine, the issue might be with the fixture itself. Check the socket connections carefully. Ensure the bulb is screwed in tightly.
Make sure the brass tab inside the socket makes proper contact. Adjusting this tab can sometimes fix connection problems.
For complex issues, consult a professional electrician. They can identify and solve challenging light fixture problems safely.
These tips will help you fix your light fixture issues. You’ll soon enjoy a well-lit space again. Good luck.
The FindPros Solution
Tackling a light fixture installation or any home project can be daunting. But with FindPros, you can get the help you need, quickly and affordably. Simply answer a few questions about your ceiling lights, lighting fixture, or other home needs, and we’ll match you with top-rated local professionals. They’ll provide accurate estimates, including materials, so you can compare quotes and choose the best pro for the job. With FindPros, you’ll get competitive pricing as pros compete for your business, and find the perfect fit for your project and your personal preferences. Trust the experts at FindPros to take the stress out of your next home improvement.
Conclusion
You’ve mastered light fixture installation through this guide. You’ve gained skills to transform spaces with new fixtures. This knowledge empowers you to tackle future projects confidently.
You’ve learned to remove old fixtures and wire new ones safely. With the right tools and techniques, you can now create your desired ambiance. Your living spaces will shine with your personal touch.
Remember to follow local regulations and get permits when needed. Consider professional help for complex projects. Balance DIY skills with expert advice for safe, long-lasting installations.
Take pride in your hands-on efforts to improve your home. Enjoy the satisfaction of seeing your hard work light up your spaces.
Frequently Asked Questions (Light Fixture Installation)


MOST POPULAR CITIES
Browse by State- Alameda
- Costa Mesa
- Laguna Beach
- Orange
- Alhambra
- Culver City
- Lancaster
- Oroville
- Anaheim
- Daly City
- Livermore
- Oxnard
- Antioch
- Davis
- Lodi
- Pacific Grove
- Arcadia
- Downey
- Lompoc
- Palm Springs
- Bakersfield
- El Centro
- Long Beach
- Palmdale
- Barstow
- El Cerrito
- Los Angeles
- Palo Alto
- Belmont
- El Monte
- Malibu
- Pasadena
- Berkeley
- Escondido
- Martinez
- Petaluma
- Beverly Hills
- Eureka
- Marysville
- Pomona
- Brea
- Fairfield
- Menlo Park
- Port Hueneme
- Buena Park
- Fontana
- Merced
- Rancho Cucamonga
- Burbank
- Fremont
- Modesto
- Red Bluff
- Calexico
- Fresno
- Monterey
- Redding
- Calistoga
- Fullerton
- Mountain View
- Redlands
- Carlsbad
- Garden Grove
- Napa
- Redondo Beach
- Carmel
- Glendale
- Needles
- Redwood City
- Chico
- Hayward
- Newport Beach
- Richmond
- Chula Vista
- Hollywood
- Norwalk
- Riverside
- Claremont
- Huntington Beach
- Novato
- Roseville
- Compton
- Indio
- Oakland
- Sacramento
- Concord
- Inglewood
- Oceanside
- Salinas
- Corona
- Irvine
- Ojai
- San Bernardino
- Coronado
- La Habra
- Ontario
- San Clemente