Popcorn Ceiling Removal Near You
Can’t find what you are looking for?
How It Works
-
 Answer a few questions about your home project.
 -
 Within seconds, get matched with top-rated local pros.
 -
 Compare quotes and choose the best pro for the job.
Popcorn Ceiling Removal In Your Area
Popcorn Ceiling Removal: A Step-by-Step Guide
Meta Description: Discover how to safely and effectively remove popcorn ceilings with our comprehensive guide. Learn techniques, tools, and tips for Popcorn Ceiling Removal success.
Is your popcorn ceiling making your home look dated? A smooth ceiling can refresh your space and boost its value. This guide will help you remove your popcorn ceiling safely and effectively.
We’ll cover everything from asbestos testing to surface refinishing. You’ll learn about the tools, techniques, and safety measures needed for success.
Key Takeaways
- Popcorn ceiling removal can transform the look and feel of a room, enhancing the home’s overall aesthetic and resale value.
- Testing for asbestos is crucial, as popcorn ceilings installed between the 1950s and 1980s may contain this hazardous material.
- Proper preparation of the work area, including covering floors and furniture, is essential to minimize mess and damage.
- Two common removal techniques, dry scraping and wet scraping, each have their own advantages and considerations.
- Patching and refinishing the ceiling surface after removal is a crucial step to achieving a smooth, professional-looking finish.
Test for Asbestos in Popcorn Ceilings
Homes built before the mid-1980s might have asbestos in their popcorn ceilings. This hazardous mineral was common in construction materials then. Asbestos was popular in popcorn ceilings from 1945 to 1980.
Testing for asbestos is crucial before starting any removal work. This step ensures safety for you and your family.
Asbestos Testing Methods for Popcorn Ceilings
You have two options to test for asbestos in your popcorn ceiling. An EPA-approved asbestos specialist can collect and analyze a sample.
Alternatively, use an EPA-approved test kit from hardware stores or online retailers. These kits guide you on safe sample collection and lab analysis.
If asbestos is found, only a certified abatement contractor should remove the ceiling. Disturbing asbestos releases harmful fibers, posing serious health hazards if inhaled.
Testing for asbestos is a vital safety step. It protects you during the popcorn ceiling removal project.
Gather Essential Tools and Materials
Removing popcorn ceilings requires specific tools and materials. You’ll need a ladder, plastic sheeting, painter’s tape, and a fan for ventilation. Paint scrapers, a spray bottle, and drywall compound are also essential.
Don’t forget a hammer, sanding blocks, paint rollers, and trays. Personal protective equipment like dust masks and safety glasses are crucial for your safety.
Having the right tools makes the process more efficient and safer. Gather everything before starting to ensure a smooth project. Protect your workspace and yourself to minimize mess and health risks.
Prepare the Workspace for Popcorn Ceiling Removal
Proper workspace prep is key for successful popcorn ceiling removal. Move small furniture out and cover larger items with waterproof tarps. Use painter’s tape to secure drop cloths on the floor.
Apply plastic sheeting to walls and fixtures. This protects your space from dust and debris during the removal process.
Cover Floors, Walls, and Furniture
Protect your space from dust and debris with these steps:
- Clear the area of small items and move larger furniture pieces to the center of the room.
- Cover floors with waterproof drop cloths or rosin paper secured with painter’s tape.
- Drape plastic sheeting over walls, fixtures, and any remaining furniture to prevent contamination.
Turn Off HVAC System and Lighting
Shut off the HVAC system and ceiling lights in the work area. This prevents dust from spreading throughout your home.
It also creates a cleaner, safer environment for the popcorn ceiling removal process.
Popcorn Ceiling Removal Techniques
Removing popcorn ceilings can be done by dry scraping or wet scraping. Both methods have their pros and cons. Let’s explore each to help you choose the best option.
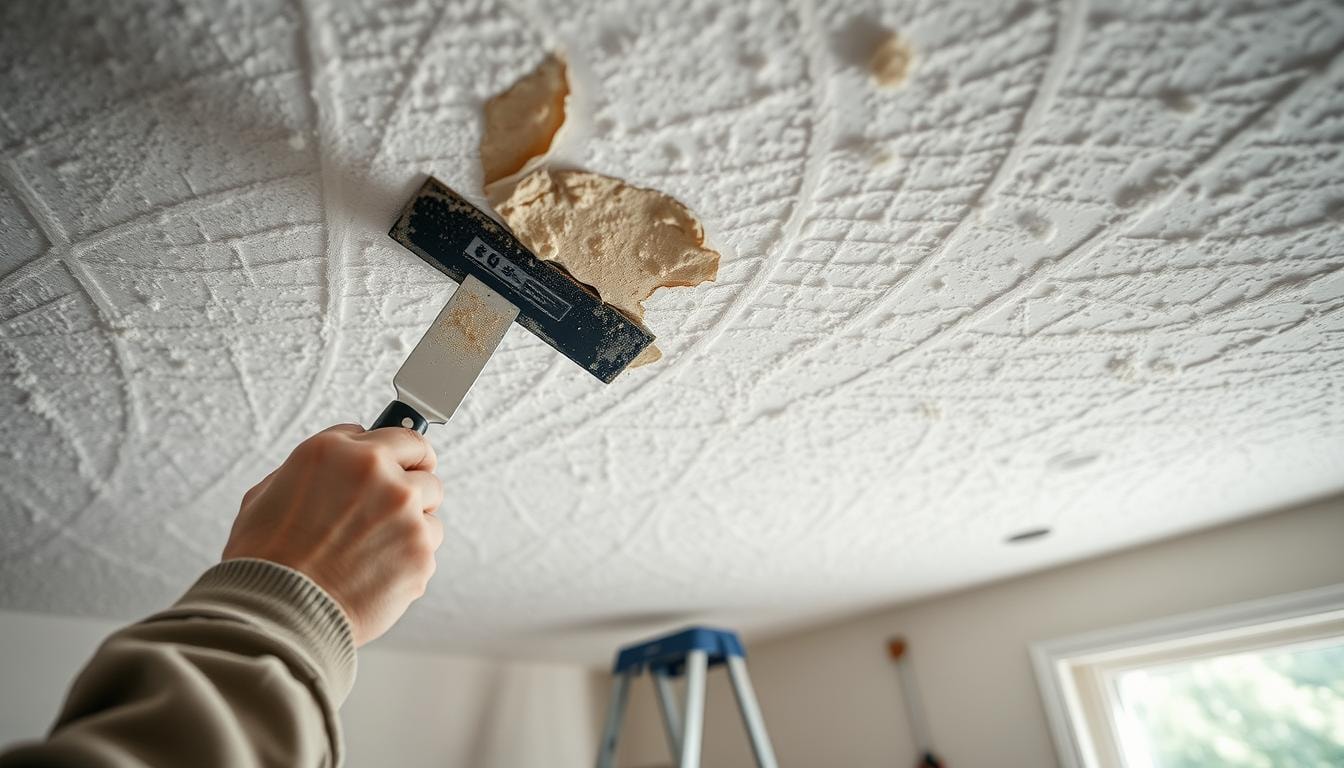
Dry Scraping Method
Dry scraping uses a paint scraper to remove small sections of popcorn texture. This method can create a lot of dust. It’s important to wear a respirator for safety.
Wet Scraping Method
Wet scraping involves spraying the ceiling with a water and soap mixture. After soaking, the material softens and becomes easier to scrape. This approach reduces dust and debris.
Be careful when working near electrical fixtures. Protect the surrounding area from moisture damage. This method offers more control and cleanliness.
For painted popcorn ceilings, a chemical stripper may be needed. This breaks down the paint barrier before scraping. It helps ensure a thorough removal process.
Your choice depends on your ceiling’s characteristics and personal preference. Safety should be your top priority. Proper preparation is key to a successful popcorn ceiling removal.
Patch and Repair Ceiling After Removal
After removing the popcorn ceiling, it’s time to fix the drywall. This step is key for a smooth, even finish. Sand down uneven areas and nail pops first.
Use joint compound to fill imperfections. Create a seamless base for the next steps. Once dry, sand the repaired areas for a level surface.
Prime and paint the ceiling to match the room. This prep work ensures a professional-looking finish. Your efforts will result in a beautifully transformed ceiling.
- Sand down any uneven areas or visible nail pops
- Use joint compound to fill imperfections
- Sand the repaired areas to ensure a smooth, level surface
- Prime and paint the ceiling to match the room
These steps will transform your ceiling from dated to modern. It enhances the room’s look and can boost your home’s value. Proper repair, sanding, priming and painting will make your new ceiling shine.
Smooth and Refinish the Ceiling Surface

After patching and repairing the ceiling, it’s time to smooth and refinish it. This may involve light sanding to create an even texture. Sanding prepares the ceiling for the final painting step.
Sanding and Preparing for Paint
Start by sanding the ceiling to remove any drywall texture or flaws. Use a pole or orbital sander for even coverage. Wipe away dust and debris carefully.
Apply a coat of primer to the smooth ceiling surface. This helps the new paint stick better and last longer.
After the primer dries, add a fresh coat of paint. Pick a top-quality, smooth ceiling paint for great coverage and a flawless look.
With proper prep and finishing, your textured ceiling will look smooth and new. This update will transform your entire space.
Popcorn Ceiling Removal: A Cost-Effective Solution
Removing a popcorn ceiling can be a cost-effective home improvement project. It’s especially true if you choose to do it yourself. By following proper steps and using the right tools, you can save money compared to hiring professional services.
For those who prefer a hands-off approach, hiring a qualified company may be best. This is particularly true if you have concerns about potential asbestos in your ceiling.
A budget-friendly alternative is using Styrofoam or Polystyrene Ceiling Tiles. These decorative tiles can transform an outdated popcorn ceiling without complete removal. They’re waterproof, lightweight, and easy to install, making them practical for many homeowners.
Industry stats show popcorn ceiling removal costs range from $923 to $3,006. The national average is $1,961. In contrast, Styrofoam ceiling tiles can be much cheaper.
Beadboard panels cost as little as 50 cents per square foot. Faux pressed tin panels range from $1 to $5 per square foot. This money-saving option appeals to homeowners on a tight budget.
Consider both costs and benefits when choosing between DIY and professional removal. Find the most cost-effective solution that fits your needs and budget.
Maximize Resale Value by Removing Popcorn Ceilings
Popcorn ceilings were popular from the 1950s to 1980s. Now, they’re seen as outdated and unappealing. Removing these textured ceilings can boost your home’s resale value and look.
Impact on Home Value and Aesthetic Appeal
Removing popcorn ceilings creates a smooth, modern finish. This makes your home more attractive to buyers. It can also increase your home’s market value.
Experts say removing popcorn ceilings can boost resale value by 3-5%. This is important in today’s competitive real estate market. Buyers want clean, modernized interiors that show off a home’s best features.
Removing popcorn ceilings makes your home appeal to more buyers. This can lead to a faster sale at a higher price. It’s a smart investment for homeowners seeking maximum returns.
Tips for Hiring the Right Popcorn Ceiling Removal Company

Hiring professional services for popcorn ceiling removal is crucial. Look for licensed, insured contractors with experience in asbestos abatement. This ensures safe and efficient project completion while prioritizing safety precautions.
Ask about safety protocols, project timelines, and cost estimates. Popcorn ceilings installed before the 1980s often contain asbestos. Professional testing and removal services are vital for these older ceilings.
Professionals bring efficiency to the removal process. They minimize damage and manage debris and dust effectively. This benefits homeowners looking to reduce mess during popcorn ceiling removal.
Safety gear and training are crucial for injury prevention. Hiring a professional can save time by avoiding mistakes. This is valuable for homeowners who prioritize efficiency and quality finishes.
When selecting a popcorn ceiling removal company, consider the following tips:
- Look for a company with a minimum of 20 years of experience in the industry.
- Check online reviews and ratings to ensure the contractor has a good reputation.
- Ensure the company is licensed, insured, and certified in asbestos abatement if necessary.
- Ask for detailed cost estimates and project timelines to set accurate expectations.
- Prioritize safety precautions and the use of proper safety gear by the crew.
These tips help you hire the right professional services. They ensure a successful and safe popcorn ceiling removal project. You’ll also minimize potential damages and unexpected costs.
FindPros: Your Trusted Popcorn Ceiling Removal Partner
Are you ready to rid your house of that dated popcorn or artex ceiling? FindPros can connect you with top-rated local professionals who can handle the job seamlessly. Simply answer a few questions about your home project, and we’ll match you with the best-suited workers in no time. No more worrying about finding the right person for the task – let our skilled workers take the load off your life. Get competitive quotes, compare options, and choose the pro that you feel most comfortable with. FindPros is here to reflect your desired ceiling style and make the process as smooth as possible.
Conclusion
Removing a popcorn ceiling can transform your home’s look and value. This guide provides steps for successful removal, whether you DIY or hire professionals. Follow these techniques to enjoy a smooth ceiling that modernizes your space.
Key takeaways include testing for asbestos and gathering the right tools. Proper workspace preparation and efficient removal methods are crucial. These steps minimize dust and disruption during the process.
Popcorn ceiling removal offers several benefits. It improves light reflection and indoor air quality. It also creates a more contemporary look that aligns with modern design trends.
The decision to remove a popcorn ceiling depends on your needs and budget. Consider its impact on your home’s value and appeal. By following this guide, you can create a space that reflects your style.
Frequently Asked Questions (Popcorn Ceiling Removal)


MOST POPULAR CITIES
Browse by State- Alameda
- Costa Mesa
- Laguna Beach
- Orange
- Alhambra
- Culver City
- Lancaster
- Oroville
- Anaheim
- Daly City
- Livermore
- Oxnard
- Antioch
- Davis
- Lodi
- Pacific Grove
- Arcadia
- Downey
- Lompoc
- Palm Springs
- Bakersfield
- El Centro
- Long Beach
- Palmdale
- Barstow
- El Cerrito
- Los Angeles
- Palo Alto
- Belmont
- El Monte
- Malibu
- Pasadena
- Berkeley
- Escondido
- Martinez
- Petaluma
- Beverly Hills
- Eureka
- Marysville
- Pomona
- Brea
- Fairfield
- Menlo Park
- Port Hueneme
- Buena Park
- Fontana
- Merced
- Rancho Cucamonga
- Burbank
- Fremont
- Modesto
- Red Bluff
- Calexico
- Fresno
- Monterey
- Redding
- Calistoga
- Fullerton
- Mountain View
- Redlands
- Carlsbad
- Garden Grove
- Napa
- Redondo Beach
- Carmel
- Glendale
- Needles
- Redwood City
- Chico
- Hayward
- Newport Beach
- Richmond
- Chula Vista
- Hollywood
- Norwalk
- Riverside
- Claremont
- Huntington Beach
- Novato
- Roseville
- Compton
- Indio
- Oakland
- Sacramento
- Concord
- Inglewood
- Oceanside
- Salinas
- Corona
- Irvine
- Ojai
- San Bernardino
- Coronado
- La Habra
- Ontario
- San Clemente