Stucco Repair Near You
Can’t find what you are looking for?
How It Works
-
 Answer a few questions about your home project.
 -
 Within seconds, get matched with top-rated local pros.
 -
 Compare quotes and choose the best pro for the job.
Stucco Repair In Your Area
Stucco Repair Process: A Step-by-Step Guide
Key Takeaways
- Stucco can last for several years but may eventually require repairs due to water damage, mold, or lack of gutters.
- The stucco repair process involves removing damaged stucco, installing metal lath or mesh, applying multiple coats of stucco, and optional painting.
- Proper surface preparation, drying, and curing are crucial for the success of stucco repairs.
- Hiring experienced stucco repair experts can ensure a long-lasting and visually appealing finish.
Introduction to Stucco Repair
Stucco is a durable exterior finish that can last for decades. It’s made of cement or lime-based plaster and is known for its beauty. Over time, stucco can get damaged by water, mold, or weathering.
Quick repairs are key to keeping your home’s exterior in good shape. Fixing stucco problems early helps prevent bigger issues down the road.
What is Stucco?
Stucco is a mix of cement, lime, plaster, and other materials. It’s tough and long-lasting, making it great for exterior finishes.
When installed right, stucco can stand up to harsh weather. It keeps homes looking nice for many years with proper care.
Common Causes of Stucco Damage
Stucco can develop cracks, blisters, and other problems over time. Here are some reasons why damaged stucco happens:
- Water seepage: Leaks or poor drainage can crack stucco and cause mold growth.
- Lack of maintenance: Not checking and fixing issues can make stucco problems worse.
- Natural weathering: Sun, wind, and temperature changes can wear down stucco.
- Structural movement: House settling can lead to cracks in stucco.
Knowing what causes stucco damage helps homeowners prevent problems. Regular checks and fixes can keep your home’s exterior finish looking great.
Taking care of stucco ensures it stays strong and beautiful for years to come. Quick action on small issues prevents bigger, costlier repairs later on.
When to Repair Stucco
Keeping your stucco exterior in good shape is vital for your home’s look and structure. Watch for signs like visible cracks, stains, discoloration, damage, and mold. These indicate the need for repairs.
Hairline cracks under 1/8 inch wide are normal and need regular upkeep. Spider-shaped or pattern cracks may point to poor application or structural problems. Diagonal cracks wider than 1/8 inch could mean settling issues.
Stains or discoloration might show water damage. Peeling or falling stucco sections clearly need fixing. Ignoring these signs can lead to more damage and higher costs later.
- Stains or discoloration on the wall can indicate water infiltration and the need for further inspection.
- If your stucco is peeling or falling off in sections, it’s a clear sign that repair or replacement is necessary.
- Ignoring these warning signs can lead to further damage and higher repair costs in the long run.
Regular home care can prevent stucco problems. Clear vegetation, paint when needed, and fix small cracks. For bigger issues, ask a stucco expert about repairs or remediation.
Tools and Materials Needed
Gather the right tools for your stucco repair project. You’ll need a drywall hawk, knife, flat trowel, and galvanized metal lath. Don’t forget gloves, grade-D builder’s paper, hammer, utility knife, and wire brush.
Organize your tools in bags for better efficiency. For the stucco mix, you’ll need portland cement, hydrated lime, and aggregate sand. Follow recommended ratios for each coat.
A wheelbarrow, water bucket, and spray bottle are crucial for mixing and applying stucco. These items will help you create the perfect mixture.
Essential Tools
- Drywall hawk – for holding and applying stucco mix
- Drywall knife – for spreading and smoothing stucco
- Flat trowel – for leveling and shaping the stucco surface
- Galvanized metal lath – for reinforcing the stucco base
- Gloves – for protecting hands during the repair process
- Grade-D builder’s paper – for creating a moisture barrier
- Hammer – for securing the metal lath to the wall
- Utility knife – for cutting and trimming materials
- Wire brush – for cleaning the surface before application
Materials for Stucco Mix
- Portland cement – the primary binding agent in stucco
- Hydrated lime – added to improve workability and durability
- Aggregate sand – provides texture and strength to the stucco mix
Keep a wheelbarrow, water bucket, and spray bottle nearby. These tools are essential for mixing and applying your stucco mixture effectively.
Preparing for the Repair

Weather conditions are crucial for stucco repair success. Safety precautions are also important. Both freezing temps and hot, dry weather can harm the repair process.
Weather Considerations
Freezing temps can ruin wet stucco. Wait for nighttime temps to stay above 40°F before starting repairs. Hot, dry, windy weather can make stucco cure too fast.
Work in shaded areas when possible. Keep the patch moist between coats by covering it with plastic.
Safety Precautions
- Wear protective gloves to avoid direct contact with the alkaline stucco mixture, which can cause skin burns.
- Use tools, such as a trowel, to handle the stucco rather than your bare hands.
- Keep a bucket of clean water nearby to quickly wash off any splashes of the stucco mixture.
Good weather conditions help ensure a lasting stucco repair. Taking safety measures protects you during the project. Follow these tips for the best results.
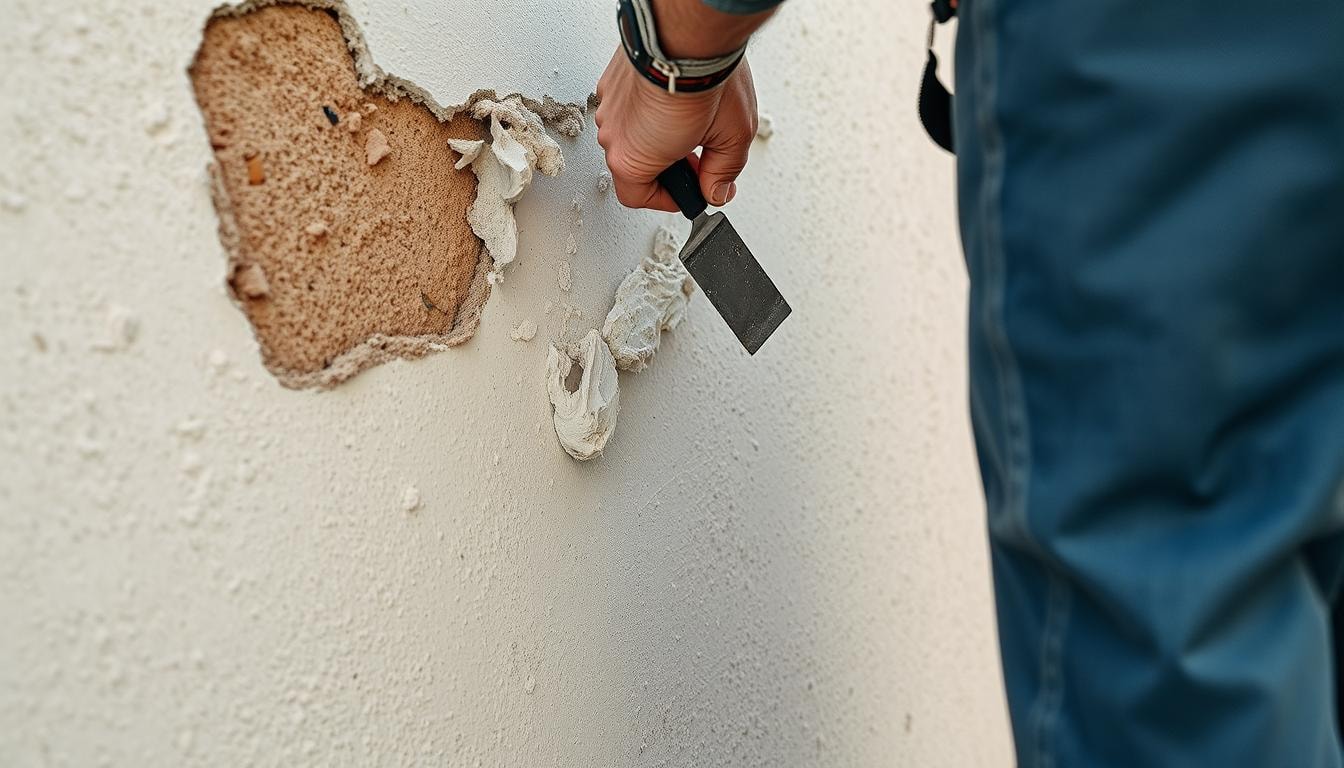
Step 1: Remove Loose Stucco
Start by removing any loose or damaged stucco. Use a hammer or a hammer and cold chisel to chip away the bad areas. Be careful not to harm the wood lath supports underneath.
Wear eye protection to shield yourself from flying bits. This step can get messy, so take safety measures. Removing damaged stucco exposes areas needing more work.
- Carefully use a hammer or a hammer and chisel to break away the loose or damaged stucco.
- Avoid damaging the underlying wood lath supports during the removal process.
- Wear eye protection to guard against any flying debris.
By removing damaged stucco, you’ll see how bad the problem is. This prepares the surface for the next repair steps.
Step 2: Chip Away at the Edges
Repairing stucco requires careful chipping of the damaged area’s edges. This step helps reach firmly adhered stucco for a strong bond. It’s crucial for a successful repair.
Use a mason’s chisel to chip away loose stucco around the damaged section. Work carefully to avoid harming intact stucco. Cut away any exposed metal mesh with snips.
Keep chipping until you reach firmly adhered stucco. This creates a smooth transition between existing and new material. Proper edge preparation ensures a durable repair.
Be patient and thorough during this step. Rushing can compromise the repair’s integrity. With care, you’ll create a seamless blend with the surrounding stucco.
Step 3: Cover Exposed Lath
To prepare for new stucco, cover the exposed wood lath. Cut grade-D builder’s paper to fit along the old stucco and exposed lath boundary. Secure the paper with roofing nails, then add a second layer for extra protection.
The builder’s paper acts as a moisture barrier. It prevents water infiltration that could harm the new stucco. This step creates a solid foundation for the stucco to adhere to.
- Cut grade-D builder’s paper to fit the exposed lath area
- Secure the paper with roofing nails
- Add a second layer of paper for added moisture protection
Preparing the lath with builder’s paper is crucial for stucco repair. This protective layer ensures a strong base for the new stucco. It helps create a successful and durable repair.
Step 4: Install Metal Mesh
Installing metal mesh is crucial before applying stucco mix. This galvanized metal lath acts as reinforcement. It prevents cracks and ensures a strong, durable finish.
Here’s how to properly install the metal mesh:
- Cut the galvanized metal lath to size using snips with offset handles. This makes cutting easier and more precise.
- Place the metal lath over the builder’s paper. Make sure it fits tightly against the edge of the existing stucco.
- Secure the mesh with roofing nails into the wood lath beneath. Use about 50 screws per sheet, spacing them 8 inches apart.
Proper installation of the metal lath creates a sturdy foundation. This helps prevent future cracks in your stucco repair.
The metal lath ensures a long-lasting, high-quality finish for your stucco project.
Step 5: Apply First Coat
Preparing the stucco mix is vital for repair. Gather materials, including a wheelbarrow, to mix stucco using the first-coat recipe. The acrylic bonding agent helps new stucco stick to old, ensuring long-lasting repairs.
Mixing the Stucco
In the wheelbarrow, blend dry stucco mix, water, and acrylic bonding agent. Use a hoe or stucco mixer attachment on a power drill. Mix until you get a smooth, lump-free consistency.
The resulting stucco mix should have a creamy, spreadable texture.
Applying the Scratch Coat
Use a trowel to scoop fist-sized wads of wet stucco. Toss them against the wire lath until it’s fully covered. Smooth the surface with a finishing trowel.
Pack the stucco mix against the existing stucco’s edges. Once it loses its wet sheen, score the surface with “x” marks.
This first coat, called the scratch coat, creates a rough surface. It helps the next coats stick better to the existing stucco. These steps build a strong base for the rest of the repair process.
Step 6: Apply Second Coat
After seven days, it’s time to apply the second coat of stucco. Remove the plastic covering and mist the patch with water. This helps keep the stucco hydrated and improves bonding.
Prepare a batch of stucco using the second-coat recipe. Apply a 3/8-inch-thick layer, working from the bottom up. Use a brick trowel to pack down the edges for a seamless transition.
Once the wet sheen disappears, smooth the surface with a trowel. Keep it just below the level of the surrounding stucco. Cover the patch again with a plastic sheet to control moisture.
Proper misting and moisture control are key to successful stucco repair. Follow these steps for a durable and seamless finish to your project.
Step 7: Apply Finish Coat
After three days, apply the final layer – the finish coat. This step is vital for achieving the desired texture and look. It helps blend the repaired area with the surrounding stucco.
Achieving Desired Texture
The application technique depends on the texture you want. For a “dash” finish, flick wet stucco mix onto the wall. Use a brick trowel until it’s flush with the existing surface.
For a smoother finish, use a sponge or cloth to blend. This method needs practice but results in a uniform look. Work in small sections, blending each area before moving on.
Let the stucco cure for several days after applying the finish coat. Keep the area moist and protected from sunlight and harsh weather. Follow the manufacturer’s curing time recommendations.
Step 8: Curing and Painting
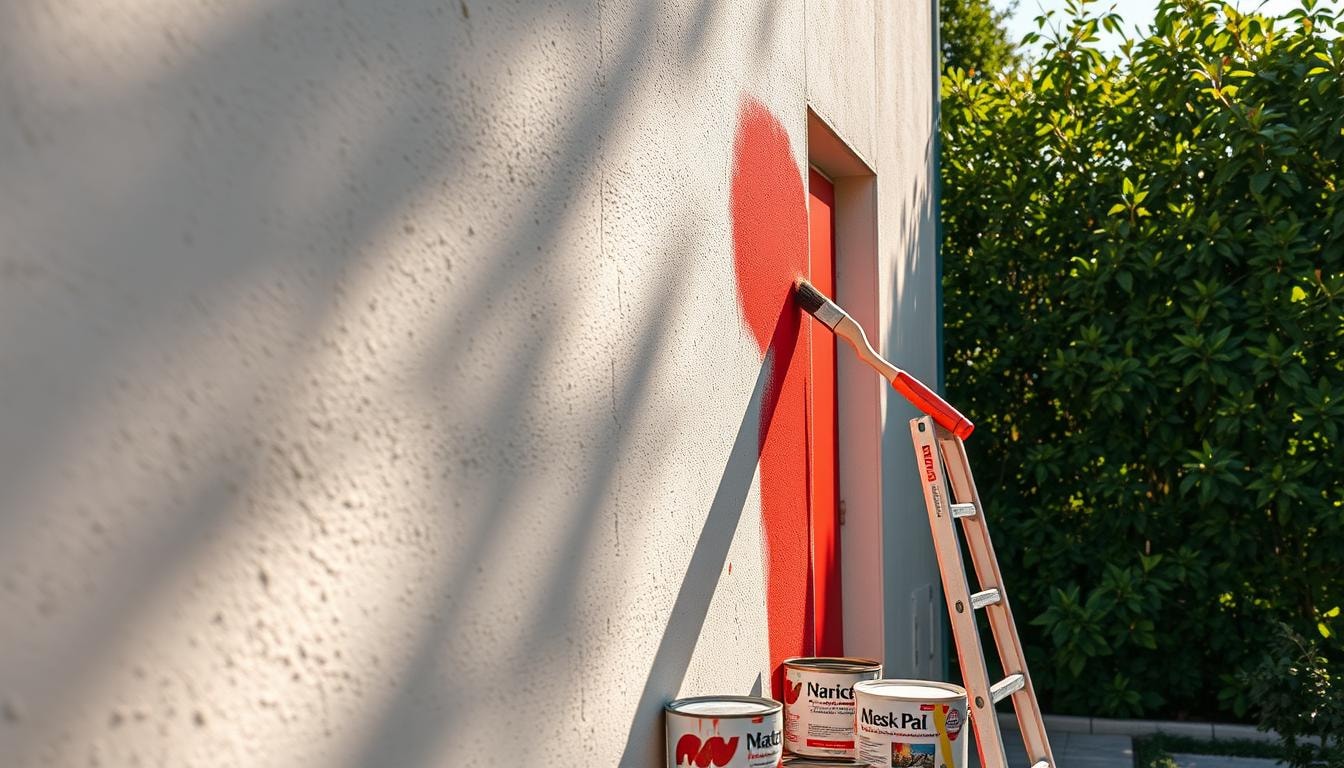
After repairing stucco, allow it to cure for at least a week. This process ensures full strength and moisture evaporation. Check with your contractor for specific curing guidelines.
Once cured, apply heavy-bodied acrylic elastomer or a suitable coating. This helps blend the repaired area with the surrounding wall. The coating provides a flexible finish that resists cracking.
Prepare the surface before painting. Address any efflorescence using a product like DRYLOK Etch. This creates a clean, paintable surface for better adhesion.
Apply two coats of acrylic latex paint for ideal coverage. Follow the manufacturer’s instructions for application and drying times. This ensures a long-lasting, professional finish.
These steps guarantee a properly cured and painted stucco repair. Your wall will look seamless and durable for years to come.
Tips for Hiring the Best Stucco Repair Experts
Hiring stucco repair experts is crucial for fixing your stucco. These professionals have the know-how and tools to ensure lasting repairs. The stucco repair cost may be higher, but it’s worth it for long-term durability.
Consider these tips when looking for a stucco repair contractor:
- Verify that the contractor is licensed and insured in your state or city. For example, in Denver, contractors must have a license from Denver Community Planning and Development and pass a rigorous exam based on construction codes and practices.
- Look for contractors who are certified by the Stucco Manufacturers Association (SMA) for stucco inspection, installation, repair, and maintenance.
- Check the contractor’s experience by asking about the number of years they’ve been in the business and the number of stucco projects they’ve completed in your local area.
- Ensure the contractor is certified to install the specific brand of stucco material you prefer, as this can affect the quality and durability of the repair.
- Review the contractor’s insurance coverage to make sure they have adequate liability and workers’ compensation policies.
- Carefully review the stucco repair estimate, looking for transparency in materials, subcontractor usage, and payment commitments. Beware of any illegal collection practices.
Choosing stucco repair experts who meet these standards ensures quality work. Your stucco repair will be done right, providing long-term durability for your home.
Discover FindPros for Your Stucco Repair Needs
Repairing stucco can be a complex process, involving multiple coats and careful attention to the existing texture and aesthetic appeal. If you’re dealing with larger cracks, water damage, or a cracked stucco finish on your walls, roof, or building, FindPros can help. Simply answer a few questions about your home project, and we’ll match you with top-rated local professionals who can handle the job, from the base coat to the final finish.
With FindPros, you’ll get the best pricing when multiple pros compete for your business, and you can choose the pro that best matches your needs and preferences. Don’t tackle stucco refinishing or DIY patching on your own – let FindPros connect you with the right expert to get the job done right.
Conclusion
Stucco is a popular exterior finish for homes. It’s durable but can get damaged over time. Learning how to repair stucco helps homeowners keep their home’s exterior looking great.
Stucco repair costs vary. A full repair can cost around $1,500, including materials and labor. Fixing issues like cracks or holes prevents further damage to your home.
Quick repairs keep your home’s structure safe. They also boost its looks and value. Regular checks and fixes are smart investments for homeowners.
Taking care of stucco damage is important. It keeps your home’s exterior strong and attractive. With proper care, your stucco finish will last for many years.
Frequently Asked Questions (Stucco Repair)


MOST POPULAR CITIES
Browse by State- Alameda
- Costa Mesa
- Laguna Beach
- Orange
- Alhambra
- Culver City
- Lancaster
- Oroville
- Anaheim
- Daly City
- Livermore
- Oxnard
- Antioch
- Davis
- Lodi
- Pacific Grove
- Arcadia
- Downey
- Lompoc
- Palm Springs
- Bakersfield
- El Centro
- Long Beach
- Palmdale
- Barstow
- El Cerrito
- Los Angeles
- Palo Alto
- Belmont
- El Monte
- Malibu
- Pasadena
- Berkeley
- Escondido
- Martinez
- Petaluma
- Beverly Hills
- Eureka
- Marysville
- Pomona
- Brea
- Fairfield
- Menlo Park
- Port Hueneme
- Buena Park
- Fontana
- Merced
- Rancho Cucamonga
- Burbank
- Fremont
- Modesto
- Red Bluff
- Calexico
- Fresno
- Monterey
- Redding
- Calistoga
- Fullerton
- Mountain View
- Redlands
- Carlsbad
- Garden Grove
- Napa
- Redondo Beach
- Carmel
- Glendale
- Needles
- Redwood City
- Chico
- Hayward
- Newport Beach
- Richmond
- Chula Vista
- Hollywood
- Norwalk
- Riverside
- Claremont
- Huntington Beach
- Novato
- Roseville
- Compton
- Indio
- Oakland
- Sacramento
- Concord
- Inglewood
- Oceanside
- Salinas
- Corona
- Irvine
- Ojai
- San Bernardino
- Coronado
- La Habra
- Ontario
- San Clemente