Trampoline Assembly Near You
Can’t find what you are looking for?
How It Works
-
 Answer a few questions about your home project.
 -
 Within seconds, get matched with top-rated local pros.
 -
 Compare quotes and choose the best pro for the job.
Trampoline Assembly In Your Area
Hiring a Trampoline Assembly Expert: Tips and Tricks
Meta Description: Discover expert tips for hiring professional trampoline assembly services. Learn how to ensure safe installation and maximize your outdoor fun with proper Trampoline Assembly.
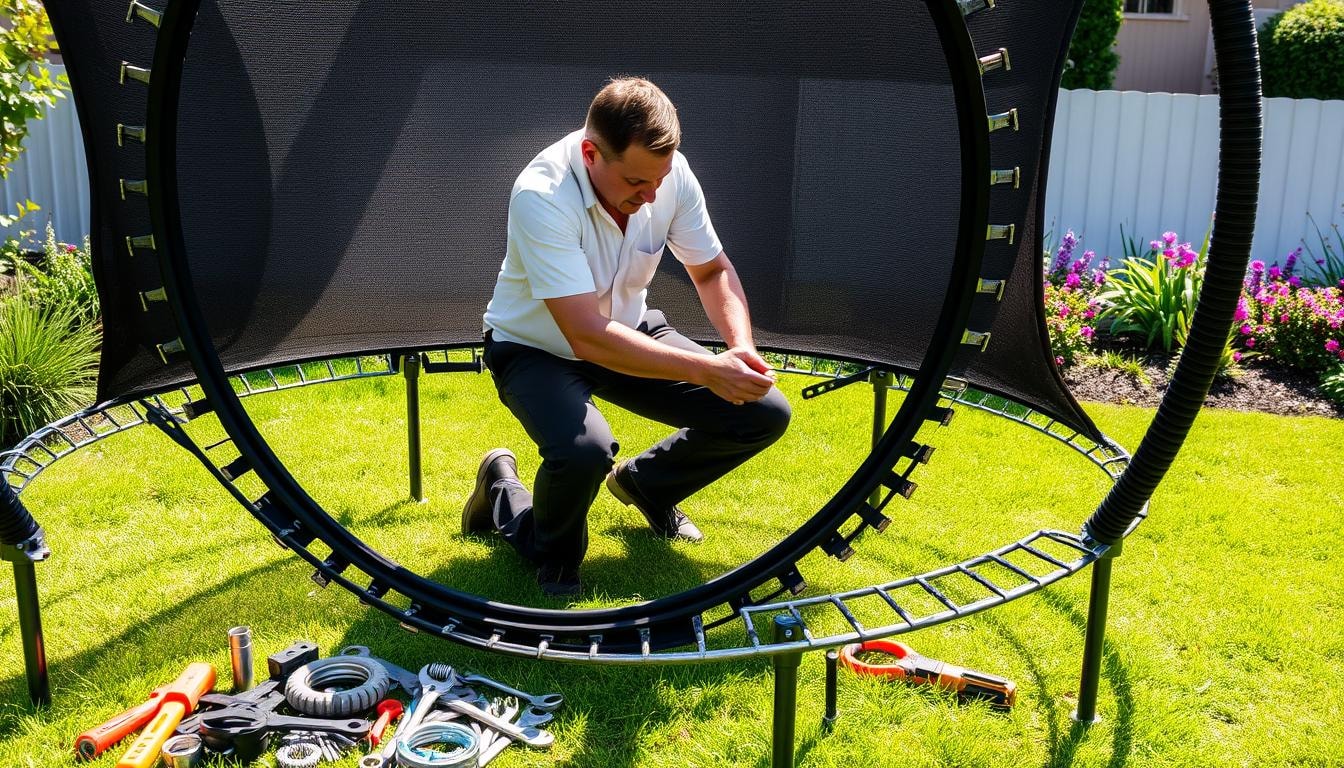
Assembling a new trampoline can be challenging, even for experienced DIYers. But don’t worry! A professional trampoline assembly service can make the process easy.
This guide will show you the perks of hiring an expert. You’ll also learn useful tips for a successful trampoline installation.
Key Takeaways
- Trampoline assembly can take 40 minutes to 6 hours, depending on size and complexity
- Hiring a professional trampoline assembly service can save time and ensure a safe setup
- Recommended tools for trampoline assembly include a power drill, spring pulling device, and rubber mallet
- Proper anchoring and safety checks are crucial for the stability and safety of the trampoline
- Consulting the manufacturer’s instructions and following safety guidelines is essential
The Importance of Proper Trampoline Assembly
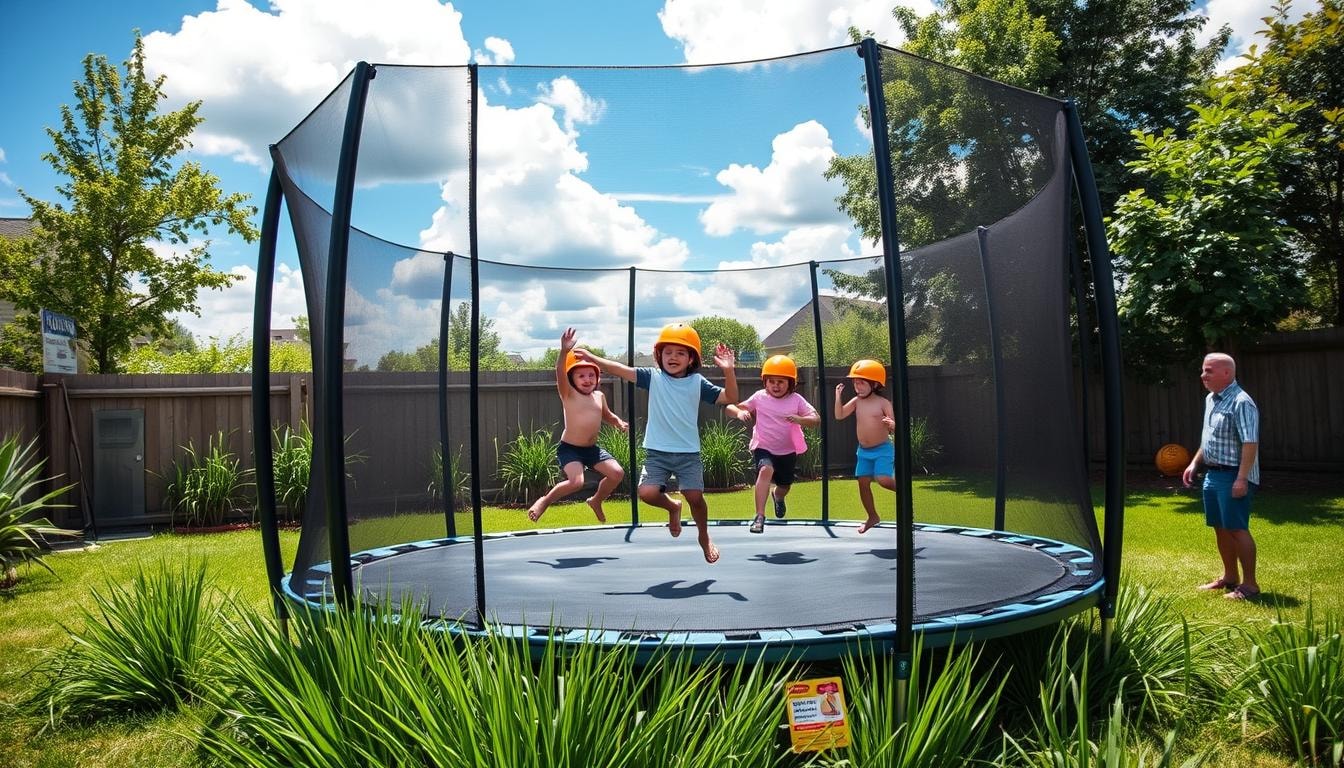
Proper trampoline assembly is vital for safety and longevity. A well-assembled trampoline offers a safe, fun experience. It also prevents damage and costly repairs.
Benefits of Hiring a Professional Trampoline Assembly Service
A professional trampoline assembly service brings expertise and efficiency. They ensure the job is done right the first time. These pros have the tools and know-how to handle the assembly process.
Experts minimize mistakes that could affect safety and stability. They save you time and effort. You can enjoy your new outdoor trampoline sooner.
Professional assembly services work with all trampoline brands. They ensure proper alignment and ground securing. This provides a safe, long-lasting jumping experience for your family.
Assessing Your Trampoline Assembly Needs
Choosing a trampoline requires careful thought about assembly needs. The size and type affect how complex it is to put together. Larger models need more time and effort to assemble than smaller ones.
Some trampolines have special features like safety nets or springless designs. These may need expert help to set up properly. Consider this when picking your trampoline.
Size and Type of Trampoline
Bigger trampolines take longer to assemble due to more parts. They have larger frames and mats that need careful installation. Special features may require extra tools and know-how.
Trampoline Assembly Experience and Skill Level
Your experience with assembling trampolines matters. Skilled builders can do it faster. Beginners might want to hire a professional trampoline assembly service.
Pros ensure safe and proper installation. This is helpful if you’re unsure or lack the right tools. Think about your skills when deciding to DIY or hire help.
Consider size, type, and your skills carefully. This helps you choose between DIY assembly and professional help. Make the best choice for your needs.
Finding a Reliable Trampoline Assembly Service
Research local companies and read customer reviews to find a professional trampoline assembly service. Look for providers with experience in trampoline installation and positive client feedback. Ensure the company is licensed, insured, and follows safety protocols.
Researching Local Companies and Reviews
Explore trampoline assembly services in your area using online directories and search engines. Check websites, service offerings, and customer reviews of potential providers. Pay attention to company credentials, including licenses and industry affiliations.
Look for reviews that highlight the assembly process and quality of trampoline installation. Contact companies directly to ask about their experience and tools and equipment. Inquire about warranties or guarantees on their work.
- Pay attention to the company’s credentials, including any licenses, certifications, or industry affiliations.
- Look for reviews that highlight the assembly process, the quality of the trampoline installation, and the overall customer satisfaction.
- Consider reaching out to the company directly to ask about their experience, the tools and equipment they use, and any warranties or guarantees they offer on their work.
Thorough vetting of potential trampoline assembly providers ensures a smooth installation experience. This diligence will help you enjoy your new outdoor trampoline safely and confidently.
Preparing for the Assembly Process
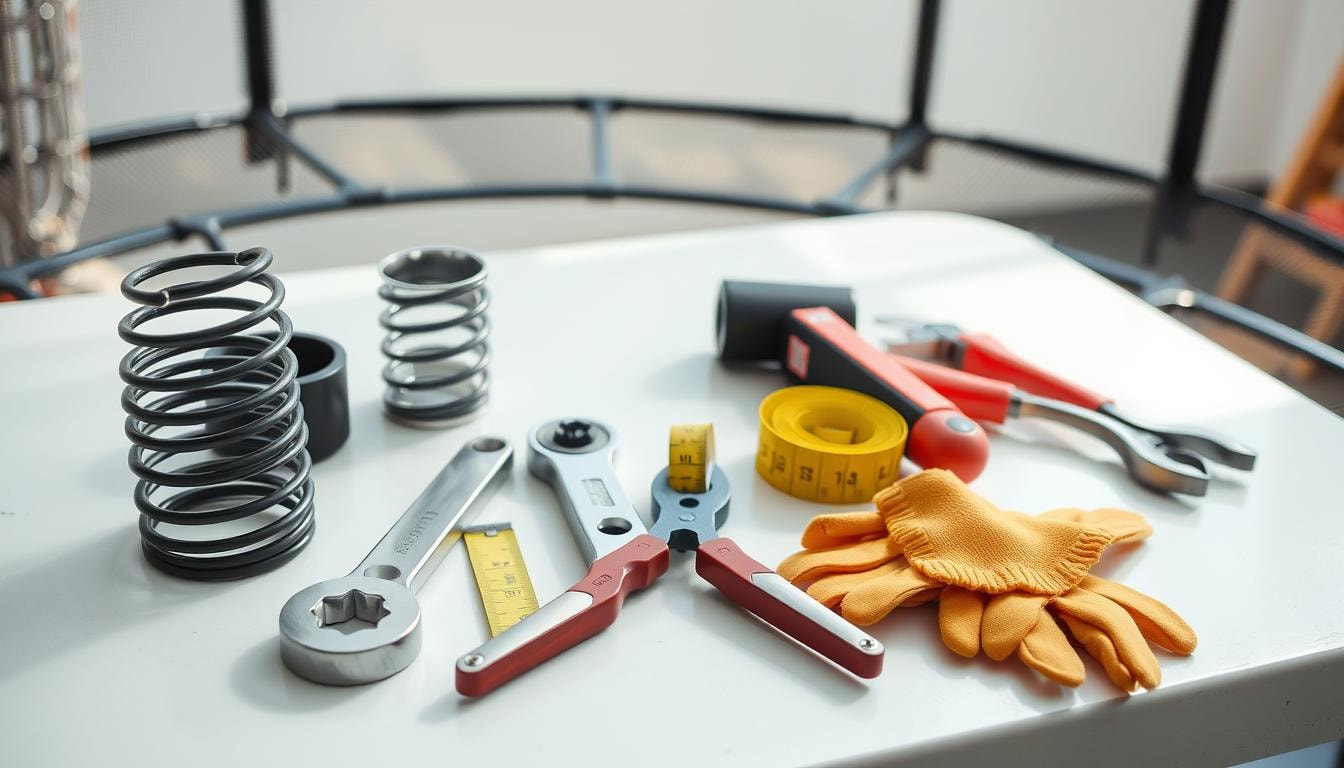
Proper preparation is key to a successful trampoline assembly. Clear the assembly area, ensuring it’s level and obstacle-free. Gather all necessary tools and materials, like a power drill and spring puller.
Check the manufacturer’s instruction manual for specific tools needed for your trampoline model. Organizing everything beforehand will streamline the installation and reduce frustration.
Clearing the Assembly Area
Pick a suitable spot for your new outdoor trampoline. The area should be level with ample space around it. Remove any debris, rocks, or obstacles that could hinder assembly or safety.
Gathering Necessary Tools and Materials
- Power drill
- Screwdrivers (both Phillips and flathead)
- Rubber mallet
- Spring puller
- Adjustable wrenches
- Jump mat
- Protective pad
- Enclosure net
- Trampoline ladder
- Anchor kit
Review the instruction manual to confirm you have all needed tools and materials. The right equipment will make assembly smoother and more efficient.
Step-by-Step Guide to Trampoline Assembly
Putting together a trampoline takes time and focus. Follow the maker’s instructions closely for a safe setup. Lay out all parts first to make assembly easier.
Common Mistakes to Avoid
Don’t skip steps or leave bolts loose when building your trampoline. This can make it wobbly and unsafe. Check your work at each stage to ensure everything is secure.
Be careful when aligning the jump mat and attaching springs. Take your time and get help with heavy parts. This prevents accidents and ensures correct assembly.
- Carefully follow the manufacturer’s step-by-step instructions in the instruction manual or using the BILT App, which provides 3D instructions.
- Organize all the trampoline components, including the frame, legs, springs, jump mat, and safety net, for easy access during assembly.
- Assemble the trampoline frame, taking care to properly connect the legs and secure the joints with bolts and screws.
- Attach the jump mat to the frame, ensuring the springs are properly connected and evenly spaced.
- Install the safety net, securing it to the frame using the provided poles and screws.
- Double-check all connections and tighten any loose bolts or screws to ensure the trampoline is stable and safe.
- Test the trampoline by gently bouncing on it to ensure it is properly assembled and functioning correctly.
Follow these steps to build your trampoline safely. Check all parts are secure and working right. If you’re unsure, hire a pro to do it for you.
Safety Considerations
Safety is crucial when assembling a trampoline. Follow the manufacturer’s instructions carefully. They guide you through proper installation and safety measures.
Secure all components tightly. Ensure bolts and screws meet recommended specifications. This step is vital for a safe trampoline setup.
Importance of Following Manufacturer’s Instructions
After assembly, do a thorough safety check. Look for loose parts and uneven surfaces. Address any issues that could make the trampoline unsafe.
Only allow using the trampoline once it’s properly installed. Your careful inspection ensures a safe jumping environment.
Safety Checks and Final Inspections
- Verify that all bolts and screws are tightened securely.
- Ensure the safety net and protective pads are properly installed and in good condition.
- Check the jump mat for any tears or wear and tear.
- Ensure the trampoline is placed on a level, stable surface and has adequate overhead clearance.
- Double-check the assembly steps to identify and address any potential issues.
Prioritize safety during trampoline assembly. Conduct thorough inspections regularly. These steps ensure safe and fun jumping for everyone.
Maintaining and Caring for Your Trampoline
Regular maintenance is key after proper trampoline assembly. It ensures your trampoline stays safe and lasts longer. Follow the maker’s guide and these steps to keep your trampoline in great shape.
Check your trampoline often for wear, loose parts, or damage. Look closely at the frame, springs, jump mat, and safety net. Fix any issues right away to keep the trampoline assembly safe and strong.
Clean your trampoline as the maker suggests. Use gentle, non-abrasive cleaners. Get a weather cover to shield trampoline components from sun, rain, snow, and wind.
Anchor the trampoline to the ground. This stops it from moving or tipping in windy weather. It’s a simple step that boosts safety and stability.
Stay alert and follow good trampoline maintenance habits. This will help your trampoline last longer. It also keeps jumping fun and safe for everyone.
Cost of Hiring a Trampoline Assembly Expert
The cost of hiring a trampoline assembly expert varies based on several factors. These include the trampoline’s size, complexity, and location. The assembler’s experience and specialized tools also affect the price.
Factors Affecting the Cost of Assembly Services
Trampoline assembly services may charge a flat rate or use hourly pricing. Some base their fees on the trampoline’s size. Compare quotes from multiple providers to get the best value.
LoadUp’s trampoline assembly service costs 20%-30% less than the national average. They offer transparent pricing based on items assembled, not volume.
- Traditional above-ground, spring-based trampolines cost between $200 and $3,000 or more.
- Springless above-ground trampolines are priced between $800 and $4,000+.
- Inground trampolines range from $1,000 to $5,000+.
- Mini trampolines (rebounders) have a price range of $30 to $500+.
- Water trampolines are priced between $300 and $3,000+.
Professional trampoline assembly services can be a wise investment. They have the tools and expertise to install your trampoline safely and correctly.
DIY vs. Professional Assembly
Trampoline assembly offers two choices: DIY or hiring professionals. DIY can be rewarding and cost-effective. However, mistakes could affect safety and stability.
Professional trampoline assembly ensures correct installation following safety guidelines. It provides peace of mind and efficiency. Yet, it may cost more upfront.
Your choice depends on experience, time, budget, and trampoline complexity. Consider these factors carefully. This will help you make the best decision for your needs.
A well-thought-out choice ensures safety and longevity. Your new trampoline will be ready for fun and exercise.
Discover FindPros: Your Trampoline Assembly Solution
Assembling a trampoline can be a daunting task, even for the most experienced DIYers. But with FindPros, you can simplify the process and ensure your new trampoline is installed properly. Our platform connects you with top-rated local professionals who can handle the job, whether you have a standard model or a specialized springfree trampoline.
Simply answer a few questions about your project, and we’ll match you with the best pros that fit your needs and budget. No more guessing if you have the right tools or worrying about potential safety issues. Let the experts at FindPros take care of the heavy lifting, so you and your kids can enjoy your new backyard oasis in no time.
Frequently Asked Questions (Trampoline Assembly)


MOST POPULAR CITIES
Browse by State- Alameda
- Costa Mesa
- Laguna Beach
- Orange
- Alhambra
- Culver City
- Lancaster
- Oroville
- Anaheim
- Daly City
- Livermore
- Oxnard
- Antioch
- Davis
- Lodi
- Pacific Grove
- Arcadia
- Downey
- Lompoc
- Palm Springs
- Bakersfield
- El Centro
- Long Beach
- Palmdale
- Barstow
- El Cerrito
- Los Angeles
- Palo Alto
- Belmont
- El Monte
- Malibu
- Pasadena
- Berkeley
- Escondido
- Martinez
- Petaluma
- Beverly Hills
- Eureka
- Marysville
- Pomona
- Brea
- Fairfield
- Menlo Park
- Port Hueneme
- Buena Park
- Fontana
- Merced
- Rancho Cucamonga
- Burbank
- Fremont
- Modesto
- Red Bluff
- Calexico
- Fresno
- Monterey
- Redding
- Calistoga
- Fullerton
- Mountain View
- Redlands
- Carlsbad
- Garden Grove
- Napa
- Redondo Beach
- Carmel
- Glendale
- Needles
- Redwood City
- Chico
- Hayward
- Newport Beach
- Richmond
- Chula Vista
- Hollywood
- Norwalk
- Riverside
- Claremont
- Huntington Beach
- Novato
- Roseville
- Compton
- Indio
- Oakland
- Sacramento
- Concord
- Inglewood
- Oceanside
- Salinas
- Corona
- Irvine
- Ojai
- San Bernardino
- Coronado
- La Habra
- Ontario
- San Clemente