Wood Fence Installation Near You
Can’t find what you are looking for?
How It Works
-
 Answer a few questions about your home project.
 -
 Within seconds, get matched with top-rated local pros.
 -
 Compare quotes and choose the best pro for the job.
Wood Fence Installation In Your Area
Wood Fence Installation: A Guide for Homeowners
Key Takeaways
- Professionally installed wood fences can cost between to per foot.
- Many communities require a building permit and neighbor approval for wood fence installation.
- Recommended tools for wood fence installation include a circular saw, cordless drill, and electric miter saw.
- Typical materials include wood fence panels, four-by-four fence posts, concrete mix, and screws.
- Homeowners can expect to pay between ,000 and ,000 to install a 150-foot fence.
Why Install a Wood Fence?
A wood fence offers many perks for homeowners. It provides privacy, security, and sets clear property boundaries. It also keeps pets safe and animals out of your yard or garden.
Privacy and Security
Wood fences create a private, peaceful outdoor space. They shield your family from prying eyes and unwanted visitors. This added privacy lets you enjoy your yard or garden without worry.
Property Boundaries
A wood fence clearly marks your property boundaries. This helps prevent neighbor disputes and land encroachment. It protects your rights as a property owner.
Animal Containment
Wood fences keep pets safe in your yard. They also stop unwanted animals from entering. Their sturdy build and design options make them great for animal containment.
A well-installed wood fence is a smart investment. It’s functional, attractive, and long-lasting. It can boost your property’s appeal and value.
Planning Your Wood Fence
Planning is key for a successful wood fence installation. You’ll need to understand local rules, consider neighbors, and assess your property’s terrain. These steps ensure a smooth project.
Local Regulations and Permits
Start by researching local building codes for fences. Many areas have specific rules about height, design, and placement. Getting the right permits is crucial for a compliant installation.
Neighbor Considerations
Talk to your neighbors about your fence plans. This can prevent conflicts and address shared concerns. Consider property lines, homeowners association rules, and potential impacts on nearby properties.
Terrain and Slope
Your property’s terrain affects fence choice and installation. Uneven ground or steep slopes may require special techniques. Property line issues might also influence your fence design.
Addressing these factors ensures a successful fence installation. Your new fence will meet all requirements and fit well with your property.
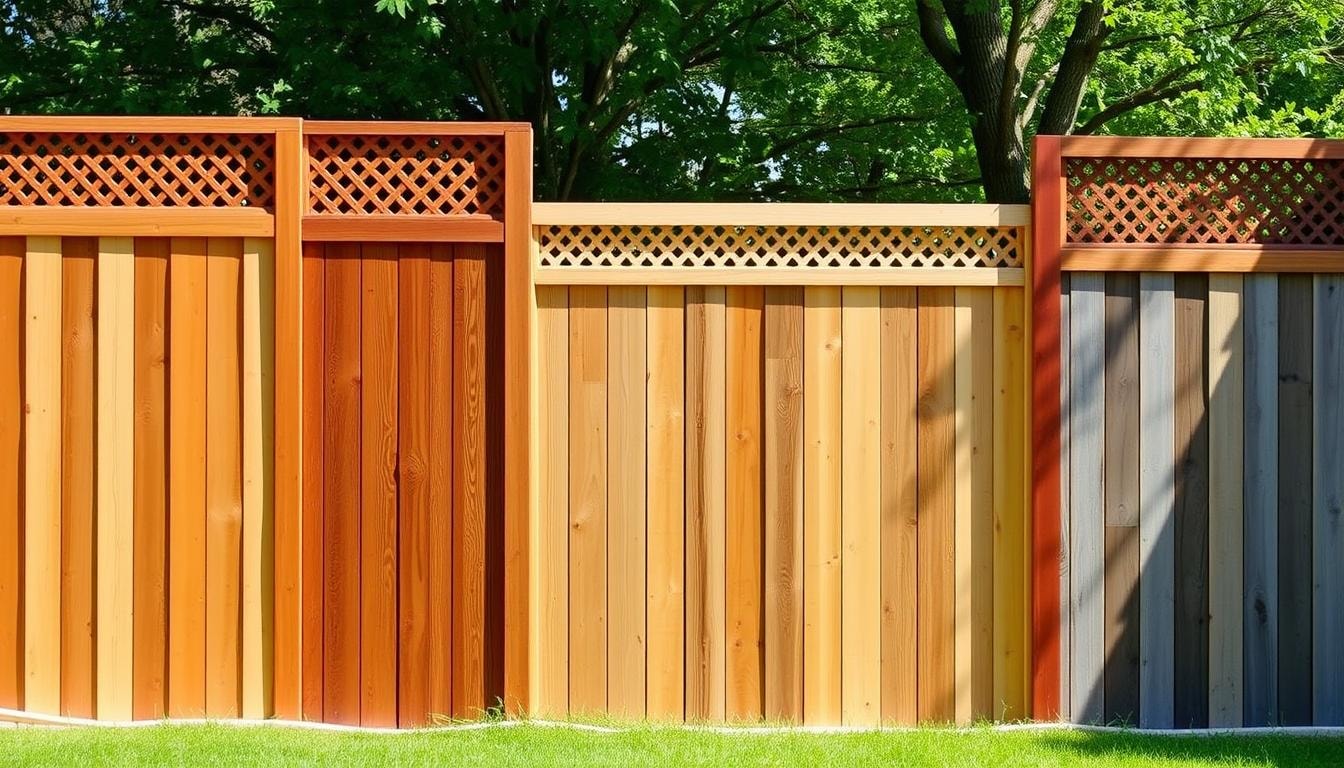
Choosing the Right Wood Fence Material
Selecting wood fence material requires careful thought. Consider durability, weather resistance, and maintenance needs. Each wood type has unique benefits for your property.
Pressure-Treated Wood
Pressure-treated wood resists rot and insects. It’s a cost-effective, durable option for fences. This wood withstands elements well but may need regular upkeep.
Cedar Wood
Cedar naturally resists decay and insects. It’s a low-maintenance choice with a warm, rustic look. Though pricier, cedar’s durability makes it a smart investment.
Composite Wood
Composite wood blends wood fibers and resin. It offers wood’s look with low maintenance and weather resistance. This option suits homeowners seeking a long-lasting, hassle-free fence.
Your ideal wood fence depends on budget and property needs. Consider durability, weather resistance, and maintenance requirements carefully. This will help you choose a fence that performs well and looks great.
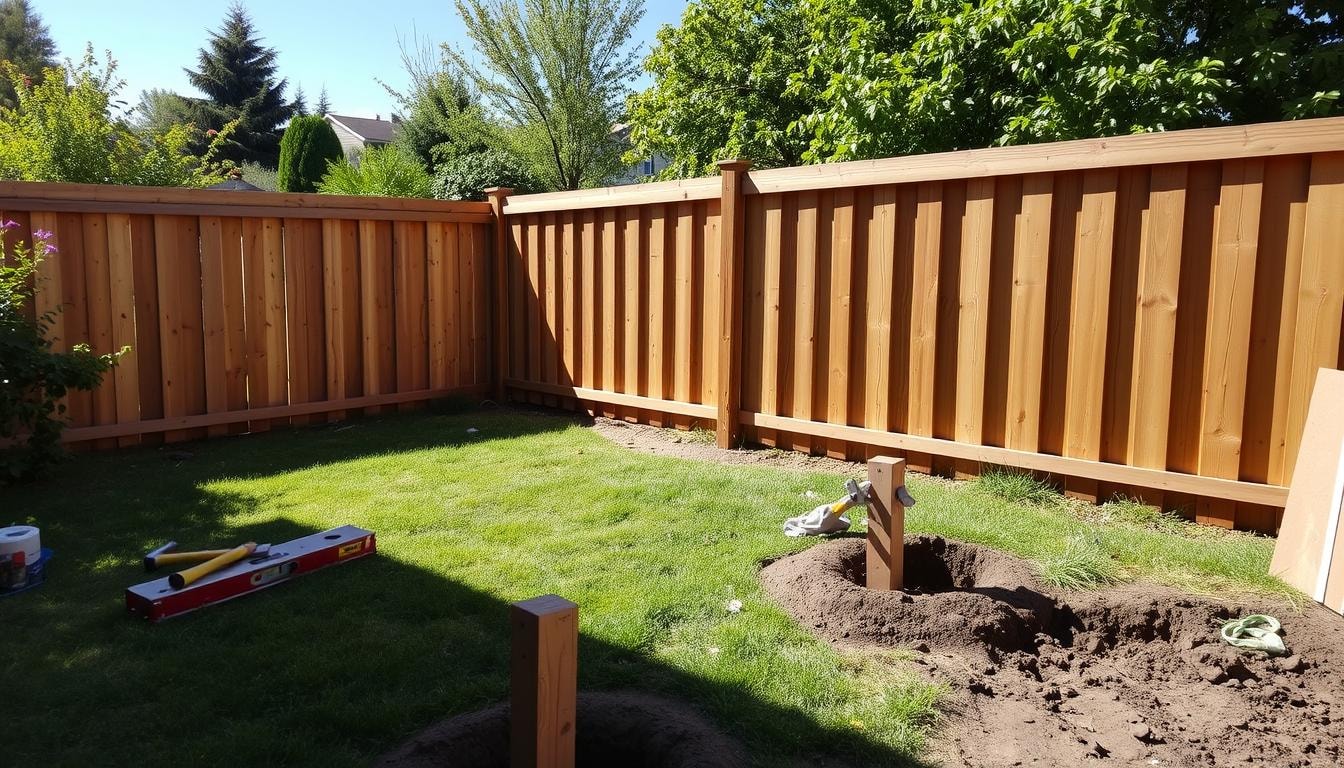
Wood Fence Installation: A Step-by-Step Guide
A well-installed wood fence lasts longer and stays stable. Start by mapping out the fence and marking post holes. Dig holes to the right depth and width. Then, set posts, brace them, and fill with concrete.
Layout and Post Hole Marking
Measure your fence length and mark post spots. Space posts 8 feet (2.4 meters) apart, center to center. Use a tape measure and paint or flags to mark each post location.
Digging Post Holes
Put on safety gear and dig holes with a post hole digger. Hole depth depends on soil type and weather. Bury at least one-third of the post for stability. Add 4 inches of gravel in each hole for drainage.
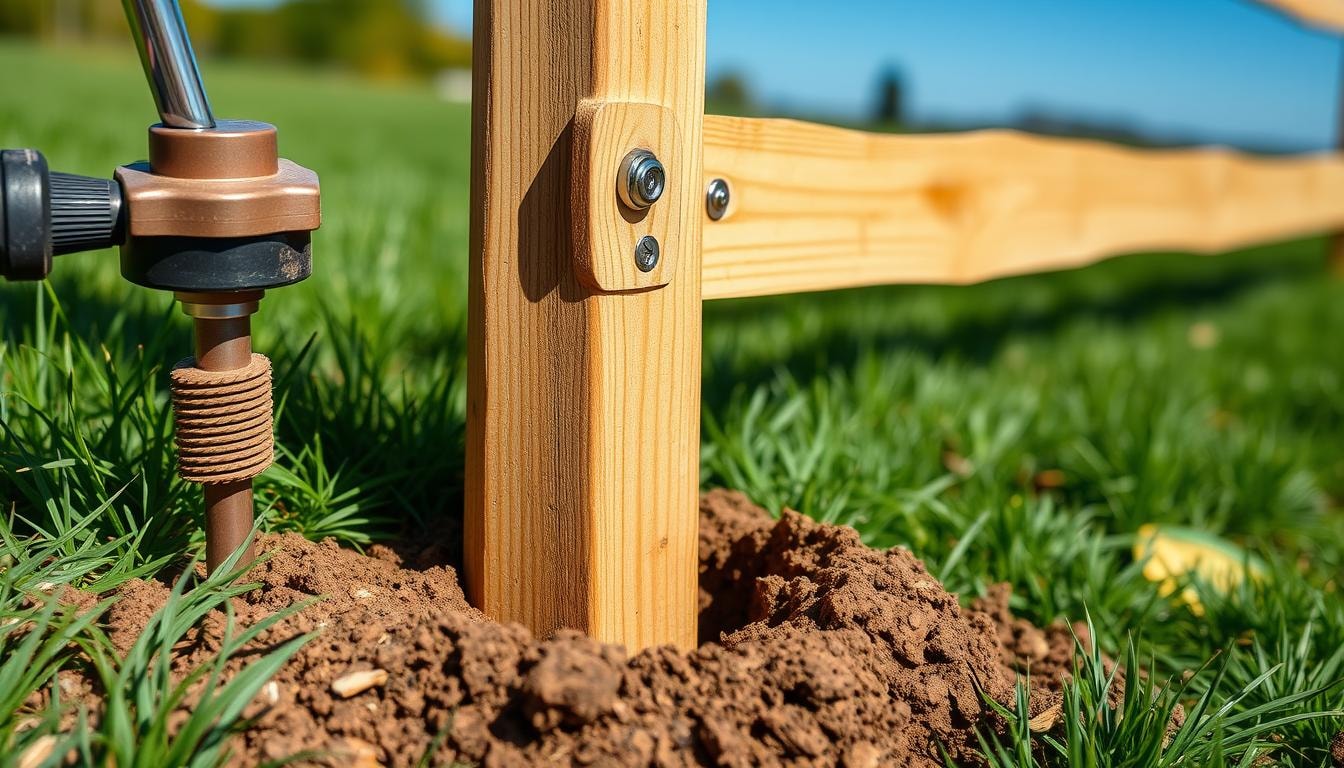
Setting Fence Posts
Place posts in holes and check they’re plumb with a level. Brace posts to keep them steady. Fill holes with concrete and let it set for 24 hours. After that, you can continue fence installation.
Installing Fence Rails
After securing your fence posts, it’s time to install the rails. Measure and cut the rails to fit between posts. Staggering joints adds stability to your fence.
Strategic rail placement around gate areas creates a solid base for hardware. This step is crucial for a strong and long-lasting fence structure.
- Measure the distance between posts and cut the rails to the appropriate length.
- Arrange the rails with staggered joints, ensuring they are positioned at the desired height from the ground (typically 7-8 inches from the top and bottom).
- Attach the rails to the fence posts using two 16-penny nails at each end, securing them firmly in place.
- For gate locations, add additional support boards between the rails to create a sturdy base for the gate hardware.
Careful rail installation creates a robust foundation for your wood fence. This attention to detail ensures your fence lasts long. It will provide the privacy, security, or animal containment you need.
Attaching Fence Pickets or Panels
Attaching fence pickets or panels is the final step in wood fence installation. For picket fences, focus on spacing and alignment. Pre-built panels can be secured between posts, simplifying the process.
Picket Installation
Maintain consistent spacing between pickets, usually 2-5 inches apart. Use a pneumatic nailer and spacers for efficient, aligned installation.
Fasten pickets to rails with 1.5-inch screws or galvanized nails. Use two or three fasteners per rail for secure attachment.
Panel Installation
Pre-assembled panels offer quicker installation. Position them between posts, ensuring they’re level and aligned. Secure panels to posts with screws or galvanized nails.
Leave a 3/4 inch gap between panel ends and posts. This method saves time for longer fences but requires careful planning.
Gate Installation
Adding a gate to your wood fence design allows easy access to your property. The process involves choosing the right hardware and reinforcing the gate post. This ensures the gate’s weight and movement are properly supported.
Gate Hardware
Selecting the right gate hardware is key for smooth operation and longevity. Hinges and latches are crucial for easy opening and closing. Choose weather-resistant and durable hardware to withstand outdoor conditions.
Gate Post Reinforcement
The gate post must be strong enough to hold the gate’s weight and movement. Add a diagonal brace or use a 6×6 wood post for extra support. This prevents sagging and ensures proper gate function.
Building a wood fence gate can take 4-8 hours, depending on your skill level. Materials cost about $140, with redwood or cedar being top choices. Use 4-inch screws for the diagonal brace and 1-5/8″ screws for pickets.
Attach gates with exterior wood screws instead of nails to prevent sagging. DIY gate building can be a profitable side business. You could potentially earn over $100 per hour.
Focus on quality hardware and post reinforcement for a smooth-operating, long-lasting wood fence gate.
Finishing Touches
Add finishing touches to your wood fence for a better look and longer life. Focus on staining, sealing, and landscaping around the fence.
Staining and Sealing: Protecting Your Investment
Apply a high-quality stain or sealant to protect your wood fence. This shields it from weather and UV damage. It also lets you customize the color and finish.
Regular stain or sealant applications every few years maintain the fence’s look. This protection ensures your investment lasts for a long time.
Landscaping Around the Fence: Enhancing Curb Appeal
Smart landscaping around your wood fence can boost your outdoor space’s appeal. Plant flowers, shrubs, or small trees to create a natural border.
This added greenery can improve your property’s curb appeal. It also creates a more inviting and well-designed landscape.
These finishing touches can make your wood fence visually stunning. They transform it from a functional feature to a design element.
Staining, sealing, or adding landscaping will make your fence look great. These final steps ensure your wood fence stays beautiful for years.
Maintenance and Care
Proper fence maintenance keeps your wood fence in top shape for years. Regular cleaning with mild detergent removes dirt and mildew. Fix damaged sections quickly to prevent wood rot and maintain structural integrity.
Regular Cleaning
Check your fence yearly for weather damage or needed repairs. Use a gentle pressure wash every 2-3 years to remove moss and mildew. Use 1500-2000 psi with a 25-degree tip for wood preservation.
Repairing Damaged Sections
- Regular application of sealant is advised to prevent rot and insect damage.
- Checking to ensure soil does not push up against the fence is recommended to prevent moisture retention and accelerate rotting.
- Avoid hitting the fence directly with sprinklers or a hose to prevent unnecessary moisture absorption and reduce the fence’s life expectancy.
Good fence maintenance can extend your wood fence’s life significantly. With proper care, wood fences can last 20 to 50 years or more.
Cost Considerations
Building a wood fence involves several cost factors. Materials, including wood and hardware, can cost $15 to $45 per linear foot. Professional installation typically ranges from $5 to $20 per linear foot.
DIY installation can be more budget-friendly for some homeowners. The overall fence cost varies based on wood type, design, and installation method.
Cedar and redwood fences are pricier, costing $5 to $60 per linear foot. Pressure-treated wood or composite materials start around $15 per linear foot, offering a more cost-effective option.
Materials Cost
Wood fencing materials usually cost $5 to $15 per foot. Additional expenses include hardware like nails, screws, and hinges. Fence height, length, and special features can affect the materials cost.
Labor Cost
Professional installation can significantly increase project expenses. On average, labor costs range from $10 to $20 per linear foot. This depends on installation complexity and contractor experience.
Consider materials and labor costs to create a realistic budget for your wood fence project. This will help you decide between DIY or professional installation.
DIY vs. Professional Installation
Wood fence installation offers two options: DIY or hiring a professional contractor. DIY can save money but requires skills, tools, and time. Professionals work efficiently, making them ideal for those with limited experience or tight schedules.
DIY fence installation can be budget-friendly, but it has challenges. Underestimating time and effort can lead to cost overruns. Local ordinances may require permits for fence building.
DIY kits are available, but they may lack proper installation guidance. This increases the risk of mistakes during the process.
Professional contractors offer many benefits for fence installation. They have the skills to install fences correctly and securely. This reduces the risk of storm damage or animal entry.
Contractors can complete projects quickly, ensuring timely completion. However, labor costs vary based on project size, complexity, and local rates.
The choice between DIY and professional installation depends on skill, time, budget, and preferences. DIY fans may enjoy the process, while others may prefer professional expertise.
Consider the pros and cons carefully before deciding. This will help ensure a successful wood fence installation experience.
Wood Fence Designs and Styles
Wood fences offer various styles, each with unique benefits and visual appeal. They can greatly enhance your property’s look. From classic picket fences to rugged split-rail designs, homeowners have many options.
Privacy Fences
Privacy fences are perfect for those seeking seclusion. They create a secure, enclosed environment with solid panels or closely spaced pickets. Cedar privacy fences are popular due to their durability and natural beauty.
Picket Fences
Picket fences offer an open, decorative look. Their distinctive vertical pickets can be customized in height and spacing. Combining them with wrought iron elements creates a unique, striking aesthetic.
Split-Rail Fences
Split-rail fences suit larger properties or rural settings. Their rustic, interlocking logs provide a natural, timeless look. They’re also economical, requiring fewer materials than other wood fence styles.
Wood fences offer versatile designs to enhance your property’s look and function. They provide privacy, security, and classic charm. There’s a wood fence solution for every need.
Tips for Hiring the Best Wood Fence Installation Experts
Installing a beautiful, long-lasting wood fence requires skilled professionals. Here are some tips to help you find the best fence installers for your project.
Research is key when hiring professional contractors. Check their licenses, insurance, and client references. Get detailed cost estimates from multiple providers to compare prices.
Look for contractors who offer warranties on their work. This gives you peace of mind and protection against future issues.
- Research professional contractors thoroughly by checking their licenses, insurance coverage, and references from past clients.
- Obtain detailed cost estimates from multiple providers and compare their quotes to find the best value.
- Look for contractors who offer warranties on their work, providing you with peace of mind and protection against future issues.
- Discuss your specific fencing needs, budget, and material preferences with the chosen contractor to get their expert guidance.
- Insist on a written contract outlining the project scope, timeline, and other important details before the work begins.
Discuss your fencing needs, budget, and material choices with the contractor. Get their expert advice. Insist on a written contract before work starts.
Skilled wood fence installation experts ensure your new fence looks great and lasts long. The right professional contractors can make your fencing project a success.
Discover FindPros for Your Wood Fence Project
Are you feeling overwhelmed by the prospect of installing a wood fence? Let FindPros simplify the process. Our platform connects you with top-rated local professionals who can handle everything from digging holes for the posts to ensuring the fence panels are level and secure. Simply answer a few questions about your project, and we’ll match you with pros who can provide competitive quotes. No more guesswork – let the experts at FindPros guide you to the best option that fits your budget and preferences. Get started today and find the perfect pro for your wood fence installation or any other home project.
Conclusion
Installing a wood fence offers many benefits for homeowners. It enhances wood fence benefits like privacy and security. It also improves property boundaries and keeps animals in check.
Careful planning and proper techniques are key to a successful fence installation. Using the right materials is also crucial. These steps ensure a long-lasting wood fence.
This guide has given you the know-how to install a wood fence. You can now make smart choices about the process. You’re ready to create the outdoor space you’ve been dreaming of.
Regular maintenance is vital for keeping your fence in great shape. Clean and repair it often. Reapply sealants or stains as needed. This care will help your fence last for many years.
Frequently Asked Questions (Wood Fence Installation)
Stockade wood fencing is a type of solid, vertical board fence that provides complete privacy. It has a more rustic, rugged appearance compared to other wood fence styles like picket or split-rail fences.
The fence line should be carefully planned to avoid any underground utilities and ensure it aligns properly with your property boundaries. Marking post locations ahead of time is an important first step in the construction process.
Common materials include pressure-treated lumber, which is durable and resists rot, and western red cedar, which has a natural resistance to fungal decay. The choice often depends on budget and desired aesthetic.
Digging the post holes to the correct depth and width is crucial. You’ll need to drill pilot holes and set the posts in concrete, ensuring they are plumb and securely anchored. This provides a sturdy foundation for the entire fence.
Regularly cleaning the fence, applying a fresh coat of paint or stain, and addressing any damage or warping promptly can help preserve the fence’s look and extend its lifespan. Proper maintenance is an important factor in getting the most out of your wood fence investment.


MOST POPULAR CITIES
Browse by State- Alameda
- Costa Mesa
- Laguna Beach
- Orange
- Alhambra
- Culver City
- Lancaster
- Oroville
- Anaheim
- Daly City
- Livermore
- Oxnard
- Antioch
- Davis
- Lodi
- Pacific Grove
- Arcadia
- Downey
- Lompoc
- Palm Springs
- Bakersfield
- El Centro
- Long Beach
- Palmdale
- Barstow
- El Cerrito
- Los Angeles
- Palo Alto
- Belmont
- El Monte
- Malibu
- Pasadena
- Berkeley
- Escondido
- Martinez
- Petaluma
- Beverly Hills
- Eureka
- Marysville
- Pomona
- Brea
- Fairfield
- Menlo Park
- Port Hueneme
- Buena Park
- Fontana
- Merced
- Rancho Cucamonga
- Burbank
- Fremont
- Modesto
- Red Bluff
- Calexico
- Fresno
- Monterey
- Redding
- Calistoga
- Fullerton
- Mountain View
- Redlands
- Carlsbad
- Garden Grove
- Napa
- Redondo Beach
- Carmel
- Glendale
- Needles
- Redwood City
- Chico
- Hayward
- Newport Beach
- Richmond
- Chula Vista
- Hollywood
- Norwalk
- Riverside
- Claremont
- Huntington Beach
- Novato
- Roseville
- Compton
- Indio
- Oakland
- Sacramento
- Concord
- Inglewood
- Oceanside
- Salinas
- Corona
- Irvine
- Ojai
- San Bernardino
- Coronado
- La Habra
- Ontario
- San Clemente