Deck Sealing

Deck Sealing Near You

Can’t find what you are looking for?

How It Works

  • Answer a few questions about your home project.
  • Within seconds, get matched with top-rated local pros.
  • Compare quotes and choose the best pro for the job.

Deck Sealing In Your Area

Deck Sealing: A DIY Guide or Professional Help

Meta Description: Discover the ins and outs of deck sealing, from DIY techniques to professional services. Learn how to protect your wooden deck and extend its lifespan effectively.

Do you want to make your outdoor space look amazing and last long? Deck sealing is key to keeping your wooden deck in great shape. But should you do it yourself or get a pro? We’ll cover everything about deck sealing in this guide. You’ll learn why it’s important, the types of sealants, and how to apply them right.

Deck Sealing

Key Takeaways

  • Sealing a wood deck protects it from UV damage, moisture, and other elements that can wear it down.
  • Penetrating sealers last longer by going deep into the wood’s cracks and crevices.
  • Getting your deck ready is important. Clean, repair, and sand it before applying sealant.
  • Using the right tools and techniques in good weather makes a big difference in the result.
  • For a perfect, lasting finish, consider hiring a professional deck sealing service instead of doing it yourself.

What is Deck Sealing?

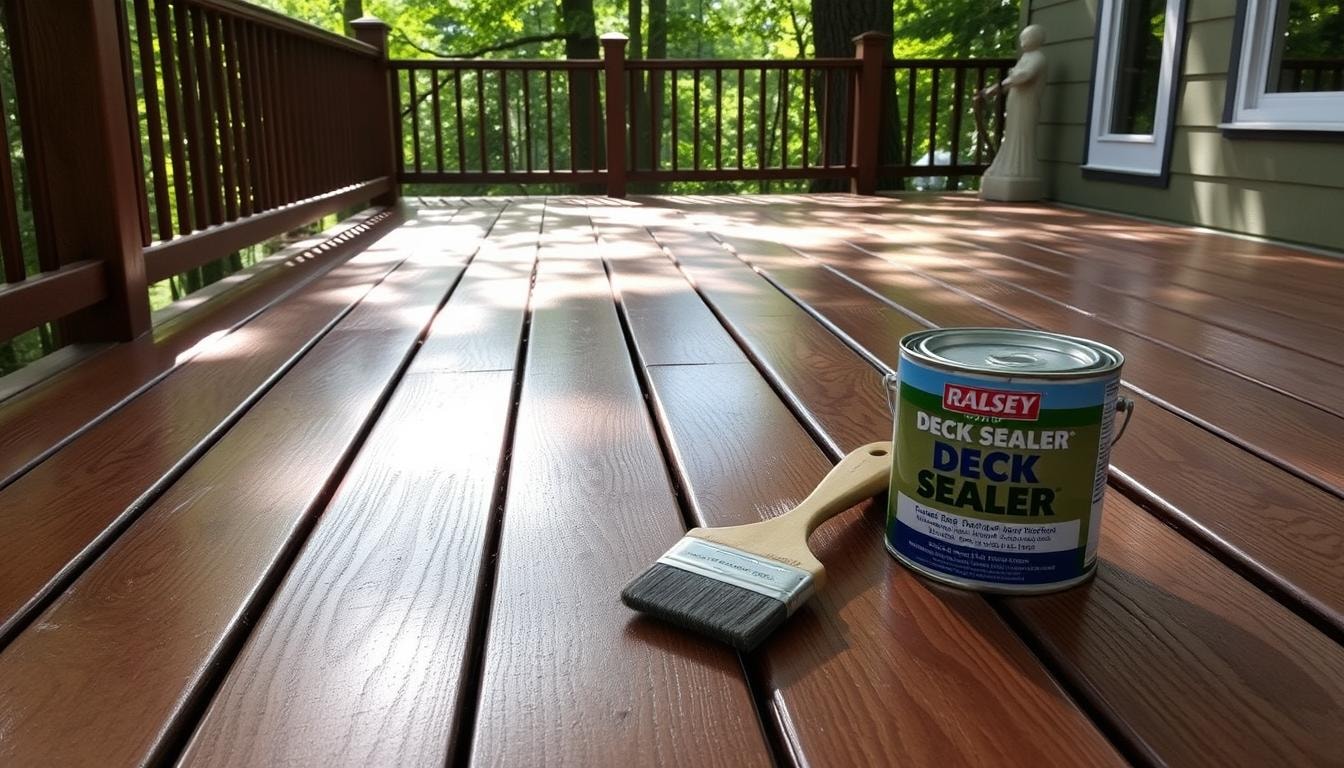
Deck sealing means putting a clear, protective coat on the wood. This keeps the deck looking great and protects it from the weather. A good sealer creates a clear shield against moisture, mold, and wood rot. These things can shorten the life of your deck.

Deck Sealer: A Protective Coating

A top-notch deck sealer goes deep into the wood. It makes a barrier that keeps moisture out. This stops mold, mildew, and fungi from growing, which can harm your deck’s strength.

Many sealants also have colors that block UV rays. This stops the deck from drying out and turning gray.

Benefits of Sealing Your Deck

  • Maintains the wood’s natural finish and color
  • Provides moisture protection to prevent rot and decay
  • Blocks UV radiation to reduce weathering and fading
  • Extends the overall lifespan of your wooden deck
  • Enhances the deck’s appearance and curb appeal

Using a quality deck sealer keeps your outdoor space looking good for many years.

Deck Sealer

Is Sealing a Wood Deck Necessary?

Most wood decks are made with treated wood. But, this won’t last long in most weather. UV rays dry out the wood, making it prone to fungus and wood rot. Heavy rain and snow don’t help.

Without deck sealers, your deck faces damage from heat, cold, and elements.

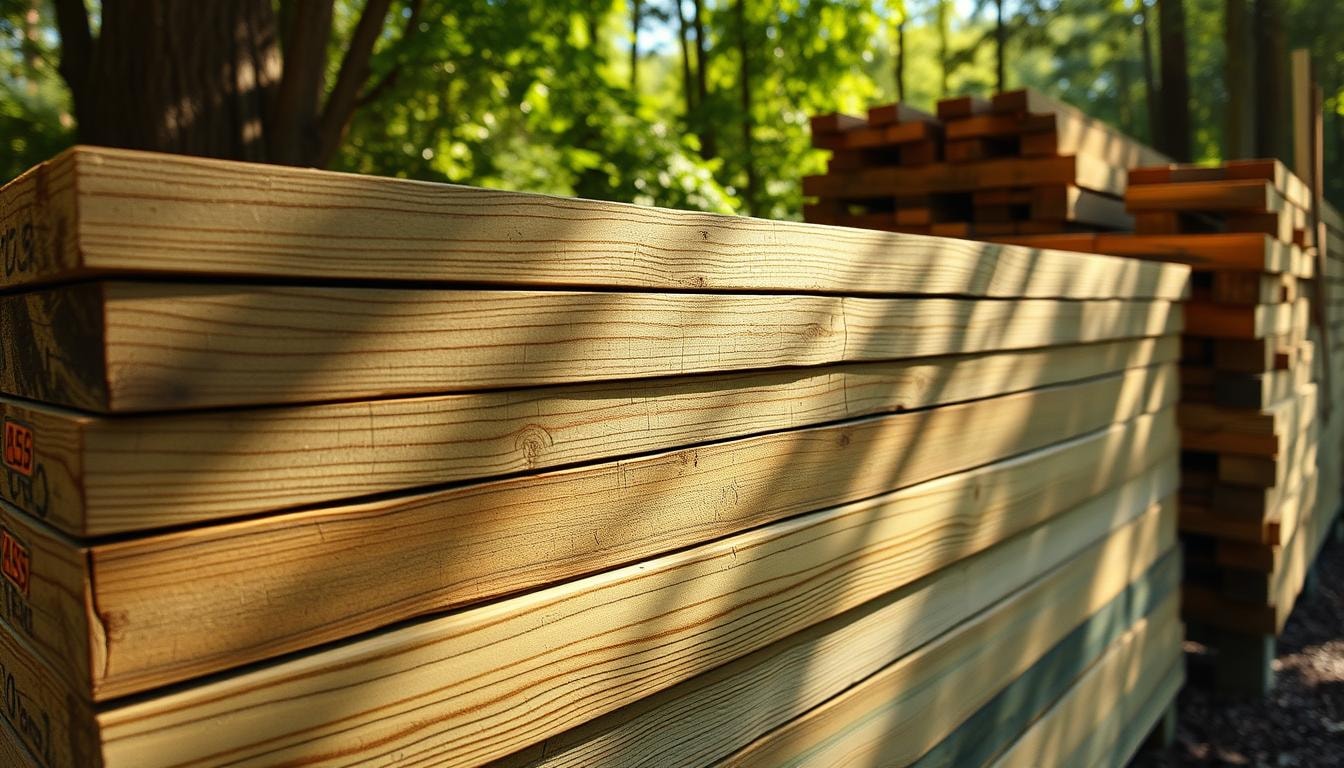
Why Pressure Treated Lumber Needs Sealing

Pressure-treated lumber fights moisture damage but not UV rays. So, sealing is a must. Pressure treatment helps wood last longer, but it depends on the chemicals used and how well they soak in.

New decks need time to dry before sealing. This can take weeks to months.

Sealing keeps your deck looking good for years. You can use sealants like Spa N Deck from Flood and Wood RX on most pressure-treated wood. Cleaning, stopping algae, and reapplying sealant yearly is key to upkeep.

Pressure Treated Lumber

The Difference Between Staining and Sealing

Understanding the difference between wood stains and sealants is key for keeping your deck looking great. Both can make your wood look better and protect it. But they are used for different things and have their own benefits.

Wood stains change or boost the wood’s color by going deep into the grain. They don’t just sit on the surface. But, they don’t protect the wood much from the outside elements. You might need to reapply stains every 5 years.

Wood sealants, on the other hand, form a shield on the wood’s surface. This keeps water, UV rays, and other things from harming the wood. Sealants are cheaper than stains but you might need to reapply them more often, every 3-6 months. There are three main types: oil-based, water-based, and resin-based, each with its own benefits.

For decks made of cedar, teak, or mahogany, wood sealants are a top choice. They keep the wood’s natural look and feel. Deck stains can make your deck look more professional but are pricier than sealants.

To get the best of both, try using a wood stain first, then a wood sealant on top. This way, you get the color you want and strong protection for your deck.

What You Need to Know Prior to Sealing Your Wood Deck

Sealing a wood deck is key to keeping it safe and lasting long. But, there are a few things to think about before you start. Let’s look at what you should know before sealing your deck.

Know When it’s Time to Seal

A brand new deck should wait 2 to 6 months before its first seal. This lets the wood cure and removes tannins and oils. Cedar decks might need sealing in just 2 months.

Use the Right Type of Sealant

For a deck with stain, pick a sealant that matches the stain. Use the same brand or a similar one based on the stain type.

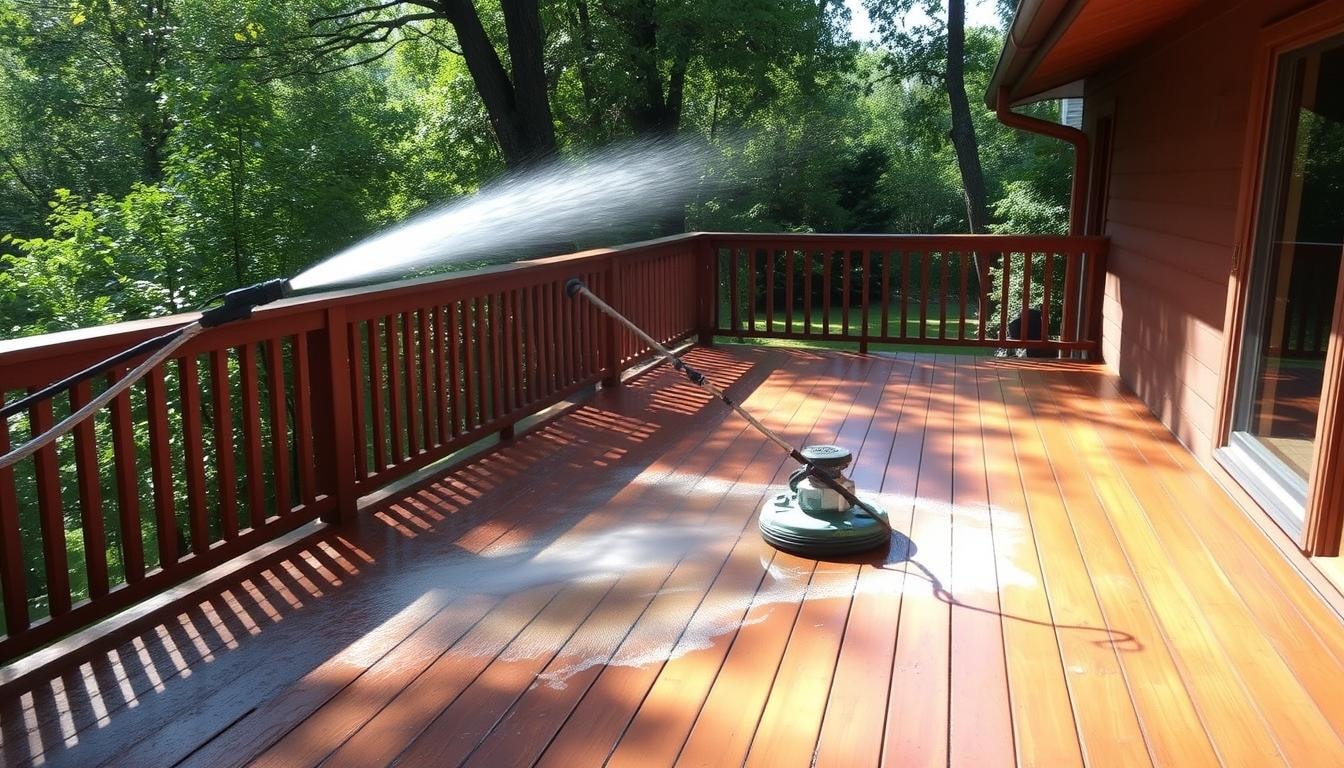
Prepare the Deck Surface

Before sealing, clean and prepare the wood deck well. Wash it, use a tannin remover if needed, and sand it lightly. Let the deck dry for at least 24 hours after.

Choose the Right Weather Conditions

Seal your deck on a sunny day when it won’t rain, freeze, or snow for 2-3 days. Don’t seal right after rain, as the wood must be dry. The best time is early morning before it gets too hot.

Tools for Even Application

Use rollers, brushes, and sprayers for even sealant application. They help cover all areas well, including edges and hard spots.

Remember these tips to seal your wood deck right. This way, it stays beautiful and lasts longer.

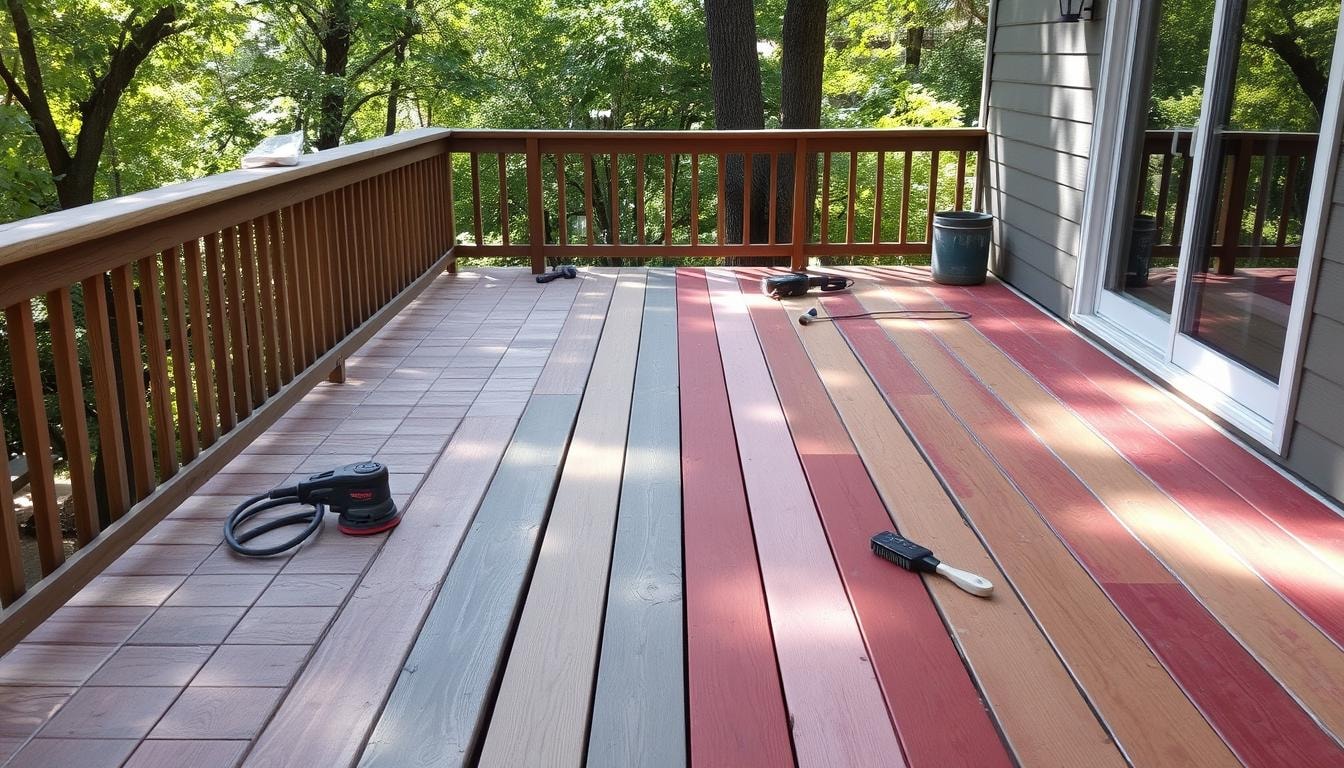
The Different Kinds of Deck Sealers

There are two main types of deck sealers: topical finishes and penetrating sealers. Knowing the differences helps you choose the right one for your deck.

Topical Finishes

Topical deck sealants create a protective film on the wood’s surface. They can make the wood look glossy and refined. These finishes are great for making the wood look better and protecting it for a short time.

Penetrating Sealers

Penetrating sealers go deep into the wood, filling cracks and crevices. They last longer than topical sealers and keep the deck looking natural. They don’t change the wood’s look or feel.

When picking between these two, think about what you want for your deck. Do you want it to look fancy or stay protected for a long time? Topical finishes make the deck look nice, while penetrating sealers protect it well and keep it looking natural.

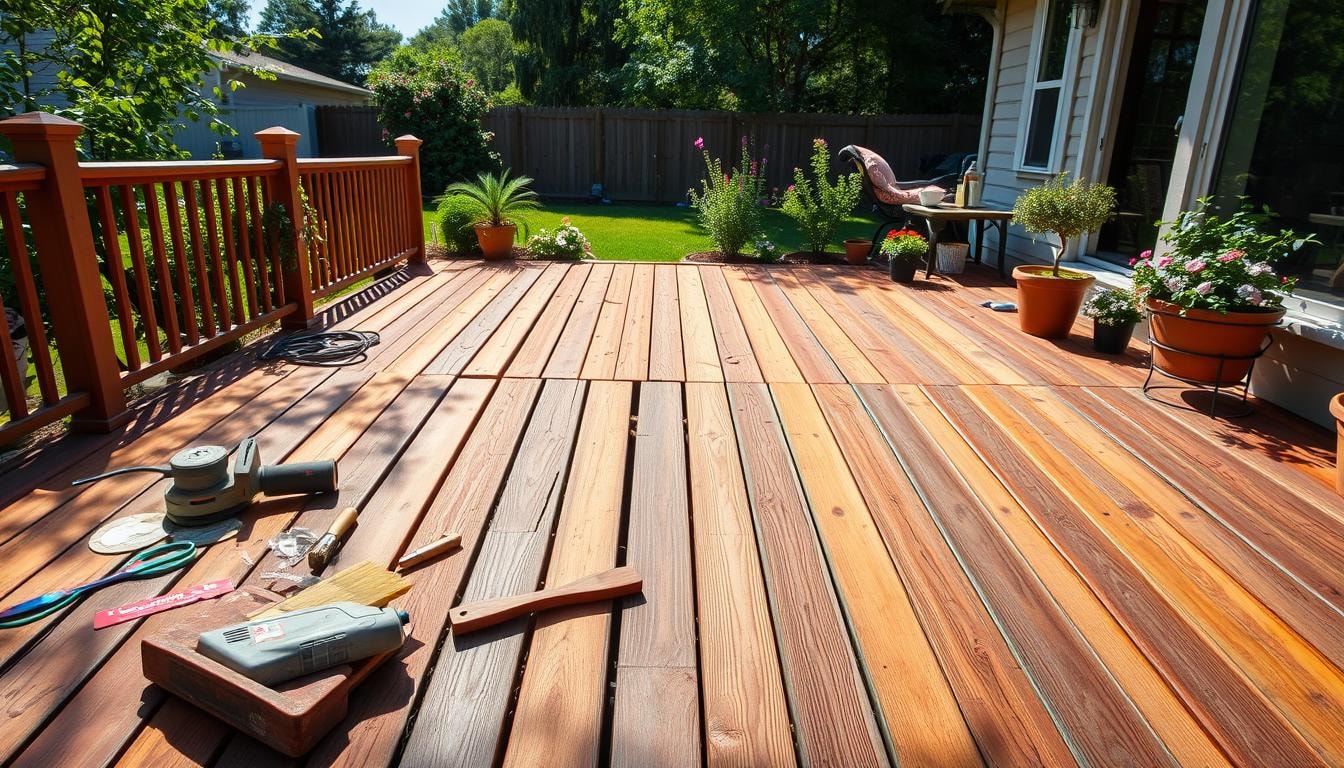
Tools and Materials Needed

Sealing a wood deck needs the right tools and materials for a good and lasting result. You’ll need everything from basic cleaning tools to special power tools. Having the right gear is key for a top-notch finish. Let’s look at what you need to seal your deck well.

Cleaning and Preparation Tools

  • Broom or leaf blower to remove loose debris
  • Garden hose and nozzle for rinsing the deck
  • Deck cleaner solution and scrub brushes for deep cleaning
  • Putty knife or scraper to remove old sealant or paint
  • 80-grit sandpaper or power sander for smoothing the surface
  • Safety goggles, dust mask, and gloves to protect yourself during preparation

Sealing Application Tools

  • Paint brushes and rollers for even sealant application
  • Spray equipment, like a paint sprayer, for big decks
  • Drop cloths or tarps to protect plants and surfaces

You’ll also need the right deck sealer for your deck type and finish. Choose between penetrating sealer or topical finish. Always read the instructions and pick a quality sealer for your deck’s protection.

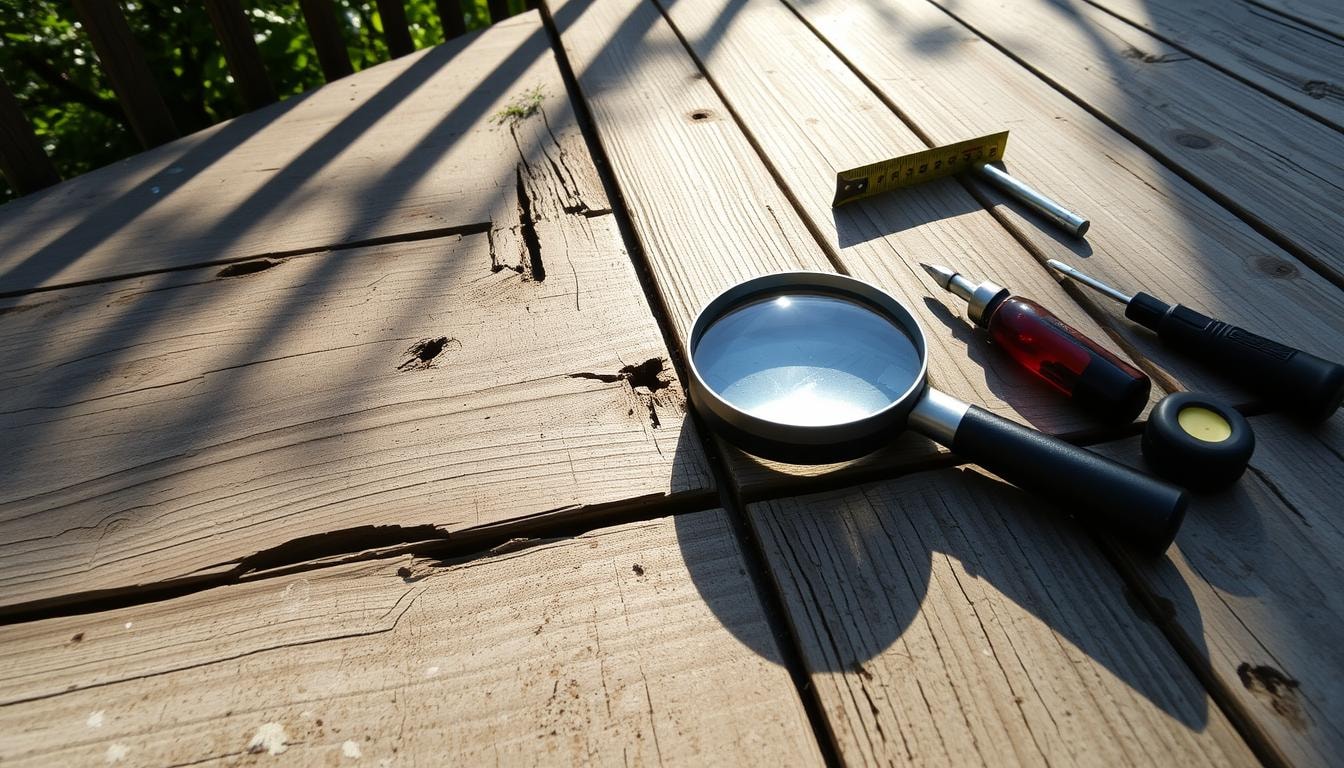
Getting the deck ready is key for good sealant adhesion. Check for damaged boards and fix them before cleaning and sealing. Clean the deck well, removing dirt, debris, and old sealant or paint. Then, sand the surface to smooth it and open the wood grain for better sealer absorption.

With the right tools and materials, you can confidently start your deck sealing project. This ensures a clean, smooth, and well-protected outdoor area for many years.

Benefits of Hiring Professionals for Deck Sealing

Protecting your outdoor space is key. Hiring pros for deck sealing is a smart move. It might seem cheaper to do it yourself, but experts offer big long-term benefits.

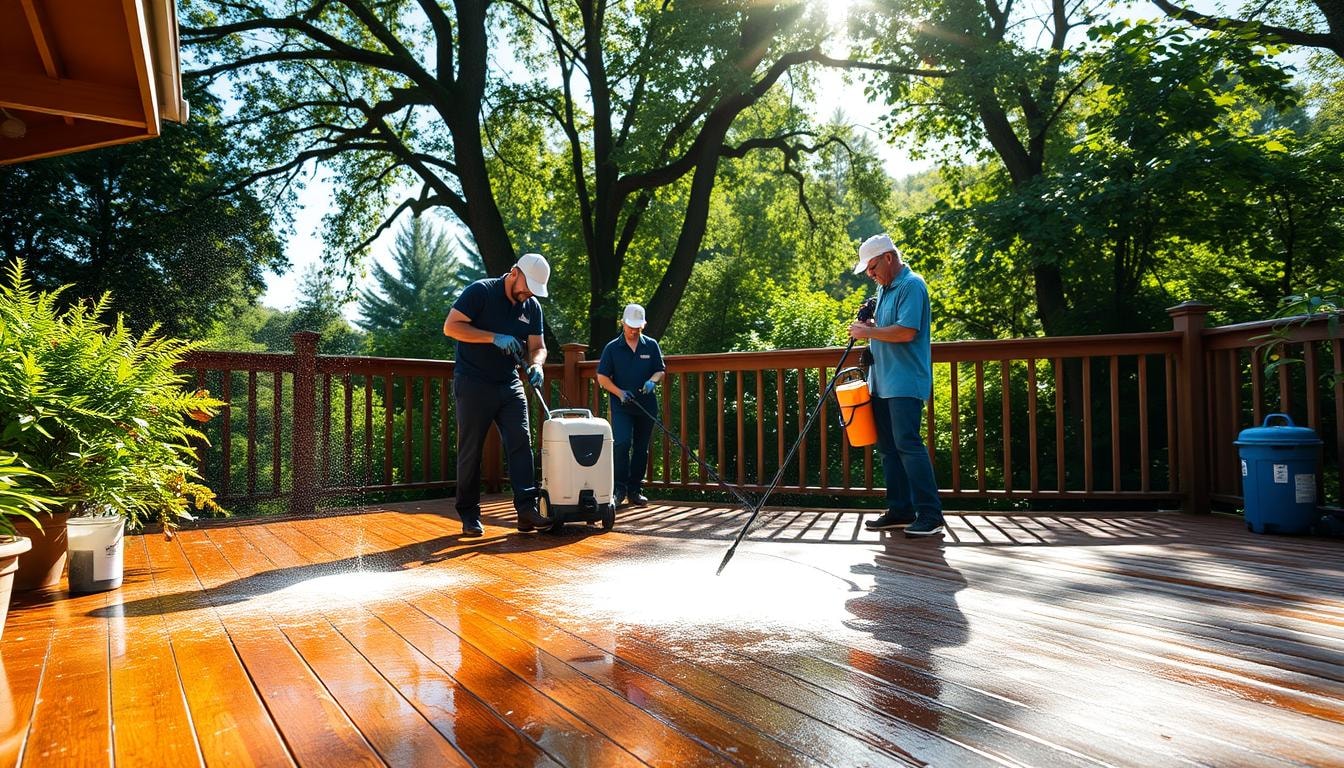
Experts in deck sealing ensure your deck stays safe and looks great. They have the right tools and know-how. They clean the deck well, apply sealant right, and protect it from the weather. This means your deck will look better and last longer, saving you money and time.

  • Pros start with a deep clean and prep work. They use special gear to get to tough spots. This makes sure the sealant sticks well.
  • They fix any big problems like cracks or mold before sealing. This keeps your deck strong and extends its life.
  • They know which sealant is best for your deck and where you live. This means your deck gets the right protection for a long time.
  • Experts use special ways to apply the sealant. This gives you a smooth, even coat that DIY can’t match.

Even though hiring pros for deck sealing costs more upfront, it’s worth it. With their skills and care, you get a quality application and long-lasting protection. This means you save money and boost your home’s value over time.

Find the Best Local Pros for Your Deck Sealing Needs with FindPros

Sealing your deck can be a time-consuming and meticulous process. But you don’t have to handle it alone. Let the experts at FindPros help you find the right professionals for the job. Simply answer a few questions about your deck and home project, and we’ll match you with top-rated local pros who can apply the deck sealant, prepare the entire deck, and ensure it is properly sealed against harsh UV rays, broken boards, and other detrimental effects.

With FindPros, you can compare quotes from multiple pros, find the ones you get along with best, and get the job done right. No more spreading puddles or fine-tuning the application – let the professionals handle the entire process, from removing dirt to applying the second coat and back-rolling for a flawless, clear finish. Get started today and enjoy your beautifully sealed deck for years to come.

Conclusion

Sealing your wood deck is key to keeping it safe and looking great for many years. You can do it yourself or hire experts. It’s important to know about sealing, the difference between staining and sealing, and the various sealers out there.

Also, learn about how to prepare and apply the sealer. Knowing the benefits of getting professional help is also crucial.

By understanding these things, your deck will stay in great shape. It will stand up to the weather and keep its natural look. Sealing your deck every 1-2 years for clear sealers or every 3-5 years for solid stain sealers is smart.

This keeps your outdoor space looking good for a long time. You can choose from transparent stains for a light look or solid stains for a bold look. You might like water-based sealers for their easy use or oil-based sealers for their durability.

Think about your deck’s material, the weather, how you want it to look, and what you’re okay with in upkeep. With the right sealer and approach, you can keep your wood deck safe and beautiful for years.

Frequently Asked Questions (Deck Sealing)

The main purpose of applying a deck sealant is to protect the deck’s surface from various elements like moisture, UV rays, and weathering. It creates a protective layer that helps maintain the wood’s natural appearance and extends the lifespan of the wooden decks.
Before applying the deck sealant, you need to properly prepare the deck’s surface. This includes removing any dirt, debris, or old deck stain using pressure washing or a palm sander. Make sure the deck dries completely before starting the sealing process.
The type of deck sealant you should use depends on the material of your wooden decks. For most wooden decks, a penetrating sealer or a water-based deck stain is a good choice as it sinks into the wood and provides long-lasting protection.
When applying the deck sealant, follow the manufacturer’s instructions carefully. Use a paint roller or a pole sander to apply the sealant in a thick, even coat, covering the entire surface of the deck. Make sure to wear a safety mask and work in dry weather, avoiding direct sunlight or extreme heat.
The frequency of resealing your deck depends on the type of sealant used and the climate in your area. As a general rule, most wooden decks should be resealed every 1-2 years for clear sealers or every 3-5 years for solid stain sealers to prevent fading, fungal growth, and other detrimental effects on the deck’s surface.

Deck Refinishing

Deck Sealing Near You

Can’t find what you are looking for?

How It Works

  • Answer a few questions about your home project.
  • Within seconds, get matched with top-rated local pros.
  • Compare quotes and choose the best pro for the job.

Deck Refinishing In Your Area

Deck Refinishing: A Complete Guide

Meta Description: Discover the essentials of deck refinishing in our comprehensive guide. Learn expert techniques, choose the right materials, and restore your deck’s beauty with confidence.

Is your deck looking weathered and discolored? Deck refinishing can transform your outdoor space into a stunning focal point. It boosts your home’s curb appeal and creates an inviting oasis.

Proper refinishing goes beyond a quick power wash and new stain. It requires careful attention to detail and the right techniques.

Deck Refinishing

Key Takeaways

  • Deck maintenance is crucial to keep your outdoor living space looking its best in a sun-baked climate.
  • Proper deck refinishing involves a thorough cleaning, repair of any damage, and the application of the right finish to protect the wood and enhance its natural beauty.
  • Using the right tools and techniques, such as power washing, sanding, and applying oil-based stains, can make a significant difference in the final outcome.
  • Attention to detail, like filling in nail holes and ensuring a uniform finish, is key to achieving a professional-looking deck.
  • Seeking expert advice can help you avoid common pitfalls and ensure a long-lasting, beautiful deck that adds value to your home.

Introduction to Deck Refinishing

Regular deck maintenance is crucial for longevity and safety of outdoor spaces. Decks face constant exposure to environmental factors that can cause wood deterioration. Routine maintenance involves inspecting for damage, cleaning the surface, and applying protective finishes.

Early issue identification and repair can prevent further damage. This approach can save money on extensive future repairs. Proper maintenance ensures a safe and long-lasting deck.

Importance of Deck Maintenance

Refinishing a deck offers benefits beyond improved appearance. It enhances aesthetics, provides better protection against elements, and simplifies maintenance. Additionally, it can increase the property’s resale value.

The process involves assessing condition, preparing the surface, and applying new finish. This can transform a worn-out deck into a stunning outdoor space. It creates a waterproof seal, preventing water penetration and reducing rot risk.

How To Refinish Your Deck?

Professional deck refinishing costs between and per square foot. DIY restoration can save 0 to 0 compared to hiring professionals. Factors like deck size, deterioration extent, and material type influence overall cost.

Materials for DIY refinishing include pressure washer, chemical stripper, sandpaper, and cleaner-brightener. Paint or stain is also needed. These materials can range from .50 to .65 per square foot.

Refinishing a deck is labor-intensive but a worthwhile investment. It maintains appearance and extends lifespan. Follow manufacturer’s instructions and take safety precautions for best results.

deck refinishing

Assessing the Condition of Your Deck

Inspect your deck thoroughly before refinishing. Look for damage and needed repairs. This ensures a solid base for your new finish.

A careful examination helps you make smart decisions. You’ll know how to restore your deck’s beauty. You’ll also maintain its structural integrity.

Inspecting for Damage

Examine your deck’s surface closely. Look for cracked, splintered, or rotting wood. Check for loose nails or screws.

Inspect boards for warping or sagging. Watch for mold, mildew, or moisture damage. These issues can weaken your deck’s structure.

Identifying Necessary Repairs

After finding problems, plan your repairs. Replace rotted or severely damaged boards. Fix minor cracks with wood filler or epoxy.

Tighten or replace loose fasteners. Treat mold or mildew with deck cleaner. You can also use a water-bleach solution.

Composite or PVC decks need different inspections. The goal is still to find issues affecting performance and appearance.

Regular maintenance keeps your deck in top shape. This applies to wood and synthetic materials.

Deck Inspection

A thorough assessment creates a strong foundation. Your refinishing project will have better results. Your deck will look great for years.

With care and attention, you’ll transform your outdoor space. Your deck will become a beautiful, inviting oasis.

Preparing Your Deck for Refinishing

Preparing your deck for refinishing is crucial. It sets the stage for a long-lasting finish. The process involves clearing the deck and cleaning the surface.

Clearing the Deck

First, remove all furniture and items from your deck. This gives you full access to the entire surface. Sweep away loose debris like leaves and twigs with a broom or leaf blower.

Cleaning the Surface

Next, clean the surface thoroughly. This removes dirt, grime, mold, and old finish remnants. You can pressure wash, scrub with a brush, or use special deck cleaners.

When pressure washing, use a fan-tip nozzle and moderate pressure. Keep the nozzle 8-12 inches away from the deck surface. For scrubbing, work in small sections and follow the wood grain.

Let the deck dry completely before refinishing. This usually takes 24 to 48 hours. Proper preparation ensures a beautiful, long-lasting deck refinishing project.

Choosing the Right Refinishing Products

Deck refinishing involves selecting the right products. Stains and paints are the main types of deck finishes. Stains come in clear, semi-transparent, and solid forms, each offering different levels of protection.

Types of Deck Finishes

Stains enhance wood’s beauty while protecting against weathering. Clear stains are transparent, showcasing natural wood grain. Semi-transparent stains offer moderate protection while revealing some wood characteristics.

Solid stains provide the most coverage for a uniform look. However, they may hide the wood grain more than other options.

Stains

Consider the deck’s condition, desired look, and protection needs when choosing a stain. Oil-based stains are easier to apply but dry slowly. Water-based stains dry faster but can be trickier to apply.

Pressure-treated lumber and rot-resistant woods like cedar may need less frequent refinishing. The best products depend on the deck owner’s specific needs and preferences.

Regular maintenance helps extend a wooden deck’s life. This includes inspections, cleaning, and replacing damaged boards. These steps ensure a beautiful, long-lasting finish.

Sanding and Preparing the Surface

Surface preparation is key to deck refinishing. Most homeowners can sand their wood deck with a hand power sander. Avoid belt sanders, as they may gouge softwood deck boards. Oscillating or random orbit sanders work better.

Use the right sandpaper grit for sanding. For the deck surface, 60-80 grit is best. It allows proper absorption of stains and sealers. Use 80-100 grit for railings to prevent splinters.

A mix of 40 and 80 grit sandpaper is ideal for thorough sanding. Never use finer than 80 grit. It can close off the timber surface, blocking proper penetration.

After sanding, clean with a shop vacuum and tack cloths. This ensures a dust-free surface for finishing products.

Connect with Right Professionals for Your Deck Refinishing with FindPros

Refinishing your wooden deck can be a labor-intensive process that requires a major time commitment. Whether you’re in San Diego or elsewhere, the project can take a few hours to several days, depending on the size and condition of your deck. If you don’t want to take on this task yourself, consider using a service like FindPros.

Answer a few questions about your home project, and we’ll match you with top-rated local professionals who can provide the natural look you desire. These pros have the right tools and expertise to get the job done efficiently, with little odor from staining or stripping the decking. You can compare quotes from multiple competitors to ensure you get the best pricing for your deck refinishing needs, all while finding a pro you’re comfortable working with.

Frequently Asked Questions (Deck Refinishing)

For DIY deck refinishing, you’ll need a power washer, palm or orbital sander, natural bristle brush, paint roller, garden hose, and stiff bristle brush. These tools help clean, prepare, and apply the new deck finish.
The larger your deck, the more labor-intensive the refinishing process will be. Bigger decks require more time and effort for cleaning, sanding, and applying the new finish, whether it’s an oil-based stain or solid stain.
Many deck refinishing companies have the expertise and professional-grade tools to get the job done quickly and efficiently. However, doing it yourself (DIY) can save on labor costs. Whether you hire a company or tackle it yourself, the end result should be a beautiful, long-lasting deck finish.
Start by power washing the deck to remove dirt, grime, and old finish. Then, use a wood brightener and a stiff bristle brush to clean the wood fibers. Rinse with a garden hose or garden sprayer and let the deck dry completely before sanding and applying the new deck finish, whether it’s an oil-based stain or solid stain.
The main steps are: 1) Thoroughly clean the deck using a power washer and wood brightener. 2) Sand the surface to remove any remaining old finish and prepare the wood fibers. 3) Apply the new deck finish, such as an oil-based stain or solid stain, using a natural bristle brush, paint roller, or paint sprayer. Be sure to work in small areas to avoid lap marks. The entire process can be time-consuming, but the results are worth the effort for a beautifully refinished deck.

Deck Cleaning

Deck Sealing Near You

Can’t find what you are looking for?

How It Works

  • Answer a few questions about your home project.
  • Within seconds, get matched with top-rated local pros.
  • Compare quotes and choose the best pro for the job.

Deck Cleaning In Your Area

Professional Deck Cleaning: Why It’s Worth It

Meta Description: Discover why professional deck cleaning is essential for maintaining your outdoor space. Extend your deck’s lifespan and enhance its beauty with expert care.

As summer nears, homeowners focus on neglected outdoor spaces. The deck often needs attention, as it can become weathered and unappealing. You might wonder if professional deck cleaning is really necessary.

Deck Cleaning

Deck surfaces need regular upkeep to stay beautiful and functional. Weather, foot traffic, and the environment can lead to mold, mildew, and algae buildup. DIY cleaning might seem cheaper, but professional pressure washing often gives better results.

Hiring experts ensures your outdoor space looks its best. They use specialized techniques and equipment to clean safely and effectively. This approach prevents damage and saves you time and effort.

Key Takeaways

  • Professional deck cleaning prioritizes safety and minimizes environmental impact.
  • Experts use specialized techniques and equipment to prevent deck damage.
  • Hiring professionals saves time and effort compared to doing it yourself.
  • Professional cleaning can revive the appearance of old, weathered decks.
  • Regular professional deck maintenance extends the lifespan of your outdoor investment.

Benefits of Hiring Professionals for Deck Cleaning

Professional deck cleaning services offer many benefits for deck maintenance. Trained technicians have the skills and equipment to use pressure washers safely. This avoids the risks of injury that come with DIY attempts.

Experts use eco-friendly cleaning methods with the right amount of water and chemicals. They know the best techniques for different deck materials. This ensures a thorough clean without causing damage.

Professional cleaners deliver better results than DIY efforts. This saves you time and effort while maintaining your property’s value. Their expertise keeps your outdoor space looking its best.

professional deck cleaning

Hiring professionals protects your investment in the long run. It ensures your outdoor oasis remains enjoyable for years to come. Experienced service providers offer more than just surface-level results.

Environmental Impact and Professional Deck Cleaning

Deck cleaning’s environmental impact is crucial. Careless DIY pressure washing can harm the environment. It can allow toxins to seep into water sources or damage nearby landscaping.

Professional pressure washing services from eco-minded companies minimize environmental impact. They use the right amount of water and eco-friendly cleaning solutions. This ensures responsible cleaning without compromising results.

Skilled professionals prioritize customer satisfaction. They strive to exceed client expectations with every service they provide.

Minimizing Environmental Effects

Professional deck cleaning companies use gentle yet effective cleaning solutions. These don’t damage wood fibers, ensuring thorough cleaning without splintering. They prioritize eco-friendly products to protect surrounding vegetation.

Choosing professional services ensures effective and environmentally friendly cleaning. This prolongs the lifespan of outdoor wood surfaces. It also contributes to a healthier, more sustainable environment.

Professional Deck Cleaning

Preventing Deck Damage During Cleanings

Deck cleaning requires caution to avoid unintentional damage. DIY efforts, especially with pressure washers, can cause surface damage. Trained technicians know the right methods for different deck materials.

Chlorine bleach can harm treated wood decks. It damages wood fibers and leaves a whitewashed look. Professional cleaners use safer options like hydrogen peroxide or oxygen bleach.

Proper cleaning techniques extend your deck’s life. Power washing can damage wood decks if done incorrectly. Experts use ideal pressure settings, spray tips, and solutions for thorough cleaning.

Professional deck cleaning ensures your outdoor space looks great. It protects your investment without causing damage. Experienced cleaners can restore wood, composite, or concrete decks safely.

No Need to Purchase Expensive Equipment

High-quality pressure washers can be costly for homeowners. Even entry-level models are expensive. By hiring deck cleaning services, you avoid buying or storing pricey equipment year-round.

Professional services have top-notch pressure washing equipment. Their machines and accessories suit both residential and commercial projects. You don’t need to buy, maintain, or store pressure washing equipment.

Experts can clean small patios or large backyard decks. Professional services deliver high-quality results without the cost of renting or buying equipment.

Skip the trip to the hardware store. Let the pros handle the tough work. Enjoy your beautifully refreshed deck without the hassle.

Better Results with Professional Deck Cleaning

Professional deck cleaning often beats DIY efforts. Experts have specialized equipment and skills for superior outcomes. They can deliver impressive results that meet your expectations.

Expertise and Specialized Techniques

Deck cleaning experts have extensive training in pressure washing best practices. They use soft washing techniques to protect your deck’s surface. This expertise leads to better outcomes than DIY attempts.

Professionals can safely use high-powered equipment for thorough cleaning. They employ gentle methods to avoid damaging your deck’s surface. Their custom solutions and attention to detail ensure top-notch results.

  • Professionals have extensive pressure washing experience and can effectively use high-powered equipment (2,500 PSI gas pressure washers) to clean decks thoroughly.
  • They employ specialized techniques, like soft washing, to gently clean the deck and avoid causing any surface damage.
  • The use of customized cleaning solutions and attention to detail enables professionals to deliver professional-level results.

Professional deck cleaners can rejuvenate your outdoor space. Their expertise ensures a beautiful, long-lasting deck. You’ll maximize the value of your investment with their services.

Time and Effort Saved

Deck cleaning can be time-consuming and labor-intensive. Professional deck cleaning services can save homeowners significant time and effort. Expert technicians complete the job faster than most homeowners could.

Professional companies have the right equipment, expertise, and specialized techniques. They clean every part of your deck thoroughly. This ensures a high-quality result that’s hard to achieve alone.

Hiring professionals helps you avoid the hassle of cleaning your deck yourself. You can focus on other home tasks or enjoy your outdoor space.

The cost of professional services is often worth it. It frees up your time and energy for other important activities.

Deck Cleaning: Maintaining Property Value

A well-kept deck can boost property value. Neglected decks become eyesores and safety risks. Hiring a professional deck cleaning service can revive old, worn-out decks.

Pros start by power washing the deck structure. They remove dirt, grime, and organic growth. Next, they assess and repair the deck as needed.

Finally, they reseal the surface to protect it. This process shields the deck from future damage.

Professional cleaning can boost the property’s value. A clean deck improves curb appeal. It makes homes more attractive to buyers.

A revived deck can skyrocket property value. This provides an excellent return on investment for homeowners.

Investing in professional deck cleaning is smart. It creates a welcoming outdoor space. Your family can enjoy a safe environment for years.

Reviving old decks maintains property value. It’s a win-win for homeowners and potential buyers alike.

Health Benefits of Professional Deck Cleaning

A clean deck is vital for both looks and family health. Neglected decks can harbor harmful growths like algae and mold. These pose serious health risks to your loved ones.

Many deck molds are toxic. Their spores can cause respiratory issues when breathed in. Wood decks are especially prone to fungal growths due to their porous nature.

Professional deck cleaning removes these harmful growths effectively. This ensures a clean and safe outdoor space for your family to enjoy.

Removing Harmful Growths

Regular professional deck cleaning keeps your outdoor space tidy. It also shields your family from health hazards linked to algae, mold, and fungi.

Professional cleaners offer proper sealing and protection. This helps safeguard your deck and its users from these health concerns.

Prolonging the Life of Wood Decks

Wood decks typically last 10 to 30 years for untreated wood and up to 50 years for treated wood. Regular cleaning, sealing, and repairs can greatly extend a deck’s lifespan. Professional deck cleaning services are key to preparing the wood for resealing and protection.

Keep an eye out for signs that your deck needs attention. These include rotting wood, loose boards, discoloration, and splintering. Sealing and staining protect against moisture, UV rays, and wear.

Seasonal care is important for deck longevity. Clean the deck thoroughly before winter. Inspect for damage and cover or store outdoor furniture. This routine helps prevent issues that could harm the deck’s structure.

Investing in professional upkeep and quality products keeps your deck in top shape. Regular maintenance prevents water damage, mold, and other problems. With proper care, your wood deck will remain beautiful and functional for years.

Choosing the Right Deck Cleaning Products

Picking the right deck cleaning products is vital for a beautiful outdoor space. DIY solutions often fall short. For the best results, seek professional advice on deck maintenance.

Avoiding Ineffective Solutions

Experts suggest using specialized cleaners with oxalic acid for decks. These products remove tough stains and discoloration effectively. Generic washes may lack cleaning power and could damage your deck.

Chemical strippers can help with older, heavily soiled decks. They break down existing stains for a fresh start. Professional guidance ensures you choose the right stripper for your deck.

Investing in proper cleaning products keeps your deck beautiful. Using effective, specialized cleaners gives stunning results. It also prevents unwanted damage to your outdoor living space.

Looking for the Best Deck Cleaning Professionals? FindPros can Help

Finding the right professionals to power wash, pressure wash, or clean your deck can be a challenge. That’s where FindPros comes in. Simply answer a few quick questions about your deck cleaning needs, whether it’s a wooden deck, composite decking, or something requiring specialized cleaning solutions like sodium hypochlorite or sodium percarbonate.

Within seconds, FindPros will match you with top-rated local professionals who can handle the job. Compare quotes from multiple pros who are eager to earn your business. Choose the one that best fits your budget and preferences. No more searching the local hardware store or trying to scrub the deck clean yourself. Let the experts at FindPros take care of your dirty house and deck cleaning project.

Conclusion

Hiring professional deck cleaning services offers many benefits. It ensures personal safety and reduces environmental impact. These services prevent deck damage and achieve better results while saving time and effort.

Professional cleaning helps maintain property value and protects health. It also extends the life of wood decks. Experts use the right cleaning products and methods for the best outcome.

The cost of professional deck cleaning usually ranges from 0 to 0. Most jobs are completed within two days. This investment is worth it for a polished, safe outdoor space.

When choosing a service, look at experience, reviews, licensing, and insurance. Check pricing too. Professionals use soft washing techniques and eco-friendly solutions for expert deck care.

Frequently Asked Questions (Deck Cleaning)

Professional deck cleaners have specialized techniques and equipment like pressure washers that can clean the deck boards thoroughly without damaging the wood grain or raising the wood fibers. They use the right pressure settings and cleaning solutions to safely clean the entire deck surface.
Composite decks and wooden decks require different cleaning solutions. Composite deck cleaners often contain milder, eco-friendly ingredients, while wooden deck cleaning solutions may include harsher chemicals to remove old deck stain and stubborn stains. It’s important to follow the manufacturer’s instructions for the specific deck material.
For an older deck or one with stubborn stains, sprinkling baking soda on the deck surface and scrubbing with a stiff bristle brush can help lift dirt, bird droppings, and other debris. White vinegar can also be used as a natural deck brightener. However, it’s important to rinse the deck thoroughly after using these household ingredients to avoid causing more harm to the wood grain or composite material.
Before a professional deck cleaning, the surface should be pre-wet with a garden hose or power sprayer to loosen any loose dirt or debris. For an older deck with existing deck stain or composite material, it’s important to follow the manufacturer’s directions for preparing the surface, which may include using a deck cleaner or power washing the entire surface to remove the old stain or any stubborn areas.
After a professional deck cleaning, it’s important to follow the manufacturer’s instructions for applying a new deck stain or sealant to protect the wood grain or composite material. Using a pump sprayer or leaf blower can help remove any remaining loose dirt or debris. Regularly sweeping the deck and addressing any stubborn stains with a deck cleaner and stiff bristle brush can help keep the entire surface looking its best between professional cleanings.

Curtain Installation

Deck Sealing Near You

Can’t find what you are looking for?

How It Works

  • Answer a few questions about your home project.
  • Within seconds, get matched with top-rated local pros.
  • Compare quotes and choose the best pro for the job.

Curtain Installation In Your Area

Curtain Installation: A Step-by-Step Guide

Meta Description: Learn how to expertly install curtains with our comprehensive guide. Discover tips for choosing the right hardware, measuring accurately, and achieving a polished look with Curtain Installation.

Tired of boring window treatments? Learn how to transform your space with our curtain installation guide. We’ll show you how to pick rods and hang draperies like a pro. Get ready to make your windows stunning focal points.

Curtain Installation

Key Takeaways

  • Choosing the right curtain rod size is crucial for a seamless installation.
  • Measuring the window width accurately is the foundation for a successful curtain hang.
  • Coordinating curtain fabric and hardware can elevate the overall aesthetic of your space.
  • Proper tools and techniques are essential for a professional-looking curtain installation.
  • Considering curtain length and styling options can enhance the final look of your window treatments.

Types of Curtain Rods

Choosing the right curtain rod can transform your window treatments. Homeowners can pick from standard, tension, and decorative rods. Each type offers unique features for different window sizes and styles.

Standard Curtain Rods

Standard curtain rods are versatile and common, usually made of metal or wood. They’re installed using brackets screwed into the wall, supporting heavier curtain fabrics.

These rods come in various finishes, from classic white to decorative brass. They can easily blend with any room’s decor.

Tension Rods

Tension rods are ideal for renters or quick installations. They use a spring-loaded mechanism, fitting between walls without drilling or screws.

These rods can hold up to 20 pounds, perfect for lightweight curtains. They’re available in different finishes to match your style.

Decorative Curtain Rods

Decorative curtain rods offer a stylish approach to window treatments. They come in various materials like wood and wrought iron.

These rods feature intricate designs and finishes, enhancing your room’s look. They work well with both functional curtains and decorative panels.

Curtain rods

Measuring for Curtain Installation

Accurate measurements are key to proper curtain installation. First, measure your window’s width, including any trim or molding. This determines the needed curtain rod length. Extend the rod 3-6 inches beyond the window frame on each side.

Consider the curtain fabric and panels you’ll use. Heavier materials may need a sturdier rod for support. These factors ensure a perfect fit and polished look for your windows.

Measuring Window Width

Use a tape measure to record the distance between the window frame’s inside edges. Measure at the top, middle, and bottom of the window. Round to the nearest 1/8-inch for accuracy.

Determining Curtain Rod Length

Add 2-4 inches on each side of the window width for rod brackets. This extra width allows curtains to move smoothly without blocking the window. Consider the curtain panel length when choosing your rod size.

measuring window width

Selecting Curtain Fabrics and Materials

Curtain fabric choice can transform your space’s look and function. From airy linen to plush velvet, fabric selection impacts room ambiance. Different materials offer various benefits for your windows.

Sheer fabrics like linen, cotton, and synthetic blends allow maximum light filtration. These lightweight materials create a soft, inviting atmosphere. They’re perfect for casual or modern interiors, offering a breezy feel.

Heavier fabrics such as wool and velvet provide more privacy and insulation. They block unwanted light and noise effectively. These formal and traditional fabrics create a cozy and intimate atmosphere.

Consider your room’s style when selecting curtain fabric. The right fabric and material can enhance your desired aesthetic. Choose wisely to create the perfect window treatment for your space.

Tools Needed for Curtain Installation

Installing curtains requires a few key tools. The right equipment makes the process smooth and efficient. You’ll need a drill, screwdriver, level, and possibly a stud finder.

Drill

A powerful drill is crucial for curtain installation. It creates pilot holes and fastens rod brackets securely. The Dewalt Compact Cordless Drill is a great option for faster, easier installation.

Screwdriver

A screwdriver is needed for wall anchors and bracket screws. The Craftsman Screwdriver Set works well with various screw types. It’s a versatile choice for your toolbox.

Level

A level ensures your curtain rod hangs straight. The Qooltek Laser Level helps achieve a professional look. It’s a must-have for perfect curtain alignment.

A stud finder locates solid wall studs for secure installation. The CH Hanson Magnetic Stud Finder is reliable. It helps you find the best spots for your curtain hardware.

These tools set you up for successful curtain installation. Always follow safety guidelines and manufacturer instructions. With the right tools, your curtains will look great and stay put.

Choosing the Right Curtain Length

Finding the perfect curtain length balances style and function. Avoid fabric pooling on the floor for a neat appearance. Curtains should lightly touch the ground, creating a clean look.

This approach allows for fabric expansion due to humidity changes. For stretchy fabrics like linen, subtract 1-2 inches from initial measurements.

Consider these guidelines for ideal curtain length:

  • Standard curtain lengths commonly found include: 63 inches, 84 inches, 94 inches, 108 inches, and 120 inches.
  • For window treatments that “puddle” on the ground, the curtains usually extend about 1-3 inches onto the floor.
  • The width of curtains should be calculated by measuring the window width and multiplying by 1.5 to 3 times for a fuller and more dramatic look.

Measure your windows carefully to ensure your new curtains fit perfectly. This will help create a stylish and functional space.

Curtain Installation: A Step-by-Step Guide

Proper curtain installation is key for a polished look. Let’s explore the essential steps for a successful installation process.

  • Marking the Bracket Locations: Use a pencil and level to mark bracket spots on the wall. Ensure even measurements on both sides for symmetry. Consider curtain width and desired fullness when placing brackets.
  • Drilling Holes and Installing Anchors: Drill holes at marked locations. For drywall or studs, screw brackets directly into the wall. Use wall anchors for surfaces without studs to provide secure support.
  • Mounting the Curtain Rod Brackets: Align brackets with wall marks and use a level for straightness. Secure brackets firmly to the wall. Slide the curtain rod into place.

Follow these steps for successful curtain installation. Measure carefully and use appropriate tools for professional-looking results.

Hanging the Curtains

It’s time to hang the curtains after securing the rod. The hanging method affects the overall style. Let’s explore different curtain hanging techniques.

Pole Pocket Curtains

Pole pocket curtains are easy to hang. Simply slide the fabric panels onto the rod. This creates a classic, tailored look for formal or traditional decor.

Tab Top Curtains

Thread the rod through fabric loops for tab top curtains. This technique gives a casual, relaxed look. It’s popular for modern or casual spaces.

Grommet Top Curtains

Grommet top curtains have pre-sewn holes for easy threading. This method offers a sleek, contemporary look. It works well in both formal and casual settings.

Measure the rod length and panel width for a proper fit. The right hanging technique can transform your room’s aesthetic.

Styling and Finishing Touches

Enhance your curtain installation with strategic styling and finishing touches. Finials and end caps add polish to curtain rods. Layering curtains creates depth and allows for versatile light control.

Finials and End Caps

Finials and end caps add elegance to curtain hardware. These decorative elements frame your window and complement the overall curtain styling. Choose pieces that match your room’s decor, whether classic, modern, or rustic.

Layering Curtains

  • Combine sheer curtains with heavier draperies to create depth and texture in the room.
  • The sheer panels allow for soft, filtered light, while the heavier curtains provide privacy and block out unwanted light.
  • Layering curtains also gives you the flexibility to adjust the level of light and privacy in the space, depending on your needs.

Match curtain hardware and styling with existing room decor. This helps create a cohesive and visually appealing space. With careful attention to details, you can make your windows stand out.

Curtain Installation Tips for Renters

Renting doesn’t mean you can’t have great curtains. There are many ways to hang curtains without damaging walls. Let’s explore some renter-friendly solutions for curtain installation.

Tension rods and adhesive hooks are perfect for renters. Tension rods work well for light curtains without drilling. Adhesive hooks, like Command hooks, can hold up to five pounds securely.

Don’t worry about small wall damage. You can easily patch and paint holes before moving out. Outside-mounted curtains go above the window frame. Inside-mounted curtains fit within the frame.

Shallow windows can be tricky. Specialized rods like Twist & Fit are made for these spaces. They work with light to medium-weight curtains and cost about at Home Depot.

These options help you create a cozy, personal space. You can make your rental feel like home without losing your deposit.

Coordinating Curtain Hardware and Room Decor

Choosing the right curtain hardware is key to enhancing your room’s decor. Heavy curtains need sturdy rods, while sheer fabrics pair well with slimmer options. Match rod finishes to metal accents in the room for a unified look.

Harmonizing curtain hardware and fabrics with the room’s design creates a polished aesthetic. Here are some tips to achieve this:

  • Choose rods and finials that match the finishes of other metal accents in the room, such as lamps or hardware.
  • Select fabrics that complement the overall room decor and create a cohesive look.
  • Consider the scale and proportion of the rods in relation to the size of the room and the window.

Thoughtful coordination of curtain hardware and room decor can transform your space. It allows you to craft a visually appealing area that reflects your unique style. Your room will feel more put-together and inviting.

Curtain Installation for Wider Windows

Wider windows need extra support for curtain rods to prevent sagging. Center support brackets offer a great solution. They’re installed between wall-mounted brackets to evenly distribute the rod and curtain weight.

Center Support Brackets

Long curtain rods for wide windows can sag in the middle. Center support brackets solve this problem. They’re mounted between wall brackets to keep the rod stable and level.

These brackets are crucial for heavy curtain fabrics like velvet or brocade. They distribute weight evenly, maintaining the desired curve and tension. This creates a polished, professional-looking installation.

Center support brackets also enhance the overall look. They break up the window’s expanse, creating visual interest. This is especially effective with wide rods and heavy fabrics.

Curtain Installation for Different Room Types

Curtain installation varies based on each room’s unique needs. The right window treatments can enhance aesthetics and offer practical benefits. Let’s explore curtain options for various spaces.

Living Rooms

Living room curtains control light and provide privacy. Choose easily adjustable curtains to set the right mood. Sheer fabrics create an airy atmosphere, while heavier curtains block light and ensure privacy.

Bedrooms

Bedrooms need substantial curtains for a restful, dark environment. Blackout curtains effectively block sunlight and street lights. Layering with sheer panels adds versatility for light control and coziness.

Dining Rooms

Sheer or lightweight curtains work well in dining rooms. They filter natural light, creating a warm, inviting atmosphere. These airy treatments complement elegant decor while providing privacy when needed.

Tailoring curtains to each room’s needs enhances ambiance and functionality. This approach improves the overall appeal of your living spaces.

Benefits of Hiring Curtain Installation Professionals

New curtains can dramatically change your home’s look and feel. Professional curtain installation services offer many advantages over DIY projects. They make the process smoother and more efficient.

Experienced curtain installers bring valuable expertise to the job. They have the right tools to ensure a proper fit for your curtains. This is crucial for achieving the desired look and functionality.

These professionals can handle any complications that may arise. They work around tricky window frames or wall materials safely and efficiently.

Professional installation saves you time and eliminates hassle. Trained installers complete the job quickly. You can enjoy your new window treatments without DIY stress.

Professional curtain installation services offer guidance on fabric selection and hardware options. They help you achieve the perfect overall design for your space. Their expertise ensures your curtains look great and function well.

Professionals provide the right level of privacy, insulation, and light control. They have the tools and experience to mount curtain rods securely. This minimizes accidents and damage to walls or windows.

Investing in professional curtain installation is a smart choice. It saves time, money, and hassle. You’ll get a high-quality, personalized solution for your home.

FindPros Can Connect You with Top-Rated Local Professionals

Struggling with measuring for the right curtain rod size? Unsure about the best fabrics and hardware for your window coverings? Let the experts at FindPros help. Simply answer a few quick questions about your home project, and we’ll match you with top-rated local professionals who can handle all your curtain installation needs. From selecting the perfect drapery rods to hanging custom-made curtain panels, our pros have the skills and experience to transform your windows. Get competitive quotes, find the right fit, and enjoy a polished, professional look for your space – all with the help of FindPros.

Conclusion

Proper curtain installation can enhance any room’s look and function. Attention to detail is key when choosing rods, fabrics, and following installation steps. This guide offers expert tips for a polished, professional-looking result that complements your home’s decor.

Quality window treatments can greatly impact your living space’s aesthetics and ambiance. This article covers measuring techniques, hardware selection, and installation best practices. These key points provide a solid base for creating the perfect curtain solution.

By applying these expert tips, you can upgrade your curtain installation. Transform your spaces with functional and appealing window treatments that match your style. Create a welcoming atmosphere that brings your vision to life.

Frequently Asked Questions (Curtain Installation)

The curtain rod should extend 3-6 inches beyond the window frame on each side. This allows the curtains to move freely without blocking the window.
Double curtain rods allow you to layer curtains, such as combining sheer panels with heavier draperies. The outer rod holds the drapery panels, while the inner rod supports the sheer curtains.
When measuring for curtain rods, include the width of the window trim. Measure from the outside edge of the trim on one side to the outside edge on the other side. This ensures the curtains will cover the entire window, including the trim.
A tension curtain rod uses a spring-loaded mechanism to fit snugly between walls without drilling or screws. It’s a great option for renters or quick installations. Simply extend the rod to fit your window opening, and it will stay in place using the tension.
Yes, you can use drapery rods for your window treatments. Drapery rods are typically thicker and more substantial than standard curtain rods, making them suitable for heavier drapery panels. Just be sure to choose a rod that can accommodate the weight of your curtain or drapery fabric.

Curtain Alterations

Deck Sealing Near You

Can’t find what you are looking for?

How It Works

  • Answer a few questions about your home project.
  • Within seconds, get matched with top-rated local pros.
  • Compare quotes and choose the best pro for the job.

Curtain Alterations In Your Area

Need Curtain Alterations? Here’s What to Know

Meta Description: Discover expert curtain alterations to transform your window treatments. Learn about custom hemming, resizing, and fabric options for a perfect fit and stylish look.

Curtains make a room look better and keep it private. They also help control how much light comes in. But, finding the perfect curtains and then realizing they’re too long can be a letdown. Hemming your curtains is an easy way to fix this. This guide will show you how to do it step by step, saving you time and money.

By hemming your curtains, you make sure they fit your windows just right. It also makes them look more professional and classy.

Curtain Alterations

Key Takeaways

  • Hemming curtains is a cost-effective solution compared to buying new ones.
  • There is a rising trend in DIY curtain alterations among both experienced and beginner seamstresses.
  • 75% of homeowners prefer floor-length curtains for an elegant effect.
  • Hemming curtains can reduce costs by up to 30% compared to purchasing custom-made ones.
  • Rod pocket headers are a popular choice for curtain alterations due to their ease of installation.

Understanding Curtain Alterations

Before you start altering curtains, make sure to check your window treatments well. Measure the window and think about the style and function you want. Decide on the floor clearance you need. This way, you can get professional-looking curtains that look great and work well in your space.

Why Curtain Alterations Matter

Curtain alterations are key for a good fit on your windows. They help your curtains look right with your room’s decor and meet your needs. Getting the size and fit right also makes your curtains work better. This means they can give you the privacy, light control, or temperature you want.

Types of Curtain Alterations

  • Hemming: Changing the length of your curtains for the right floor clearance. This makes them look polished and custom.
  • Resizing: Adjusting the width of your curtains for a snug fit. This improves their visual appeal.
  • Fabric Modifications: Changing the style and function of your curtains. You can switch the fabric, headers, rod pockets, grommets, pleats, and more.

Knowing about these curtain alterations helps you choose the best way to improve your window treatments. This ensures they match your style and function perfectly.

Curtain Alterations

Measuring for Perfect Curtain Fit

Getting the right fit is key for curtains. First, measure the window where you’ll hang them. Note the width and height. These will tell you how long and how much fabric you need.

Think about the style and function you want your curtains to have. Also, consider the curtain headers you’ll use, like rod pockets or grommets. These choices affect the length you’ll need.

Don’t forget to think about floor clearance for a neat look. Here are some tips:

  • Custom curtains come in lengths like 63, 84, 94, 108, and 120 inches. In the UK, they’re standard at 137, 182, 228, and 274cm.
  • For living rooms, floor-length curtains are often best. But for dining rooms and bedrooms, curtains that puddle on the floor can look great.
  • Put curtain rods 8 to 10 inches above the window. They should stick out 10 to 12 inches on each side. For high ceilings, you can raise the rod 12 to 24 inches.

By measuring carefully and thinking about style and function, you can make sure your curtains look great. It’s safer to have longer curtains than short ones that look bad.

Measuring curtains

If you’re unsure, consider getting help from a designer or tailor. Tailoring pre-made curtains can save money and give you a custom look. Or, go for custom-made curtains for the best personal touch.

Curtain Alterations

Curtains are key to any room’s look, but they might not always fit right. Curtain alterations can fix this. There are two main types: hemming and resizing.

Hemming Curtains

Hemming means folding and sewing the bottom of the curtain to the right length. You’ll need scissors, pins, a sewing machine or thread, an iron, and an ironing board. Measure and mark where you want the hem, then fold and secure it with tape or stitches.

Resizing Curtain Width

Resizing means making the curtain wider or narrower. It takes more sewing skills. If your curtains are off-size, this is what you need. You can do it yourself if you’re skilled, or get a pro to do it.

For hemming or resizing, make sure you have the right tools. This includes fabric, scissors, pins, a sewing machine, thread, an iron, an ironing board, a seam ripper, thread snips, and a ruler. With patience and care, you can get your curtains to fit perfectly.

Tools and Supplies for Curtain Alterations

Having the right tools and supplies is key for altering your curtains well. You’ll need a flexible measuring tape for accurate sizes and a sewing machine for stitching. These items help you get a professional look for your curtains.

Start with a high-quality measuring tape for perfect fits. Use a fabric marker or tailor’s chalk to mark the hem. Don’t forget sharp fabric scissors for clean cuts. Pins are great for holding the fabric steady while you work.

For sewing, you can use a sewing machine or just a needle and thread. An iron and ironing board are important for pressing the hem. Tools like a seam ripper, thread snips, and a ruler help with making changes and keeping things precise.

  • Measuring tape
  • Fabric marker or tailor’s chalk
  • Fabric scissors
  • Pins
  • Sewing machine or needle and thread
  • Iron and ironing board
  • Seam ripper
  • Thread snips
  • Ruler

Make sure you have all these tools ready before you start altering your curtains. With the right gear, you’ll make the process smooth and efficient. This way, you’ll get the perfect fit and look for your home.

DIY vs. Professional Alterations

Do you want to do curtain alterations yourself or get help from a pro? Doing it yourself can save money and be fun if you know how to sew. But, if you’re not skilled or want top-notch quality, a pro might be better.

Cost and Experience Considerations

Thinking about cost and skill is important when choosing between DIY and a pro. DIY can be cheaper, but pros offer special skills for a perfect fit and look. Professionals make sure curtains look great.

Trying DIY can lead to bad results because of tricky fabrics and needed skills. Professionals use special machines for great results.

Think about your skills, time, and how perfect you want it to be. Pros have lots of experience and custom services for each client, ensuring great results.

Choosing pro curtain alteration services can really improve your home’s look and use.

Need Curtain Alterations? Let FindPros Help

Are you looking for the right professional to handle your curtain hemming, resizing, or fabric modifications? Search no further than FindPros. Our platform connects you with top-rated local experts who can tackle your home projects with ease. Simply answer a few questions about your needs, and we’ll match you with pros that best suit your style and budget. Get competitive quotes, find the perfect fit, and make your curtains look perfectly tailored – all without the hassle. Stop searching and let FindPros bring you the solutions you need.

Conclusion

Curtain alterations can make your window treatments look great and fit perfectly. They are a smart and affordable way to change your curtains. By learning how to hem and resize them, you can do it yourself or hire a professional for help.

Whether you want to change the length, width, or look of your curtains, this guide has you covered. It will help you make your curtains look tailored and match your home’s style.

Getting your curtains to fit right can make your room look better. You can change their length and width, or try lining and different header styles. Adding bold patterns or layering curtains can also make a big difference.

Choosing to alter your curtains is a smart way to update your space. It’s cheaper than buying new ones. By focusing on details and getting a perfect fit, you can make your windows look amazing. This shows off your style and makes your home feel welcoming.

Frequently Asked Questions (Curtain Alterations)

The most common drapery alterations are hemming to adjust the length, resizing to change the width, and fabric modifications like switching headers or adding pleats. These alterations can transform the look and function of your curtains.
When searching for a drapery alteration business, look for ones with experience, good reviews, and a range of services. You can find them online or in your local area. Don’t be afraid to speak to the team and get a quote for your specific project.
The most common materials used are fabrics like cotton, linen, velvet, and silk. The business you work with can help you choose the right material to create the look you want for your space.
The price of drapery alterations can vary depending on the complexity of the project, the materials used, and the business you work with. However, it is often more cost-effective than buying brand new curtains, especially if you just need a small change like hemming.
A good drapery alteration business will work closely with you to understand your needs and come up with the best solution. They’ll take measurements, provide samples, and give you a quote before starting any work. They’ll also be happy to answer your questions and make sure you’re satisfied with the final result.

Countertop Resurfacing

Deck Sealing Near You

Can’t find what you are looking for?

How It Works

  • Answer a few questions about your home project.
  • Within seconds, get matched with top-rated local pros.
  • Compare quotes and choose the best pro for the job.

Countertop Resurfacing In Your Area

Countertop Resurfacing: A Guide to Revitalizing Your Kitchen

Meta Description: Discover how countertop resurfacing can transform your kitchen without breaking the bank. Learn about methods, materials, and benefits for a budget-friendly upgrade.

Are your kitchen countertops looking old and worn out? Don’t worry! You’re starting an exciting journey to make them look new again. Think about turning that dull, scratched surface into the highlight of your kitchen. It’s not just about looks; it’s about making them strong and useful again.

In this guide, we’ll take you through a magical world of countertop transformation. We’ll cover different materials and DIY tricks that anyone can do. So, get your sandpaper and brushes ready. Let’s turn those old surfaces into masterpieces that will make chefs jealous. Keep reading!

Countertop Resurfacing

Key Takeaways

  • Discover the art of reviving dated kitchen countertops through cost-effective resurfacing techniques.
  • Explore a range of countertop materials, from durable quartz to the versatile epoxy, to find the perfect fit for your kitchen’s aesthetic.
  • Learn the step-by-step process for successfully updating your countertops, from proper preparation to expert installation.
  • Discover the latest trends in countertop refinishing and find the best sources for your dream surfaces.
  • Dive into the world of revitalizing butcher block countertops and learn to avoid common pitfalls.

Introduction: The Art of Countertop Transformation

Reviving old kitchen countertops is a fun journey. It turns them into the heart of your kitchen. This guide will show you how to transform your kitchen countertops. We’ll look at different materials, steps, and trends to make your countertop renovation look new. It’s a way to make your kitchen countertops last longer, look better, and match your style.

The cost to refinish a kitchen countertop is about ,300. It usually takes 1 to 2 days to do. After 48 hours, you can start using it again. You can choose from many colors like whites, chocolates, grays, and blues for your countertop remodeling. This lets you make your kitchen look amazing.

You can refinish many materials like laminate, Corian, and even stone. The CrystalTop Finish is very durable. It resists scratches, stains, and heat up to 300 degrees. It also comes with a five-year warranty against damage.

Countertop transformation

If you want to update your kitchen countertop or do a full countertop renovation, this guide has you covered. It will give you the skills and confidence to make your kitchen look great. Your kitchen will show off your style and improve the look of your home.

Choosing the Right Material for Countertop Resurfacing

Choosing the right material for countertop resurfacing is key. Options like quartz and epoxy coatings can change your kitchen’s look and feel. Let’s look at two popular choices that can refresh your countertops.

Quartz: Durability and Elegance Combined

Quartz countertops are great for their toughness and beauty. They’re made from natural quartz and resin. This makes them strong against scratches, stains, and heat.

They’re also safe for food prep, making your kitchen clean and hygienic. Quartz fits any kitchen style, from old to new, with many colors and patterns.

Epoxy: The Chameleon of Countertop Coatings

Epoxy coatings are versatile for resurfacing countertops. They’re tough, scratch and heat resistant. You can change the look of your old counters, including laminate, granite, or concrete.

Epoxy comes in many colors and finishes. This lets you match your style perfectly. Though it takes more time to apply, the results last long, making it a top choice for kitchen counters.

Think about durability, upkeep, and looks when picking a countertop material. This ensures a lasting change that you’ll love.

quartz countertops

Step-by-Step Process for Updating Countertops

Getting your kitchen countertops ready for a change is key to a great update. Whether you want to refresh your countertop updating, countertop refinishing, or redo your kitchen renovation, it’s important to follow the right steps.

Preparation: The Foundation for Success

Start by cleaning and degreasing the old countertop well. This makes sure the new countertop coating or material sticks right. If your countertop is made of certain materials, you might need to use a primer first. This makes the surface smooth and ready for the new finish.

  • Thoroughly clean and degrease the existing countertop.
  • Assess the current condition and apply a primer if necessary.
  • Carefully measure the countertop area to determine the amount of material needed.
  • Protect surrounding surfaces like cabinets and floors to prevent any mess during the countertop installation.
  • Ensure you have all the required tools and supplies, such as brushes, rollers, and the appropriate countertop refinishing product.

By preparing the surface well, you set the stage for a smooth kitchen remodel. You’ll end up with a beautiful, lasting countertop change.

Installation: Where Precision Meets Craftsmanship

Starting a countertop installation is like a well-planned show. Every step, from measuring to using top-notch adhesives, needs careful focus. This is where your kitchen’s new look and durability start to shine.

First, measure your countertop space carefully. Make sure the dimensions fit the new material, like quartz, granite, or epoxy. Cutting accurately is key for a perfect fit and a top-notch finish.

Then, spread a top-quality adhesive evenly on the surface. This creates a strong bond that lasts. Carefully put the new countertop or epoxy on, making sure it’s aligned right and smooth.

Finally, seal your countertop with a high-quality sealant. This keeps it looking great and protects it from stains and scratches. These steps turn your kitchen into a beautiful spot, showing off your style and love for cooking.

Working with skilled pros ensures your new countertops look amazing and last long. They make your kitchen a great place for cooking and entertaining.

Maintenance Tips for Longevity

Keeping your kitchen countertops looking great needs regular care. Whether they’re quartz, granite, or solid surface, a few simple tips can keep them looking new. This will also make them last longer.

  • Everyday Cleaning: For daily cleaning, use a soft cloth or sponge with a neutral, non-abrasive cleaner. Don’t use harsh chemicals or scrub hard, as they can harm the surface. Clean your countertops every day to stop spills and residue.
  • Avoiding Direct Heat: Keep your countertops away from direct heat. Use hot pads or trivets for hot pots, pans, or dishes. This stops them from getting damaged by heat.
  • Regular Sealing: For natural stone like granite or marble, sealing is key to keep them strong and stain-free. You might need to seal them every 6 months to 1 year. Quartz countertops don’t need sealing because they’re already resistant to stains and easy to care for. Solid surface materials like Corian® or Hi-Macs® also need little upkeep and don’t need sealing.

By following these easy countertop maintenance, cleaning, and sealing tips, your kitchen countertops will stay looking great for years. This will also help with the longevity and protection of your kitchen.

Latest Trends in Countertop Refinishing

The kitchen is the heart of the home, always changing in design. Countertop refinishing trends now mix sustainability, technology, and personal style. We see ultra-compact surfaces and recycled materials becoming popular for kitchen countertops.

Ultra-compact surfaces are changing countertop refinishing. They are strong and look like natural stone or wood. This lets homeowners have a luxury look without losing function. More people want sustainable kitchen designs too. They choose recycled materials to lessen their environmental impact while updating their kitchens.

Digital printing is also big in countertop refinishing now. It lets homeowners use their kitchens as art spaces. They can add cool patterns, bright colors, or even photos to their countertops. This makes countertops truly unique and shows off personal style.

These trends are making kitchens better in both looks and use. Whether you like ultra-compact surfaces, recycled materials, or digital printing, there are many ways to update your kitchen countertops. These options are diverse and inspiring.

Where to Find the Best Countertops

Looking for the best countertops for your kitchen or bathroom? Revecuisine is your top choice. They’re known for their durable, elegant, and modern countertops. Quartz countertops from Revecuisine are tough, easy to keep clean, and don’t stain easily. This makes them perfect for busy areas.

Revecuisine has many quartz countertop styles that look great and have special features. Their countertops don’t let liquids go through, keeping your home clean. They also offer guides and advice to help you choose the right one, showing they care about customers.

For kitchen or bathroom updates, Revecuisine is the best place to find the best countertops. They focus on quality and customer happiness, so you’ll get the right kitchen countertops or bathroom countertops for your space. If you’re looking for countertop shopping or countertop installation, check out Revecuisine’s wide selection and expert advice.

Refinishing Butcher Block Countertops

Refreshing your butcher block countertops is a fun DIY project. It lets you make your kitchen look new again. With a few easy steps, you can get great results and make your countertops last longer.

  • Preparing the Surface: Start by sanding the butcher block to bare wood. Use an 80-grit sandpaper first, then move to finer grits like 120, 180, and 220. This makes the surface smooth and ready for the next steps. Always sand with the wood grain to hide scratches well.
  • Enhancing the Wood: After sanding, put on a wood conditioner. It makes the stain go on evenly, avoiding blotchy spots. Once dry, stain your wood with the color you like for a beautiful finish.
  • Protecting the Surface: Protect your butcher block with a polyurethane finish. This layer keeps it safe from daily damage. It keeps your kitchen looking great for years.

Follow the maker’s instructions for applying and drying the finish right.

By doing these steps, you can refinish your countertops yourself. Enjoy the warm look of your butcher block countertops again.

Countertop Remodeling: 5 Easy Covers

Don’t think that redoing your kitchen has to be expensive. There are five smart ways to update your countertops without a big overhaul. You can try peel-and-stick makeovers, painting, tiling, DIY countertop refinishing kits, or contact paper for a new look on a budget.

Each method has its own perks. Peel-and-stick options are cheap and easy to use. Painting lets you be creative. Tiling adds elegance. Refinishing kits cover a lot of surface. Contact paper is versatile. These ideas let you make your kitchen countertops your own without spending a lot.

  • Peel-and-Stick Countertops: Change your countertops with peel-and-stick options like wood or marble looks. These products stick easily and don’t require the cost or mess of replacing your counters.
  • Countertop Painting: Painting your counters is a lasting fix. Use acrylic paint or countertop painting kits for a unique look. Make sure to prep the surface well for the best finish.
  • Countertop Tiling: Tiles can make your kitchen look timeless and classy. This method needs a smooth surface for the tiles to stick right. But, it’s a beautiful and easy way to keep your counters looking great.
  • DIY Countertop Refinishing Kits: These kits have everything you need to refresh your counters. They’re a smart way to update your kitchen without replacing everything.
  • Contact Paper Countertops: For a quick and cheap fix, use contact paper. It comes in many designs and textures. Try different looks until you decide on a permanent change.

These countertop remodeling ideas each have their own benefits. From the easy and affordable peel-and-stick to the creative freedom of painting or tiling. Trying these new ways can make your kitchen look fresh without spending a lot.

Benefits of Hiring Countertop Resurfacing Professionals

Revitalizing your kitchen can be easy and affordable with countertop resurfacing. It’s better than doing it yourself. Professionals have the skills, tools, and knowledge for a smooth kitchen update.

Experts can guide you on the best materials for your kitchen. They offer advice on everything from strong quartz to versatile epoxy coatings. This ensures your countertops look great and fit your needs.

Professional installers are precise and skilled. They focus on details and use the right techniques. This means your countertops will look perfect and work well in your kitchen.

Working with pros saves you time and effort. They finish the job quickly and without a big mess. This lets you enjoy the kitchen update without the hard work.

Professionals also offer insurance for their work. This protects you from damage or accidents during the project. It makes the renovation worry-free and covers unexpected costs.

Using countertop resurfacing experts makes getting the kitchen you want easy. They bring knowledge, precision, and quality to the job. Your kitchen will be beautiful and functional for years.

Find the Perfect Pros for Your Kitchen Refresh

If you’re looking to transform your kitchen countertops, FindPros can help you find the right professionals for the job. Simply answer a few quick questions about your project, and we’ll match you with top-rated local pros who can provide free estimates. Compare pricing and reviews to find the best fit for your budget and style. Whether you need to refinish damaged surfaces, replace old laminate countertops, or update your backsplash and sink, FindPros makes it easy to get the job done right. Your dream kitchen is just a few clicks away – and it could be totally worth it. Get started today and you’ll be absolutely loving your new countertop turned space in no time.

Conclusion

Countertop resurfacing is a great way to make your kitchen look new without spending a lot. You can do it yourself or get help from professional countertop services. This guide shows you many ways to refresh your old countertops.

Choosing the right material is key. Options like quartz and epoxy coatings can make your kitchen look better and work better. By following the steps and keeping up with your countertops, you can make your kitchen show off your style and be useful for daily life.

Start with countertop resurfacing to change your kitchen for the better. Budget-friendly upgrades like this can hide old damage, make your countertops last longer, and even raise your home’s value. Picking to refinish or resurface your countertops is a smart move. It’s a way to make your kitchen look new and show off your style without spending a lot.

Frequently Asked Questions (Countertop Resurfacing)

Laminate countertops can be refinished with options like epoxy coatings, quartz overlays, or painting. These can transform the look of your existing counter without a full replacement.
To prepare the old laminate or cultured marble counter, you’ll need to thoroughly clean and degloss the surface. Using an epoxy primer can help the new surface adhere properly to the existing counter.
Countertop refinishing can be a DIY project, but hiring a professional is recommended for the best results. They have the right tools, experience, and warranties to ensure the new surface is installed correctly and lasts.
Applying an epoxy coating typically involves cleaning the existing counter, using an epoxy primer, carefully applying the epoxy in thin, even coats, and allowing it to fully cure before use. A clear coat may also be applied for extra protection.
Affordable options like painting, using contact paper, or installing peel-and-stick countertop overlays can give your old laminate or tile countertops a fresh new look without the cost of a full replacement. These DIY projects can be super clear and transform your kitchen or vanity tops.

Countertop Installers

Deck Sealing Near You

Can’t find what you are looking for?

How It Works

  • Answer a few questions about your home project.
  • Within seconds, get matched with top-rated local pros.
  • Compare quotes and choose the best pro for the job.

Countertop Installers In Your Area

Things to Consider When Choosing Countertop Installers

Meta Description: Discover key factors to consider when selecting countertop installers. Learn how to find skilled professionals for your kitchen or bathroom renovation project.

Choosing the right countertop installer is key when updating your kitchen or bathroom. With many options, how do you pick the best one? Look at their track record and consider important factors like quality, cost, and satisfaction.

Countertop Installers

What makes top installers stand out? It’s their history, skills, and focus on making customers happy. Want to know how to find the best installer for your home project?

Key Takeaways

  • Pick installers with a good history of happy customers and quality work.
  • Look at their experience and knowledge of countertops for expert advice and a good install.
  • Check prices and compare quotes to find an installer that fits your budget.
  • Ask about warranties for support and peace of mind after installation.
  • Check references and read reviews to see if the installer is reliable and professional.

Track Record and Reputation

Choosing the right countertop installers means looking at their track record and reputation. A good installer has a history of happy customers and successful projects. This gives you the confidence you need for a smooth and top-quality installation.

Quality of Work and Customer Satisfaction

Find installers known for their great work and happy customers. Check out reviews, testimonials, and references from past clients. This shows the quality of their work and their service level. A well-known installer is more likely to meet or beat your expectations.

Portfolio and Successful Projects

Looking at an installer’s portfolio shows what they can do. It shows their skills and the countertops they’ve installed. You can see the variety of materials and designs they’ve worked with. This helps you picture how they’ll work on your project.

By looking at an installer’s track record and reputation, you can make a smart choice. You’ll find a pro who offers the quality, skill, and service you want for your kitchen or bathroom update.

Experience and Expertise

Choosing the right countertop installers is key. They need to have lots of experience and know-how. Countertop installers know all about different countertop materials. They also know the best ways to install them. This means your new countertops will last longer and work better.

Knowledge of Countertop Materials

Each countertop material, like granite, quartz, or laminate, is different. Countertop installers know how to work with these materials. They know how to handle them safely and finish them right. They can help pick the best countertop material for your kitchen design or bathroom.

Installation Techniques and Requirements

  • Skilled countertop installers know the latest installation techniques and best practices.
  • They have the right tools and safety steps for a smooth installation process.
  • They can measure and fit countertops perfectly with your cabinetry and fixtures.
  • They can solve special problems, like fitting custom countertops or working with existing countertops.

With their big experience and expertise, countertop installers can make your kitchen or bathroom look great and work well.

countertop installers

Countertop Installers: Pricing and Budget Considerations

Finding the right countertop installer is more than just skill. You must think about cost and budget too. The price of putting in countertops can change a lot. It depends on the material, work, and extra services needed.

Homeowners should remember that countertop materials can cost from per square foot for laminate to over 0 for quartz or marble. The average cost to install new countertops is . Prices usually range from ,859 to ,346.

To get the best deal, compare quotes from several countertop installers and countertop contractors. This way, you find someone who offers good quality at your budget. Remember, labor can make up to 50% of the total cost. So, include installation services in your countertop project budget.

Knowing about countertop materials and their costs, and labor expenses, helps homeowners make smart choices. This way, you can pick the best countertop installation option for your budget. Planning and researching can help you get what you want without going over budget.

countertop installers

Warranties and Customer Protection

When picking countertop installers, ask about their warranty. A good warranty means peace of mind and shows the installer cares about quality and your happiness. A top installer will fix any problems after installation quickly.

Terms and Duration of Warranties

Warranties for quartz countertops usually last 15 years to forever. Each brand has its own rules, but they’re mostly the same. Warranties start when you buy, install, or a store activates it. Some can even stay with the countertop if you sell your house.

The Granite Company gives a 10-year warranty on their granite countertops. It covers fabrication or installation mistakes but not damage from abuse, normal wear, nature, scratches, or chips. HausProTM offers a Lifetime Limited Warranty on their quartz countertops in North America. It covers manufacturing defects for normal use and service for the first owner.

Commitment to Quality Assurance

Warranties show an installer’s promise of quality. Good installers have strict rules and exclusions to keep their products lasting long. They might need you to install it right, limit what you put on it, and not cover damage from changes or wrong installation. Following these rules shows they care about doing great work and protecting your investment.

When looking at installers, check the warranty terms and quality promises. This ensures your new countertops are installed well and last a long time.

Finding the Right Countertop Installers Made Easy with FindPros

Searching for the perfect countertop installers can be a daunting task. That’s where FindPros comes in. Simply answer a few quick questions about your home project, and we’ll match you with top-rated local professionals. Our network of skilled installers will compete to provide you with the best pricing and services. Compare multiple quotes to find the pro that fits your needs and budget seamlessly. Take the stress out of your countertop installation and let FindPros handle the legwork. Get started today.

Conclusion

Finding the right countertop installers is key for your kitchen or bathroom project. Look at their past work, experience, and what services they offer. This helps you pick the best one to make your dream come true.

Take your time to look at different options and ask questions. The right countertop installer will help you every step of the way. They make sure your new custom countertops look great and last long.

When updating your countertops or redoing your kitchen design, a pro countertop installation team is a big plus. They save you time, money, and make sure the final look is top-notch.

With a skilled countertop installer, your bathroom or kitchen will shine with beautiful, high-quality countertops. These countertops will look great and last a long time. The right installer makes your countertop project go smoothly, saving you money and hassle.

Frequently Asked Questions (Countertop Installers)

The key factors are the installers’ track record, experience and expertise, pricing and budget, and warranty coverage. Look for installers with a good reputation, knowledge of different countertop materials, competitive prices, and strong warranties to ensure a quality installation.
Start by asking for referrals from friends, neighbors, or local home improvement stores. Check online reviews and portfolios of local countertop installers. Compare quotes and services to find the one that best fits your needs and budget.
Check the warranty coverage provided by your countertop installer. A reputable installer should offer a warranty that covers any manufacturing defects or installation problems. Contact them promptly to request a free replacement or complete repair of the damaged counters. Their warranty and customer service will be key in resolving the issue.

Corian Countertop Repair

Deck Sealing Near You

Can’t find what you are looking for?

How It Works

  • Answer a few questions about your home project.
  • Within seconds, get matched with top-rated local pros.
  • Compare quotes and choose the best pro for the job.

Corian Countertop Repair In Your Area

Corian Countertop Repair: Common Issues and Solutions

Meta Description: Discover expert solutions for Corian countertop repair. Learn how to fix common issues and restore your surfaces to their original beauty. Professional tips and techniques included.

Corian is a top choice for countertops because it’s tough, versatile, and comes in many colors. But even Corian can show signs of wear over time. So, how do you keep your Corian countertops looking new? Let’s look at common problems and how to fix them to keep your countertops looking great for years.

Corian Countertop Repair

Key Takeaways

  • Corian is a versatile and durable solid surface material used for countertops, vanities, and other applications.
  • Over time, Corian surfaces may experience minor issues like scratches, dullness, or cracks that require attention.
  • DIY repair methods, such as using specialized glues or fillers, can address many common Corian countertop problems.
  • Professional restoration services are available for more extensive damage, including repolishing, crack repairs, and section replacements.
  • Proper care and maintenance, such as avoiding harsh chemicals and heat exposure, can help prevent future Corian countertop issues.

Introduction to Corian Countertops

Corian is a top pick for kitchen and bathroom counters. It’s known for being tough, versatile, and good-looking. Made from solid surface material, Corian lets homeowners design unique looks that match their style.

  • Durability and Versatility of Corian Material: Corian is a tough composite that resists stains, scratches, and heat. It’s perfect for busy spots in the home. Its non-porous design means no sealing is needed. With many colors and finishes, Corian fits any decor, from modern to classic.
  • Advantages of Corian over Other Countertop Materials: Corian stands out among other countertop options. It’s cheaper than natural stone but looks high-end. Plus, it’s easy to keep up and fix, great for busy homes.

corian countertops

Common Issues with Corian Countertops

Corian countertops are popular in kitchens and bathrooms for their durability and versatility. But, even this top-notch material can have problems over time. Scratches, dull surfaces, cracks, chips, and damage from impacts can happen. Keeping Corian countertops looking great requires some care.

Scratches and Dull Surfaces

Corian is a bit soft, so it can get scratched and worn down easily. These small marks can make the surface look dull over time. To stop this, use cutting boards and don’t slide heavy or rough things on the countertop.

Cracks, Chips, and Impact Damage

Corian is tough, but it can still crack, chip, or get damaged from impacts or heat. These problems might come from dropping something heavy or from heat stress, especially near seams. Fixing these issues quickly helps keep the Corian looking good.

Corian Countertop Damage

It’s important to take good care of Corian countertops to keep them looking great. Knowing about common problems and how to prevent them helps homeowners enjoy their Corian for a long time.

DIY Care for Minor Corian Damage

Fixing your Corian surfaces with scratches or chips is easy with simple DIY steps and the right products. Follow some pro tips to make your dull sinks and surfaces look new.

Restoring Dull Sinks and Surfaces

Begin with a weekly cleaning routine for your Corian sink. Mix three parts household bleach with one part water in a spray bottle. Spray the sink, let it sit overnight, and rinse in the morning.

For a deeper clean, use MARBLELIFE® [Granite & Quartz Cleaner] on Corian and engineered stone countertops.

To fix minor dullness on your Corian, use a bit of effort. A lightly abrasive cleaning pad and a mild liquid cleaner work well. Buff the area with a soft cloth or sponge. Make sure to rinse well to remove any residue.

If you have big damage like cracks or deep scratches, get a pro. A Corian fabricator can fix the damage and replace it with a matching piece. They make sure it looks perfect.

Preventing damage is key for your Corian surfaces. Use cutting boards, avoid hot pans on the counter, and don’t use harsh cleaners. With care and effort, your Corian will stay looking great for years.

Professional Repair Services for Major Damage

If your Corian countertops have big damage, getting professional help is key. These experts have the right tools and skills for big repairs. They can fix deep scratches, cracks, or even replace big sections.

  • Repolishing and Crack Repairs: Corian countertops can lose their shine and get cracks over time. Repolishing services can make them look new again. For cracks, experts can fix them so they’re gone.
  • Section Replacement for Extensive Damage: If your Corian countertops have big chips or cracks that can’t be fixed, you might need a section replaced. Technicians can take out the bad part and add a new one that fits perfectly.

Don’t let Corian problems ruin your kitchen. Call professional repair services to fix your countertops.

Preventing Future Corian Countertop Damage

Keeping your Corian countertops looking new needs a proactive plan. This tough material can handle daily use, but taking care of it helps avoid expensive fixes.

Heat Protection and Safe Kitchen Practices

Corian countertops can handle heat, but not too much. Don’t put hot pots or appliances right on them to avoid cracks and damage. Use a trivet or hot pad to shield the Corian from too much heat.

Also, be careful when pouring hot water into sinks. Sudden changes in temperature can cause cracks or breaks.

Avoiding Harsh Chemicals and Abrasives

Avoid using harsh chemicals like paint thinners, oven cleaners, and drain cleaners on your Corian countertops. They can make the surface look bad or etch it. If you spill something, clean it right away with soapy water to prevent damage.

Don’t use abrasive cleaners or scouring powders on your Corian surfaces. They can make the finish rough.

By taking these steps and being careful in the kitchen, you can keep your Corian countertops looking great. This way, you won’t have to worry about expensive repairs or getting new ones.

Pie-Cut Repairs for Cutout Corners and Edges

Pie-cut repairs are a great way to fix cracks or damage in Corian® countertops. This method uses color-matched Corian® inserts to fill in the damaged spots. It’s both affordable and effective.

Template Creation and Damaged Area Removal

First, a template is made to make sure the insert fits well. You can use a store-bought template or make one yourself. Then, the damaged area is removed with a router, leaving at least 4 inches untouched for strength.

Insert Fabrication and Reinforcement

Next, the Corian® insert is made a bit wider than the repair spot. Reinforcement blocks are added for extra support. These blocks are cleaned and the insert and blocks are bonded together. After the glue sets, the blocks and extra glue are taken off. The whole area is then refinished for a smooth look.

Pie-cut repairs are a fast and budget-friendly way to fix Corian® countertops. They help with cracks, chips, and other damage in corners and edges. This way, your Corian® countertops look and work like new again.

Find the Right Professionals for Your Corian Repair Needs with FindPros

Having trouble finding the right professionals to repair your Corian countertops? Let FindPros help. Just answer a few simple questions about your home project, and we’ll match you with top-rated local installers and repair experts. Compare quotes from multiple pros who are eager to compete for your business. Find the perfect fit for your budget and your personal preferences. With FindPros, you’ll get the best pricing and the pros that you get along with best. It’s a fast, easy way to take care of your Corian cabinets, countertops, and more. Get started in your browser, and we’ll have you connected with the right local pros in no time.

Conclusion

Corian countertops are great for kitchens and bathrooms. They come in many colors and designs. Even though they’re tough, scratches, dull spots, and cracks can happen.

Don’t worry, you can fix these problems yourself or hire a pro. Keeping Corian countertops clean and well-maintained helps them last longer. If you need more serious repairs, a pro can fix it right.

Corian countertops are loved for their lasting quality and easy upkeep. Knowing how to fix common problems helps keep them looking good. This makes Corian a smart choice for anyone wanting a beautiful, durable surface.

Frequently Asked Questions (Corian Countertop Repair)

You can contact the manufacturer, DuPont, or a local Corian fabricator to get a matching material for repairing cracks or chips in your Corian countertop. They can provide the exact color and texture to blend in with your existing Corian.
For a chipped or cracked Corian edge, you’ll need to have a professional Corian installer come and replace the damaged section. They can precisely match the color and material to create a seamless repair that extends the life of your countertop.
To prevent moisture damage, make sure to wipe up any spills right away and avoid letting water sit on the surface. You can also seal the edges and seams to create a barrier against moisture. Proper maintenance will help your Corian countertop last.
Yes, you can try light sanding to remove minor scratches and restore the shine on your Corian countertop. Use a fine-grit sandpaper and sand gently in the direction of the existing surface. Be careful not to over-sand, as this can damage the material.
The cost to repair Corian countertops can vary depending on the extent of the damage and the work required. For small chips or cracks, a professional repair service may charge 0-0. For larger damage that requires replacing a section, the cost can be 0 or more. It’s best to get a quote from a local Corian installer.

Construction Managers

Deck Sealing Near You

Can’t find what you are looking for?

How It Works

  • Answer a few questions about your home project.
  • Within seconds, get matched with top-rated local pros.
  • Compare quotes and choose the best pro for the job.

Construction Managers In Your Area

Construction Managers: Find the Right Expert for Your Project

Meta Description: Discover expert construction managers to lead your project. Learn about their roles, qualifications, and how they ensure successful building outcomes.

As your business grows and new projects start, picking the right construction manager is key. Construction managers are crucial for project success. But how do you find one who fits your goals and knows the construction world well?

Construction Managers

Key Takeaways

  • Good communication is important when choosing a construction manager. They should answer calls and emails quickly.
  • Construction projects can be complex. You need a manager who pays attention to details.
  • Experience matters a lot. A good manager should have dealt with different situations in the industry.
  • It’s important to stick to your budget. Managers should be open about handling budget changes and market shifts.
  • The average salary for construction managers is ,890 a year. The job is expected to grow by 8% from 2021 to 2031.

The Importance of Choosing the Right Construction Manager

Choosing the right construction manager is key to a project’s success. They make sure projects are done right, on time, and within budget. It’s vital to pick someone who fits your business goals and knows how to handle issues like power quality.

  • Aligning with Your Business Goals: Skilled construction managers know how to handle complex projects. They work with you to understand your goals. This way, they make sure your project uses the right technology and meets your needs.
  • Considering Factors Like Power Quality: Big construction companies have managers who know about technical stuff like power quality. Power quality is important because it affects how well buildings work and last. A good manager will make sure power quality is right from the start, working with other experts to meet standards.

Picking the right construction manager is crucial for your project’s success. By focusing on your goals and power quality, you increase the chances of a successful project that meets your expectations.

Construction Manager

Communication and Responsiveness: Key Qualities to Look For

In the construction world, talking well is key to success. Good talk leads to teamwork. Bad talk can cause delays and problems. When picking a construction manager, look for someone great at talking and answering fast.

Timely Updates and Quick Response Times

Construction projects need lots of info sharing. If we don’t talk right, mistakes can happen. A top construction manager keeps you updated on project progress, money, and any issues.

They answer your questions fast and solve your worries quickly. This makes sure you’re always in the know.

Attention to Detail and Addressing Concerns

Good construction managers know a lot from past projects. They use this knowledge to make smart choices. They have clear plans to get things done on time and within budget.

They focus on budgets, schedules, and important details. This helps them keep track of money and understand what’s really important.

Great construction managers work well with others. They give tasks to the right people and lead the team well. They solve problems, fix conflicts, and get things done fast.

Construction manager communication

Experience Matters: Benefits of Hiring Seasoned Construction Manager

Experience is key in construction projects. Choosing a new partner might seem cheaper, but a seasoned construction manager can change your project’s success. They’ve faced many challenges and know how to tackle your project with ease.

Seasoned managers know a lot. They’ve worked on many projects, big and small, including office buildings. They understand the industry, project control, and technical skills well. This means they can spot problems early and manage your budget well.

They also have great business skills and know how to lead a team. They make sure everyone talks clearly, keeps you updated, and solves problems fast. This keeps your project on track and meets your goals.

Choosing a seasoned manager means you get help with tough construction-related field issues. They’re ready for anything, big or small, on your project. This lets you focus on the big picture.

So, a seasoned construction manager’s experience and skills are crucial for your project’s success. By picking a proven expert, you make sure your project is well-managed from start to end.

The Role of Operations Experts in Construction

For a construction company to do well, it needs skilled construction operations experts. These pros manage daily tasks. They make sure construction projects finish on time and don’t go over project budgets.

Project Planning and Management

Construction operations experts are key in project planning and management. They handle a construction project from start to finish. They manage resources, schedules, and logistics to keep the project on track and meet project goals.

Budget Planning and Cost Control

Construction operations experts are also in charge of budget planning and cost control. They work with project managers to set up project budgets. They use strategies to use resources wisely. This keeps the construction company profitable by staying within project budgets.

Construction operations experts are vital for the construction industry. They make sure projects are done on time and within budget. This keeps the construction company competitive.

Essential Skills for Construction Operations Experts

Construction operations experts are key to finishing construction projects well. They come from backgrounds like construction management, civil engineering, or similar fields. They have skills that make them stand out. Let’s look at the key skills they need.

Project Management and Analytical Abilities

Good project management skills are a must for these experts. They plan, organize, and coordinate project parts like budgeting, scheduling, and managing risks. They also need strong analytical skills to spot problems, analyze data, and make smart choices.

Communication and Leadership Qualities

Great communication skills are important for these experts. They must share information well, keep everyone updated, and solve concerns with contractors, staff, and management. Leadership skills are also key to lead teams, motivate people, and follow quality standards and rules.

These experts are vital because they combine project management, analytical, communication, and leadership skills. With these skills, they help projects succeed, work more efficiently, and grow the construction industry.

Construction Managers: Sourcing Top Talent

Finding the right people for your team is key to your project’s success. There are many ways to find great construction managers. Let’s look at two good ways to find and draw in the best people.

Utilizing Professional Networks and Industry Associations

Connecting with potential candidates is easy through professional networks and industry groups. Go to events, conferences, and networking meetings. This helps you meet experienced pros in the field. You’ll learn about their skills, what they know, and if they’re available.

Joining industry groups also opens doors to skilled construction managers. These groups often have job boards and can refer you to top talent.

Leveraging Online Job Boards and Social Media

Online job boards and social media are key in today’s job search. Use job boards made for the construction industry. They list many jobs and resumes from skilled pros.

Also, use your company’s website and social media to share job openings. Show off your company’s culture and values to attract the right people.

Using professional networks, industry groups, online job boards, and social media helps you find the best construction managers. This way, you can lead your projects to success.

Evaluating and Selecting the Right Construction Manager

Finding the right construction manager is key to a project’s success. Start by knowing what your company needs and what the ideal candidate looks like. Look at your current team and see where you can get better. This helps you know what skills and experience you need.

When looking at candidates, think about their technical skills and soft skills too. Skills like communication, leadership, and solving problems are important. Construction managers must work well with others, manage money, and finish projects on time.

Choose managers who have a history of successful projects and know the industry well. Certifications like the Certified Construction Manager (CCM) show they’re serious about their work. Also, some places require construction managers to have a license, so check the laws where you are.

Picking the right construction manager means your project is in good hands. They will help you meet your business goals.

Your construction project’s success relies on your manager’s quality. Take time to understand your needs, create a clear profile of what you’re looking for, and choose the best person for the job.

Find the Right Construction Professionals for Your Project with FindPros

If you’re looking to find the best construction professionals to supervise your projects, look no further than FindPros. Our platform connects you with top-rated local construction specialists who can oversee all aspects of your building activities.

Whether you’re a self-employed general contractor, a construction manager overseeing large projects, or an experienced manager in the construction trade, FindPros can help you find the right pros to fit your needs. Simply answer a few questions about your home or commercial project, and we’ll match you with certified professional constructors who can prepare cost estimates, utilize the latest construction technology, and meet your deadlines.

Don’t settle for less – let FindPros help you find the construction specialists that can bring your conceptual development and industrial complexes to life.

Conclusion

Finding the right construction manager is key for your project’s success. Look for good communication, quick responses, and lots of experience in candidates. Operations experts are also vital, handling daily tasks and making sure projects finish on time and within budget.

Knowing what skills and qualifications you need for managers and experts helps you find the best team. With a 24.02% growth rate for Construction Managers, and a big need for skilled workers, picking the right talent is crucial. It can really help your construction projects do well.

Good construction management brings many benefits. It saves costs, manages risks, improves infrastructure, and uses resources well. Choosing the right construction manager means your projects will be top-notch. This helps the construction industry grow and improve.

Frequently Asked Questions (Construction Managers)

Construction managers work closely with civil engineers, construction workers, and other building specialists to coordinate construction project activities. They discuss technical details, refine construction plans, and ensure projects meet design specifications.
To become a construction manager, individuals typically need a high school diploma or associate’s degree combined with extensive construction experience. Many construction managers also complete on-the-job training, cooperative education programs, or specialized construction exams to learn management techniques.
Self-employed construction managers, also called general contractors, have the added responsibility of overseeing the entire project, from preparing cost estimates to managing subordinate supervisory personnel. They must effectively delegate tasks and submit budget estimates to clients.
Construction managers plan, supervise, and coordinate construction project activities to ensure projects meet building and safety codes, stay within budget, and are completed on time. They work closely with subcontractors, city inspectors, and other construction specialists to monitor progress and address any issues that arise during the construction phase.
Construction managers may oversee a variety of construction projects, including residential, commercial, and industrial structures. They may specialize in specific construction methods, such as green building, or focus on particular construction technologies, like Building Information Modeling (BIM). Experienced managers may also have the opportunity to open their own construction firm and pursue other building-related business opportunities.

Concrete Stamping

Deck Sealing Near You

Can’t find what you are looking for?

How It Works

  • Answer a few questions about your home project.
  • Within seconds, get matched with top-rated local pros.
  • Compare quotes and choose the best pro for the job.

Concrete Stamping In Your Area

Choosing the Right Concrete Stamping Contractor: Tips and Tricks

Meta Description: Discover expert tips for selecting the perfect concrete stamping contractor. Learn how to ensure quality, durability, and stunning results for your project.

Are you thinking about a concrete stamping project to make your outdoor space look better? The right contractor is key to bringing your dream to life. But how do you pick the best one? We’ll cover the main things to think about when choosing a concrete stamping contractor. This will help you make a smart choice for a beautiful and lasting result.

Concrete Stamping

Key Takeaways

  • Pick contractors with lots of experience and a good history in concrete stamping.
  • Check if they have the right licenses and insurance to work safely and legally.
  • Look at their reputation by reading reviews, asking for referrals, and checking their work.
  • Learn how important a good base and the right mix of concrete are for a successful project.
  • Talk about what you want, your budget, and when you need it done to find a contractor who fits your needs.

The Importance of Selecting the Right Concrete Stamping Contractor

Finding the right concrete stamping contractor is key to a successful project. They need to have the right experience, skills, and eye for detail. This ensures the stamped concrete looks great, lasts long, and is installed right.

Stamped concrete is popular with homeowners because it’s affordable, can be customized, and lasts a long time.

Why the Right Contractor Matters

Concrete stamping needs special skills and knowledge for the best look. A good contractor knows how to mix concrete, cure it, and add reinforcement. They also keep up with new trends and methods to make sure your project is top-notch.

The Consequences of a Poor Choice

Picking the wrong contractor can lead to bad results, high repair costs, and harm to your property or home value. Stamped concrete that’s not done well can crack, stain, or fade early. This can ruin the look and lifespan of your outdoor areas.

Also, if the subgrade or concrete mix is wrong, you might face structural problems. This makes the project more expensive and a bigger headache.

To make sure your stamped concrete project goes well, do your homework on contractors. Look for ones with lots of experience, the right licenses, and a focus on making customers happy. Choosing wisely lets you enjoy the look and benefits of stamped concrete for many years. It also boosts your home’s curb appeal and value.

Stamped Concrete

Understanding Your Concrete Stamping Project Needs

Before starting your concrete stamping project, define what you want. This makes sure you pick the right contractor and get the look you want.

Defining Your Project Scope

First, figure out the size and details of your project. Is it for an old driveway or a new patio? Or maybe you want to cover a big or small area? Knowing what you need helps pick the right contractor and materials.

Setting Your Priorities: Budget vs. Quality

Then, think about what matters more: your budget or quality. Concrete stamping is often cheaper than brick patterns or natural stone. But, good quality work makes your concrete surface last longer and look better. Decide how much you can spend on concrete cost and labor. Then, find a balance between saving money and getting stamped concrete that makes your outdoor spaces look great.

By setting clear goals for your concrete stamping project, you can find the best concrete stamping contractor. Whether it’s a simple stamped concrete patio or a big stamped concrete project, you’ll know what to look for.

stamped concrete patterns

Researching Potential Concrete Stamping Contractors

Finding the right concrete stamper is key for your project. Use many resources to make a list of possible contractors. Then, check their skills and make a choice that fits your project and quality needs.

Begin by looking at online reviews of concrete stamping contractors in your area. Look for customer feedback, ratings, and examples of their work. This helps you understand their reputation, skills, and how happy customers are.

Also, ask friends, family, or local concrete supply companies for advice. They can tell you about the contractors’ quality, reliability, and skill in complex projects.

After making a list of concrete stamping contractors, check their qualifications closely. Make sure they have the right licenses, insurance, and a history of properly installed stamped concrete that matches your quality standards. This careful check helps you choose the right contractor for your project.

Using these steps, you can find a concrete stamping contractor to make your outdoor areas look great. They’ll use decorative concrete to improve curb appeal and increase your home value.

Evaluating Concrete Stamping Contractors’ Qualifications

Choosing the right concrete stamping contractor is key. Look at their experience, reputation, and if they have the right licenses and certifications.

Experience and Reputation

Find contractors with at least 5 years in the business. This shows they know how to do the job well and manage projects. Also, check what others say about them online by reading reviews and looking at references. A good reputation means they do quality work and make customers happy.

Licensing and Certifications

Make sure the contractor has the right licenses and certifications. Look for ones from groups like the American Concrete Institute (ACI). These show they know their stuff and follow the rules. Having these means they’re good at what they do and protect you legally.

By looking at these things, you can pick a contractor who is skilled, well-known, and follows the rules. This way, you get great results for your outdoor areas.

Key Questions to Ask Potential Concrete Stamping Contractors

Choosing the right concrete stamper is key. Make sure to ask important questions. This ensures they meet your project’s needs. Focus on their insurance and licensing, and ask for references and past work examples.

Inquiring About Insurance and Licensing

First, ask about their insurance. You need to make sure they have the right coverage. This protects you from accidents or damage during the project.

Also, check if they are licensed in your state. This means they follow the rules and standards of the industry.

Requesting References and Past Project Examples

Then, ask for references from past clients. It’s good to talk to these people to learn more about the contractor’s skills and reliability. Also, ask to see their past work on stamped concrete.

This way, you can see their quality and style. It helps you decide if they’re the right fit for your project.

By asking the right questions, you can find a skilled contractor. They will make your outdoor spaces look great and increase your home’s value.

Preparing the Subgrade for Concrete Stamping

Getting the subgrade ready is key for a good concrete stamping job. It makes sure the installation is strong and lasts a long time. The subgrade must be flat, packed down tight, and strong enough for the concrete and any extra stuff used during stamping.

The Importance of Proper Subgrade Preparation

If the subgrade isn’t ready, you might see soil washing away, cracks, and uneven surfaces. These problems can ruin the look and quality of the stamped concrete. Stamped concrete is great for driveways, patios, and outdoor areas. So, the subgrade needs to be packed well to work right.

Before pouring the concrete, you need to set up forms with wood, plastic, or metal. Adding steel bars or wire mesh for extra support is also a must. This helps keep the slab from cracking and staying strong.

You’ll need a good team to stamp the concrete well and finish on time. If the stamping is done wrong, fixing it can be expensive and take a lot of time.

Getting the subgrade right is crucial for the slab’s performance and strength. It stops drainage problems and soil erosion under the concrete. With a strong base, the stamped concrete will look great and work well for many years.

Choosing the Right Concrete Mix for Stamping

Choosing the right concrete mix is key for great stamped concrete results. Contractors pick their favorite mixes based on the weather and project size. They look for a “fatty” mix with lots of cement paste. This mix makes stamping easier and keeps details sharp.

Understanding Concrete Mix Designs

It’s important for contractors to know about concrete mix components. They need to adjust the mix for the project’s needs. Portland cement makes up 10% to 15% of the mix, and fly ash can replace 18% to 20% of it.

The right water-to-cement ratio is crucial for hydration, between 0.19 to 0.22. Workable ratios should be between 0.40 to 0.60. Water reducers can cut water use by 3% to 10%, and superplasticizers can reduce it by 12% to 25%.

Aggregate size matters for the mix’s characteristics. A 3⁄8-inch rock is good for stamped applications. Air entrainment is important too, usually 3% to 7% of the concrete. Synthetic fibers add 1.0 to 1.5 pounds per cubic yard to prevent shrinkage.

For homes, like driveways and sidewalks, mixes need to be 2,500 to 3,000 psi strong. But for big projects, like commercial buildings, mixes should be 4,000 psi or stronger. Aesthetics-focused projects, like stamped patios, need special mixes for looks and strength.

In extreme weather areas, the right mix is a must. Air-entrained concrete is best for freezing and thawing areas. Water-reducing admixtures help with workability without hurting the concrete’s strength.

Concrete Placement and Finishing for Stamping

Getting the concrete right is key for a great stamped concrete job. Workers must quickly move the concrete from the truck to the subgrade. This stops the concrete from setting too fast, making it hard to stamp.

After placing the concrete, finishers smooth it out. This makes the surface ready for stamping. A well-coordinated team is needed for top-notch results.

When the surface is dry, spread color hardener on it from below. This helps avoid losing material. Adding a second layer of hardener makes sure the surface is fully covered.

Use a brush to spread powdered release agents on the concrete. Liquid agents can be sprayed on before stamping. Make sure tinted agents are mixed well before use.

Check if the concrete is ready for stamping by pressing your fingers into it. A deep imprint means it’s good to go. Texturing the edges helps with nonflexible stamps.

Start stamping in the order the concrete was laid. This keeps things even and in line. Make sure the first row is lined up right to guide the rest.

Press the stamps into the concrete well. You might need to walk on them or do some light tamping. Use tools like a chisel for touch-ups if needed.

Apply a curing compound after cleaning off the release agent. This can be done a few days later, depending on the weather. Cut joints in the concrete to stop it from cracking.

Seal the concrete after it’s fully cured. Do this a few weeks later. Don’t apply too much sealer to avoid moisture issues.

Selecting the Right Stamping Tools and Patterns

Choosing the right tools and patterns is key for a successful concrete stamping project. It’s important to buy high-quality tools, like enough stamps for the area, for good results. Contractors should know many patterns, like brick, stone, and wood. They should suggest ones that fit the project’s design and look.

Investing in Quality Stamping Tools

Look for stamps with a tight fit, even thickness, and a weight you can handle. They should have straight edges and give a crisp texture. Realistic look and pattern variation are also important. Avoid stamps that are poorly made as they can lead to a bad finish.

Buying tools from local stores is better than online. It ensures quality, lets you get feedback, and you can get help with warranties.

Exploring Popular Stamping Patterns

There are many stamping patterns available, from simple to complex designs. Suppliers often sell sets with different patterns for a realistic look. It’s important to pick patterns that match the project’s design and boost curb appeal and home value.

Trying out different stamp patterns and materials, like wood, slab, and pavers, can help get the look you want. This ensures a durable and surface finish for outdoor spaces.

Choosing the right tools and patterns makes a big difference in how a stamped concrete looks and lasts. By investing in quality stamping tools and trying out various stamp patterns, contractors can complete complex projects well. This results in a properly installed finish that adds curb appeal and home value.

Coloring and Texturing Stamped Concrete

Creating beautiful and long-lasting stamped concrete is all about color and texture. Skilled contractors know how to pick colors that match the building’s look. They use gray, earthy colors, and bold charcoal to make the concrete look great.

The Role of Color in Stamped Concrete

Color is key in making stamped concrete look amazing. The right colors can make a space feel calm and in tune with its surroundings. You can choose from many colors to make your outdoor area look like stone or something modern.

Brickform offers many colors like grays, earth tones, and terracotta. Using special agents, contractors can make the concrete look subtle or bold. Integral color gives a consistent look that lasts a long time.

Texturing stamped concrete is just as crucial as coloring it. Techniques like applying special agents make the surface interesting and safe to walk on. This makes the concrete look like real stone, tile, or wood.

By picking the right colors and textures, contractors can turn plain outdoor areas into beautiful spots. These spaces not only look great but also make your home worth more.

Maintaining and Protecting Stamped Concrete

Keeping stamped concrete in top shape is key for its long life and good looks. These surfaces can last for many years if cared for right. They need regular cleaning based on how much they’re used and the weather.

It’s a good idea to reseal stamped concrete every 2 to 3 years. This keeps dirt, chemicals, and other substances from getting into the concrete. Sealers also help stop color from fading and make the concrete last longer.

  • Sealing stamped concrete with good sealers is important to protect it from the weather and keep it looking nice.
  • Don’t use deicing salts on decorative concrete outside, especially the first winter, to avoid damage from freezing and thawing.
  • Cleaning with a mild detergent and a pressure washer keeps stamped concrete looking great. But, don’t use harsh chemicals that can harm it.
  • Fixing cracks, stains, or weather damage quickly helps stop more harm and keeps the curb appeal and value of your home.

By taking good care of stamped concrete, both homeowners and contractors can make it last longer. This keeps the outdoor space looking beautiful and safe for many years.

Finding the Right Concrete Stamping Contractor Made Easy with FindPros

Are you ready to transform your outdoor living spaces with stunning stamped concrete, but unsure where to start? Let the experts at FindPros make the process seamless. Simply answer a few quick questions about your home project, and we’ll match you with top-rated local concrete stamping contractors. Compare competitive quotes, read verified reviews, and choose the pro that best fits your needs and budget. Take the guesswork out of your stamped concrete project – let FindPros connect you with the right contractor for the job.

Conclusion

Choosing the right concrete stamping contractor is key for your project’s success. This could be for a home driveway, patio, or a business outdoor area. This article gives you tips to pick the best contractor for your stamped concrete needs.

Start by knowing what you want for your project and look for contractors who can do it. Check their skills and ask important questions. This guide helps you find a skilled concrete stamping pro who can make your dream come true.

Look for a contractor with experience, the right licenses, and good past work. They should be able to make your outdoor spaces look great. This will boost your curb appeal and home value.

For any concrete stamping project, big or small, the right contractor makes a big difference. They make sure your work lasts long and looks good. With this article’s advice, you can pick the best contractor and enjoy your decorative concrete for years.

Frequently Asked Questions (Concrete Stamping)

Concrete stamps allow you to easily stamp patterns into fresh concrete, allowing it to mimic the look of brick, stone, or other natural materials. Stamped concrete patios can help you achieve an attractive, customized look that adds curb appeal to your home.
The concrete slab needs to have the proper workability and strength to hold up to the stamping process. Things like water-to-cement ratio, aggregate size, and admixtures like calcium chloride need to be carefully balanced to create a durable, stamped concrete surface.
A stamped overlay can be applied to an existing concrete slab or other concrete structures to create the look of brick, stone, or other natural materials. This is a cost-effective way to upgrade the appearance without replacing the entire concrete surface.
A variety of stamping mats and texture mats are available to imprint everything from straight lines and joint lines to more complex patterns that mimic the look of natural materials like wood or stone. Using the right combination of these tools is key to achieving the desired DIY project look.
Regular cleaning with a push broom and mild detergent, resealing every 2-3 years, and avoiding harsh chemicals or deicing salts are important for maintaining the look and safety of stamped concrete surfaces. Adding a non-skid additive can also improve slip resistance in high foot traffic areas like pool decks.