Wall Painters

Wall Painters Near You

Can’t find what you are looking for?

How It Works

  • Answer a few questions about your home project.
  • Within seconds, get matched with top-rated local pros.
  • Compare quotes and choose the best pro for the job.

Wall Painters In Your Area

Hiring Wall Painters: A Guide to Finding the Best Professionals

Meta Description: Discover how to hire top-notch Wall Painters for your interior project. Learn about costs, qualifications, and tips for finding the best professionals in your area.

Wall Painters

Ready to refresh your home with new paint? This guide will help you find top-notch wall painters. We’ll cover key steps to locate skilled pros for your painting project.

First, consider what you want from your ideal painting contractor. This will guide your search and help you make the best choice.

Key Takeaways

  • Get multiple written estimates from local painters to compare costs and services.
  • Check the contractor’s license, insurance, and trade memberships for professionalism.
  • Examine past work, references, and online reviews to assess service quality.
  • Read the contract carefully, noting timeline, payment terms, and warranty details.
  • Pick a painter who meets your needs, not just the cheapest option.

Understanding the Scope of Your Painting Project

Assessing your painting project’s scope is vital. This helps you grasp the time and resources needed. You’ll be better prepared to achieve your desired results.

Interior vs. Exterior Painting

Decide if you need interior, exterior, or both types of painting. Interior painting focuses on wall surfaces. Exterior painting covers siding, trim, and other outdoor elements.

Knowing which areas need attention is key to planning your project. This will guide your preparation and execution.

Identifying Areas of Concern

Inspect the surfaces you plan to paint carefully. Look for wallpaper, texture, holes, or damage that needs fixing. Proper wall preparation ensures a smooth, long-lasting finish.

Color Selection Considerations

Picking the right paint colors is crucial. Think about the overall look you want to achieve. Some colors, like deep reds or blues, may need extra coats.

Finalize your color choice early. This prevents delays during the project.

Understanding your project’s scope helps you plan better. Assess your needs and identify problem areas. Choose your colors wisely. These steps set the stage for a successful painting experience.

Qualities to Look for in a Reputable Wall Painting Contractor

Hiring a trustworthy wall painting contractor is essential for a successful project. Look for licensed painters with proper insurance. This protects you from liability if accidents occur during the project.

Positive reviews and referrals from past clients indicate quality work and excellent service. These factors help ensure you’re working with a reliable professional.

Licensing and Insurance Requirements

Reputable contractors should be licensed according to local regulations. They need liability insurance and workers’ compensation coverage to protect you and your property.

Always ask for proof of licensing and insurance before hiring. This step safeguards your interests throughout the project.

Positive Reviews and Referrals

  • Check online reviews to gauge the contractor’s work quality and customer satisfaction.
  • Ask the contractor for references from previous clients and follow up to get a firsthand account of their experience.
  • Prioritize contractors with a history of positive reviews and referrals from satisfied customers.

Choosing a licensed, insured, and well-reviewed contractor ensures quality work. It also protects your home or business during the painting project.

Estimating Best Practices for Wall Painting Projects

Proper estimation is vital for wall painting projects. Experienced painters conduct in-person consultations to assess the project area thoroughly. They identify potential issues and provide detailed proposals outlining the work scope and costs.

In-Person Consultations

Reputable painting contractors schedule on-site visits to inspect the area. They measure the space and evaluate wall conditions. This allows them to provide accurate painter estimates that account for all necessary materials and labor.

Detailed Proposal and Scope of Work

After the painter site visit, the contractor provides a comprehensive painting proposal. It includes a breakdown of the project, such as paint coats and materials used. The proposal also outlines the expected timeline for completion.

Clear communication of the work scope helps homeowners make informed decisions. It allows them to compare painter estimates from multiple contractors effectively.

Hiring a professional painter who follows these practices ensures a smooth project. It covers everything from initial painter estimates to final touch-ups.

Verifying Credentials and Certifications

licensed painters

Checking a wall painter’s credentials is crucial. Professional painters should have licenses, insurance, and specialized training. This ensures quality work and protects you from potential problems.

Many states require painters to be licensed. Licensing proves painters meet education, experience, and examination requirements. Painters may also need bonding, liability insurance, and workers’ compensation coverage.

  • Licensing and insurance requirements vary by state and local jurisdiction, so it’s important to research the specific regulations in your area.
  • Hiring an unlicensed or uninsured painter could result in financial losses, including covering medical expenses for on-site injuries, potential lawsuits, and the cancellation of your own insurance policies.
  • Unlicensed painters may not be properly trained in industry best practices, leading to subpar results and potential scams, such as disappearing after receiving a deposit or providing incomplete and shoddy work.

Certifications show a painter’s expertise and industry commitment. The EPA Lead-Safe certification is needed for pre-1978 homes. It ensures painters know how to handle lead-based paint safely.

Ask potential painters for proof of licensing, insurance, and certifications. This information helps you make a smart choice for your project.

Additional Questions to Ask Potential Wall Painters

Asking the right questions is key when hiring a painter for your walls. Go beyond initial estimates and project scope. Investigate several factors to make an informed decision.

Crew Consistency and Supervision

Ask about the painter crew’s consistency and supervision level. A good contractor should have a skilled team working together regularly. Inquire about work hours, communication, and crew management for quality and efficiency.

References and Portfolio Review

Get a list of references from the painter and contact them. This helps you understand their work ethic and customer satisfaction. Also, review their portfolio to see the quality of previous projects.

Materials and Finishes Used

Talk about the paint brands, types, and finishes they plan to use. High-quality paints affect the longevity and look of the finished product. Make sure they use reputable materials that match your needs.

Preparation Process and Furniture Handling

Ask about their preparation process and how they’ll protect your furniture and floors. Good prep is crucial for a professional, long-lasting finish. Check their attention to detail and home protection methods.

Warranty Provisions

Discuss the warranty offered by the painter. A good contractor should provide coverage for materials and workmanship. Understand the warranty terms, duration, and any limitations or exclusions.

These questions will help you understand the painter’s skills and commitment to quality. You’ll be able to make a smart choice and ensure a successful painting project.

Making the Final Decision: Comparing Quotes and Contractors

Hiring a painting contractor involves more than just looking at prices. Focus on service quality, professionalism, and expertise when evaluating potential contractors. These factors are crucial for a successful painting project.

Get multiple proposals from qualified wall painting contractors near you. Compare how detailed and accurate each quote is. Look for proposals that outline specific tasks, materials, and timelines.

Pay attention to the contractor’s professionalism and communication during the quoting process. Responsive and knowledgeable contractors are more likely to deliver a positive experience. They should take time to understand your needs.

  1. Assess the contractor’s level of professionalism and communication throughout the quoting process. Responsive and knowledgeable contractors who take the time to understand your needs are more likely to deliver a positive overall experience.
  2. Review the contractor’s portfolio of previous work and client references to gauge the quality of their craftsmanship and customer satisfaction. This can help you choose painting contractor that aligns with your expectations.
  3. Consider your overall comfort level with the contractor’s team and their ability to handle the project efficiently. A good rapport and a sense of trust can go a long way in ensuring a successful hiring painting contractor experience.

Don’t base your decision solely on the lowest compare painting quotes. Investing in a reputable contractor can be worthwhile. It can lead to a smoother painting project and better results.

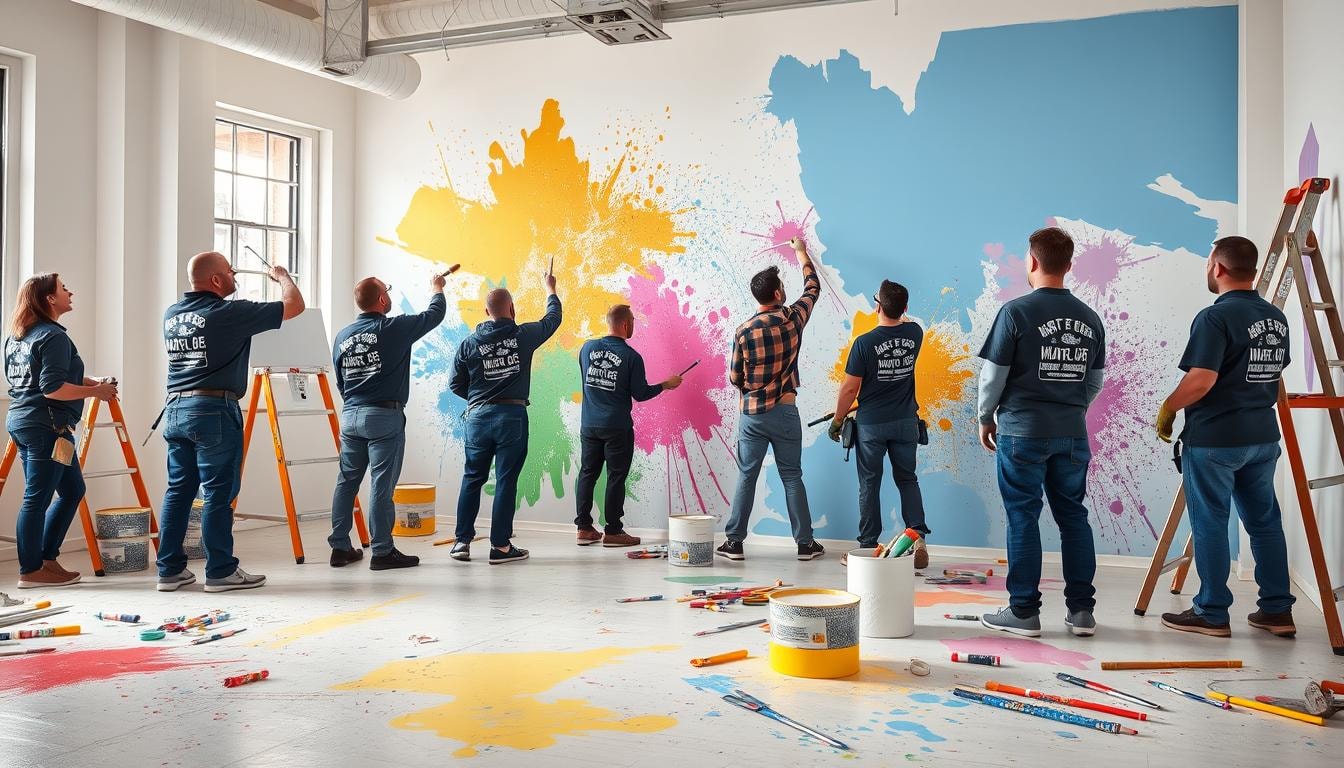
Services Offered by Wall Painters

Wall painters offer a wide range of services for both interior and exterior needs. They can transform your home with exterior house painting, interior wall painting and staining. These experts handle various projects with skill and precision.

Exterior House Painting

Refreshing your home’s exterior can boost its curb appeal significantly. Exterior house painters are skilled in dealing with outdoor surface challenges. They ensure a flawless finish that can withstand harsh weather conditions.

These pros expertly handle siding materials and surface prep. Their work results in an attractive, long-lasting paint job for your home.

Interior Wall Painting and Staining

A fresh coat of paint or stain can instantly revitalize any indoor space. Interior wall painters know how to work with various wall materials. They can select the right paint or stain finishes for your home.

These experts pay close attention to detail in every project. Whether it’s one room or the whole house, they ensure flawless results.

Specialty Services

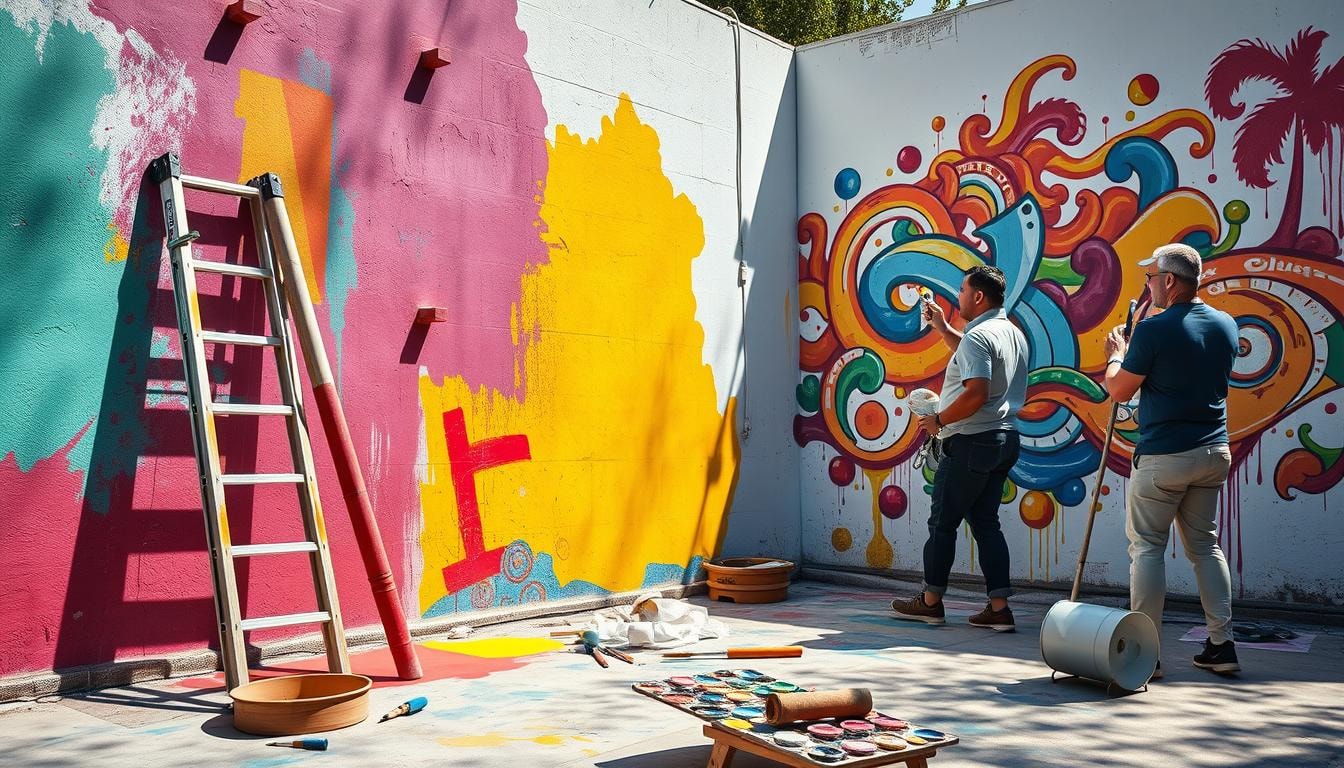
Many wall painters offer unique services beyond standard painting. These include murals, faux finishes, and cabinet painting. Such options allow you to add personal touches to your living spaces.

When choosing a wall painting contractor, check their skills and experience. Make sure they can handle your specific project needs. This ensures your home gets the best possible transformation.

Hiring a Wall Painter: Step-by-Step Guide

Hiring a Wall Painter

Finding the right wall painter is key to a successful painting project. Follow these steps to hire a skilled professional.

Research and Understand Expectations

First, figure out your painting needs and wants. Think about the project size and any special areas or colors you prefer.

This will help you explain your wishes to potential painters clearly.

Obtain Multiple Estimates and Site Inspections

Contact several painting contractors for in-person visits. They’ll check out your project and give you detailed estimates.

Compare their quotes and services to get the best deal for your money.

Check References and Review Past Work

Look into the painters you’re thinking about hiring. Ask for references from past clients they’ve worked with.

Check out their previous work to make sure they have the skills you need.

Sign a Contract and Make Payment Arrangements

Choose the best painter for your job. Read and sign a contract that covers all project details.

Set up a clear payment plan to keep things smooth and open.

Using this guide, you can hire a painter who’ll do great work for you. They’ll meet your needs and make your project a success.

DIY vs. Hiring a Professional Wall Painter

Wall painting presents homeowners with two options: DIY or hiring a professional. Both DIY wall painting and professional wall painting have unique benefits. This is true for interior painting DIY and exterior painting professional projects.

Interior Painting: Doable DIY or Better Left to Pros?

Interior DIY wall painting can be a fun and cost-effective project. It offers a sense of achievement and saves money. However, it requires time for tasks like furniture moving and surface preparation.

DIY interior painting can take days or weeks, depending on your skills. Professional wall painters can finish in 3-5 days due to their expertise. They often provide warranties for 1-3 years, ensuring peace of mind.

Exterior Painting: When to Hire a Professional

Exterior painting professional services offer clear advantages. It requires special equipment and knowledge of surface prep and weather conditions. Pros have the skills to ensure a lasting, high-quality finish.

Professional painters use premium paints and follow strict safety rules. This creates a cleaner, safer work environment than interior painting DIY projects. Their skills produce a flawless finish that surpasses DIY efforts.

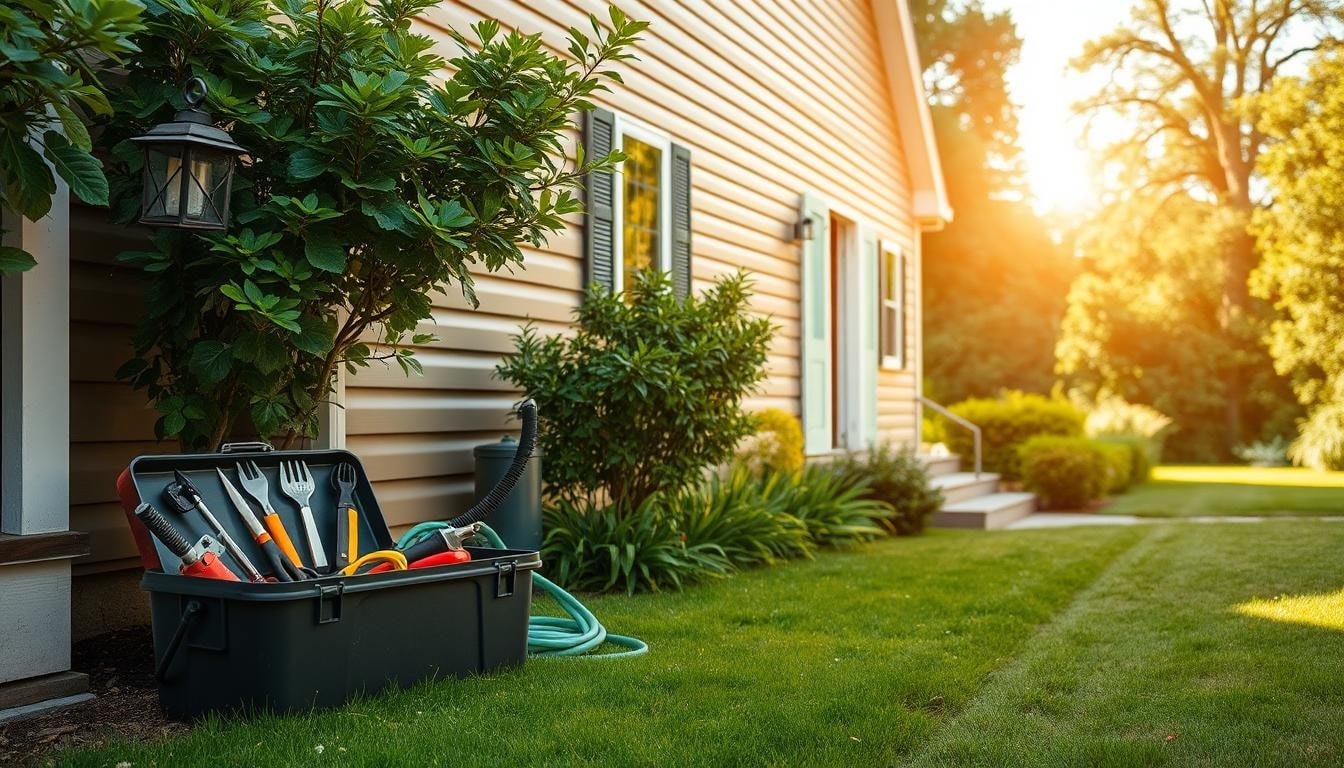
Preparing for Your Wall Painting Project

Proper preparation is crucial for a successful wall painting project. Ensure your work area is clear and surfaces are protected. This guide will help you prepare for an efficient painting process.

Clearing the Work Area

Start by removing all items from walls and floors. This creates an unobstructed space for painting. 75% of primer buyers use a 2″ or 2½” angled bristle brush to paint a narrow strip of primer along trim and inside corners of the room.

Protecting Surfaces and Flooring

Canvas drop cloths are preferred by 60% of individuals for protecting flooring and furniture during painting due to their durability and ability to absorb paint spills. Cover the floor with a drop cloth and secure it with painter’s tape.

70% of individuals prefer longer pieces of painter’s tape over shorter pieces to minimize gaps and ensure clean paint lines. Use additional drop cloths or plastic sheeting to protect remaining furniture.

Proper preparation ensures a smooth painting project. With a clean space and protected surfaces, you can paint with confidence.

Paint Types and Finishes for Interior Walls

The paint finish you pick can greatly affect your room’s look and use. Each finish, from matte to semi-gloss, has unique traits for different rooms.

Matte, Eggshell, Satin, and Semi-Gloss Finishes

Flat or matte paints absorb light, creating a soft, velvety look. They often need fewer coats but may be less tough.

Semi-gloss and gloss paints reflect light, giving a bright, shiny finish. These are highly durable and easy to clean.

Eggshell paint has a low sheen and smooth finish, popular with many homeowners. Satin finish paint offers an elegant look with good durability.

Semi-gloss paint is more reflective than satin. It works well in high-moisture areas like bathrooms.

Choosing the Right Sheen for Each Room

  • High-gloss paint suits smaller surfaces like doors and cabinets. It can make flaws more visible on larger areas.
  • Satin and eggshell finishes are versatile for interior walls. They balance appearance and practicality.
  • Matte or flat paints are ideal for low-traffic areas like ceilings. They hide flaws better but are less durable.

Think about each room’s needs when picking interior wall paint types and interior paint finishes. Consider traffic, lighting, and desired look.

Work with your painting contractor to choose the best paint sheen selection. This will ensure a beautiful and functional result.

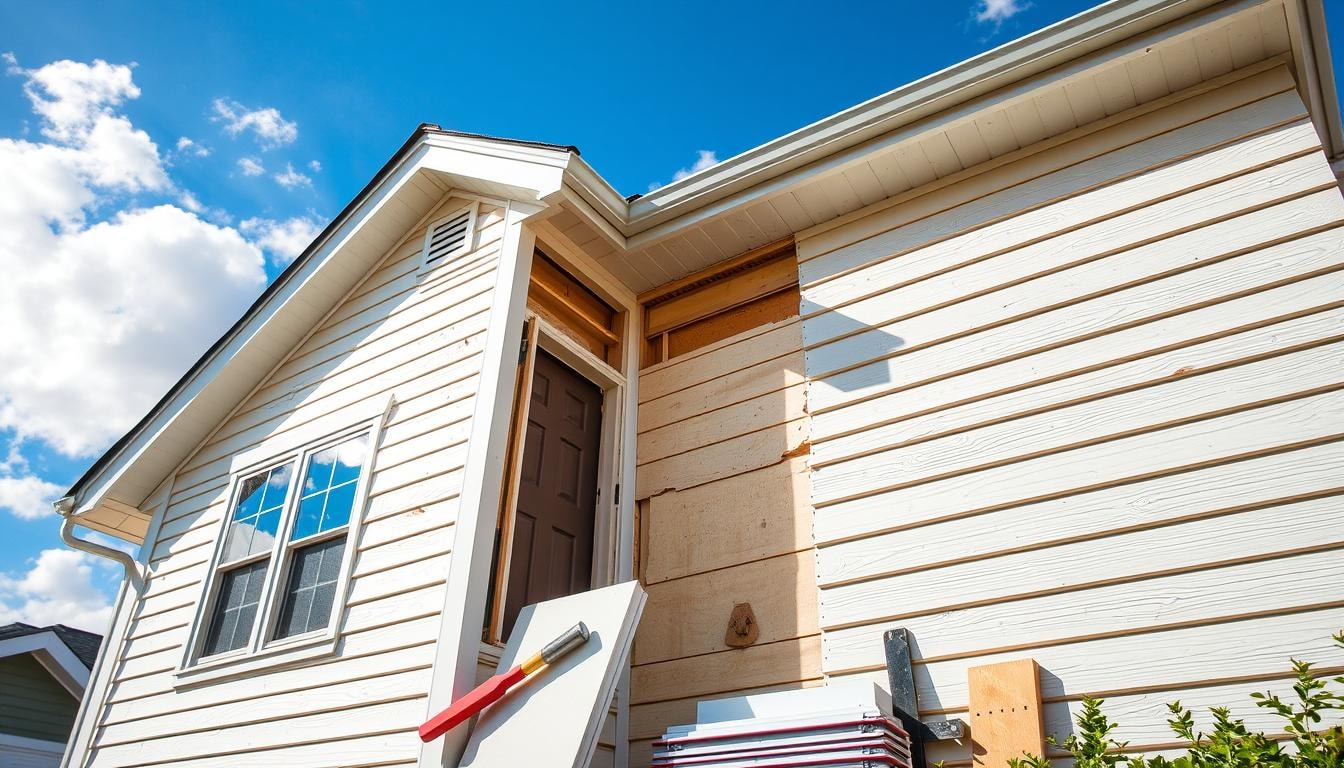
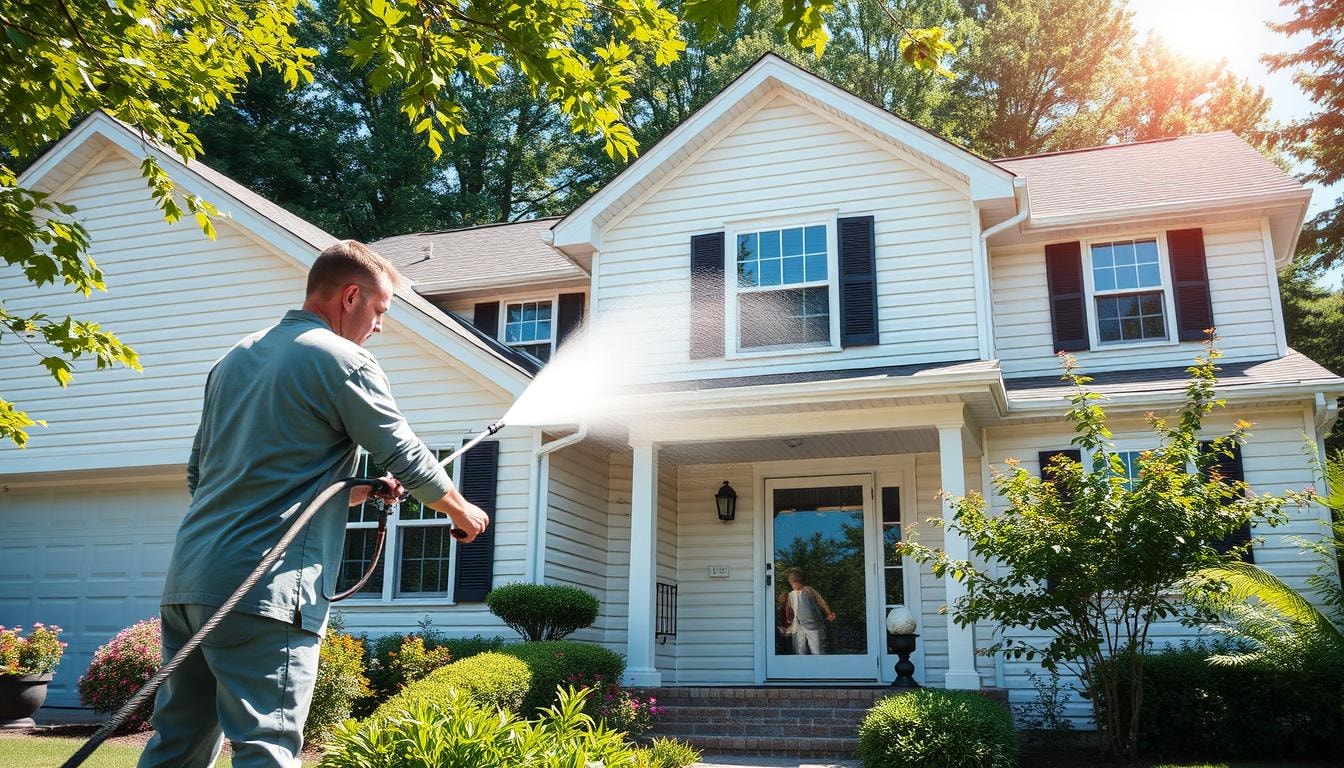
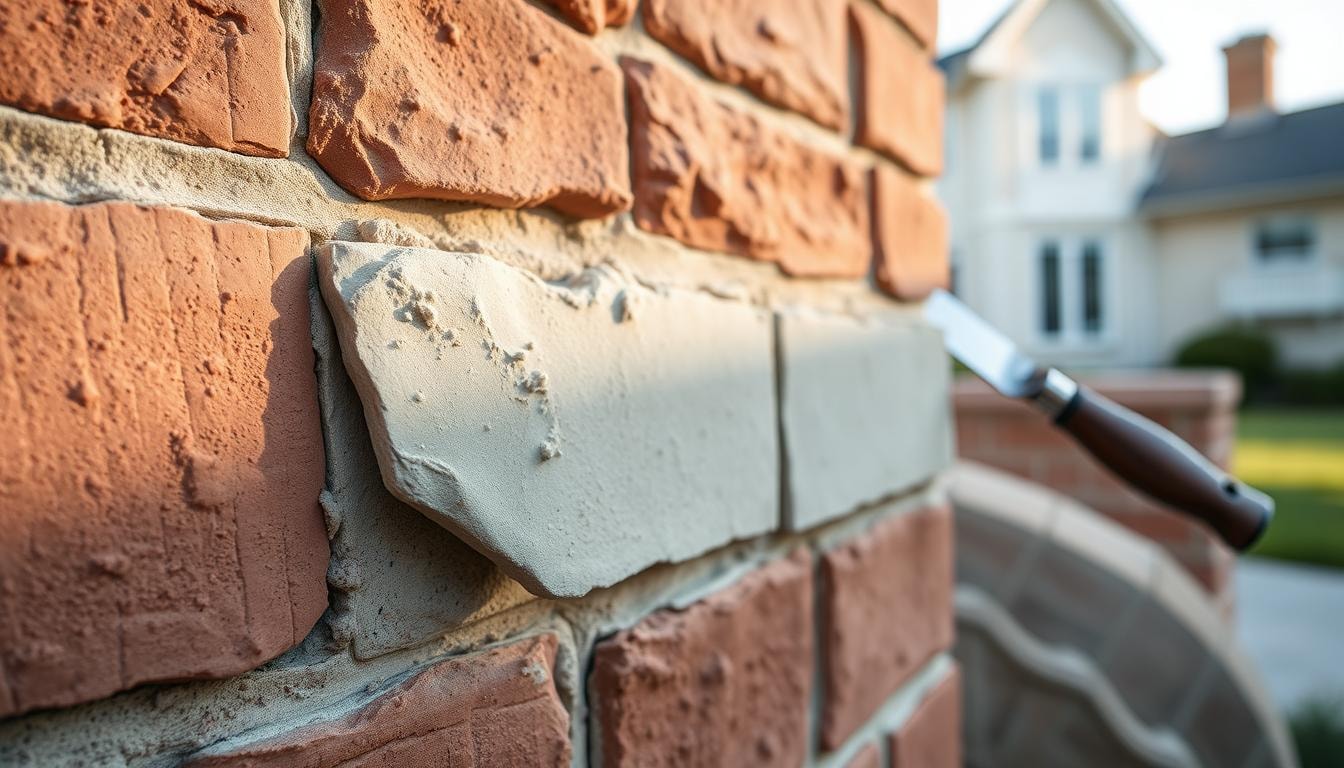
Exterior Wall Painting Considerations

Exterior wall painting needs careful thought about siding and surface prep. Local weather affects the job’s success and timing. Your painter should know best practices for your home’s exterior and local climate.

Siding Materials and Surface Preparation

Your home’s siding type decides the needed surface prep before painting. Proper prep includes pressure washing, scraping, and sanding for a smooth, lasting finish.

Priming after prep helps paint stick better. It also prevents issues like tannin bleed-through.

Weather Conditions and Painting Timelines

Early summer or fall are best for exterior painting. These seasons offer moderate temps and less rain. Extreme summer heat can dry paint too fast, causing uneven finish.

Moderate temperature and humidity are ideal for paint drying. This allows proper curing and adhesion to the surface.

  • Most exterior paints last approximately 15 years, with variations depending on climate and paint quality.
  • Acrylic latex paint is recommended for exterior painting due to its durability, flexibility, and ease of use.
  • High-quality paints with titanium dioxide pigments and at least 45% solids by weight provide longer-lasting finishes.

Know your siding, prep needs, and best weather for painting. This ensures a successful, long-lasting paint job for your home’s exterior.

Maintaining and Protecting Your Newly Painted Walls

Keeping your freshly painted walls pristine is crucial. It preserves your investment in your home’s interior or exterior. Taking the right steps can help maintain the longevity and luster of your new paint job.

Touch-Ups and Minor Repairs

Over time, your painted walls may develop small nicks, scuffs, or scratches. Address these minor imperfections promptly to maintain a cohesive look. Use high-quality paint that matches the original color and sheen.

For best results, lightly sand the affected spots before reapplying the paint. This will help blend the touch-up areas seamlessly with the surrounding wall.

Cleaning and Caring for Painted Surfaces

  • Wait at least two weeks after painting before cleaning newly painted walls to ensure maximum durability.
  • Duller paint finishes are more susceptible to burnishing or marring when cleaned compared to higher-sheen paints.
  • For general cleaning, use a mixture of water and a small amount of mild, non-sudsing detergent.
  • Tackle stubborn stains with a non-abrasive cleaner like Simple Green® All-Purpose Cleaner. Use mild grease-cutting soap for grease stains.
  • Permanent markers may require a high-quality, stain-blocking primer like BLOCK-IT® Premium before touch-up painting.

Following these best practices for maintaining painted walls will keep your surfaces looking fresh. Regular wall painting touch-ups and proper cleaning painted walls techniques ensure long-lasting beauty.

Find the Best Local Pros with FindPros

Struggling to find the right home painters for your interior painting projects? Let FindPros connect you with top-rated local professionals who can transform your space. Answer a few simple questions about your painting needs, from accent walls to high ceilings, and we’ll match you with skilled painters who will provide competitive quotes. Easily compare labor costs, job details, and painting services to find the perfect fit for your house interiors. Skip the hassle of visiting paint stores or coordinating with unreliable home painters. With FindPros, the best local pros will compete for your painting job, ensuring you get the ideal service at the best price.

Conclusion

Hiring skilled wall painting professionals is vital for a top-notch, lasting finish. Understanding the job scope, researching painters, and prepping the area ensure a great painting experience.

Finding experienced wall painting contractors is key for exceptional results. Follow this guide to confidently hire painters and transform your living spaces.

A well-done wall painting project boosts your home’s appeal and value. Take time to find the right professional painters for your job.

Enjoy seeing your vision come to life with a fresh, expert paint job. Your home will look amazing and last longer.

Frequently Asked Questions (Wall Painters)

When painting interior walls, consider the paint type, finish, and color that best suits the room’s purpose and your desired aesthetic. Also, prepare the surface properly by covering floors and furniture, and repair any cracks or holes before painting.
To find reliable interior house painters, research local professionals, check their licenses and insurance, review their portfolios and references, and compare quotes. Hire a painter who can provide a detailed plan and timeline for your interior painting project.
The cost of interior painting services can vary depending on factors like the size of the space, the number of coats needed, any necessary repairs or prep work, and the painter’s experience. As a general guideline, interior painters may charge $2-$5 per square foot for a single room or $3-$7 per square foot for the entire house interior.
To prepare for an interior painting project, start by clearing the space, covering floors and furniture, and repairing any cracks, holes, or other surface imperfections. Coordinate with the painter to ensure the necessary prep work is completed before they arrive to begin the painting.
To maintain the quality of your newly painted interior walls, conduct touch-ups as needed to address any minor nicks or scratches. Clean the walls gently with a mild detergent solution, avoiding abrasive cleaners. Additionally, be mindful of the paint’s drying time and avoid placing heavy objects on the walls until the paint is completely dry.

Vinyl Siding Repair

Wall Painters Near You

Can’t find what you are looking for?

How It Works

  • Answer a few questions about your home project.
  • Within seconds, get matched with top-rated local pros.
  • Compare quotes and choose the best pro for the job.

Vinyl Siding Repair In Your Area

Vinyl Siding Repair: Tips for Finding the Right Contractor

Meta Description: Discover expert tips for finding the right vinyl siding repair contractor. Learn key factors to consider and questions to ask for a successful home improvement project.

Vinyl Siding Repair

Is your home’s vinyl siding damaged? Ignoring repairs can cause bigger, pricier problems later. This guide helps you find a trustworthy contractor to fix your home’s exterior.

We’ll explore key tips for choosing the best vinyl siding repair specialist. These insights will help keep your home looking great for years.

Key Takeaways

  • Seek out contractors with extensive knowledge of siding materials and proven expertise in worry-free siding service.
  • Prioritize quality workmanship and attention to detail to achieve a seamless, long-lasting siding repair.
  • Hiring a local, experienced siding contractor can provide personalized service, quick response times, and competitive pricing.
  • Thoroughly evaluate a contractor’s experience, reputation, and references to ensure a successful siding repair project.
  • Understand the common causes of vinyl siding damage and work with your contractor to determine the best repair or replacement options.

What to Look for in a Professional Vinyl Siding Repair Contractor

Seek a vinyl siding repair contractor with extensive knowledge about siding materials. They should explain different siding types’ pros and cons. This expertise ensures you get the most worry-free siding service possible.

Reliable contractors finish projects on time and to the homeowner’s satisfaction. They use the right tools and equipment for high-quality workmanship. This approach provides lasting protection and enhances curb appeal.

Watch for signs of attention to detail and proper installation techniques. Look for contractors who leave the jobsite clean and free of debris. A fair and transparent cost structure is crucial.

Warranty coverage is another important factor to consider. It protects your investment in the long run. Choose a contractor who offers comprehensive warranty options.

Selecting a contractor with these qualities ensures top-notch vinyl siding repair. It will improve your home’s value and provide long-lasting protection.

Benefits of Hiring a Local Vinyl Siding Contractor

Hiring a local contractor for vinyl siding repair offers many advantages. They understand the area’s unique architecture and construction practices. This allows them to provide personalized service tailored to your needs.

Local contractors can respond quickly to any concerns or issues. Their physical presence in the community enables fast problem-solving. This saves homeowners time and reduces stress during projects.

Local contractors often offer competitive pricing due to market familiarity. They can leverage bulk discounts on materials, passing savings to you. You can easily check the quality of the contractor’s previous work by visiting nearby homes.

Local Knowledge

Local contractors know regional architecture and building codes well. This knowledge allows them to provide efficient vinyl siding services. They can meet the unique needs of your community.

Personalized Siding Service

Local contractors offer more personalized and attentive service. They care about maintaining a strong reputation in the community. This drives them to deliver high-quality workmanship and exceptional customer service.

Quick Response

Local contractors can address issues quickly during vinyl siding projects. They minimize disruption and ensure a smooth experience. This leads to a stress-free process for homeowners.

Evaluating a Siding Contractor’s Experience and Reputation

Contractor Reputation

Assessing a contractor’s experience and reputation is crucial when considering vinyl siding repair or replacement. This helps identify professionals with a proven track record of quality work. You’ll also find those who excel in customer satisfaction.

Check Online Reviews and Ratings

Research contractors online to read reviews and check ratings on platforms like BBB, Yelp, and HomeAdvisor. These reviews offer insights into workmanship, customer service, and reliability. Pay attention to both positive and negative feedback for a balanced understanding.

Ask for References from Recent Projects

Request references from the contractor’s most recent projects. Follow up with these customers to get first-hand accounts of their experience. This helps identify contractors with satisfied clients and quality work.

By evaluating a contractor’s experience and reputation, you can make an informed decision. This ensures you hire a reliable professional for your vinyl siding project.

A contractor’s online reviews, ratings, and references from recent projects offer valuable insights. These reveal their contractor experience and work quality. Consider all these factors before making your choice.

Vinyl Siding Repair: Tips for Assessing Damage

Careful damage assessment is key before starting vinyl siding repairs. Vinyl siding can face issues like cracks, holes, and loose pieces. These problems often result from strong winds, temperature changes, and water damage.

Common Causes of Vinyl Siding Damage

  • Strong winds can dislodge siding panels or create cracks and holes.
  • Temperature fluctuations can cause the siding to expand and contract, leading to damage.
  • Water infiltration, such as from leaks or poor drainage, can weaken and deteriorate the siding.
  • General wear and tear over the years can take a toll on the siding’s integrity.

Identifying Repairable vs. Replacement Areas

Siding pros use special tools to check damage and decide on repairs or replacements. Small holes or cracks might be fixable. Larger holes or badly damaged areas may need full panel replacement.

Proper damage evaluation ensures the siding is restored to its original state. This step is crucial for maintaining the siding’s function and appearance.

Understanding vinyl siding damage helps homeowners make smart repair choices. Quick fixes for minor issues can prevent bigger problems later. Often, repairing vinyl siding costs less than replacing it entirely.

Understanding the Costs of Vinyl Siding Repair

Vinyl siding repair costs can vary based on damage extent and required materials. Homeowners should factor in both material and labor costs. These elements play a crucial role in determining the overall expense.

Material Costs

Material costs depend on the number of replacement panels and additional supplies needed. Small repairs can cost between $100 and $400 per panel. Fiber cement or wood siding repairs may be pricier, ranging from $300 to $800 per panel.

Labor Costs

Labor costs vary based on repair complexity and contractor rates. Vinyl siding repairs typically cost $40 to $60 per hour. Cedar or fiber cement siding repairs may cost $50 to $80 per hour or more.

It’s wise to get multiple quotes for your vinyl siding repair project. This helps you compare costs and make informed decisions. With this knowledge, you can budget effectively for your siding repair needs.

Preparing for Your Vinyl Siding Repair Project

Vinyl Siding Repair Timeline

Proper preparation is vital for a successful vinyl siding repair project. Work closely with your contractor to set a realistic timeline. Consider factors like weather, material availability, and repair complexity.

Setting a Realistic Timeline

Vinyl siding repair projects can vary in scope and duration. Discuss potential challenges with your contractor to establish an achievable timeline. This helps minimize disruptions and ensures efficient completion of repairs.

Ensuring Proper Permits and Insurance

Your contractor may need to obtain permits from local authorities. This ensures adherence to building codes and safety regulations. Verify that your contractor has appropriate insurance coverage for the project.

Being proactive about timelines, permits, and insurance creates a smooth siding repair project. This approach meets your expectations and minimizes disruptions to your home.

Maintaining Your Vinyl Siding After Repairs

Proper upkeep of repaired vinyl siding is vital for its durability. Regular cleaning and care protect your investment and prevent future issues.

Proper Cleaning and Care

Clean your vinyl siding every six months to a year. Use mild detergents and soft brushes to remove dirt and grime.

Avoid harsh chemicals like undiluted bleach or liquid grease removers. These can damage the siding. For mold or mildew, use a vinegar and water solution.

Preventing Future Damage

Keep heat sources like grills at least 10 feet away from the siding. Trim overhanging branches to protect against scratches or impact damage.

Allow room for the siding to expand and contract with temperature changes. This prevents buckling or warping of the material.

Following these tips will extend your vinyl siding’s lifespan. You’ll enjoy an attractive exterior for many years to come.

Choosing the Right Vinyl Siding for Replacements

Replacing damaged vinyl siding requires careful consideration. Homeowners must focus on matching existing siding and evaluating long-term durability. These factors ensure a seamless and lasting finish.

Matching Existing Siding

Maintaining visual harmony is crucial for a home’s exterior. Choose vinyl siding that matches the color, texture, and profile of existing panels. This creates a cohesive look, blending new siding seamlessly with the rest.

Considering Long-Term Durability

  • Opt for premium-quality vinyl siding with a thickness of at least 0.042 inches to ensure long-lasting performance.
  • Look for siding with comprehensive warranties that cover color retention, fading, and weather-related issues for 50 years or a lifetime.
  • Insulated vinyl siding offers enhanced energy efficiency, helping to reduce utility costs and improve the home’s overall comfort.

Consult an experienced vinyl siding contractor to find the best options. They can help identify choices that meet aesthetic and practical needs.

Choosing the right replacement siding maintains your home’s visual appeal. It also provides a durable and low-maintenance solution for years to come.

Simplify Your Siding Repair with FindPros

Having trouble finding the right contractor for your siding repair? Let FindPros help. Whether you need to fix all the siding, address areas with extensive damage and large holes, or simply patch a small damaged piece, our network of top-rated local pros can provide the expertise you need. From securing the bottom lip to replacing rotten corners, our pros have the skills to get the job done right.

No need to worry about pull tabs, drywall, or ensuring a seamless look – our vetted professionals will handle it all, from start to finish. Simply answer a few questions about your home project, and we’ll match you with the best-fitting pros who can provide competitive quotes. Get the perfect pro for your siding repair, without the hassle.

Conclusion

Vinyl siding repair can be tricky. But with these tips, you can find the right contractor to fix your home’s exterior. Look for experienced professionals with a good reputation. Ask for a thorough assessment of the siding damage.

Understand the costs involved and prepare for the project. Proper maintenance after repair is key. For replacing sections, choose materials that match and offer durability.

Quick action and hiring a skilled local pro can protect your investment. Consider cost-effectiveness, aesthetic preservation, and energy efficiency when deciding to repair or replace.

With the right approach, your vinyl siding can remain attractive and durable. This ensures your home looks great for years to come.

Frequently Asked Questions (Vinyl Siding Repair)

If you have damaged siding, the first step is to assess the extent of the damage. Look for cracks, holes, or loose pieces. Small areas of damage can often be repaired, while larger issues may require replacing the entire damaged panel.
Regular siding maintenance is key to protecting your home. Clean the siding every 6-12 months using mild detergents and soft brushes. Keep nearby plants and trees trimmed to avoid scratches. Inspect the siding periodically for any issues and address them promptly.
For minor siding repairs, you’ll need a putty knife, zip tool, utility knife, and potentially a caulk gun. For larger repairs or replacing damaged panels, you may need a saw, hammer, nails, screws, and a pry bar to remove the old piece.
Start by cleaning the damaged area with a utility knife to remove any loose or cracked material. Apply a siding filler or putty to the hole or crack, smoothing it out for a seamless look. If needed, you can use a piece of the same siding material to patch the area and paint it to match.
When replacing a damaged siding panel, it’s important to find a close match in color and style to maintain the overall appearance of your home. Carefully remove the damaged panel, taking care not to damage the surrounding areas or the sheathing behind it. Install the new panel securely, using screws or nails, and caulk the edges to prevent water infiltration.

Vinyl Siding Cleaners

Wall Painters Near You

Can’t find what you are looking for?

How It Works

  • Answer a few questions about your home project.
  • Within seconds, get matched with top-rated local pros.
  • Compare quotes and choose the best pro for the job.

Vinyl Siding Cleaners In Your Area

Vinyl Siding Cleaners: Find the Right Pro

Meta Description: Discover top-rated vinyl siding cleaners to revitalize your home’s exterior. Learn about effective cleaning solutions and find professional services for a spotless finish.

Vinyl Siding Cleaners

Is your vinyl siding looking dull and stained? Don’t worry! It’s easy to bring back its vibrant look. The key is finding the right cleaner for your needs.

This guide will help you choose the best vinyl siding cleaner. We’ll look at different types and assess your siding’s condition. You’ll learn how to pick the perfect cleaner for your home.

By the end, you’ll know how to make your vinyl siding look great again. Your home’s curb appeal will get a big boost!

Key Takeaways

  • Vinyl siding is a popular and low-maintenance exterior option, but it can become dingy over time.
  • Finding the right vinyl siding cleaner is crucial to revitalizing your home’s appearance and protecting the siding.
  • This article will explore different types of vinyl siding cleaners, assess siding condition, and provide tips for choosing the best cleaner.
  • The article will also discuss the benefits of hiring a professional cleaning service.
  • Maintaining clean vinyl siding can increase a home’s property value by up to 5%.

What Are Vinyl Siding Cleaners?

Vinyl siding cleaners are special products that remove stains, dirt, and buildup from vinyl siding. These cleaners come in various forms, like hose-end sprayers, concentrated liquids, and pressure washer-compatible solutions.

Types of Vinyl Siding Cleaners

There are different types of vinyl siding cleaners for specific needs. Some remove mold and mildew, while others tackle rust and calcium stains.

General cleaners handle everyday dirt and grime. Using the right cleaner can restore your home’s exterior and protect the siding.

Benefits of Using Vinyl Siding Cleaners

Vinyl siding needs regular cleaning to stay in good shape. It’s a cheaper option than replacing mold-covered siding.

Even big vinyl siding makers use cleaning solutions for warranty claims. The right cleaner can remove dirt, grime, mold, and mildew effectively.

This improves your home’s look and protects the surfaces from damage. Regular cleaning keeps your vinyl siding looking great for years.

Assessing the Condition of Your Vinyl Siding

Inspect your home’s exterior before choosing a vinyl siding cleaner. Look for dirt, grime, mold, mildew, algae, stains, oxidation, or chalking. The type and severity of buildup will guide your cleaning solution choice.

Clean vinyl siding once a year to maintain its look. Don’t wait longer than two years, as dirt can cause more damage over time.

  • Examine the siding for any visible dirt, grime, mold, mildew, or algae buildup.
  • Check for stains, oxidation, or chalking that may have developed on the surface.
  • Inspect the siding for any cracks, holes, or loose panels that could indicate more severe issues.

A thorough inspection helps you pick the best cleaner for your needs. It also prevents further damage to the vinyl siding.

Early issue detection maintains your home’s exterior and extends your vinyl siding’s life.

Choosing the Right Vinyl Siding Cleaner for Your Needs

vinyl siding cleaner

Picking the best vinyl siding cleaner depends on your home’s unique cleaning needs. Think about stains, application method, and environmental impact. Safety is also a key factor to consider.

Factors to Consider When Selecting a Cleaner

  • Stain and Buildup Removal: Sodium hypochlorite or peroxide-based cleaners work well on mold and algae. Tough stains like rust may need special cleaners.
  • Application Method: Pick a cleaner that fits your cleaning style, like brushing or pressure washing. Make sure the instructions are easy to follow.
  • Environmental Impact: Look for eco-friendly options that won’t harm nearby plants or landscaping. These cleaners are safer for the surrounding environment.
  • Safety Precautions: Choose a cleaner that’s safe for vinyl siding and won’t cause damage. Follow the maker’s advice on safety gear and proper ventilation.

Evaluate these factors to find a cleaner that removes dirt, grime, and stubborn stains effectively. Look for options that are safe and eco-friendly.

The right cleaner will tackle mold, mildew, and algae without harming your home. It should also be easy to use and kind to the environment.

Preparing for Vinyl Siding Cleaning

Safety Precautions

Safety is key when cleaning vinyl siding. Wear gloves, eye protection, and a mask when using household cleaning chemicals. Make sure your work area has good air flow.

Shield plants, landscaping, and water sources from runoff. Many vinyl siding cleaners can harm aquatic life. Always follow the maker’s instructions and local rules for safe use.

  • Wear gloves, eye protection, and a mask when handling cleaning chemicals
  • Ensure the work area is well-ventilated
  • Protect plants, landscaping, and water sources from runoff or overspray
  • Follow the manufacturer’s instructions and local regulations for safe use and disposal

Taking safety steps seriously helps you clean your siding well. It also keeps you and the environment safe. With these measures, you’ll have a successful cleaning project.

Applying Vinyl Siding Cleaners

The application process is key to maintaining your vinyl siding’s appearance. You can apply cleaners manually or with a pressure washer. The choice depends on the product and siding condition.

Manual Application Techniques

For manual cleaning, mix the solution with water as instructed. Use a soft-bristle brush to gently scrub the siding. Rinse thoroughly with a garden hose to remove all cleaning solution.

Pressure Washer Application Techniques

Apply the cleaner through a downstream injector when using a pressure washer. Let it sit for the recommended time, then rinse clean. Keep the pressure around 2,000 PSI to avoid damaging the siding.

Protect nearby plants and landscaping during the cleaning process. Avoid forcing water behind vinyl siding panels to prevent moisture problems. Following these techniques will help you clean effectively without causing damage.

Post-Cleaning Maintenance

vinyl siding maintenance

After cleaning vinyl siding, it’s crucial to maintain its fresh look. Regular rinsing with a garden hose removes leftover dirt and grime. This simple routine extends the time between major cleanings.

Experts suggest cleaning vinyl siding yearly to prevent damage. Lighter-colored siding may need more frequent cleaning. Regular upkeep ensures your home’s exterior stays attractive for years.

For tough stains, use a 70% water and 30% white vinegar solution. Apply it with a soft cloth or brush, then rinse well. When using a pressure washer, start with low pressure to avoid damage.

Avoid cleaning products with organic solvents, chlorine, bleach, or furniture polishes. These can harm vinyl siding. Use gentle, mildly abrasive cleaners like Soft Scrub, Ajax, or Bon Ami instead.

Follow these tips to keep your vinyl siding looking great. Have all supplies ready before starting your maintenance routine. This will make the process smooth and efficient.

Benefits of Hiring a Professional

Hiring a pro for vinyl siding cleaning has many perks. They have the skills and tools to remove tough stains safely. Pros can protect your home and landscaping while cleaning effectively.

One big plus is saving time. Experts work fast and well. This helps homeowners who are short on time or lack proper tools.

Pro services can be cost-effective long-term. They prevent costly mistakes that could damage your siding. Their know-how helps avoid pricey repairs later on.

Professional cleaners use proper safety equipment. They know how to clean without harming your property. Their methods ensure effectiveness and safety.

Before hiring a vinyl siding cleaning service, do your homework. Check their qualifications and read reviews. Get a detailed quote to make a smart choice.

Hiring a Professional Vinyl Siding Cleaning Service

Hiring pros to clean your vinyl siding can be a smart move. They have the know-how and tools to make your siding look new again. It’s crucial to find a trustworthy service provider.

Check online reviews and verify licenses and insurance. Ask for a detailed estimate of their cleaning methods and products. Inquire about their vinyl siding experience and safety measures.

The average cost to clean home siding is $300 to $600. Most people pay around $380 for a 1,500 square foot home. Pressure washing costs $0.30 to $0.40 per square foot.

Soft washing a 1,500 square foot home costs $275 to $400. Labor costs range from $55 to $80 per hour. Professional cleaning can extend your siding’s life and boost curb appeal.

Choose a provider that values quality work and customer satisfaction. This ensures your home’s exterior stays in top shape for years to come.

Tips for Maintaining Clean Vinyl Siding

Clean vinyl siding is crucial for your home’s curb appeal. Regular maintenance extends the life of this durable material. Here are some tips to keep your vinyl siding spotless:

  • Rinse your vinyl siding regularly with a garden hose to remove surface-level dirt and grime. This simple task can help prevent the buildup of more stubborn stains.
  • For tougher mold, mildew, or algae buildup, use a soft-bristle brush and a mild cleaning solution. Avoid using abrasive scrubbers, which can damage the siding.
  • Address any stains or discoloration promptly. Letting issues like rust or mildew linger can make them more difficult to remove over time.
  • Establish a regular cleaning routine, such as giving your siding a thorough wash once or twice a year. This will help maintain its fresh, vibrant appearance.

These simple maintenance tips will keep your vinyl siding looking great. Regular cleaning with a hose and soft brush preserves your home’s charm.

Simplify Your Vinyl Siding Cleaning with FindPros

Need help cleaning your textured, dirty vinyl siding, outdoor surfaces, or other areas around your home? FindPros can connect you with top-rated local professionals who can tackle the job using the right pressure washers, power washers, and cleaning solutions like household bleach, mold armor, and dish soap. Whether you have new siding, wood, brick, cement, glass, stucco, windows, aluminum, or many other surfaces that need attention, our expert pros can provide an informed decision on the best approach.

Simply fill out our quick survey about your home project, and we’ll match you with qualified candidates who will compete to offer you their services. Get the best pricing and find the pro you get along with best to get your home looking fresh and clean again.

Conclusion

Clean, well-maintained vinyl siding is key to your home’s beauty and value. Choose the right cleaner and method to revitalize your home’s exterior. This will help your siding look new for years.

DIY cleaning works, but professional services offer expertise and efficiency. They can give you peace of mind about your home’s appearance. Regular upkeep keeps your siding looking great.

Proper care of vinyl siding is a smart investment. It boosts curb appeal and may increase resale value. Taking pride in your home’s exterior ensures lasting beauty and worth.

Frequently Asked Questions (Vinyl Siding Cleaners)

The best vinyl siding cleaners are those that are specifically designed for the material. Many vinyl siding products can handle tough stains, mold, and mildew without damaging the surface. Look for cleaners that are safe for painted surfaces and avoid using undiluted chlorine bleach.
It’s generally not recommended to use regular household cleaners on vinyl siding. These products may be too harsh and can potentially damage the material. Instead, look for vinyl siding products that are formulated for this specific purpose. They will be more effective and gentle on the siding.
Before cleaning, inspect your vinyl siding for any damage or problem areas. This will help you choose the suitable cleaner and application method. Protect nearby plants, porch enclosures, and other surfaces from the house wash. Use a garden sprayer or pressure washer to apply the cleaner, following the manufacturer’s instructions.
Textured vinyl siding can be a bit more challenging to clean. Look for a cleaner specifically designed for these surfaces. You may need to use a soft-bristle brush or sponge to gently scrub the siding, rather than relying solely on a pressure washer. This will help ensure the cleaner reaches all the nooks and crannies.
The frequency of cleaning will depend on the condition of your siding and the environment. As a general rule, it’s a good idea to clean your vinyl siding at least once a year to prevent mildew growth, dirt buildup, and other issues. If you live in an area with a lot of pollution or surrounded by trees, you may need to clean more often. Consult with a professional contractor for their recommendation based on your specific situation.

Vinyl Fence Repair

Wall Painters Near You

Can’t find what you are looking for?

How It Works

  • Answer a few questions about your home project.
  • Within seconds, get matched with top-rated local pros.
  • Compare quotes and choose the best pro for the job.

Vinyl Fence Repair In Your Area

Vinyl Fence Repair: Tips for Finding the Right Professional

Meta Description: Discover expert tips for finding the right professional for vinyl fence repair. Learn how to assess damage, choose skilled contractors, and ensure lasting results.

Vinyl Fence Repair

Vinyl fencing is a top choice for homeowners. It’s durable, low-maintenance, and looks great. But even vinyl fences need repairs sometimes.

Let’s explore tips for fixing vinyl fences. These will help keep your fence strong and attractive for years.

Learn how to fix your vinyl fence quickly. You can save money and avoid hiring a pro with these DIY repair secrets.

Key Takeaways

  • 01Vinyl fencing is a popular choice for homeowners due to its durability, low maintenance, and aesthetic appeal.
  • 02Common tools for vinyl fence repair include a hammer, screwdriver, saw, level, measuring tape, and power drill.
  • 03It is essential to address loose or damaged panels promptly to prevent further deterioration and maintain the fence’s integrity.
  • 04While many repairs can be done DIY, complex issues may require professional assistance.
  • 05Sustainable practices can enhance the longevity and performance of a vinyl fence while promoting resource conservation.

Understanding the Need for Vinyl Fence Repair

Vinyl fences are a top pick for homeowners. They’re tough, need little upkeep, and resist decay and pests. Vinyl keeps its color without paint or sealants.

But even vinyl fences can have problems. These issues may need fixing to keep the fence looking good.

Common Causes of Vinyl Fence Damage

Cracks, warping, and panel shifts can happen to vinyl fences. These often come from hits, temperature changes, or poor setup.

Impacts may crack vinyl fence panels. Soil shifts or wrong post placement can make fence rails loose or lean.

Signs That Your Vinyl Fence Needs Repair

  • Visible cracks or holes in the fence panels
  • Discoloration or fading of the vinyl material
  • Loose or wobbly fence posts
  • Displaced or misaligned fence rails
  • Accumulation of debris or dust on the fence surface

Ignoring these signs can cause more damage. It’s key to fix issues quickly.

Compare repair costs to replacement benefits. A pro can help find the best long-term fix for your fence.

DIY vs. Professional Vinyl Fence Repair

vinyl fence repair

Vinyl fence maintenance offers two choices: DIY or professional repair. Each option has its pros and cons. Let’s explore these differences to help you decide what’s best for your fence.

Advantages and Disadvantages of DIY Repair

DIY vinyl fence repair can save money on minor issues like small cracks. It’s satisfying and cuts labor costs. But severe damage may need professional help.

DIY repairs might cause more harm or look less appealing. They may not match the durability of professional work.

Benefits of Hiring a Professional

Professional vinyl fence repair ensures high-quality work, often with warranties. Experts have the right tools and skills for complex repairs.

They keep your fence sturdy and attractive. While pricier, professional repairs can prevent future damage and maintain fence integrity.

Your choice depends on the damage, your skills, and project willingness. For complex repairs, consult a reputable professional vinyl fence repair company.

Professionals ensure the job meets fence meets all necessary regulations and aesthetic requirements.

Factors to Consider When Choosing a Professional

Hiring a professional for vinyl fence repair requires careful consideration. Structural damage, large-scale issues, and foundation problems need expert attention. Quality assurance, regulatory compliance, and complex installations also demand professional skills.

Look for licensed and certified contractors for your vinyl fence repair. Check online reviews and testimonials to gauge workmanship and customer service quality.

Ensure the professional knows relevant building codes and homeowner association rules. This helps avoid legal issues or fines. Professionals have access to quality materials and proper tools.

Expert knowledge is crucial for unique fence designs. They maintain repair integrity while addressing complex issues. A well-built vinyl fence withstands weather challenges like extreme temperatures and heavy rain.

Choosing a licensed and certified contractor ensures high-quality vinyl fence repair. They comply with regulations and handle complex designs effectively. Consider their credentials and customer feedback for the best results.

Tips for Finding a Reputable Vinyl Fence Repair Company

Vinyl Fence Repair Company

Finding a reliable vinyl fence repair company is essential for maintaining your property. Here are some tips to help you choose the right professionals for the job.

Checking Licenses and Certifications

Always verify a company’s licenses and certifications before hiring them. This ensures they’re qualified to work in your area. Look for industry certifications that prove their expertise in vinyl fence repair.

Proper qualifications guarantee safe and efficient work. This step helps you avoid potential problems down the road.

Reading Online Reviews and Testimonials

Research online reviews and testimonials to gain insights into a company’s reputation. Look for feedback on their work quality and customer service. A vinyl fence repair company with happy clients is more likely to deliver great results.

By following these tips, you’ll find a trustworthy repair company. They’ll have the right licenses, certifications, reviews, and testimonials to restore your fence effectively.

Preparing for the Repair Process

Clean the fence and surrounding area before starting repairs. Wear safety gear like gloves and glasses to prevent injuries. This ensures a safe work environment.

Assess the damage carefully to determine the right repair approach. This step helps identify whether you need PVC glue or replacement parts.

Gathering Necessary Materials and Tools

Have all materials and tools ready before starting repairs. This prevents interruptions and makes the process smoother.

  • PVC glue
  • Utility knife
  • Saw
  • Drill
  • Measuring tape
  • Level
  • Replacement parts (if required)

Good preparation sets the stage for a successful vinyl fence repair. With the right tools and safety measures, you’re ready to begin.

Common Repair Techniques and Methods

Keeping your vinyl fence beautiful and functional is easy. With the right tools and methods, you can fix common issues quickly. Let’s explore how to handle cracks, holes, and panel problems.

For small cracks, apply PVC glue along the crack. Press the vinyl together for a strong bond. Fill tiny holes with PVC glue or vinyl filler.

Larger holes might need a vinyl patch or new panel. Secure these with glue or screws. If a post is damaged, remove it and install a new one.

  1. Larger holes or damaged panels may require a vinyl patch or replacement panel, which can be secured with glue or screws.
  2. If a post is beyond repair, remove it from the fence structure and install a new post, making sure it is perfectly aligned and level.

Clean up after repairs and check your work. This ensures your fence looks great. With these vinyl fence repair tricks, you can easily refresh your outdoor space.

Fix cracks, holes, or panel issues quickly to keep your vinyl fence in top shape. These DIY steps can save you money on professional vinyl fence repair services.

Maintenance and Care After Repair

Keep your vinyl fence looking great after repairs. Clean it regularly with mild soap and a soft brush. This removes dirt and mold, keeping the surface clean.

Check your fence often for new problems. Fix issues quickly before they get worse. Use a vinyl-specific weatherproofing treatment to protect against damage from the elements.

  • Regular cleaning with a mild detergent and a soft brush or cloth can remove dirt, debris, and mold buildup.
  • Periodic inspections to identify any emerging issues and address problems before they worsen.
  • Applying a weatherproofing treatment can help shield the vinyl fence from the elements.

Watch out for pests and deal with them promptly. Know your warranty terms to get help with covered issues. This ensures your fence stays in top shape.

Good maintenance keeps your vinyl fence strong and attractive. Follow these tips to enjoy your fence for many years to come.

The FindPros Advantage

Are you in need of a reliable vinyl fence repair professional? Look no further than FindPros. Our platform connects you with top-rated local experts who can handle all your vinyl fence repair needs, from replacing damaged pickets to patching small holes. Simply answer a few questions about your yard and project, and we’ll match you with the best pros for the job. Get competitive quotes, compare services, and choose the perfect fit – all without the hassle of digging through endless options. With FindPros, you’ll get the final appearance you desire, with the peace of mind that your fence is properly repaired and maintained.

Conclusion

Vinyl fencing remains popular among U.S. homeowners for its durability, low maintenance, and aesthetic appeal. Following these tips helps homeowners repair and maintain their vinyl fences effectively. This ensures they stay strong, attractive, and eco-friendly for a long time.

Homeowners can protect their investment by handling minor repairs or hiring a professional. This enhances their property’s appearance and value. Embracing sustainable practices and understanding warranty coverage contributes to a greener outdoor space.

Vinyl fencing offers many styles, colors, and designs, providing unmatched versatility. This allows homeowners to create a unique outdoor environment matching their home’s look. Prioritizing timely repairs and proper maintenance ensures long-lasting performance and improved curb appeal.

Frequently Asked Questions (Vinyl Fence Repair)

Apply a small amount of plastic body filler to the hole using a putty knife. Smooth it out to match the surface of the fence. Let it dry completely, then sand it down until it’s flush with the rest of the fence. This will help cover and repair the hole.
First, measure the diameter of the damaged picket. Purchase a replacement picket of the same size. Carefully remove the old picket, then install the new one, making sure it is flush with the rest of the fence. Use an adhesive to secure the new picket in place.
If you have excess foam insulation around your fence posts, it’s important to remove it slowly and carefully. Spray a small amount of foam remover onto the excess foam, then use a putty knife or sandpaper to wipe it away. This will help prevent any damage to the vinyl fence.
If a hole appears in your vinyl fence, the best thing to do is to repair it as soon as possible. You can use a plastic body filler or vinyl repair adhesive to fill the hole. Smooth it out with a putty knife and let it dry completely. This will help prevent further damage and maintain the appearance of your fence.
If a larger section of your vinyl fence is damaged, you may need to replace it entirely. First, measure the area that needs to be replaced and purchase a new section of fence that matches. Carefully remove the damaged section, then install the new fence, making sure it is level and flush with the rest of the fence. Secure it in place with an adhesive or other fasteners.

Vertical Blinds Repair

Wall Painters Near You

Can’t find what you are looking for?

How It Works

  • Answer a few questions about your home project.
  • Within seconds, get matched with top-rated local pros.
  • Compare quotes and choose the best pro for the job.

Vertical Blinds Repair In Your Area

Vertical Blinds Repair: Tips for Finding the Right Professional

Meta Description: Discover expert tips for finding the right professional for vertical blinds repair. Learn how to choose a reliable service to restore your window treatments efficiently.

Vertical Blinds Repair

Vertical blinds greatly impact a home’s look and function. They offer privacy, light control, and enhance the overall ambiance. These blinds also improve energy efficiency by providing insulation and reducing energy costs.

This guide helps you tackle common vertical blind problems. It shows how to keep them in top condition. You’ll learn to maintain their vital role in your home.

Key Takeaways

  • Vertical blinds repair involves addressing issues like broken slats, stuck/unresponsive blinds, misaligned blinds, and worn-out parts.
  • Proper installation and regular maintenance are crucial for the longevity and functionality of vertical blinds.
  • Hiring a professional vertical blinds repair expert can ensure efficient and safe resolution of common problems.
  • Vertical blinds offer versatility in design, light control, and energy efficiency, making them a popular choice for homeowners.
  • Understanding the anatomy and repair techniques for vertical blinds can help homeowners maintain their investment in this essential window treatment.

The Importance of Vertical Blinds

Vertical blinds offer many benefits for window treatments. They improve functionality and aesthetics in any living space. These blinds blend seamlessly with various interior design styles.

Enhancing Functionality and Aesthetics

Vertical blinds provide excellent light control and privacy. You can easily adjust natural light and visibility in your rooms. This creates a comfortable and inviting atmosphere in your living spaces.

These window treatments come in various colors, textures, and materials. They can be customized to match your existing decor. This enhances the visual appeal of your home.

Energy Efficiency and Cost Savings

Vertical blinds improve your home’s energy efficiency. They act as an extra layer of insulation. This helps regulate indoor temperature and reduces energy costs.

These blinds are especially useful for large windows or sliding glass doors. They block sun heat in summer and retain warmth in winter. This can lead to significant savings on your energy bills.

Understanding the Anatomy of Vertical Blinds

Vertical blinds are versatile and elegant window treatments. Let’s explore the components that make them work smoothly.

Key Components and Their Functions

The headrail is the backbone of vertical blinds. Made of aluminum or PVC, it provides a sturdy base for the entire system.

The tilt rod controls the angle of the slats. It allows users to adjust light and privacy levels precisely.

The carrier stems connect to the tilt rod. They hold the slats and help them open and close in sync.

The slats or vanes are the visible parts of vertical blinds. They come in various materials, colors, and textures.

Each part of the vertical blind system is vital. Together, they create a seamless and attractive window covering.

Common Issues with Vertical Blinds

Vertical blinds have four key components but can face various problems. These include broken slats, stuck blinds, rotation issues, and misalignment. Other troubles are detached slats, stripped gears, and snapped cords.

Broken or damaged slats are a frequent issue. Vertical vanes can crack, bend, or detach from the headrail. Wear and tear or accidents often cause this damage.

Stuck blinds may result from dust buildup or faulty installation. This can prevent smooth movement of the blinds. Rotation problems occur when blinds won’t tilt as desired.

Worn-out gears, broken combs, or snapped cords can cause rotation issues. Misaligned blinds and detached slats often stem from poor installation or long-term use.

Fixing these problems early is key to maintaining vertical blinds. Quick action can extend their lifespan and keep them working well. This ensures a smooth experience for homeowners using vertical blinds.

Broken or Damaged Slats

Mangled or snapped vertical blind slats are a common issue. Cracks or bends can hinder smooth operation. Damage can result from regular use, rough handling, sunlight, or curious pets.

Compromised slats affect both the look and function of vertical blinds. Prompt attention to these problems is essential for maintaining your window treatments.

Identifying the Problem

Visible cracks or bends in slats signal damage. These issues can disrupt the smooth gliding motion of your blinds. Quick action helps preserve the appeal and functionality of your window coverings.

Step-by-Step Repair Guide

  1. Begin by sliding out the damaged slat from the carrier stem.
  2. Visit your local hardware store or browse online retailers to purchase a replacement slat that matches the style and size of your existing vertical blinds.
  3. Gently insert the new slat into the vacant spot, ensuring a secure and seamless fit.

These steps can revive your vertical blinds and restore smooth operation. Timely vertical blinds repair maintains the appeal of your window treatments. It also ensures they function well for years to come.

Stuck or Unresponsive Blinds

Vertical blinds that won’t budge can be a real headache. Usually, the tilt rod or carrier stems are to blame. These parts can stop your blinds from opening or closing right.

But don’t worry! With some know-how, you can fix your vertical blinds and get them working again.

Troubleshooting the Issue

First, take the blinds off the window. This lets you check the inside parts. Look at the tilt rod for any jams.

If you find a problem, try to free the tilt rod gently. Next, check the carrier stems. Fix any that are out of place.

If carrier stems are broken, you’ll need to swap them out. This will help your blinds work right again.

Repair and Adjustment Techniques

  • Inspect the tilt rod for any jams or obstructions and try to gently free it.
  • If the tilt rod is broken, replace it with a new one.
  • Examine the carrier stems for any alignment issues and reset them to their original position.
  • Replace any broken or damaged carrier stems to restore proper operation.
  • Rehang the vertical blinds and test their operation to ensure smooth opening and closing.

These easy steps can often fix stuck vertical blinds. Find the root cause, like a jammed tilt rod or misaligned stems.

Once you do, you can get your window coverings working smoothly again.

Misaligned Blinds and Detached Slats

Vertical Blinds Repair

Proper alignment of vertical blinds is key for their function and look. Misalignment happens when slats are unevenly spaced or not level. This can be due to faulty carrier stems or headrail issues.

Vertical blinds track repair may be needed to fix these problems. It’s important to address misalignment to keep your blinds working well and looking great.

Causes and Identification

Wear and tear or rough handling can cause misalignment in vertical blinds. Carrier stems may shift, making slats hang unevenly. Detached slats can also occur, hurting the blinds’ look and function.

Realignment and Reattachment Methods

  • To address misalignment, begin by gently removing the blinds from the supporting brackets.
  • Examine the headrail, focusing on the carrier stems. Using a pair of needle-nose pliers, realign each stem to its rightful position, ensuring the corresponding slats are properly attached and hanging level.
  • For detached slats, the first step is to procure the necessary replacement for any broken parts, primarily the valance clips that hold the slats in place.
  • Remove the detached slat, replace any damaged clips, and gently push the slat into the correct position until it clicks into place.

These steps can help fix your vertical blinds’ alignment and attachment. You’ll restore their smooth operation and keep them looking great.

Dealing with Worn-Out Parts

Vertical blinds are sturdy but can wear down over time. Continuous use or rough handling can damage their components. A common issue is a stripped master gear, affecting the blinds’ rotation.

This happens when the gear’s teeth wear down from prolonged use. A jolt from rough handling can also cause this problem.

Identifying Stripped Master Gears and Broken Components

A stripped master gear doesn’t mean replacing the entire blinds system. These parts are key for blind rotation. Damage often results from long use or rough handling.

This can lead to mechanical failure or issues when you fix hanging blinds.

Replacement Procedures

  1. Procure a replacement gear from a nearby home improvement store or order one online.
  2. Using a screwdriver, carefully remove the old, stripped master gear from the headrail.
  3. Secure the replacement gear in its place, ensuring it fits securely.

For horizontal blinds with a damaged gear, the process is similar. Find a replacement part and remove the broken one. Gently install the new part, making sure it fits properly.

Quick action on worn-out parts can restore smooth operation. This extends the lifespan of your vertical blinds. You’ll save money and avoid the hassle of full replacement.

Maintaining Vertical Blinds After Repair

Keeping your vertical blinds in great shape after repair is easy. Simple habits can extend their life and maintain their appearance.

Cleaning and Care Tips

Dust can make vertical blinds look dull and harm the mechanism. Clean regularly with a microfiber cloth or vacuum with a soft brush attachment.

For fabric blinds, gently hand-wash or machine-wash every few months. Use mild detergent and warm water for best results.

Prolonging the Life of Your Blinds

  • Avoid overusing manually operated vertical blinds. Mix natural light with indoor lighting to reduce wear and tear.
  • Schedule regular professional inspections to catch minor issues early. This prevents costly repairs in the future.
  • For mildew or tough stains, try natural cleaners like lemon juice or white vinegar.

These simple maintenance tips will keep your vertical blinds working smoothly. Follow them to enjoy your blinds for many years.

Tips to Hire the Right Vertical Blinds Repair Professionals

vertical blinds repair professional

Choosing a trusted vertical blinds repair professional is crucial for fixing your window blinds. Look for experience and expertise on their website. Check online reviews or ask locals about their reputation.

Ask potential professionals about repair costs upfront to avoid surprises later. This helps you find quality service within your budget. Inquire about credentials to ensure the company is licensed and insured.

  • Look for professionals with extensive experience and expertise in vertical blinds repair
  • Check online reviews and local reputation to ensure the professional is reliable
  • Ask about costs upfront to find a service that fits your budget
  • Verify that the professional is licensed and insured for your peace of mind

Following these tips helps you hire the right professional. They’ll provide high-quality, affordable, and trustworthy service. Your window treatments will be restored to their former glory.

FindPros: The Reliable Vertical Blinds Repair Solution

Dealing with broken or misaligned vertical blinds can be a hassle. But FindPros can make the process straightforward. Our network of vetted professionals specializes in repairing most vertical blinds, from fixing stuck mechanisms to realigning slats. Simply answer a few questions about your home project, and we’ll match you with top-rated local pros who can get your window treatments back in the right position. Compare quotes, find the perfect fit, and get your vertical blinds repaired quickly and affordably. Take the stress out of repairing, twisting, and pulling your blinds back into shape with FindPros.

Conclusion

Window blind repairs can be simple. You now know how to spot damage signs and understand what experts can fix. Hiring vertical blinds repair pros saves time and prevents DIY mishaps.

Choose a reputable service provider with the right expertise. Follow maintenance tips after repairs to keep your blinds in great shape.

Repairing blinds is often cost-effective and environmentally-friendly. It can extend your window coverings’ life by several years. This improves their functionality and ensures smooth operation.

With expert help, your window treatments can look and perform their best. Skilled vertical blinds repair professionals can keep your blinds in top condition for years.

Frequently Asked Questions (Vertical Blinds Repair)

The most common issues with vertical blinds are broken slats, stuck or unresponsive blinds, misaligned blinds, and worn-out parts like the tilt mechanism or master gear.
To fix broken blinds, you’ll need to identify the damaged slat and replace it. Gently slide out the broken slat and insert a new replacement that matches the style and size of your existing blinds.
If your vertical blinds are stuck or not opening/closing properly, the issue is likely with the tilt rod or carrier stems. Try gently freeing the tilt rod and resetting any misaligned carrier stems to get your blinds working smoothly again.
To realign misaligned vertical blinds, first remove them from the window. Then, use needle-nose pliers to gently reposition the carrier stems and ensure the slats are hanging evenly. For detached slats, replace any broken valance clips and carefully reattach the slats.
Regular cleaning with a microfiber cloth or soft-bristle vacuum, hand-washing fabric blinds, and avoiding overuse of the manual tilt mechanism can all help prolong the life of your repaired vertical blinds. It’s also a good idea to schedule professional inspections periodically.

Upholstery Cleaners

Wall Painters Near You

Can’t find what you are looking for?

How It Works

  • Answer a few questions about your home project.
  • Within seconds, get matched with top-rated local pros.
  • Compare quotes and choose the best pro for the job.

Upholstery Cleaners In Your Area

How to Find the Right Upholstery Cleaners for Your Home

Meta Description: Discover the best upholstery cleaners for your home. Learn how to choose effective solutions for different fabrics and tackle tough stains with ease.

Upholstery Cleaners

Spills and stains happen. But with the right upholstery cleaner, you can refresh your furniture and car interiors. These cleaners come in many forms to fit your needs and budget.

When picking an upholstery cleaner, think about how well it works. Also consider if it’s easy to move and use. Check its noise level and overall value too.

Key Takeaways

  • Upholstery cleaners come in various forms, including portable and handheld options.
  • Consider factors like performance, portability, ease of use, and value when choosing an upholstery cleaner.
  • Regular upholstery cleaning can significantly extend the lifespan of your furniture.

Importance of Upholstery Cleaners

Upholstery cleaners are essential for maintaining your home’s fabrics. They remove stains, dirt, and odors from couches, chairs, carpets, and rugs. These cleaners keep your living space fresh and inviting.

Regular cleaning extends the life of your upholstered furniture and carpets. Professional services are recommended periodically, depending on furniture usage. This investment can save money by avoiding premature replacements.

Pet owners benefit greatly from upholstery cleaners. They effectively tackle tough pet stains and odors. Professional cleaners have expertise in handling various fabric types without causing damage.

Professional cleaning services offer superior results compared to DIY methods. They use specialized equipment and eco-friendly solutions for a thorough clean. This approach preserves both appearance and structural integrity of your items.

Upholstery cleaners are crucial for maintaining your home’s fabrics. They help create a healthier, more inviting living environment. Regular use ensures the beauty and longevity of your upholstered items.

Types of Upholstery Cleaners

Upholstery cleaners come in two main types: machines and solutions. Machines like Bissell SpotClean Pro use suction and water-based cleaners. Spot cleaners are portable and use chemical solutions for specific areas.

Spot Cleaners

Spot cleaners, like the Dirt Devil Portable, are great for small messes. They’re compact and easy to use. These tools can quickly remove stains from food, drinks, and pet accidents.

Spot cleaners are versatile for maintaining upholstery between deep cleans. They’re perfect for hard-to-reach spots on your furniture.

Choosing the right cleaner depends on your task’s size and severity. Both machines and spot solutions can be effective. Your specific needs will determine the best choice for your upholstery.

Factors to Consider

Choosing an upholstery cleaner requires careful thought. Look for one that removes various stains effectively. Portability is key, so pick a cleaner that’s easy to move and store.

User-friendly features are important. Clear water tanks and comfy handles make cleaning easier. Check the noise level too, as some cleaners can be loud.

Consider the value for your money. Find a cleaner that fits your budget and offers great performance. This way, you’ll keep your furniture looking fantastic.

  • Performance: Look for a cleaner that can effectively remove a variety of stains, from red wine to pet accidents.
  • Portability: Consider the weight, cord length, and design of the cleaner to ensure it’s easy to maneuver and store.
  • Ease of use: Look for features like clear water tanks, comfortable handles, and intuitive controls.
  • Noise level: Some upholstery cleaners can be quite loud, so consider your noise tolerance.
  • Value: Determine your budget and look for a cleaner that offers the best performance for the price.

Best Plant-Based Upholstery Cleaner

plant-based upholstery cleaner

Method Stain and Odor Treatment Spray

The Method Stain and Odor Treatment Spray is a top-performing eco-friendly upholstery cleaner. This plant-based formula effectively removes stubborn stains that other cleaners can’t handle.

In tests, it successfully cleaned an old stain on a white damask dining room chair. The clear, non-sudsy formula rinses easily and leaves a pleasant Spearmint Sage scent.

Tough stains may need multiple applications. However, this versatile cleaner works well on both upholstery and carpets.

The spray boasts an impressive 4x concentrated formula. It reduces plastic, water, and energy waste by over 75%.

Its 99.36% natural, plant-based formula is developed by Ph.D. chemists. MDs evaluate it for safety, making it family-approved and 100% biodegradable.

This low-foaming, fast-acting cleaner is easy to use. It works in carpet cleaning machines or by hand.

Certified by PETA and Leaping Bunny, it’s a safe, eco-friendly choice. For plant-based upholstery cleaning, Method Stain and Odor Treatment Spray is excellent.

Best Upholstery Cleaner for Pet Stains

The Bissell Professional Stain & Odor Remover is great for homes with pets. It uses enzymes to fight stains and smells from pet accidents. Let it soak for 12 to 72 hours to get rid of odors.

This cleaner works well on many pet stains. It’s effective on upholstery, carpets, and bedding. You can find it for $8 on Bissell’s website, $9 at Chewy, or $18 on Amazon.

Another option is the Woolite INSTAclean Permanent Stain and Odor Remover. It comes in a two-pack for $23 on Amazon or $27 at Wayfair. This product tackles tough pet messes on upholstery and carpets.

Quick action is key when dealing with pet stains and smells. Both Bissell and Woolite cleaners can help restore your furniture and carpets. These products are reliable choices for pet owners.

Best Upholstery Cleaner for Delicate Fabrics

Cleaning delicate upholstery fabrics like silk brocade and velvet requires special care. Traditional wet cleaning methods can damage these fabrics. The Capture Carpet & Rug Dry Cleaner offers a safe, dry cleaning option.

This cleaner uses porous granules to absorb dirt and fresh stains. It avoids water-related issues common with delicate fabrics. Simply sprinkle the granules on the fabric and let them sit for 30 minutes.

Then, vacuum up the granules. Your delicate upholstery will be refreshed and brightened. This method is ideal for fabrics labeled with cleaning codes “S” or “X”.

The upholstery cleaner for delicate fabrics is perfect for those wanting to dry clean upholstery at home. It’s gentle yet effective, maintaining the beauty of your prized upholstered pieces.

Best Upholstery Cleaner for Leather

The Furniture Clinic Leather Care Kit is top-notch for keeping leather furniture pristine. This two-step system cleans and conditions leather thoroughly. It keeps your leather items supple and protected.

The kit’s powerful cleaner removes tough stains and grime without leaving residue. Its conditioner keeps leather soft and flexible. This makes the leather more resistant to future damage.

The kit includes a sponge and buffing pad for easy application. It works on furniture, bags, and shoes. At $38 on Amazon, it’s a smart buy for leather care.

Best Upholstery Cleaner for Red Wine Stains

Red wine spills on upholstery can be frustrating. The Wine Away Red Wine Stain Remover is the top solution for this problem. It’s highly effective and convenient for tackling these tricky stains.

Wine Away works quickly on fresh and set-in red wine stains. It often needs minimal blotting or scrubbing. This cleaner also removes stains from berries and fruit juices.

The Wine Away Red Wine Stain Remover is perfect for recent spills and stubborn stains. Its fast-acting formula makes it essential for preserving upholstered furniture. It’s a must-have for anyone wanting to keep their furniture looking great.

Other options for treating red wine stains include salt, baking soda, and vinegar. However, Wine Away remains the best choice. It offers a reliable solution for this common household issue.

Cleaning and Maintenance Tips

upholstery cleaning tips

Keep your upholstered furniture looking great with these practical cleaning tips. Regular care can extend the life of your cherished pieces. It will also maintain their vibrant appearance.

  1. Vacuum upholstery regularly to remove surface dirt and dust. Aim to vacuum at least once a month to prevent buildup.
  2. Address spills and stains promptly, using the appropriate cleaner for the specific fabric type. Act quickly to prevent set-in stains.
  3. Rotate and flip cushions periodically to ensure even wear and tear across the upholstery.
  4. Apply a fabric protection spray to repel future stains and extend the time between deep cleanings.
  5. Schedule professional upholstery cleaning every 12-24 months to deep clean and condition the fabric.
  6. Avoid placing upholstered furniture in direct sunlight, which can cause fading and damage over time.

Follow these upholstery cleaning tips to keep your home’s fabrics looking their best. Regular upholstery maintenance will help preserve the beauty of your furnishings.

Establish a routine for how to clean upholstery to protect your investment. Your upholstered pieces will thank you with long-lasting beauty and comfort.

Eco-Friendly Alternatives

Several eco-friendly upholstery cleaners are now on the market. The Method Stain and Odor Treatment Spray is a plant-based option. It removes stains without harsh chemicals.

Other natural choices include baking soda, vinegar, and castile soap-based cleaners. These can be just as effective as commercial products. They also reduce your impact on the environment.

When picking an eco-friendly cleaner, look for biodegradable and non-toxic options. Avoid products with synthetic fragrances and dyes. Green cleaning is growing due to concerns about harmful chemicals.

Brands like KisClean, Biokleen, and Puracy offer plant-based upholstery cleaners. These products prioritize eco-friendliness and safety. They create a healthier indoor environment for families and pets.

Steer clear of cleaners with phosphates, solvents, and undisclosed fragrances. Steam cleaners are a great chemical-free option for carpets. They clean naturally without any harsh substances.

By choosing sustainable cleaning practices, you keep your home clean and support responsible brands. This helps reduce your carbon footprint and protects the environment.

Stain Removal Techniques

Upholstery stain removal can be tricky, but effective techniques exist for tough marks and spills. The right approach makes a big difference in tackling unsightly stains on your furniture.

Here are some helpful methods to remove stains from upholstery:

  1. Blot, don’t rub: Gently blot the stained area with a clean, absorbent cloth. Rubbing can spread the stain and push it deeper into the fabric.
  2. Use cold water: Start with cold water to lift the stain. Hot water can set fresh stains, making them harder to remove.
  3. Apply the right cleaning solution: Spray or dab appropriate cleaner onto the stain. Let it sit for a few minutes to penetrate the fibers.
  4. Agitate the fabric: Gently scrub the stained area with a soft-bristle brush or sponge. This helps loosen and lift the stain from the upholstery.
  5. Rinse thoroughly: Remove all cleaning solution to prevent residue. Leftover cleaner can attract more dirt and cause future stains.

These techniques can help you tackle various stains and keep your furniture looking great. Always test cleaning solutions on a hidden spot first to avoid fabric damage.

Professional Upholstery Cleaning Services

Heavily soiled or delicate upholstery often needs professional cleaning. These experts use special equipment and solutions to remove tough stains safely. They know the best methods for different fabrics and materials.

DIY cleaning works for regular upkeep. But professional cleaning every 12-24 months can extend your furniture’s life. Research local providers and read reviews to find a reliable company.

Professional cleaning ensures your furniture gets a deep, thorough clean. It maintains appearance and extends lifespan. Many reputable providers offer specialized services to fit your needs.

Find the Best Local Pros with FindPros

Looking for the right upholstery cleaner spray, portable upholstery cleaners, or other cleaning products to tackle those pesky upholstery stains, embedded dirt, and deep food stains? Don’t settle for less – let FindPros match you with top-rated local professionals who can get the job done right.

With FindPros, you’ll get the best pricing when multiple pros compete for your business, and you can find the pros that you get along with best. Simply answer a few quick questions about your home project, and within seconds, you’ll be matched with the top local pros for the job. Compare quotes, read reviews, and choose the best pro to keep your carpets, couches, and other delicate fabrics in tip-top shape – without all the sticky residue, pet hair, and dirty water tank hassles.

FindPros makes it easy to find the cleaning power and lightweight design you need, whether it’s for spot cleaners, portable carpet cleaners, or any other cleaning solutions. Get started today and say goodbye to those most stains for good.

Conclusion

Upholstery cleaners keep your furniture, carpets, and fabrics looking great. Choose a cleaner based on performance, portability, ease of use, and value. Options range from powerful machines to eco-friendly spot cleaners.

Regular cleaning and maintenance keep your upholstered items in top shape. Follow the manufacturer’s instructions to remove dirt, stains, and allergens effectively. This approach enhances your home’s appeal and creates a healthier living space.

Consider the type of upholstery when selecting a cleaner. With many options available, you can maintain your furniture’s condition. Regular cleaning and professional services ensure your upholstery stays pristine for years.

Frequently Asked Questions (Upholstery Cleaners)

The Wine Away Red Wine Stain Remover is one of the top performing products for quickly removing fresh and set-in red wine stains on upholstery. It also works well on berry and fruit juice stains.
When choosing an upholstery cleaning machine, consider factors like powerful suction, large tank capacity, and various cleaning modes. This ensures you can thoroughly clean carpets and fabrics without frequent refilling.
For leather furniture, the Furniture Clinic Leather Care Kit is an excellent choice. It includes a cleaner to remove grime and a conditioner to keep the leather soft and supple. This two-step system helps maintain the leather’s condition.
Upholstery cleaning sprays are convenient for spot-treating stains and refreshing fabrics between deep cleanings. They can effectively remove food, wine, and pet stains with minimal elbow grease.
When selecting the best overall upholstery cleaner, look for one that offers a balance of cleaning power, portability, and value. Consider factors like the cleaning formulas, suction strength, and ease of use to find the right match for your carpet and upholstery needs.

Tv Mounting

Wall Painters Near You

Can’t find what you are looking for?

How It Works

  • Answer a few questions about your home project.
  • Within seconds, get matched with top-rated local pros.
  • Compare quotes and choose the best pro for the job.

Tv Mounting In Your Area

TV Mounting: Hiring the Right Professional

Meta Description: Discover expert TV Mounting services for a secure and professional installation. Get the right tools and know-how for your perfect home theater setup today.

TV Mounting

Is your TV awkwardly placed on a stand? Worried about wall damage when mounting it? A professional TV mounting service could be your answer.

Wall-mounted TVs create a clean, space-saving look. But the installation can be tricky. Improper mounting might damage your wall or TV.

Professional mounting ensures a secure and attractive setup. Let’s explore the benefits, finding the right service, and what to expect.

Key Takeaways

  • Professional TV mounting can ensure a secure and damage-free installation.
  • Full motion TV mounts allow for optimal viewing angles and comfortable body positions.
  • Hiring a professional can save time and effort compared to a DIY TV mounting project.
  • Different TV mount types are recommended based on TV size and application.
  • Professional TV mounting services often provide additional benefits like cable management and surround sound installation.

The Importance of Proper TV Mounting

Mounting your TV on the wall ensures optimal viewing and protects your investment. It prevents neck strain and maintains the best viewing angle. Proper mounting also safeguards your TV and wall from potential damage.

Preventing Neck Strain and Optimal Viewing Angles

Wall mounting has become popular as TVs become thinner and lighter. However, incorrect mounting can cause significant neck strain and discomfort. The US Consumer Product Safety Commission reported concerning statistics about TV-related accidents.

71% of child fatalities from falling TVs were due to inadequate support. This highlights the critical need for proper installation techniques.

Avoiding Damage to Your TV or Wall

Poor mounting can damage both your TV and wall. Toppling TVs are a growing concern, leading to recommendations for anchoring. Improper cable management can cause unsightly holes and cracks, resulting in costly repairs.

Professional TV mounting ensures optimal height and angle installation. This prevents neck strain and provides secure, long-lasting results. It protects your investment and maintains your home’s aesthetics.

TV Mounting: DIY or Professional?

Mounting your TV on the wall offers two options: DIY or hiring a pro. Each approach has its own set of factors to consider. Let’s explore the benefits of professional TV mounting services.

Considerations for DIY TV Mounting

DIY TV mounting needs specific tools and skills. You’ll need a drill, level, stud finder, and proper hardware. Mistakes can lead to damage or safety hazards.

The process can be time-consuming and may lack professional precision. Any errors could potentially void your TV’s warranty. This leaves you responsible for any resulting problems.

Benefits of Hiring a Professional

  • Safety and Expertise: Professional services have experience and specialized equipment. They ensure secure installation, reducing risks of damage or injury.
  • Optimal Positioning: Pros help determine the ideal height and viewing angle. This provides a comfortable and ergonomic viewing experience.
  • Warranty and Guarantees: Many professional services offer warranties on their work. This gives you peace of mind and protection.
  • Efficient Installation: Professionals complete the mounting process quickly. They often finish faster than DIY projects.
  • Cable Management: Experts can conceal and organize your TV’s cables. This creates a clean and visually appealing setup.

Professional TV mounting may cost more than DIY. However, the benefits often outweigh the initial investment. Safety, expertise, and warranty protection are valuable advantages.

Your choice depends on your skills, tools, and priorities. Consider how much you value a secure and attractive installation.

Finding the Right TV Mounting Professional

Proper TV mounting ensures safety and enhances your viewing experience. To find the perfect expert, research and compare quotes from multiple providers. This approach helps you make an informed decision.

Researching and Comparing Quotes

Look for experienced TV mounting professionals in your area. Check their websites, online profiles, and customer reviews. This will give you an idea of their expertise and work quality.

Compare quotes from several providers. This ensures you’re getting a fair price for the services you need.

Evaluating Reviews and Credentials

Pay close attention to reviews and credentials when choosing a professional. Look for licensed and insured providers with a proven track record of successful TV installations.

Check their reviews to gauge customer satisfaction. This will give you insight into their service reliability.

Taking time to find the right professional ensures a smooth experience. Your TV will be installed safely, providing optimal viewing for years to come.

Cost Considerations for Professional TV Mounting

TV mounting cost factors

Professional TV mounting costs vary based on several factors. The average price in the U.S. ranges from $159 to $361. Your location, wall material, and additional services can affect the final cost.

Average Pricing for TV Mounting Services

Installing a TV mount, including labor, can cost between $165 and $900. Labor alone typically ranges from $150 to $400. TV size, installation complexity, and extra work can impact the price.

Flat rates for TV mount installation usually fall between $150 and $400. This excludes the cost of the mount itself. Hourly rates for these services average $75 to $100.

Mounting a TV under a kitchen cabinet costs $75 to $300. Above a fireplace, it may run $175 to $400.

Additional expenses may include surround sound wiring ($250-$1,200) and new outlet installation ($210 on average). Wire concealment can cost up to $1,000. Drywall work ranges from $12 to $20 per panel.

Debris removal typically costs between $140 and $360. To ensure fair pricing, get multiple quotes and understand the full scope of work.

Ensuring Proper TV Mounting Techniques

Proper TV mounting is crucial for safety and a great viewing experience. Professional services have the skills to handle this task with precision. They prioritize your TV’s protection and your home’s overall look.

Choosing the Optimal Location

TV placement is key for the best viewing experience. Pros consider viewing angles, wall material, and power access. They ensure your TV is at the ideal height and distance for comfort.

Factors like natural light and potential glare are also taken into account. This helps create the perfect viewing environment in your home.

Hiding Cables and Wires

Professional TV installation includes expert cable management. Technicians use special methods to hide unsightly wires. This creates a clean look that enhances your home entertainment system.

Hidden wires improve visual appeal and safety. They eliminate tripping hazards, making your space safer and more attractive.

Professional TV mounting ensures secure and proper installation. Experts pay attention to safety, functionality, and aesthetics. This guarantees a seamless and enjoyable home entertainment experience for years.

Additional Services from Professional TV Mounters

surround sound installation

Professional TV mounting services offer more than just installing your television. They can integrate surround sound systems and set up complete home theaters. These experts can also install other audio/visual equipment for you.

Surround Sound System Installation

Hiring a pro ensures a high-quality result that seamlessly integrates all components. Skilled technicians can mount the TV and position surround sound speakers. They can also connect the audio system for an immersive experience.

TV mounting experts can properly install and configure surround sound systems. They ensure optimal speaker placement and audio calibration for the best sound quality. These pros can hide cables and wires to keep your living space clutter-free.

Opting for additional tv mounting services and surround sound installation enhances your entertainment experience. A home theater and audio system integrated setup creates a seamless, immersive environment for your enjoyment.

The Convenience of Professional TV Mounting

Upgrading your home entertainment setup can be exciting. But tackling a TV mounting project alone can be daunting. Hiring a professional TV mounting service offers a hassle-free experience. These experts have the skills and tools to install your TV safely and securely.

Working with professionals gives you peace of mind. You avoid risking damage to your expensive TV or wall. Many services offer a warranty, adding to the convenience and stress-free nature of the experience.

Professional TV mounting services are time-saving. They can complete the installation quickly and efficiently. This frees up your time for other tasks or relaxation.

The convenience and expertise of professional services make them a valuable investment. You get assurance of a job well done. You can quickly start enjoying your new TV setup without worry.

FindPros: The Smarter Way to Mount Your TV

Tired of the hassle of finding a reliable TV mounting professional? Look no further than FindPros. Our platform connects you with top-rated local experts who can handle any TV installation, from that one TV in your living room to the surround sound system in your apartment. Simply fill out our quick survey, and we’ll match you with the best pros for the job, ensuring you get the most competitive pricing and a friendly, kind service.

Whether you have a wood, concrete, or brick wall, our professionals have the tools and expertise to get the job done right. Don’t struggle with complicated DIY kits or an impossible schedule – let FindPros handle the details and book your appointment in no time. Contact us today and let our excellent, friendly service make your TV mounting project a breeze.

Conclusion

Hiring a professional TV mounting service ensures a secure and attractive installation. You’ll avoid DIY risks like damaging your TV or wall. A professional can create the perfect home entertainment setup for you.

An expert provides a secure installation that protects your valuable investment. They can integrate your system seamlessly. This lets you focus on enjoying your favorite shows without installation worries.

Professional TV mounting is ideal for those wanting to improve their living space. It creates an immersive viewing experience. With a qualified service, your TV will be securely installed.

You can relax and enjoy your entertainment fully. The investment in professional mounting pays off in peace of mind.

Frequently Asked Questions (Tv Mounting)

To confirm if a professional TV mounting service is right for you, consider factors like your TV size, wall material, and any additional services you may need, such as surround sound installation. A professional can provide the expertise and tools to ensure a secure and attractive TV setup.
DIY TV mounting is possible, but it requires specific tools and skills. If you’re not confident in your abilities, it’s best to hire a professional. They have the expertise to prevent damage to your TV or wall and ensure optimal viewing angles.
Absolutely. Professional TV mounting services are equipped to handle various wall materials, including concrete. They can use the appropriate hardware and techniques to securely mount your TV, even on a concrete wall.
Yes, professional TV mounting services can assist with installing any brand of TV, including your new Sony. They have the expertise to handle different TV models and sizes, ensuring a secure and customized setup for your specific needs.
Yes, a professional TV mounting service can help adjust the tilt of your TV to the optimal viewing angle. They have the tools and knowledge to properly position your TV, taking into account factors like room layout and seating arrangement, to provide a comfortable and enjoyable viewing experience.

Tuckpointing

Wall Painters Near You

Can’t find what you are looking for?

How It Works

  • Answer a few questions about your home project.
  • Within seconds, get matched with top-rated local pros.
  • Compare quotes and choose the best pro for the job.

Tuckpointing In Your Area

Need Tuckpointing? Here’s What You Should Know

Meta Description: Discover the essentials of tuckpointing, from costs to DIY options. Learn how this vital masonry repair can protect your brick structure and enhance its appearance.

Tuckpointing

Have you checked your building’s brick façade lately? Brick structures are tough, but they need care over time. Crumbling joints can become unsightly and dangerous.

If ignored, they can cause water damage and weaken the structure. Tuckpointing is crucial for maintaining brick buildings. Let’s explore why it’s so important.

Key Takeaways

  • Brick facades can last hundreds of years, but mortar joints typically require attention every 20-30 years.
  • Tuckpointing can dramatically improve a wall’s structural integrity and create a more waterproof envelope.
  • Visual inspections can reveal signs of mortar joint deterioration, such as cracks, crumbling, or discoloration.
  • Tuckpointing is a labor-intensive process, but a worthwhile investment to safeguard the building’s structural integrity.
  • The cost of tuckpointing can vary widely, depending on factors like location, size of the area, and type of structure.

What is Tuckpointing?

Tuckpointing, or repointing, fixes mortar joints in brick walls. It involves removing old mortar and adding fresh mortar or grout. This repair addresses mortar wear caused by weather conditions.

Tuckpointing vs. Repointing

Tuckpointing and repointing are similar, but their end results differ. Tuckpointing creates a nice look by contrasting new and old mortar. This method became popular in 18th century England.

Repointing focuses on fixing mortar joints without adding decoration. Both methods use specialized tools and techniques for brick compatibility.

These processes help control silica exposure and ensure occupational safety. Vacuum dust collection systems are often used. Proper tuckpointing improves wall strength and waterproofing.

Why is Tuckpointing Important?

Tuckpointing keeps brick buildings strong. It fixes mortar joints to stop water damage. Without it, mold and pests can enter, causing health and structural problems.

This crucial process prevents costly future repairs. Experts recommend tuckpointing every 25-30 years. Factors like humidity and temperature may change this timeline.

Look for cracked or missing mortar joints. These signs mean you need tuckpointing right away.

Quality mortar is key for lasting repairs. Choose materials and techniques carefully for the best results. Regular upkeep prevents expensive fixes later on.

Water stains on brick walls can indicate bad mortar. Address these issues promptly to avoid bigger problems.

Neglecting tuckpointing may lead to replacing the entire masonry facade. This costs much more than timely maintenance. Proper tuckpointing can also boost a building’s value.

Signs That You Need Tuckpointing

cracked mortar

Keeping your building’s masonry strong is vital. Tuckpointing often fixes issues that come up. Learn the signs that show your brick or mortar needs help.

Cracked or Missing Mortar

Cracked or missing mortar between bricks is a clear sign you need tuckpointing. This can let water in and cause more damage. It can also weaken the wall’s structural integrity.

Regular visual inspections help spot any cracked mortar or missing mortar. Catching these issues early can prevent bigger problems later on.

Loose or Crumbling Bricks

When mortar integrity fails, it can lead to loose bricks or crumbling bricks. A simple scratch test with a key can check the mortar’s condition.

This test helps decide if tuckpointing is needed to stop water penetration. It also helps maintain the building’s structural soundness.

Quick action through tuckpointing stops further damage. It keeps your structure safe for years to come. Regular checks and fast fixes protect your masonry’s beauty and strength.

Tuckpointing Lifespan and Timing

Mortar joints in brick structures typically last 20 to 30 years. This depends on materials used and local weather conditions. It’s vital to fix mortar problems as soon as they’re spotted.

Loose bricks in a building’s facade need immediate attention. They may be too damaged for simple tuckpointing to work. Cracks or crumbling mortar are signs that tuckpointing is needed.

A scratch test can help check the mortar’s strength. Quick action prevents further damage and costly repairs. Tuckpointing boosts a home’s structure, looks, and protection against water damage.

Industry experts suggest tuckpointing every 25 to 30 years. Do it sooner if you see cracks, crumbling mortar, or loose bricks. Very humid areas may need more frequent tuckpointing.

Mortar needs 36-48 hours to cure after tuckpointing. Regular tuckpointing keeps mortar lifespan long and prevents further deterioration. Fixing mortar issues quickly avoids costly repairs and maintains the building’s integrity.

Tuckpointing Process

Tuckpointing is a careful task that fixes old mortar between bricks. It involves removing bad mortar and adding new, matching mortar. Experts first check the existing materials to choose the right new mortar.

The process starts by grinding out old mortar from brick joints. This step needs precision to keep the right joint size. Dust collection systems are vital to protect workers from silica dust.

  1. Remove old, deteriorated mortar from brick joints using specialized tools.
  2. Determine the appropriate new mortar composition that will be visually compatible with the existing bricks.
  3. Carefully fill the cleaned-out joints with the new, compatible mortar, ensuring a smooth and consistent application.
  4. Apply a thin layer of lime putty to the surface of the newly installed mortar, creating a contrasting visual effect that enhances the overall appearance of the brickwork.

Tuckpointing fixes brick walls and makes them look better. It matches new mortar to old bricks carefully. This process can make old brick buildings look new again.

Cost of Tuckpointing

tuckpointing cost

Tuckpointing expenses can vary widely for homeowners. The average cost typically ranges from $500 to $3,000. This depends on project size and location.

Tuckpointing requires specialized expertise and careful material selection. It’s a labor-intensive process that prevents potential brick damage.

Labor is the main cost driver, ranging from $7 to $25 per square foot. Tuckpointing companies may charge $50 to $150 per hour.

Solo workmen or handymen might charge $20 to $50 hourly. Materials like cement-lime mortar ($30-$50 per bag) and bricks ($0.50-$1.50 each) add to costs.

Several factors affect tuckpointing costs. These include existing mortar condition, project height, site accessibility, and historical preservation requirements. The time of year also impacts pricing.

Urban areas see costs of $12 to $25 per square foot. Suburban and rural areas typically range from $8 to $20 per square foot.

Tuckpointing is a valuable investment for brick buildings. It maintains structural integrity and waterproofing. Professional services ensure proper materials and techniques are used.

DIY Tuckpointing: Pros and Cons

DIY tuckpointing might seem like a money-saving option, but it’s best left to professional masons. This specialized task needs high-level expertise to ensure proper depth, width, and mortar compatibility. Without the right skills and tools, DIY attempts can damage your wall’s structure and waterproofing.

Cost savings are a major draw for DIY tuckpointing. It can also be a valuable learning experience. However, mistakes due to lack of skill can lead to expensive repairs later.

DIY projects often take longer, especially on large areas. Professional contractors offer specialized expertise and quality workmanship. They ensure a precise match in mortar color and texture for a seamless finish.

Hiring professionals is costlier but can prevent further damage. It helps maintain the building’s structural integrity. Professional companies often provide warranties on their work, offering additional protection to homeowners.

Professionals work more efficiently, finishing projects faster with minimal disruptions. For best results, hire a professional tuckpointing contractor. They can properly assess existing conditions and use appropriate materials and techniques.

Tips for Hiring the Best Tuckpointing Experts

Restoring brick structures requires skilled tuckpointing experts. Seek contractors with extensive masonry experience and successful project history. They should assess conditions, select materials, and use proper techniques for appealing, sound results.

Occupational safety is vital in tuckpointing. Choose contractors who know silica dust exposure guidelines. They should use vacuum dust collection systems to protect workers and maintain a clean environment.

  1. Look for contractors with extensive masonry expertise and a proven track record of successful tuckpointing projects.
  2. Verify the contractor’s knowledge of occupational safety guidelines related to silica dust exposure and their use of proper equipment to mitigate these risks.
  3. Ensure the contractor can properly assess the existing conditions, select compatible materials, and execute the repair work using the appropriate techniques to achieve a visually appealing and structurally sound result.
  4. Check if the contractor is licensed, bonded, and insured, as this indicates their authorization, financial stability, and commitment to professionalism.
  5. Evaluate the contractor’s communication style, customer service, and references to ensure a positive and successful project experience.

Hiring skilled tuckpointing experts ensures your brick structures’ long-term integrity. It also enhances their waterproof envelope and visual appeal.

Need a Reliable Tuckpointing Expert? FindPros Can Help

Have you noticed deteriorating mortar, damaged mortar lines, or even partially missing horizontal joints on your brick wall or chimney? Tuckpointing can be a complex and labor-intensive task, but FindPros can connect you with top-rated local professionals who can handle it efficiently.

Simply answer a few questions about your tuckpointing needs, and we’ll match you with pros who can closely match the existing brick color, use the right mortar composition, and ensure the wet mortar is applied in straight, clean lines. These experts can tackle even the most significant damage, from repointing an entire brick surface to addressing environmental elements that may be causing moisture problems.

By using FindPros, you’ll get the best pricing as multiple pros compete for your job, and you can choose the one you feel most comfortable with. Forget the hassle and additional costs of the DIY route – let our network of reliable tuckpointing specialists handle the job right the first time.

Conclusion

Tuckpointing is crucial for maintaining brick buildings. It preserves masonry’s structural integrity and prevents water damage. This task protects against water infiltration, mold growth, and other safety issues.

Hiring experienced professionals is vital for proper tuckpointing. Regular maintenance can save property owners from costly future repairs. It also ensures the building’s longevity and safety.

Tuckpointing addresses health concerns related to water damage and mold. It keeps masonry in top condition, safeguarding occupants’ well-being. Investing in professional services is wise for preserving brick or stone buildings.

Frequently Asked Questions (Tuckpointing)

Look for signs of mortar deterioration, such as cracked, crumbling, or missing mortar joints between the bricks. This can allow water to penetrate the wall and cause structural issues over time.
The tuckpointing process involves removing the deteriorated mortar from the brick joints, then carefully filling the cleaned-out joints with new, matching mortar. This helps restore the structural integrity and waterproofing of the brick wall.
The cost of tuckpointing can vary widely, ranging from $500 to $3,000 or more, depending on factors like the size of the project, location, and the condition of the existing mortar joints.
While DIY tuckpointing can save money, it’s best left to professional masons who have the expertise and specialized tools to ensure the work is done correctly. Mistakes in tuckpointing can lead to further damage and costly repairs down the line.
Mortar joints in brick structures typically last 20 to 30 years, depending on the materials used and local weather conditions. It’s important to address any signs of mortar deterioration promptly to prevent further damage and maintain the structural integrity of the building.

Tree Surgeons

Wall Painters Near You

Can’t find what you are looking for?

How It Works

  • Answer a few questions about your home project.
  • Within seconds, get matched with top-rated local pros.
  • Compare quotes and choose the best pro for the job.

Tree Surgeons In Your Area

Hiring Tree Surgeons: What to Look For

Tree Surgeons

Key Takeaways

  • Hire a tree care company with at least 10 years of experience to avoid inexperienced services.
  • Ensure the tree service company has at least 2 certified arborists on staff.
  • Look for a tree service that can explain precautions taken to minimize yard damage.
  • Verify the tree service company’s equipment is OSHA certified and in good condition.
  • Confirm the tree service company is licensed, bonded, and insured to protect against liability.

The Importance of Hiring Professional Tree Surgeons

Trees are valuable assets to any property. They provide shade, beauty, and environmental benefits. Professional tree surgeons are crucial for maintaining tree health and safety.

Tree experts can identify and address issues effectively. They safely remove or trim trees when needed. These professionals also understand local regulations and best practices.

Reasons for Hiring a Tree Service

  • Certified arborists undergo rigorous training and education to understand different trees, including their growth patterns, diseases, and risks.
  • Hiring a professional tree care service reduces the risk of potential damage to property.
  • Professional tree care services have access to state-of-the-art tools and machinery for tasks like pruning, trimming, and removal.
  • Attempting tree care tasks without proper equipment can result in irreversible damage to trees.
  • Hiring professional tree care services saves money in the long run by addressing problems before they escalate.
  • Regular tree care maintenance can extend the life of trees, saving on costly removal or replacement expenses.
  • Well-maintained landscapes with healthy trees can significantly increase property value.
  • Trees absorb carbon dioxide, reduce pollution, provide shade, and support wildlife, contributing to a healthier environment.

Tree surgeons are trained to handle dangerous tasks. They work at heights and remove diseased limbs safely. These experts have proper equipment and insurance to protect trees and property owners.

Hiring professionals ensures tree health and safety. It also helps avoid risks and liabilities linked to DIY tree care.

Questions to Ask Tree Surgeons

Asking the right questions helps you find reliable tree surgeons. You can assess their experience, credentials, and safety practices. This ensures you hire qualified professionals who’ll protect your property and landscape.

Evaluating a Tree Service’s Experience and Credentials

Start by asking about the tree service’s background and qualifications. Find out how long they’ve been in business. Companies with over ten years of experience are often more reliable.

Check if they have certified arborists on their team. This certification shows expertise in tree care. It also means they follow industry standards.

  • Inquire about the company’s licensing and insurance coverage to ensure they can operate legally and protect your property in case of any accidents or damages.
  • Request references from past clients to gauge the level of customer satisfaction and the quality of work provided by the tree service.
  • Ask about the specific services offered, such as tree trimming, removal, stump grinding, and emergency tree care, to ensure they can meet your needs.

Look into their range of services. This helps you find a trustworthy partner for your tree care needs. You’ll make an informed decision based on their capabilities.

Assessing Tree Surgeons’ Procedures

Evaluating tree surgeons’ procedures is vital for safety and property protection. Reliable tree care companies use proper equipment and have clear cleanup plans. They should outline steps to protect your landscaping during the job.

Good tree surgeons use techniques like crown thinning to reduce property damage risk. They may also perform stump grinding to improve your yard’s appearance.

  • Approximately 73% of tree surgery procedures involve crown lifting to improve sunlight penetration and raise the tree’s canopy height.
  • Crown thinning, which includes the removal of dead branches and pruning of cross branches, can reduce the risk of property damage and enhance air circulation, as emphasized by the New York State Department of Environmental Conservation.
  • An estimated 86% of tree removal procedures are best performed by professional tree services to prevent injury or property damage.
  • Stump grinding is a prevalent post-felling operation, typically addressing the removal of stumps to enhance landscape aesthetics.
  • Around 67% of homeowners prefer stump removal to avoid potential root issues post-tree removal.

Careful assessment of tree surgeons’ methods ensures they have the right skills. This helps guarantee safe and efficient handling of your tree care needs.

Checking for Tree Surgeons’ Reviews and Referrals

Evaluating a tree surgeon’s reputation is vital when hiring. Research their reviews and referrals for insights into customer satisfaction and expertise. Check online platforms like Google, Yelp, and the Better Business Bureau.

Ask tree surgeons for past client referrals. These provide firsthand accounts of their work quality and customer service. This information helps you make an informed decision.

Evaluating a Tree Service’s Reputation

Look for a tree service with positive reviews and satisfied customers. Pay attention to timeliness, communication, and overall work quality. Seek evidence that they take pride in their work.

Referrals offer a well-rounded view of the company’s reliability. They help you gauge the tree surgeons’ trustworthiness and professionalism.

  • Check online reviews from various platforms to get a comprehensive understanding of the tree service’s reputation.
  • Ask the tree surgeons for referrals from previous customers, and follow up to get their feedback.
  • Look for a tree service with a strong track record of delivering high-quality work and exceptional customer service.

Thorough research ensures you hire reliable tree surgeons. They’ll provide efficient and high-quality tree care services. Your effort will lead to a satisfying experience.

The Tree Surgeons Hiring Process

Choosing the best tree surgeons for your property takes careful planning. Research and compare several local tree care services. Ask key questions about their experience, credentials, and procedures.

Ask for free estimates from your top picks. Review each proposal’s details closely. Consider the price, qualifications, customer reviews, and overall service quality.

  1. Look for tree surgeons with at least five years of industry experience.
  2. Check if they belong to professional groups like the Arboricultural Association.
  3. Make sure they have proper licensing and insurance coverage.
  4. Ask for references to judge their skills and reputation.
  5. Get multiple estimates to compare prices and service offerings.
  6. Pick a tree surgeon offering various services to avoid hiring multiple specialists.

Get a written contract before starting the project. It should outline the scope of work, timeline, and any warranties.

This process helps you find the right tree care specialists. They’ll meet your tree removal, tree trimming, and other tree service needs.

Avoiding Tree Service Scams

Tree service scams are unfortunately common. Be careful when hiring tree surgeons. Watch out for door-to-door contractors, as they’re often linked to fraud.

Beware of companies with no online presence or reviews. Good tree services have a strong digital footprint. Be careful of unusually low prices. This may mean lack of experience or proper licenses.

  • Verify the company’s insurance policies, including liability and worker’s compensation, to ensure you’re protected in case of accidents.
  • Check the tree service’s certification status with the state’s certification board to confirm their legitimacy.
  • Avoid paying the full amount upfront, as there’s no guarantee the work will be completed to your satisfaction.

Do your homework to avoid tree service scams. Hire a trustworthy team to care for your trees. A little research can protect your investment and peace of mind.

Red Flags to Watch Out For

Be aware of red flags that may show a potential scam. Look out for these warning signs when hiring tree surgeons.

  • Door-to-door contractors: These individuals are often associated with fraudulent practices and unfinished projects.
  • Companies with no online presence or reviews: Reputable tree service providers will have a strong digital footprint, allowing you to research their reputation.
  • Unusually low prices: Beware of tree surgeons offering significantly lower prices than the competition, as this may signify a lack of experience or proper licensing and insurance.
  • Upfront full payment requests: Refuse to pay the entire amount before the work is completed to your satisfaction.

Stay alert and do your research. This will help you avoid tree service scams. Hire a trustworthy team to care for your trees.

Tree Surgeons for Storm Damage and Emergency Situations

Emergency tree removal

Severe storms often require quick action from skilled tree surgeons. They remove fallen or damaged trees to prevent more property damage. This ensures the safety of the surrounding area.

Choose tree service companies with storm response experience. They should have the right equipment and personnel. Proper insurance coverage is crucial to protect you from liability.

Be cautious of high prices during busy times. Get multiple estimates before making a decision.

  • Experienced in handling emergency storm damage and debris removal
  • Equipped with specialized tools and machinery for efficient tree removal and trimming
  • Fully insured to safeguard your property and customers
  • Able to provide prompt response times and reliable service
  • Offer free estimates to ensure transparent and affordable pricing

Hiring a trusted tree surgeon protects your property from further storm damage. It creates a safer environment for your neighbors and community.

Comparing Quotes and Pricing for Tree Surgeons

Understanding tree surgeon pricing factors is key when hiring. Prices depend on man-hours, debris removal, and equipment needed. Safety measures also affect costs.

Tree location, season, and recent weather events can impact pricing. Knowing these factors helps you evaluate estimates fairly. This knowledge allows for better decision-making when choosing a tree service.

Factors Affecting Tree Work Pricing

  • Estimated man-hours required for the job
  • Quantity and type of debris that needs to be removed
  • Specialized equipment and safety measures needed for the project
  • Location of the trees and accessibility of the property
  • Seasonal factors and recent weather events that may impact resource availability

Gather 2-3 estimates to ensure fair pricing. Be wary of phone quotes, as they may change after inspection. Don’t just choose the lowest quote.

Consider experience, expertise, insurance, certificates, and references when hiring. These factors are crucial for quality tree care services.

Local tree surgeons often provide better service. They know the area well and want to keep a good reputation. Quality work and customer satisfaction should be your top priorities.

The Benefits of Hiring Certified Arborists

Certified arborists offer many perks for your tree care needs. They’ve mastered tree biology, disease detection, and safe trimming methods. Their expertise ensures your trees get top-notch care.

ISA certified tree surgeons stay current on arboriculture advances. They excel in pruning, planting, emergency care, and soil aeration. Trusting a certified expert gives you peace of mind about your trees’ well-being.

  • Certified arborists can help you develop a comprehensive tree care plan to promote the long-term health and viability of your landscape.
  • They are skilled in identifying and effectively managing tree diseases and pests, ensuring your trees remain vibrant and disease-free.
  • Proper pruning and trimming techniques by certified arborists can reduce the risk of falling branches and improve the overall appearance of your trees.
  • Certified arborists are trained to assess the risks associated with trees, such as proximity to structures or utility lines, and provide mitigation solutions to ensure the safety of your property.
  • They are committed to environmental stewardship, emphasizing tree preservation and sustainable tree care practices.

Certified arborists are true tree care specialists. Their skills help maintain thriving, healthy landscapes. With their help, your trees will flourish for years to come.

Tree Surgeons Offering Additional Services

Tree Surgeons Services

Skilled tree surgeons provide more than just tree removal and trimming. Many offer a wide range of services for diverse client needs. These include tree fertilization, pest and disease management, stump grinding, and landscape design and installation.

Tree care solutions from professionals help maintain healthy, safe, and attractive outdoor spaces. A well-rounded tree care specialist can handle routine maintenance, emergency cleanup, and treatments for sick trees.

Services Beyond Tree Removal and Trimming

When choosing a tree service provider, ask about their full range of services. These may include:

  • Tree Fertilization to promote healthy growth and vigor
  • Pest and Disease Management to identify and treat tree-related issues
  • Stump Grinding to remove unsightly stumps left behind after tree removal
  • Landscape Design and Installation to enhance the overall aesthetic of your property

Working with a company offering these services ensures your trees and landscape get the care they need. Your outdoor space will thrive with specialized attention from experienced professionals.

FindPros: Your Tree Care Solution

Are you in need of a reliable tree service but unsure where to start? Look no further than FindPros. Our platform connects you with top-rated local professionals who can handle all your tree care needs, from tree removal to comprehensive maintenance. Simply answer a few questions about your project, and we’ll match you with the best-suited pros in your area. Get competitive quotes from multiple providers, and choose the one that fits your budget and personality best.

Take the guesswork out of finding the perfect tree care specialist for your home or business. With FindPros, you’ll enjoy the peace of mind that comes with hiring the right professional, whether you need to remove a problematic tree or keep your landscape thriving with the help of an ISA certified arborist. Trust FindPros to simplify your tree care journey, just as you would trust a skilled professional to care for your property, and your wife’s peace of mind.

Conclusion

Hiring a qualified tree surgeon is vital for maintaining healthy and safe trees on your property. Research potential providers thoroughly and ask the right questions. Prioritize credentials, insurance coverage, and customer reviews when making your choice.

The right tree surgeon helps you enjoy a thriving urban forest for years. They preserve valuable tree species and enhance biodiversity in urban areas. Their expertise ensures the health and safety of your trees.

Tree surgeons provide essential tree care, tree removal, and tree trimming services. These services contribute to a more beautiful and sustainable landscape. Choose a reputable provider for routine maintenance or emergency tree service.

A reliable tree service creates a lush, healthy tree canopy. This enhances your property’s value and benefits the environment. It also positively impacts your local community.

Frequently Asked Questions (Tree Surgeons)

Tree fertilizer is a specialized blend of nutrients that helps promote healthy growth and vigor in trees. An ISA certified arborist can recommend the right fertilizer for your trees to ensure they thrive.
Look for the ISA (International Society of Arboriculture) certification when hiring a tree service. ISA certified arborists have undergone rigorous training and testing to demonstrate their expertise in tree care.
A reputable tree service will provide a free estimate after inspecting your property. They’ll assess the work needed, such as tree removal or trimming, and provide a detailed cost breakdown. This helps you make an informed decision.
If a tree needs to be removed, a certified arborist can safely and efficiently handle the process. They’ll use specialized equipment and follow best practices to remove the tree without causing any damage to your residential or commercial property.
A certified arborist can develop a comprehensive tree care plan to maintain the health and appearance of your trees, especially during the fall season. They’ll work with your tree care crew to ensure your landscape thrives year-round.

Tree Debris Removal

Wall Painters Near You

Can’t find what you are looking for?

How It Works

  • Answer a few questions about your home project.
  • Within seconds, get matched with top-rated local pros.
  • Compare quotes and choose the best pro for the job.

Tree Debris Removal In Your Area

How to Find the Best Tree Debris Removal Service

Tree Debris Removal

Key Takeaways

  • Understand the different types of tree debris and associated removal costs
  • Explore professional tree debris removal options, including renting a dumpster
  • Learn about DIY solutions for hauling away tree limbs and dropping off at landfills
  • Discover the benefits of renting a wood chipper for efficient tree debris management
  • Uncover creative ways to repurpose tree debris, such as turning it into mulch or firewood

Understanding Tree Debris Removal

Tree debris includes branches, limbs, stumps, trunks, leaves, and grass clippings. It also covers other organic waste from trees and landscaping. Managing tree debris keeps properties safe and tidy.

Types of Tree Debris

The main types of tree debris include:

  • Branches and limbs
  • Stumps and trunks
  • Leaves and grass clippings
  • Brush and wood chips
  • Green waste such as yard trimmings

Each type of tree debris has unique traits. They may need different removal and disposal methods. Knowing these differences helps create better tree debris management plans.

Handling tree debris correctly is vital for property safety and looks. Understanding debris types and removal methods prevents hazards. It also helps manage organic waste more effectively.

Professional Tree Debris Removal Options

Managing tree debris requires careful consideration of professional options. Renting a dumpster is a popular choice for convenient debris collection and disposal. Dumpster sizes range from 10 to 40 cubic yards, allowing flexible loading and pickup schedules.

Renting a Dumpster

Tree debris removal costs vary, averaging around $150. Labor costs typically range from $50 to $100 per hour. Stump removal, an additional service, can cost between $80 to $250 per stump.

Several factors influence pricing, including load size, vehicle size, and distance to disposal location. Tipping fees also play a role in determining the overall cost.

Dumpster rental offers on-site debris collection and professional handling. This option saves time and reduces the risk of injuries from DIY removal.

For smaller amounts of debris, DIY solutions may be more cost-effective. These include dropping off at local landfills or transfer stations.

  1. Dumpster sizes range from 10 to 40 cubic yards
  2. Rental process typically involves coordination with local waste management
  3. Costs can be influenced by load size, vehicle size, distance to disposal, and tipping fees
  4. Offers convenience and safety for debris removal
  5. DIY options may be more cost-effective for smaller amounts of debris

Hauling Away Tree Limbs

Tree limb removal

Scheduling a bulky waste pickup or curbside collection is a handy option for tree limb removal. Local waste management departments or private hauling services often provide this service. It’s great for larger volumes of tree debris that won’t fit in standard bins.

Many cities offer curbside pickup for yard waste, including tree limbs and branches. Just place the debris at the curb on collection day. The waste team will handle the tree limb removal and organic waste hauling.

This service is usually part of regular waste fees, making it budget-friendly for homeowners. For bigger loads, bulky waste pickup services are available. These waste management services deal with items too large for standard collection.

Residents can set up a pickup time for haulers to remove tree limbs and other bulky waste. These pro tree limb removal options let homeowners get rid of debris easily. No need to haul it yourself or cram it into regular bins.

DIY Tree Debris Removal Solutions

Homeowners can manage tree debris through several DIY options. Local landfills or transfer stations offer proper disposal or recycling services. Many cities have composting programs to turn organic matter into soil amendments.

You can also store and repurpose wood debris as firewood for personal use. These methods help you handle tree waste responsibly and cost-effectively.

Dropping Off at Landfills or Transfer Stations

Taking tree debris to a landfill or transfer station is a straightforward DIY option. It costs about $30 to $40 per ton, making it budget-friendly.

You might need multiple trips depending on your debris volume. Check local guidelines and fees for disposing of tree waste in your area.

  • Locate your nearest landfill or transfer station that accepts tree debris
  • Prepare the debris by bundling or bagging it for easier transport
  • Be prepared to pay the applicable disposal fees based on the weight or volume of your debris
  • Inquire about any special instructions or requirements for dropping off tree waste

This DIY method can save you money compared to professional services. It also ensures responsible disposal of your tree waste.

Renting a Wood Chipper

Renting a wood chipper is smart for dealing with tree debris. These machines turn branches and twigs into useful mulch or compost. This approach reduces hauling needs and promotes sustainable yard waste management.

Wood chipper rentals typically cost $70 to $550 per day. Companies offer daily, weekly, or monthly rates to fit your project needs. Longer-term rentals are often more cost-effective for extended projects.

Consider your project’s size when choosing a wood chipper. Electric models work well for light tasks and are affordable. Gas-powered units handle bigger jobs but cost more.

Watch for extra fees like delivery, pickup, and insurance. These can impact your total rental expense.

Renting a wood chipper helps manage tree debris efficiently. It also creates a valuable resource for your lawn. This method reduces waste and boosts your outdoor spaces’ health and beauty.

Creative Ways to Repurpose Tree Debris

Tree debris offers exciting repurposing options beyond traditional disposal methods. Leftover branches, stumps, and trunks can unlock creative potential. From wildlife habitats to unique furniture, the possibilities are endless.

Transform tree debris into cozy homes for local wildlife. Hollow out logs or stumps for birdhouses or insect hotels. Larger branches can become rustic fencing, offering protection for small animals.

  • Build birdhouses and insect hotels from tree debris
  • Construct wildlife-friendly fencing and structures
  • Incorporate stumps and logs into landscaping features

DIY enthusiasts can use tree debris for various projects. Slice trunks into wood slabs for one-of-a-kind furniture like coffee tables or benches. Smaller branches can be woven into baskets, wreaths, or sculptures.

  1. Craft furniture from wood slabs and logs
  2. Weave branches into baskets, wreaths, and sculptures
  3. Utilize tree debris for unique home decor

Tree debris can be valuable in the garden. Shredded branches and leaves make excellent mulch, retaining moisture and suppressing weeds. Larger stumps and logs can become seating areas, pathways, or planters.

  • Use shredded tree debris as mulch for gardens and landscaping
  • Incorporate stumps and logs into landscaping features
  • Explore creative ways to repurpose tree debris in your yard

Repurposing tree debris reduces waste and creates a sustainable environment. It enhances outdoor spaces and provides shelter for wildlife. Your imagination is the only limit to what you can create.

Choosing the Right Tree Debris Removal Service

Finding a reliable tree debris removal service is crucial. A professional provider can efficiently clear your property of unwanted branches and leaves. Consider these factors when searching for the best option:

  • Licensing and Insurance: Look for a licensed and insured tree debris removal service. This ensures they follow regulations and provide liability coverage for accidents.
  • Experience and Expertise: Choose a provider with a proven track record. Opt for a company with certified arborists who follow industry best practices.
  • Cost Estimates: Get multiple quotes to compare pricing. Be cautious of extremely low offers, as they may indicate poor service.
  • Customer Reviews: Check online reviews to gauge customer satisfaction. Look for positive feedback on professionalism, timeliness, and attention to detail.

Communicate your specific needs to ensure a smooth process. Discuss timelines, disposal methods, and any special considerations with the service provider.

By choosing the right company, you’ll ensure safe and effective tree debris removal. This will also help you comply with local regulations.

Preparing for Tree Debris Removal

Preparing your property is key before tree debris removal starts. Create space for a dumpster or removal vehicle. Check for needed permits and HOA guidelines.

Organize tree debris into manageable piles. This will make the removal process smoother and more efficient.

Clear your driveway for easy access to removal equipment. Remove obstacles or vehicles to provide enough space. Ask the removal company about the best driveway setup.

  1. Check if your location requires any permits for tree debris removal. Local regulations may have specific guidelines, and your HOA may also have additional requirements.
  2. Review your HOA’s policies regarding tree debris disposal. Some communities have specific instructions on how to handle and organize the debris before removal.
  3. Organize the tree debris into manageable piles or sections. This can help the removal crew efficiently load and transport the materials. Separate any branches, logs, leaves, or other types of debris to streamline the process.

Good preparation ensures a smooth tree debris removal experience. Follow all guidelines to make the process efficient and hassle-free.

Disposal Methods and Regulations

Tree Debris Disposal

Proper tree debris disposal requires knowing approved methods and local rules. Options may include landfills, transfer stations, recycling, or composting programs. Check your area’s guidelines to ensure environmental compliance.

Landfills are common for tree debris disposal. However, check local rules for weight or volume limits. Some areas have specific preparation requirements for tree debris.

Transfer stations offer a handy alternative to landfills. They often have areas for yard waste and organic materials. These facilities may provide recycling or composting services.

  • Many municipalities offer curbside pickup programs for tree debris, especially during seasonal leaf and branch collection periods.
  • Some regions have regulations that prohibit burning of tree debris, so it’s essential to understand and comply with these local guidelines.
  • Composting is an environmentally friendly option for disposing of tree debris, as it can be repurposed as nutrient-rich soil amendment.

Following local rules for tree debris disposal is vital. It ensures responsible management and minimal environmental impact. Stay informed and use best practices for your cleanup efforts.

Environmental Impact of Tree Debris Removal

Tree debris removal is vital for a healthy landscape. However, it can affect the environment. Poor disposal can increase emissions and waste organic materials. It’s crucial to think about eco-friendly ways to handle tree debris.

Tree debris removal has a carbon footprint from transport and disposal. Landfill decomposition releases methane, a harmful greenhouse gas. Sustainable disposal options like composting or chipping can reduce the environmental impact.

Composting tree debris creates useful soil for gardens. Chipping can make mulch for landscaping projects. Both methods promote resource conservation and offer ecological benefits.

  • Use composting or chipping to lessen tree debris removal’s impact.
  • Repurpose tree debris as mulch or soil to promote resource conservation.
  • Reduce the carbon footprint of transportation and disposal.
  • Boost ecological benefits by using eco-friendly removal practices.

By adopting sustainable methods, we can make tree care more environmentally-friendly. This approach helps protect our landscapes and the planet.

FindPros: Your One-Stop Solution for Efficient Yard Debris Removal

Navigating the complexities of yard waste removal can be daunting, but FindPros is here to make the process seamless. Whether you’re dealing with tree branches, fallen trees, or other yard debris, our network of top-rated local professionals can provide the yard waste removal services you need. Simply answer a few questions about your home project, and we’ll match you with the best-suited pros who will compete for your business, ensuring you get the most competitive pricing.

From tree stump removal to brush pile pickup, our trusted providers will handle all the heavy lifting, allowing you to make an informed decision and enjoy a complete, hassle-free solution for your yard waste disposal needs.

Conclusion

Effective tree debris removal keeps your property safe and tidy. You can choose professional or DIY options based on your needs. Prioritize efficiency, safety, and sustainability for successful tree debris removal.

Professional services offer safety, expertise, and proper disposal methods. They save time, reduce accident risks, and enhance your property’s appeal. Responsible disposal is crucial for environmental stewardship and ecosystem balance.

Managing tree debris is key to property maintenance. Choose between professional or DIY solutions based on your needs and budget. Consider all factors to ensure efficient, effective, and eco-friendly tree debris removal.

Frequently Asked Questions (Tree Debris Removal)

The main types of yard debris include branches, limbs, stumps, trunks, leaves, grass clippings, brush, and other organic waste from trees and landscaping.
Professional options include renting a dumpster, scheduling a bulky waste pickup or curbside collection, and using a tree debris removal service. These services can efficiently handle the cleanup and disposal of yard waste.
DIY methods for yard debris removal include taking it to the local landfill or transfer station, renting a wood chipper to create mulch, and repurposing the debris for projects like wildlife habitats or landscaping features.
Important factors include the service provider’s licensing, insurance, experience, and expertise, as well as getting multiple cost estimates and reading customer reviews. Communicating your specific needs is also crucial for a smooth process.
Preparation steps include creating space for a dumpster or removal vehicle, checking for any required permits or HOA guidelines, organizing the debris into manageable piles, and clearing the driveway for easy access. This ensures an efficient and hassle-free removal process.