Mole Exterminators

Mole Exterminators Near You

Can’t find what you are looking for?

How It Works

  • Answer a few questions about your home project.
  • Within seconds, get matched with top-rated local pros.
  • Compare quotes and choose the best pro for the job.

Mole Exterminators In Your Area

Mole Exterminators: Your Guide to Hiring the Best

Meta Description: Discover expert mole exterminators near you. Learn effective control methods, costs, and how to choose the right professional to rid your property of destructive moles.

Mole Exterminators

Is your yard turning into a mess of molehills and tunnels? Moles can wreak havoc on lawns and gardens. Hiring a pro mole exterminator is often the best solution.

This guide will help you find the right mole exterminators for your property. We’ll cover costs, methods, and services to help you make a smart choice.

Key Takeaways

  • 01

    Moles can cause big damage to yards with their tunnels and dirt mounds.

  • 02

    A pro mole exterminator is often the best way to fix the problem.

  • 03

    The average cost for mole extermination is $300, but prices can vary.

  • 04

    Factors like property size and yard repair needs can affect the final cost.

  • 05

    This guide covers hiring mole exterminators, their services, and managing costs.

Understanding Moles and Their Habits

Moles are small, cylindrical rodents that live underground. They have pointed snouts, short tails, and create round-shaped mounds. These features distinguish them from voles and gophers.

Distinguishing Moles from Voles and Other Burrowing Pests

Moles are larger than voles, measuring 4.4 to 6.25 inches long. They weigh 2.5 to 4.5 ounces. Voles have a more rounded body and shorter snout.

Moles: The Solitary Dwellers of Underground Tunnels

Moles live alone, except during mating season. They dig extensive tunnel networks using their strong front paws and sharp claws. Their main diet consists of insects, earthworms, and grubs.

Mole activity peaks in spring and summer when soil is softer. They dig more easily during these seasons.

Moles can create tunnel systems covering up to 2.7 acres in one territory. Their digging often damages lawns, gardens, and landscaping. This makes them a common problem for homeowners.

The Difference Between Mole Control and Mole Extermination

Moles on your property can be tricky to handle. The approach depends on your location and land size. Sometimes, mole extermination works, while other times, mole control is better.

Natural habitats nearby can affect mole management. Urban homeowners might achieve full mole extermination. Rural residents may need ongoing mole control measures instead.

Property size and layout influence the choice. Large or diverse landscapes may require long-term mole control. Smaller yards might suit mole extermination efforts better.

To eradicate moles effectively, consider your specific property and surroundings. Experts can help you choose the best approach for your land.

Evaluate your property and environment carefully. This helps decide between mole control and mole extermination. Mole control experts can guide you to the most effective solution.

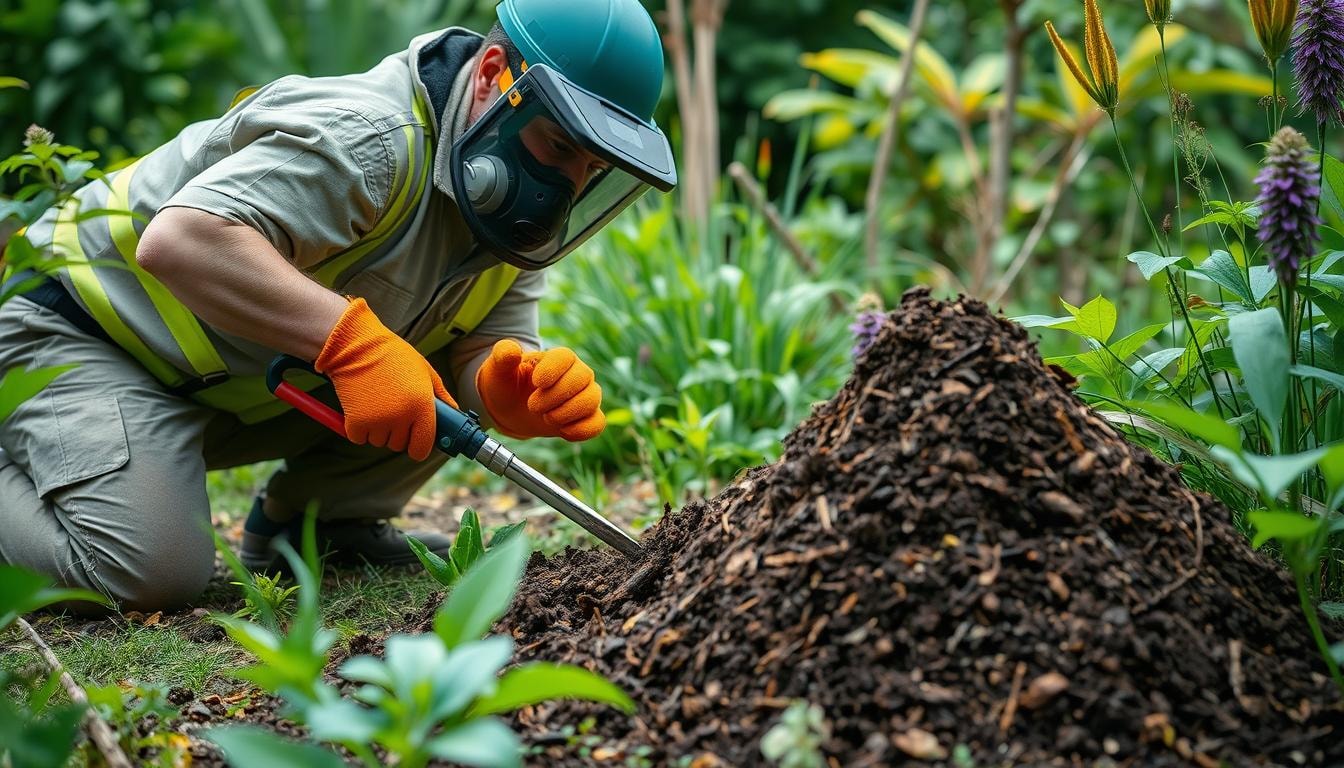
Mole Extermination Methods

Mole exterminators use various techniques to remove burrowing pests from your property. These methods range from exclusion and grub control to advanced fumigation. Each approach offers unique benefits in tackling mole problems.

Exclusion: Fencing Out Moles from Your Garden

Exclusion is an effective mole extermination method. It involves installing wire mesh or galvanized steel screens below your garden’s surface. This barrier stops moles from burrowing into specific areas.

The fencing must extend deep enough to be effective. Moles can dig up to 160 feet of ground in just one night.

Grub Control: Removing Moles’ Food Source

Moles are drawn to grubs and insects in lush lawns and gardens. Using granular insecticides can control grub populations, making your yard less attractive to moles.

However, this method can affect beneficial organisms like earthworms. A balanced approach is recommended when using this technique.

Fumigation: Using Gases to Kill Moles Underground

Fumigation is a direct approach to mole extermination. It uses gases like carbon dioxide, nitrogen, phosphine, or sulfur to penetrate mole tunnels.

This method can effectively eradicate mole infestations. However, it’s often the most expensive option available.

Each mole extermination method has its own pros and cons. Consult a professional pest control expert to find the best approach for your situation.

Trapping Moles: A Hands-On Approach

mole trapping

Trapping is an effective way to remove moles, but it needs consistent effort. Homeowners can use snap traps, scissor-jaw traps, or live traps. Live trapping is less practical because moles rarely come above ground.

Experts suggest setting 3 to 5 traps in active tunnel systems. This boosts the chances of catching these elusive pests. Proper placement is key, as moles create surface and deeper tunnels.

Mole trapping can take weeks to show results. Check traps every 24 hours and reset as needed. Moles are persistent, creating up to 150 feet of tunnels daily.

Some homeowners manually remove moles using a shovel and container. Check local wildlife laws before trapping and releasing moles. It’s important to follow regulations.

DIY mole trapping can save money, but it has challenges. Wrong trap placement or type can lead to frustration. For severe cases, consult professional pest control experts.

Preventive measures can help keep moles away from your yard. Install barriers, remove food sources, and compact the soil. Understanding mole behavior helps maintain a healthy, mole-free lawn and garden.

Baiting: The Cost-Effective Mole Removal Method

Mole baiting is a budget-friendly way to get rid of moles. It uses rodenticide baits placed in tunnel openings. This method keeps other animals safe from the bait.

Professional mole baiting services cost between $125 and $275. The price depends on your property’s tunnel system size.

Baiting can be effective and affordable. But it must be done safely to protect pets and wildlife. Pest experts know how to handle mole baiting properly.

Mole baiting is often cheaper than trapping or fumigation. Most homeowners pay about $400 for medium mole infestations. Baiting can save you money while still solving the problem.

It’s best to talk to a pest control service about mole baiting. They can check your property and suggest the right approach. Experts ensure the process is safe and follows local rules.

With professional help, mole baiting can solve your pest issues. It’s a cost-effective way to care for your lawn.

Pricing Factors for Mole Extermination Services

Mole extermination costs vary based on several key factors. The number of molehills on the property is a primary consideration. For one or two molehills, prices typically range from $100 to $250.

Properties with three to four molehills may cost $290 to $380. Larger infestations with extensive tunnel systems can exceed $500. Pest control companies assess the size and complexity of the mole problem.

They consider property size, ongoing maintenance needs, and potential rodent damage repairs. Choose reputable companies with proper licensing, insurance, and expertise for effective mole removal.

Mole Exterminator Costs Based on the Number of Molehills

  • 1-2 molehills: $100 – $250
  • 3-4 molehills: $290 – $380
  • Larger infestations with extensive tunnel systems: $500+

Mole control costs can differ between towns and cities across the United States. Research and contact local pest control companies for accurate pricing information. They can provide specific details for your area and mole infestation situation.

Mole Exterminators: Service Plans and Contracts

Homeowners often seek professional mole exterminator services for stubborn infestations. These services offer structured plans to manage mole, vole, and gopher populations. Long-term solutions help keep your property pest-free and looking great.

Monthly Service Agreements

Monthly plans are a popular choice for ongoing mole control. They typically cost $40 to $60 per month. Regular visits help maintain your lawn’s health and appearance year-round.

Quarterly Contracts

Some services offer quarterly contracts for a more thorough approach. These usually cost $100 to $300 per visit, with four visits yearly. Contracts often include trapping, baiting, and other effective mole control methods.

Seasonal Plans for Peak Mole Activity

Seasonal plans target peak mole activity periods. They cover three to six months with monthly visits. These plans usually cost $100 to $175 per month.

Service plans provide recurring pest control and expert care. They offer long-term benefits for maintaining a healthy, mole-free property. Homeowners can enjoy a beautiful lawn without the hassle of mole damage.

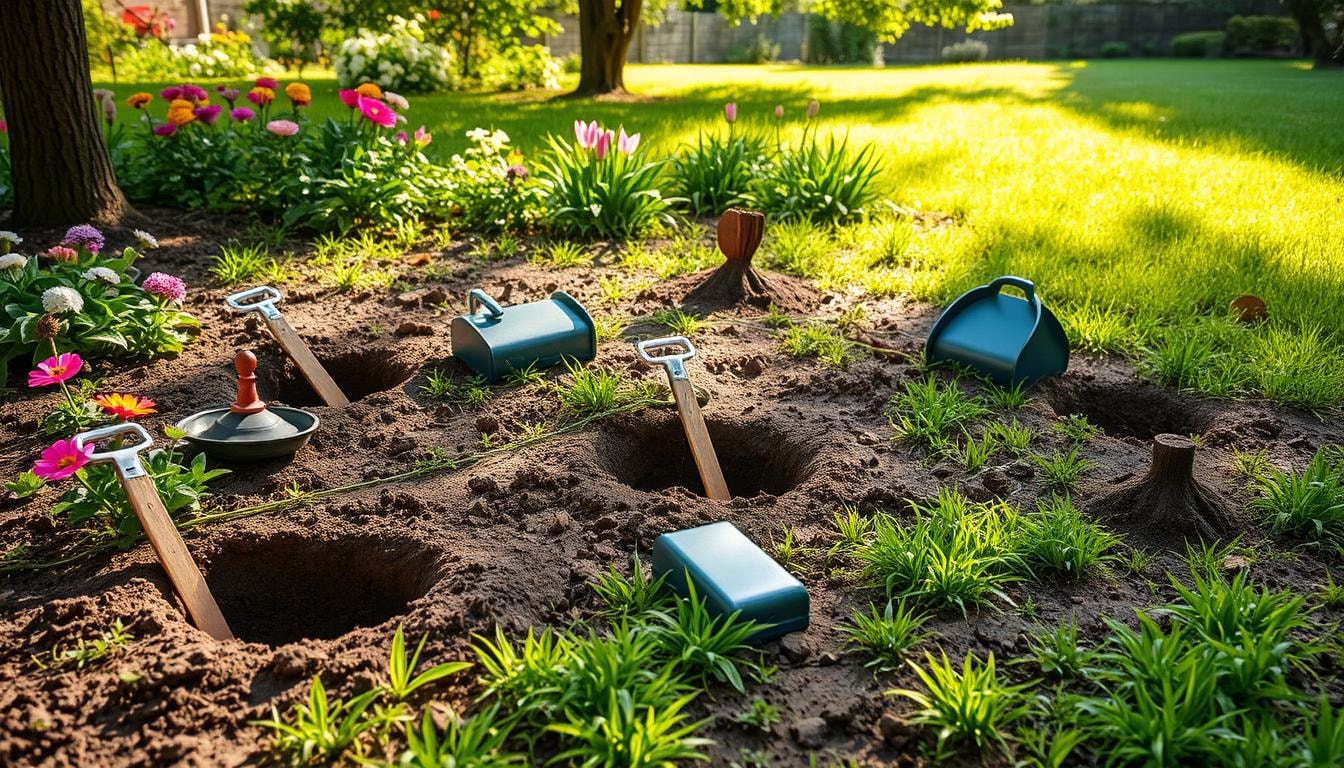
Landscaping and Yard Repair Costs After Mole Removal

Mole Damage

Mole infestations can wreak havoc on your property. They cause unsightly soil disturbances and destroy lawns and gardens. Homeowners must consider both extermination and restoration costs.

Landscaping and yard repair after mole removal can cost $100 to $500. The price depends on property size and damage extent. These tasks include filling holes, leveling soil, and reseeding lawns.

Hiring a professional landscaping company is crucial for restoring your yard. They ensure your outdoor space returns to its former glory. This investment helps maintain your property’s beauty and value.

  • Landscaping costs: $100 to $500
  • Yard repair activities:
    • Filling in holes
    • Leveling the soil
    • Reseeding the lawn
    • Replanting damaged plants and gardens
  • Hiring a landscaping professional can ensure a comprehensive restoration of your property after mole removal.

Understanding repair costs helps homeowners plan for mole infestation expenses. Professional extermination and landscaping services restore outdoor spaces. Your property can return to its pristine condition with proper care.

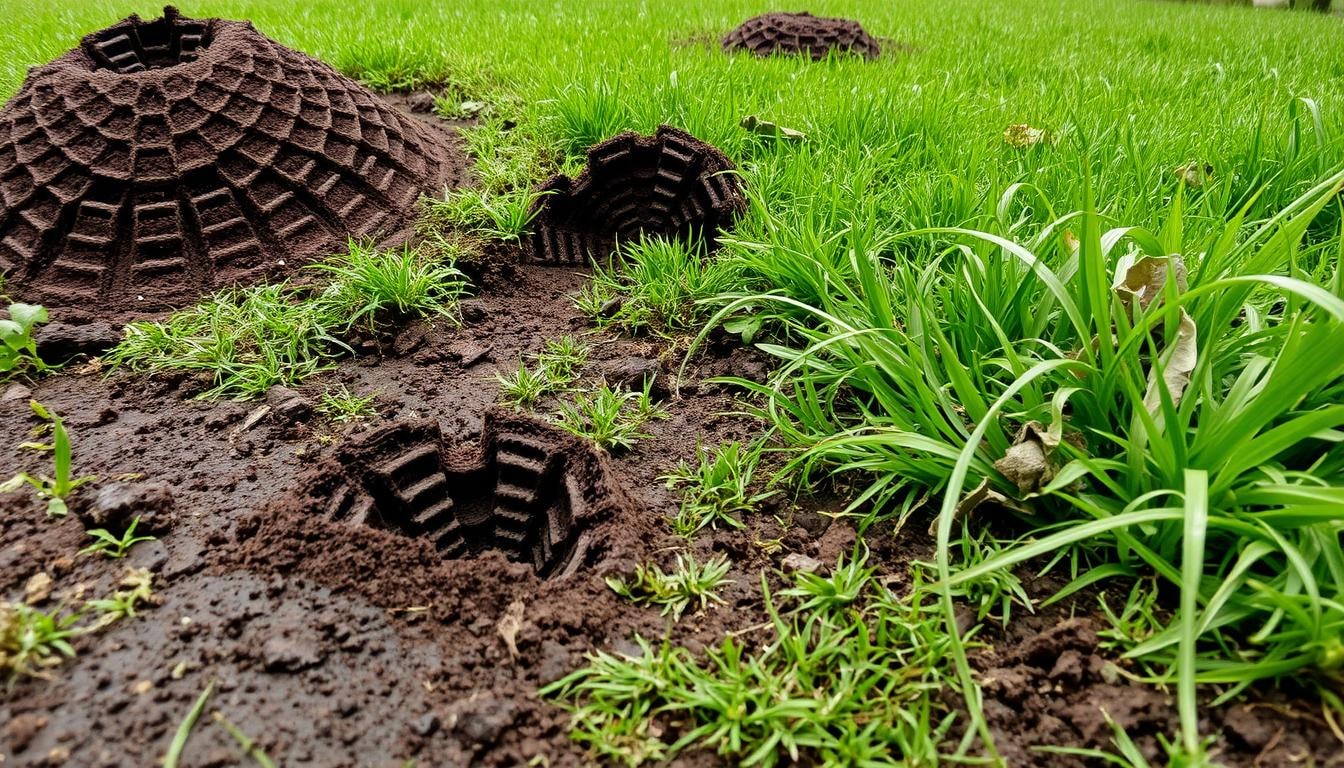
Mole Exterminators: Identifying the Signs of Infestation

Spotting mole infestation signs is key for effective pest control. Moles differ from voles and gophers in looks and behavior. Knowing these signs helps homeowners explain the problem to exterminators.

Distinguishing Moles, Voles, and Gophers

Moles have pointed snouts, short tails, and large front paws for digging. Voles have rounded snouts, long tails, and smaller paws. Gophers have rounder heads and smaller front paws.

Moles create round, volcano-shaped mounds. Gophers leave crescent-shaped mounds with finer dirt particles.

Recognizing Mole Activity and Damage

  • Mole tunnels near the surface of the lawn, creating visible ridges or “runs”
  • Frequent appearance of fresh, moist molehills, typically in a scattered pattern
  • Discolored or dying patches of grass, indicating damage to plant roots
  • Abundance of stones or other debris brought to the surface by mole tunneling
  • Dying plants or shrubs, often due to moles disrupting the root systems

Watching for these signs helps gauge the infestation’s extent. This information is vital when talking to mole exterminators. It ensures they can provide the right pest control solutions.

Health Concerns and Risks Associated with Moles

Moles may look cute, but they can pose health risks to homeowners. These burrowing pests can transmit diseases, though it’s not common. If threatened, moles can bite painfully, potentially spreading illness or causing injury.

Moles aren’t major disease carriers. However, they can host parasites like ticks and fleas that carry illnesses. Ticks in mole tunnels can spread Lyme disease and anaplasmosis. Fleas on moles might carry plague and murine typhus.

Rabies in moles is very rare. The risk of transmission to humans is low. Still, seek medical help if bitten by a mole. Watch for signs of infection or tick-borne diseases.

Moles aren’t usually aggressive towards humans. Clean and disinfect any mole bite wound thoroughly. Mole tunnels and mounds can create tripping hazards. They can also harm the health of your lawn or garden.

To reduce mole-related health risks, consider professional pest control. Experts can manage mole populations effectively. This helps keep your family and pets safe from potential harm.

Choosing Between Exterminators and Lawn Care Professionals

Homeowners facing mole problems can hire specialized exterminators or lawn care experts. Mole exterminators focus on pest elimination. Lawn care professionals offer a more comprehensive approach to mole management.

Expertise in Comprehensive Lawn Care Solutions

Lawn care experts consider overall lawn health and environmental factors attracting moles. They develop customized solutions addressing the root causes of infestations. This leads to more effective and long-lasting mole removal and prevention.

Personalized Mole Control Strategies

Lawn professionals offer tailored mole control strategies based on your property’s unique features. They consider soil type, vegetation, and moisture levels. This results in more effective and sustainable solutions for mole prevention.

Superior Mole Remedies from Lawn Pest Experts

Lawn care professionals have access to a wide range of pest control methods and products. They use integrated pest management strategies for effective, long-lasting mole infestation solutions.

Their expertise in lawn maintenance ensures your lawn stays healthy despite mole-related damage. This comprehensive approach provides better results than focusing solely on pest elimination.

Discover Local FindPros for Mole Extermination

Having trouble finding the right mole exterminator for your property? FindPros can help. Simply answer a few questions about your mole infestation, and we’ll match you with top-rated local professionals who offer several methods to exterminate moles and protect your yard. Get the best pricing when multiple pros compete for your job, and find the experts you feel most comfortable with.

Whether you need an initial visit or ongoing mole control, FindPros provides access to the right service providers for your specific needs. Learn more about our featured mole extermination specialists and other insects, rats, or animal species that may be troubling your home.

Conclusion

Moles can wreak havoc on lawns and gardens. Hiring expert mole exterminators or lawn care pros is key to tackling mole infestations. This guide covers mole control methods, costs, and choosing the right service provider.

Homeowners can reclaim their property with the right mole-free strategies. Trapping techniques, dealing with the food source, or getting help from pest management experts are effective solutions. These methods protect your property and keep your yard in top shape.

The right approach and expert guidance can solve mole problems for good. Prioritizing comprehensive solutions safeguards your property from these pesky critters. With proper care, you can enjoy a thriving, lush yard free from pest troubles.

Frequently Asked Questions (Mole Exterminators)

You can identify a mole infestation by looking for signs like molehills, ridges in the lawn, and dying plants. Moles are solitary animals that create round, volcano-shaped mounds, unlike gophers or voles.
The most effective methods to eliminate moles include using traps, baits, and fumigation. Exclusion fencing and grub control can also help deter moles from your property.
The cost to hire a mole exterminator can range from $100 to over $500, depending on the size of the infestation and extent of the damage. Factors like property size and the need for yard repairs can also affect the labor costs.
Moles are attracted to areas with a lot of insects, grubs, and other food sources. Applying a one-time grub treatment or using castor oil can help deter moles and make your yard less attractive to them.
If you have a serious mole infestation, it generally makes sense to hire a professional mole exterminator or lawn care expert. They have access to more effective methods and can provide follow-up treatments to ensure the moles are eliminated. However, for smaller issues, you can try using kill traps or other DIY mole deterrents.

Mold Inspectors

Mole Exterminators Near You

Can’t find what you are looking for?

How It Works

  • Answer a few questions about your home project.
  • Within seconds, get matched with top-rated local pros.
  • Compare quotes and choose the best pro for the job.

Mold Inspectors In Your Area

Mold Inspectors: Find the Right Expert for Your Home

Meta Description: Discover expert mold inspectors for comprehensive home assessments. Learn about inspection processes, costs, and benefits to ensure a safe, healthy living environment.

Mold Inspectors

Is your home hiding a mold problem? Professional mold inspectors can help you find out. They’re crucial for identifying and addressing mold growth in your living space.

But how do you choose the right mold inspector? With so many options, it can be tricky. Let’s explore how to find the best expert for your home.

Key Takeaways

  • 01

    Mold inspectors perform comprehensive assessments to determine the root cause of mold growth and provide recommendations for remediation.

  • 02

    Hiring a professional mold inspector is essential when purchasing a new home, after water damage, when restoring a vacant house, after mold remediation work, or if visible mold is present.

  • 03

    Mold exposure can be detrimental to health, so understanding the need for mold inspection and finding the right expert is vital for maintaining a safe, mold-free living environment.

  • 04

    Mold inspectors should have the necessary certifications, experience, and expertise to provide accurate assessments and practical solutions.

  • 05

    Mold inspection costs can vary widely, but the investment is crucial for addressing mold issues before they escalate and compromise your home and family’s well-being.

Understanding the Need for Mold Inspection

Mold growth can be a persistent problem in homes with water damage or long vacancies. Regular mold inspections help identify and address issues early. These checks are vital to prevent escalation of mold problems.

  • When Purchasing a New Home: A thorough mold inspection is crucial during the home inspection process. Experienced inspectors can uncover hidden growth or moisture issues. This step helps prevent future mold problems in your new property.
  • When Water Damage Has Occurred: Mold thrives in dark, damp spaces after water damage from leaks. An inspection assesses the problem’s extent. It also determines the best remediation methods for your situation.
  • When Restoring a Vacant House: Unoccupied houses can become mold breeding grounds. A mold inspection is necessary before starting any restoration work. This ensures the safety of both the property and workers involved.
  • After Mold Remediation Work: A follow-up inspection is crucial after mold remediation. It confirms that all mold has been removed. This step ensures the problem has been effectively addressed.
  • If Mold Is Visible: When you spot mold on any surface, call for a professional inspection. They’ll assess the situation properly. An expert can recommend the right remediation methods for your home.

Regular inspections and proactive moisture control help prevent mold growth. Addressing mold concerns promptly ensures your home’s health and safety. Quick action avoids costly and hazardous consequences of untreated mold.

Hiring a Professional Mold Inspector

A professional mold inspector is crucial for thorough home assessments. They identify the root cause of mold growth. Their expertise ensures a safe and healthy living environment.

About 70% of homes have mold, often due to moisture issues. Mold exposure can worsen allergies and cause respiratory problems. Mold inspection services help limit exposure and control its spread.

When choosing an inspector, look for certifications from reputable organizations. Ensure they have experience in mold investigation and sampling. The inspector should carry Professional Liability Insurance for client protection.

  • Find a reputable mold inspector through referrals and reviews.
  • Communicate openly and expect a detailed report with recommendations.
  • Avoid companies that both test and remediate mold.
  • Choose mold inspection firms in good standing with the BBB.

A professional mold inspector provides an unbiased property assessment. This leads to effective mold remediation. The result is a safe, healthy living environment.

Mold Inspectors vs. DIY Mold Testing

Choosing between mold inspectors and DIY mold testing kits can impact result accuracy and remediation efforts. Professional mold inspectors offer a more comprehensive approach to identifying mold issues. Their expertise ensures reliable results for effective mold treatment.

Mold Inspection Costs

Professional mold inspections cost $300 to $1,000, depending on home size and inspector experience. DIY mold test kits cost $50 to $100. The benefits of a professional inspection outweigh the higher initial cost.

Limitations of DIY Mold Testing

  • DIY mold test kits are limited in the types of mold they can detect, often focusing only on airborne mold spores.
  • These kits may provide incomplete or inaccurate results, as they lack the precision and expertise of certified mold inspectors.
  • The accuracy rate of DIY test kits can vary widely, making it difficult to rely on their findings.
  • DIY kits cannot identify the specific types of mold present or assess the extent of the contamination, which is crucial for developing an effective remediation plan.

Professional mold inspectors use advanced tools like moisture meters, infrared cameras, and air sampling devices. These tools help accurately detect various mold types in homes. Inspectors follow methods recommended by AIHA and ACGIH for comprehensive mold reports.

These reports detail mold types, concentration levels, and affected areas. This information is crucial for creating effective mold remediation plans. Certified inspectors also provide guidance on preventing future mold infestations.

The Mold Inspection Process

mold inspection process

Mold inspection is vital for tackling mold issues in your home. It’s a thorough assessment that guides the creation of an effective remediation plan.

Visual Inspection

The process starts with a detailed visual check of your property. Experts look for signs of mold growth and moisture problems. They identify the mold’s extent and location, as well as its underlying causes.

Air and Surface Sampling

After the visual check, inspectors collect air and surface samples. These samples come from affected areas and various surfaces. They’re sent to a certified lab for analysis.

Laboratory Analysis

Lab analysis is crucial in mold inspection. It reveals the mold type, potential health risks, and infestation severity. This data helps create a thorough remediation plan.

The mold inspection process combines visual checks, sampling, and lab analysis. It provides a full picture of the mold situation. This info helps homeowners make smart decisions about mold removal.

Mold Inspectors: Understanding Their Qualifications

Hiring a qualified mold inspector is crucial. Top inspectors have certifications from reputable institutions like IICRC. These cover mold inspection, infrared technology, and water damage restoration.

Certifications show their thorough training and expertise in the field. They demonstrate the inspector’s knowledge and skills in mold detection.

Certifications and Training

Certified mold inspectors complete extensive coursework and pass comprehensive exams. For instance, AHIT’s Certified Mold Assessor Technician Course involves 16 hours of online training.

Certification ensures inspectors are educated in all aspects of mold detection and remediation. This knowledge is essential for accurate mold assessment.

Experience and Expertise

Experienced mold inspectors understand building science concepts like moisture control and ventilation. They use infrared technology and know water damage restoration techniques.

This expertise allows them to accurately identify and assess mold issues. Hiring a certified, experienced inspector can greatly impact the inspection’s quality.

A certified mold inspection ensures thorough evaluation of your property. It helps address any mold-related issues properly.

Mold Inspectors: Services and Limitations

Mold inspectors examine accessible interior areas for signs of leaks and water damage. They focus on moisture-prone spaces like bathrooms, kitchens, and laundry rooms. Their goal is to identify potential mold growth in these areas.

Standard inspections may not include attics, crawlspaces, or exteriors. These areas can be harder to access or need special equipment. Inspectors may only check them if specifically asked.

  • Mold inspectors are required to adhere to the NAMRI Code of Ethics, which emphasizes integrity, client confidentiality, and professional competence.
  • Inspectors must perform inspections in compliance with NAMRI Standards of Practice, ensuring clarity in reporting suspected microbial growth and conducive areas.
  • The scope of mold inspections is limited to visual observations of accessible areas to detect suspected mold growth and report conditions conducive to microbial growth.
  • Limitations to mold inspections include not dismantling or moving equipment, furniture, or inaccessible areas like concealed structural elements.

Understanding a mold inspector’s services and limits is key. Work with a qualified professional to get a thorough inspection. They’ll provide a detailed report on potential mold issues in accessible areas of your home.

Mold Testing: When It’s Necessary

Mold testing isn’t always needed, especially when mold is visible. Air quality testing checks if home air is safe. Surface sampling identifies the mold type.

Testing should follow a visual check. It helps find the mold’s source and spread. Air tests can confirm safety after mold removal.

Air Quality Testing

Air quality testing is key for indoor safety. It finds airborne mold spores that can harm health. This test shows if mold removal is needed.

It also checks if the air is safe after cleanup. Homeowners can make sure their air is healthy.

Surface Sampling

Surface sampling checks mold on walls, floors, and furniture. It tells us what kind of mold is there. This helps target the cleanup and fix the problem fully.

Mold testing isn’t always needed. The EPA says to skip it if you see mold. Instead, focus on cleaning it up.

Testing helps when buying a home or after water damage. It’s also good for vacant properties. These tests ensure the air is safe.

Mold Inspectors: Finding the Right One

mold inspectors

Finding an experienced mold inspector with a proven track record is crucial. Ask for referrals and check online reviews to identify reliable professionals.

Referrals and Reviews

Get recommendations from friends, neighbors, or real estate agents for mold inspectors. Look for positive reviews highlighting expertise, communication, and thoroughness. Online platforms can provide insights into work quality and customer service.

Communication and Reporting

Choose a mold inspector who communicates effectively. They should discuss the problem and explain the inspection process clearly. A thorough written report detailing results and remediation recommendations is essential.

Prioritize referrals, reviews, and clear communication when selecting a mold inspector. This approach ensures you find a thorough and transparent professional for your home.

Interpreting the Findings of Mold Inspectors

Mold inspectors assess properties and provide crucial recommendations for addressing mold problems. Their findings shape the remediation plan and ensure effective mold eradication.

Inspectors analyze key factors like the extent and type of mold growth. They conduct visual inspections and collect samples to determine the issue’s severity.

They also identify specific mold species involved. This information guides the remediation plan and treatment approach.

  1. Extent of Mold Growth: Inspectors assess the size and location of visible mold colonies. They also check for hidden mold in walls and crawlspaces.
  2. Type of Mold: Laboratory analysis helps identify specific mold species. This information is crucial for creating an effective remediation plan.

Inspectors provide homeowners with a clear understanding of the mold problem. They recommend an effective remediation plan to address the issue completely.

The plan may include moisture control, structural repairs, and professional mold removal. These steps ensure mold elimination and prevent future growth.

Interpreting mold inspection findings is crucial for successful remediation. Homeowners should work closely with their inspector to understand the results fully.

This collaboration helps homeowners feel confident in the recommended action plan. It’s essential for addressing mold issues effectively and permanently.

Mold Remediation: The Next Step

After a mold inspection, professional mold remediation is crucial. Mold inspectors can recommend reputable remediation companies for proper handling. These experts can effectively manage the remediation process.

The remediation process involves several key steps:

  1. Controlling the moisture control source to prevent future mold growth
  2. Drying the affected areas to eliminate any remaining moisture
  3. Containment of the mold to prevent it from spreading to other areas
  4. Cleaning of all contaminated surfaces and materials
  5. Proper disposal of any mold-infested items or debris

Effective mold remediation ensures mold is fully addressed and doesn’t return. Reputable companies often require post-remediation clearance from third-party mold assessors.

Choosing a Remediation Company

Look for remediation companies with specific mold expertise. Ask about recent mold remediations they’ve performed. Check if they have required licenses or certifications in your area.

The Remediation Process

The remediation process starts with a thorough mold infestation assessment. This includes visual inspection, air quality testing, and moisture testing.

A comprehensive plan is then developed for containment, cleaning, and disposal. Well-executed remediation effectively addresses mold and prevents future growth.

Mold Prevention and Maintenance

Mold prevention is crucial for a healthy home. Control moisture levels and address potential issues early. Regular maintenance helps safeguard your living space from mold growth.

Controlling Moisture Levels

Mold thrives in damp conditions. Keep indoor humidity below 50% using HVAC systems and dehumidifiers. Check for water leaks and condensation regularly.

Address any sources of excess moisture promptly. This prevents mold from taking hold in your home.

Regular Inspections

  • Inspect your home often, focusing on areas prone to moisture buildup.
  • Look for water damage signs, musty odors, or visible mold growth.
  • Consider hiring a professional mold inspector for thorough assessments.

Stay alert and take action to control moisture. Conduct regular inspections to catch issues early. Quick responses to moisture problems maintain a healthy, mold-free home.

The Importance of Mold Inspectors’ Expertise

Professional mold inspectors are vital for addressing home mold issues. They have the knowledge and tools to assess, identify, and recommend solutions. Their expertise ensures mold problems are fully resolved, protecting your health and air quality.

Mold inspectors can find hidden infestations and identify different mold species. They use advanced tools like infrared thermography and moisture meters. Their process includes visual checks, moisture assessment, and lab analysis of mold samples.

Hiring a professional provides accurate assessment and a custom remediation plan. They offer guidance on preventing future mold growth. This expertise gives you peace of mind about your home’s safety.

Reputable companies often require post-remediation clearance by third-party assessors. This step confirms the mold problem is solved and your home is safe again.

Mold grows on materials exposed to wetness or high humidity. Spores can spread, creating new contaminated areas through cross-contamination. These spores are invisible to the naked eye.

Professional inspection is key to developing an effective remediation plan. It guides proper containment, cleaning, and restoration. The cost ranges from $200 to $400 for an average house.

This investment helps address mold problems thoroughly. It prevents further health risks and property damage.

Mold Inspections for Rental Properties

Mold is a common issue in rental properties. Both tenants and landlords need to know their roles in mold inspections. Building codes, laws, and lease terms often decide who handles mold problems.

Tenant vs. Landlord Responsibilities

Tenants can ask for a mold inspection if they suspect growth. Landlords usually must fix mold issues within 30 days of a written complaint. Tenants should keep the property clean and report mold quickly.

Landlords may have to pay for mold removal in certain cases. This includes when the mold isn’t caused by tenants and they ignore complaints. Professional mold inspectors can help solve these issues in rental properties.

About 50% of US homes have some form of mold. Mold can grow and spread within 24 to 48 hours if left alone. This can lead to health issues like breathing problems and allergies.

Yearly mold checks are a good idea. Landlords should do them when tenants report issues. If landlords don’t fix mold problems, legal action may be needed.

Severe mold can make a property unlivable. Tenants might seek money for medical bills and moving costs. Both parties should know their duties and work together on mold issues.

Let FindPros Help You Find the Right Mold Inspector

Struggling to find the right mold inspector for your home? Let FindPros match you with top-rated local professionals who can provide a comprehensive assessment and recommend effective solutions. Answer a few questions about your mold concerns, from musty smells in crawl spaces to visible growth on hard surfaces.

Within seconds, we’ll connect you with experts well-versed in detecting and remediating all types of molds, including the hazardous Stachybotrys chartarum. Get the best pricing when multiple pros compete for your job and find the perfect match for your home project. Take the first step towards a healthier, mold-free living environment with FindPros.

Conclusion

Mold inspectors ensure homeowners’ health and safety through comprehensive assessments. They identify mold growth causes and provide remediation recommendations. Hiring a qualified inspector is crucial for their expertise in the inspection process.

Mold inspectors help interpret findings and guide homeowners through necessary steps. By understanding inspections’ importance, homeowners can maintain a healthy environment. Early detection and strategic remediation protect property value and family well-being.

Mold affects an estimated 70% of U.S. homes. Professional inspections use air sampling and surface testing to identify mold types. These methods help quantify concentrations and determine appropriate actions.

Homeowners who prioritize mold inspections show commitment to a healthy living space. This is important when buying a home, addressing water damage, or maintaining property.

Frequently Asked Questions (Mold Inspectors)

Mold inspection costs can range from $300 to $1,000, depending on the size of the home and the inspector’s experience.
Mold tests, such as air quality testing and surface sampling, help identify the type and concentration of mold present in the home. This information is crucial for developing an effective remediation plan.
A moisture meter is a tool used by mold inspectors to measure the moisture content in walls, floors, and other surfaces. This helps them identify areas with high moisture levels, which can lead to mold growth.
It’s crucial to address all the mold in a home, as even small amounts can spread and cause significant damage. Partial or incomplete mold remediation can lead to the problem recurring.
The HVAC system can contribute to mold growth if it’s not properly maintained. Inspectors may recommend upgrades or modifications to the HVAC system to improve air circulation and reduce moisture levels, which can prevent mold from forming.

Mirror Repair

Mole Exterminators Near You

Can’t find what you are looking for?

How It Works

  • Answer a few questions about your home project.
  • Within seconds, get matched with top-rated local pros.
  • Compare quotes and choose the best pro for the job.

Mirror Repair In Your Area

Professional Mirror Repair: Restoring Your Mirrors to Perfection

Meta Description: Discover expert mirror repair services to restore your damaged mirrors. From cracks to chips, we provide professional solutions for all types of mirror issues.

Mirror Repair

Mirrors add both function and beauty to our homes. They create an illusion of space and enhance decor. Keeping mirrors in top shape is crucial for their looks and use.

Sometimes, mirror damage goes beyond simple fixes at home. That’s when expert help becomes essential. Professional services can bring damaged mirrors back to their original state.

Let’s explore how experts fix various mirror issues. We’ll look at solutions for problems like cracks and chips. You’ll learn how to revive your damaged mirrors.

Key Takeaways

  • 01

    Professional mirror repair services can restore damaged mirrors to their former glory.

  • 02

    Expert technicians can address a wide range of mirror issues, from small cracks to extensive damage.

  • 03

    Properly repaired mirrors can enhance the aesthetic appeal and functionality of your home or business.

  • 04

    Regular maintenance and proper care can extend the lifespan of your mirrors.

  • 05

    Seeking professional assistance is recommended for valuable or large mirrors with significant damage.

Ever wonder when to call in the pros for mirror repair? Curious how experts can make damaged mirrors shine again? This guide has answers.

We’ll uncover the secrets of professional mirror restoration. You’ll learn how to give new life to your mirrors. Get ready to see your reflection in a whole new light!

Understanding the Importance of Repairing Cracked and Broken Mirrors

Cracked mirrors are not just unsightly; they can be dangerous. They can weaken your home or business’s structure. Damaged mirrors may lead to bigger problems and expensive replacements.

Maintaining Mirror’s Integrity

Fixing small cracks or chips can stop them from growing. This can make your mirror last 25% longer. Early repairs keep mirrors safe and secure for years.

Aesthetic Appeal & Value Preservation

Well-kept mirrors make spaces look better and can boost property value. Damaged mirrors can make your home or business less appealing. Quick repairs are key to keeping mirrors looking good.

Hiring professional mirror repair services is a smart move. It protects your home or business and your investment. Fixing cracked mirrors quickly lets you enjoy beautiful, strong mirrors for years.

The DIY Approach: Repairing Small Cracks in Mirrors

Minor cracks in mirrors can often be fixed at home. Simple DIY mirror repair methods use common items. These techniques can help restore mirrors to their original state.

  • Using Aluminum Foil for Quick Fixes: Aluminum foil can fix small, hairline cracks in mirrors. This quick solution helps stop cracks from getting bigger. However, it may not work for larger mirror problems.
  • Repairing with Epoxy Resin Adhesive: Epoxy resin adhesive can fix bigger mirror cracks. This special glue fills gaps and smooths the mirror’s surface. Always wear cut-resistant gloves when handling glass during repairs.

Safety is key when fixing mirrors at home. Take care to avoid injuries from sharp glass edges.

Mirror Repair Kits: A Convenient Solution

mirror repair kits

Mirror repair kits offer a quick fix for minor damage. These kits include epoxy resin adhesive to fill imperfections. The process involves cleaning, taping, and applying resin to cracks.

The Components and Process

Mirror repair kits usually contain the following components:

  • Epoxy resin adhesive
  • Applicator tool or syringe
  • Clear tape
  • Instructions for the repair process

Clean the damaged area thoroughly before starting. Apply clear tape over larger cracks for protection. Carefully add epoxy resin to smaller cracks or flaws.

The resin bonds with the mirror’s surface. This creates a smooth and lasting repair.

Efficacy of Resin-Based Repair Kits

These kits effectively fix small black spots or tiny cracks. The resin-based adhesive restores the mirror’s reflective properties. It also improves the mirror’s overall look.

Safety is crucial when working with glass. Always wear cut-resistant gloves during repairs.

Mirror repair kits are popular for their ease and affordability. They work well on bathroom mirrors and wall mirrors. These kits help maintain your mirrors’ look without breaking the bank.

Step-by-Step Guide: Foil Method for Repairing Cracked Mirrors

The foil method offers a quick fix for minor mirror cracks. It’s a budget-friendly option for temporary repairs. Follow this guide to mend your cracked mirrors using foil.

  1. Start by thoroughly cleaning the cracked area with a glass cleaner to remove any debris or residue.
  2. Cut a piece of aluminum foil slightly larger than the crack.
  3. Apply clear tape to one side of the foil patch to create a sturdy backing.
  4. Carefully place the foil patch over the cracked area, ensuring there are no bubbles or gaps.

This foil method works best for small mirror damages. It’s not meant for long-term use or big cracks. Keep in mind it’s just a temporary solution.

Preventing Mirror Damage: Care and Maintenance Tips

Regular mirror care keeps them beautiful and functional. Proper maintenance extends their lifespan and preserves their value. Let’s explore some tips to keep your mirrors in top shape.

Cleaning Your Mirrors Regularly

Clean mirrors often with a gentle, ammonia-free glass cleaner. Use a soft, lint-free cloth to wipe the surface. Avoid cleaners with vinegar or ammonia, as they can damage the backing.

For stubborn stains, try using 0000 oil-free steel wool. This gentle method can effectively remove tough spots without harming the mirror.

Protecting Mirrors from Physical Impact

After installation, avoid cleaning or applying pressure for 72 hours. This allows the mirror mastic to fully cure, preventing distortion. Place mirrors away from door handles or objects that could cause cracks.

Store mirrors in temperature-controlled areas. Avoid unheated spaces or outdoors to prevent expansion, contraction, and breakage.

These simple tips will help preserve your mirrors’ beauty. Regular cleaning and protection from impact are key. Proper storage ensures your mirrors stay in excellent condition for years.

Alternative Methods: Nail Polish and Spray Paint for Mirror Repair

mirror repair

Homeowners can use nail polish and spray paint to fix minor mirror damage. These innovative options address tiny cracks and disguise visible damage. They offer alternatives to traditional foil methods and specialized repair kits.

Nail polish works well for repairing tiny mirror cracks. It acts as a transparent sealant, filling in small fissures. This quick fix blends seamlessly with the mirror’s surface.

Spray paint designed for mirrors can cover larger cracks or chips. It creates the illusion of a flawless reflective surface. This method helps maintain the mirror’s aesthetic appeal without replacement.

These methods are best for small, localized issues. They provide temporary fixes, not long-term solutions. For extensive damage, consult professional mirror repair services.

Nail polish and spray paint can address minor mirror imperfections. However, they’re quick fixes, not permanent solutions. For lasting repairs, seek expert help to maintain mirror safety and appeal.

Choosing the Right Tools and Materials for Mirror Repair

Mirror repair needs specific tools and materials. Get scissors, clear tape, a soft cloth, and specialized products like epoxy resin adhesive. High-quality materials are essential for proper mirror surface preparation.

Choose trusted brands for mirror repair. This ensures a long-lasting, professional-looking result. Gathering the right tools and materials is key to successful mirror repair.

Essential Mirror Repair Tools and Materials

  • Scissors or utility knife for cutting materials
  • Clear tape or aluminum foil for temporary repairs
  • Soft, lint-free cloth for cleaning the mirror surface
  • Epoxy resin adhesive or specialized mirror repair kits
  • Safety gear like gloves and goggles

Clean the mirror before repair. Remove dust, debris, or residue around the damaged area. This helps the adhesive or repair materials bond well to the mirror.

Use the right tools and prepare properly for great results. This approach can fix small cracks and chips successfully. You can extend your mirror’s life with these professional-looking repairs.

When to Seek Professional Mirror Repair Services

Small cracks can often be fixed with DIY methods or repair kits. However, extensive damage requires professional help. Seek expert assistance for large cracks, structural issues, or safety concerns.

Professional mirror repair services have specialized knowledge and tools. They can restore mirrors safely and effectively. These experts handle complex damage that DIY methods can’t fix.

  • Substantial cracks that require replacement rather than simple repair
  • Deep scratches that go beyond the surface and cannot be addressed with household remedies
  • Extensive chipped edges that need professional-grade repair and finishing
  • Antique mirrors with issues like dark spots, streaks, and frame damage

Safety is crucial when dealing with large or fragile mirrors. Attempting repairs without proper skills can lead to injury. Expert help ensures your mirror is fixed securely.

Professional services restore mirrors to their best condition. They preserve the mirror’s beauty and value. These experts offer the best solutions for your repair needs.

Benefits of Professional Mirror Replacement

Professional mirror replacement services offer significant advantages. They prioritize safety and deliver high-quality results. These services excel at transforming your space effectively.

Making Safety Paramount

Safety is crucial when dealing with mirrors. Professional installers have the expertise to handle mirror removal safely. They use specialized equipment to minimize injury and property damage risks.

These experts understand proper techniques for securing mirrors to walls. They ensure a stable fit that lasts for years to come.

Achieving Seamless Results

DIY mirror replacement can lead to uneven edges and visible gaps. Professional services employ expert craftsmanship to deliver flawless results. Their precision-driven approach guarantees a polished, high-end look.

Professional mirror replacement integrates seamlessly with your interior design. This level of quality is hard to achieve through DIY efforts.

Investing in professional services ensures safety and aesthetic perfection. It also saves valuable time and effort. You can enjoy your transformed space without the DIY hassle.

Discover FindPros for Mirror Repair Needs

Are you in the market for a new mirror or need to replace a damaged one? FindPros can help. Our service connects you with top-rated local professionals who can handle any mirror-related project, from repairing small scratches to completely replacing old or custom mirrors.

Simply answer a few questions about your home project, and we’ll match you with vetted pros who will compete for your business, ensuring you get the best pricing. No more guesswork or risk – let FindPros find the right pro to get your mirror project done quickly and hassle-free.

Conclusion

Keeping your mirrors in top shape is crucial for looks and function. Address issues quickly, whether you DIY or hire pros. This ensures your mirrors enhance your space’s beauty and usefulness.

Well-kept mirrors improve safety and property value. Investing in repair or replacement protects your investment. It maintains your vehicle or home’s visual appeal.

The auto industry now uses salvaged parts like side-view mirrors for cost-effective repairs. For major damage, professional help ensures safety and longevity. Understanding repair techniques helps preserve your property’s appeal and value.

Proper mirror maintenance prioritizes your family’s safety. With the right approach, you’ll enjoy clear reflections for years to come.

Frequently Asked Questions (Mirror Repair)

The main problems with mirrors are cracked mirror, broken mirror, scratched mirror, and chipped mirror glass.
You should consider replacing a mirror if it has extensive damage, such as large cracks, deep scratches, or significant chipping. Replacing is better for safety and achieving a seamless, high-quality look.
Some practical tips include using epoxy resin adhesive, aluminum foil, or nail polish to fix small cracks and chips. Carefully clean the area before applying any repair materials.
To ensure a successful mirror replacement, it’s important to carefully measure the space, choose a replacement mirror that fits properly, and have it professionally installed to avoid gaps or uneven edges.
Yes, there are a few tricks, such as using spray paint designed for mirrors to cover up small scratches or chips, or placing the mirror in a frame to hide any noticeable damage on the edges or backside of the mirror.

Microwave Repair

Mole Exterminators Near You

Can’t find what you are looking for?

How It Works

  • Answer a few questions about your home project.
  • Within seconds, get matched with top-rated local pros.
  • Compare quotes and choose the best pro for the job.

Microwave Repair In Your Area

Microwave Repair: Troubleshooting Tips and When to Call a Pro

Meta Description: Discover essential microwave repair tips and learn when to call a professional. Get expert advice on troubleshooting common issues and extending your appliance’s lifespan.

Microwave Repair

Is your microwave oven acting up? It can be frustrating when it doesn’t heat food properly or won’t work at all. You might wonder if you can fix it yourself and save money.

This guide will help you decide between DIY repair and calling a pro. Learn if it’s worth attempting a DIY fix or if professional help is needed.

Key Takeaways

  • 01

    Understand common microwave problems and potential solutions

  • 02

    Learn the basic troubleshooting steps to diagnose and fix minor issues

  • 03

    Discover the importance of safety when attempting DIY microwave repairs

  • 04

    Recognize when it’s time to call in a professional microwave repair technician

  • 05

    Explore the benefits of hiring a qualified expert for your microwave repair needs

Understanding Common Microwave Problems

Microwaves can face various issues. Sometimes they run but don’t heat food. This could be due to turntable, magnetron, or door switch problems.

If your microwave has power but doesn’t work, check the control panel, fuses, or power cord. These are common culprits for microwave malfunctions.

Microwave Not Heating Food But Running

A faulty turntable mechanism can cause heating issues. The plate and drive motor are crucial for even cooking. They affect up to 80% of microwave operations.

Door-related problems can also cause heating issues. Faulty latch assemblies and hinges account for about 30% of microwave problems.

Microwave Not Working But Has Power

Electronic component issues can cause a powered microwave to stop working. Door switch, voltage diode, and magnetron problems affect about 50% of reported malfunctions.

Touchpad issues can make microwaves unresponsive. Problems with the membrane switch and control board impact nearly 20% of microwave malfunctions.

Identifying the root cause is key to fixing microwave problems. Sometimes, you can fix issues yourself. Other times, it’s best to call a professional technician.

Basic Microwave Troubleshooting Steps

Safety comes first when fixing a broken microwave. Always unplug the appliance before attempting repairs. This simple action prevents electrical shocks and other dangers.

Check for easy-to-fix problems first. Make sure the microwave is getting power. Look at the circuit breaker and outlet. Inspect the turntable for any blocks that might stop it from heating food well.

Clean your microwave inside and out regularly. This can solve many issues. Check your user manual for the right cleaning methods.

If these steps don’t work, look at your microwave’s manual. It has info on error codes and fixes. The manual also tells you when to call a pro.

These steps can fix many microwave problems without expert help. For complex issues or safety concerns, ask a qualified repair tech. They have the skills to handle tricky situations safely.

Safety Precautions for DIY Microwave Repairs

Fixing a microwave requires caution due to its sensitive electrical parts. DIY repairs can save money, but safety is key. Always unplug the microwave before starting any work.

Wear safety glasses and protective gloves when working on a microwave’s internals. High-voltage capacitors can hold deadly charges even when unplugged. This poses a serious risk if not handled correctly.

  • Unplug the microwave and wait for the internal components to discharge completely before attempting any repairs.
  • Ensure the work area is well-lit and organized to prevent tripping hazards.
  • Carefully follow the manufacturer’s instructions when disassembling or reassembling the microwave.
  • Never attempt to bypass or tamper with the microwave’s safety features, such as the door interlock switches.

Without proper knowledge, microwave repairs can lead to accidents or damage. If unsure, consult a microwave repair technician for safe and effective results.

Turntable Issues and Fixes

Is your microwave’s turntable stuck? This can cause uneven heating or no heating at all. But don’t worry! Many turntable problems are easy to fix.

Check if the turntable spins freely. Look for any obstructions or debris that might be blocking it. Make sure it’s properly installed in its supporting tracks.

A faulty drive motor can make the turntable turn too fast or too slow. It might even stop it from turning at all.

  1. Try placing the microwave on a stable, level surface to see if that resolves any issues with the turntable.
  2. Regularly clean the microwave to remove dust, food particles, and other debris that could interfere with the turntable’s movement.
  3. Inspect the turntable’s drive bushing for damage or misalignment, which can impact its rotation.

If these steps don’t fix the microwave turntable, call a pro. Electrical faults or motor failures need expert help.

Not all microwaves have spinning turntables. Some older or commercial models use stationary plates. These allow for easier cleanup and fit larger dishes.

Magnetron Problems and Replacements

The magnetron is crucial for your microwave. It generates microwaves that cook your food. When it malfunctions, your microwave may heat poorly or not at all.

Common magnetron issues include strange noises, sparking, and uneven heating. Some DIY troubleshooting is possible. However, magnetron repair and replacement should be done by professionals.

Accessing the magnetron can be dangerous without proper knowledge. Professional services can safely diagnose and replace faulty microwave magnetrons.

Repairing a microwave is often cost-effective and eco-friendly. This is especially true for microwave magnetron issues. However, consider replacement if repair costs exceed 50% of a new microwave’s price.

When facing microwave magnetron problems, weigh repair against replacement costs. A microwave repair technician can often extend your appliance’s life. Sometimes, a new microwave might be better, especially if yours is outdated.

Your decision depends on your microwave’s age, condition, and value. Consider your needs and budget when choosing between repair and replacement.

Door Switch Malfunctions and Repairs

The microwave door switch ensures safe operation. It stops the microwave from running when the door is open. A faulty switch can cause problems like the microwave not starting or heating food properly.

To diagnose a faulty switch, use a multimeter. Most microwaves have three or four door switches. Test the continuity between the COM, N.O., and N.C. terminals.

A working switch should read zero ohms when closed and infinity when open. If it’s not functioning correctly, you’ll need to replace it.

  1. If the door switch is not functioning as expected, it will need to be replaced.
  2. Replacing a microwave door switch is a relatively straightforward process, but it does involve working with electrical components. If you’re not comfortable with this type of repair, it’s best to seek the assistance of a professional microwave repair technician.
  3. When replacing the door switch, be sure to use an OEM (original equipment manufacturer) part that is specifically designed for your microwave model. This will ensure a proper fit and avoid any compatibility issues.

Address a faulty door switch quickly. Using a microwave with a broken switch can be dangerous. It might lead to bigger problems later on.

Fixing the door switch can extend your microwave’s life. It also ensures safe and reliable operation. Don’t delay this important repair.

Control Panel Resets and Replacements

The microwave’s control panel manages user commands. When it malfunctions, the microwave may not respond correctly. You can take steps to fix control panel problems before replacing it.

A simple reset can often solve control panel issues. Unplug the microwave, wait a few minutes, then plug it back in. This can clear temporary glitches or software problems.

If resetting doesn’t work, you might need to replace the control panel. This job is best left to professional technicians. They have the expertise to install this complex component properly.

Control panel issues make up a large portion of microwave repairs. For older microwaves, fixing the control panel can be expensive. It may cost nearly half the price of a new unit.

Consider the microwave’s age before replacing the control panel. Microwaves usually last 7 to 10 years. For older appliances, buying a new one might be better than repairing.

Microwave Repair: Fuse and Power Cord Checks

Microwave fuse

Is your microwave not turning on? A blown fuse or damaged power cord might be the reason. These small issues can stop your microwave from working properly.

First, find the microwave’s fuse. Be careful when opening the microwave. If you’re unsure, ask a professional for help. Check the fuse for damage or discoloration.

Replace the fuse if it looks blown. Make sure the new fuse matches your microwave’s specs.

  1. Identify the location of the microwave’s fuse.
  2. Inspect the fuse for any visible signs of damage or discoloration.
  3. Replace the blown fuse with a new one that matches your microwave’s specifications.

Next, look at the power cord. Check for fraying, cracks, or exposed wires. If it’s damaged, replace it with a new microwave power cord.

Using a damaged cord can cause microwave power cord damage and create fire risks. Always prioritize safety when dealing with electrical appliances.

  • Inspect the microwave’s power cord for any visible signs of damage.
  • Replace the microwave power cord if it appears to be in poor condition to avoid microwave power cord damage.

Fixing microwave fuse and cord issues can solve common microwave fuse problems. Your microwave might work again after these repairs.

If you’re not sure about these fixes, ask a professional technician for help. They can safely repair your microwave.

DIY Microwave Maintenance Tips

Regular cleaning and upkeep can extend your microwave’s lifespan. Simple DIY tips can keep it running efficiently and prevent costly repairs.

Regular Cleaning

Wipe down the microwave’s interior and exterior often. Use a damp cloth and mild detergent to remove food splatters. Unplug the microwave before cleaning.

Never submerge the entire appliance in water.

Filter and Vent Maintenance

  • Check vents and filters for obstructions or buildup. Clean these parts as instructed by the manufacturer.
  • Replace charcoal filters every 6-12 months, depending on usage. They help remove odors.

Identifying Early Warning Signs

  1. Watch for unusual noises, smells, or performance issues. These could signal a problem with your microwave.
  2. Check the door seal and latch regularly. Ensure they work properly and create a tight seal.
  3. If heating efficiency drops, have a pro check the magnetron or other parts.

Address minor issues early to keep your microwave working well. This can help avoid more extensive and costly repairs later.

These tips can help preserve your microwave’s performance and efficiency.

When to Call a Professional Microwave Repair Technician

Some microwave issues can be fixed with DIY methods. However, it’s best to call a professional microwave repair technician for complex problems. This is especially true if you’re not comfortable with electrical components.

Wilshire Refrigeration & Appliance is a trusted local service provider. Their skilled technicians can diagnose and fix various microwave issues safely and efficiently. They have the expertise to handle even the most challenging problems.

Here are signs that you need a professional microwave repair technician:

  • Your microwave stops unexpectedly or makes unusual noises. This could mean issues with the magnetron or other critical parts.
  • The turntable isn’t spinning properly. This may be due to motor or drive system problems.
  • The door isn’t sealing correctly. This can lead to safety concerns or uneven heating.

Trying to fix these issues yourself can be risky. It might even cause more damage to your microwave. Hiring a professional microwave repair technician from Wilshire Refrigeration & Appliance is safer.

They can restore your appliance effectively. This saves you time and money in the long run.

Benefits of Hiring a Professional for Microwave Repair

Hiring a pro for microwave repairs offers huge perks over DIY fixes. Expert techs bring know-how, safety, and savings to the table.

  • Expertise and Experience: Pro microwave techs have top-notch training and years of hands-on experience. They can quickly spot issues and fix them fast. This ensures your microwave works like new in no time.
  • Safety and Damage Prevention: Microwave repairs can be risky due to electrical parts and high voltage. Pros follow strict safety rules to protect you and your appliance. They use the right tools to prevent accidents and further damage.
  • Time and Cost Savings: DIY fixes often lead to wasted time and wrong parts. Pros diagnose issues quickly and have the right replacement parts on hand. This saves you both time and money in the long run.

Expert techs can also catch hidden problems before they get worse. This helps avoid costly repairs down the road. Choosing a pro is often the smarter choice for safety and savings.

Microwave Repair vs. Replacement Considerations

microwave repair vs replacement

Is your microwave on the fritz? You’ll need to decide whether to fix or replace it. Think about its age, cost, warranty, and installation expenses.

Age and Cost of the Microwave

Microwaves usually last 7 to 10 years. Some can go even longer with good care. Compare repair costs to the price of a new unit.

If your microwave is old and repairs are pricey, getting a new one might be smarter. But if it’s fairly new and fixes are cheap, repairing could be best.

Warranty Coverage

Check if your microwave is still under warranty. The manufacturer might cover some or all repair costs. This could make fixing it the better choice.

Without warranty, you’ll need to weigh repair costs against a new microwave’s price. Consider all options carefully before deciding.

Installation Costs for Replacement

Replacing a built-in or mounted microwave can be costly. You might need new cabinets or changes to your kitchen structure.

These extra costs can add up quickly. Sometimes, repairing a well-installed microwave is cheaper than replacing it entirely.

FindPros: The Smart Choice for Microwave Repair

Are you dealing with a malfunctioning over the range microwave, built-in microwave, or other kitchen appliances? Don’t let a broken microwave disrupt your daily routine. FindPros can connect you with qualified technicians who can quickly diagnose and repair your appliance, ensuring it operates at maximum capacity for years to come. Avoid the wrong move of attempting quick fixes on your own – let the experts at FindPros handle the job.

Simply answer a few questions about your home project, and you’ll be matched with top-rated local pros who can get your microwave, dryer, or other appliances repaired safely and efficiently. Compare quotes from multiple providers and choose the best pro for the job, so you can get back to enjoying your kitchen and home without any hassle.

Conclusion

This guide covers common microwave problems, troubleshooting steps, and safety precautions. It also explains when to hire a professional technician. You’ve learned about turntable, magnetron, and door switch issues.

We’ve discussed microwave maintenance and early warning signs of trouble. The article helps you decide between repairing or replacing your microwave. These tips empower you to handle minor repairs or seek professional help.

This resource equips you with knowledge for DIY fixes or professional repairs. You can now keep your microwave safe and reliable. Your appliance will be ready for everyday cooking needs for years to come.

Frequently Asked Questions (Microwave Repair)

Common signs that your microwave ovens requires microwave oven repair include food not heating properly or evenly, unusual noises or burning smells, control panel issues or the microwave not responding, and problems with the turning mechanism, door, or other components.
Yes, you can attempt to fix a broken door switch on your microwave ovens yourself, but it’s important to take safety precautions. Unplug the microwave, discharge any high voltages, and carefully follow the manufacturer’s instructions when replacing the switch. If you’re not comfortable working with electrical components, it’s best to call a qualified appliance repair person.
The decision to repair or replace an old microwave ovens depends on factors like the age of the microwave, the cost of the repair vs. the cost of a new microwave, whether the microwave is a built-in, over-the-range, or counter microwave model, and your overall satisfaction with the microwave’s performance. Generally, if the repair cost is less than 50% of a new microwave’s price, it may be worth repairing.
Regular maintenance is key to preventing issues with your microwave ovens. Be sure to clean the interior and exterior regularly to avoid built-up food and grease, avoid putting metal objects or foil-lined containers in the microwave, check the door seal and latch to ensure a tight seal, and replace the stirrer belt or other components as recommended by the manufacturer. Following the manufacturer’s guidelines for use and care can help extend the life of your microwave.
It’s best to call a qualified appliance repair person if you encounter issues like a malfunctioning magnetron (the vacuum tube that generates the microwaves), problems with the control panel or electronic components, persistent heating or performance issues that you can’t resolve through basic troubleshooting, or any safety concerns, such as sparks or a burning smell. Attempting complex repairs yourself can be risky, so it’s often safer and more cost-effective to have a repair service handle it.

Mice Exterminator

Mole Exterminators Near You

Can’t find what you are looking for?

How It Works

  • Answer a few questions about your home project.
  • Within seconds, get matched with top-rated local pros.
  • Compare quotes and choose the best pro for the job.

Mice Exterminator In Your Area

Mice Exterminators: How to Find the Best One for Your Home

Meta Description: Discover how to choose the best mice exterminators for your home. Learn effective pest control methods and prevent future infestations with expert advice.

Mice Exterminators

Dealing with mice in your home or business? These rodents aren’t just annoying. They can be dangerous to your health and damage your property.

Quick action is vital to tackle mouse infestations and stop future problems. The solution? Team up with a skilled mice exterminator.

A good exterminator will wipe out the issue and set up long-term fixes. They’re your best bet for a mouse-free space.

Key Takeaways

  • 01

    Mice can pose serious health and property risks, requiring prompt action to address infestations.

  • 02

    Proper identification of mouse species is essential for developing an effective extermination plan.

  • 03

    Professional mice exterminators use a comprehensive approach, including inspection, exclusion, trapping, and monitoring.

  • 04

    Licensing, certifications, and proven experience are crucial when selecting a reliable mice exterminator.

  • 05

    Customized treatment plans and consultation processes are essential for successful mouse control.

Understanding Common Mouse Species

Mice are among the most common household pests. Three main species often invade homes: house mouse, deer mouse, and white-footed mouse. Knowing their traits helps with effective pest control.

House Mouse

House mice are the smallest, measuring 3 to 4 inches long. They have gray-brown fur and a hairless tail as long as their body. These mice commonly live in urban and suburban areas.

Deer Mouse

Deer mice are larger, reaching 5 to 8 inches in length. They have grayish-brown to reddish-brown coats with white undersides and feet. Their tails are shorter than their bodies.

These mice prefer rural and forested areas but may venture into suburbs.

White-footed Mouse

White-footed mice look similar to deer mice but are larger. They measure 5 to 8 inches long with brown or grayish-brown coats. Their feet and undersides are white.

You’ll find these mice in woodlands, suburbs, and farmlands.

Knowing these mouse species helps homeowners and pest control experts. They can better identify, control, and prevent mouse infestations in various settings.

Mice Infestations and Associated Risks

Mice infestations are dangerous to human health and property. They can spread diseases like hantavirus and Salmonella through their urine and droppings. These illnesses can cause severe respiratory and gastrointestinal problems.

Mice can chew through walls, insulation, and wiring, causing structural damage and fire hazards. They also contaminate food and leave behind unpleasant odors. Dealing with a mice infestation quickly is vital to reduce health risks and property damage.

  • Mice can bite to defend themselves, but they will typically not bite unless provoked by an attempt to catch them.
  • Mice live on average 2.5 years, depending on their living conditions.
  • House mice can have up to 35 babies a year, leading to rapid reproduction within a household.

The disease transmission risks associated with rodent infestations include:

  1. Hantavirus Pulmonary Syndrome (HPS), which can be transmitted through deer mouse droppings and urine.
  2. Salmonella infection, caused by mice contaminating food and surfaces.
  3. Leptospirosis, spread through mouse urine, leading to liver and kidney damage.
  4. Lymphocytic Choriomeningitis Virus (LCMV), with symptoms like fever, headache, and muscle aches, transmitted through mouse saliva and urine.

Taking quick action against a mice infestation is crucial to protect your health and home. Seek professional pest control services to keep your family safe from these dangers.

Professional Mice Exterminator Services

Professional Mice Exterminator

A professional mice exterminator is the best solution for mouse infestations. These experts use a thorough approach to solve the problem. They start with a complete inspection and identification of mouse species.

Exterminators also find potential entry points and hiding spots. This helps them create a custom plan to get rid of mice.

  • Inspection and Identification: Skilled exterminators use their know-how to assess the infestation’s extent. They then create a tailored treatment plan. This ensures the most effective way to eliminate mice.
  • Exclusion and Sealing: After inspection, the exterminator focuses on exclusion and sealing methods. They use caulk, steel wool, or other materials to seal gaps larger than a quarter-inch. Closing these access points is key to preventing future mouse problems.
  • Trapping and Removal: The final step is trapping and removal of existing mice. Exterminators use various techniques like snap traps, live traps, and bait stations. They also guide proper sanitation and food storage to prevent future infestations.

Pest control services offer valuable expertise and tools for safe mice removal. A reliable professional mice exterminator helps property owners regain control of their space. They also prevent damage and health risks linked to mouse infestations.

The Process of Mice Extermination

Professional exterminators use a systematic approach to eliminate mouse infestations. Their process involves several key steps for a complete solution. This ensures the problem is tackled effectively.

Exterminators start with a thorough inspection of the property. They look for entry points and hiding spots. This helps them create an effective action plan.

Next, they focus on exclusion methods. They seal cracks and gaps larger than a quarter-inch. Materials like caulk, steel wool, or foam sealant are used.

The exterminator then uses trapping and baiting to eliminate mice. Snap traps, live traps, and bait stations are placed strategically.

Throughout the process, they monitor the property closely. This ensures the treatment is working well. They make adjustments to the plan if needed.

Ongoing maintenance is crucial for a mouse-free environment. This process helps eliminate current mice and prevent future infestations. It’s a comprehensive approach to solving the problem.

Signs of a Mouse Infestation

Spotting mouse signs early is key to quick action. Mice are sneaky, but they leave clues. Look out for these hints in your home.

Visual Signs

Mouse droppings are a clear sign of trouble. These small, dark pellets show up where mice hang out. You might also find nests made of shredded paper or fabric.

Gnaw marks on wood, wires, or food boxes are another giveaway. Mice love to chew on things around the house.

Audible Signs

Mice are night owls. You may hear scratching in walls or ceilings after dark. These sounds often mean mice are nearby.

Odors

Mouse pee smells like ammonia. Dead mice also stink. These odors can point to a mouse problem in your home.

If you spot these signs, act fast. Quick action stops the problem from growing. It also cuts down on risks from mouse invaders.

Prevention Methods for Mice

Mouse prevention

Stopping mice from entering your home is vital to avoid risks and damage. Seal all entry points larger than a quarter-inch with caulk or steel wool. Keep food in airtight containers and clean up spills quickly.

Remove clutter that mice could use for nesting. Trim trees and shrubs away from your building. Fix any structural damage to keep mice out.

House mice can have up to 10 litters yearly, with five to six young each. Baby mice are born in three weeks and grow up in six to 10 weeks. Mice can jump 13 inches high and squeeze through tiny cracks.

Set traps no more than 10 feet apart where mice are active. Use rodenticides carefully, only as a backup to trapping. A single mouse can leave 36,000 droppings in a year.

Good sanitation and proper food storage are key to preventing mouse infestations. Exclusion is crucial for any mouse prevention plan. These steps will help keep your home mouse-free.

Understanding Mouse Behavior

Mice show unique behavior patterns that help with control and prevention. They’re mostly nocturnal, active at night while looking for food and shelter. Mice live in family groups led by a dominant male.

As omnivores, mice eat various foods like grains, seeds, nuts, and even soap. They need little food and water daily. Mice often return to the same food sources repeatedly.

Female mice can have 5-12 pups every 3 weeks. Their quick breeding makes control challenging.

Nocturnal Habits

Mice are active at night, searching for food and shelter. They hide in dark areas like attics and wall voids during the day. Knowing their nocturnal habits helps create effective control plans.

Social Structure

Mice live in groups led by a dominant male. These families work together to build nests and defend their territory. They communicate using various sounds, including ultrasonic ones humans can’t hear.

Diet and Food Sources

Mice eat a wide variety of foods, including grains, seeds, fruits, and small insects. They’re drawn to easy food sources like spills, crumbs, and poorly stored pantry items.

Mice have a great sense of smell. They can find food from far away and often return to the same spots.

Mice Exterminators: What to Expect

Professional mice exterminators offer a thorough approach to tackle mouse infestations. They start with a detailed inspection and assessment of your property. This helps identify entry points and potential hiding spots for mice.

Exterminators then focus on exclusion and sealing methods. They block small openings with caulk or steel wool. This prevents mice from re-entering your home or business.

Next, they use trapping and baiting strategies. Snap traps, live traps, and bait stations are set up strategically. These tools help eliminate the existing mouse population.

Professional services use specialized pest control methods that outperform DIY approaches. They also provide advice on prevention to avoid future infestations.

A skilled mice exterminator addresses mouse problems efficiently and effectively. Their expertise minimizes risks and disruptions associated with infestations. You can feel confident that your mouse problem will be solved.

Tips for Choosing the Right Mice Exterminator

Selecting a reputable mice exterminator is key to solving a mouse infestation. Look for pest control services with a proven track record. They should use integrated pest management and offer comprehensive services.

Consider these factors when picking a mice exterminator:

  • Qualifications and Licensing: Ensure the exterminator is licensed, insured, and certified for safe rodent control.
  • Client Reviews: Check online reviews to gauge the company’s service quality and effectiveness.
  • Warranties and Guarantees: Choose services that offer warranties, ensuring the problem is fully resolved.
  • Comprehensive Approach: A reliable exterminator should provide thorough inspection and develop a customized plan.
  • Experienced Technicians: Pick a company with knowledgeable staff who can implement effective pest management strategies.

Choosing the right mice exterminator ensures efficient problem resolution. It minimizes risks and inconveniences linked to mouse infestations.

The FindPros Advantage for Mice Control

Are you struggling with a mice infestation and need professional mice control services? Look no further than FindPros, your one-stop solution for connecting with top-rated local pest control experts. With FindPros, you can easily find the best professionals for controlling mice, preventing future infestations, and providing long-lasting protection for your home.

Simply answer a few questions about your rodent issues, and we’ll match you with pre-screened pros who can tackle the job efficiently. Avoid the hassle of dealing with dead rodents, feces, and other pest problems. Let FindPros help you find the right mice control expert who can get the job done right, within your budget. Take the first step towards a mice-free home today.

Conclusion

Dealing with mice exterminators is vital for protecting your health and property. Mice infestations pose serious health risks and can harm your home. Understanding these challenges is key for homeowners and business owners.

Working with expert mice exterminators helps eliminate pests effectively. They can identify mouse species and create custom solutions. Their knowledge is crucial for successful mouse control.

Proactive steps can keep your space mice-free. Seal entry points, remove food sources, and set humane traps. For severe cases, use pesticides wisely with integrated pest management techniques.

This approach ensures a comprehensive and environmentally friendly solution. It provides long-term home protection and property safety. Remember, prevention is always better than cure in pest management.

Frequently Asked Questions (Mice Exterminator)

Mouse traps are an effective way to control a mice infestation. They are designed to catch and remove the mice from your home. Placing mouse traps in areas with mice droppings or other signs of mouse activity can help eliminate the existing mice population.
To prevent mice from entering your home, focus on removing potential food sources and sealing up any cracks or holes larger than a quarter-inch. Store food in airtight containers, keep counters clean, and use metal containers or storage boxes with tight lids. Seal any gaps or openings in your home’s foundation, walls, and crawl spaces to deny mice easy access.
A rodent infestation, whether it’s mice or rats, can pose serious health risks. Mice droppings and urine can spread diseases like hantavirus, salmonella, and leptospirosis. Rodents can also cause property damage by chewing through walls, wires, and insulation. It’s important to address a rodent infestation promptly to protect your family’s health and home.
Signs of a mice or rat problem include finding droppings, hearing noises in the walls or attic, and seeing gnaw marks on food containers or other household items. You may also spot nesting materials, like shredded paper or fabric, in quiet areas of your home. If you notice any of these signs, it’s best to contact a professional mice exterminator to properly identify the pest and develop an effective control plan.
To prevent mice from being attracted to your home, focus on removing potential food sources and denying them access to your home. Store food in airtight containers, keep counters and floors clean, and take out the trash regularly. Seal any cracks or holes in your home’s exterior, and use metal containers or storage boxes with tight lids to store items. Additionally, trim back vegetation and remove clutter around your home to eliminate potential nesting sites.

Metal Roof Repair

Mole Exterminators Near You

Can’t find what you are looking for?

How It Works

  • Answer a few questions about your home project.
  • Within seconds, get matched with top-rated local pros.
  • Compare quotes and choose the best pro for the job.

Metal Roof Repair In Your Area

Metal Roof Repair: Everything You Need to Know

Meta Description: Discover expert tips and techniques for effective metal roof repair. Learn how to identify issues, choose the right materials, and extend your roof’s lifespan.

Metal Roof Repair

Metal roofs are known for their strength. But even they can develop problems over time. This guide will help you keep your metal roof in top shape for years to come.

Key Takeaways

  • 01

    Metal roofs can last 50 years or more with proper maintenance and repair.

  • 02

    Common metal roof issues include holes, rust, leaks, and loose fasteners.

  • 03

    Repair costs range from $1 to $5 per square foot for tasks like sealing leaks and replacing panels.

  • 04

    Professional roofers recommend focusing on permanent repairs over temporary fixes.

  • 05

    Proper preparation and the right tools are essential for successful DIY metal roof repair.

Understanding Metal Roof Durability

Metal roofs are among the most durable roofing options. They can last 50 years or more with proper care. Other materials like asphalt, composite, and wood shingles have shorter lifespans.

Longevity of Metal Roofs

Metal roofs outlast many other roofing materials. They can handle various weather conditions, from heavy snow to high winds. Metal roofing resists rot, mildew, and pests, adding to its long life.

Comparison to Other Roofing Materials

  • Metal roofs can last 40-70 years on average, significantly longer than the 15-30 year lifespan of asphalt shingle roofs.
  • Steel roofing can last for 30-50 years or more with proper maintenance and coatings.
  • Aluminum roofing can last for 30-50 years or more and is resistant to corrosion.
  • Copper roofing can last for 100-200 years or more with proper care and maintenance.
  • Zinc roofing can last for 80-100 years and develops a distinctive bluish-gray patina over time.

Metal roofing systems offer impressive durability compared to other materials. Their long lifespan and weather resistance make them a smart choice. Many homeowners and building owners find metal roofs practical and cost-effective.

Common Metal Roof Repair Needs

Metal roofs are tough, but they still need fixes sometimes. Common repairs include patching holes, fixing rust, and sealing leaks. Let’s look at these issues closer.

  • Patching Holes and Cracks: Holes in metal roofs can form from wear or falling objects. Quick patching stops further damage and leaks. Cracks also need fixing to keep water out.
  • Repairing Rust and Corrosion: Rust and corrosion can weaken metal roofs over time. This happens when protective coatings wear off. Treating these problems keeps the roof strong.
  • Fixing Leaks and Loose Fasteners: Leaks often come from loose fasteners or open seams. Tightening or replacing fasteners helps prevent leaks. Sealing gaps keeps the roof sturdy.

Fixing these issues quickly helps your roof last longer. It also prevents bigger, costlier repairs later on. Regular checks can catch problems early.

Metal Roof Repair Costs

metal roof repair costs

Metal roof repair costs vary based on damage extent and labor type. Professional repair services have different price ranges for various issues. Here are the average costs:

  • $375 for patching a hole (ranging from $150 to $600)
  • $600 for repairing splits, cracks, or gaps
  • $700 for fixing leaks
  • $1,750 for rust and corrosion repair
  • $1,750 for fixing areas that are buckling or wrinkling

Some repairs cost $1 to $5 per square foot. These include sealing leaks and fixing fasteners. The national average for metal roof repair is $900.

Repair costs depend on the metal type used. Aluminum and tin repairs start at $6 per square foot. Copper and stainless steel can cost up to $20 per square foot.

Roof size, damage severity, and repair complexity affect overall costs. These factors are important when budgeting for metal roof repairs. Homeowners should consider them carefully.

Preparing for Metal Roof Repairs

Safety and proper tools are crucial for metal roof repairs. Good preparation ensures a successful repair job. Let’s explore the key aspects of getting ready.

Safety Considerations

Safety is the top priority when working on a metal roof. A hole may signal bigger structural issues. Check the under-deck and roof carefully before starting repairs.

Use proper personal protective equipment (PPE) throughout the process. This includes a safety harness, gloves, and eye protection.

Tools and Materials Needed

Having the right tools and materials makes repairs more efficient. Here’s what you’ll need for metal roof repair:

  • Metal snips
  • Cordless drill
  • Wire brush
  • Metal file or emery cloth
  • Caulk gun
  • Paintbrush
  • Pencil
  • Putty knife
  • Sheet metal to match the roof
  • Urethane sealant
  • Asphalt-impregnated patching membrane
  • Pan-head sheet metal screws
  • Color-matched paint
  • Simple Green (or another cleaner that does not leave a residue)

With safety measures and proper tools, you’re set for metal roof repairs. For more details on metal roof repair preparation, check out West Roofing Systems.

Step-by-Step Metal Roof Repair Guide

Metal roof care is key for long-lasting protection. It prevents costly water damage. This guide covers fixing holes, cracks, rust, and other issues.

Cleaning and Surface Preparation

Start by cleaning your metal roof thoroughly. Use Simple Green to remove dirt and algae. Then, scuff the area with a wire brush. This helps the sealant bond well to the metal.

Patching Holes and Cracks

Cut a metal patch that overlaps the damaged spot by 2 inches. Round the corners to avoid sharp edges. Apply color-matched urethane sealant to the panel.

Press the patch into place. Secure it with pan-head sheet metal screws. Space screws every 3-4 inches around the edge.

Replacing Damaged Panels

Sometimes, a panel needs replacement. Remove the damaged one carefully. Install a new panel, ensuring a proper fit. Seal the seams to stop future leaks.

Repairing Rust and Corrosion

Clean rusty areas with a wire brush. Apply a rust-inhibitive primer first. Then, use a matching topcoat paint. This protects the metal from further damage.

Sealing Seams and Joints

Check all seams and joints on your roof. Apply high-quality sealant to these areas. This prevents water from getting in.

Addressing Oil Canning

Oil canning causes waviness in metal panels. Adjust fasteners or add supports to fix this. This helps maintain your roof’s good looks.

Metal Roof Maintenance Tips

Regular care keeps your metal roof strong and lasting. Proper maintenance prevents leaks, rust, and damage. These issues can harm your roof and lead to expensive fixes.

Yearly inspections help catch problems early. Look for rust, loose fasteners, and tears in metal panels. These checks are key to keeping your roof in top shape.

Keep gutters clear to allow good water flow. This prevents buildup that can cause rust. Limit walking on the roof to avoid dents and holes.

  • Ensure gutters and downspouts are free of debris to allow proper water drainage and prevent buildup that can lead to corrosion.
  • Limit unnecessary foot traffic on the metal roof to avoid punctures, dents, and other forms of physical damage.
  • Address any issues promptly, such as patching small holes or resealing seams, to maintain the roof’s energy efficiency and extend its lifespan.

Fix small issues fast to keep your roof efficient. Patch holes and reseal seams right away. This care saves you from big repairs later on.

Good metal roof care pays off. It helps avoid major fixes or full replacements. With proper upkeep, your metal roof will last for many years.

Working with Professional Roofers

Metal roof repair may seem simple, but it’s best left to the pros. Hiring professional metal roof repair experts can save you time and money.

Roofing experts prioritize safety. Roofing work on metal surfaces can be risky. Pros have the right gear and skills to avoid falls and other dangers.

They can fix your roof safely and quickly. You won’t have to worry about your property or workers getting hurt.

Professional metal roof repair services offer efficiency and expertise. Skilled roofers can spot and fix issues fast. They know different roofing materials well.

Pros can solve your specific problems. Whether it’s repairing rust, patching cracks, or addressing leaks, they’ve got you covered.

Many professional roofers offer warranties on their work. This gives you peace of mind about your investment. A trusted roofing expert ensures your metal roof lasts for years.

Metal Roofing Systems for Commercial Buildings

Metal roofs are gaining popularity for commercial properties. They offer long-lasting durability and excellent energy efficiency. Various metal types are available, each with unique benefits.

Common Metal Roof Types

Commercial metal roofing often uses these materials:

  • Steel: A popular, durable option. It’s coated to prevent corrosion and rust.
  • Aluminum: Lightweight but less common due to potential denting.
  • Copper and Stainless Steel: Premium choices. They resist rust and corrosion exceptionally well.

Choosing the Right Repair Products

Selecting proper repair products is vital for commercial metal roofs. Urethane and silicone-based sealants are effective options. Acrylic and polyurethane coatings also work well.

These products offer flexibility and weather resistance. They can also improve energy efficiency for your commercial metal roof.

Proper installation and maintenance are crucial for metal roofs. They can help your roof last for decades. This longevity justifies the initial investment.

Understanding metal roof types is important. Choosing the right repair products is equally vital. These steps ensure long-term benefits for commercial building owners.

Challenges of Metal Roof Repairs

metal roof repair challenges

Metal roofs are durable but can face unique repair challenges. Temperature changes cause metal panels to expand and contract. This can loosen fasteners and open seams, potentially causing leaks.

Galvanic corrosion is another common issue. It happens when different metals touch each other. This can occur during roof construction or when metal contacts other materials.

Corrosion can worsen roof deterioration, making repairs more complex and expensive. Skilled professionals are essential for effective metal roof repairs.

Experts can properly diagnose and fix underlying issues. They prevent further damage and maintain the roof’s long-term integrity. These professionals offer guidance on the best repair products and techniques.

Working with experienced roofers ensures effective and efficient repairs. This minimizes downtime and costly complications. Regular inspections help identify issues early, addressing challenges proactively.

Find the Right Pros for Your Metal Roof Repairs with FindPros

Are you a building owner dealing with the challenges of metal roof repairs? Look no further than FindPros, the trusted service that connects you with top-rated local professionals for all your metal roofing needs.

Whether you’re facing issues with metal roof sealant, leaks, or the need for a complete replacement, FindPros can help. Simply fill out a quick survey about your project, and we’ll match you with the best-suited pros who can provide personalized solutions. With FindPros, you’ll get competitive quotes from multiple experts, ensuring you find the right fit for your commercial or industrial property and budget.

Don’t let aging metal roofs or extensive repairs overwhelm you. Let FindPros simplify the process and provide you with the expertise you need to keep your roof in top condition.

Conclusion

Metal roofs are popular for commercial properties. They’re durable, energy-efficient, and long-lasting. Regular care is needed to maintain their integrity and performance over time.

Building owners should know common metal roof repair needs. These include patching holes, addressing rust, and fixing leaks. Taking proactive steps can extend the lifespan of metal roofs.

A thorough repair process is crucial. Hiring professional metal roofing experts helps protect your investment. This ensures the roof provides robust protection for decades.

Metal roofing offers many advantages for commercial properties. It’s durable, energy-efficient, and sustainable. Proper maintenance enhances the building’s value and curb appeal.

Frequently Asked Questions (Metal Roof Repair)

Common metal roof repair needs include patching holes, fixing rust and corrosion, sealing leaks, addressing loose fasteners, and repairing cracks or splits in the metal roof panels.
To prepare for metal roofing repairs, building owners should ensure they have the right safety equipment, tools, and materials like metal snips, sealants, and color-matched paint. Proper surface preparation by cleaning and scuffing the area is also crucial.
When choosing a professional roofing contractor for metal roof repairs, building owners should consider their expertise in working with metal roof systems, safety practices, warranty coverage, and the ability to efficiently identify and address underlying issues to ensure the longevity of the roof.
To maintain an existing metal roof system, building owners should conduct regular inspections, keep gutters and downspouts clear, limit foot traffic, and address minor issues like patching holes or resealing seams promptly to prevent larger problems from developing.
When replacing an aging or damaged metal roof system, building owners should consider the type of metal, the appropriate repair or replacement options based on the extent of the damage, the importance of maintaining a watertight seal, and the potential need for a complete overhaul of the roof system, including the structural roof deck.

Metal Roofers

Mole Exterminators Near You

Can’t find what you are looking for?

How It Works

  • Answer a few questions about your home project.
  • Within seconds, get matched with top-rated local pros.
  • Compare quotes and choose the best pro for the job.

Metal Roofers In Your Area

Metal Roofers: Finding the Best for Your Home

Meta Description: Discover top-quality Metal Roofers for your home. Learn how to find experienced professionals, compare options, and ensure a durable, long-lasting metal roof installation.

Metal Roofers

Picking the right metal roofing contractor is crucial for your project’s success. The best metal roofers stand out from the rest in several ways. You want to ensure your metal roof investment lasts for decades.

Don’t settle for poor workmanship that could cause future problems. Instead, choose a contractor who will deliver quality results. Your choice can make a big difference in the long run.

Key Takeaways

  • 01

    The National Roofing Contractors Association (NRCA) is a valuable resource for finding credible metal roofing contractors.

  • 02

    Consultations with at least three different metal roofing contractors are recommended to compare options.

  • 03

    Positive online reviews and a contractor’s license, insurance, and experience are crucial factors to consider.

  • 04

    Contractors should be willing and able to answer your questions during the consultation process.

  • 05

    Specialized metal roofing materials like stone-coated steel and aluminum offer unique benefits over traditional roofing.

Understanding the Importance of Hiring a Qualified Metal Roofer

Your home’s roof needs the right metal roofing contractor. Metal roofs are tough and long-lasting. But they need proper installation to perform well long-term.

A qualified metal roofer with expertise can make a big difference. Their skills ensure your roofing project’s success. Choosing wisely is key for your home’s protection.

Why Hiring the Right Contractor Matters

Skilled metal roofers know how to work with various roofing materials. They use proper sealing and installation methods to prevent leaks. This ensures your roof lasts longer.

Professional roofers follow strict safety rules. This cuts down on accidents during the project. Homeowners feel more secure knowing experts are handling the job.

The Risks of Working with an Inexperienced Metal Roofer

Hiring an inexperienced metal roofer can cause costly problems. Poor installation can lead to leaks and water damage. Your roof might wear out faster, needing expensive fixes later.

An inexperienced contractor might lack proper safety gear and training. This puts your property and family at risk. It’s crucial to choose a qualified pro.

Where to Find Reputable Metal Roofers

Finding the best metal roofers for your home requires thorough research. There are several reliable ways to identify reputable professionals in your area. These include considering referrals, contacting roofing organizations, and consulting industry experts.

  • Asking for Referrals from Friends and Neighbors: Personal recommendations offer valuable insights into local reputable metal roofers. Ask friends and neighbors about their experiences with roofing contractors. Inquire about work quality, professionalism, and overall satisfaction with the service provided.
  • Reaching Out to Roofing Organizations and Associations: Roofing organizations and roofing associations can help you find qualified reputable metal roofers. These groups often maintain directories of member contractors. Their lists are great resources for finding experienced professionals in your area.
  • Consulting Architects and Builders: Architects and builders can provide excellent referrals for reputable metal roofers. They often have extensive knowledge of the local roofing market. Their recommendations come from positive experiences with contractors they’ve worked with.
  • Contacting Metal Roof Manufacturers: Metal roof manufacturers can help you find qualified installers in your area. Many maintain lists of authorized or preferred contractors. These professionals have the expertise to work with specific roofing products.

Evaluating Metal Roofing Contractors

Evaluating Metal Roofing Contractors

Finding the right metal roofing contractor is crucial for your project’s success. Proper licensing, insurance, and permits ensure safety and quality work. Assess their qualifications carefully before making your choice.

Checking Licenses, Insurance, and Permits

Most states require roofers to be licensed, but requirements vary. Verify that your chosen contractor is licensed to work in your area. Make sure they have liability coverage and worker’s compensation insurance.

Assessing Their Equipment and Specialized Tools

A contractor’s tools and equipment show their expertise and professionalism. Look for those with specialized tools like standing seam profiling machines. Bending machines and high-quality hand tools are also essential.

These tools ensure precise and durable metal roof installation. The right contractor can greatly impact your roof’s longevity and performance. Choose wisely to ensure your project meets the highest standards.

The Consultation Process

After choosing potential metal roofers, schedule a consultation. This step helps you evaluate the contractor’s skills and ask questions. The roofer will inspect your roof, discuss options, and provide payment and warranty details.

Site Inspection and Measurements

The metal roofer will inspect your roof thoroughly. They’ll take precise measurements to ensure the new system fits perfectly. This step helps determine the right products for your home or building.

Product and Material Discussion

The contractor will present various product and material options. They’ll consider your budget, architectural style, and local climate. This discussion helps you make an informed decision that meets your needs.

Payment Options and Warranty Information

The metal roofer will explain payment options and warranty details. They’ll discuss financing opportunities and outline warranty coverage. This includes both the manufacturer’s warranty and the contractor’s workmanship guarantee.

Exploring these aspects during consultation builds confidence in your choice. It ensures a smooth and successful installation process for your metal roof.

Questions to Ask Potential Metal Roofers

Asking the right questions can help you find the best metal roofer for your home. You’ll want to check their reliability, credibility, and project-specific details. This ensures you’re working with a qualified pro who can deliver quality work.

Reliability and Credibility Questions

  • Are you licensed and insured to perform metal roofing work in our state?
  • How many years of experience do you have in the metal roofing industry?
  • Can you provide references from previous customers who are satisfied with your work?
  • Do you have any specialized certifications or training in metal roofing installation?
  • What percentage of your business is dedicated to metal roofing projects?

Project-Specific Questions

  1. Who will be the primary point of contact for our project?
  2. How long will the metal roofing installation take to complete?
  3. Do you have the necessary permits to perform the work in our area?
  4. How will you ensure safe and efficient access to our property during the project?
  5. Can you provide a detailed breakdown of the bid or quote, including materials, labor, and any additional fees?

These questions will help you assess the contractor’s expertise and reliability. You’ll also learn about their commitment to your metal roofing project. Thoroughly vetting potential roofers will help you make an informed choice.

This process ensures you’ll have a smooth and satisfying experience with your new metal roof.

Red Flags to Watch Out For

metal roofing contractors

Stay alert for warning signs when hiring a metal roofing contractor. Spotting these red flags can help you find a trustworthy professional. Your vigilance will ensure a smooth roofing project.

Be wary of contractors demanding full cash payments upfront. Reliable professionals offer reasonable payment plans. They usually ask for no more than half the total cost as a down payment.

Avoid roofers asking for excessive upfront fees. This is a major warning sign of potential trouble.

  • Poor customer feedback and lack of a portfolio or references are also significant red flags. Thoroughly research the contractor’s reputation and past work before hiring them.
  • Substantially exaggerated damage claims or pressuring you to sign a contract immediately should raise concerns about the contractor’s integrity and professionalism.

Finding the right metal roofing contractor requires careful research. Trust your instincts and stay vigilant. This approach will help you avoid costly mistakes and ensure success.

Types of Metal Roofing Fasteners

Metal roofing fasteners are vital for securing a roof. They come in two main styles: exposed and hidden fasteners. Your choice affects the roof’s looks and performance.

Exposed Fasteners

Exposed fastener metal roofs have visible screws or nails. They’re budget-friendly and easier to install. This makes them popular for DIY projects and homes.

However, exposed fasteners may not look as sleek as hidden ones. They don’t create the same seamless appearance on your roof.

Hidden Fasteners

Hidden fastener metal roofs conceal fasteners under the panels. This creates a clean, uninterrupted look. Installation requires more skill but results in a polished appearance.

Hidden fastener systems are common in commercial and high-end homes. They’re ideal when aesthetics are a top priority.

Choosing the right fasteners is crucial for roof durability. Consider screw material, length, and compatibility with your roofing system.

These factors ensure a secure and reliable installation. They help maintain your roof’s performance over time.

Metal Roofers: Styles and Materials

Metal roofing offers homeowners many styles and materials. The three most common types are corrugated, standing seam, and stone-coated metal roofing.

Corrugated Metal Roofing

Corrugated metal roofs have a classic, industrial look with exposed fasteners. They cost $9 to $30 per square foot. These roofs are durable and can last 30-50+ years.

Standing Seam Metal Roofing

Standing seam metal roofs have a sleek look with hidden fasteners. They cost $10 to $15 per square foot. This style complements various architectural designs.

Stone-Coated Metal Roofing

Stone-coated metal roofing mimics traditional materials like shingles or tiles. It costs $7 to $22 per square foot. This option provides an attractive and versatile choice.

Metal roofing enhances curb appeal while offering superior protection. It also provides energy efficiency for your home. A qualified metal roofer can help you balance form and function.

Customization and Additional Services

Metal roofing offers many customization options. You can choose from various panel profiles, materials, and colors. Your roof can perfectly complement your home’s style.

Practical add-ons enhance your roof’s functionality. These include skylights, solar panels, and snow retention systems. They improve energy efficiency and safety.

Metal roofs come in over 40 standard colors. Custom shades are also available. PVDF coatings ensure the colors stay vibrant for decades.

Experienced roofers can guide you through customization. They’ll help you find the perfect solution for your needs. You’ll get a durable and appealing roof.

  • Customization options include panel profiles, metal materials, and color choices
  • Additional services like skylights, solar panels, and snow retention systems can enhance functionality
  • PVDF coatings provide superior color retention for a lasting, vibrant appearance
  • Experienced metal roofers can guide you through the customization process to find the perfect solution

Get the Best Metal Roofers with FindPros

Are you ready to find the perfect metal roofing contractor for your home? Look no further than FindPros. Our platform connects you with top-rated local professionals who specialize in metal roofing. Simply answer a few questions about your project, and we’ll match you with experienced subcontractors who can handle the installation, repairs, or any other metal roofing needs, including copper.

Get multiple quotes to compare pricing and find the best fit for your budget and preferences. With FindPros, you can obtain the manufacturer’s warranty coverage and ensure a smooth, hassle-free experience from start to finish. Search our network of vetted pros and get started on your metal roofing project today.

Conclusion

Choosing the right metal roofing contractor is vital for your home’s durability and value. Research reputable metal roofers and ask key questions. This ensures expert installation of your metal roof.

A well-installed metal roof can last 40 to 70 years. Modern metal roofing offers superior rust resistance and wind resilience. Experienced roofers provide these benefits through their expertise.

Consider factors like licensing, insurance, and specialized tools when selecting a contractor. Look for attention to detail in their work. This helps you find a roofer who delivers high-quality, custom solutions.

Finding the right metal roofer is a smart investment. It pays off for decades. With a skilled professional, you’ll enjoy a durable, energy-efficient roof.

Your new metal roof will protect your home for years. It’s eco-friendly and enhances your property’s value. Make the choice that benefits you long-term.

Frequently Asked Questions (Metal Roofers)

Metal roofs are more durable, energy-efficient, and have a longer lifespan compared to traditional roofing materials like asphalt shingles. They can last 40-70 years, while asphalt shingles typically last 15-30 years.
In addition to metal, other popular roofing materials include tile, slate, and synthetic/composite shingles. Each material has its own unique benefits in terms of appearance, durability, and cost.
A qualified metal roofer should be able to provide professional repair services, such as fixing leaks, replacing damaged panels, and maintaining the integrity of the roof. They should also be able to offer advice on proper maintenance to extend the life of your metal roof.
Many metal roofing manufacturers and contractors offer financing options to help homeowners afford the upfront cost of a new metal roof. This can include payment plans, low-interest loans, or partnership with third-party lenders.
A reputable metal roofer should have a clear plan for clean-up and disposal of any waste or debris generated during the installation process. They should provide you with proof of proper disposal and leave your property clean and free of any leftover materials or equipment.

Metal Fabrication

Mole Exterminators Near You

Can’t find what you are looking for?

How It Works

  • Answer a few questions about your home project.
  • Within seconds, get matched with top-rated local pros.
  • Compare quotes and choose the best pro for the job.

Metal Fabrication In Your Area

Metal Fabrication: A Guide to Hiring the Right Professional

Meta Description: Discover the essential steps to hiring the right Metal Fabrication professional. Learn about services, materials, and techniques to ensure your project’s success.

Metal Fabrication

Finding the right metal fabrication pro can make or break your project. Success hinges on a thorough evaluation of a fabricator’s skills, facilities, and reputation. This guide will help you choose wisely.

We’ll explore key steps to hire the perfect metal fabrication partner. You’ll learn to assess specialties, client portfolios, and workforce expertise. We’ll also cover quality control processes.

By the end, you’ll confidently select a pro who’ll exceed expectations. They’ll bring your project to life with precision and skill.

Key Takeaways

  • 01

    Understand the scope of your metal fabrication needs to identify the right fabricator.

  • 02

    Evaluate a fabricator’s industry specialties, client portfolio, and past project experience.

  • 03

    Assess a fabricator’s facilities, equipment, and technology to ensure they can meet your project requirements.

  • 04

    Analyze the fabricator’s workforce capacity, expertise, and project-specific staffing levels.

  • 05

    Compare pricing structures and cost transparency to find the best value for your investment.

Understanding the Scope of Your Metal Fabrication Needs

Define your project’s scope before hiring a metal fabrication company. Ask for a detailed breakdown of their services and specialties. Review their client portfolio to check for experience with similar projects.

A diverse customer base shows the fabricator can handle complex jobs. Look for expertise in heavy steel fabrication, rolling, forming, machining, and finishing. This ensures they can manage your project completely.

Assessing the Capabilities of Potential Fabricators

When evaluating metal fabrication companies, consider the following:

  • Comprehensive understanding of the fabricator’s services and industry expertise
  • Diverse client portfolio demonstrating experience with projects similar to yours
  • Specialized capabilities in heavy steel fabrication, rolling, forming, machining, and finishing

Evaluating Industry Specialties and Client Portfolios

A fabricator’s specialties and portfolio reveal their capabilities. Check if they’ve worked with clients in industries related to your project. These may include medical, aerospace, defense, communications, technology, or renewable energy.

A wide-ranging customer base shows the fabricator can handle various needs. This diversity indicates their skill in tackling different fabrication challenges.

Evaluating Company History and Experience

A metal fabrication partner’s history and experience are key success indicators. Look for a company with a rich project portfolio. For example, IVI has thrived in metal fabrication for over 30 years.

Examining Vendor Relationships and Financial Stability

Check if the fabricator pays bills on time and has reliable sourcing. Experienced professionals may cost more upfront but often save money long-term. Quality equipment is crucial for avoiding product issues and project delays.

Reviewing Past Projects and Reputation

Examine the fabricator’s portfolio and references to assess their professionalism and reliability. Clear communication and regular updates are vital for project success. A robust safety plan, including training, is essential for productivity.

Choose a fabricator with a growth vision and a history of exceeding client expectations. This approach often leads to a high-quality, stress-free experience.

Assessing Facilities, Equipment, and Technology

Metal fabrication equipment

The size and capabilities of a metal fabricator’s facilities are key. Tour their shop to check their technology and machinery. Make sure they can handle your job’s complexity.

Ask about recent investments in advanced equipment. This shows their commitment to quality work. Look for CNC machining centers and laser cutting machines. These tools ensure precise final products.

Consider the fabricator’s location and proximity to your site. A nearby facility can respond quickly to issues. It can also provide faster turnaround times.

Evaluate the range of services the fabricator offers. A single-source manufacturer can reduce errors and delays. They can ensure consistent quality throughout the process.

Check if the fabricator is compliant with industry-standard certifications. ISO 9001 and AWS/ASME welding standards are important. These show their commitment to quality control.

Analyzing Workforce Capacity and Expertise

Skilled workers are vital for successful metal fabrication. Check the qualifications and certifications of a fabricator’s workforce before hiring. Ask about the staff assigned to your project to ensure they have the right expertise.

Inquiring About Certifications and Qualifications

Look for a team with diverse certifications and qualifications. This includes welding certifications and training in advanced machinery operation. Seek fabricators with professional accreditations in quality management systems.

A well-trained workforce is more likely to deliver excellent results consistently. They can handle complex projects with precision and efficiency.

Determining Project-Specific Staffing Levels

Evaluate the fabricator’s overall workforce capacity. Ensure they have enough skilled workers to complete your project without compromising other commitments. Assess their ability to scale their team as needed.

A flexible workforce can handle unexpected challenges better. This ensures timely completion of your project, even when issues arise.

Vetting a metal fabricator’s workforce capacity and expertise is crucial. It helps ensure your project will be handled by skilled professionals. This approach increases the likelihood of getting exceptional results.

Comparing Pricing and Cost Transparency

Price matters when choosing a metal fabrication partner, but it’s not the only factor. Seek a fabricator offering detailed cost breakdowns. This helps you understand what you’re paying for and spot hidden fees.

Compare the fabricator’s pricing to industry standards and other providers’ quotes. This ensures you get a fair, competitive rate. A transparent fabricator is more likely to deliver a project on budget.

Reviewing Itemized Estimates and Cost Breakdowns

Ask for detailed cost estimates from potential fabricators. Look for breakdowns of material costs, labor, overhead, and additional fees. This helps you spot any inflated charges.

Carefully examining these estimates prevents overpaying for services. It also ensures you understand all costs involved in your project.

Benchmarking Prices Against Industry Standards

Compare fabricator pricing to industry benchmarks and other providers’ quotes. This helps determine if rates are competitive and market-aligned. Thorough comparisons ensure you choose a fabricator with fair pricing.

Price is crucial, but don’t let it be your only deciding factor. Look for detailed breakdowns, competitive pricing, and transparency. This approach helps keep your project on budget and avoids surprises.

Evaluating Dependability and Reputation

metal fabricator reputation

A metal fabricator’s dependability and reputation are crucial for your project’s success. Check their references and online reviews carefully. Look at how well they meet deadlines, stay on budget, and deliver quality work.

Consider how well they handle multiple projects without compromising your job. A reliable fabricator will likely provide a stress-free experience. Look for strong communication, project management skills, and customer satisfaction focus.

Checking References and Online Reviews

Contact the fabricator’s past clients about their experiences. Ask about responsiveness, attention to detail, and timeline adherence. Check online review platforms for broader perspectives on reputation and customer satisfaction.

Assessing Ability to Meet Deadlines and Stay on Budget

  • Examine the fabricator’s history of meeting project deadlines and staying within budgets.
  • Assess their agility in juggling multiple projects and clients without compromising quality or timelines.
  • Look for evidence of effective project management and communication practices that enable them to deliver on their commitments.

Evaluating a metal fabricator’s dependability increases your chances of a successful partnership. You’re more likely to find a reliable provider who delivers positive results.

Metal Fabrication: Ensuring Quality and Craftsmanship

Quality and craftsmanship are key in metal fabrication. Evaluate the fabricator’s material selection and quality control processes. Look for those who meet or exceed industry standards.

Inspecting Material Selection and Quality Control Processes

Top metal fabricators have strict quality control systems. Ask about their material sourcing and testing methods. Check their quality assurance steps throughout the fabrication process.

  • Ensure the fabricator uses high-quality metals that meet or exceed industry specifications.
  • Evaluate their quality control measures, such as dimensional accuracy testing, non-destructive testing, and visual inspections.
  • Verify that they have a well-documented quality management system in place.

Assessing Finishing Capabilities and Options

Finishing touches greatly impact the product’s quality and look. Check the fabricator’s surface treatments and coating options. These processes can boost durability, fight corrosion, and improve appearance.

  1. Inquire about the fabricator’s range of finishing options, such as powder coating, electroplating, or anodizing.
  2. Assess their ability to provide custom finishes or specialty coatings to meet your specific requirements.
  3. Ensure the fabricator has the necessary equipment and expertise to deliver a high-quality, visually appealing final product.

Choose a metal fabricator committed to excellence. This ensures you’ll get a top-quality, durable, and attractive final product. Your expectations will be met or exceeded.

Considering Location and Lead Times

A metal fabricator’s location and lead times can greatly affect your project. Consider how close they are to your site. This impacts their ability to respond quickly to issues or changes.

Ask about their typical project completion times. This helps you plan your timeline effectively. A conveniently located fabricator with reliable lead times often provides a smoother experience.

When assessing lead times, consider the supplier’s production capacity and project complexity. Also, factor in material availability. An Enterprise Resource Planning (ERP) system can help reduce lead times.

Quality standards like ISO and AS9100 can indicate a supplier’s reliability. They also show the ability to meet deadlines. Choosing a well-located fabricator with good lead times ensures on-time project completion.

Finding the Right Metal Fabrication Pro with FindPros

Struggling to find the perfect metal fabrication partner for your project? Let FindPros handle the search. Simply provide details about your metal fabrication needs, such as the desired shape, materials, and any specialized requirements like corrosion resistance. Within seconds, we’ll match you with top-rated local pros who can deliver quality work within your budget and timeline.

Compare quotes from multiple qualified fabricators, and choose the one that best fits your project and preferences. Take the guesswork out of your metal fabrication needs – let FindPros connect you with the right pro for the job.

Conclusion

Hiring the right metal fabrication professional is key to your project’s success. Evaluate capabilities, facilities, workforce, pricing, and reputation of potential partners. Choose a provider who delivers high-quality, cost-effective results that exceed your expectations.

Prioritize quality, craftsmanship, and dependability for your metal fabrication project. These factors determine the long-term value and performance of your finished product.

The metal fabrication industry has grown with technology, materials, and process advancements. It adapted from steam power to computer-aided design and automation. The industry meets demands in construction, manufacturing, and defense sectors.

The global market for metal fabrication continues to expand. This creates opportunities for economic growth and employment. Skilled professionals in this field remain in high demand.

Choosing the right partner ensures precision, efficiency, and attention to detail in your project. This contributes to your business success and the broader economic landscape. Invest time in finding the right fabricator for long-term benefits.

Frequently Asked Questions (Metal Fabrication)

The most common types of metal fabrication services include custom metal fabrication, sheet metal fabrication, plate metal fabrication, and shaping metal into desired shapes and forms. Fabrication shops often offer a range of services like cutting, bending, welding, and assembly to create various metal products.
When selecting a metal fabrication partner, key factors to consider include their capabilities in handling different raw materials, the range of fabrication techniques they offer, their quality control processes, the expertise of their workforce, and their ability to meet project timelines and budgets. Evaluating their facilities, equipment, and industry certifications is also important.
Reputable fabrication shops have robust quality control measures in place, such as dimensional accuracy testing, non-destructive testing, and visual inspections. They also carefully source high-quality raw materials that meet industry standards. Proper metal preparation, advanced fabrication techniques, and skilled workers are crucial for producing consistently high-quality metal products.
A full-service metal fabrication provider can offer benefits like single-source accountability, streamlined communication, and better coordination throughout the production process. They often have the capability to handle the entire fabrication lifecycle, from engineering drawings to assembly and finishing, ensuring a cohesive and efficient workflow.
Custom metal fabrication allows for the creation of unique, tailored metal components that are optimized for specific applications. By working closely with the fabricator, customers can incorporate custom features, such as specialized coatings or intricate shapes, to improve the product’s functionality, aesthetics, and performance. This level of customization can provide a competitive edge in various industries, including automotive, industrial, and construction.

Masons

Mole Exterminators Near You

Can’t find what you are looking for?

How It Works

  • Answer a few questions about your home project.
  • Within seconds, get matched with top-rated local pros.
  • Compare quotes and choose the best pro for the job.

Masons In Your Area

Masons: Services, Prices, and How to Hire

Meta Description: Discover expert masons for your construction needs. Learn about services, pricing, and hiring tips. Find skilled Masons to bring your project to life today.

Masons

Masons are skilled craftspeople who build iconic structures in our communities. They create everything from historic cathedrals to modern patios and chimneys. Their masonry work is impressive, but what else do they offer?

Let’s explore the world of masons and their services. We’ll also look at key factors for finding and hiring the right professional for your project.

Key Takeaways

  • 01

    Masons are skilled tradespeople who specialize in building and repairing structures made from stone, brick, and other masonry materials.

  • 02

    Understanding the typical services provided by masons, such as brick and stone installation, chimney repair, and patio construction, is crucial when hiring one for your project.

  • 03

    Finding a qualified mason involves research, reading reviews, and comparing bids to ensure you hire the right professional for the job.

  • 04

    Establishing a written contract with a mason is essential for outlining project details, expectations, and responsibilities to protect both parties.

  • 05

    Typical masonry costs can vary widely, from $1,000 to $50,000, depending on the scope of the project and the materials used.

Understanding Masonry Services

Masons are experts in building with brick, stone, and other materials. They offer various masonry services, including installation, repair, and maintenance. Their work covers walls, pathways, patios, chimneys, fireplaces, and retaining walls.

Masonry requires extensive training and expertise. Restoration projects take years to master. It takes 10,000 hours to become an expert in the field. Skilled masons earn high wages due to their rare abilities.

Masons use natural stone from places like Owen Sound and Sudbury. They also work with concrete blocks and pavers. Their projects range from residential chimneys to commercial patios.

Masonry work is physically demanding and requires special skills. It needs certifications, math knowledge, and equipment expertise. DIY masonry repairs can cause more harm than good. Hiring a pro ensures the job is done right.

Research potential contractors’ services and specialties before starting a project. Common repairs include fixing cracks and repointing mortar. Hiring a skilled mason saves time and prevents costly mistakes.

Finding a Qualified Mason

Research your masonry project’s requirements and materials before hiring a mason. Know if you need an artistic mason for decorative work or a general mason for basic installation. Explore brick and stone options, costs, and their pros and cons.

Survey your neighborhood to learn about typical masonry project costs. This helps set a realistic budget and evaluate quotes from potential masons. Thorough research ensures you find a qualified mason for your project.

Research Your Project and Materials

  • Understand the specific skills and expertise required for your masonry project, such as decorative work or basic brick/stone installation.
  • Explore the different brick and stone options, their costs, and their advantages and disadvantages.
  • Survey your local area to gain insights into the typical costs of similar masonry projects.
  • Use this research to set a realistic budget and evaluate potential masons’ quotes.

Research your project and materials to boost your chances of finding a great mason. This approach helps you find someone who can deliver the results you want.

Reading Reviews and Ratings

Online ratings and customer feedback offer valuable insights into mason quality. They reveal work quality, customer service, and industry reputation. Look for details about communication, site management, and problem-solving approaches.

Contractor websites and online directories showcase experience and portfolios. These resources help you understand a mason’s standing in the community. This comprehensive assessment aids in making an informed decision.

  • Evaluate mason reviews and ratings to gauge their work quality and customer service
  • Explore contractor websites and online directories to learn about their experience and reputation
  • Look for details on communication, site management, and problem-solving skills, not just the final product

Thorough research helps find a skilled and reliable professional. This crucial step ensures you hire the right mason for your project. It guarantees high-quality results and exceptional service.

Comparing Bids

Securing multiple bids is vital for masonry projects. It ensures you get a fair price for the work. Masonry contractors often quote projects based on different rates or methods.

Understanding how each contractor calculates their bid is crucial. This includes factors like window framing or site cleanup. These elements could impact the final cost.

Comparing bids accurately is key when reviewing masonry proposals. Examine the details of each proposal carefully. Pay attention to pricing structure, materials, and additional services or fees.

This approach helps identify the most cost-effective option. It ensures alignment with your masonry project’s scope.

To aid in bid comparison, consider these factors:

  • Understand the per-unit rates for materials like bricks, stones, or blocks
  • Evaluate the hourly labor rates and estimated hours for the project
  • Identify any hidden costs, such as site cleanup or waste disposal
  • Compare the quality and warranties of the materials proposed
  • Assess the contractor’s experience and expertise in similar masonry projects

Careful analysis of multiple masonry bids leads to informed decisions. It ensures you get the best value for your investment. This diligence helps avoid unexpected costs.

Your thorough approach will contribute to a successful masonry project. It’s worth the effort to secure the right contractor for your needs.

Obtaining a Masonry Contract

A well-crafted contract is crucial for masonry projects. It should outline project details, materials, timeline, and payment terms. This document guides both homeowner and contractor, ensuring a successful project.

Contract Essentials

A thorough masonry contract should include these key elements:

  • Proof of the contractor’s license and insurance, including worker’s compensation and general liability coverage
  • A detailed description of the scope of work, including the types of materials to be used and the specific tasks to be performed
  • A clear timeline for the project, with milestones and a projected completion date
  • Payment terms, including any upfront deposits, partial payments based on job progress, and the final balance due
  • A workmanship guarantee, ensuring the quality of the masonry work
  • Procedures for handling changes or issues that may arise during the masonry project

These essential elements provide clarity for both parties. They help avoid misunderstandings and disputes. A solid contract protects everyone involved in the project.

Typical Costs of Masons

Mason costs vary based on project scope, materials, and local demand. Brick paver or patio installation typically costs $1,000 to $2,000. Brick repair ranges from $700 to $2,000. Stone patios or pathways can cost $1,800 to $4,800.

Larger masonry projects come with higher price tags. Garden or retaining walls may cost $3,000 to $8,000. Outdoor fireplaces can range from $1,500 to $20,000. Brick siding installation is often the priciest, costing $9,000 to $25,000.

Factors affecting costs include design complexity, material quality, and site accessibility. Local labor rates also play a role. For accurate estimates, consult a professional mason and request detailed bids.

Knowing typical masonry costs helps homeowners plan their projects better. This info aids in budgeting and hiring qualified masons. It also helps compare bids to ensure the best value for your investment.

Hiring the Right Mason

Finding the perfect mason is vital for your project’s success. Look for candidates with experience in brick, stone, or concrete work. Make sure they’re licensed, insured, and have good references.

When hiring, consider the mason’s insurance coverage. Liability insurance protects clients from potential damages. It ensures peace of mind in case of accidents.

Pricing can indicate the quality of work. Remember, lower fees don’t always mean better value. Often, you get what you pay for in masonry services.

Check social media platforms for insights into a mason’s work. Look at Instagram, Facebook, and Twitter for customer satisfaction. Read testimonials on their websites and recommendations from neighbors.

The Better Business Bureau website can reveal any negative reviews. This information helps you make an informed decision about potential masonry companies.

Investing in a qualified mason ensures well-constructed homes. It protects your property’s longevity and structural integrity. Follow these tips to hire the right mason for your project.

Interviewing Masons

masons interviewing

Conducting a thorough interview is vital when hiring a masonry contractor. Asking the right questions helps assess a mason’s skills and experience. Let’s explore some key questions to consider when interviewing masons.

Essential Questions

  1. How much experience do you have as a mason? Look for masons with extensive experience in the specific type of project you need.
  2. Are you properly licensed and insured? Ensure the mason meets all local and state requirements to operate legally and protect your investment.
  3. Have you used the specific materials required for this project before? Hands-on experience with the materials is important for quality workmanship.
  4. Can you provide references and examples of similar work? Reviewing past projects will give you a better idea of the mason’s capabilities.
  5. What will your team look like, and what is your workmanship guarantee? Understanding the team and any warranties will help you set realistic expectations.

These questions to ask masons during the masonry contractor interview help identify the most qualified professional. Their answers reveal expertise, attention to detail, and commitment to quality results.

Expectations for Masonry Work

Masonry projects require realistic expectations for timeline, work site, and final outcome. The process can be messy and disruptive. Homeowners should prepare for yard or work area disarray during the project.

Masonry work often takes longer than expected due to its nature. Masons may face challenges like bad weather, material shortages, or structural issues. Clear communication and flexibility with the timeline are crucial.

  1. Expect a Messy Worksite: Masonry work is dusty and noisy. Keep the area clear for masons. Be ready for some disruption to your daily routine.
  2. Understand the Masonry Project Timeline: Projects can take weeks or months to finish. Be patient and work closely with the mason to stay on track.
  3. Collaborate on Masonry Work Expectations: Talk openly about your expectations for the outcome, job site, and timeline. Work together to solve any issues that come up.

Setting realistic masonry work expectations helps ensure a smoother project. Open communication about masonry project expectations and masonry job site expectations is key. This approach leads to a more successful masonry project timeline.

Vetting Masonry Contractors

Vetting a masonry contractor is key to a successful project. Start by defining your expectations and knowledge about the work. This helps you ask smart questions and evaluate contractors better.

Check the contractor’s license, insurance, and credentials. Look into their financial stability and past masonry projects. This helps find skilled contractors who can deliver quality work on time and budget.

  • Conduct a thorough self-assessment to define your project requirements and expectations
  • Verify the masonry contractor’s license, insurance, and credentials
  • Assess the contractor’s financial stability and track record of completing similar projects
  • Ensure the contractor has the necessary expertise and resources to handle your masonry project

Careful vetting leads to hiring the right team for your project. This approach helps avoid future issues. Taking time now will pay off in the long run.

Soliciting Bids and Referrals

Finding the right masonry professional is crucial for your project’s success. Start by asking friends, neighbors, or local suppliers for recommendations. These referrals offer valuable insights into a contractor’s work quality and reliability.

Request bids from at least three qualified masonry contractors. This helps you get a fair price and the best value. Masonry bids differ from proposals, quotes, and estimates.

Bids are final, fixed prices for the entire project. Construction bids are used when project conditions are well-defined. Quotes and estimates can change with material and labor costs.

  • Construction bids are used when project conditions are well-defined, while quotes and estimates can fluctuate with changing material and labor costs.
  • A construction bid should include contact information, project scope, existing conditions, cost breakdown, payment terms, relevant documentation, and the project schedule.
  • The bidding process involves solicitation, subcontracting, bid submission, selection, contract finalization, and project commencement.

Follow local regulations when soliciting masonry bids. This may include publishing notices in newspapers or trade publications. Ensure all bids are publicly opened and read at the specified time and place.

Research contractor referrals and get multiple bids for your masonry project. This approach helps find a skilled professional at a fair price. Quality workmanship and reasonable costs are within reach with careful planning.

Preparing Questions for Contractors

masonry contractor interview questions

Asking the right questions is crucial when hiring a masonry contractor. A well-prepared list helps assess qualifications, experience, and project suitability. Consider these key questions when interviewing potential masonry contractors:

  1. What is your experience in the masonry industry, and what specific projects have you worked on that are similar to mine?
  2. Are you licensed and insured? Can you provide documentation to verify your credentials?
  3. What is your typical project timeline, and how will you communicate with me throughout the process?
  4. How do you select the materials for a masonry project, and what are your recommendations for my specific project?
  5. Do you offer any warranties or guarantees for your workmanship, and what is the process for addressing any issues that may arise?

These questions offer insight into the contractor’s qualifications and project management approach. You’ll learn about their commitment to quality results. This information helps you make an informed decision when hiring.

Vetting potential contractors is key to a successful masonry project. Ensure they have the expertise and resources to meet your needs. Take time to prepare questions and find the best contractor for your project.

Due Diligence and Verification

Thorough due diligence on masonry contractors is vital for project success. This involves verifying licenses, insurance, and credentials. It’s also crucial to check references and view previous work samples.

Key factors to consider in masonry contractor due diligence include:

  • License verification: Ensure the contractor is properly licensed in your area. This protects you from legal issues and confirms their qualifications.
  • Insurance coverage: Check that the contractor has adequate liability and workers’ compensation insurance. This safeguards you against potential accidents or damages.
  • Credentials and associations: Look for contractors who belong to professional organizations like the Masonry Contractors Association of America (MCAA). This shows their commitment to quality standards.
  • References and past work: Request references from previous clients and examine their past projects. This helps you gauge their workmanship and customer service quality.

Careful vetting of each masonry contractor allows for informed decision-making. This process helps avoid future problems and ensures high-quality work.

You’ll be more likely to work with a reliable professional by following these steps. The result? A project completed to the highest standards.

Need Help Finding the Right Masonry Contractor? Let FindPros Assist

As you explore the rich history and traditions of Freemasonry, you may also be in need of skilled masonry services for your home or business. That’s where FindPros can help. Our platform connects you with top-rated local masonry professionals who are ready to compete for your project.

By answering a few simple questions about your masonry needs, FindPros will match you with the best-fit contractors. You’ll get to compare multiple quotes and find the mason that aligns with your budget and preferences. It’s a quick and easy way to access the expertise of master masons, just like the cathedral builders of old.

Don’t settle for less than the best when it comes to your masonry project. Let the power of competition and our industry connections work for you. Get started with FindPros today.

Conclusion

Hiring a skilled mason is crucial for your construction or renovation project. Research and compare qualified masonry contractors to ensure your masonry project meets your expectations. Set clear goals and budget to get the best results.

Quality and expertise should be your top priorities when selecting a mason. Work closely with them throughout the project to achieve your desired outcome. This approach will add lasting value to your property.

The right masonry services can transform your vision into reality. Whether it’s a new foundation, brick wall repair, or stone patio, choose wisely. Follow these steps to find the perfect mason for your project.

Frequently Asked Questions (Masons)

A masonic lodge is the basic organizational unit of Freemasonry. To become a mason, one must join a local masonic lodge and go through the three degrees of Entered Apprentice, Fellowcraft, and Master Mason. Masons are part of the worldwide fraternity of Free and Accepted Masons.
Freemasonry uses many symbolic tools and imagery in its rituals and ceremonies. Common masonic symbols include the square and compass, the all-seeing eye, and the pillars of Jachin and Boaz. Masonic ceremonies like the Festive Board and the Raising of a Master Mason are important traditions.
Local masonic lodges are overseen by a Grand Lodge, which is the supreme Masonic authority in a given jurisdiction. The Grand Lodge grants charters to local lodges and sets the standards for Freemasonry in that area. Lodges are led by a Worshipful Master and other elected officers.
Freemasonry requires a belief in a Supreme Being but does not endorse any specific religion. Members are expected to uphold moral and ethical principles, but the organization is non-denominational. The Catholic Church has historically been critical of Freemasonry, considering it incompatible with Catholic doctrine.
Freemasonry has its roots in the medieval stonemason guilds, known as operative lodges. As the building craft declined, the organization transformed into a philosophical and fraternal society, known as speculative Freemasonry. Today, Freemasonry continues to evolve while maintaining its focus on self-improvement, charity, and community service.

Marble Restoration

Mole Exterminators Near You

Can’t find what you are looking for?

How It Works

  • Answer a few questions about your home project.
  • Within seconds, get matched with top-rated local pros.
  • Compare quotes and choose the best pro for the job.

Marble Restoration In Your Area

Marble Restoration Services: What to Expect

Meta Description: Discover expert marble restoration services to revitalize your stone surfaces. Learn about the process, benefits, and what to expect for stunning results.

Marble Restoration

Is your marble losing its shine? Professional restoration can revive your floors, countertops, and shower walls. Let’s explore how experts bring back the beauty of natural stone surfaces.

Key Takeaways

  • 01

    Marble restoration involves specialized techniques like diamond grinding to remove scratches and restore the desired finish.

  • 02

    Hiring a professional marble restoration company is crucial, as they have the necessary tools, experience, and knowledge toThe restoration process typically involves preparing the work area, protecting surrounding surfaces, and using the appropriate equipment and materials for the specific stone type and finish. achieve exceptional results.

  • 03

    The restoration process typically involves preparing the work area, protecting surrounding surfaces, and using the appropriate equipment and materials for the specific stone type and finish.

  • 04

    Proper post-restoration care, including regular cleaning and sealing, is essential to maintain the beauty and longevity of your marble surfaces.

  • 05

    Marble restoration services can transform dull, worn surfaces into like-new masterpieces, bringing back the shine and elegance you desire.

Curious about reviving your marble surfaces? Let’s uncover the secrets to restoring their timeless beauty. We’ll explore the steps experts use to bring life back to your stone treasures.

What is Marble Restoration?

Marble restoration revives worn or damaged marble surfaces to their original condition. It uses special techniques and equipment like diamond grinding. This process removes scratches and imperfections, restoring the stone’s natural beauty and shine.

Understanding the Process

Marble restoration requires expertise from experienced professionals. It involves diamond grinding to smooth out blemishes. Polishing follows to restore the stone’s shine and luster.

The final step may include honing or flaming for a unique textured look. Each step is crucial for achieving the desired finish.

Why Hire a Professional?

DIY marble restoration can lead to further damage. Professional companies have the right knowledge and equipment to safely restore the stone.

They protect surrounding surfaces and ensure proper ventilation. Their expertise transforms worn marble into stunning, polished masterpieces.

Professional marble restoration enhances the beauty of any space. It brings new life to damaged surfaces, creating a lasting impression.

Marble Restoration Process

Restoring marble surfaces requires a skilled technician’s expertise. The process starts with diamond grinding to remove scratches and damage. This technique reveals the fresh, undamaged surface beneath.

Diamond Grinding Technique

Technicians use a specific sequence of diamond grits during grinding. This smooths and levels the marble surface. The process is crucial for achieving the desired finish.

Restoring Different Finishes

  • To restore a honed finish, the technician will use a series of diamond abrasives to gradually refine the surface until the desired satin-like appearance is achieved.
  • For a flamed finish, the technician will employ the same controlled burning technique used in the original processing of the tile or slab, carefully restoring the unique textured look.

Skilled technicians use their knowledge to treat stone surfaces with care. Their precision results in a beautifully restored finish. This enhances the natural beauty of the marble.

Marble Restoration Preparation

Prepare for marble restoration by taking crucial steps. First, schedule a free estimate with the restoration company. A technician will assess your marble and provide a proposal.

Once you approve, the company will schedule your project quickly. This ensures a smooth and successful restoration process.

Clearing the Work Area

Before technicians arrive, clear the work area of personal belongings. Remove items from countertops, floors, and surrounding surfaces. This allows the team to work efficiently.

A clutter-free space helps the restoration team perform necessary procedures. These include protecting surfaces, removing fixtures, and addressing marble damage.

By preparing properly, you’ll help create a seamless restoration project. This ensures the best outcome for your valuable stone surfaces.

During the Marble Restoration Project

marble restoration project

Pure Light Cleaning technicians protect surrounding areas during marble restoration. They carefully mask walls, floors, and cabinets to prevent damage. This safeguards the work environment throughout the project.

Protecting Surrounding Areas

Technicians use strategic coverings to shield walls, floors, and cabinets. This keeps the rest of the room clean during restoration. Their attention to detail maintains organization throughout the process.

Equipment and Materials Used

For floor restoration, technicians use a swing machine and powerful vacuum. They also employ professional-grade products tailored to marble surfaces. Hand machines and vacuums are used for walls, counters, and stairs.

The restoration process may create noise from periodic vacuuming. However, technicians work to minimize odor and dust. Their wet process captures particles, keeping the environment clean.

After restoration, technicians clean the entire work area thoroughly. They remove all masking and protective coverings. This leaves the site pristine, ready for clients to enjoy their restored marble.

Types of Stone Professionals Restore

Contractors revive various natural stone surfaces. They work with marble, granite, limestone, travertine, and slate. These materials are often used for flooring, countertops, and backsplashes.

  • Marble: Marble is a timeless and elegant choice for many. Over time, it can become dull, scratched, or stained. Technicians restore marble using special grinding and polishing methods.
  • Granite: Granite is popular for countertops and flooring. It’s known for its durability and unique patterns. The restoration process can revive dull or damaged granite surfaces.
  • Limestone: Limestone adds sophistication to any space. It can be prone to etching and discoloration. Professionals clean, hone, and seal limestone to maintain its natural beauty.
  • Travertine: Travertine is often used for flooring, walls, and countertops. Its pitted surface can become dull over time. Services can transform travertine, restoring its shine.
  • Slate: Slate is common for floors, fireplaces, and other features. It’s durable but can become stained or worn. Professionals can revive slate surfaces and enhance their natural beauty.

A team can restore all these stone types. They ensure surfaces look their best. Contact for a free estimate and learn how they can help.

Post-Restoration Care and Maintenance

marble restoration

Proper care is crucial after marble restoration. Your restoration company will provide detailed cleaning instructions. They’ll recommend a high-quality stone soap and hydrophobic sealant for maintenance.

Cleaning and Sealing Instructions

Clean marble regularly with a stone soap. Avoid harsh chemicals or abrasive cleaners that can damage the stone. Use a mild, pH-neutral stone soap that leaves no residue.

Apply a hydrophobic sealant after cleaning. This creates a protective barrier against water spots and stains. It helps maintain the stone’s beautiful appearance.

Avoiding Future Damage

  • Wipe up spills immediately to prevent staining or etching.
  • Use coasters and placemats to protect the stone from water rings or other marks.
  • Place mats or rugs in high-traffic areas to minimize scratches and wear.
  • Avoid using harsh cleaners, abrasive pads, or tools that could scratch the surface.
  • Reseal the stone every 3-5 years to maintain its protective barrier.

Follow proper cleaning and sealing instructions to keep your marble looking its best. Take steps to prevent future damage. Regular maintenance preserves the beauty and value of your marble surfaces.

Discover FindPros for Effortless Marble Restoration

Tired of scrubbing and polishing your marble surfaces with elbow grease? Let FindPros take the hassle out of your stone restoration needs. Whether you’re looking to revive your polished marble floors, countertops, or even that stubborn marble shower, our network of vetted professionals can provide tailored solutions to meet your specific needs.

With just a few clicks, you can get matched with top-rated local pros, compare their quotes, and choose the best fit for your project. No more guessing which polishing machine or matte finish is right for your concrete or grout-filled surfaces – let the experts at FindPros handle it all, and enjoy your beautifully sealed, dirt-free marble in no time.

Conclusion

Marble restoration services can revive worn or damaged stone surfaces. They transform them to look brand new. Understanding the process and hiring a professional ensures long-term protection of natural stone investments.

Marble floors last longer than other flooring materials. Restoration makes them denser and more durable. It reduces chipping and cracking risks, and prevents harmful bacteria buildup.

Professional restoration ensures thorough rejuvenation of marble floors. It enhances the property’s aesthetic appeal and market value. The cost is often lower than replacing marble floors.

Clean, well-maintained floors positively impact health and well-being. They eliminate allergens, mold, and bacteria that accumulate on neglected surfaces. Modern marble polishing technology offers dust-free procedures for minimal disruption.

Skilled technicians can now restore marble surfaces with maximum results. Homeowners can enjoy the beauty and durability of restored marble. The investment typically yields substantial returns over time.

Frequently Asked Questions (Marble Restoration)

Hiring a professional marble restorer is crucial because they have the necessary tools, experience, and knowledge to safely and effectively restore marble surfaces to their original beauty. They can use specialized techniques like diamond grinding to remove scratches and restore the desired finish.
The restoration process typically starts with preparing the work area, protecting surrounding surfaces, and using the appropriate equipment and materials for the specific stone type and finish. This may involve diamond grinding, polishing, honing, or flaming to achieve the desired look, such as a polished, matte, or high-gloss finish.
Proper post-restoration care, including regular cleaning with a stone-safe soap and sealing with a hydrophobic sealant, is essential to maintain the beauty and longevity of your marble surfaces. Avoiding harsh chemicals, wiping up spills immediately, and using coasters or mats can also help prevent future damage.
While DIY marble restoration kits are available, it’s generally recommended to hire professional surface care experts for the best results. They have the specialized equipment, such as polishing machines, and the expertise to safely and effectively restore marble, travertine, and other natural stone surfaces without causing further damage.
Professional marble restoration services can revive a variety of natural stone surfaces, including marble, granite, limestone, travertine, and slate, which are commonly used for floors, countertops, shower walls, vanities, and other applications. Whether your marble surfaces need crack repair, a re-honed finish, or a high-gloss polish, the restoration work can transform dull, worn areas into like-new masterpieces.