Wallpaper Calculator

Wallpaper Calculator

Calculate how many rolls of wallpaper you need for your project by entering your room’s dimensions and coverage per roll below. Estimate the cost by adding the price per roll.

  • By
    FindPros

    FindPros connects consumers with professionals in over 600 different categories.

  • Reviewed by
    Jacky L.

    FindPros connects consumers with professionals in over 600 different categories.

Room Dimensions

This field is required.
Value should be positive.
This field is required.
Value should be positive.
This field is required.
Value should be positive.
This field is required.
Value should be positive.

Optionally enter the price per roll

$
Please enter valid price.
Wallpaper Estimate:

Wallpaper Needed

{{rolls_needed}}

Estimated Material Cost

{{ cost }} $

Total Square Footage

{{ total_sq_ft }} $

Learn how we calculated this below

Add this calculator to your site

How to Estimate How Much Wallpaper You Need

Whether you choose to use wallpaper on an accent wall or to cover all the walls of your home, it’s important to understand how much material to order. Dye lots often mean that if you run out and order more later, you may not get an exact match of color between rolls, so ordering the correct amount from the beginning can help ensure your project goes smoothly.

To calculate how much wallpaper you need, follow a few simple steps. First, find the square footage of the surfaces to be wallpapered, determine the usable wallpaper per roll, then calculate how many rolls of wallpaper will be needed to cover the room’s square footage.

Step One: Find the Square Footage of the Room

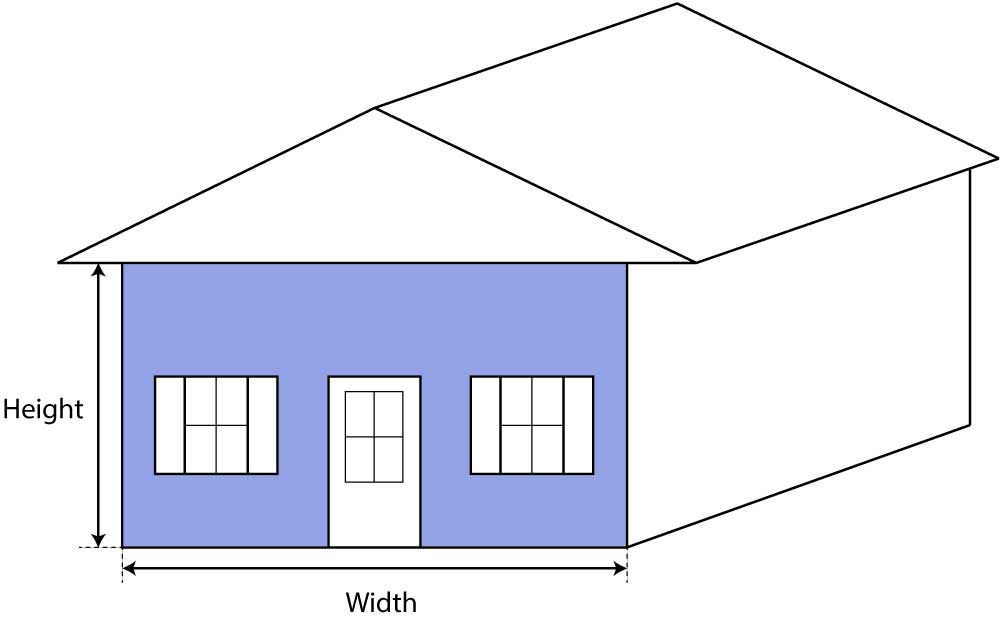
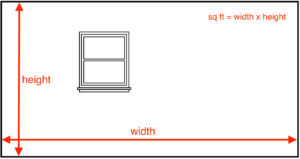
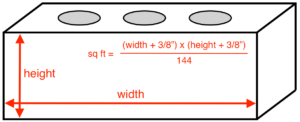
The first step in estimating wallpaper is to find the square footage of the area to be papered. Square footage is the measurement of the area in feet. You can find the square footage by measuring the length and height, and then multiplying them together.

Make sure length, width, and height measurements are in feet before you multiply to find the square footage. It may be easiest to round your measurements to avoid working with inch fractions and decimals.

However, if you are measuring for a wallpaper border, or if you want to estimate the wallpaper for a short section of wall, you can measure in inches; once you get the height and width and multiply for square inches, divide by 144 to get the square feet. Round up to the nearest whole foot.

For example, let’s find the square footage of a wall that is 12 ft wide by 9 ft high.

sq ft = width × height
sq ft = 12 ft × 9 ft
sq ft = 108 sq ft

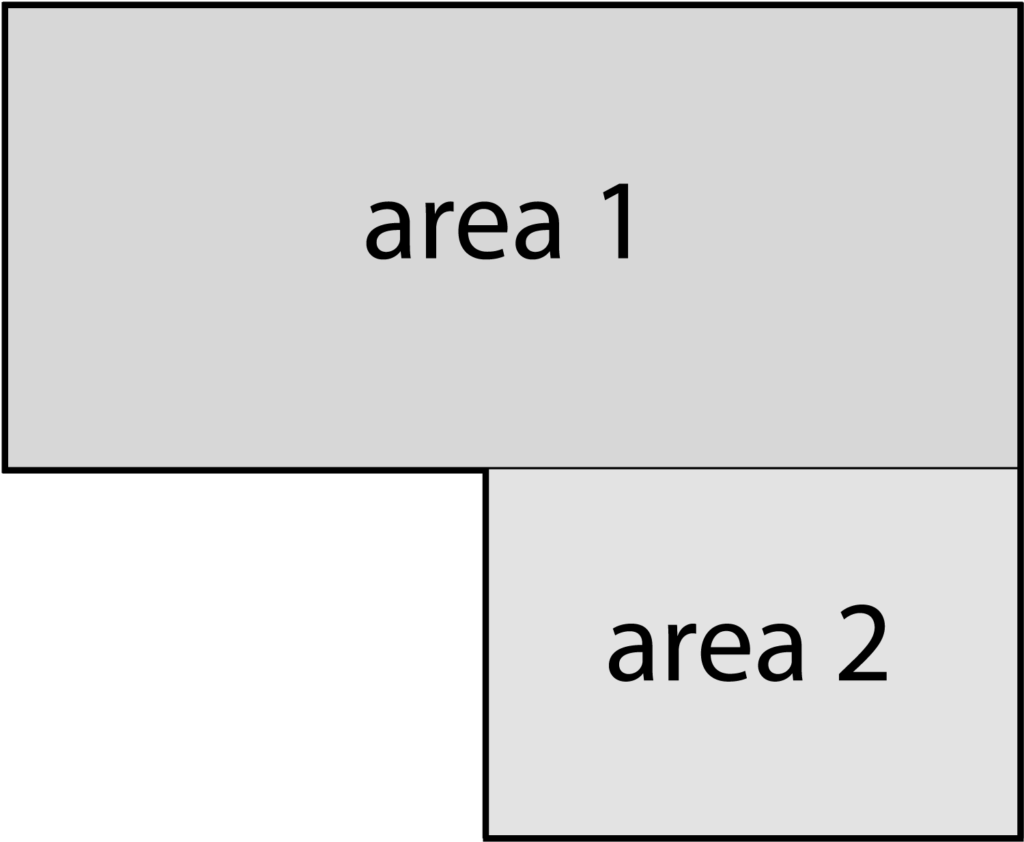
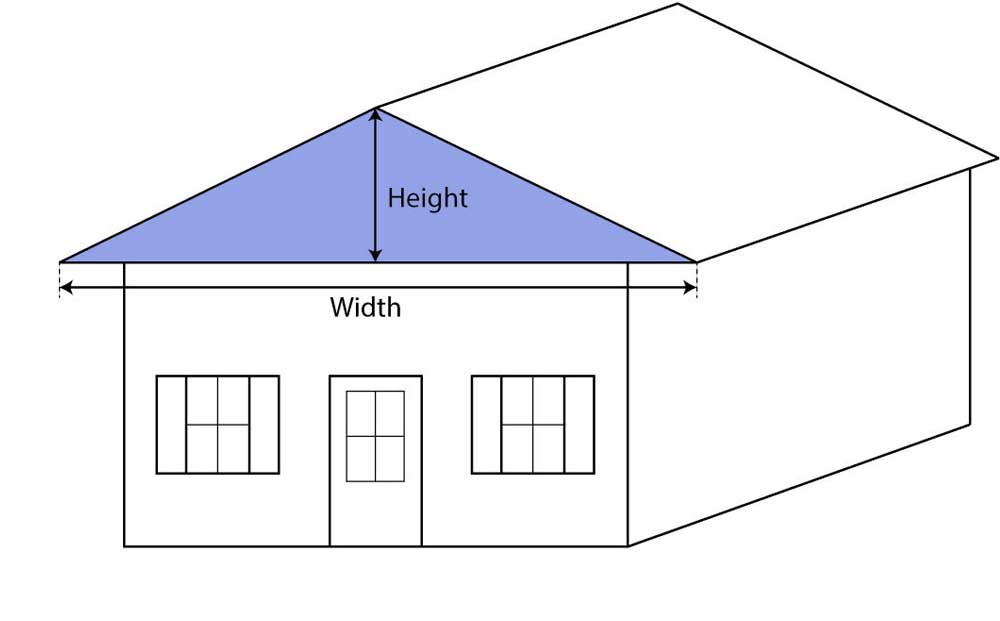
If your walls are not simple rectangles or are complex, then you can split up the wall into smaller chunks and find the square footage of each part separately, then add the square footage measurements together.

For example, if your wall is not a simple rectangle, break it into different sections and measure the square footage of each section and add the different sections together.

Illustration showing how to break up a complex wall shape into smaller pieces to measure.

Learn more about how to measure rooms and complex spaces with our step-by-step guide.

Once you know the square footage of each wall, add all of them together to find the total project square footage.

Here’s a tip: try using our square footage calculator to easily find the square footage of your room.

If you have a lot of windows or doors in the room, you may want to subtract them from your total square footage. Measure the width and height of each window or door in feet, and multiply them together to get its square footage. Subtract the square footage of each area not being papered from the total.

Step Two: Find the Wallpaper Coverage

The next step is to find the usable coverage for your chosen wallpaper in square feet. Different wallpaper patterns have different amounts of usable square footage, which is determined by the drop match pattern.

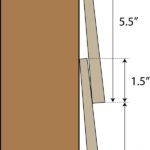
Drop match patterns align both horizontally and vertically. They can be full, 1/2 drop or 1/4 drop, depending on the size of the pattern. In order to line up, you need to start the next row of wallpaper a certain distance from the last, by measuring a “drop” on the roll of the recommended number of inches.

When you drop the next section of wallpaper to align the pattern with the previous section, there will be waste that needs to be cut to make the pattern line up. This waste reduces the usable square footage of the roll.

The following are estimates of the coverage of different drop patterns.

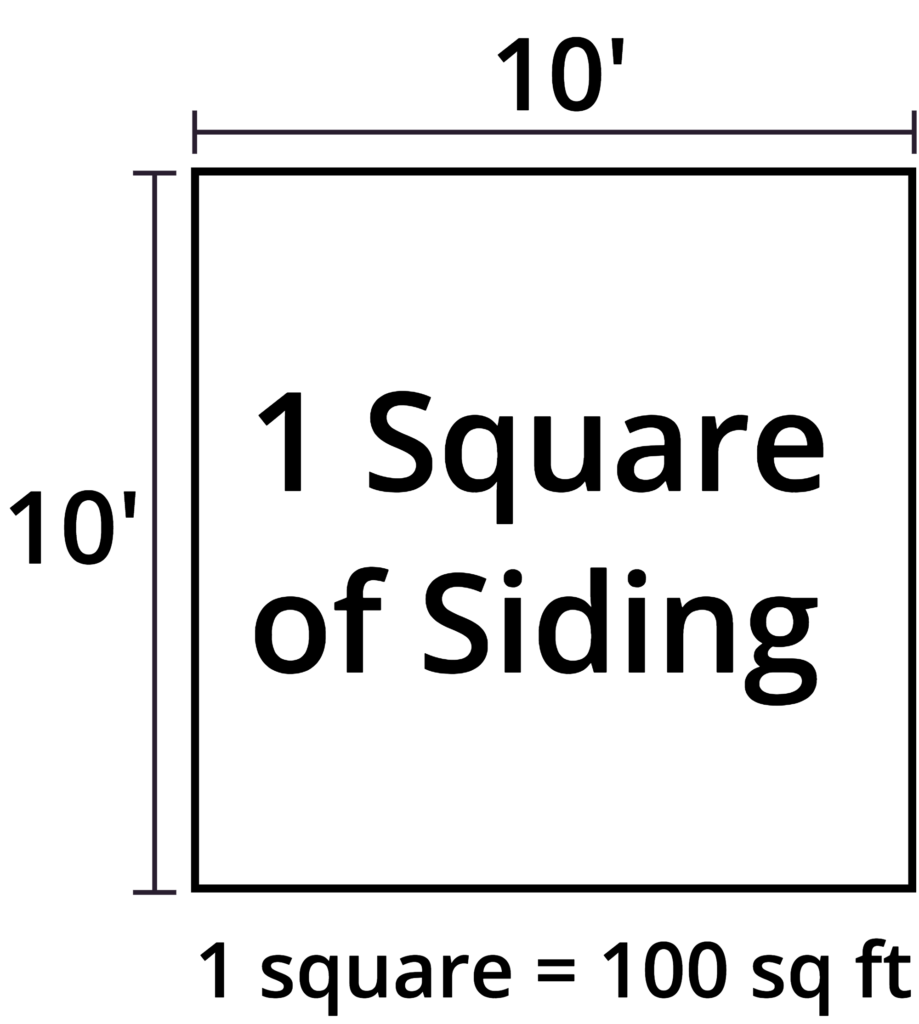
Usable wallpaper per roll for various drop patterns. A standard US wallpaper roll with no pattern will cover 36 square feet, and a standard European roll will cover 29 square feet

Drop Pattern Wallpaper Coverage
no drop pattern 29 – 36 sq ft
0″ – 6″ drop pattern 25 sq ft
7″ – 12″ inch drop pattern 22 sq ft
13″ – 18″ inch drop pattern 20 sq ft
19″ – 23″ inch drop pattern 15 sq ft

Step Three: Calculate Wallpaper Rolls Needed

The final step in estimating wallpaper is to use the total square feet and coverage per roll to find the number of rolls you need. Find the number of rolls needed by dividing the total square footage by the usable square footage per roll.
For example, find the number of rolls needed to cover a room with 350 sq ft of walls using rolls that have 25 usable square feet.

rolls = wall sq. ft. ÷ usable sq. ft.
rolls = 350 sq. ft. ÷ 25 sq. ft.
rolls = 14

We recommend ordering about 10% to 20% extra to allow for cuts and waste material. If you are fairly close to an even roll, then it may be a good idea to order an extra roll to ensure you are not short on material.

It might even be worth ordering some extra to allow for future patches and repairs, if needed.

If you’re also doing some painting in this space, you might be interested in estimating how many gallons of paint you’ll need.

Paint Calculator

Paint Calculator

Calculate how much paint and primer you need by entering the dimensions of your room below. Optionally, include ceiling paint in your estimate.

  • By
    FindPros

    FindPros connects consumers with professionals in over 600 different categories.

  • Reviewed by
    Jacky L.

    FindPros connects consumers with professionals in over 600 different categories.

Room Dimensions

This field is required.
Value should be positive.
This field is required.
Value should be positive.
This field is required.
Value should be positive.
Paint Estimate:
{{wall_paint}}
{{cell_paint}}
{{total_primer}}

Paint Area:

{{wall_sq_ft}}
{{wall_sq_ft}}
{{wall_sq_mt}}
{{wall_sq_mt}}
{{ceiling_area}}
{{ceiling_area}}
{{ceiling_area_meter}}
{{total_sq_mt}}
{{total_sq_ft}}
{{total_sq_ft}}
{{total_sq_mt}}

*results assume 350 square feet of coverage per gallon of paint and 200 square feet of coverage per gallon of primer, some paints and primers may cover more or less

Learn how we calculated this below

Add this calculator to your site

How to Calculate Paint and Primer

When you’re painting a room, a fence, or your whole house, you might be wondering how many gallons of paint you’ll actually need. There are a few methods to figure this out.

The first method is to use the paint calculator above. It estimates the amount of paint, primer, and ceiling paint you’ll need for any project.

Simply enter the size of the area, and the calculator finds the square footage of the walls, then estimates the paint and primer needed for that area.

Of course, you can estimate paint without a calculator as well. You can calculate how many gallons you need in a few simple steps.

How Many Gallons of Paint Do You Need?

The first step is to calculate the size of the area you will be painting. Paint is a most costly material, and while you do want a small amount extra for touch-ups later, you don’t want to order much more than you need, as it is not returnable.

By far, the easiest way to estimate how many gallons of paint you need for a project is to consult the quick reference table below.

Paint Coverage Estimates

This table shows the estimated amount of paint needed for average-sized rooms.

One gallon of typical latex paint usually covers 350 to 400 square feet of wall area.

This does assume that the paint you are using can cover in one coat. If you are going from light to dark or dark to light, you may need either a tinted primer and one to two coats of paint or two to three coats of paint without primer to get the desired color.

Paints that contain paint and primer in one will usually cover in one coat, but always check the brand and type of paint you’re using for recommendations, particularly for bright or dark colors. If you’re painting new drywall, then it’s a good idea to apply a coat of primer first.

Room Size Gallons of Paint Needed
small room (8′ x 8′) 1 gallon
medium room (12′ x 12′) 2 gallons
large room (18′ x 18′) 3 gallons
bathroom 1 gallon
kitchen 1-2 gallons
bedroom 2 gallons
family room 3 gallons

Amount of paint needed to cover the average-sized room, using a standard latex paint

How to Measure a Room

Using a reference table is quick and easy, but the most accurate method of calculating paint and primer for a project is to measure the surfaces to be painted and use the coverage estimate for the specific product you’re using.

Step One: Measure the Walls

The first step in estimating paint material is to measure the walls or ceilings you will be covering. Measure the length and height of each wall in feet and write them down. It may be easiest to round up to the next foot measurement for measurements that contain partial feet.

You can also measure the walls in inches and convert the area to square feet later for more accurate measurements, particularly in small spaces, closets, or small bump-out walls.

Step Two: Calculate Square Footage of Each Surface

The next step in the process is to calculate the square footage of the walls and ceilings. Square footage is an area measurement of a space, measured in feet, and we have a simple calculator to help with these calculations.

For each set of measurements from step one, multiply the width and height together to get the square footage.

If you measure in inches, divide the number you get from multiplying by 144 to convert to square feet. If doing this method, it is sometimes easiest to add up the square inches from each area first, then convert to square feet. Write down the square footage of each wall.

For example, let’s find the square footage of a wall that is 10 ft. wide by 9 ft. high.

sq ft = 10 ft. × 9 ft.
sq ft = 90 sq ft

Pro Tip: use an area calculator to find the area of complicated wall shapes.

For walls that have large banks of doors or windows, consider subtracting the area of those from the wall square footage to avoid ordering too much paint. To do that, measure the length and height of each door and window and multiply to find the square footage. Then, subtract the door and window square footage from the wall square footage to find the area that needs paint.

If the walls are not simple rectangles or are complex, then consider breaking the wall into smaller sections and calculate the square footage of each section individually. To illustrate this, if your wall is not a normal rectangle, break it into different sections and measure the square footage of each section. Learn more about how to measure irregular walls.

Illustration showing how to break up a complex wall shape into smaller pieces to measure.

Step Three: Add Square Footages Together to Find the Total

Once you know the square footage of each wall, add them together to find the total square footage. If you had split complex walls into several surfaces, then be sure to add each surface to get the total.
For example, let’s find the total square footage for two walls that are 120 square feet and two walls that are 150 square feet.

total sq ft = 120 + 120 + 150 + 150
total sq ft = 540 sq ft

Step Four: Calculate Paint Coverage

The final step is to find the coverage ratio of your paint and calculate the number of gallons needed to cover the total square footage. Most professionals use the formula of 350 to 400 square feet of wall coverage per gallon of paint and 200 square feet of wall coverage per gallon of primer.

It’s important to note that different types and manufacturers may cover more or less area. It’s also important to note that different application methods, such as spraying, rolling, or brushing, will cover differently.

These figures also assume that you will be giving an even, solid coat of paint. If you are choosing to use a faux finish, this will change the calculations as well.

Your paint vendor should be able to tell you the coverage for your selected paint, and it’s often indicated on the container.

Divide the total square footage by the coverage rate to find the number of gallons needed.

For example, let’s find the paint needed to cover 540 square feet using a product that covers 350 square feet per gallon.

gallons = sq ft ÷ coverage
gallons = 540 ÷ 350
gallons = 1.54 gallons

You’ll need to round up to the nearest full gallon or quart. It is not a bad idea to have some leftover paint at the end of a project since it can be used for touch-ups, particularly with some shades that can be difficult to match or that can vary slightly from lot to lot.

How to Estimate Paint for Trim

Here’s a tip: estimate the paint and primer needed to cover trim or small surfaces by taking the linear footage of the room – or the number of feet around the perimeter, and multiplying this by the height of the trim. To make it more accurate, measure the perimeter in inches or divide the linear feet by 12 before multiplying.

Once you have the total square inches, divide by 144 to get the square feet. This can be an easier method than attempting to find the height in feet of some trims, like a pencil, which may be less than 1 inch tall.

You can also estimate trim using the measurement method above. Start by measuring the height of the trim in inches, then convert that to feet. For example, trim that is 4 inches tall is 0.33 feet tall.

Then multiply the height by the length of trim to find the square footage. Then follow the rest of the steps above to estimate the paint needed to cover that square footage.

How to Estimate Exterior Paint

You can estimate the exterior paint you’ll need just like interior projects. Start by measuring each exterior wall of the home, then calculate the square footage of each one.

For walls with a gable, measure the square portion and the gable portion separately. You might find a triangle area calculator helpful to find the square footage of the gable.

Then, add the square footage of each area together. Subtract the square footage of any doors and windows that you won’t be painting from the total square footage.

Consult the directions on the specific product you’ll be using for a coverage estimate.

Keep in mind that walls with porous surfaces such as concrete, brick, or rough wood will soak up much more paint than a smooth surface. We suggest ordering more paint than you estimate to cover these surfaces.

Or speak to the paint retailer about what they recommend for painting these surfaces. Likewise, a home with wood siding that is older will require more paint than a home with new wood siding.

When making dramatic color changes, you might also need an additional coat of paint to get adequate coverage; be sure to account for this in your estimate.

You can also use our fence stain and deck stain calculators to estimate how much you’ll need.

Estimation Tips

It may be a good idea to order 10-20% extra, probably an extra quart or gallon, depending on your project, to allow for differences in coverage and to have extra material for touch-ups down the road. If you are fairly close to an even gallon on a small project and want to save some money, consider ordering a quart for your overage.

Don’t forget to estimate other supplies needed for a painting project. Learn more about the costs associated with a painting project.

Be sure to grab plenty of tarps and use a good blue masking tape to tape off any surfaces for a clean paint job. Finally, make sure you choose a good brush and rollers; spending an extra dollar or two on these will have just as much impact on your finish as the quality of the paint itself.

You might also be interested in estimating wallpaper for your space.

Frequently Asked Questions

This can vary depending on the type of paint and the surface you are covering. The general rule of thumb, however, is that 1 gallon of latex paint will cover 350 to 400 sq ft.

Most likely, you will need two gallons of paint to cover a room of this size. However, things like windows and doors, the color of the paint, and the current color of the walls can all influence the total amount you will need.

This depends a lot on the project. For cedar or redwood, vinyl, or big color changes – from very light to dark or dark to light, as well as to cover stains from things like mold, then yes, primer is required. Otherwise, it may not be necessary, depending on the paint you choose.

Recommended

Drywall Calculator

Drywall Calculator

Calculate drywall or Sheetrock panels, screws, joint compound, and tape needed for your project by entering your room’s dimensions. Optionally include the ceiling if you’re drywalling that as well.

  • By
    FindPros

    FindPros connects consumers with professionals in over 600 different categories.

  • Reviewed by
    Jacky L.

    FindPros connects consumers with professionals in over 600 different categories.

Room Dimensions

This field is required.
Value should be positive.
This field is required.
Value should be positive.
This field is required.
Value should be positive.

Sheet Details

Optionally enter the price per sheet

$
Drywall Material Estimate:

Material Estimate:

{{drywall_sheets}}
${{drywall_cost}}

Screws

{{total_pound_of_screws}}

Tape

{{tape}}

Joint Compound

{{total_pounds}}
{{gallons}}
{{pounds_of_lightweight}}
{{quick_setting}}

Total Area

{{total_area_sqft}}
{{total_area_sqmeter}}

Learn how we calculated this below

Add this calculator to your site

How to Calculate Drywall

Drywall, also referred to as Sheetrock or wall-board, is used to cover wall studs in modern construction. Drywall creates the solid wall surfaces you see in your home.

It’s usually finished and painted after installation. When you’re completing a renovation or construction project, you’ll likely need drywall to cover the studs or wall frame of the home.

There are a few ways to estimate the amount of drywall and materials you’ll need for the project.

The first method is to use the drywall calculator above.

Enter the size of your room, and the drywall calculator finds the square footage of the walls, estimates the amount of drywall needed to cover those surfaces, and estimates additional supplies, including screws, joint compound, and tape.

How to Estimate Drywall Without a Calculator

To estimate the amount of drywall needed for your project, you need to calculate the square footage of the walls and ceilings that you’ll be sheetrocking.

Square footage of the walls is the length in feet times the width in feet of each wall. , Thus, you can calculate square feet by multiplying the length times the width.

Do this for each wall, then add them all together to get the total square footage.

If the walls are complex and not rectangular, then it may be easiest to split the walls into smaller sections, and calculate each section individually, then add them together.

For example, to measure walls that have a vault, it will be easiest to determine the square section and vault separately.

If you have doors, windows, or other areas where you won’t be installing drywall, find the square footage of those areas and subtract it from the total square footage figure. This will make your calculation more accurate and reduce excess materials and waste.

After you find the square footage of drywall needed, simply divide it by the square footage of the sheet size you will be using to find the number of sheets needed.

We suggest ordering about 10% additional materials to account for cuts and material waste. Having additional material can help prevent delays due to waste for offcuts and broken pieces.

How to Estimate Joint Compound and Tape

Estimating the amount of joint compound and drywall tape you need starts with finding the square footage. Different joint compound or mud products have different coverage levels, so it’s best to check the product you intend to use to verify the coverage.

If you’re using a lightweight joint compound (not premixed), then you’ll probably need 0.053 pounds of mud per square foot of drywall. If you’re using a quick-setting product, then you’ll likely need 0.073 pounds of mud per square foot. Drywall tape typically covers about 2-3 square feet of Sheetrock per foot of tape.

Likewise, when finishing the drywall, it may be given different textures. These textures may change the amount of coverage that a compound could give you.

How to Estimate Drywall Cost

To effectively estimate the cost of a drywall project, you need to calculate how many sheets you’ll be installing, the tape and joint compound required, and how many screws are necessary for the project.

Keep in mind that there are different types of drywall for different areas. For example, drywall that is mold or moisture-resistant is best for bathrooms. These can have different costs as well.

The calculator above can estimate the material costs for the project, but every drywall project needs one critical component – a skilled laborer to install and finish the project.

The cost of labor varies drastically based on your geographic area and the skill of the craftsmen. We suggest getting several quotes in your area to get an accurate cost estimate for the project.

You can also use our drywall cost calculator to estimate the cost of the project in your area.

Bear in mind that more complex framing, layouts, or exclusions will require manual estimation of materials, any automated estimation will have a reduced level of accuracy as the complexity of the framing or exclusions rises.

Sheetrock Panel Size Factors to Consider

  • Long sheets require fewer seams and cost much less to finish, but are more difficult to install.
  • Long sheets may not fit in tight spaces or through stairwells.
  • Long sheets are significantly heavier to lift and transport. A 4’x8′ 1/2″ sheet of drywall weighs 54 pounds, while a 4’x12′ 1/2″ sheet weighs 82 pounds.

Don’t forget to consider transportation and delivery requirements when ordering materials. Drywall products are very heavy, and you’ll want to make sure you have the appropriate tools for moving large amounts of Sheetrock.

We recommend using a panel carry tool, which basically adds a set of handles at just the right height to make carrying large Sheetrock panels very easy.

As an Amazon Associate, we may earn commissions from qualifying purchases from Amazon. Learn more

Using tools like this can make life easier moving heavy sheets, but can also help prevent damage to the drywall sheets as well.

Frequently Asked Questions

If you are purchasing 4′ x 8′ sheets, then yes; they are designed to butt against one another. Drywall can be found in many different sizes, however, such as 4′ x 10′ and 4′ x 12′, as well as different thicknesses, such as 1/4″, 1/2″, and 5/8″.

The most common size of drywall for walls is 4′ x 8′. However, if you have taller ceilings or an unusual layout, you can purchase larger sheets as well.

If the room is exactly 10′ x 10′ with a 9′ ceiling, then you would need 15 sheets of 4′ x 8′ drywall to cover the walls and ceiling. Likely, this number will be lower, however, once things like doors and windows are subtracted.

Yes, in that Sheetrock is a brand of drywall. Much like people use brand names like Kleenex or Jacuzzi to describe a product, Sheetrock is sometimes used to describe generic drywall.

Next Step – After drywall, it’s time to finish the space. Estimate how much primer and paint you’ll need to finish this room. Or, estimate how many rolls of wallpaper you’ll need.

Siding Material Calculator

Siding Material Calculator

Find the number of squares of siding material needed by entering the dimensions of the building below for a wall or gable. Optionally, include the number of doors and windows to refine the estimate.

  • By
    FindPros

    FindPros connects consumers with professionals in over 600 different categories.

  • Reviewed by
    Jacky L.

    FindPros connects consumers with professionals in over 600 different categories.

This field is required.
Value should be positive.
This field is required.
Value should be positive.
This field is required.
Only numbers are allowed.
This field is required.
Only numbers are allowed.
This field is required.
Value should be positive.
This field is required.
Value should be positive.
This field is required.
Only numbers are allowed.
This field is required.
Only numbers are allowed.
Results:

Error:

There are too many doors and windows for this sized wall

Material Needed

{{total_squares}}
{{area}}

Learn how we calculated this below

Add this calculator to your site

How to Measure for Siding

If you’re planning a siding replacement project or preparing to install a new exterior, take the time to estimate the size of the project as your first step. Doing so will help with estimating material and labor costs.

While different types of siding may come in different styles and may be installed in varying ways, they all require correct measurements for the best results.

How Much Is a Square of Siding

Siding is often estimated and priced by the square. A Square is a term used by contractors, installers, and building suppliers and is a unit of measure equal to 100 square feet of material.

Most popular types of siding, like vinyl siding, are commonly estimated by the square to determine how much labor and material is needed.

One square of siding will cover 100 square feet. Siding may be packaged and sold in varying quantities of squares. For example, an average box of vinyl siding contains two squares of material.

To find the number of squares of siding needed for an installation, measure the width and height of each wall in feet. Multiply the width and height to get the area of the wall in square feet.

If your walls are in a mixture of partial and total feet, round up to the nearest whole foot. For example, if one wall is 12.4 feet and one is 20.8 feet, round to 13 and 21 feet, respectively, before multiplying.

Divide the square footage by 100 to get the number of squares needed for the wall.

For example a wall that is 40 ft wide and 12 ft high will require at least 4.8 squares of material.

40 × 12 = 480
480 ÷ 100 = 4.8

Be sure to round up to the nearest square, so in this case, you’d probably need 5 full squares.

How to Measure Gable Walls

Finding the square footage of a gable wall is similar to finding the square footage of a standard wall. Measure the width of the gable and the height of the gable from the base of the triangle to the peak.

Then multiply the width and height, just like you would to find the area of a rectangle. Finally, divide the area in half to get the final square footage. Divide by 100 to get the number of squares.

For example a 20ft wide gable that is 10ft tall will require 1 square of material.

20 × 10 = 200
200 ÷ 2 = 100
100 ÷ 100 = 1

It is a good idea to order additional material to account for angle cutoffs along the edge of the gable roof.

If you have a very steep gable, such as a salt box or an A-frame, or you have a very tall home, you can get more specific measurements if desired. Measure from the ground to the lowest edge of the roof to get the height, then straight across to get the width.

This will give you the square feet of the wall below the gable. For the gable itself, you want the height from the lowest point of the roof to the highest, as well as the total width. Take the total width and divide it in half, then multiply by the height to get the square footage of the gable.

Add it to the square footage of the area below the gable to get the total square footage of the wall.

How to Account for Doors and Windows

A wall with doors and windows may require fewer squares of material to cover than a wall with no openings. To account for this overage in material, find the square footage of space that will not be covered in siding for the doors and windows and subtract that from the total square footage of the wall.

For example, an average door is 3 ft wide by 7 ft high. Subtract 21 sq ft from the total square footage to account for a door. Windows vary in size, and the square footage can be found by multiplying the length and the width.

Material Overages

Because there will inevitably be some waste due to off-cuts, measurement errors, or unintended damage, it’s always a good idea to order some extra material for the project. It is commonly recommended to order an additional 10% material to account for waste.

Having left over siding material is also a good idea since it allows you to make future repairs that will match the existing siding.

Additional Siding Measurement and Installation Resources

For clapboard and lap siding, use our clapboard siding calculator to find the number of boards needed to cover the home. The board and batten siding calculator can estimate the material needed for a board and batten project.

Find the cost of siding installation in your area or find qualified installers.

Clapboard and Lap Board Siding Calculator

Clapboard and Lap Board Siding Calculator

Find the number of clapboards needed using our siding board calculator. The calculator will also determine the overlap and exposure of each board, find the total number of boards needed, and is perfect for estimating cedar wood siding or Hardie fiber lap siding.

Optionally enter the number of doors and windows to refine your estimate.

  • By
    FindPros

    FindPros connects consumers with professionals in over 600 different categories.

  • Reviewed by
    Jacky L.

    FindPros connects consumers with professionals in over 600 different categories.

This field is required.
Value should be positive.
This field is required.
Value should be positive.
This field is required.
Only numbers are allowed.
This field is required.
Only numbers are allowed.
This field is required.
Value should be positive.
This field is required.
Value should be positive.
This field is required.
Only numbers are allowed.
This field is required.
Only numbers are allowed.
Results:

Error

There are too many doors and windows for this sized wall

Material

{{linear_feet}}
{{board_12inch}}

Installation Summary

{{sqft}}
{{courses}}

Learn how we calculated this below

Add this calculator to your site

How to Estimate Siding Boards Needed

Cedar wood siding and fiber cement siding are commonly available in a clapboard or lap board style and are often sold by the 12′ board. The boards overlap each other and are only partially exposed to the elements to keep the building water-tight.

Lap boards can have different styles to them, such as a Dutch lap, which has the board cut at an angle to cast a shadow, a beaded lap, which has a decorative channel at the bottom, or the bevel, which is thinner at the top than at the bottom.

Regardless of style, you can estimate the number of boards needed in the same way. Even boards like shiplap, which lock together on the top and bottom, or tongue and groove siding are estimated the same way.

You can find the number of boards needed for a project in a few simple steps.

Get the Total Square Footage

One way of determining how much siding you need is to measure the square footage of the area you are siding. For this, you will need to get the length and width of each section in feet. Multiply these together to get the square footage.

For gable roofs, you can measure the square section to the bottom of the roof edge in the same way. Then get the height and the width of the triangular section. Multiply these together, and divide in half to get the square footage of this section.

If you choose, you can get the square footage of the windows and doors, and subtract them from the total.

Most siding is sold bundled. Some are bundled in squares – 100 sq. ft. – while others may be sold in groups of planks, such as 25 planks. In the latter example, you can find the square footage the planks will cover by multiplying the width and length in inches, and dividing by 144.

For example, a popular size for fiber cement siding planks is 6.25″ x 12′ or 144″. This makes each plank 6.25 square feet. Packaged into groups of 25, each group of 25 will cover 156 sq. ft.

While the planks will overlap one another, their full coverage of the wall won’t necessarily be affected by this. Therefore, going by square footage, adding at least 10% for waste, and rounding to the nearest bundle will generally result in an accurate siding estimate.

Find the Overlap and Exposure of the Board

Board siding is installed from the bottom up, with each board overlapping each other by a small margin. Different materials and styles of siding have varying requirements for the minimum amount of overlap needed to keep the wall water-tight and maximize the durability of the siding.

Often, the minimum amount of overlap is 1″ – 1 1/2“.

The exposure of the board is the amount of the board that is exposed to the elements. This can be found by subtracting the overlap of the boards from the actual board width.

The exposure is what will be used to determine the number of courses needed for the wall, and ultimately to find the number of linear feet of siding needed.

Cedar Board Dimensions

Common cedar board sizes and their maximum exposure.

Nominal Actual Exposure
4″ 3.5″ 2″
6″ 5.5″ 4″
8″ 7.5″ 6″
10″ 9.5″ 8″
12″ 11.5″ 10″
Hardie Fiber Board Dimensions

Common Hardie board sizes and their maximum exposure.

Common Hardie board sizes and their maximum exposure.
Nominal Exposure
5.25″ 4″
6.25″ 5″
7.25″ 6″
8.25″ 7″
9.25″ 8″
12″ 10.75″

These dimensions are for average styles and materials only; refer to the siding manufacturer for exact specifications.

Estimate the Number of Courses of Siding

The number of courses of siding can be found by dividing the height of the wall in inches by the exposure of the board. Use our feet to inches conversion calculator if you know the height of the building in feet.

Siding should be kept 6″ off the ground; you’ll need to account for this when measuring and estimating material.

For example, installing siding with a 4″ exposure on a wall that is 12ft high will take 36 courses of siding.

12′ × 12″ per ft = 144″
144 ÷ 4 = 36

It’s likely that a partial course will be needed if the exposure of the board does not divide evenly into the height of the building. In that case, re-calculate the exposure slightly so that each course is even and the top course does not end up being too short.

For example, installing siding with a 7″ exposure on a wall that is 12ft high will take 20.6 courses of siding. Adjust the exposure of the board to be 6.85″ to end up with an even 21 courses.

12′ × 12″ per ft = 144″
144 ÷ 7 = 20.6
144 ÷ 20.6 = 6.85

Estimate Linear Feet

Estimate the number of linear feet of siding needed by multiplying the width of the wall in feet by the number of courses. Boards are most commonly sold in 12′ lengths, though 16′ and 20′ lengths can often be ordered.

Divide the linear footage by 12′ to find the number of boards needed to cover the wall. If you have a board with a different length, such as 16′ or 20′, you will divide by that number.

For example, installing 21 courses of siding on a 20′ wide wall will require 420 linear feet of siding, or 35 boards.
21 × 20 = 420
420 ÷ 12 = 35

Learn more about how to calculate linear feet. Always order at least 10% extra to account for cuts, breakage, and waste when installing.

How to Estimate Gable Walls

Finding the number of boards needed for the area beneath a gable roof is fairly simple. Simply multiply the height and width of the gable and estimate the linear footage like you would for a rectangle using the width and height.

Divide in half to get the linear footage needed to cover a triangular area.

For example, installing 21 courses of siding on a 20′ wide gable will require 210 linear feet of siding, or 18 boards.

21 × 20 = 420
420 ÷ 2 = 210
210 ÷ 12 = 17.5 – round up to 18

Consider ordering additional material for offcuts needed for the angle. While 10% additional may be fine for the other areas, angle cuts may require as much as 20% for this area to account for the many cuts required.

More Siding Installation Resources

Use our siding squares calculator to estimate vinyl siding square material needed. Our board and batten calculator can estimate board and batten siding materials.

Learn more about the cost of siding installation in your area and find qualified installers near you.

Brick Calculator

Brick Calculator

Calculate how many bricks and bags of mortar you’ll need for a wall or masonry project by entering the wall dimensions and selecting a brick size. Optionally, estimate the cost of materials by adding the price per brick.

  • By
    FindPros

    FindPros connects consumers with professionals in over 600 different categories.

  • Reviewed by
    Jacky L.

    FindPros connects consumers with professionals in over 600 different categories.

This field is required.
Value should be positive.
This field is required.
Value should be positive.

Optionally enter the price per brick

$
Material Estimate:
{{bricks}}
{{bags_of_mortar}}
{{yd_sand}}

Estimated Material Cost:

{{brick_cost}}
{{mortar_cost}}
{{sand_cost}}
{{total_cost}}

Installation Overview:

Square Footage: {{sq_footage}} ft²

Learn how we calculated this below

Add this calculator to your site

How Many Bricks Do You Need?

Bricks are a versatile building material that come in many sizes, wear ratings, and colors. They are often used for exterior walls, chimneys, and fireplaces, but can also be used to create patios, stairs, or some decorative projects.

Many bricks have three or more holes in the center to reduce the weight, raw materials, and cost, while others are solid, and some may be thinner than average. These latter are known as brick veneers and are common for finishing the exterior of a structure rather than being used for support.

Bricks are commonly made of clay or shale and are kiln-baked. They are often laid in courses or rows and are held in position by laying them in a bed of mortar, which also fills the joints between them.

The type of brick you choose will determine how many you need for a wall because bricks do come in different sizes. The thickness of the mortar bed you use can also vary your material needs, as well as the spacing between the bricks.

This calculator assumes a 3/8” mortar bed.

Calculate how many bricks you need using the calculator above. You’ll also get a cost estimate for materials.

You can also refer to the coverage table below or keep reading to learn how to perform the calculations yourself.

How to Calculate How Many Bricks You Need

A wall built with a standard modular brick will require seven bricks per square foot to complete the project. Projects using different sizes may need more or fewer bricks.

Follow the steps below for an accurate estimate.

Step One: Find the Square Footage of the Wall

Start estimating the number of bricks you’ll need by determining how much area you need to cover in square feet. To do this, measure the width and height of your wall or surface.

Once you’ve measured the wall’s width and height, you can find the area in square footage by multiplying the wall’s width in feet times the wall’s height in feet.

drawing showing how to find the square footage of a wall
You can also choose to measure the wall in inches and make your calculation in inches. Once you’ve multiplied the height and width to get your total square inches, you will convert back to square feet.

Divide square inches by 144 to get the square feet. Always round up to the nearest full measurement.

For example, let’s find the area of a 10′ wide wall that is 8′ high.
area = 10′ × 8′ = 80 sq. ft.
Step Two: Find the Square Footage of Each Brick

After you know the surface area, you need to find the amount of area that each brick will cover.

The easiest way to do that is to find each brick’s area in square inches and then divide by 144 to convert square inches to square feet. Keep in mind that there will also be a 3⁄8” mortar joint between each brick.

For example, let’s find the area of a modular brick measuring 7 5⁄8” wide x 2 1⁄4” high

To get the square footage of a modular brick, add 3⁄8” to each dimension to account for the mortar joint, then use the formula (length × width) ÷ 144 = sq. ft. of the brick.

brick & mortar width = 7 5⁄8 + 3⁄8 = 8
brick & mortar height = 2 1⁄4 + 3⁄8 = 2 5⁄8
brick sq ft = (8 × 2 5⁄8) ÷ 144
brick sq ft = 21 ÷ 144 = .1458

You can also use a square feet calculator to easily find the square footage of your brick.

Step Three: Find How Many Bricks Fill the Wall

You can determine the number of bricks needed to cover your area by dividing the square footage of the area to be covered by the brick’s square footage (wall sq ft ÷ brick sq ft).

For example, let’s find the number of modular bricks needed to cover the 80 sq ft wall from the earlier examples. Use the following formula:
80 ÷ .1458 = 549 bricks

We strongly recommend adding 10% additional material to cover any waste and account for any broken blocks or cuts. If you plan on creating any patterns in the brick, add another 10% waste to the total.

The brick calculator above accounts for partial bricks and cutoffs automatically and may return a different number for your project.

Check out our concrete block calculator to find the number of concrete blocks needed for a project. Concrete blocks, or cinder blocks, are larger than bricks, but the strategy to find the number of bricks to cover a surface can be used to find the number of concrete blocks to cover a surface as well.

How Much Mortar Do You Need?

You can estimate mortar by referring to the coverage rate for the specific mortar used on the project. Mortar is a mixture of cement, sand, and often lime. The type of mortar you will use for your project can vary depending on location, flexibility, and the compressive strength needed. Most mortars used for bricks require one bag of cement per 100-142 bricks, depending on the size.

One bag of cement is needed for every 142 modular, 125 queen, or 100 utility bricks. This estimate assumes using a mortar that needs to be mixed with three parts sand. A 1:3 cement to sand mix will require one cubic yard of sand for every seven bags of mortar.

Pre-mixed bags of mortar are also readily available, and an 80-pound bag of mix will often yield 30-36 bricks. Divide the total number of bricks by 36 to calculate the bags needed. Try our mortar calculator to calculate mortar needs more accurately.

Brick Coverage Table

It is important to note that there are many types of bricks and many sizes as well. See some of the most common brick types and sizes below, along with an estimate of how many you’ll need per square foot (or square meter).

Brick Style Size (D x H x W) Weight Coverage
Inches Millimeters Pounds Kilograms Bricks per Ft² Bricks per M²
Modular 3 58” x 2 14” x 7 58 92mm x 57mm x 194mm 4.2 lbs 1.9 kg 7 73
Queen 3 18” x 2 34” x 7 58 79mm x 70mm x 194mm 4.1 lbs 1.86 kg 6 73
Closure 3 58” x 3 58” x 7 58 92mm x 92mm x 194mm 6.8 lbs 3.1 kg 4.5 48
Standard 3 58” x 2 14” x 8″ 92mm x 57mm x 203mm 4.5 lbs 2 kg 6.5 70
Jumbo Standard 3 58” x 2 34” x 8″ 92mm x 70mm x 203mm 5.9 lbs 2.7 kg 6 61
King 2 34” x 2 58” x 9 58 79mm x 70mm x 244mm 5.6 lbs 2.5 kg 4.5 49
Roman 3 58” x 1 58” x 11 58 92mm x 41mm x 295mm 4.7 lbs 2.1 kg 6 64
Norman 3 58” x 2 14” x 11 58 92mm x 57mm x 295mm 6.4 lbs 2.9 kg 4.5 49
Utility 3 58” x 3 58” x 11 58 92mm x 92mm x 295mm 10.2 lbs 4.6 kg 3 32

Sizes and coverage rates of commonly used bricks.

Board and Batten Siding Calculator

Board and Batten Siding Calculator

Find how many boards, battens, and furring strips are needed to install board and batten siding by entering the dimensions of the building below for a wall or gable. Optionally, refine your estimate by providing the number of doors and windows on the wall or gable.

  • By
    FindPros

    FindPros connects consumers with professionals in over 600 different categories.

  • Reviewed by
    Jacky L.

    FindPros connects consumers with professionals in over 600 different categories.

This field is required.
Value should be positive.
This field is required.
Value should be positive.
This field is required.
Value should be positive.
This field is required.
Value should be positive.
This field is required.
Only numbers are allowed.
This field is required.
Only numbers are allowed.
This field is required.
Value should be positive.
This field is required.
Value should be positive.
This field is required.
Value should be positive.
This field is required.
Value should be positive.
This field is required.
Only numbers are allowed.
This field is required.
Only numbers are allowed.
Results:

There are too many doors and windows for this sized wall

Material (in Linear Feet)

{{ total_length_of_board }}
{{ total_length_of_batten }}
{{furring_strips}}

Installation Summary

{{area}}
{{total_battens}}

Learn how we calculated this below

Add this calculator to your site

How to Estimate Materials for Board and Batten Siding

Board and batten siding is the oldest type of milled siding in the U.S. Board and batten siding has a distinctive look with the boards installed vertically.

Historically, the boards were roughly 12″ wide and 1″ thick, but today, the boards can range from 6″ to 12″ in width, with 10″ to 12″ being the most common. Thin strips of wood known as battens, which are usually 1″ x 1″ are installed over the seams.

Board and batten siding is found in wood, metal, and fiber cement, as well as in some vinyl styles. For vinyl and metal, the boards and battens are not separate from one another, and they are designed to overlap and interconnect. For wood and fiber cement, the pieces are separate and need to be installed over furring strips.

The first step to estimating materials is to measure each wall’s width and height,

Illustration showing the composition of boards, battens, and furring strips that make up board and batten siding.

Estimate Furring Strips for Board and Batten Siding

Most homes are covered in plywood or OSB sheathing prior to siding. If this is the case, you can attach the boards for your new siding directly to the sheathing.

However, some older homes that are not sheathed may require furring strips prior to installing the finished siding. Likewise, if you are creating a rain screen, or if you are using certain types of insulation beneath your siding, you may require furring strips as well.

Furring strips are 2″-3″ boards that are installed horizontally every 18″-24″ on the wall. Since the building’s framing is also installed vertically, the board and batten siding will need to be attached to these strips.

To find the amount of furring strip material needed, first start by calculating the number of rows of furring strips that will need to be installed, which can be found by dividing the height of the building in feet by 2 to find the number of 24″ sections on the building.

Round the number up to the nearest whole number, then add 1 to account for adding a strip along the top or bottom edge.

number of rows = (height in feet ÷ 2) + 1)

If your wall measurements are in inches, then divide by 24 instead of 2.

number of rows = (height in inches ÷ 24) + 1)

To find the linear feet of furring strip material, multiply the width of the wall in feet by the number of rows. Learn more about how to find linear footage.

linear feet = number of rows × wall width in feet

Estimate the Number of Boards and Battens Needed

The boards used in board and batten siding are often 10″-12″, but can be any width of your choosing. The boards are wider than the battens, and the battens are installed on top of the seam between each board.

The battens are thinner than the boards, usually 1″ wide and 1″ thick, though they can be wider as well.

Most board and batten siding will have the boards butted up against one another, with the batten over the seam. This comes from the original installations where the home was not watertight, and there was often no sheathing beneath the siding; the battens helped seal up the walls.

If your material of choice is wood, then the boards should have a 1/2″ gap between them to allow for expansion and prevent buckling. Larger gaps can also be used as needed, but the battens should be 1″ wider than the gap to allow for good coverage.

To find the number of boards needed, you simply need to divide the width of the wall by the width of the board. If you are using a panel installation, such as a steel or vinyl board and batten siding, you need the total width of the panel, which is often one board and batten together, but may be as much as two boards and two battens together.

number of boards = (wall width in inches + board spacing) ÷ (board width in inches + board spacing)

To find the number of battens, simply subtract 1 from the number of boards.

number of battens = number of boards -1

Trim should also be accounted for. At least one board will be needed on either side of the wall at the edges.

number of edge trim boards = 2

Most of the time, you will want your boards, battens, and trim to be whole boards, with no joints in the verticals. Because of this, be sure to order material by the board and find boards that are long enough to cover the wall height, and try to avoid ordering material by the linear foot.

However, many homes may be taller than the planks available. To account for this, and to avoid seams in the vertical siding, a horizontal board is usually run at the top of the section of siding. The second, higher section starts on the top half of the board.

How to Lay Out Board and Batten Siding

There are many ways to lay out your board and batten siding. It is common that your exterior walls may not be evenly divided by the width of the boards. However, most homes do have trim around the edges, which can give you some leeway in how you layout and install the boards.

Getting a wider trim can help fill a space where a board may have needed to be cut to fit. Or, if you need to cut boards to fit the space, you can lay out the boards so that they begin in the center of a wall, and move out evenly to either side.

While you may have cut boards on either end, they will be the same width, and will still provide an even and symmetric installation. If your home is not perfectly square, and has interior corners, sometimes you may want to “bury” a cut piece in an inside corner, where it is less likely to be seen.

In some cases, a board may only need to be trimmed slightly. Making a board on the end of the run 10” when the rest are 12” is unlikely to be very noticeable. A very thin board, however, may be less desirable, in which case, larger trim may be the better choice.

You can use our board and batten layout calculator to perfectly lay out an even spacing between the boards and battens.

Note that this step is not required, it is only necessary when it is desirable to avoid an uneven board width on the final board.

More Siding Installation Resources

If you’re installing vinyl siding or need to estimate the amount of material in squares, our siding square calculator can estimate the squares of material needed to cover a wall. Our clapboard siding calculator can help estimate the amount of material needed for clapboard and lap siding.

Finally, you can get free estimates from local siding professionals in your area to compare costs and find a contractor.

Roofing Material Calculator

Roofing Material Calculator

Calculate your roof’s size and estimate how many bundles of shingles, rolls of felt, and squares of roofing material you need for a new roof. Add the price per square for materials to get an estimated material cost.

  • By
    FindPros

    FindPros connects consumers with professionals in over 600 different categories.

  • Reviewed by
    Jacky L.

    FindPros connects consumers with professionals in over 600 different categories.

Dimensions measured from the ground

This field is required.
Value should be positive.
This field is required.
Value should be positive.
find roof pitch

Optionally enter the price per square

$

*The average cost of materials for a standard 3-tab shingle is about $100 per square, including shingles, felt paper, and nails.

Roofing Material Estimate:
{{result.num_of_bundles}}
{{result.num_of_rolls}}

Estimated Material Cost

${{result.total_cost}}

Installation Overview

{{result.size_in_sq}}
{{result.sq_footage}}

Learn how we calculated this below

Add this calculator to your site

How to Estimate the Size of a Roof

If you’re replacing a roof, one of the first considerations you make needs to be the roof’s size so you can accurately estimate project materials.

In the US, roofs are measured in square footage, and roofing contractors typically quote projects based on the size of the roof in squares, which are equal to 100 sq. ft. If your roof measures 2,300 sq. ft, then you would need 23 squares of material.

Consequently, gathering the size of the roof in squares and square footage is the first step.

Keep in mind that there is no correlation between the size or square footage of your home and that of your roof. A 2,000 sq. ft. home may have a simple gable roof, a complex cross-gable roof, or a hipped roof, and each one of these roofs will have a different size to them.

Typically, the more slopes your roof has, the higher the total square footage will be. For example, a gable roof has two slopes, so it needs less material than a Dutch roof, which has three slopes, or a hipped roof, which has four. This is true even if the footprint and size of the home itself are identical in each case.

Find the Area of the Footprint of the Roof

To calculate a roof’s dimensions, you need to measure the roof as if it were flat, then account for roof pitch, calculate square footage, and finally determine how many squares of material are required for the roof.

Keep in mind that you will need to do this for each section of the roof. While the illustration above shows a simple gable roof, a cross gable roof will require you to take the length and width of each individual section, and complex roofs like gambrels and mansards will have two sections of roofing to each side.

The calculator above can handle all of this; simply enter the length, width, and pitch, and it will determine the size of the roof in squares.

Start by measuring the roof’s length and width in feet as you’re standing on the ground. Remember that the length and width need to be found for the roof, not the house, so take into account that the roof overhangs the building.

Then determine the area of the roof as if it were flat. Multiply the length by the width in feet to get the area measurement.

Finding the Total Roof Area

Once the area of the roof’s footprint is known, the overall roof area can be found by accounting for the roof’s pitch. The pitch of the roof is the rise over a 12-inch run.

This means that for every 12 inches horizontally, your roof will rise a specific number of inches. Most roofs will fall between a rise of 4/12 and 8/12, but a gambrel roof will likely have a section that is 20/12 and a section that is 7/12. This can mean that you need to calculate for each area separately.

It’s also important to keep in mind that each section of roofing may have its own pitch. This is true even of gable roofs, which may be what is known as a dual-pitch gable – one side of the roof will have a different pitch than the other side. You will need to calculate each side separately in this case.

Use our roof pitch calculator to find the pitch of your roof.

Next, multiply the footprint of the roof by the multiplier below for your roof pitch to find the overall roof area.

For example, a 4/12 pitch roof that is 100 square feet:

100 × 1.054 = 105.4 sq. ft.
Roof Pitch Area Multipliers

Multipliers for common roof pitches that can be used to find the total area of a roof.

Pitch Multiplier
0/12 1
1/12 1.0035
2/12 1.0138
3/12 1.0308
4/12 1.0541
5/12 1.0833
6/12 1.118
7/12 1.1577
8/12 1.2019
9/12 1.25
10/12 1.3017
11/12 1.3566
12/12 1.4142
13/12 1.4743
14/12 1.5366
15/12 1.6008
16/12 1.6667
17/12 1.7341
18/12 1.8028
19/12 1.8727
20/12 1.9437
21/12 2.0156
22/12 2.0883
23/12 2.1619
24/12 2.2361
Finding the Size of the Roof in Squares

Roofing contractors estimate projects and materials by the square, so it is crucial to find this measurement to estimate the amount of material needed accurately. A square simply refers to a 10′ x 10′ square of roofing. This is simply 100 square feet of roof.

To find the squares, divide the overall roof area by 100 and then round up. For instance, if the roof is 1550 square feet, then it is 16 squares.

How to Estimate Roofing Materials

Although roofing projects are estimated and sold by the square, roofing material is often not sold in 1-square increments.

How Many Bundles of Shingles Will You Need

The average bundle of shingles covers 33.3 sq. ft., so three bundles of shingles are needed per square. Asphalt shingles range in price from about $25 per bundle for a standard 3-tab style to around $50-$75 or more for an upgraded architectural style.

Since transportation is a major cost factor, expect prices to vary by location. A typical bundle of shingles weighs about 75 pounds, while some premium products can weigh over 100 pounds per bundle, so consider delivery of materials.

Typically, only asphalt shingles are sold by the bundle in this way. Roofing shingles can come in other materials, including wood, metal, plastic, and slate, and that each of these materials may be packaged and sold in other ways.

How Many Rolls of Felt Will You Need

Roofing felt is sold by the roll. The average roll of 15-pound roofing felt covers about 400 sq. ft., or 4 squares, while the average roll of 30-pound roofing felt covers about 200 sq. ft. or 2 squares.

Rolls of felt are 36″ wide x 144′ long for 15# and 72′ long for 30#. Consider other underlayment options as needed, such as ice and water shield, rubber, or tar products.

The felt that your roof needs will be dictated by the roofing material. 30-pound felt is the most common and recommended type for most roofs, but a tile roof often requires 50-pound. In addition, new synthetic materials are also available, which are thinner and lighter weight while having superior performance.

Always check to see what is recommended by the manufacturer of the roofing material you are installing, or check with your roofer.

How Many Nails Will You Need

Nails will also be required for most roofing projects. The average 3-tab shingle needs four nails per shingle. High-wind areas and other types of shingles may need more. You’ll typically need 320 nails to install a square of standard 3-tab shingles, assuming four nails per shingle and 80 shingles per square.

However, architectural shingles may require 480 nails per shingle. Materials like tile, slate, and some types of metal roofing may use other fasteners as well.

Standing seam roofs, for example, do not use nails but have hidden fasteners in the seams. Always consult the manufacturer for the material you are choosing to use on your roof for the recommended fasteners and number required per square.

Other Materials

Keep in mind that a drip-edge will be needed to protect the roof’s edge from rot, vents, and other materials such as flashing or caulk. Also, consider that the fascia boards may need to be replaced depending on their condition.

Drip-edge and fascia boards are sold by the linear foot, find the perimeter of your roof in feet to find the length of drip-edge and fascia boards needed.

In addition to accurately estimating materials, it is important to make sure you order extra material when ordering. Account for about 5-10% overage on your project to make sure you have enough material if measurements are a little off or material is wasted or damaged. This is more critical for materials that are special-order or have long lead times.

We recommend getting free roofing estimates to understand material and labor costs and identify other project complexities that could affect the cost.

Other Considerations

There are some other factors to consider when installing a new roof. Learn about the costs of installing a new roof. Many localities require permits and inspections for roofing projects; check with your local inspections office and consult local building codes for more information on the requirements.

Also, consider that removing old materials is often required and will require disposing of a large amount of waste. Plan ahead for this by ordering a dumpster for the project.

Think your home might be due for a new roof? Learn the warning signs that it’s time to replace it before it leaks.

Roof Snow Load Calculator

Roof Snow Load Calculator

Calculate the snow load on a roof by entering the roof’s dimensions below along with the depth.

  • By
    FindPros

    FindPros connects consumers with professionals in over 600 different categories.

  • Reviewed by
    Jacky L.

    FindPros connects consumers with professionals in over 600 different categories.

This field is required.
Value should be positive.
This field is required.
Value should be positive.
This field is required.
Value should be positive.

Snow Load:

{{pounds_min_vol}} – {{ pounds_max_vol }} {{pounds_min_vol}}

Learn how we calculated this below

Add this calculator to your site

How to Calculate Snow Load

Snow load is the additional weight on a roof structure added by snow and ice buildup on the roof. Calculating the snow load is crucial to determining if the structure can handle the snow’s additional weight.

The ATC has a snow load hazard tool that can help you identify when a snow load presents a hazard to the structure.[1] You can calculate snow load in a few easy steps.

Step One: Calculate the Volume of the Snow on the Roof

The volume of snow on the roof directly relates to how much it will weigh. To find the snow volume, start by measuring the roof’s footprint.

Measure the Roof
We strongly recommend against walking on the roof to take these measurements for obvious safety reasons. Instead, measure the length and width roof from the ground to find the footprint; we’ll account for the pitch later. Keep all measurements in feet to simplify the formulas.

When you have the roof’s length and width as measured from the ground, multiply them together. This will give you the area of the footprint. Alternatively, you can also use a volume calculator to find this measurement.

Account for Roof Pitch
If you measured from the ground and did not measure the roof’s actual dimensions, then it’s time to account for the roof pitch. If you don’t know your roof pitch, then try our roof pitch calculator to find it.

To account for the pitch, you’ll need to multiply the area by the multiplier for the given roof pitch. You can find a list of multipliers on our roofing calculator. The calculator above applies this formula. If the roof is a flat roof, then this step is not needed..

Before moving on, multiply the area by the snow depth in feet to find the volume of snow on the roof.

Step Two: Find the Snow Density

Snow varies in weight depending on the density. Fresh powder weighs much less than wind-packed drifts. Check out our snow weight calculator to find the density of various types of snow.

Step Three: Calculate Snow Load

The final step in calculating the snow load is to multiply the volume of snow on the roof by its density. If you have a density range, then multiply the volume by each part of the range separately to find the minimum and maximum snow load.

You might also be interested in our snow to water volume calculator.