Picture Hanging Services

Picture Hanging Services Near You

Can’t find what you are looking for?

How It Works

  • Answer a few questions about your home project.
  • Within seconds, get matched with top-rated local pros.
  • Compare quotes and choose the best pro for the job.

Picture Hanging Services In Your Area

Professional Picture Hanging Services: The Best Way to Hang Your Artwork

Meta Description: Elevate your space with expert picture hanging services. Our professionals ensure perfect placement and secure installation of artwork, mirrors, and more. Transform your walls today!

Picture Hanging Services

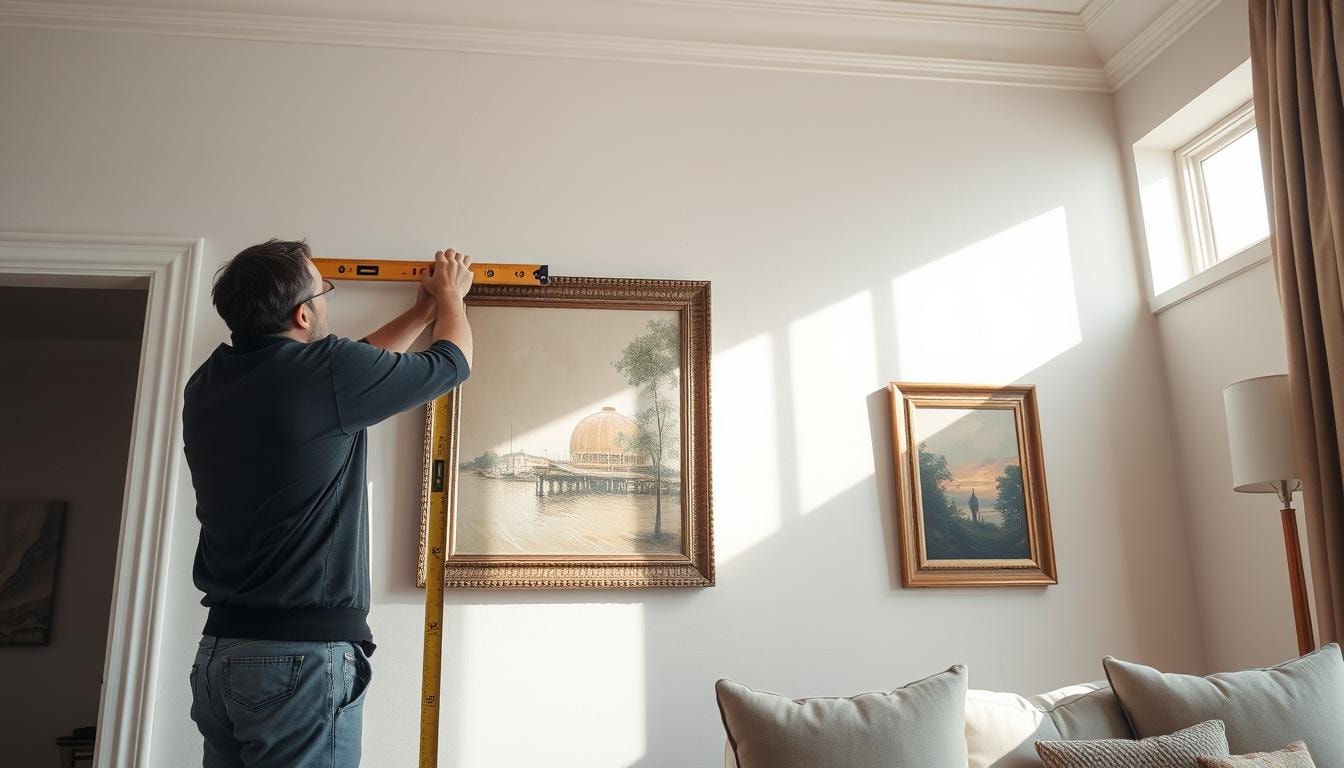
Is crooked artwork ruining your space’s aesthetic? Transform your home or business with professionally hung artwork, mirrors, and wall decor. Picture hanging services ensure perfect placement and secure installation of your pieces. These services create a stunning, cohesive display that truly elevates your space.

Expert hangers have the skills to tackle various wall materials and artwork types. They save you time and prevent costly damage. Your prized possessions will be displayed with utmost care and precision.

Key Takeaways

  • Professional picture hanging services ensure your artwork is securely and precisely installed for a polished, seamless look.
  • Expert picture hangers have the skills, tools, and experience to tackle a wide range of wall materials and artwork types.
  • Commercial and residential clients alike can transform their spaces with custom framing, mirror hanging, and other specialty services.
  • Hiring professionals saves time, avoids costly damage, and guarantees your prized possessions are displayed with care.

The Importance of Professional Picture Hanging

Hanging pictures isn’t as simple as it seems. It requires specialized expertise to ensure safety and effectiveness. DIY attempts can lead to costly mistakes like damaged walls and falling frames. Hiring expert picture hangers is crucial to transform your space with a polished, gallery-worthy display.

Why Hiring Experts is Crucial

Professional picture hangers bring years of hands-on experience in weight distribution, alignment, and wall composition. Improperly hung pictures can skew over time. This can damage or reduce the value of cherished pieces.

A professional hanger is trained in safety best practices. They use the correct equipment for each job. Hiring a pro protects art and ensures safety by avoiding accidents.

Art hung unevenly can disrupt the aesthetic appeal of a room. Pros consider lighting, furniture, and viewing angles during installation. Professional hangers complete work efficiently, delivering superior outcomes compared to DIY attempts.

Hiring experts for picture hanging saves time and hassle. Different wall types need specific hanging techniques. Professional handymen bring precision to ensure perfect installation every time.

Professionals come equipped with specialized tools like stud finders, laser levels, and wall anchors. Their expertise ensures the selection of appropriate hardware for secure hanging. This avoids common DIY mistakes and pitfalls.

Hiring professional picture hangers offers significant aesthetic benefits by transforming a room with the right placement. Their services provide convenience, reliability, and customer satisfaction. They’re the best choice for your picture hanging needs.

Services Offered by Professional Picture Hangers

Professional picture hanging services offer expertise for displaying your artwork and wall decor. These specialists can handle a wide range of items. From small family photos to large-scale paintings, they’ve got you covered.

Their skills go beyond basic picture hanging. They can install mirrors, wall clocks, and even shelving units. These pros excel at tackling unique challenges too.

Heavy pieces, artwork on angled ceilings, or rough surfaces are no problem. They use high-quality hangers and hooks to secure your artwork safely.

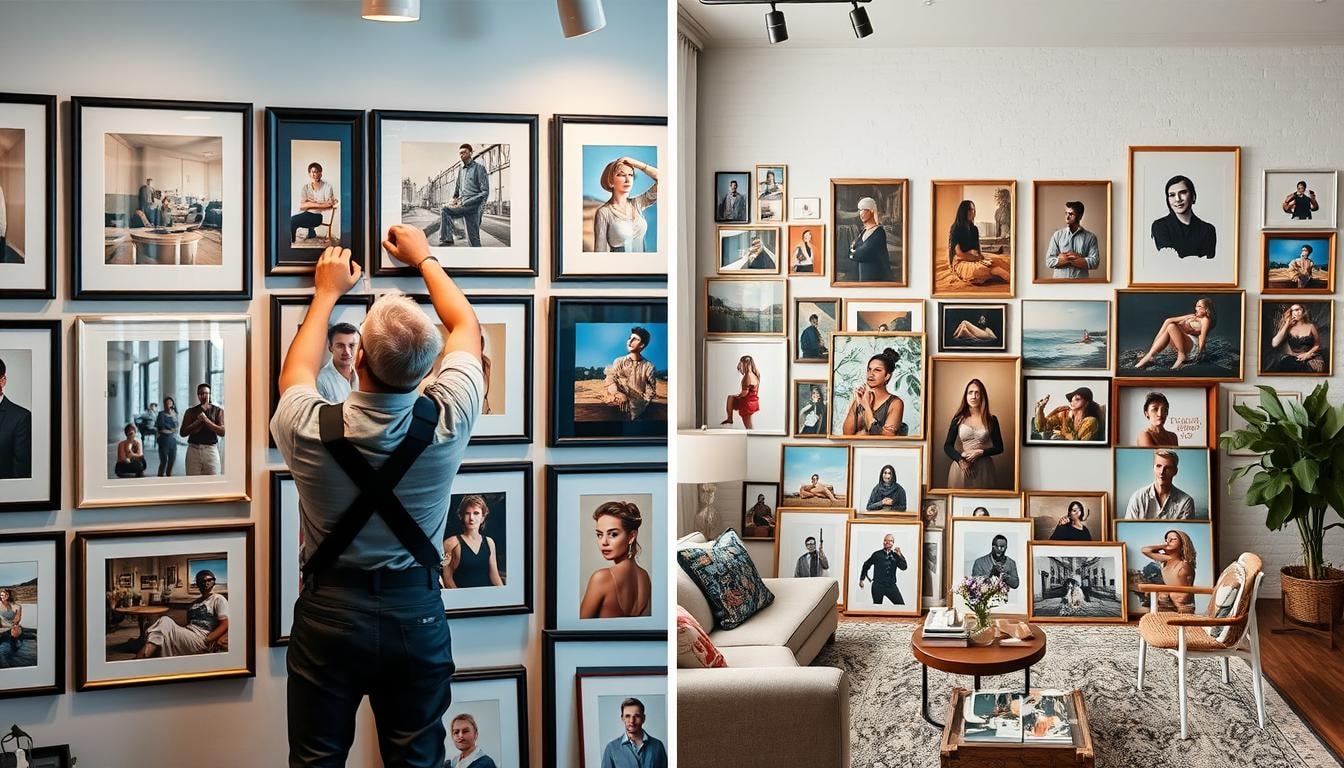
These experts can handle single frames or entire gallery walls. They work with care and attention to detail. You can trust them to display your wall decor precisely.

Types of Walls and Materials for Picture Hanging

drywall hanging

Hanging artwork needs skill, especially with different wall surfaces. Pro picture hangers can install art on drywall, plaster, wood, brick, and stone. They know the best methods for each wall type.

Pros ensure artwork is secure without damaging walls. They use the right tools and techniques for every surface.

Expertise in Various Wall Types

For drywall and plaster, pros use proper anchors to spread weight evenly. This stops art from falling. On wood, brick, and stone, they use special hardware for strong installations.

Their know-how lets them hang art confidently on any surface. They choose the best method for each wall type.

  • Drywall requires specific hooks and hardware to ensure safe installation.
  • Plasterboard walls need plasterboard screws or wall plugs for hanging pictures safely.
  • Cinder block walls may require consideration of the type of hook, placement, and weight of the artwork.
  • Brick walls need the right screws, nails, or hooks to avoid irreversible damage.
  • Concrete walls offer a solid and stable foundation for picture frames, preventing misalignment over time.

Pro picture hangers know how to work with all wall types. They use the right hardware for safe art installation. Their skills prevent damage and ensure your art stays put.

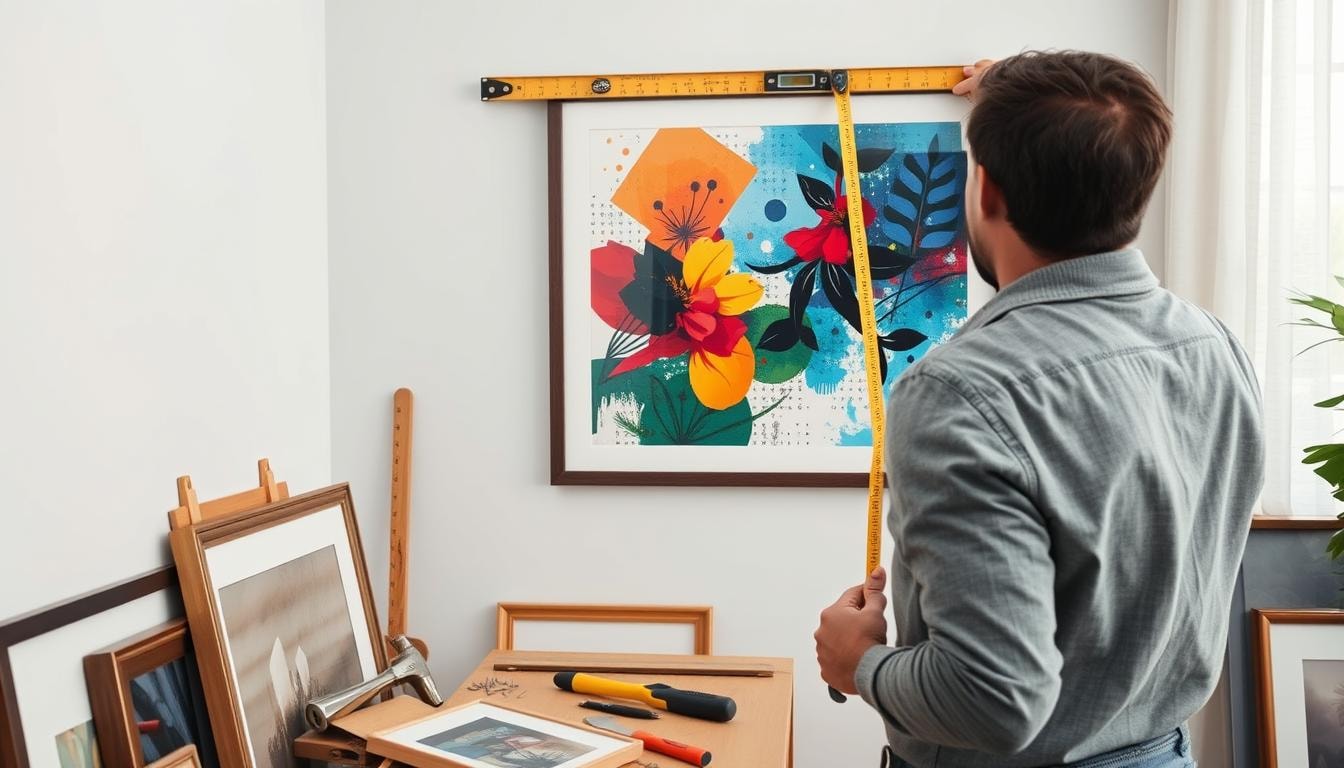
Tips for Hanging Pictures Like a Pro

Professional picture hangers follow best practices for flawless installations. They focus on finding wall studs for secure support, especially for heavy pieces. They also choose hardware rated for the artwork’s weight to prevent frames from falling.

Experts plan artwork placement carefully before drilling holes. They measure to achieve a balanced, level display. This helps avoid uneven spacing, crooked frames, and wall damage.

By using these expert methods, they hang art with precision. This ensures a damage-free hanging experience for your cherished pieces.

  • Use a stud finder to locate wall studs for the most secure support, especially for heavier pieces.
  • Select hardware rated for the weight of the artwork, such as picture hooks and wall anchors, to prevent frames from pulling away from the wall.
  • Carefully plan the placement and spacing of the artwork, measuring to achieve a balanced, level display.
  • Adhere to expert techniques to avoid common DIY pitfalls like uneven spacing, crooked frames, and wall damage.

These pro tips will help you display artwork beautifully. Your home or office will look stunning with perfectly hung pictures. You’ll create a visually appealing space without damaging your walls.

Benefits of Hiring Professional Picture Hangers

Professional picture hanging services offer many perks for transforming your space. These experts have the skills and tools to hang artwork securely and evenly. They create a polished, gallery-worthy display in your home or office.

Professionals provide secure installation, a key benefit of their service. They use specialized hardware to mount artwork without damaging walls. This saves you time and money on future repairs.

Professional picture hangers have a keen eye for detail. They measure and position each piece carefully. This creates a cohesive and visually appealing arrangement that’s hard to achieve alone.

  • Enjoy the benefits of professional hanging for a hassle-free, damage-free experience.
  • Leverage their expert techniques to transform your space with a stunning, professional-grade artwork installation.
  • Benefit from their customized services tailored to your specific needs and preferences.
  • Experience the time-saving convenience of having a team of experts handle the entire picture hanging process.

Hiring professional picture hangers is a smart choice. They offer a cost-effective and stress-free way to create a beautiful display. Their work adds depth and character to your space.

Picture Hanging Services for Commercial and Residential Spaces

Commercial and Residential Picture Hanging

Professional picture hanging services transform spaces into visual masterpieces. These experts install paintings, sculptures, and other art pieces seamlessly. They cater to both commercial and residential clients.

In commercial settings, they handle large-scale pieces with precision. They create cohesive displays in art galleries, offices, and public buildings. At home, they work with homeowners to showcase family photos and artwork.

These professionals collaborate with interior designers and property managers. They bring creative visions to life through expertly installed artwork. Their skills shine in bustling offices and cozy living rooms alike.

Services include art gallery installations and office artwork setups. They also offer home decor, custom framing, and gallery wall design. Their expertise ensures visually harmonious spaces.

Picture hanging professionals focus on client satisfaction and quality work. They’re the top choice for elevating spaces through expertly installed art. Their skills transform any area into a stunning display.

Finding the Right Picture Hanging Service Provider

Searching for a professional picture hanging service requires careful vetting. Look for companies with a proven track record and positive customer reviews. Ensure they have trained technicians who are licensed, insured, and equipped with proper tools.

Experienced providers use specialized equipment to preserve your artwork. They can assess your space and choose the best methods for displaying pieces. This ensures maximum visual appeal and security.

  • Check customer reviews and recommendations to gauge service quality and satisfaction.
  • Verify that the provider is licensed and insured to protect you and your artwork.

Consider the convenience and flexibility of the picture hanging service. Look for providers who can work with your schedule. Seek those offering a seamless experience from consultation to installation.

Vetting picture hanging services helps you find experts to transform your space. This ensures safe and elegant display of your artwork. Choose wisely for a confident and satisfying experience.

Preparing for Professional Picture Hanging

Take simple steps before picture hangers arrive. Measure wall areas for artwork placement. Identify wall materials like drywall, plaster, or brick for proper hardware selection.

Gather frames, artwork, and hanging hardware you’ll use. Tell specialists about the size, weight, and number of pieces. This helps them bring the right tools and equipment.

  • Measure the wall space to determine the best placement for your artwork.
  • Identify the wall types (drywall, plaster, brick) to ensure the use of suitable hardware.
  • Collect any existing frames, artwork, and hanging hardware you plan to use.
  • Communicate the size, weight, and quantity of pieces to be hung.
  • Clear the work area of any furniture or obstacles to provide easy access.

These steps help your picture hanging service work faster. They’ll have the info they need for a smooth installation. Your artwork will be displayed with care and precision.

Cost Considerations for Picture Hanging Services

Professional picture hanging costs vary based on several factors. These include the size and number of pieces, installation complexity, and wall materials. Such factors play a crucial role in determining the pricing.

On average, these services start at $270 for the first hour. After that, it’s $170 per hour, excluding taxes. Hanging multiple artworks may result in a bundled deal, potentially lowering the overall cost.

Larger or fragile pieces might require specialized equipment or techniques. This can drive the price up accordingly. The type of wall surface also impacts the cost.

Hanging pictures on drywall may range from $40 to $120. Installing on concrete walls can cost between $70 and $140. Other surfaces like wood, tiles, or stone can further influence pricing.

Stone walls might cost up to $170 for installation. Additional costs may include travel expenses, consultation services, and necessary hardware or materials.

Consider the expertise of picture hanging professionals when hiring. Their specialized skills can prevent costly DIY mistakes or artwork damage.

Research, compare pricing, and assess the provider’s portfolio and reviews. This ensures a quality installation that protects your valuable artwork.

FindPros: The Smarter Way to Hang Your Art and More

Tired of the hassle of hanging pictures, mirrors, TVs, and other items on your own? FindPros can connect you with the right pro for the job. Simply answer a few questions about your home project, and we’ll match you with top-rated local professionals who can provide the expertise and support you need.

Get competitive quotes, find a pro you get along with, and make your vision a reality without the stress. Whether you need help hanging art, mounting a TV, or any other home project, FindPros has you covered. Take the first step towards a beautifully decorated space today.

Conclusion

Professional picture hanging services offer a top-notch solution for your walls. They turn them into amazing displays for your art and decorations. Trained experts ensure your pieces are secure, level, and perfectly spaced.

These services work for both homes and businesses. They can handle projects of any size or difficulty. The results will make your space look much better.

Hiring pros is a smart choice for hanging your art. It saves you time and prevents mistakes. Your wall decor will look great and stay safe for a long time.

Frequently Asked Questions (Picture Hanging Services)

Professional wall hanging services ensure your artwork is securely and precisely installed, preventing damage to your walls or the art itself. They have the expertise to handle a variety of wall materials and artwork types.
Professional picture installers have the tools, skills, and experience to properly hang even heavy mirrors, framed art, and fine art pieces. DIY picture hanging can be a daunting task and may result in uneven, unsafe, or damaged installations.
Professional picture hanging services can work with drywall, plaster, wood, brick, concrete, and other wall types. They know the best methods and hardware to use for each surface to ensure a safe and secure installation.
Professional installation services can help you display your artwork in the most visually appealing way, creating a cohesive and polished look throughout your home. They have the knowledge and attention to detail to deliver the best picture hanging results.
When choosing a picture hanging service, look for a provider with extensive experience, proper licensing and insurance, and positive customer reviews. They should be able to offer advice, handle all the work, and deliver a stress-free, high-quality installation.

Phone System Installation

Picture Hanging Services Near You

Can’t find what you are looking for?

How It Works

  • Answer a few questions about your home project.
  • Within seconds, get matched with top-rated local pros.
  • Compare quotes and choose the best pro for the job.

Phone System Installation In Your Area

Phone System Installation: A Complete Guide

Meta Description: Discover the essential steps for successful phone system installation in your business. Learn about VoIP technology, hardware setup, and optimizing call quality.

Phone System Installation

Ready to upgrade your business communication? Installing a new phone system is easier than you think. With the right approach, you can set up a VoIP system in just one day.

But before you start, it’s important to consider key factors. These will ensure a smooth and cost-effective installation process.

Key Takeaways

  • Modern phone systems can be installed quickly, often within a single day.
  • Thorough testing and vendor support assessment are crucial before implementation.
  • Tailoring system features to your business needs can enhance productivity and customer experience.
  • Continuous monitoring and adjustment are essential for optimal phone system performance.
  • VoIP adoption is on the rise due to its cost-saving benefits and advanced capabilities.

Introduction to Business Phone Systems

Businesses need reliable and efficient phone systems. Three main types exist: Analog, PBX, and VoIP. Each offers unique advantages for modern businesses.

Types of Small Business Phone Systems

Analog systems use traditional wire-bound hardware. They rely on public switched telephone networks. These systems have limited features and can be costly.

PBX systems offer more advanced functions. They still need PSTN connections. Installation and setup can be complex.

VoIP phone systems use the internet instead of hardware. They’re cost-effective and flexible for small businesses. VoIP integrates well with remote teams and unified communications.

Benefits of VoIP Phone Systems

  • Significant cost savings, especially for long-distance and international calls
  • Increased mobility and flexibility, enabling remote work capabilities
  • Advanced features such as video conferencing, call forwarding, and integrations
  • Scalability to accommodate business growth and changing needs
  • Reliable and high-quality communication through a stable internet connection

VoIP systems are popular for small businesses. They offer many benefits for today’s work needs. These include cost savings and improved productivity.

Assess Your Business Needs: Factors to Consider

Take a close look at your business requirements before installing a phone system. Identify key factors like calling needs, essential features, and budget. Consider flexibility, scalability, privacy, and regulatory compliance too.

Evaluate your business phone needs for sales, customer support, or both. Analyze expected call flows and user permissions for your team. This helps determine the right features for your phone system.

Think about your budget for the phone system. Include both initial costs and long-term expenses. Consider flexibility and scalability to support future growth.

Decide between a cloud-based VoIP solution or a traditional on-premises system. Assess which option best meets your privacy and regulatory requirements.

By examining these factors, you’ll find the right communication solution for your needs. This ensures a smooth and effective phone system for your business.

Test Network Connections

Checking your internet connection and bandwidth is key for VoIP phone systems. A stable internet is vital for good call quality. Poor calls can hurt customer interactions and business operations.

A bandwidth of 100 kbps is usually needed for one VoIP call. Quality of service (QoS) settings on your router help ensure steady packet transfer. Setting QoS to favor VoIP can reduce jitters, latency, and call drops.

Bandwidth Requirements

For best VoIP performance, aim for 100 kbps bandwidth per call. This applies to both upload and download speeds. Actual needs may vary based on users, call volume, and system features.

Quality of Service (QoS) Settings

  • QoS settings on your router can prioritize VoIP traffic. This ensures your calling app gets needed bandwidth for clear calls.
  • Good QoS helps prevent jitters, latency, and call drops. These issues can ruin the user experience.
  • Ask your VoIP phone system provider about proper QoS setup. A networking pro can also help with this.

Test your internet connection thoroughly. Set up proper bandwidth and QoS. This lays groundwork for successful VoIP installation. It ensures smooth business communication.

Evaluate Phone System Features and Providers

Picking the right business phone system is crucial. Key features include virtual calls, auto attendant, and smart call routing. Other important features are text messaging, call analytics, and recording.

Pricing is also a major factor to consider. Providers offer different subscription plans to suit various needs. Comparing these plans helps you find the best fit.

Essential Features

When choosing a business phone system, look for these key features:

  • Virtual phone calls for seamless remote and mobile communication
  • Auto attendant to efficiently route incoming calls
  • Smart call routing to direct calls to the appropriate team members
  • Business text messaging for real-time customer and team communication
  • Call analytics and conversation intelligence to gain valuable insights
  • Call recording for quality assurance and training purposes
  • Local, international, and toll-free calling options
  • Conference calling for team collaboration and client meetings

Studying pricing information helps you make a smart choice. Cloud-based systems usually cost $20 to $50 per user monthly. This makes them affordable for small businesses.

Plan and Manage Users

Small businesses must carefully plan and manage their phone users. This ensures efficient communication and collaboration. Not all staff may need a direct inward dialing (DID) number.

Proper planning of extensions, permissions, and call flows is crucial. It helps create a seamless phone system implementation. A comprehensive spreadsheet or database can help manage phone users effectively.

Include details such as:

  • Employee names and contact information
  • Assigned phone extensions
  • Call flow configurations (e.g., direct lines, ring groups, call forwarding)
  • User permissions and access levels

This system keeps you organized and ensures proper access for each user. It streamlines communication and boosts productivity. Your team will enjoy a smooth user experience.

Transfer Existing Phone Numbers

Your business phone number is crucial. It’s on marketing materials and how customers reach you. When changing phone systems, it’s vital to move your existing numbers.

This is called the “porting process”. It usually takes 1 to 2 weeks. Providers may charge fees, but you can often negotiate reductions or waivers.

Record Voicemail Greetings

Voicemail is crucial for VoIP phone systems. It helps callers confirm they’ve reached the right number. A good voicemail greeting can build a connection with customers.

VoIP systems let companies manage staff voicemail boxes. They can download voicemails or listen to them online. Notification management is also possible.

Here are some key tips for recording voicemail greetings on different phone models:

  • 100% of phone models require users to enter a PIN to record a voicemail greeting.
  • On Polycom Conference 5000/6000/7000 phones, it takes 7 steps to record a voicemail greeting.
  • 85% of phone models involve pressing a specific key to record an “Unavailable” Greeting.
  • 100% of phone models guide users to select “User Options” before recording a voicemail greeting.

For Yealink T4x S/G Phones and W52H/W56H, users press 4 keys to enter “User Options”. Then they can record their voicemail greeting.

On average, it takes 6.75 steps to record an “Unavailable” Greeting across all phone models.

Learn your specific phone system’s steps. You’ll be able to record professional-sounding voicemail greetings quickly. This will boost your business’s communication with customers.

Review Service Level Agreements (SLAs)

service level agreements

Reviewing SLAs is vital when setting up a new business phone system. These contracts outline service standards, support, and performance expectations from your provider. Understanding SLAs ensures fair treatment and good customer support throughout your phone system’s lifetime.

SLAs typically cover key aspects such as:

  • Guaranteed uptime and network availability
  • Response times for technical support and issue resolution
  • Compensation for service disruptions or failures
  • Protocols for reporting problems and escalating concerns
  • Data security and privacy measures
  • Disaster recovery and business continuity plans

Examining SLA details helps you choose the right phone system provider. It sets realistic expectations for service levels. This careful review can prevent future frustrations and ensure vendors meet their obligations.

Providers usually offer standard SLAs, but you can often negotiate custom terms. These adjustments can better align with your business needs and vendor contracts. Involving legal counsel in this process helps identify gaps or areas needing clarification.

Check Phone Setup Requirements

Getting ready for a new VoIP phone system? Make sure you have the right hardware and software. A solid internet connection is key. You’ll also need devices like computers or phones for VoIP software.

Many providers offer desk phones and VoIP headsets. These allow for a wireless setup. With the right tools, you can enjoy VoIP’s benefits.

Hardware and Software

To start, you’ll need some basic equipment:

  • A modem and router to connect your internet network
  • Desktop computers, laptops, or mobile devices to install the VoIP software
  • Desk phones, IP phones, or VoIP headsets for making and receiving calls

Your VoIP provider will help with software setup. This may involve downloading an app or using a web platform. Check that your devices meet the minimum requirements for VoIP.

Prepare your network and equip your team properly. This lays the groundwork for successful VoIP implementation. A good setup lets you enjoy VoIP’s cost savings and advanced features.

Verify Number Assignments

A well-structured phone system is vital for your business. It includes direct inward dialing (DID) numbers and call groups. These route inbound calls to teams using a single extension number.

Review your outbound caller ID settings. Ensure your company’s main phone number is displayed, not individual employee numbers.

Direct Inward Dialing (DID) Numbers

DID numbers offer direct lines to specific employees or departments. They help customers reach the right person quickly. Check that your DID numbers are correctly assigned and working properly.

Ring Groups

Ring groups route incoming calls to a team using one extension number. Make sure your ring groups are set up correctly. Confirm the right team members are in each group.

Outbound Caller ID

Employee caller IDs may show their individual numbers on outbound calls. Change this to display your company’s main number instead. This presents a more professional image to your customers.

Checking your phone number settings is crucial. This includes DID numbers, ring groups, and outbound caller ID. These steps ensure your business phone system runs smoothly and effectively.

Evaluate Security and Privacy Measures

Setting up a business phone system requires careful security evaluation. Robust data security and privacy measures are vital. These safeguard communications and protect against cyber threats.

Encryption and Compliance

Choose a phone system with advanced encryption and secure data storage. Ensure your provider complies with privacy laws like HIPAA and GDPR. This protects your sensitive information.

A reliable cybersecurity infrastructure is essential. Look for anti-virus protection and secured networks. These features help prevent data breaches and unauthorized access.

  1. Ensure your phone system offers end-to-end encryption to secure your business communications.
  2. Confirm that your provider’s data storage solutions meet industry-standard compliance requirements.
  3. Evaluate the cybersecurity measures, such as anti-virus protection and secured networks, implemented by your phone system provider.

Thorough security evaluation protects your company’s sensitive data. It ensures compliance with industry rules. Your organization stays safe from potential cyber threats.

Phone System Installation Process

phone system installation process

Setting up a new business phone system involves several key steps. It’s designed to improve your communication setup. This process helps your organization connect better.

Account Setup

First, set up your account with the chosen service provider. Create an account and pick a suitable subscription plan. Provide your business details to lay the groundwork for system integration.

Software and Hardware Setup

Download the browser extension and web/mobile app for better access. Configure software and hardware components for effective operation. Assign phone numbers and extensions to get your system running smoothly.

Team Member Onboarding

Invite your team to join the platform. Give clear instructions on how to use the system. Train them on the phone system’s features to get the most out of it.

Integrations and Add-Ons

Connect your phone system with other important business tools. This can boost efficiency and streamline workflows. Explore add-ons to enhance your communication setup even further.

Configuration and Testing

Fine-tune system settings and check number assignments. Test all features to make sure everything works properly. This helps catch and fix issues before the system goes live.

Following these steps ensures a smooth switch to your new phone system. It empowers your team and boosts your business efficiency.

Tips for Hiring Professionals for your Project

Installing a phone system can be tricky for many businesses. Hiring experts can make the project smoother and more successful. Here are some tips for finding the right professionals:

  1. Choose vendors with telecom experience and a solid installation history. These experts can handle everything from pre-installation checks to after-launch support.
  2. Focus on project management skills. Good managers ensure your installation finishes on time and within budget. They also minimize disruptions to your business.
  3. Look for providers offering expert advice. They can help you make smart choices throughout the process.
  4. Check the provider’s communication and customer service. Quick responses and clear communication are vital for a smooth installation.

Hiring professionals lets you focus on your main business tasks. It saves time and money while avoiding technical headaches.

Experts can set up your communication system for success. They handle the complex parts, so you don’t have to worry.

Finding the Right Phone System Pros with FindPros

Struggling with setting up a new phone system for your business? The experts at FindPros can help. Our platform connects you with top-rated professionals who specialize in VoIP services, telephone installation, and internet protocol support. Simply fill out our quick survey about your existing internet connection, phone technology needs, and business number requirements.

Within seconds, we’ll match you with pros who can efficiently handle the entire process, from forwarding calls to integrating with your cell phones and office devices. Don’t settle for less – let FindPros help you find the perfect telephone system solution for your company.

Conclusion

A modern phone system can boost collaboration, customer service, and efficiency. VoIP technology can transform your business communication effortlessly. It empowers your team to excel in today’s competitive market.

Plan your installation to address specific business needs. Ensure a smooth transition to your new phone system. Features like integration and remote access make it a powerful productivity tool.

A modern system can improve customer experience and boost your competitive edge. The VoIP market is growing rapidly. Businesses are recognizing its value for communication and long-term goals.

Investing in a reliable business phone system can elevate your customer service. It supports your communication infrastructure and business continuity. A good phone system installation can boost productivity and set you up for future success.

Frequently Asked Questions (Phone System Installation)

The main types of business phone systems are analog, PBX, and VoIP. Analog systems use traditional phone lines, PBX systems use on-premises hardware, and VoIP systems use the internet for communication.
A virtual phone system uses the internet and VoIP technology instead of traditional phone lines. It allows features like remote access, call forwarding, and voicemail management online, whereas traditional phone lines are limited to basic calling features.
A reliable internet connection is crucial for a VoIP phone system to function properly. It ensures clear call quality, consistent availability, and the ability to access all the features of the virtual phone system, like voicemails online and call forwarding.
VoIP phone systems often cost less than traditional landline services, especially for long-distance and international calls. They also eliminate the need for costly on-premise hardware maintenance. This can lead to significant cost savings for the business in the long run.
The key steps include account setup with the provider, software and hardware configuration, team member onboarding, integrating with other business tools, and thorough testing to ensure everything is working correctly. Hiring professional installation services can make this entire process smoother and more efficient.

Pest Control Services

Picture Hanging Services Near You

Can’t find what you are looking for?

How It Works

  • Answer a few questions about your home project.
  • Within seconds, get matched with top-rated local pros.
  • Compare quotes and choose the best pro for the job.

Pest Control Services In Your Area

Need Pest Control Services? Here’s What to Look For

Meta Description: Discover top-quality pest control services to safeguard your home. Learn what to seek in professional exterminators for effective, long-lasting pest management solutions.

Pest Control Services

Pests can be more than just a nuisance. They can pose serious threats to your health, property, and livelihood. Rodents contaminate food supplies, while insects like termites cause structural damage.

Professional pest control services become necessary when infestations persist. But how do you choose a reliable provider? Let’s explore what to consider when seeking expert help.

Key Takeaways

  • Pests can pose significant risks to health and property, making professional pest control essential.
  • Proper identification of the pest and the extent of the infestation is crucial for effective control measures.
  • DIY pest control methods may not be sufficient for persistent or complex infestations, requiring professional intervention.
  • Choosing a reputable pest control company with specialized expertise and customer-centric service is key.
  • Preventive measures and ongoing monitoring can help keep pests at bay for the long term.

What Are Pests and Why Do We Need Pest Control?

Pests are animals or insects that harm human health, food supplies, and property. Less than 1% of species are true pests. Rodents can eat and spoil up to 20% of the world’s food supply.

Termites cause $1.5 billion in damage to American homes yearly. Pest control protects our food, homes, and well-being from these invasive species.

South Florida’s hot, humid weather keeps pests active all year. Boca Raton, West Palm Beach, Jupiter, and Fort Pierce have high rates of ants and termites.

Roaches, spiders, and silverfish are also common. These pests spread diseases through contact with humans. German cockroaches produce allergens that can worsen asthma and other breathing problems.

Pests can spoil food, forcing replacement of affected items. Termites and powderpost beetles damage structures, lowering property values. Costly repairs may be needed.

Homeowner’s insurance rarely covers pest damage. They see pest control as regular upkeep. Professional services use the best products and methods to remove pests.

Do-It-Yourself vs. Professional Pest Control

Homeowners often choose between DIY pest control and professional services. DIY methods can be cost-effective for minor issues. However, their effectiveness and safety can vary greatly.

DIY pest control offers cost savings and quick action. But it has limitations. Homeowners may lack the expertise to identify pests and use proper control methods.

This can lead to safety risks and incomplete treatment. Complex infestations may not be fully addressed with DIY approaches.

Professional pest control services offer a more thorough approach. Trained technicians can diagnose problems accurately. They use integrated pest management techniques and specialized tools.

These services provide safety assurances. They follow strict regulations when handling hazardous chemicals. Professional help is often needed for large or recurring infestations.

Experts have the knowledge to tackle complex pest issues. They ensure long-term solutions and minimize harsh chemical use.

The choice depends on the pest problem’s nature and severity. It also depends on the homeowner’s expertise and willingness.

A hybrid approach can be effective. This combines DIY prevention with occasional professional inspections or treatments.

Signs You Need Professional Pest Control Services

Common Indicators of a Pest Infestation

Spotting a pest problem early is key. Quick action can prevent major issues. Look for these signs to determine if you need professional help.

Pest droppings, gnaw marks, and insect parts are clear signs. Strange sounds like scratching or scuttling may indicate pests. Odd odors and property damage are also red flags.

If recurring pests appear despite DIY efforts, call the experts. They can find the root cause and fix it. Professionals have the tools to eliminate infestations for good.

  • Pest Droppings: Small, dark, and hard droppings can indicate the presence of pests like rats or mice.
  • Gnaw Marks: Visible damage to wood, wires, or other materials can signify the activity of rodents or other pests.
  • Strange Sounds: Scratching, scuttling, or squeaking noises may indicate the presence of pests within the walls or attic.
  • Strange Odors: Unusual smells, such as urine or a musty odor, can be a sign of a pest infestation.
  • Property Damage: Discolored drywall, peeling paint, or chewed wiring can all be indicators of a pest problem.
  • Recurring Pests: If DIY methods fail to eliminate recurring pest issues, it’s time to call in professional pest control services.

Notice any of these signs? Don’t wait to call a pro. They’ll find the cause and fix it fast. Protect your property with expert help today.

Integrated Pest Management (IPM)

IPM Pest Control Methods

Integrated Pest Management (IPM) is a smart way to control pests. It focuses on prevention and uses less harmful chemicals. IPM identifies pests, checks how bad the problem is, and picks the best control methods.

These methods may include sealing entry points and removing food sources. Traps and careful use of pesticides are also options. IPM aims to solve pest problems using safe and eco-friendly techniques.

IPM Services, started in June 1999, offers top-notch pest control solutions. Their technicians are trained and certified in Kentucky and Indiana. They use safe products that won’t disrupt your facility’s normal operations.

IPM blends biological, cultural, physical, and chemical tools. It reduces risks to health, the environment, and the economy. IPM experts use monitoring to prevent serious pest damage.

The National Road Map for IPM promotes safe and effective practices. It also works to lessen the impact of invasive species.

The Federal IPM Coordinating Committee (FIPMCC) leads pest management efforts. It includes federal agencies with IPM programs. FIPMCC works with public and private groups to gather info on IPM practices.

Customers praise IPM Services for their professional and eco-friendly solutions. By using IPM, homes and businesses can solve pest issues safely.

Non-Chemical Pest Control Methods

Many homeowners now seek eco-friendly pest control methods. These focus on making homes less inviting for pests without using harsh toxins. There are many effective ways to address common household pests.

Moisture Control and Exclusion

Pests are often drawn to damp, humid environments. Address moisture issues through proper ventilation and dehumidification. Seal entry points to make your home less appealing to unwanted visitors.

Use exclusion techniques like caulking cracks and installing door sweeps. Repair screens to physically prevent pests from gaining access to your home.

Sanitation and Mechanical Controls

Thorough cleaning can eliminate food sources and nesting sites that attract pests. Vacuum, wipe down surfaces, and store food in airtight containers. These simple steps are effective sanitation measures.

Mechanical controls, such as traps and baits, can remove pests without chemicals. When combined with preventive strategies, these methods can be highly effective.

Eco-friendly approaches minimize risks linked to traditional chemical pesticides. They may require more effort but offer a safer pest control option. Integrated Pest Management (IPM) provides a sustainable solution for long-term pest prevention.

When to Use Chemical Pest Control

Non-chemical methods should be your first defense against pests. However, sometimes chemical pest control is necessary for severe infestations. It’s often the most effective solution for pests that threaten health or structures.

Many pest control companies use chemical pesticides like pyrethrins, pyrethroids, and fipronil. These chemicals mimic natural pesticides and offer long-term protection. Always follow label instructions and use proper pesticide safety precautions.

A professional pest control expert can help apply treatments safely and effectively. They have specialized equipment and expertise to deliver successful results. Many use advanced software like PestPac to streamline their operations.

Consider the environmental and health impacts of chemical pest control. Explore eco-friendly alternatives and integrated pest management strategies when possible. These options can help minimize the use of chemical pesticides.

Pest Control for Common Household Pests

Homes often face attacks from various pests. Ants, cockroaches, rodents, termites, and bed bugs are common invaders. Effective control uses exclusion, sanitation, traps, and targeted pesticides.

Identifying the pest is crucial for proper treatment. Professional pest control companies can quickly diagnose and solve the problem. Orkin, a leading provider, has served millions of customers for over 120 years.

Orkin’s specialists inspect homes and create custom treatment plans. They cover bed bugs, ants, termites, cockroaches, and rodents. Orkin offers a 30-day money-back guarantee for customer satisfaction.

Rose Pest Solutions also provides residential pest control services. They handle bed bugs, ants, termites, and other common pests. Their approach focuses on prevention and reducing pesticide use.

  • Proper pest identification helps implement preventative measures and reduce unnecessary pesticide use.
  • Preventive actions under IPM include reducing clutter, sealing pest entry points, removing trash, maintaining clean areas, installing pest barriers, and eliminating standing water.
  • Control methods under IPM include pest trapping, heat/cold treatment, physical removal, and targeted pesticide application.

Professional pest control companies help homeowners tackle common pests effectively. They minimize health and environmental risks while solving pest problems.

Preparing for a Pest Control Service Visit

pest control service

Homeowners should take steps to prepare for a pest control service visit. Identify areas of concern or suspected pest infestation. This helps the technician focus their inspection on specific locations.

Clear access to potential entry points and remove clutter. This allows for a more thorough assessment of the property. Understanding the treatment process is crucial for effective pest control.

The process may involve applying pesticides, setting traps, or sealing cracks. Follow the technician’s post-treatment guidance on cleaning and re-entry protocols. This ensures the pest control measures are effective.

What to Expect and How to Prepare

Preparing for a pest control service visit involves several key steps:

  • Identify areas of concern or suspected pest infestation to help the technician focus their inspection.
  • Clear access to potential entry points and remove clutter to allow for a comprehensive assessment.
  • Understand the treatment process, which may include pesticide application, trap setting, or sealing cracks and crevices.
  • Follow the technician’s guidance on post-treatment cleaning and re-entry protocols to maximize the effectiveness of the pest control measures.

Taking these steps ensures a smooth and successful pest control service visit. It helps address professional pest control issues effectively. This meets service preparation and treatment expectations.

Pest Control Costs and Pricing

Professional pest control costs vary based on infestation severity, pest type, and treatment methods. Many companies offer free inspections for customized quotes. Pricing depends on affected area size, treatment frequency, and specialized services.

A single pest control visit can cost $100 to $500 or more. Ongoing plans may have additional fees. The average cost is around $450.

Specialized treatments for termites, bedbugs, or wildlife can reach up to $8,000. DIY pest control options typically range from $50 to $250.

Common DIY tools like sprays, traps, and repellents cost between $5 and $50 each. Understanding service scopes and pricing helps homeowners manage costs effectively.

Factors Affecting Pest Control Pricing

  • Type of service (one-time, additional visits, monthly preventative)
  • Frequency of service
  • Type of pests
  • Type of treatment (chemical, non-chemical)
  • Size of the property
  • Severity of the infestation
  • Geographic location

Knowing these factors helps homeowners make smart choices about pest control services. They can ensure they get the best value for their investment.

Preventive Pest Control Measures

Being proactive is crucial for a pest-free home. Taking preventive measures can keep pests away long-term. Homeowners can implement a comprehensive preventive pest control strategy to protect their property.

Regular home maintenance deters pests. This includes fixing leaks, sealing entry points, and removing food sources. Pest prevention also involves cleaning, using pest-resistant containers, and applying integrated pest management (IPM) strategies.

Natural repellents and bait stations can be effective pest-proofing measures. Partnering with a professional pest control service ensures a tailored prevention plan. This approach addresses your home or business’s unique needs.

A proactive approach to home maintenance keeps pests away. Employing preventive pest control techniques maintains a healthy environment. These steps create a long-term, pest-free living space.

Pest Control Services for Businesses

Pest control is vital for commercial properties and businesses. Restaurants, hotels, and warehouses face unique pest challenges. Professional companies have the expertise to identify issues and implement tailored strategies.

Businesses need providers with industry experience and a history of effective service. These experts protect operations, brand reputation, and customer experience. They address pest management for various commercial properties.

Orkin, a leading provider, has set high standards for over 120 years. They offer specialized services for food processing, healthcare, and hospitality industries. Orkin’s approach ensures eco-friendly pest control solutions for businesses.

Businesses should choose providers that respond quickly and offer guarantees. Look for companies that provide educational resources for maintaining pest-free environments. Partnering with experts helps protect operations and ensure regulatory compliance.

Choosing the Right Pest Control Company

Selecting the right pest control company is vital for protecting your property. Look for providers with expertise in addressing your specific pest issues. Choose a company that offers a comprehensive, integrated approach to treatment.

Evaluate a pest control provider’s qualifications and track record for effective services. Consider these factors when selecting a pest control company:

  • Years of experience: Inquire about the company’s history and the number of years they’ve been in the pest control business.
  • Licensing and certifications: Verify that the company and its technicians are properly licensed and certified by the state.
  • Customer reviews: Check online reviews and ask for references to gauge the company’s reputation and customer satisfaction.
  • Approach to safety: Ensure the company uses low-toxicity, environmentally responsible pest control methods.
  • Comprehensive services: Look for a provider that offers a wide range of pest control solutions tailored to your specific needs.

Thorough research helps you make an informed decision about pest control services. You can feel confident in your choice of company. Enjoy peace of mind with effective, long-lasting pest management solutions.

The FindPros Advantage for Pest Control Services

Searching for reliable pest control services can be a daunting task. That’s where FindPros comes in. Our platform connects you with top-rated local pest control professionals in your area, ensuring you get the best pricing when multiple pros compete for your job. Simply answer a few questions about your pest control needs, and we’ll match you with the pros that best fit your project and budget.

Enjoy the convenience of comparing quotes and choosing the expert that you feel most comfortable with, all without the added hassle. Whether you’re dealing with termites, mosquitoes, or any other year-round pest issues in the warm southeastern states, FindPros has you covered with a comprehensive approach and expert advice tailored to your home. Get the professional pest control service you deserve without the additional cost.

Conclusion

Effective pest control is crucial for protecting your home and health from invasive insects and rodents. DIY methods can work for minor issues. However, complex infestations often need professional pest control solutions.

Experts can identify pests and understand their behaviors. They use a comprehensive integrated pest management approach to eliminate problems and prevent future invasions.

The right professional pest control partner helps you reclaim your property. They use eco-friendly techniques and customized solutions to maintain a pest-free home.

Reliable pest control services safeguard your home or workplace. They provide peace of mind that comes with a pest-prevention environment.

Effective pest control requires partnering with industry experts. They have the knowledge and tools to address your unique challenges. A trusted pest control provider can help you enjoy a pest-free lifestyle.

Frequently Asked Questions (Pest Control Services)

Pest control experts offer a variety of treatments including pesticide application, baiting, trapping, and exclusion techniques. They use an integrated approach to effectively rid your home of pests.
Pest control experience is crucial, as technicians need to properly identify the pest and implement the right treatment plan. An experienced provider will have the expertise to address your specific pest concerns effectively.
Look for a local pest control company with a reputation for excellent service. They should assign the same knowledgeable technician to your home and offer flexible scheduling options for multiple visits. A good provider will also offer additional services like lawn care to meet all your needs.

Perc Testing

Picture Hanging Services Near You

Can’t find what you are looking for?

How It Works

  • Answer a few questions about your home project.
  • Within seconds, get matched with top-rated local pros.
  • Compare quotes and choose the best pro for the job.

Perc Testing In Your Area

Perc Testing: What You Need to Know Before Building

Meta Description: Discover the essentials of Perc Testing before building your home. Learn about soil evaluation, percolation rates, and septic system requirements for your property.

Perc Testing

Planning to build a new property? Don’t forget about perc testing. This vital step can determine your project’s success. It checks if the land can support a septic system.

Perc tests ensure proper wastewater treatment and disposal. They’re crucial for your construction project. Let’s explore what a perc test is and why it matters.

Key Takeaways

  • Perc testing determines if the soil can properly absorb and treat wastewater from a septic system.
  • Perc tests are required before building in many areas to ensure septic system functionality.
  • Perc test results remain valid for 2-5 years, with possibilities for renewal.
  • Soil characteristics like high clay content or low permeability can lead to perc test failure.
  • Successful perc tests are crucial for obtaining necessary permits and approvals for construction.

What is a Perc Test?

A perc test checks how well soil absorbs wastewater from septic systems. It measures how fast water drains through the soil. This is crucial for septic systems to work properly.

Explanation of Perc Test and Its Purpose

Perc tests determine if a site suits a septic system. They provide data to design systems that handle property wastewater. The results show soil permeability, which is key for sizing and placing septic systems.

Sandy soil absorbs more water than clay-rich soil. It also absorbs more than soil near the water table. Leach line testing uses 5 holes, 3-6 feet deep, to measure water percolation.

Horizontal pit testing needs 5-8 holes, 3-10 feet deep. This test checks water spread. Vertical seepage pit testing uses one 3-4 foot wide hole, 20-30 feet deep.

This test calculates the needed pit size and number. Some areas use soil texture analysis and long-term acceptance rates. These may replace or complement percolation tests.

Importance of Perc Testing for Building

Perc testing is vital for building projects. It ensures a property can support a working septic system. Septic systems treat wastewater for homes not linked to municipal sewage.

Poor soil absorption can cause expensive issues. These include sewage backups and groundwater contamination. It may even prevent building on the property.

Perc tests help decide if a standard septic system works. They also show if an alternative system is needed. This info guides decisions about building on a site.

The test checks soil permeability. It measures how fast water soaks into the ground. This data helps determine septic system size and type.

It also guides drainfield placement. Some soils may need special systems like mound systems. These ensure proper wastewater treatment and disposal.

Local authorities require permits for septic installation. They also conduct inspections to ensure safety and functionality. Perc test results shape the septic system’s design and approval.

Perc testing protects the environment and property value. It helps avoid costly future problems. Developers and homeowners can make smart choices about building sites.

When is a Perc Test Required?

Perc tests check if soil can support a septic system. They assess the soil’s ability to absorb and filter wastewater. These tests are necessary in certain situations before building or changing a property.

Scenarios Requiring Perc Testing

  1. New Construction: A perc test is needed before building a new home. It ensures the soil can support a working septic system. This step is vital for planning and getting permits.
  2. Existing Septic System Replacement: When replacing an old system, a new perc test may be needed. It checks if the soil can still handle a new system. This helps ensure the new system works properly.
  3. Property Transfer: Selling a property may require a perc test. It confirms the soil’s ability to support a septic system. This is especially true for older systems or unknown conditions.
  4. Permit Requirements: Many areas require perc tests for new construction or septic work. This applies regardless of the property’s history. It’s part of the local permitting process.

Knowing when perc tests are needed is important for property owners and builders. It helps ensure compliance with local rules. Perc tests are key for successful septic system installation or replacement.

Who Performs Perc Tests?

Perc tests check if soil can handle a septic system. Trained pros like soil techs or licensed septic installers do these tests. Local health departments often oversee the process.

Rules for who can do perc tests vary by area. Check with local health officials to know the rules. Hiring an expert soil technician or licensed professional ensures accurate results.

  • Local health departments or environmental departments often oversee perc testing.
  • Soil testers might be licensed septic system designers, soil engineers, or soil testing companies.
  • In some areas, a government agent must perform or witness the perc test.
  • Most towns have licensed septic system designers who are knowledgeable about local soil types and regulations.

A qualified person must do the perc test for reliable results. This helps design a good septic system for your property.

Working with a certified professional ensures the test follows all rules. They’ll meet local health department regulations and industry certification standards.

Step-by-Step Guide to Conducting a Perc Test

Perc test procedure

A perc test is vital for building projects. It shows if soil can handle wastewater disposal. Here’s how to do a standard perc test:

  1. Digging one or more test holes, typically 6 to 12 inches in diameter and 2 to 3 feet deep, in the proposed drain field area.
  2. Placing 2 inches of clean gravel in the bottom of the holes.
  3. Scraping the sides of the holes to loosen any compacted soil.
  4. Pre-soaking the soil by filling the holes with water and maintaining a 12-inch water level for at least 4 hours (12 hours for clay soils).
  5. Measuring the water level drop in the holes every 30 minutes (or less for highly permeable soil) the following day.
  6. Calculating the percolation rate, which is the time it takes for the water to fall 1 inch.

Local regulations can affect perc test requirements. Check with your local health department before starting. This ensures you follow the correct test procedure.

The percolation rate is key for septic system suitability. Soil preparation, pre-soaking, and water level measurement are crucial steps. These steps help get accurate perc test results.

Interpreting Perc Test Results

A perc test checks if a site can handle a septic system. It shows how well soil absorbs wastewater. The results help choose the right septic system design.

The key metric is the percolation rate, measured in minutes per inch (MPI). This rate shows how fast water soaks into the soil. Here are some general guidelines:

  • Below 5 MPI: Highly permeable soil, may require alternative systems with pre-treatment or pressurized dosing.
  • 5 to 60 MPI: Suitable for a conventional gravity-fed septic system.
  • 60 to 120 MPI: Low-permeable soil, may require alternative systems with enhanced treatment or mound systems.
  • Above 120 MPI: Very low-permeable soil, may only be suitable for alternative perc test, alternative septic systems with extensive wastewater treatment.

Local rules can change these guidelines. Check with your health department about accepted rates in your area. The perc test results help pick the right septic system.

A good system follows local laws and protects the environment. It also safeguards public health. Always consult experts when interpreting perc test results.

Understanding Soil Types and Their Impact on Perc Rates

Soil type greatly affects perc rates and septic system suitability. Sandy and gravelly soils have the best percolation rates. Clay-rich soils or solid rock are less suitable for septic systems.

You can do a simple ribbon test to check soil suitability. Dig below the topsoil and form a ribbon of subsoil. If it makes a long, thin ribbon, it’s likely clay-rich and may fail a perc test.

A high water table or impermeable layers can make a site unsuitable for conventional septic systems. Sandy soil drains quickly, ideal for septic systems. Loamy soil offers optimal drainage and water retention.

Clay soil drains slowly, causing low perc rates and septic system challenges. Silty soil has moderate drainage but can compact, affecting perc rate. Peaty soil holds water well but drains slowly.

Soil texture includes sand, coarse particles, fine silt, and clay. Sandy soils drain well, while clay soils drain poorly. Soil structure affects how wastewater moves through porous soil in septic systems.

Loamy soil is ideal for septic systems. It balances absorption and drainage. Soil permeability affects effluent percolation and prevents contaminant buildup.

Soil density impacts the septic system’s ability to absorb, filter, and drain wastewater. Absorption capacity is crucial to handle wastewater without saturation. This prevents groundwater contamination.

The depth-to-water table is important to avoid groundwater contamination. Soil pH balance affects beneficial microorganisms in septic systems. This influences effluent treatment and prevents groundwater pollution.

Perc Testing Regulations and Requirements

Perc testing regulations vary based on your location. Most states allow towns to set their own rules within broader guidelines. Here are some common regulations to keep in mind:

  • Requiring a licensed or certified professional to conduct the perc test
  • Specifying the minimum number of test holes and their depth and diameter
  • Dictating the acceptable percolation rates for different types of septic systems
  • Restricting when perc tests can be performed (e.g., only during certain times of year)
  • Mandating that a health department representative be present to witness the test

Check with your local health department about specific perc testing requirements. This step is crucial before scheduling the test. Ignoring regulations can cause delays or rejection of your building permit.

Following local perc test rules is key for project approval. Work with a licensed pro to meet all standards. This approach helps you confidently move forward with your building plans.

Factors Affecting the Cost of Perc Testing

Perc test costs can vary greatly due to several key factors. These variables help homeowners and developers budget accurately for their building projects.

Land size is a primary cost driver. Larger properties need more test holes, increasing labor costs. Properties from 0.25 to 5 acres typically require 2 to 7 holes.

The hole size and depth also affect overall cost. Larger or deeper holes can add $100 to $150 per foot. Hand-dug holes cost $200 to $1,500, while excavator-dug holes range from $500 to $3,000.

Labor costs are another significant factor. Perc test professionals charge $100 to $250 per hour. The total labor cost averages $300 to $900.

Additional requirements can increase perc test costs. These include permits, certified technicians, lab testing, or cold weather testing. Such extras can add hundreds or thousands to the project budget.

A perc test on a 0.5-acre property typically costs $300 to $500. For a 2-acre property, it may cost $900 to $1,400. Consider these costs when planning your building project.

Failed Perc Test: What Are Your Options?

septic system

A failed perc test can halt building plans. It suggests the land can’t support a conventional septic system. But don’t worry, you still have options.

  1. Alternative septic systems: These work when soil doesn’t meet percolation rate requirements. Options include mound systems, pressure-dosing systems, and advanced treatment systems. They cost more than standard systems. Mound systems can add over $10,000 to the price.
  2. Soil rehabilitation: An engineer might improve soil permeability. They can add sand, gravel, or other materials. This could make the site suitable for a septic system.
  3. Seek a variance: Local health departments may grant exceptions. This could allow a septic system on a failed site. However, approval isn’t guaranteed.
  4. Consider a different property: If other options don’t work, you might need a new site. Look for land that can pass the perc test.

Alternative septic systems need more care and monitoring. They cost more due to their complexity. Some states only accept specific system types.

Perc Testing for Existing Septic Systems

Perc testing isn’t just for new builds. It’s sometimes needed for existing septic systems too. Homeowners should know when their system might need a perc test.

Septic System Replacement

When replacing an old septic system, a new perc test may be needed. This checks if the soil can still handle a new system. It verifies the soil’s ability to drain and filter wastewater properly.

Property Transfer

During property sales, a perc test might be requested. This checks the soil’s suitability for the current septic system. It’s especially important for older systems or those with unknown histories.

System Modifications

Local rules may require a new perc test for major system changes. This ensures the soil can handle an expanded or modified septic system. It’s crucial even if the current system works well.

Perc test rules for existing systems vary by area. Check with local health or building departments before any septic work. This helps avoid surprises and ensures compliance with local regulations.

Best Time of Year for Accurate Perc Test Results

The best time for a perc test is during the driest part of the year. This is usually in late summer or early winter. Accurate results are crucial for assessing long-term soil permeability.

During these times, the water table is typically at its lowest point. This allows the soil to absorb water more easily. Wet soil from recent rainfall can skew test results.

Avoid testing when the soil is frozen or recently disturbed. These conditions can also affect the accuracy of results.

Check with local authorities about the best timing for perc testing in your area. Some regions have specific rules about when these tests can be done.

Testing during the dry season gives the most accurate soil assessment. This knowledge helps you make informed decisions about your building plans. It also ensures your project meets all necessary requirements.

Working with Local Authorities

Collaborating with local authorities is vital for perc tests. This ensures compliance with all regulations in your area. The health or building department can provide guidance.

To work well with local authorities, keep these points in mind:

  • Understand the local perc test regulations, including who can perform the test, the minimum number of test holes required, acceptable percolation rates, and any restrictions on the timing of the test.
  • Determine if a health department representative is required to witness the perc test.
  • Inquire about any necessary permits or approvals needed before conducting the perc test.
  • Provide the local authorities with the perc test results and work with them to determine the appropriate septic system design or alternative solutions if the site fails the test.

Working with authorities ensures correct testing and result acceptance. This approach can save time and prevent future problems. It’s key for building and septic system permits.

Tips for Hiring Professionals for Perc Testing

Hiring the right professional for a perc test is crucial. A reputable expert can ensure reliable results for your project. Let’s explore key factors to consider when selecting a perc test professional.

  1. Verify the professional’s qualifications: Ensure the technician or company performing the test is licensed, certified, or otherwise approved to conduct perc tests in your local jurisdiction.
  2. Look for local experience: Professionals with familiarity in your specific area may be better equipped to navigate local regulations and interpret the results accurately.
  3. Request references and past project examples: Ask for references from previous clients and examples of past perc test projects to gauge the professional’s expertise.
  4. Get multiple cost estimates: Obtain quotes from several professionals to compare the costs and ensure you’re getting a fair price for the perc test.
  5. Understand the testing process: Ask the professional to explain the step-by-step procedure they will follow to conduct the perc test.

These tips will help you choose a qualified perc test professional. With the right expert, you can trust the test results for your project.

Finding the Right Pros for Your Septic System Needs

Are you navigating the complexities of perc testing and septic system installation? Let FindPros help. Our network of vetted professionals can guide you through the process, from conducting the necessary test holes to designing and installing the perfect septic system for your property.

With FindPros, you’ll get competitive quotes from multiple pros, ensuring you find the best fit for your project and budget. Simply answer a few questions about your septic system needs, and we’ll match you with top-rated local experts who can bring your vision to life.

Conclusion

Perc testing is crucial for determining a property’s suitability for a septic system. It’s a key step in the building process. Understanding perc tests helps homeowners and developers make smart choices about building sites.

Working with local authorities is important for proper perc testing. Hiring experienced professionals ensures reliable results. Conducting the test at the right time of year is also crucial.

A failed perc test can be challenging. However, there are ways to overcome this obstacle. You can explore alternative septic systems or find a more suitable property.

Prioritizing perc testing helps avoid future costly issues. It sets your building project up for success. A thorough assessment of the property’s suitability can make a big difference.

By understanding perc testing, you can ensure your project’s success. Take the necessary steps for an accurate property assessment. This approach will greatly benefit your building project.

Frequently Asked Questions (Perc Testing)

A percolation test, also known as a perc test, is an evaluation of how quickly water can percolate or absorb into the soil. This test is crucial because it determines whether the soil can properly support a septic system, which is essential for properties not connected to municipal sewage systems.
A percolation test involves digging one or more test holes, typically 6 to 12 inches in diameter and 2 to 3 feet deep, in the proposed leach field area. The holes are pre-soaked, and then the rate at which the water level drops is measured. This test measures the soil’s water absorption rate, which helps determine the appropriate septic system design.
If a perc test fails, it means the soil on the property is not suitable for a conventional septic system. In such cases, the property owner may need to explore alternative options, such as a mound system or an advanced treatment system, which can be more expensive but may still allow construction on the site. Working with the local county health department is crucial when a perc test fails.
Percolation test results are typically valid for 2 to 5 years, depending on the local requirements. If the property is recently purchased or there have been significant changes to the site conditions, a new perc test may be required, even if the previous one was successful.
In most jurisdictions, a percolation test must be conducted by a licensed professional, such as a septic company or a licensed excavator. These individuals are trained to follow the proper procedures and interpret the results accurately to ensure the septic system will function properly and comply with local regulations.

Paver Installers

Picture Hanging Services Near You

Can’t find what you are looking for?

How It Works

  • Answer a few questions about your home project.
  • Within seconds, get matched with top-rated local pros.
  • Compare quotes and choose the best pro for the job.

Paver Installers In Your Area

Paver Installers: Find the Best for Your Project

Meta Description: Discover top-rated paver installers for your outdoor project. Get expert advice, quality workmanship, and beautiful results. Transform your space with professional paver installation.

Paver Installers

Ready to transform your outdoor space with paver stones? The success of your project depends on finding skilled paver installers. Professionals can turn a standard patio into a work of art.

How do you find the best paver installers? What factors ensure a successful and cost-effective installation? This guide will help you make an informed decision.

We’ll explore paver installation essentials. You’ll learn how to create your dream outdoor oasis.

Key Takeaways

  • Paver installation costs vary. Material choice, project size, and labor expenses influence the final price.
  • Certified paver contractors offer specialized skills for successful installations.
  • Research, including recommendations and online reviews, helps identify the right installer.
  • Asking questions and communicating your vision leads to a satisfying installation experience.
  • Verifying credentials, references, and attention to detail ensures a long-lasting paver project.

Understanding Paver Installation Costs

Paver installation enhances outdoor living spaces. The cost varies based on several factors. Let’s explore what influences the price of your paver project.

Factors Influencing Cost Estimates

Project size, paver materials, and site preparation affect installation costs. High-end pavers like natural stone are pricier than standard concrete ones. Intricate patterns or inlays can increase labor costs.

Design complexity and drainage needs also impact the final price. Consider these factors when planning your project budget.

Average Costs for Paver Installation

Paver installation typically costs $10 to $17 per square foot. Materials range from $4 to $6, while labor averages $6 to $11 per square foot.

A 400-square-foot patio project may cost between $4,000 and $6,800. The final price depends on materials and labor requirements.

Understanding these factors helps you plan your project budget. Research paver installation costs and consult experienced contractors for informed decisions. This ensures your project aligns with your budget and goals.

Importance of Certified and Specialized Paver Contractors

paver contractors

Paver contractors don’t need a specific license to work. Many go further by getting certifications through specialized courses. These certified professionals have fine-tuned their skills, ensuring top-notch landscaping services.

For paver installation projects, seek specialized contractors certified by the Interlocking Concrete Paver Institute (ICPI). These installers have the know-how to deliver flawless results. Their expertise minimizes the risk of costly errors.

Certified paver contractors may charge more, but their skills can save money long-term. They help keep projects within budget, avoiding unexpected costs. These pros have access to specialized tools for high-quality installations.

Paver Installers: How to Hire the Right One

Start by asking neighbors for word-of-mouth recommendations about recent paver projects. Some skilled contractors may not have a strong online presence. Local referrals can help you find hidden gems.

Online Research and Reviews

Use web searches to expand your list of potential paver contractors. Check their names on the Better Business Bureau website. Also, look them up on the Contractor State License Board site.

This research helps ensure contractors have good standing and current insurance. It’s an important step in finding a reliable professional.

  1. Obtain at least three quotes from separate paver installers to compare prices for the project.
  2. Check the qualifications and references of paving contractors, as the workforce quality can affect the quality of the job.
  3. Ask specific questions to paver contractors, such as job duration, free estimates, insurance, design services, references, portfolio of previous work, ICPI certification, and a written contract.

Following these steps helps you hire the right paver installer. Take time to research potential contractors thoroughly. Your effort can make a big difference in the project’s outcome.

Questions to Ask Potential Paver Installers

paver installers

Asking the right questions is key when hiring paver installers. You’ll want to know about licenses, insurance, and project timelines. This helps ensure you’re working with the best team for your project.

Vetting potential installers gives you confidence in their ability. It helps ensure your vision comes to life smoothly. Here are some important questions to ask:

  1. Are you licensed and insured? Reputable paver installers should have proper licenses and liability coverage. This protects both them and your property during installation.
  2. How experienced are you with projects like mine? Look for installers with a proven track record of similar successful projects.
  3. Can you provide references from past clients? Checking references gives insights into work quality, professionalism, and customer service.
  4. Can you give me a detailed written estimate? Get a thorough breakdown of estimated expenses upfront. This helps avoid hidden fees or surprises.
  5. What is your timeline for completing the project? Understanding start and end dates helps you plan and avoid scheduling conflicts.
  6. How will you handle challenges during the project? Look for installers who communicate openly about potential problems and solutions.
  7. Can I see examples of your previous work? Viewing photos or visiting past job sites shows craftsmanship and attention to detail.
  8. What pavers do you recommend, and why? A knowledgeable installer can guide you towards the best options for your needs.

Asking these questions helps you select the right team for your paving project. It ensures a successful and stress-free installation experience. Remember, due diligence goes a long way in achieving great results.

Ensuring a Successful Paver Installation

A successful paver installation starts with careful planning. Choose your contractor wisely and keep communication open throughout the project. This approach helps ensure your vision becomes reality.

Reviewing Credentials and References

Thoroughly vet potential paver installers before hiring. Check online reviews and call provided references. Look up the installer’s information on the Better Business Bureau website.

This research helps you assess the installer’s expertise and work quality. It also gives insight into their level of customer satisfaction.

Clearly Communicating Design Vision

Share your design ideas in detail with the paver installer. Show them inspirational images to help convey your vision. Make sure they understand your expectations fully.

Check in regularly during the project to monitor progress. This allows you to make any needed adjustments to the design.

Focusing on these steps helps protect the value of your property. It ensures a successful paver installation that meets your quality and workmanship standards.

Find the Best Paver Installers with FindPros

Looking for skilled paver installation professionals to transform your outdoor space? FindPros can help. As homeowners, we understand the importance of finding reliable contractors who can maintain your investment and guarantee quality work.

Simply answer a few questions about your paver project, and we’ll match you with top-rated local pros that can serve your needs. Verify their credentials and compare quotes to find the best fit for your home. Get started today and take the first step towards your dream paver patio or walkway.

Conclusion

Paver stones are a durable, classic building material for outdoor spaces. Hiring a qualified professional is crucial for proper paver installation. A skilled contractor has the expertise to transform your space and boost property value.

Follow the steps in this article to find the best paver installers. They can create stunning patios, walkways, or driveways. Skilled contractors address local climate and site conditions effectively.

Quality paver installation is a practical and strategic choice. It pays off in the long run. Careful selection of installers ensures a beautiful, functional outdoor space.

Your new paver installation will add value to your home for years. Take time to research and choose the right professionals for the job.

Frequently Asked Questions (Paver Installers)

When hiring paver contractors, look for ones that are licensed, insured, and certified by the Interlocking Concrete Paver Institute (ICPI). They should have experience with similar paver patio or walkway projects, and be able to provide references and examples of their completed work.
Reputable paver installation companies will have a proven track record of quality workmanship. Review their portfolio, check online reviews, and ask for references from past customers. A good contractor will also offer a warranty on their completed work.
Interlocking concrete pavers can significantly boost your home’s curb appeal and property value. They are durable, low-maintenance, and can be customized to create beautiful paver patios, walkways, and driveways that enhance the look of your outdoor spaces.
Hire a skilled, experienced paver contractor who follows proper installation methods. They should properly prepare the foundation, install the pavers with precision, and ensure proper drainage to prevent issues like cracks or sinking over time. A reputable company will also provide a limited warranty on their completed work.
A professional paver installation company will guide you through the entire process, from initial consultation to the completed project. They will work closely with you to understand your vision, provide design recommendations, obtain necessary permits, and complete the installation in a timely and neat manner. They should also be available to address any questions or concerns you have throughout the project.

Patio Repair

Picture Hanging Services Near You

Can’t find what you are looking for?

How It Works

  • Answer a few questions about your home project.
  • Within seconds, get matched with top-rated local pros.
  • Compare quotes and choose the best pro for the job.

Patio Repair In Your Area

Patio Repair: How to Choose the Right Contractor

Meta Description: Discover expert tips for selecting the right patio repair contractor. Ensure your outdoor space is restored professionally for lasting beauty and functionality.

Patio Repair

Your outdoor living space shows off your home’s appeal and function. Picking the right contractor for patio repair is key. This guide offers expert tips to help you find the perfect patio repair pro.

Take a look at your concrete or outdoor patio. Is it in top shape? Or could it use some expert care? Your answer could lead to a stunning outdoor space makeover.

Key Takeaways

  • Trustworthy patio repair contractors are licensed and insured for legal compliance and protection.
  • Seasoned contractors with proven success can tackle challenges and offer valuable insights.
  • Look for contractors known for quality work, clear talk, and upfront pricing.
  • Check a contractor’s credentials, licenses, insurance, and reviews to gauge their reliability.
  • Evaluate bids based on cost and overall value for the best balance of quality and price.

The Importance of Hiring a Professional Contractor for Patio Repairs

Professional contractors offer many benefits for patio repairs. They have the skills and tools to restore your outdoor space. Hiring a licensed and insured contractor ensures your project is in good hands.

Avoid Costly Mistakes and Ensure Quality Work

Professional contractors help you avoid expensive DIY mistakes. They can spot small signs of damage and fix them quickly. Their expertise guarantees high-quality repairs that meet industry standards.

Peace of Mind with Licensed and Insured Contractors

Licensed and insured contractors follow regulations and industry standards. This provides protection that DIY enthusiasts can’t match. Their insurance coverage shields you from potential liabilities during the project.

Hiring a professional ensures your patio repair is done right the first time. You’ll benefit from their expertise and avoid costly mistakes. This investment will enhance your outdoor space and give you peace of mind.

Contractor Recommendations and Initial Screening

Start your patio repair journey by seeking contractor recommendations. Ask friends, neighbors, and trusted sources like local building inspectors for insights. Their experiences can guide you to reputable professionals.

Online reviews and ratings offer valuable information about contractors. They reveal customer satisfaction levels and work quality. Use this research to make an informed decision.

Ask Friends, Neighbors, and Trusted Sources

  • Talk to friends, neighbors, and trusted sources to get their recommendations on reliable patio repair contractors.
  • Reach out to local building inspectors or hardware store employees for their insights on reputable contractors in your area.
  • Ask about the contractor’s quality of work, customer service, and overall satisfaction with the finished project.

Research Online Reviews and Ratings

  1. Scour online review platforms to research the reputation and customer satisfaction of potential patio repair contractors.
  2. Look for consistent positive reviews, high ratings, and evidence of the contractor’s expertise and professionalism.
  3. Dig deeper into any negative reviews to understand the contractor’s responsiveness and how they handle issues that may arise.

Combine personal referrals and online research to create a shortlist of reputable contractors. This screening process helps find trustworthy professionals. You’ll be more likely to get quality work and great service.

Conducting Thorough Interviews and Background Checks

Hiring a contractor for patio repair requires careful vetting. This process ensures you work with a reliable professional who delivers quality results. During interviews, observe their communication style and how they address your concerns.

Check the contractor’s credentials, including licensing and insurance. Review their certifications and online ratings to gauge their reputation. This vetting gives you insight into their competence and suitability for your project.

  • Assess the contractor’s communication skills and ability to address your concerns
  • Examine their licensing, insurance, and any professional certifications
  • Research online reviews and ratings to evaluate their reputation and past work
  • Conduct a thorough background check to ensure the contractor’s integrity and trustworthiness

Thorough interviews and vetting help you choose the right contractor. This careful selection process increases your chances of a successful patio repair project.

Assessing Contractor Experience and Expertise

patio repair experience

Evaluate potential contractors for your patio repair needs carefully. Look for those with a proven track record in patio repair. They should demonstrate their specializations in this field.

Specializations in Patio Repair and Related Services

Find contractors who focus on patio-specific projects. These pros have the skills to handle your repairs effectively. They should excel in various areas of patio work.

  • Paver patio installation and repair
  • Concrete patio construction and resurfacing
  • Drainage solutions for patio areas
  • Outdoor lighting and landscaping integration
  • Custom patio design and fabrication

Choosing a specialized expert ensures your patio repair meets high standards. This approach leads to long-lasting results for your outdoor space.

Years of Experience and Project Portfolio

A contractor’s years in business indicate their experience level. Look for those with many successful patio repair projects. Ask to see their project portfolio.

This helps you understand the contractor’s skills and work quality. You’ll also see the patio styles and materials they’ve worked with.

Assess the contractor’s experience thoroughly before deciding. This ensures your patio repair is handled by a skilled pro.

Evaluating Contractor Licensing and Insurance

Verify your patio repair contractor’s licensing and insurance coverage. Check if they have the necessary licenses to operate legally in your area. Confirm their liability insurance and worker’s compensation coverage to protect yourself from potential liabilities.

Contractor licensing requirements vary by location. California has over 50 construction license types. These range from Class B General Contractor to specialized Class C licenses for trades like landscaping.

In Mississippi, a contractor’s license is needed for projects over $50,000. Operating without a valid license can lead to fines, legal action, and reputation damage.

Liability insurance protects against claims from damages to third parties. Worker’s compensation insurance is often the most expensive part of a contractor’s premiums. Coverage varies by trade type.

Larger projects may require additional coverages. These include Liability Umbrella policies, Hired & Non-Owned insurance, Leased Equipment Coverage, and Employment Practices coverage.

Ask for proof of the contractor’s licensing and insurance coverage before signing a contract. Review policy details to ensure coverage limits match your project’s scope. This evaluation provides peace of mind and protection throughout your patio repair project.

Understanding Project Scope and Cost Estimates

Clear project scope and cost estimates are vital when hiring a patio repair contractor. A detailed breakdown helps you make smart choices. It ensures you get the best value for your money.

Detailed Breakdowns for Materials and Labor

Ask for detailed cost estimates from each contractor. These should include breakdowns of materials and labor costs. This lets you compare bids accurately and spot areas of better value.

Materials costs should cover items like concrete, pavers, or tiles. Labor costs should include worker numbers, hourly rates, and estimated project time.

Factoring in Additional Costs and Contingencies

  1. Ask contractors to include extra expenses like permit fees and disposal costs.
  2. Inquire about contingencies for unforeseen issues such as hidden damage or unexpected site conditions.
  3. Contingencies help keep the project within budget and avoid surprise costs later on.

Detailed cost estimates help you make informed decisions about your patio repair project. This transparency ensures you stay within budget. It also helps you find a contractor who delivers quality work.

Contract Negotiation and Payment Terms

Negotiate the contract and payment terms carefully when choosing a patio repair contractor. Set up a payment schedule linked to project milestones. This helps you control the project’s progress.

Discuss change order policies and dispute resolution processes. These talks can protect both you and the contractor legally. Clear communication prevents issues later on.

Structured Payment Schedules and Milestones

Patio repair payment schedules often include an initial deposit and progress payments. A final payment is made upon project completion. Many construction firms allow 30 days or more for customers to pay.

Your contract should clearly outline payment terms tied to specific milestones. These might include demolition completion, new patio installation, and final inspection.

Change Order Policies and Dispute Resolution

Change orders can affect project cost and timeline. Have a clear procedure in place for handling these changes. Include dispute resolution clauses, like arbitration, to manage potential conflicts.

Addressing these issues upfront protects your interests. It also helps create a successful working relationship with your contractor.

A well-negotiated contract ensures a smooth patio repair project. It provides legal protection from start to finish. Review and negotiate terms carefully for the best outcome.

Ensuring Clear Communication and Project Management

communication

Clear communication and proper project management are vital for successful patio repair. Set up regular updates with your contractor. Make sure they respond to your questions and align with your expectations.

Reliable contractors have a proven process for every project. They should measure client satisfaction using a 1-to-10 scale. Weekly check-ins are important for communication and task review.

Encourage open feedback throughout the project. The contractor should ask for a punch list at the end. Payment schedules should be tied to work milestones.

Prioritizing clear communication and effective project management ensures a smooth patio repair experience. This approach helps avoid misunderstandings and keeps the project on track.

Maintaining a Safe and Organized Work Site

A reputable patio repair contractor should prioritize a safe work site and an organized work site. They should follow safety protocols and keep the area clean and free of debris. This protects workers and you from potential liabilities.

A well-maintained work site offers many benefits. It reduces accident risks and improves productivity. It also enhances project quality and customer satisfaction.

To achieve a safe and organized work site, contractors should follow these practices:

  1. Establish and enforce safety protocols, including the use of personal protective equipment (PPE) and proper handling of materials.
  2. Maintain a clean and organized work area, with designated storage spaces for tools and materials.
  3. Regularly remove debris, dust, and other hazards to prevent trip and fall accidents.
  4. Minimize disruptions to your daily activities by cordoning off the work site, maintaining clear pathways, and adhering to a well-planned schedule.
  5. Communicate effectively with the homeowner about any potential project disruptions or safety concerns.

By focusing on safety and organization, contractors show their commitment to professionalism. They also ensure your satisfaction with the patio repair project.

Common Patio Repair Issues and Solutions

Outdoor living spaces need regular upkeep to stay beautiful and functional. A skilled contractor can fix various patio problems. They can restore your patio’s structure and appeal by addressing common issues.

Cracks, Sunken Areas, and Uneven Surfaces

Concrete patios can deteriorate due to weather, heavy use, and poor installation. Signs include cracks, holes, discoloration, and uneven surfaces. Contractors may suggest cleaning and resealing the concrete to fix these problems.

Patching cracks and holes or resurfacing the entire patio are other options. Leveling sunken concrete and adding decorative features can improve the patio’s look and function.

Drainage Problems and Water Damage

Good drainage is crucial for a long-lasting patio. Pooling water can cause damage, mold, and further decay. Fixing drainage issues may involve unclogging drains or improving grading.

Adding drainage features might be necessary. Sealing concrete with a quality penetrating sealer protects against water damage during freeze-thaw cycles.

Homeowners can enjoy a functional and attractive patio for years by addressing these issues. The right solutions extend the life of outdoor spaces and enhance their appearance.

Enhancing Curb Appeal and Outdoor Living Spaces

A well-executed patio repair project can boost your home’s curb appeal and functionality. Working with a pro can transform your patio into a beautiful, inviting area. This improves your property’s look and increases its resale value.

Exterior renovations can significantly increase property value. Simple projects like adding flower beds or fresh paint can make a big difference. More extensive projects might include building a new roof or outdoor living space.

It’s crucial to match design choices with your home’s existing architecture. A professional design-build firm can help achieve the best results for exterior renovations.

Potential projects include creating a welcoming entryway or revamping the front window design. Updating architectural details, enhancing the roof, and adding room extensions are also great options.

Outdoor spaces like patios and decks offer functional and appealing extensions to your living area. A design-build firm can provide flexible options to incorporate eye-catching features.

They can maximize available space while enhancing your home’s charm through carefully chosen materials. Investing in patio repairs and exterior renovations can greatly improve your property’s overall appeal.

Finding the Right Pros with FindPros

Maintaining your stone patio, deck boards, or outdoor living area can be a daunting task for many homeowners. From addressing safety hazards like tripping hazards to giving your space a fresh coat of protection, it takes time, effort, and the right know-how. When issues arise, FindPros can match you with the top-rated local professionals to get the job done right, whether it’s repairing a damaged deck or preventing cracking on your patio.

Simply answer a few questions about your home project, and within seconds, you’ll get connected with pros who can provide cost-effective solutions to restore your outdoor area to its former glory. FindPros ensures you find the right professionals that fit your needs and budget, so you can focus on entertaining guests and enjoying your beautiful outdoor space.

Conclusion

Choosing the right patio repair contractor is crucial for your project’s success. It ensures long-term enjoyment of your outdoor space. This guide helps you find a skilled professional who delivers quality work.

Invest in your home’s curb appeal by partnering with the right patio repair contractor. They’ll provide excellent workmanship and attention to detail for a seamless project experience.

Successful patio repair depends on selecting a contractor with proper expertise. Look for service providers with necessary professional credentials. Thorough research and vetting will ensure quality work.

Transform your home improvement project by partnering with the right patio repair specialist. This article guides you in selecting the perfect contractor. Create the beautiful, functional outdoor space you’ve always wanted.

Frequently Asked Questions (Patio Repair)

A concrete patio repair contractor can fix issues like patio cracks, sunken areas, and uneven concrete slabs. They can also address drainage problems and water damage to restore the structural integrity of the patio.
For stone patios or paver patios, repair services can address damaged pavers, uneven surfaces, and issues with the underlying base. Contractors can provide patio sealing services to protect the stone or pavers from wear and tear, UV rays, and other debris.
Hiring a professional patio repair contractor ensures the work is done correctly and safely, preventing costly repairs or safety hazards like tripping hazards down the line. Contractors have the knowledge and tools, like a pressure washer, to properly prepare and maintain the patio. This can give new life to an old patio and create a beautiful outdoor space.
When evaluating cost estimates, homeowners should look for detailed breakdowns of material costs and labor. This allows them to compare the overall value and find a cost-effective solution, without sacrificing quality. Reputable, locally owned contractors can provide high-quality materials and services at a reasonable total cost.
Regular maintenance, such as periodic cleaning and sealing, is crucial to preserving the patio’s appearance and structural integrity. Homeowners can use cost-effective ways like a pressure washer to keep the patio clean and prevent issues like cracking or moss growth. Addressing minor problems quickly can also help avoid larger, more costly repairs in the future.

Patio Furniture Repair

Picture Hanging Services Near You

Can’t find what you are looking for?

How It Works

  • Answer a few questions about your home project.
  • Within seconds, get matched with top-rated local pros.
  • Compare quotes and choose the best pro for the job.

Patio Furniture Repair In Your Area

Need Patio Furniture Repair? Here’s What to Expect

Meta Description: Discover expert patio furniture repair services to revitalize your outdoor living space. Learn about restoration options, materials, and costs for your beloved patio pieces.

Patio Furniture Repair

Your business’s outdoor spaces can leave a lasting impression on guests. Stylish, well-maintained patio furniture invites customers to relax and linger. But what happens when your furniture starts showing its age?

Knowing patio furniture repair options helps keep your outdoor areas inviting. It’s crucial to spot signs that it’s time for repairs or replacement.

Many business owners wonder if repairing patio furniture is worth it. The answer depends on the furniture’s condition and repair costs. Consider these factors against your business goals and budget.

Key Takeaways

  • Patio furniture repair can extend the life of your outdoor furnishings, saving you money in the long run.
  • Identifying common issues like creaking, chipped paint, and worn cushions can help you determine when it’s time for repairs or replacement.
  • Investing in high-quality patio furniture with durable materials like aluminum or teak can provide years of use and minimize the need for frequent replacements.
  • Professional patio furniture repair services can tackle everything from strap replacement to powder coating refinishing, ensuring your outdoor spaces remain inviting and stylish.
  • DIY repair techniques, such as replacing vinyl straps or mesh slings, can be a cost-effective solution for maintaining your patio furniture.

Signs It’s Time to Replace Your Outdoor Furniture

  • Creaking Noises: Creaking wood shows your outdoor furniture is aging. This results from weathering and joint misalignment. If ignored, it can lead to serious structural damage.
  • Chipped Paint and Water Damage: Chipped paint isn’t just an aesthetic issue. It lets moisture seep into the frame. This can cause mold and rust, weakening your furniture.
  • Rust and Corrosion: Rust and corrosion are harmful to outdoor furniture, especially metal pieces. They affect appearance and weaken structure. This puts your safety at risk.
  • Stains and Discoloration: Stubborn stains on frames and upholstery signal the end of furniture life. These issues make your patio look unkempt. Consider replacing if cleaning doesn’t work.
  • Mold and Mildew Growth: Mold on outdoor cushions looks bad and poses health risks. It’s a clear sign to replace affected cushions. You might need to replace the entire set.
  • Worn and Damaged Cushions: Tears, fading, and shape loss in cushions mean replacement is needed. Worn cushions can ruin your patio’s overall look. New cushions can refresh your outdoor space.
  • Outdated Styles: Functionality is key for outdoor furniture, but style matters too. If your patio set looks outdated, consider an upgrade. New furniture can revitalize your outdoor area.

Spotting wear and tear helps decide between repair and replacement. Stay alert to issues. Address problems quickly to keep your patio inviting and comfortable.

Lifespan of Outdoor Furniture Materials

outdoor furniture materials

The quality of materials, frame construction, and environment affect outdoor furniture’s lifespan. Proper maintenance also plays a crucial role. These factors help you choose and care for patio furniture wisely.

Quality and Cost

Cost doesn’t always reflect outdoor furniture’s quality and longevity. High-quality materials like cast aluminum can last 20+ years with proper care. Some cheaper plastic pieces may only last a few years.

Frame Material Durability

Frame material is key in determining outdoor furniture’s lifespan. Cast aluminum and wrought iron can last 20-25 years or more. Well-maintained wooden frames can also last decades. Plastic frames typically last 5-10 years before showing wear.

Environmental Factors

Your area’s climate affects outdoor furniture’s lifespan. Harsh sunlight, heavy rain, or coastal salt air may require more upkeep. Furniture in moderate climates often lasts longer with less maintenance.

Ease of Maintenance

Easy-to-clean furniture can last longer. Pieces with smooth, non-porous surfaces resist stains, mold, and mildew. These features make it simpler to keep furniture in good condition over time.

Consider these factors when selecting and caring for outdoor furniture. This approach ensures years of enjoyment and value from your patio pieces.

Patio Furniture Repair Services

Is your patio furniture looking worn? Professional patio furniture repair services can revive your outdoor space. These services include vinyl strapping replacement, mesh sling replacement, and powder coating refinishing.

Vinyl Strapping Replacement

Vinyl strapping is common on lawn chairs and patio furniture. Over time, these straps can fade, crack, or break. Replacing vinyl strapping is a cost-effective way to refresh your outdoor seating.

Mesh Sling Replacement

Mesh slings offer comfortable, breathable seating for patio furniture. However, they can wear out or become discolored. Sling replacement lets you pick new fabrics to customize your furniture’s look.

Powder Coating Refinishing

Patio furniture frames face harsh weather, leading to fading or rust. Powder coating refinishing protects your furniture from the elements. It gives your pieces a fresh, updated look that lasts.

Repair services are a smart choice for aging or outdated patio furniture. These options can make your outdoor furnishings look great again. Your patio set will be ready to enjoy for many more seasons.

Assessing and Preparing for Repairs

It’s vital to check your outdoor furniture before fixing it. Look for issues and gather the right tools. This ensures a successful repair or refinishing project.

Common Issues to Look For

Check for scratches, nicks, and rust on metal frames. Look for fading, loosening, or tears in vinyl straps and mesh slings. These problems often stem from sunlight and harsh weather.

Fixing issues early can prevent bigger problems later. It can also save you time and money in the long run.

Tools and Supplies Needed

  • Cleaning supplies (mild soap, water, rags, etc.)
  • Sandpaper and steel wool
  • Touch-up paint or stain
  • Replacement parts (straps, slings, hardware)
  • Specialty tools (pliers, wrenches, screwdrivers)

Cleaning and Surface Preparation

Good cleaning and prep are key for successful repairs. Different materials need different cleaning methods. Use mild soap for wood, and dish soap for metal.

After cleaning, sand the surfaces lightly. This helps paint or sealant stick better.

Taking time to check and prep your furniture sets you up for success. You can fix many issues yourself with the right tools. For tougher jobs, seek help from pros.

DIY Repair Techniques

Fixing worn-out patio furniture might seem tough. But with simple DIY methods, you can revive your outdoor pieces. Let’s look at replacing vinyl straps and mesh slings to restore your furniture.

Replacing Vinyl Straps

Vinyl straps can crack over time, affecting comfort and looks. Here’s how to replace them:

  1. Measure the existing strap to ensure you order the correct replacement size.
  2. Carefully remove the old strap, taking note of how it was attached to the frame.
  3. Clean the frame thoroughly to prepare for the new strap.
  4. Align the replacement strap and secure it in place, following the original installation method.
  5. Tighten the strap to ensure a snug and comfortable fit.

Replacing Mesh Slings

Mesh slings on chairs can tear or stretch out. This affects their support and looks. Here’s how to replace them:

  • Measure the existing sling to determine the correct replacement size.
  • Carefully remove the old sling, taking note of how it was attached to the frame.
  • Clean the frame to prepare for the new sling.
  • Align the replacement sling and secure it in place, following the original installation method.
  • Ensure the new sling is taut and provides ample support.

These DIY fixes can help you tackle common patio furniture problems. You’ll enjoy fixing up your outdoor space.

The satisfaction of restoring your furniture is worth the effort. Your patio will look great and be comfy again.

Refinishing and Painting

refinishing patio furniture

Give your tired outdoor furniture a makeover with fresh paint or refinishing. Choose the right paint or stain for the material. Follow proper steps to transform your outdoor pieces into something new and beautiful.

Choosing the Right Paint

For metal furniture, use rust-inhibiting paint made for outdoor use. This protects against corrosion and ensures a lasting finish. For wooden pieces, try outdoor wood stain or sealer.

These products enhance the wood’s natural beauty. They also provide protection from harmful UV rays.

Application Methods

Prepare surfaces well for a smooth, even finish. Clean thoroughly and sand lightly to create texture for paint adhesion. Apply thin, even coats using spraying, brushing, or rolling methods.

This approach prevents drips and creates a professional look. Take care to follow the right steps for each method.

Patience and attention to detail are key for successful refinishing. Follow manufacturer’s instructions carefully. Be prepared to apply multiple coats for best coverage and durability.

With the right approach, you’ll transform your outdoor furniture. You’ll enjoy its fresh look for many years to come.

Maintaining Wooden Outdoor Furniture

Wooden outdoor furniture needs special care to stay beautiful and durable. Regular upkeep helps preserve the furniture and makes it last longer. Let’s look at how to care for your wooden outdoor pieces.

Addressing Splits, Cracks, and Loose Joints

Check your wooden outdoor furniture for signs of wear and tear. Look for splits, cracks, or loose joints that can weaken the furniture. Fix these issues quickly to prevent more damage.

Fill cracks with wood filler or epoxy. Tighten loose joints with wood glue or epoxy. These steps will keep your furniture strong and safe.

Staining and Sealing

Sand the entire surface to remove weathered or discolored areas. Apply an outdoor wood stain or sealer with UV protection and water resistance. Follow the maker’s instructions for best results.

Use a clear sealer over the stain to lock in color. This adds extra protection against the weather. Regular staining and sealing will keep the wood’s natural beauty.

Fixing damage and keeping wood stained and sealed extends your furniture’s life. Regular care helps you enjoy your patio or deck furnishings for years.

Find the Best Patio Pros with FindPros

Searching for reliable patio furniture repair and restoration services? Look no further than FindPros. Simply answer a few quick questions about your project, and we’ll match you with top-rated local professionals who can tackle everything from vinyl strap replacement to complete furniture refinishing.

Our network of vetted brands and service providers ensures you get the best pricing when multiple pros compete for your job. Discover the right pro that fits your style and budget, so you can enjoy a fun, covered patio space with chairs and many types of restored outdoor furniture. Get started with FindPros today.

Conclusion

Your patio furniture needs care to stay inviting and comfortable. Learn about common issues, repairs, and maintenance to keep your outdoor space looking great. Your guests will enjoy a positive experience in your well-maintained patio.

DIY techniques and professional services can address various furniture needs. Regular checks and timely repairs extend your outdoor furniture’s lifespan. They also protect your investment and maintain its appeal.

Hauser’s Patio offers high-quality parts, fabrics, and refinishing services. They focus on customer satisfaction and quality. With their help, your patio furniture will look its best for years to come.

Frequently Asked Questions (Patio Furniture Repair)

Common issues include creaking noises, chipped paint, rust, mold, and worn cushions or sling fabric.
You can measure the existing strap or sling, clean the frame, and then carefully install the new replacement parts.
Many outdoor furniture stores and brands like Hauser’s Patio provide complete restoration services for patio chairs, frames, and fabrics.
You can refinish or paint the furniture to get the exact color and finish you want, or replace the sling fabric with a Sunbrella or other matching material.
Many outdoor furniture stores and specialty retailers carry a wide variety of patio chairs, frames, and fabrics to choose from at different price points.

Parking Lot Paving

Picture Hanging Services Near You

Can’t find what you are looking for?

How It Works

  • Answer a few questions about your home project.
  • Within seconds, get matched with top-rated local pros.
  • Compare quotes and choose the best pro for the job.

Parking Lot Paving In Your Area

Parking Lot Paving: What You Need to Know

Meta Description: Discover the essentials of parking lot paving, from materials to costs. Learn how to choose the right surface for your needs and ensure a durable, attractive parking area.

Parking Lot Paving

Paving your parking lot is a vital decision for business owners and property managers. It affects your property’s look, function, and long-term costs. This guide covers key aspects of parking lot paving.

We’ll explore the paving process, costs, upkeep, and environmental impact. We’ll also help you choose between asphalt and concrete for your project.

Is your current parking lot meeting your business needs? Learn how to invest in a lot that serves your property best.

Key Takeaways

  • Properly constructed parking lots with good drainage systems can prevent standing water issues and damage.
  • Paved parking lots with a solid gravel base can last 20-30 years with proper maintenance.
  • Asphalt is a common material for parking lot construction due to its lower cost and quicker installation times.
  • Parking lot paving costs can range from $2.50 to $5 per square foot, depending on various factors.
  • Routine maintenance, such as pothole repair and sealcoating, is essential for extending the lifespan of a parking lot.

Introduction to Parking Lot Paving

A well-paved parking lot is crucial for businesses and property managers. It boosts property value and creates a great first impression for customers. Careful planning ensures a durable, attractive, and cost-effective solution for your property.

Importance of a Well-Paved Parking Lot

A good parking lot can greatly impact a business’s property value and customer experience. It enhances safety for both pedestrians and vehicles. A well-designed lot ensures proper drainage and accessibility.

Factors to Consider Before Paving

Business owners and property managers should think about several key factors. These include the surface material, existing lot condition, and expected traffic volume.

  • Desired surface material (asphalt or concrete)
  • Condition of the existing lot
  • Expected traffic volume and vehicle types
  • Drainage requirements
  • Maintenance needs
  • Environmental impact

Thoughtful planning leads to a long-lasting, functional parking lot. This enhances property value and improves the overall customer experience. A well-executed project is a smart investment for any business.

Choosing Between Asphalt and Concrete

Asphalt and concrete are the top choices for parking lot paving. Each material has its own pros and cons. Property owners should weigh these factors carefully before making a decision.

Advantages and Disadvantages of Asphalt Parking Lots

Asphalt parking lots cost less to install than concrete ones. They’re quick to set up, ready for use in just two days. However, asphalt needs more upkeep, especially in cold climates.

This material can suffer damage from harsh weather and heavy traffic. Despite these drawbacks, asphalt remains a popular choice for many property owners.

Advantages and Disadvantages of Concrete Parking Lots

Concrete parking lots are tougher and can handle heavier loads. They resist weather changes better, making them ideal for warmer climates. These lots can last over 40 years with minimal maintenance.

However, concrete costs more to install and can be harder to fix. Annual cleaning and joint sealing are usually enough to keep them in good shape.

Your choice between asphalt and concrete depends on your property’s needs. Consider your budget, local climate, and weather conditions. Also, think about durability, maintenance, and environmental impact when picking your paving material.

The Parking Lot Paving Process

Paving a parking lot involves multiple steps. It starts with site prep and ends with final striping. Careful planning ensures a durable and appealing result.

Site preparation is the first step. This may include excavation, grading, and installing a stable base. Proper compaction of the sub-base material is crucial to prevent future stability issues.

Next, the paving material is applied. For asphalt lots, old asphalt is removed to the subgrade layer. This prevents old cracks from showing through the new pavement.

Asphalt is poured and compacted using specialized equipment. This ensures even and consistent application. The equipment ranges from 8-20 feet wide.

For concrete lots, the concrete is poured and smoothed. The final step adds striping and markings. This includes parking stalls, directional arrows, and handicap spaces.

The paving process can take days to weeks. Project size and complexity affect the timeline. Working with experienced contractors ensures the job meets necessary specifications.

The construction timeline typically includes these steps:

  • Site preparation, including excavation, grading, and base installation
  • Asphalt application or concrete pouring, depending on the chosen material
  • Striping and markings to delineate parking spaces, traffic flow, and other essential features

This parking lot paving process creates functional, attractive parking lots. It meets the needs of customers and visitors. Property owners and contractors can achieve long-lasting results.

Site Preparation and Base Installation

Site Preparation

Proper site prep and base installation are vital for parking lot paving success. First, evaluate soil conditions and ensure proper grading for drainage. Create a slight slope of 1-2% to direct water runoff away from the lot.

Importance of Proper Grading and Drainage

A stable base of compacted gravel or crushed stone provides a solid foundation. The base layer’s thickness varies based on traffic volume and soil conditions. Proper compaction prevents settling and preserves pavement integrity.

Poor site prep can cause cracking, sinking, or uneven surfaces. Drainage issues may lead to water pooling, damaging the asphalt or concrete. Good preparation reduces repair costs and extends pavement life.

  • Clearing the site of existing structures, vegetation, and debris
  • Excavating the area to the desired depth
  • Grading and leveling the site to ensure proper drainage
  • Compacting the soil to create a stable foundation
  • Installing the base layer of compacted gravel or crushed stone

Focus on proper site prep and base installation for durable parking lots. This approach ensures surfaces that withstand heavy traffic and environmental conditions.

Asphalt Mix Design and Application

Creating a durable parking lot requires careful asphalt mix design and application. The mix combines aggregates like crushed stone with a bituminous binder. Its composition is tailored to expected traffic volume and vehicle weights.

Heavier traffic needs a thicker asphalt layer and stronger mix. Proper application and compaction are vital. This ensures a smooth surface and prevents premature cracking or rutting.

Considerations for Traffic Loading and Vehicle Weight

The asphalt mix design must consider expected traffic loading and vehicle weights. Important factors include pavement thickness, aggregate composition, and binder type.

These elements ensure the asphalt can handle heavy equipment and commercial vehicles. Proper compaction during application is crucial to prevent future issues.

Parking Lot Striping and Markings

After paving cures, striping and markings are crucial for parking lots. These elements guide traffic, mark spaces, and ensure safety. They’re vital for directing cars and protecting pedestrians.

Parking lot striping includes lines for spaces, arrows, and crosswalks. Handicap spots must be clearly marked to meet ADA rules. The paint should be visible, tough, and weather-resistant.

Good striping makes parking lots work better and look nicer. It helps drivers and walkers move safely. Striping costs about $0.04 per square foot. Special marks like arrows cost extra.

Different paints are used: oil-based, water-based, and thermoplastic. Painting time depends on lot size and paint drying. Most paints dry in an hour and cure in four.

State rules require businesses to follow parking guidelines. This ensures access for all and avoids fines. Following rules keeps parking safe and open to everyone.

Pro stripers use laser guides and special tools. These help make precise, professional-looking markings. Weather can affect how long paint takes to dry.

  • Importance of clear parking lot markings for pedestrian safety and ADA compliance
  • Types of parking lot striping including lines, arrows, and crosswalks
  • Factors to consider when selecting paint types and application
  • Regulations and guidelines for parking lot striping and traffic flow
  • Use of advanced technologies by professional pavement stripers for precise and durable parking lot markings

Parking Lot Paving Costs

Paving a parking lot’s cost varies based on size, material, and site conditions. Asphalt costs $2.50 to $4.00 per square foot. Concrete ranges from $6.00 to $8.00 per square foot.

These prices cover materials, labor, and equipment. Long-term maintenance and repair costs should be considered too. Asphalt may need more frequent upkeep than concrete.

The choice between asphalt and concrete depends on budget and specific needs. Consider expected lifespan and maintenance requirements when deciding.

Cost Breakdown for Asphalt vs. Concrete

Asphalt costs include site prep, base installation, materials, paving, and additional features. Concrete parking lots cost $10 to $20 per square foot for materials and labor.

Each parking space may cost $405 to $1,134. Repaving an asphalt lot every 15-20 years costs $1.50 to $3.50 per square foot.

Maintenance and Longevity

Parking Lot Maintenance

Regular upkeep is crucial for your parking lot’s durability and appearance. It extends the lifespan of your investment and helps avoid costly repaving projects.

Routine Maintenance Practices

Asphalt parking lots need sealcoating every two to three years. Prompt crack filling, pothole repair, and regular sweeping are also important. These steps can double your asphalt surface’s lifespan from 5 to 10 years or more.

Concrete parking lots require crack repairs and addressing spalling or chipping. Maintaining the drainage system is also essential. These tasks can extend your concrete parking lot’s life to 50 years.

Extending the Lifespan of Your Parking Lot

With proper care, asphalt parking lots can last 20 to 30 years. Concrete parking lots may endure up to 50 years. Traffic patterns, weather, and initial construction quality affect longevity.

Regular parking lot maintenance includes sealcoating, crack filling, and pothole repair. Sweeping and drainage maintenance are also important. These tasks maximize lifespan and durability, leading to significant cost savings over time.

Environmental Impact of Parking Lot Paving

Parking lots are essential for many properties, but their construction affects the environment. Traditional paving materials contribute to high greenhouse gas emissions. These surfaces can also disrupt natural stormwater drainage, causing increased runoff and water pollution.

Some property owners are choosing sustainable solutions like permeable pavers. These allow water to infiltrate the ground naturally. By selecting materials that minimize carbon footprint, owners can reduce their project’s environmental impact.

USDA Forest Service research shows shaded parking lots can lower surface temperatures significantly. Trees in parking lots offer many benefits. These include better stormwater management and reduced greenhouse gas emissions.

As parking lot demand grows, sustainability must be a priority. Permeable pavers, strategic tree placement, and green infrastructure can help. These methods reduce environmental impact and create a more sustainable built environment.

  • Permeable pavers allow water to infiltrate the ground naturally, reducing stormwater runoff and potential water pollution.
  • Strategically placed trees in parking lots can help reduce the urban heat island effect, improve air quality, and enhance the overall aesthetic appeal of the environment.
  • Sustainable materials and construction techniques, such as recycled asphalt or low-carbon concrete, can help minimize the carbon footprint of parking lot paving projects.

Parking Lot Lighting and Safety

Effective parking lot lighting is crucial for safety and security. It improves visibility, deters crime, and guides traffic flow. LED lights are now the top choice for parking lots.

LEDs offer energy efficiency, long life, and bright, directional lighting. When planning lighting, consider lot size, layout, and local regulations. Good lighting enhances user experience and reduces accident risks.

The National Safety Council reports 50,000+ crashes in parking areas yearly. These result in 500 deaths and over 60,000 injuries. Proper lighting is key to preventing crimes and accidents.

LED lights last longer and use less energy. A color temperature of 4000K-5000K improves visibility without glare. This boosts safety for both pedestrians and vehicles.

Other safety measures are also important. Consider security patrols during night hours. Use access control like key cards for private lots.

Provide required handicap-accessible spaces. Implement smart parking systems to guide drivers. These steps create a safer parking experience.

Prioritizing lighting and safety measures creates a secure environment. This enhances user experience and reduces risks. Parking lot owners can make a big difference with these steps.

Hiring a Professional Parking Lot Paving Contractor

Partnering with a reputable contractor is vital for a successful parking lot paving project. These experts have the skills to deliver top-notch work and great service.

When choosing professional paving contractors, keep these factors in mind:

  1. Qualifications and Experience: Seek contractors with a solid history of successful projects. Check their licenses, insurance, and industry experience.
  2. References and Past Projects: Request client references and review their completed work. This shows their project management skills and customer satisfaction levels.
  3. Attention to Detail: A skilled paving contractor will understand your needs and create a detailed plan for your project.

Working with an experienced professional paving contractor ensures your parking lot is built to last. This investment can boost your property’s appeal and attract more customers.

Don’t risk your parking lot’s quality with DIY or inexperienced help. Choose a professional paving contractor for a durable result that serves you well.

FindPros: The Easy Way to Find Reliable Paving Contractors

As a property manager or business owner, you know the importance of a well-maintained parking lot. Whether you need to pave a new lot or revamp an existing one, FindPros can connect you with the best local paving contractors for the job. Unlike traditional search methods, our platform allows you to compare quotes from multiple pros, ensuring you get the best pricing and find the right fit for your unique needs.

Simply answer a few quick questions about your asphalt pavement or concrete paving project, and we’ll match you with top-rated experts who can handle everything from site preparation to pouring asphalt layers and ensuring ADA compliance. Say goodbye to the hassle of researching paving services and hello to a streamlined, low-maintenance solution that will have your parking lot looking its best for years to come.

Conclusion

Paving a parking lot is a big investment for property owners. It’s crucial to understand key factors for a successful, long-lasting outcome. This includes choosing between asphalt and concrete, proper site preparation, and ongoing maintenance.

Careful consideration of materials, costs, safety, and environmental impact is essential. These decisions will serve property needs for years. Working with an experienced paving contractor ensures high-quality, durable, and cost-effective results.

Asphalt offers durability, while concrete provides aesthetic appeal. Efficient resurfacing can minimize downtime. A strategic approach to parking lot paving is key.

Prioritizing proper grading, maintenance planning, and regulatory compliance is crucial. This creates a safe, sustainable, and appealing parking facility. It will meet the needs of both businesses and customers.

Frequently Asked Questions (Parking Lot Paving)

Asphalt parking lots are generally less expensive to install and faster to construct, but require more frequent maintenance like sealcoating. Concrete parking lots are more durable, last longer, and need less upkeep, but have a higher initial cost.
Consider factors like your budget, local climate, expected traffic volume, and long-term maintenance needs. Asphalt may be better for smaller lots or areas with colder temperatures, while concrete is ideal for heavy commercial use and warmer climates.
The key steps include site preparation (excavation, grading, and installing a stable base), applying the asphalt or concrete material, and adding the necessary striping and markings. Proper construction techniques are crucial for a durable, functional parking lot.
Investing in regular maintenance like crack sealing and sealcoating can extend the lifespan of an asphalt parking lot and reduce the need for costly repaving. Choosing the right materials upfront and working with an experienced parking lot contractor can also help manage costs.
Sustainable options like permeable pavers and strategically placed trees can help reduce stormwater runoff, the urban heat island effect, and the overall environmental impact of the parking lot. Selecting materials with a lower carbon footprint is also important.

Paint Stripping

Picture Hanging Services Near You

Can’t find what you are looking for?

How It Works

  • Answer a few questions about your home project.
  • Within seconds, get matched with top-rated local pros.
  • Compare quotes and choose the best pro for the job.

Paint Stripping In Your Area

Paint Stripping Services: What to Expect and How to Find a Reliable Contractor

Meta Description: Discover professional paint stripping services to revitalize your surfaces. Learn what to expect and how to find a reliable contractor for your paint removal project.

Paint Stripping

Is old, chipped paint ruining your wood furniture or home’s exterior? Professional paint stripping services might be your answer. This guide explores paint removal benefits and techniques to revitalize your surfaces.

We’ll cover the “dip and strip” process and address common challenges. Learn about preventing wood damage and removing stubborn stains. Discover which materials work best for paint stripping and which to avoid.

Get insights into the refinishing process and popular items for transformation. This guide will help you choose between DIY and professional services. Find the best paint stripping contractor for your project.

Key Takeaways

  • Professional paint stripping services can effectively remove old, chipped, or damaged paint from a variety of surfaces.
  • The “dip and strip” process is a popular technique for stripping wood furniture, doors, and other items.
  • Certain materials, like solid wood, are better suited for paint stripping than others.
  • Hiring a professional is recommended when dealing with lead paint or for multi-story homes to ensure safety and compliance.
  • Evaluating the pros and cons of DIY vs. professional paint stripping can help you choose the best option for your needs.

Introduction to Paint Stripping Services

Paint stripping removes old or unwanted paint from surfaces. It prepares items for refinishing or restoration. Professional services offer an efficient way to revitalize furniture, doors, and metal items.

What is Paint Stripping?

Paint stripping uses specialized techniques to remove old paint layers. It’s often needed before refinishing or restoring surfaces. Professionals use equipment to safely strip paint from various materials.

Benefits of Professional Paint Stripping

Hiring a professional paint stripper offers several advantages. They have specialized equipment for efficient paint removal. Experts handle chemicals safely, ensuring a secure work environment.

  • Access to specialized equipment and techniques for efficient and effective paint removal
  • Expertise in handling chemicals safely, ensuring a safe work environment
  • Ability to tackle large or difficult projects that would be challenging for a DIY approach
  • Uncovering the natural beauty of the underlying wood or metal surfaces
  • Creating a fresh, updated look for your refinished items

What Is “Dip and Strip”?

“Dip and strip” is a powerful paint stripping method. It uses a chemical bath to remove old paint and varnish. This technique prepares surfaces for refinishing and restoration.

The Dip and Strip Process

The dip and strip method follows specific steps for thorough paint removal:

  1. The item is carefully submerged in the chemical bath, allowing the solvent to penetrate and dissolve the existing coatings.
  2. The item is left in the chemical bath for a specified duration, depending on the complexity and thickness of the existing finishes.
  3. Once the desired level of stripping is achieved, the item is removed from the bath and thoroughly cleaned to remove any remaining residue.
  4. After the cleaning process, the item is ready for any necessary repairs, sanding, or refinishing work.

This method works well on items with many paint layers. It’s great for removing stubborn coatings that are hard to scrape off.

The chemical bath ensures consistent paint removal. It prepares the surface for restoration or refinishing work.

Items You Can Dip and Strip

Dip and strip services can refresh many wood and metal items. They can make old, worn pieces look new again. Common wood items include doors, gates, mantels, and furniture.

For metal, popular choices are wrought iron, cabinets, and radiators. Car parts like fenders and bumpers can also be dipped and stripped.

Wood Items for Dip and Strip

  • Doors
  • Gates
  • Wood mantels
  • Furniture

Metal Items for Dip and Strip

  1. Wrought iron
  2. Metal cabinets
  3. Cast iron radiators
  4. Automotive parts (fenders, bumpers)

Dip stripping removes old paint, varnish, and rust from various materials. This prepares items for refinishing and restoration. However, some items may not be suitable for this process.

Particle board and veneered furniture might fall apart during dip stripping. It’s best to avoid these materials.

Items Not Suitable for Dip and Strip

dip and strip

Professional dip and strip services can handle various wood and metal items. However, some materials aren’t suitable for this process. Particle board, plywood, and veneered furniture can fall apart during dip stripping.

Furniture made from pressed cardboard or other pressed wood products is also unsuitable. The chemical bath can compromise the integrity of these materials.

It’s crucial to have professionals inspect your item before dip stripping. They’ll ensure it can withstand the process without damage.

  • Particle board furniture
  • Plywood furniture
  • Veneered furniture
  • Pressed cardboard furniture
  • Pressed wood products

Companies may suggest sanding as an alternative for unsuitable furniture. Customers must bring items in for assessment. Pictures alone can’t determine if an item is compatible with stripping.

When asking about stripping services, take photos of your furniture. Provide information about the materials used. This helps professionals decide the best refinishing method for your item.

Preparing Items for Paint Stripping

To prepare items for professional dip stripping, remove all removable parts. This includes drawers and doors. Take detailed photos from various angles for the paint stripping service.

Inspect the item’s materials carefully. Some composite woods may not work with dip stripping. Bring the piece in person for a professional assessment.

Proper preparation ensures a successful paint stripping experience. It saves time and money. You’ll also get better results that meet your expectations.

Do Certain Woods Strip Better Than Others?

Professional paint stripping results vary depending on the wood type. Older, solid wood pieces typically strip better than newer, composite materials. Very old wood may need extra care during the stripping process.

Wood age, condition, and construction affect chemical stripping outcomes. Experts assess each piece individually for safe and effective paint removal.

Not all materials can be dip stripped. Particle board and some veneered furniture fall apart during the process. Only solid wood items are suitable for dip stripping.

In-person evaluation by experts ensures the best stripping techniques. This is especially important for older pieces that may pose unique restoration challenges.

Challenges in Paint Stripping

Professional paint stripping services face many challenges in their projects. Ensuring delicate wood items stay intact during stripping is a primary concern. Experts use special techniques to safely remove old paint without damaging the wood.

Removing stubborn stains from antique wood requires skill and expertise. Stripping heavy rust from metal surfaces demands specialized knowledge. Managing client expectations is vital across all paint stripping projects.

  • Preventing Wood from Falling Apart: Older, fragile wood pieces need careful handling during paint stripping. Professionals use special techniques to protect the wood’s structure. This ensures the item remains intact throughout the process.
  • Removing Old Stains from Wood: Stubborn stains on antique wood can be tough to remove. Experts assess the wood’s condition before choosing the right methods. They select products that effectively remove stains without causing damage.
  • Stripping Rusty Metal: Removing heavy rust from metal surfaces requires special skills. Experts use the right techniques and tools for this task. Their goal is to restore the metal to a smooth, uniform finish.
  • Managing Client Expectations: Clear communication is key in paint stripping projects. Professionals set realistic timelines and explain the process thoroughly. They aim to deliver high-quality results that meet customer needs.

Popular Items for Paint Stripping

Professional paint stripping services handle various wood and metal items. Vintage cast iron radiators are a favorite among homeowners and restoration fans. These classic fixtures can be beautifully restored to their original luster.

Stripping Radiators

The dip and strip process works best for radiators. It can reach all the intricate spots that other methods might miss. This technique is great for removing layers of old paint or rust.

Reviving antique radiators is a common request for paint stripping companies. It helps homeowners keep the charm of their vintage homes. Experts can make these fixtures shine like new again.

The dip and strip process works on all types of radiators. It can reveal the true beauty of grand, ornate cast iron models. Even sleek, modern versions can benefit from this restoration technique.

Pros and Cons of Paint Stripping

Paint stripping can be done yourself or by professionals. Both methods have their advantages and disadvantages. Let’s explore these to help you make the best choice.

Professional paint strippers have specialized equipment and techniques. They can handle complex items and deliver great results. These experts also know how to safely manage hazardous materials like lead-based paints.

However, professional services often cost more than doing it yourself. DIY paint stripping can save you money. You can use chemical strippers or manual methods available in stores.

But DIY stripping requires more work and skill. It may be harder to get good results on tricky surfaces. The choice depends on the item’s value and your desired outcome.

Consider your resources and the project’s complexity. Weighing these factors will help you find the best solution for your needs.

DIY Paint Stripping vs. Professional Services

Paint stripping projects offer two choices: DIY or professional services. DIY can be cost-effective but demands time, effort, and skill. Professional services provide specialized equipment and techniques for superior results.

Professional paint strippers bring expertise to the table. They handle hazardous materials safely and use efficient methods. This knowledge is crucial for valuable or delicate items.

Professional services may cost more upfront. However, their efficiency and safety precautions make them a worthwhile investment. This is especially true for complex projects.

DIY paint stripping can be budget-friendly. But it’s time-consuming and potentially dangerous without proper training. It’s important to weigh the pros and cons of each approach.

Consider project size, item value, and your skill level. Think about your access to safety gear too. These factors will help you make an informed decision.

Your specific needs and budget guide the choice between DIY and professional services. DIY can work for some projects. But professional expertise may be invaluable for complex or high-stakes jobs.

Tips for Hiring the Best Paint Stripping Professionals

paint stripping professionals

Restoring antique furniture or historic elements requires skilled paint stripping professionals. These experts can safely remove old paint layers, revealing the beauty underneath. Choosing the right company is crucial for successful restoration.

Verify the qualifications of any paint stripping company you’re considering. Look for a properly licensed and insured team with experience in various restoration projects. Good communication is essential for a reliable provider.

  1. Check the company’s qualifications, including licenses and insurance coverage.
  2. Ensure they have a track record of excellent communication and customer service.
  3. Review references and online reviews to gauge the quality of their work.
  4. Obtain a detailed, written contract that outlines the scope of work, timeline, and warranty information.

Take time to thoroughly vet potential paint stripping contractors. This helps you find a trustworthy partner for your restoration project. Hiring qualified professionals ensures your valuable items are in good hands.

Need Help from FindPros for Your Paint Stripping Project?

If you’re tackling a paint stripping project, consider enlisting the help of FindPros. Our service connects you with top-rated local professionals who can provide efficient and reliable paint removal services. Simply answer a few questions about your home project, and we’ll match you with pros who can safely use chemical paint strippers, remove stubborn layers of paint, and deliver the final result you desire.

FindPros ensures you get the best pricing by having multiple pros compete for your job, and you can choose the one you feel most comfortable working with. Take the guesswork out of your paint stripping project – let FindPros handle the heavy lifting and find the perfect pro for the job.

Conclusion

Professional paint stripping services offer a valuable solution for reviving surfaces. They safely remove old, damaged paint and coatings from wood, metal, and other materials. These experts have the tools to uncover the natural beauty of items.

DIY paint stripping can be budget-friendly. However, hiring professionals provides superior results and safer handling of hazardous materials. They also offer efficient workflows for your restoration projects.

Understanding the benefits of paint stripping companies helps in making informed decisions. The right professional partner can make your refinished piece look better than new. Prioritize safety, sustainability, and aesthetics when choosing paint stripping services.

The choice between professional services and DIY depends on your needs and skills. Consider the pros and cons carefully. This will help you breathe new life into cherished items through restoration.

Frequently Asked Questions (Paint Stripping)

Chemical paint strippers are effective at removing all the paint from surfaces. They can dissolve and lift off even stubborn, multiple layers of paint. This allows you to start fresh and apply a new paint job.
Always follow the product instructions carefully. Apply the stripper in thin, even coats using a brush or rag. Let it sit for the recommended time, then use a putty knife or steel wool to remove the softened paint. Wear gloves and work in a well-ventilated area.
If the paint is proving stubborn, apply more of the chemical stripper and let it sit a bit longer. You may need to use a heat gun or steam heat to help loosen the paint. Avoid excessive scraping, as this can damage the surface.
Once you’ve removed all the paint, thoroughly clean the surface. Sand it lightly to rough up the wood or metal, then wipe away any dust or debris. This will help the new paint or finish adhere properly.
Always wear gloves and work in a well-ventilated area when using chemical strippers. Avoid skin contact and inhalation of fumes. Dispose of any waste properly. Cover surrounding surfaces with plastic to contain the mess. Take your time and don’t rush the process.

Packing & Unpacking Services

Picture Hanging Services Near You

Can’t find what you are looking for?

How It Works

  • Answer a few questions about your home project.
  • Within seconds, get matched with top-rated local pros.
  • Compare quotes and choose the best pro for the job.

Packing & Unpacking Services In Your Area

Why Choose Professional Packing Unpacking Services

Meta Description: Discover how professional packing unpacking services can streamline your move, protect your belongings, and save you time and stress. Learn more about our expert solutions.

Packing and Unpacking Services

Moving to a new home can be overwhelming. But there’s a way to make it easier. Professional packing and unpacking services can reduce stress and physical strain during your move.

Expert packers can handle wrapping, labeling, and loading your belongings. This frees up your time for planning your new home’s layout or exploring your future neighborhood.

The unpacking service will place your items exactly where you want them. This saves you from the tedious task of unpacking numerous boxes.

Key Takeaways

  • Professional packing and unpacking services can save you valuable time and physical labor during a move.
  • Experienced movers have the right equipment and techniques to ensure your belongings are handled with care.
  • Packing services include room-by-room organization, fragile item handling, and inventory management.
  • Unpacking services involve unpacking boxes, furniture assembly, and post-move cleanup for a hassle-free experience.
  • Hiring professional packers and movers can sometimes be more cost-effective than doing it yourself.

Time and Stress Savings

Moving to a new home can be overwhelming and exhausting. Packing, coordinating, and managing the chaos often leads to stress and anxiety. Packing and unpacking services can ease this burden, letting you focus on crucial tasks.

Efficient Process

Professional packers can pack your belongings much faster than you could. They use expert packing techniques to ensure space-efficient and protective packing. This efficiency saves you time and reduces moving chaos.

Their skills also lessen the burden of moving. They handle everything from heavy lifting to furniture assembly and electronics packing.

Reduced Chaos and Burden

Moving is often as stressful as major life changes like divorce or job loss. Professional packing services can significantly reduce this stress and anxiety.

By outsourcing the packing process, you can focus on settling into your new home. This allows for a smoother transition for you and your family.

Expertise and Experience

professional packing services

Professional movers bring unmatched expertise to packing and unpacking. Their skills ensure your belongings are handled with care and efficiency. They protect even the most delicate items during moves.

Trained Professionals

Dearman Moving and Storage’s team consists of experienced, background-checked packers. They’ve trained extensively in best practices for packing various items. Your possessions will be packed securely and transported safely.

Proper Handling of Belongings

Professional movers handle your belongings with utmost care. They use specialized materials like heavy-duty tape and bubble wrap. These techniques minimize breakage risk during packing and unpacking.

Experienced movers provide peace of mind for your relocation. They take care of the heavy lifting and meticulous packing. This allows you to focus on other important aspects of your move.

Professional Packing and Unpacking Services

Professional packing and unpacking services offer care and efficiency. Experienced movers provide all necessary packing materials. They ensure your belongings are protected during the packing process and move.

Materials Provided

The professional packers bring a full set of packing supplies. These include:

  • Heavy-duty tape
  • Bubble wrap
  • Styrofoam wraps
  • Blankets
  • Boxes in different sizes

Room Organization

During unpacking, movers label each box based on its original room. This helps keep your new home organized. You can quickly find your belongings in the right room.

Choosing a professional moving company lets you focus on settling in. The professionals handle the physical work and logistics. This saves you time and reduces stress on moving day.

Cost-Effectiveness

packing and unpacking services

Hiring packing and unpacking services might seem costly at first. But it can save you money in the long run. Hidden costs of moving yourself can add up quickly.

Professional movers offer competitive prices and provide all necessary supplies. They use expert techniques to protect your belongings. This minimizes the risk of damage to fragile items and artwork.

Outsourcing packing can be a smart choice for many people. It’s helpful for those with limited time or physical abilities. It’s also great for those moving valuable items.

By hiring professionals, you can focus on other important aspects of your move. This saves you precious time and energy during a busy period.

Customizable Options

Packing and unpacking services aren’t one-size-fits-all. United, America’s #1 Mover®, offers tailored options for your moving needs. Choose from partial packing services or full-service packing and unpacking solutions.

Partial or Full Packing: Flexibility for Every Budget

Partial packing services can save you money on moving costs. You pack what you’re comfortable with, while professional packers handle the rest. This lets you focus on important tasks while experts ensure proper handling of your belongings.

Specialty Item Handling: Protecting Your Most Valuable Possessions

For valuable artwork, antiques, or fragile items, custom crating services are available. These services provide extra care during the packing process and move.

Step-by-step tutorials and expert helpful advice teach you packing techniques to keep valuables safe. Professional movers offer customized solutions for a stress-free move.

Move Coordination and Support

Moving can be overwhelming, but a personal move coordinator can make it easier. These professionals guide you through the entire relocation process. They provide packing and unpacking services and handle your belongings with care.

Personal Move Coordinator

A personal move coordinator is your main contact during the move. They keep you informed and in control throughout the process. They’ll work with you to understand your needs and create a custom plan.

Your coordinator will oversee the professional packers and movers. Their expertise can reduce the stress often linked with moving. This allows you to focus on other important aspects of your transition.

They’ll help create an inventory list and ensure smooth unpacking in your new home. With their guidance, you can enjoy a well-organized move. This leaves you free to settle into your new surroundings.

A professional moving company offers complete packing and unpacking services. With a dedicated coordinator, you can expect a stress-free relocation. This allows you to focus on the exciting new chapter ahead.

Valuation and Damage Protection

Proper valuation and damage protection are crucial when using professional packing services. Reputable movers prioritize safeguarding your valuables during packing and moving. They offer various protection options for your belongings.

Standard liability coverage values items at 60 cents per pound. Full replacement value protection (FRVP) offers $6 per pound for covered items. For high-value items, a calculated rate is determined based on their assigned value.

Choose your valuation level and deductibles before loading begins. The cost is added to your overall moving fees. FRVP policy covers repairs or replacements at the declared value, minus deductibles.

Remember, items you pack yourself aren’t covered under the valuation policy. Professional packers use techniques to protect artwork, electronics, and other valuable possessions. Their expertise ensures careful handling during packing and unpacking.

Selecting a mover with comprehensive protection gives you peace of mind. This allows you to focus on other important aspects of your move. Choose wisely for a worry-free moving experience.

Peace of Mind and Safety

Reputable professional moving companies handle your move with care and attention to detail. Professional movers safely transport your belongings using proper equipment and techniques. This lets you focus on exciting aspects of your move instead of stress and physical labor.

Packing and unpacking services ensure the safety of your belongings throughout the moving process. Experienced movers handle fragile items like valuable artwork, glass tabletops, and large mirrors with great care. This minimizes damage risks during transit.

Professional packers use necessary packing supplies and techniques to secure your valuable items. Trusting a reputable moving company gives you peace of mind about your belongings’ safety. You can focus on other important things during this transition.

  • Professional movers are trained to handle your belongings with care
  • Proper equipment and techniques are used to prevent damage to your valuables
  • Experienced packers know how to safely pack and transport fragile items
  • You can focus on the exciting aspects of your move rather than the stress and physical labor

Choosing a professional moving company with background-checked and experienced movers ensures a seamless moving experience. You can start your new journey confidently, knowing your belongings are in capable hands.

Find the Right Pros with FindPros

Simplify your move with FindPros. After deciding on professional packing and unpacking services, let us help you find the right local pros for the job. Just answer a few questions about your home project, storage needs, and moving requirements. We’ll quickly match you with top-rated local professionals who can assist with the packing phase, full service moving, unpacking process, and more.

Compared to doing it yourself, FindPros saves you a significant amount of time so you can focus on the more important things like setting up your new floor plan and sound system. Get the best pricing when multiple pros compete for your business and find the pros you get along with best.

Conclusion

Professional packing and unpacking services can make your move easier and more efficient. They save time, reduce stress, and ensure proper handling of your belongings. A professional team provides a seamless experience, letting you focus on the exciting parts of relocating.

These services can save up to 50% of typical packing and unpacking time. They also reduce stress levels by about 60%. Over 90% of clients report a stress-free moving experience. The overall satisfaction rate is around 80%.

Trained professionals use high-quality packing materials and handle your belongings with care. They can make your next move successful. Consider the benefits and choose a reputable provider for a smooth transition.

Frequently Asked Questions (Packing & Unpacking Services)

The main benefits are time and stress savings, efficient packing process, reduced chaos, and expertise in handling belongings.
Many moving companies offer tutorials and tips on proper packing techniques to help you pack fragile or valuable items safely.
Full packing services include packing all your belongings, labeling boxes by room, and unpacking everything in your new location.
Professional unpacking services will place your items exactly where you want them in your new home, saving you the tedious task of unpacking numerous boxes.
Use high-quality packing materials like bubble wrap, packing paper, and sturdy boxes. Label boxes by the appropriate room to make unpacking easier.