Patio Installers

Patio Installers Near You

Can’t find what you are looking for?

How It Works

  • Answer a few questions about your home project.
  • Within seconds, get matched with top-rated local pros.
  • Compare quotes and choose the best pro for the job.

Patio Installers In Your Area

Hiring Patio Installers: Tips for Finding the Best Fit

Meta Description: Discover expert tips for hiring the best patio installers. Learn how to evaluate experience, compare quotes, and ensure quality craftsmanship for your outdoor space project.

Patio Installers

A stunning patio can transform your outdoor living space. The key is finding the right patio installers for your project. Expert professionals can turn your patio dreams into reality.

What makes a patio installation truly exceptional? It’s the skill and commitment of the team you choose. Their expertise can make all the difference in your outdoor space.

Key Takeaways

  • Belgard Master Craftsman certification signifies the highest level of expertise and quality in paver patio projects.
  • Thorough research, including online searches, referrals, and reviews, is crucial for selecting a reliable paver patio contractor.
  • Detailed contracts should include the scope of work, timelines, payment schedules, and warranties.
  • Understanding local permits and regulations is essential for successful project completion.
  • Maintaining open communication and building a positive relationship with your contractor is key to a smooth project.

Understanding Your Outdoor Living Project Needs

Assess your outdoor living project’s scope and requirements before finding patio installers. Define the project’s scale and your design preferences. This helps you find the right contractor for your patio dreams.

Assessing the Scope and Requirements

Evaluate the size and layout of the area you want to transform. Consider available space, existing features, and specific needs like fire pits. This assessment helps determine materials, installation process, and project complexity.

Defining Your Vision and Preferences

  • Decide on the overall aesthetic you’d like to achieve, whether it’s a modern, natural, or traditional look.
  • Explore the various materials available, such as patio pavers, natural stone, or concrete, and determine which option best suits your preferences and budget.
  • Envision the functionality of the space, such as incorporating a designated dining area, lounge seating, or a fire pit.
  • Consider the level of maintenance you’re willing to commit to, as some patio materials require more upkeep than others.

Assessing your project’s scope helps you find the right patio installers. They can create a visually appealing, low-maintenance patio that fits your needs.

Your chosen contractor can bring your patio dreams to life. They’ll create a well-designed patio that suits your unique vision.

Researching Potential Patio Installers

Finding the right patio installers requires thorough research. Start by searching online and using local directories. Look for reputable patio paver installers and contractors in your area.

Online Searches and Local Directories

Use the internet to your advantage. Search for “patio installers near me” and “paver patio contractors”. Check local business directories for more options.

These resources can help you find professionals with a solid track record. You’ll discover experts who deliver high-quality work for your patio project.

Referrals and Word-of-Mouth

Ask friends, family, and neighbors for patio installer recommendations. Their experiences can offer valuable insights into contractors’ work quality. You’ll learn about their professionalism, craftsmanship, and customer service.

Reviewing Portfolios and Testimonials

Examine the portfolios of potential patio installers. Look for photos of completed projects to assess their craftsmanship. Read client reviews to gauge their customer service and satisfaction levels.

Thorough research helps you find skilled patio installers for your outdoor living project. This approach ensures you work with professionals who meet your specific needs.

You’ll be able to create a beautiful and functional patio space. The right installer will bring your vision to life.

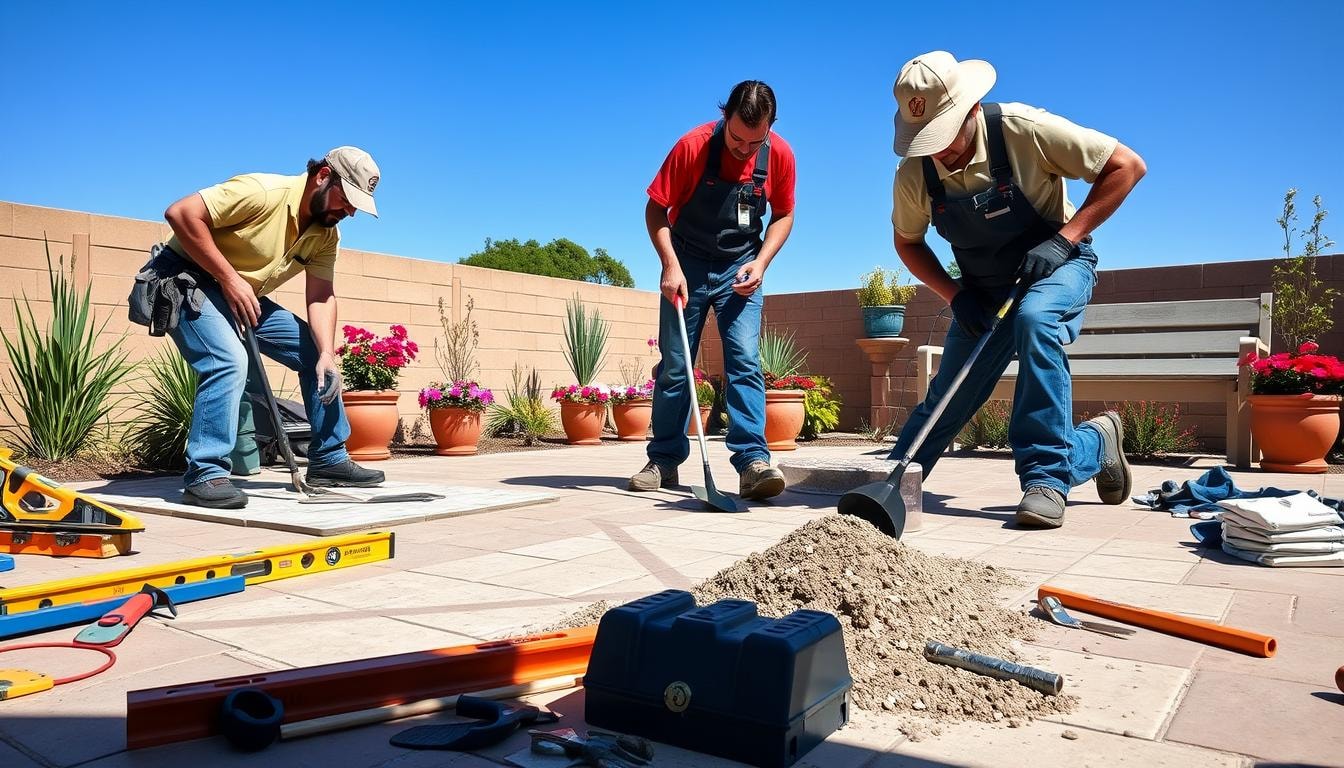
Interviewing Patio Installers

Patio Installers

After listing potential patio installers, set up in-person interviews. These meetings help assess their skills and understanding of your needs. Face-to-face chats ensure you find the best fit for your outdoor project.

Discussing Experience and Portfolio

Ask about the patio installers’ experience and previous work. Inquire about pavers, concrete, and other materials they’ve used before. Learn about the shapes and designs they’ve created.

This gives you insight into their capabilities and work quality. You’ll get a clear picture of what they can do for you.

Understanding Timelines and Costs

Talk about timelines and costs for your project. Ask about their process for estimating and managing the project. Inquire about warranties or guarantees they offer.

This helps you work closely with installers to bring your outdoor living dream to life. You’ll stay within your budget and timeframe.

Careful interviewing helps you find the right team for your project. They’ll create a functional and durable outdoor space for your family. Your residential landscape will become a dream come true.

Verifying Credentials and References

Checking credentials and references is vital when hiring patio installers. Take time to vet paver patio contractors, patio paver installers, and paver patio installers thoroughly. This ensures you get top-notch service.

Start by verifying licenses, insurance, and certifications. This confirms that your chosen patio installers are qualified and follow local rules. Contact their references to learn about their previous work and customer satisfaction.

  • Verify licenses and insurance coverage
  • Check for relevant certifications and industry memberships
  • Contact references to gauge work quality and customer service
  • Review online reviews and testimonials

Evaluate the project, landscaping, and driveway needs carefully. This helps ensure your chosen patio installers can meet your backyard and floor space requirements.

Doing this research helps you make a smart choice. It sets the stage for a successful patio installation project.

Obtaining and Comparing Quotes

Gathering quotes from multiple patio installers is vital. It helps you find the best value for your project. Costs can vary greatly, so compare options carefully.

Detailed Cost Breakdowns

Ask for detailed cost breakdowns from potential installers. These should include material costs per square foot and labor charges per hour. Look for the estimated project duration and any potential overtime costs.

Understanding the full project scope helps you make an informed decision. It ensures you’re getting the best value for your investment.

Evaluating Value, Not Just Price

Cost is important, but consider the overall value each contractor offers. Look at their experience, work quality, and any warranties they provide. Check their reputation in the local community.

Your goal is to find an installer who can deliver a great patio. It should be functional, durable, and match your preferences.

Comparing detailed quotes helps you make a smart choice. You’ll find an installer who can bring your patio vision to life. Choose someone who fits your budget and meets your needs.

Patio Installers: Understanding Contracts and Agreements

patio installers

Reviewing contracts is key when hiring patio installers. A good contract covers work scope, timeline, payments, and warranties. This protects your investment and sets clear expectations.

Scope of Work and Project Timeline

The contract should detail the patio’s size, layout, and materials. It should also include start and end dates, and key project milestones. This helps you plan for the installation process.

Payment Schedules and Warranties

Check the payment terms and total cost in the contract. Look for warranties on installation and materials. These can protect your investment long-term.

A thorough contract review ensures your patio installers will deliver quality work. It helps create a functional, durable patio that meets your needs.

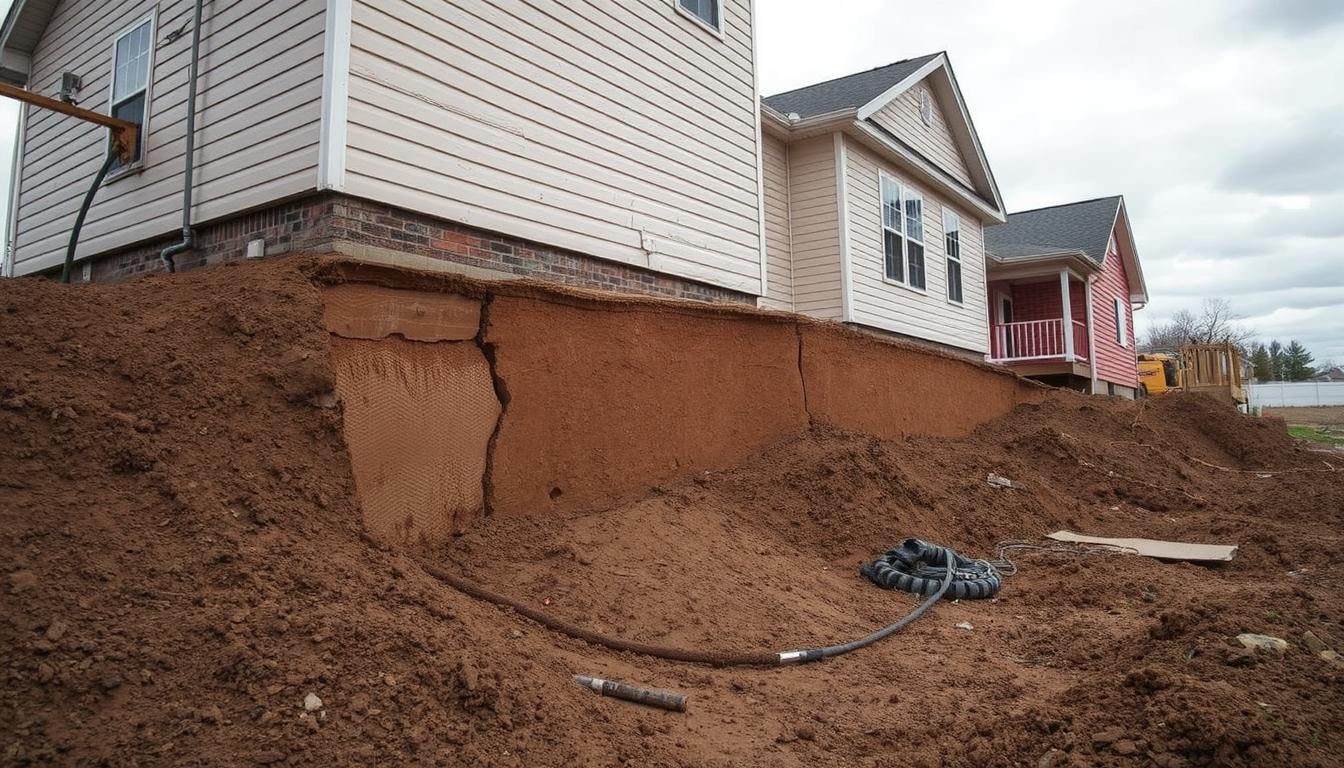
Navigating Permits and Regulations

Understanding local regulations is vital for patio installation projects. Specific approvals may be needed before construction starts. Work with your patio installers to comply with building codes and regulations.

The permit process involves submitting detailed plans and material information. This ensures safety standards and community aesthetic guidelines are met. Skipping permits can lead to fines or patio removal.

Experienced patio paver installers can guide you through the permit process. They’ll help you understand project requirements and prepare necessary paperwork. This teamwork prevents delays during construction, ensuring timely completion.

Obtaining permits is crucial for creating your dream landscape. Working with your contractor helps meet local requirements. You’ll create a durable patio that fits your needs and complies with property standards.

Permit Considerations for Landscaping Projects

Major landscaping projects often require building permits. This includes excavation, grading, and drainage work. Decks, patios, retaining walls, and pools may also need permits.

Property size, zoning limits, and environmental concerns affect permit needs. Follow approved blueprints and permit requirements to avoid delays or penalties.

  • Zoning laws determine land use regulations
  • Building codes ensure the structure meets safety standards
  • HOA rules may have additional constraints on design and placement

Experienced patio installers make the permit process easier. They ensure your project is completed on time and follows rules. Your new patio will add beauty and functionality to your property.

Managing Expectations and Project Timelines

Open communication with patio installers is crucial for project success. Outdoor space transformations can be complex. Factors like size, materials, and weather affect timelines.

Basic patio installations typically take 1 to 2 weeks. Larger or custom projects may need 2 to 4 weeks. Unexpected challenges can extend timelines by days or weeks.

  • Be prepared for potential delays or unforeseen circumstances that may arise during the installation process.
  • Maintain a collaborative and flexible approach with your patio installers to ensure a smoother project experience.
  • Stay in regular communication with your installers to understand the progress and any changes to the timeline.

Set realistic expectations and be open to adjustments. Work closely with your installers to create your ideal outdoor space. This approach ensures a smoother project experience.

A successful patio project requires managing expectations and maintaining good relationships. Patience and collaboration help overcome challenges. With this mindset, you’ll achieve your dream outdoor living space.

The FindPros Advantage

Finding the right patio installers doesn’t have to be a hassle. With FindPros, our customers can easily get the best pricing when multiple pros compete for their job. Simply answer a few questions about your home project, and within seconds, you’ll be matched with top-rated local professionals who are the best fit for your needs.

Compare quotes, review profiles, and choose the pro you get along with best to ensure your patio is installed correctly, from the ground up. Take the stress out of your next paving or landscaping project – let FindPros do the work for you.

Conclusion

Hiring skilled patio installers is vital for creating a stunning outdoor living space. The right contractor can turn your patio dreams into reality. By following these tips, you’ll find the best professional for your project.

Paver patios offer durability and customization options. They come in various colors, patterns, and textures to match your style. Though installation takes time, the long-term benefits make it worthwhile.

Experienced installers can transform your outdoor area into a visually appealing, functional space. They ensure your patio complements your home’s aesthetic perfectly. Quality work will make your patio a source of pride for years.

Your new patio can be a cozy fire pit area or a spacious entertaining space. With the right installers, you’ll create a low-maintenance outdoor retreat. Your family will enjoy this beautiful addition to your home for many years.

Frequently Asked Questions (Patio Installers)

Proper paver installation is crucial for homeowners as it ensures the durability, longevity, and visual appeal of patios, driveways, walkways, and other outdoor areas. Improper installation can lead to issues like uneven surfaces, cracked pavers, and drainage problems.
Homeowners should consider the project’s scope, their design preferences, local regulations, and the experience and credentials of potential paver installers. It’s also important to understand the timelines, costs, and warranties associated with the project.
Homeowners should thoroughly vet paver installers by checking their licenses, insurance, certifications, and references. Reviewing detailed contracts and obtaining multiple quotes can also help ensure the job is done right.
High-quality pavers, such as brick or flagstone, can provide a durable, low-maintenance, and visually appealing surface for patios, driveways, and walkways. They are less prone to stains, cracks, and uneven settling compared to lower-quality options.
Homeowners should maintain open communication with their paver installers, share their vision and preferences, and collaborate to address any challenges that may arise during the installation process. This helps ensure the final product meets their expectations and is installed correctly.

Parking Lot Striping

Patio Installers Near You

Can’t find what you are looking for?

How It Works

  • Answer a few questions about your home project.
  • Within seconds, get matched with top-rated local pros.
  • Compare quotes and choose the best pro for the job.

Parking Lot Striping In Your Area

Parking Lot Striping: How to Find the Right Contractor

Meta Description: Discover how to choose the right parking lot striping contractor for your business. Learn key factors to consider and ensure durable, high-quality markings.

Parking Lot Striping

Managing a property involves many challenges. A well-marked parking lot is one of them. Clear parking areas boost safety and property appeal. Faded markings can cause confusion and accidents.

Finding a reliable striping contractor is crucial. They should understand your needs and deliver quality work. A good contractor provides ongoing maintenance and support.

This guide will help you pick the right striping partner. You’ll learn key factors to consider. The goal is to find a company that values your property.

Key Takeaways

  • Maintaining a well-marked parking lot enhances the visual appeal and safety of your property.
  • Finding a reliable striping contractor is crucial for consistent quality and ongoing support.
  • Choosing the right contractor involves more than just getting lines painted; it’s about building a long-term partnership.
  • This guide will help you identify the key factors to consider when selecting a striping contractor.
  • Establishing a relationship with a company that values your property as much as you do is the goal.

The Importance of Professional Parking Lot Striping

A well-striped parking lot is crucial for safety, accessibility, and curb appeal. Professional parking lot striping services enhance functionality and visual appeal of commercial properties. They play a vital role in maintaining an attractive and efficient space.

Safety and Accessibility

Clear parking lot lines prevent accidents and ensure smooth traffic flow. Professional striping delineates driving lanes, handicapped stalls, and pedestrian walkways. This minimizes confusion and reduces collision risks, protecting customers and employees.

Well-marked lots help businesses avoid potential liability issues. They create a safer environment for everyone using the parking area.

Curb Appeal and Property Value

A well-maintained parking lot significantly impacts curb appeal and property value. Freshly striped lots with vibrant markings create a positive first impression. They enhance visual appeal and convey professionalism and attention to detail.

Investing in professional parking lot striping is a smart decision for property managers and business owners. It improves safety, accessibility, and curb appeal. This important maintenance task ensures a welcoming and efficient space for all.

Why Hire Professionals for Parking Lot Line Marking?

A well-marked parking lot is crucial for safety and accessibility. It reduces accidents, improves traffic flow, and ensures compliance with local rules. Hiring experts for this task is better than doing it yourself.

Professional line markers bring expertise to the job. They know how to place lines correctly and use different markings properly. This knowledge helps keep both pedestrians and drivers safe in the parking area.

Property owners must make their premises safe for visitors. Poor parking lot markings can lead to accidents and legal issues. Hiring professionals reduces these risks and meets safety standards.

Clear parking lot lines make your property more appealing. This can attract more customers or tenants. It may even increase your property value over time.

Hiring parking lot line marking professionals is a smart choice. It improves safety, liability protection, and curb appeal. Expert help ensures your lot is both attractive and safe for all.

Key Factors in Selecting the Right Contractor

parking lot striping contractor

Choosing the right parking lot striping contractor is vital for property safety and appeal. Skilled professionals can transform your outdoor spaces. They ensure visual appeal, accessibility, and safety for customers or tenants.

Experience and Expertise

Seek a contractor with a proven track record in complex projects. Their experience shows skill and reliability. A company familiar with local climate and traffic conditions offers valuable insights.

An experienced contractor can foresee potential issues and address them proactively. They’ll get the job done right the first time.

A Streamlined Process from Start to Finish

Choose a contractor known for keeping clients informed. They should provide quick responses, clear timelines, and regular updates. Look for those who assign a dedicated project manager.

This manager should oversee all aspects of the project. They ensure smooth operations and address any concerns you have. Effective management minimizes delays and keeps everything on track.

Select a contractor who can adapt to unexpected situations. Ask how they handle changes in scope or unforeseen challenges. This includes weather conditions or last-minute client requests.

Comprehensive Services and Quality Materials

Find a parking lot striping contractor offering a wide range of services. The right provider should handle everything from layout to final details. This approach simplifies the process and reduces coordination hassles.

Quality materials like Sherwin-Williams paints are crucial for long-lasting results. These premium paints withstand heavy traffic and harsh weather. They’re perfect for the Midwest’s challenging climate.

Investing in quality materials ensures vibrant, visible markings that last. This choice can lower maintenance costs over time. It also creates a more appealing parking area.

  • Comprehensive services for all your parking lot striping needs
  • One-stop shop for a seamless, hassle-free experience
  • Durable Sherwin-Williams paints that last in heavy traffic and harsh weather
  • Vibrant, long-lasting markings that reduce maintenance costs
  • Compliance with ADA requirements for accessible parking spaces

Choose a contractor offering comprehensive services and high-quality materials. This ensures a durable, compliant, and visually appealing parking area. Your parking lot will serve your needs for years to come.

How to Find the Right Contractor

Choosing a parking lot striping contractor is vital. You need a partner who delivers quality work and prioritizes safety. They should follow regulations and care for the environment.

A good contractor ensures your lot is properly marked and accessible. They make sure it complies with local codes too.

Adherence to Safety and Regulations

Top contractors know industry safety standards and local rules. They use eco-friendly paints that are visible and long-lasting. These paints are good for the environment too.

Following the Americans with Disabilities Act is crucial. It makes sure your parking lot is usable for everyone.

Insurance and Warranties

Good insurance protects everyone involved in the project. Warranties show the contractor believes in their work. They peace of mind about the quality of services.

Look for a contractor who values safety and follows rules. Check if they offer insurance and warranties. These traits show their dedication to customer satisfaction.

A professional contractor will handle your parking lot project with care. You can trust them to do a great job.

Do Your Research: Find the Perfect Partner

research

Choosing the right parking lot striping contractor is crucial. Take time to research and find the ideal partner. This upfront effort can ensure a successful outcome.

Read Online Reviews

Start by reading online reviews of potential contractors. Look for testimonials highlighting clear communication and efficient project management. Positive feedback from other property managers can boost your confidence.

Pay attention to recurring themes in reviews. This can help gauge the contractor’s consistency in service.

Ask the Right Questions

During consultations, ask tough questions about communication and project management. Inquire about their approach to unexpected situations. Ask for references and follow up with past clients.

Questions like “How do you manage project timelines?” can reveal valuable information. “What steps do you take to ensure quality control?” is another important query.

Thorough research helps find the perfect parking lot striping partner. This ensures a successful and stress-free project. Find a contractor with expertise, communication skills, and commitment to excellence.

Building a Long-Term Partnership

Your parking lot is crucial to your property. We offer more than just striping services. Our long-term partnership focuses on responsive service and proactive communication.

Responsive Service

We’re always ready to answer your questions quickly. Our team is reachable and attentive to your needs. You can rely on us for timely assistance.

Proactive Communication

We keep you informed about project progress and potential challenges. Regular updates ensure you’re aware of your project’s status. Our approach helps anticipate issues before they grow.

We also provide future maintenance recommendations. This leads to smooth execution and your complete satisfaction. Our goal is to exceed your expectations.

Choose parking lot striping experts for exceptional service and value. We’re committed to a long-term relationship that ensures your parking lot’s ongoing care.

Benefits and Considerations of Choosing a Local Contractor

The location of your parking lot striping contractor can affect project quality and cost. Local contractors offer several benefits worth considering. Let’s explore the advantages and factors to keep in mind.

Working with a local contractor can lead to cost savings. They often have lower transportation costs for materials and equipment. This can result in more competitive pricing for you.

Local contractors may have a stronger drive to deliver excellent work. They know their projects are visible in their community. This can lead to higher quality results.

When choosing a local contractor, ensure they have the right experience and expertise. Check if they offer a streamlined process from start to finish. Verify their adherence to safety regulations and insurance coverage.

Consider these factors to make an informed decision for your business and property. Balance cost, quality, and long-term maintenance needs. This approach will help you choose the best contractor for your project.

The FindPros Advantage

Looking to upgrade your parking lot with professional line striping services? FindPros can connect you with top-rated parking lot stripers in your local area. Simply answer a few quick questions about your project, and we’ll provide you with multiple competitive quotes from experienced pros who can deliver durable, long-lasting markings using high-quality paints and equipment.

FindPros takes the hassle out of finding the right parking lot striper by allowing you to compare pricing and reviews, ensuring you get the best value for your investment. Get started today and let our network of reliable local professionals handle all your parking lot striping needs.

Conclusion

Choosing the right parking lot striping contractor is vital for your property’s safety and appeal. An experienced partner with quality services ensures your lot stays in top shape. Local contractors offer cost-effective solutions tailored to your area’s needs.

Thorough research helps you find the perfect contractor to upgrade your parking lot. Read reviews and ask important questions to make an informed choice. This approach guarantees a professional and secure image for your property.

Investing in reliable striping services boosts your property’s value and appearance. It creates a welcoming environment for your business or community. Choose wisely to build an efficient and safe parking area.

Frequently Asked Questions (Parking Lot Striping)

Parking lot line striping is important for safety, accessibility, and curb appeal. Clear markings delineate driving lanes, handicapped spots, and walkways to prevent accidents and ensure smooth traffic flow. Well-maintained lots also enhance the visual appeal of the property and can increase its value.
The key factors include the contractor’s experience and expertise, a streamlined process from start to finish, comprehensive services, and the use of high-quality, durable materials like Sherwin-Williams paints. Look for a contractor who prioritizes safety, follows regulations, and offers insurance and warranties.
Working with a local contractor can lead to cost savings due to lower transportation costs for materials and equipment. Local contractors may also have a stronger incentive to deliver excellent work, as their projects are visible in the community. However, it’s important to ensure the local contractor has the right experience and expertise.
Parking lot pavement markings can include straight lines, arrows, handicapped symbols, and other designs in various colors like yellow, blue, and white. These markings help direct traffic, designate parking spaces, and improve visibility. Choosing the right combination of durable, bright markings is crucial for both the aesthetic and functional aspects of the parking lot.
To maintain the quality of parking lot striping, it’s important to work with a reliable striping contractor who can provide ongoing maintenance and support. This may include regular inspections, touch-ups, and reapplications of traffic paint as needed. Proactive communication and responsive service from the contractor can help ensure the parking lot continues to look its best and remain safe for all users.

Palm Tree Trimming

Patio Installers Near You

Can’t find what you are looking for?

How It Works

  • Answer a few questions about your home project.
  • Within seconds, get matched with top-rated local pros.
  • Compare quotes and choose the best pro for the job.

Palm Tree Trimming In Your Area

Palm Tree Trimming: A Guide to Hiring the Right Professional

Meta Description: Discover expert tips for palm tree trimming and learn how to hire the right professional for your landscape maintenance needs. Enhance your property’s beauty safely.

Palm Tree Trimming

Palm trees need regular care to stay healthy and beautiful. Hiring the right professional for trimming is crucial. Let’s explore how to find the best palm tree trimming company.

This guide will help you choose the perfect palm tree service. You’ll learn about proper pruning techniques and the best time for trimming. With this knowledge, you can keep your palm trees thriving for years.

Key Takeaways

  • 01Periodic palm tree trimming is essential for maintaining optimal growth and appearance.
  • 02Hiring a professional arborist ensures your palm trees are pruned safely and effectively.
  • 03Proper trimming techniques, such as removing dead fronds and avoiding over-pruning, are crucial for tree health.
  • 04Timing is critical, with spring and early summer being the ideal seasons for palm tree trimming.
  • 05Understanding the specific needs of different palm tree species can help you make informed decisions about maintenance.

Importance of Palm Tree Trimming

Palm tree trimming is vital for health, safety, and beauty. These trees add tropical charm to warm climates like Florida and Hawaii. Regular trimming keeps them healthy and prevents hazards.

Aesthetic Appeal

Well-trimmed palm trees look stunning and enhance the landscape’s beauty. They make a positive impression on customers and improve commercial property appearance. Removing dead fronds promotes a clean, well-groomed look.

Promoting Tree Health

Trimming is crucial for palm trees’ overall health and growth. It removes dead, damaged, or diseased fronds, focusing energy on new growth. This prevents disease spread and ensures long-term vitality.

Regular trimming also maintains the tree’s structure. It prevents safety hazards from falling branches or fronds.

Palm tree trimming is essential for beauty and health. It ensures safety and enhances the surrounding landscape. Regular maintenance keeps palm trees thriving and looking their best.

When to Trim Palm Trees

Timing is key for palm tree trimming. Young palms need minimal pruning, focusing on dead or damaged fronds. Mature palms benefit from yearly trimming to remove dead fronds and spent flowers.

Late spring and early summer are ideal for pruning. This allows for removing dead fronds, flower stalks, and fruit. Avoid trimming during extreme heat or cold snaps.

Professional trimming is safer and more effective. Experts have the right equipment and know-how to prune correctly. They remove only dead fronds, preserving the tree’s health.

Proper care keeps landscapes healthy and beautiful. Hire a local company familiar with palm species in your area for best results.

Trimming Techniques and Tools

Proper palm tree trimming needs the right tools and techniques. This ensures the health and safety of your trees. Use pruning shears for smaller branches and loppers for larger limbs.

Having the right equipment is crucial for effective palm tree maintenance. It helps you trim your trees safely and efficiently.

Proper Pruning Tools

Palm tree trimming requires various tools. The choice depends on the size and condition of your trees. Here are some essential pruning tools:

  • Pruning shears: Ideal for trimming smaller fronds and branches.
  • Loppers: Designed to handle larger branches and limbs.
  • Pruning saw: Useful for cutting through thick, woody stems and branches.

Safety Gear

Protecting yourself during trimming is as important as using the right tools. Always wear proper safety gear. Here’s what you need:

  • Gloves: To protect your hands from sharp fronds and branches.
  • Goggles: To shield your eyes from debris and falling plant matter.
  • Hard hat: To safeguard your head in case of falling branches or debris.

Use the correct pruning tools and wear appropriate safety gear. This ensures a safe and effective palm tree trimming experience.

Hiring a Professional Palm Tree Trimming Service

Proper palm tree care requires expert help. Professional trimmers have the skills and tools to maintain your trees safely. Their expertise ensures your palms stay healthy and beautiful.

Experience and Certifications

Choose a service with certified arborists, like those from the International Society of Arboriculture (ISA). These experts know the best pruning methods and disease management techniques.

Their knowledge can greatly improve your palm trees’ long-term health and looks. Certified professionals make a real difference in palm tree care.

Insurance and Liability

Make sure the company you hire has full insurance coverage. This protects you from accidents or property damage during trimming.

Good companies have policies to protect their workers and your property. This gives you peace of mind during the service.

Choosing experienced, certified, and insured professionals is a smart move. It saves you time and money in the long run.

With experts handling your palm trees, you avoid future problems from poor maintenance. Your palms will thrive under their skilled care.

Safety Considerations for Palm Tree Trimming

Safety is crucial when trimming palm trees. Proper precautions ensure a successful and accident-free process. Key safety considerations include ladder stability and avoiding power lines.

Ladder Safety

Ladder safety is vital during palm tree trimming. Palm fronds can weigh up to 50 pounds, making balance difficult. Place the ladder on level ground and avoid overreaching while trimming.

Use the right ladder height for the tree’s size. Have a spotter nearby for support if needed.

Avoiding Power Lines

Palm trees often grow near power lines, creating a serious safety risk. Keep a safe distance from overhead power lines to prevent electrocution.

If the tree is close to power lines, hire a professional palm tree trimming service. They have the expertise and equipment to handle the job safely.

Focus on safety considerations and use proper equipment when trimming palm trees. Taking precautions ensures a successful and safe trimming process.

Benefits of Regular Palm Tree Trimming

palm tree trimming

Palm tree trimming offers more than just visual appeal. It provides several advantages for your property and environment. Disease prevention and improved air circulation are two key benefits.

Disease Prevention

Pruning removes dead or diseased fronds from palm trees. This stops harmful diseases from spreading to other parts of the tree. Regular trimming protects palm trees against common diseases like bud rot and fusarium wilt.

Improved Air Circulation

Proper trimming enhances air flow within the palm tree canopy. This reduces the risk of fungal infections and makes trees more resistant to pests. Better air circulation also promotes improved photosynthesis, helping trees thrive.

Regular palm tree trimming is a smart investment for property owners. It keeps palm trees healthy, vibrant, and visually appealing. This practice benefits homeowners and property managers across various locations.

Identifying the Right Time for Palm Tree Trimming

Palm trees need regular trimming to stay healthy and attractive. Most require pruning once or twice yearly. The best time depends on the tree’s species, growth rate, and local climate.

Early to mid-June is usually ideal for trimming palm trees. They’re actively growing then and can recover more easily. This timing helps trees look great before summer’s peak.

Trimming at the wrong time can harm or stunt growth. It’s crucial to plan your trimming schedule carefully.

  • Palm trees should be trimmed once or twice a year, typically in early to mid-June.
  • Trimming during the right time of year helps the trees recover and maintain their aesthetic appeal.
  • Over-pruning can cause permanent damage to palm trees, so it’s crucial to follow a proper trimming schedule.

For the right time for palm tree trimming, ask experienced arborists or tree services. They can assess your palm trees’ needs and suggest the best trimming schedule.

Professionals consider seasonal factors in your area. A careful approach to trimming keeps trees healthy, beautiful, and safe for years.

Understanding Palm Tree Species and Their Trimming Needs

Palm trees come in various shapes, sizes, and growth habits. Each type needs a specific approach to pruning and trimming. Proper care maintains the health and appearance of your palms.

Date palms can have up to 180 fronds, each growing 15 feet long. Washingtonia palms typically have about 30 green fronds. Sabal palms survive transplanting better when all fronds are removed.

Mature fronds are crucial for palm health. They provide food and support for developing parts of the tree. Some palm species need a 2:1 ratio of juvenile to mature fronds.

It can take 3 to 5 years for fronds to fully mature. Proper pruning techniques are essential for palm health. Experts advise against topping palms, as it can harm their growth.

Understanding your palm’s trimming needs helps them thrive. Regular, professional trimming prevents disease and improves air circulation. This care enhances the overall health and longevity of your palms.

Post-Trimming Care and Maintenance

Palm trees need proper care after trimming. Water them well to support recovery and new growth. Use a special palm tree fertilizer to replace lost nutrients.

Watering and Fertilization

Palm trees have deep taproots for stability. They also have shallow, fibrous roots for water and nutrients. Water your palm deeply after trimming to help it recover.

Be careful not to overwater, as this can cause root rot. Apply a high-quality palm tree fertilizer to provide essential nutrients.

Choose a fertilizer made for palm trees. It will have the right mix of nutrients for their specific needs.

  • Maintain a consistent watering schedule to keep the soil moist but not waterlogged.
  • Apply a palm tree-specific fertilizer according to the manufacturer’s instructions, typically every 3-6 months.
  • Adjust the fertilization and watering routine based on the tree’s response and environmental factors.

Follow these care practices to help your palm tree recover. This will keep it healthy and looking great for years to come.

Choosing a Reputable Palm Tree Trimming Company

Reputable palm tree trimming company

Selecting a professional palm tree trimming service requires careful consideration. Research their experience, certifications, and safety practices. This ensures they have the expertise to handle your palm trees effectively.

Reading customer reviews and testimonials offers valuable insights. They reveal the company’s service quality and customer satisfaction levels. This information helps you make an informed decision.

Customer Reviews and Testimonials

Positive reviews indicate a reputable palm tree trimming company. Look for businesses with satisfied clients who praise their professionalism and attention to detail. These testimonials show the company’s commitment to excellent service.

Choosing a reputable company with satisfied customers ensures your palm trees receive proper care. You can feel confident knowing your trees are in capable hands.

Preparing Your Property for Palm Tree Trimming Services

Get your property ready for palm tree trimming. Clear the area around trees for safe and smooth work. This helps crews work efficiently and protects your property.

Clear paths to palm trees. Remove objects, furniture, and debris that could block crews. This includes garden tools and potted plants that might cause accidents.

  • Clear access paths to the palm trees
  • Remove any obstacles or debris around the trees
  • Ensure a clear workspace for the trimming crew

Prune nearby plants and shrubs. This gives crews a clear view of the trees. It allows them to work more efficiently.

A well-prepared property helps the trimming process. It also keeps your palm trees healthy and looking good. These simple steps ensure successful palm tree trimming.

Cost Considerations for Professional Palm Tree Trimming

Professional palm tree trimming costs vary based on several factors. Tree size, height, accessibility, and required work all affect pricing. Industry estimates show palm tree trimming can cost between $60 and $945.

Costs differ across states, ranging from $45 to $1,200. States like Florida, California, and Texas have varying prices. The number of trees trimmed also impacts overall cost.

Trimming five small palm trees might cost around $230. More trees often mean a lower cost per tree. Tree health, accessibility, and disposal needs can influence pricing.

Emergency trimming after storms may cost at least $250 per hour. To get the best value, compare quotes from reputable palm tree trimming companies. Some offer discounts for seniors, veterans, or multiple tree trimmings.

Regular maintenance helps minimize cost considerations over time. Timely trimming can prevent more expensive problems in the future. It’s a smart investment for your palm trees’ health and appearance.

Discover FindPros for Top-Rated Palm Tree Trimming Professionals

Are you in need of reliable and skilled palm tree trimming services? Look no further than FindPros. Our platform connects you with top-rated local professionals who specialize in pruning, trimming, and maintaining healthy palm trees. Simply answer a few questions about your project, and we’ll match you with the best-fitting pros in your area.

Compare quotes, read reviews, and choose the perfect fit for your palm tree care needs. With FindPros, you’ll get the best pricing when multiple pros compete for your job, ensuring you find the right professionals you can trust. Take the guesswork out of palm tree trimming and let FindPros handle the rest.

Conclusion

Proper palm tree trimming is vital for maintaining healthy and attractive landscapes. Regular trimming keeps your palm trees thriving and enhances your property’s beauty. Expert care ensures the long-term well-being of your outdoor oasis.

Certified arborists use specialized equipment to keep your palm trees looking their best. This practice improves safety and promotes overall tree health. It also prevents disease and enhances air circulation.

Frequently Asked Questions (Palm Tree Trimming)

Palm trees typically need to be trimmed once or twice a year, usually in the early to mid-summer months. This timing allows the trees to recover and maintain their appearance before the peak of the growing season.
Regular palm tree trimming provides several benefits, including disease prevention, improved air circulation, enhanced visual appeal, and reduced safety risks from falling fronds or branches.
When trimming palm trees, it’s important to remove only the dead or broken fronds, leaving the healthy, green fronds intact. Avoid over-pruning, as this can harm the tree’s energy and growth. Use the right pruning equipment, such as sharp loppers or pruning shears, and wear proper safety gear like gloves and goggles.
To prepare for palm tree trimming, homeowners should clear the area around the trees, removing any obstacles or debris that could block the crew’s access. Pruning nearby plants and shrubs can also help provide a clear workspace for the trimmers.
The cost of palm tree trimming can vary based on several factors, including the size and height of the trees, the accessibility of the trees, the amount of work required (such as removing dead or broken fronds), and the location of the property. Homeowners should compare quotes from reputable, certified arborists to ensure they get the best value for their money.

Painters

Patio Installers Near You

Can’t find what you are looking for?

How It Works

  • Answer a few questions about your home project.
  • Within seconds, get matched with top-rated local pros.
  • Compare quotes and choose the best pro for the job.

Painters In Your Area

Choosing the Best Painters: Tips for a Successful Project

Meta Description: Discover expert tips for choosing the best painters for your project. Learn how to ensure quality work, stay within budget, and achieve stunning results for your home or business.

Painters

A professional paint job can transform your home or business. But how do you pick the right painters? This guide explores key factors to consider when choosing the best painters.

We’ll provide expert tips to help you achieve a flawless outcome. Our advice will ensure your project’s success from start to finish.

Key Takeaways

  • 01Seek referrals and online reviews to identify reputable and reliable painters.
  • 02Evaluate a painter’s experience, past work, and approach to ensure they’re the right fit for your project.
  • 03Understand the painting process, including preparation, application techniques, and product selection.
  • 04Look for signs of professionalism, such as clear communication and attention to detail.
  • 05Prioritize the use of high-quality paints, primers, and materials for long-lasting results.

The Importance of Finding Reliable Painters

Interior painting can yield up to 107% ROI, while exterior painting offers 55%. To maximize value, hiring skilled painters is crucial. Professional painters have expertise in surface prep, paint selection, and application techniques.

They can transform your home or business appearance. Their specialized knowledge ensures a flawless finish and long-lasting results. This enhances your property’s overall value significantly.

Maximizing Return on Investment

Reliable painters should have valid licenses, insurance, and bonding. This protects your project and ensures compliance with local regulations. Check the contractor’s board website for any past complaints or license suspensions.

Online reviews can reveal if someone had a bad experience. These steps help you choose a trustworthy painter for your project.

The Transformative Power of Professional Painting

Professional painters bring new life to spaces. They understand proper surface preparation and recommend suitable paint products. A skilled painter has extensive knowledge of paint products.

They can explain why one product works better than another. They ask the right questions to understand your needs fully. This helps them provide a detailed plan for the painting process.

Professional painting enhances your space’s appeal and increases its value. Reliable painters prioritize safety and maintain a clean job site. They protect your belongings, ensuring a stress-free experience.

Researching and Evaluating Potential Painters

painters

Finding the best painters requires thorough research and evaluation. Ask friends and neighbors for referrals based on their recent painting projects. Their experiences can offer valuable insights into painters’ work quality and professionalism.

Online reviews on platforms like Angi or HomeAdvisor provide additional information about painters’ reputations. Look for consistently high ratings and positive feedback. This helps identify painters who excel in delivering outstanding results.

Assessing Experience and Past Work

Consider painters’ years of experience and the quality of their previous work. Look for those with a proven track record in projects similar to yours. Ask to see examples of their past work.

Inquire about their approach to handling unique challenges or tricky areas. A painter’s experience level and past project quality indicate their ability to deliver excellent results.

Understanding the Painting Process

Grasping the painter’s process is vital for a successful project. Discuss color choices, challenges, and timelines to align expectations. Evaluate preparation and application techniques to gauge the painter’s expertise.

Discussing Project Scope and Expectations

Open communication with your painter is essential. Talk about the color palette, unique features, and expected timeline. This ensures your vision matches the painter’s abilities and resources.

Evaluating Preparation and Application Techniques

Proper surface preparation is key for a quality finish. Painters should clean, repair imperfections, and apply the right primers. Their approach to painting reveals their expertise and attention to detail.

The painting process often follows a deliberate sequence. Multiple paintings may be in progress at once. It can take months from start to finish.

Traditional materials like oil paints mixed with drying oils are common. Techniques such as glazing and underpainting show the painter’s commitment to quality.

Understanding the painter’s process builds confidence in their abilities. Choosing the right painters is crucial for a successful outcome. This ensures a flawless finish that meets your expectations.

Professionalism and Communication

Professionalism and clear communication are crucial when choosing painters for your project. Look for signs like punctuality, neat appearance, and an organized workspace. Good communicators listen to your concerns and provide detailed estimates without hidden fees.

Signs of Professionalism to Look For

  • Punctuality in adhering to scheduled appointments and project timelines
  • A clean, orderly, and organized work environment
  • A professional appearance, including well-kept uniforms or attire
  • Respectful and courteous interactions with the client and property

Importance of Clear and Transparent Communication

Great painters keep you informed about the project’s progress and address any unexpected challenges. They welcome your feedback and answer your questions promptly. This transparency ensures a positive experience and successful outcome for your painting project.

Hiring professional painters who value professionalism and communication can greatly improve your project’s quality. It also enhances your overall satisfaction with the painting process.

Painters: Preparation and Product Selection

Professional painters excel in preparation and quality product use. Ask painting contractors about their surface prep methods and protection strategies. This includes cleaning walls, fixing flaws, and using proper primers.

Surface Preparation and Protection

Experts say preparation is key to paint success. Proper cleaning, repairing, and priming greatly impact the paint job’s quality and durability.

Choosing Quality Paints, Primers, and Materials

Top painters use premium products that resist fading and harsh weather. These paints also contain fewer harmful chemicals. Experts emphasize understanding project needs when selecting paint.

Consider factors like application site, existing coating, and desired effect. Choosing high-quality paints from trusted brands ensures beautiful, long-lasting results. Understanding a painter’s prep and product approach helps guarantee a successful painting project.

Achieving a Flawless Finish

brush and roller techniques

Mastering brush and roller techniques is key to a flawless painted finish. Professional painters excel at loading paint and applying it evenly. Their expertise ensures high-quality, uniform coverage that delights clients.

Brush and Roller Techniques

Skilled painters use various methods for seamless finishes. They carefully load brushes and rollers to avoid drips and streaks. Using proper angles, they apply paint in smooth strokes, blending edges for a cohesive look.

Addressing Unique Challenges and Tricky Areas

Painting projects often present challenges like windows, trim, and cabinets. Pros have strategies for these tricky areas. They use special tools for intricate details and hard-to-reach surfaces.

Mastering these techniques allows painters to deliver flawless, long-lasting finishes. Their commitment to excellence transforms spaces and ensures client satisfaction.

Efficiency and Time-Saving Strategies

Professional painters use smart techniques to work faster and better. These methods help them finish projects quickly while maintaining high quality. They also reduce disruptions for clients.

One trick is wrapping brushes in plastic to keep them moist. This saves time by avoiding frequent cleaning. Using special buckets and grips instead of roller pans also speeds up painting.

Experienced painters use paint conditioners to slow drying and get smoother results. This lets them work faster without losing quality. These time-saving strategies help painters boost efficiency for their clients and businesses.

  • Covering brushes and rollers in plastic wrap to prevent drying
  • Utilizing specialized equipment like buckets and roller grips
  • Employing paint conditioners to extend drying time
  • Optimizing brush and roller techniques for a faster, more even application

These strategies help professional painters work faster and smarter. They deliver better results and make clients happier.

Finding the Right Painters with FindPros

Are you looking to transform your home or office space with a professional paint job? FindPros can help you find the best painters for the job. By answering a few simple questions about your project, we’ll match you with top-rated local pros who are ready to compete for your business. This ensures you get the best pricing and find the painters you’ll love working with.

Whether you need to update your furniture, floors, ceilings, or create a new look for your offices and homes, FindPros can connect you with experienced, reliable painters. In just moments, you can compare quotes and choose the pro that’s the perfect fit for your needs. Don’t settle for less – let FindPros help you find the painting services you’re looking for, fast.

Conclusion

Selecting the right painters is crucial for a successful painting project. This article provides insights to help you choose experienced and reliable professionals. You’ll learn about researching referrals, understanding preparation methods, and product selection.

Quality, communication, and attention to detail are key for a seamless painting experience. These factors ensure a beautiful, long-lasting finish. Statistical data shows drawing is fundamental for painters’ expression and experimentation.

This guide helps homeowners, business owners, and project managers make informed decisions. It teaches you to work with painters who value excellence. Following these tips creates stunning spaces that reflect your style.

Your newly painted area will add significant value to your property or business. With the right painters, you’ll achieve the desired look for your home or workplace.

Frequently Asked Questions (Painters)

When hiring painters, look for services like surface preparation, high-quality paint application, and attention to detail. Experienced painters should offer a comprehensive set of services to ensure a flawless finish.
Seek out painters with valid licenses, insurance, and a track record of professional work. Union membership can also indicate skilled, reliable workers.
Communicate clearly with the painters, understand their process, and create a detailed schedule. Efficient painters use time-saving techniques like wrapping brushes to maintain productivity.
Union-backed painters often have extensive training and follow strict safety protocols. This can give you greater confidence in the quality of their work and the overall success of your project.
Choose painters who prioritize client communication, cleanliness, and attention to detail. This will help make the painting process stress-free and give you the beautiful, long-lasting results you’re looking for.

Outdoor Lighting Repair

Patio Installers Near You

Can’t find what you are looking for?

How It Works

  • Answer a few questions about your home project.
  • Within seconds, get matched with top-rated local pros.
  • Compare quotes and choose the best pro for the job.

Outdoor Lighting Repair In Your Area

Outdoor Lighting Repair: Tips for Finding the Right Professional

Meta Description: Discover expert tips for finding the right professional for outdoor lighting repair. Enhance your landscape’s beauty and safety with reliable lighting solutions.

Outdoor Lighting Repair

Is your outdoor lighting failing you? A well-working landscape lighting system is key for your property’s beauty and safety. Finding the right pro for repairs can make a big difference.

This guide will help you find the best outdoor lighting specialists. They’ll keep your backyard or patio bright and beautiful.

Key Takeaways

  • Outdoor lighting not only enhances the aesthetic appeal of your property but also provides safety and security benefits.
  • A well-maintained and properly functioning lighting system can increase the value and curb appeal of your home.
  • Understanding the best practices for landscape lighting repair and maintenance is crucial for achieving long-lasting results.
  • Hiring a professional outdoor lighting specialist can ensure your system is optimized for performance, energy efficiency, and longevity.
  • Preventive maintenance is key to protecting your investment and extending the life of your outdoor lighting system.

Outdoor lighting repair needs special skills and care. It’s about getting great results that last.

This applies to fixing old systems or putting in new ones. The right pro can make your landscape lighting work well and look great.

Understanding the Importance of Outdoor Lighting Maintenance

Outdoor lighting maintenance is key for safety, security, and beauty. It creates an inviting atmosphere and guides visitors safely. Regular upkeep extends your system’s life and provides lasting results.

  • Enhancing Safety and Security: Well-lit areas reduce trip hazards for you and your guests. Good lighting also deters intruders, protecting your property. This helps create a safer environment for everyone.
  • Increasing Property Value and Curb Appeal: Smart lighting highlights your home’s best features. It can showcase architecture and landscaping elements. Well-maintained outdoor lighting boosts curb appeal and property value.

Regular checks are vital for your lighting system. Look for burnt-out lamps and wiring issues. Protect against weather damage too.

Following best practices ensures a beautiful, safe outdoor space. Your lighting will shine bright for years to come.

Common Issues with Outdoor Lighting Systems

Outdoor lighting systems can face challenges over time. They’re vital for safety, security, and curb appeal. Knowing common issues helps maintain their performance and fix problems quickly.

Lamp Burnout

Lamp burnout is a frequent outdoor lighting problem. It can happen due to long use, power surges, or unsuitable lamps. Burnout may cause no light, flickering, dimming, or color changes.

Wiring Problems

Outdoor lights are exposed to the elements, leading to wiring issues. Weather, wear and tear, or poor installation can cause these problems. This can result in flickering lights or tripped circuit breakers.

Wiring issues may also cause intermittent functioning. In some cases, they can even pose a risk of electrical shocks.

Weather and Environmental Damage

Harsh weather can harm outdoor lighting systems. Rain, wind, and extreme temperatures are common culprits. Environmental factors like corrosion and loose fixtures can also cause problems.

Small animals may damage outdoor lights too. These issues can affect the safety and performance of your lighting.

Regular upkeep is key to prevent these problems. Use durable materials and fix issues promptly. This will keep your outdoor lighting system working well.

Routine Inspection and Cleaning Procedures

Regular care keeps outdoor lighting beautiful and functional. Turn off power before starting to avoid electrical hazards. Use a soft cloth to remove dirt from fixtures.

Check for wear, like loose connections or damaged parts. Replace burnt-out bulbs to maintain consistent lighting. Clean lenses with mild soap and rinse well.

Dry fixtures completely to prevent water damage. Don’t use harsh chemicals that could harm the finish. Quarterly inspections help catch issues early.

Regular maintenance extends your lighting system’s life. It keeps your property safe and beautiful for years. Staying on top of cleaning helps prevent major problems.

Troubleshooting and Repair Techniques

Outdoor Lighting Repair Techniques

Your outdoor lighting system may face issues despite regular upkeep. Quick problem-solving helps maintain performance and longevity. Common problems include non-functioning lamps, intermittent lighting, and dim or flickering lights.

Identifying the Root Cause

Troubleshooting often involves checking electrical connections and voltage levels. Replace faulty components as needed. For safety, consult a professional electrician if you’re unsure about repairs.

Repairing Wiring Issues

  • Inspecting wiring for signs of damage or deterioration
  • Checking for proper connections and tightness of wire terminals
  • Identifying and replacing any faulty or corroded wiring

Replacing Faulty Components

  1. Inspecting lighting fixtures, bulbs, and power supplies for any issues
  2. Replacing any malfunctioning or damaged components
  3. Ensuring the new components are compatible and properly installed

Fixing the root cause of lighting problems restores function and prevents future issues. Always prioritize safety when dealing with electrical systems. When in doubt, seek help from a professional electrician.

Outdoor Lighting Repair: DIY vs. Professional Services

Homeowners often wonder whether to fix their outdoor lighting themselves or hire a pro. DIY maintenance can save money but comes with challenges and risks.

Assessing Your Skill Level

DIY outdoor lighting repairs suit those who understand electrical systems well. They should be skilled at wiring and replacing components. For those without electrical know-how, attempting complex repairs can be risky.

Improper wiring or installation can cause safety hazards and code violations. It can also damage your lighting system.

Weighing the Costs and Risks

DIY projects can save on labor costs. However, the risks need careful thought. Professional installers have licenses, bonds, and insurance to meet industry standards.

Pros have access to high-quality materials and equipment. This can make your lighting system last longer. DIY installations might lead to costly mistakes.

Outdoor lighting faces rain, humidity, ice, and snow. These can cause damage over time. Fixing these issues often needs special knowledge and tools.

Your decision should depend on your skills and the system’s complexity. Consider the risks involved too. If you lack electrical expertise, hire a qualified pro.

Choosing the Right Professional for Outdoor Lighting Repair

Finding the right specialty residential contractor is key for outdoor lighting maintenance. Look for someone with extensive experience in landscape lighting design and repair. Check customer reviews to gauge their reputation and reliability.

Evaluating Qualifications and Experience

Ensure the contractor has proper licenses and insurance coverage. This protects both parties from liability in case of accidents or damages.

Ask about warranties on fixtures and services. Inquire about maintenance plans or regular check-ups to keep your system performing well.

Checking Licensing and Insurance

Verify the professional’s qualifications and experience in outdoor lighting repair. Seek a contractor with a proven record in electrical expertise and safety.

Thoroughly vetting your chosen professional ensures your lighting investment is in good hands. This approach guarantees long-lasting performance and value for your home.

Preventive Maintenance: Extending the Life of Your Outdoor Lighting System

outdoor lighting system preventive maintenance

Maintaining your outdoor lighting system is vital for optimal performance. Environmental factors can impact its functionality and lifespan. Proactive measures can extend your lighting system’s life and maintain efficiency.

Invest in weather-resistant fixtures that can withstand the elements. Ensure all electrical connections are properly sealed and waterproofed. Use buried wire protection and pest deterrent methods to safeguard your system.

Prune vegetation around lighting fixtures to create a buffer zone. This prevents overgrowth from blocking light and causing wear on components.

  • Regularly inspect your outdoor lighting system for damage, debris, and wear.
  • Adjust timers and clean lenses to maintain optimal lighting performance.
  • Check ground connections periodically to prevent electrical issues.

These practices can help your outdoor lighting system last longer. Regular upkeep and timely repairs make a big difference. Your lighting investment will benefit from proper care.

Find the Right Landscape Lighting Pros with FindPros

Having trouble with your landscape lighting system? Whether it’s an older system in need of repairs or a complete replacement, FindPros can help you find the best local professionals for the job. Our platform connects you with vetted landscape lighting repair services and specialists who can assess your system, provide solutions, and give you competitive quotes.

From low voltage lighting to LED upgrades, FindPros makes it easy to find the right pro for your specific needs and budget. Simply answer a few questions about your project, and we’ll match you with top-rated experts in your area. Compare quotes, read reviews, and choose the pro you feel most comfortable with to get your outdoor lighting shining bright again.

Conclusion

A beautiful and functional outdoor lighting system enhances safety, security, and your property’s appeal. This guide offers expert tips to keep your landscape lighting in top shape. You’ll learn how to showcase your home’s features and create a welcoming outdoor atmosphere.

The guide covers regular inspections, cleaning, and troubleshooting common issues. It also provides preventive maintenance strategies to keep your lights shining brightly. You can choose to maintain your system yourself or hire a professional.

Prioritizing landscape lighting care increases safety, curb appeal, and property value. Use these insights to confidently handle outdoor lighting repair and maintenance. A well-kept system not only looks great but also protects your family and property.

Frequently Asked Questions (Outdoor Lighting Repair)

When hiring a landscape lighting specialist, look for someone with extensive experience in outdoor lighting design, installation, and repair. They should have proper licenses, insurance, and a track record of quality work. Verify their qualifications and ask about warranties on their services.
Common issues include burnt-out bulbs, wiring problems, and weather/environmental damage. Start by checking for any loose connections, damaged wires, or malfunctioning electrical components. Replace faulty bulbs or fixtures as needed. If you’re unsure about the issue, it’s best to consult a professional landscape lighting repair service.
Upgrading to a new landscape lighting system can provide several benefits, such as improved energy efficiency with LED technology, enhanced brightness and coverage, and better integration with smart home features. A new system can also increase your property’s curb appeal and value, making it a significant investment worth considering.
Regular maintenance is key to keeping your landscape lighting system in working order. Perform quarterly inspections to check for any issues like burnt-out bulbs, damaged wires, or malfunctioning fixtures. Clean the lenses and ensure all electrical components are in good condition. Addressing problems promptly can extend the life of your lighting system.
When selecting new landscape lighting fixtures, consider the type of lighting (path lights, spotlights, etc.), the power source (low voltage or line voltage), the bulb type (LED or incandescent), and the overall aesthetic. Ensure the fixtures are durable and weather-resistant to withstand the outdoor elements. Consult a landscape lighting specialist to help you choose the best fixtures for your property and desired lighting effects.

Outdoor Kitchen Builders

Patio Installers Near You

Can’t find what you are looking for?

How It Works

  • Answer a few questions about your home project.
  • Within seconds, get matched with top-rated local pros.
  • Compare quotes and choose the best pro for the job.

Outdoor Kitchen Builders In Your Area

Outdoor Kitchen Builders: Your Guide to Creating the Perfect Outdoor Space

Meta Description: Discover how outdoor kitchen builders can transform your backyard into a culinary oasis. Learn about design options, materials, and essential features for your perfect outdoor space.

Outdoor Kitchen Builders

Picture your backyard as a culinary paradise. The smell of grilled food mixes with laughter from friends and family. Skilled outdoor kitchen builders can make this dream come true.

Your outdoor kitchen can be sleek and modern or rustic and charming. The options are endless for creating your perfect outdoor oasis.

This guide explores outdoor kitchen builders and their world. We’ll look at benefits, types, and key parts for the ultimate outdoor living space.

Key Takeaways

  • 01

    Outdoor kitchens extend your living space and boost cooking and entertainment experiences.

  • 02

    Careful planning is key for layout, features, and materials in your outdoor kitchen.

  • 03

    Professional installation ensures smooth setup, while DIY options offer personal satisfaction.

  • 04

    The right lighting, shade, and plumbing improve your outdoor kitchen’s function and atmosphere.

  • 05

    Modern appliances and amenities can turn your outdoor space into a true culinary oasis.

Ready to boost your outdoor living experience? Let’s uncover secrets to building your perfect outdoor kitchen. We’ll help you create a space that fits your lifestyle and tastes.

Introduction to Outdoor Kitchens

Outdoor kitchens extend your backyard entertaining space. They keep all outdoor cooking and dining in one area. These additions can boost property value and create a hub for memorable gatherings.

Benefits of an Outdoor Kitchen

Outdoor kitchens offer several advantages for homeowners. They expand living space and increase property value. They also allow for year-round outdoor cooking and dining.

  • Expanded living and entertaining space in your backyard
  • Increased property value
  • Opportunity for year-round outdoor cooking and dining
  • Enhanced culinary experiences and atmosphere for entertaining
  • Reduced heat and odors in your indoor kitchen

Types of Outdoor Kitchens: Prefab vs. Custom

Homeowners can choose between prefabricated and custom-built outdoor kitchens. Prefab kitchens offer easy installation, while custom ones provide more flexibility and personalized details.

Prefab outdoor kitchens are convenient and affordable. They often cost 20%-40% less than custom builds due to reduced labor fees.

Custom outdoor kitchens allow for greater customization. They integrate seamlessly with your backyard design. These kitchens can include specialized features and high-end materials.

Your choice depends on budget, design preferences, and backyard needs. Carefully weigh the pros and cons of each option. This will help you make an informed decision for your outdoor living goals.

Planning Your Outdoor Kitchen

Designing an outdoor kitchen needs careful planning. The location affects how well it works and looks. Think about how close it is to your indoor kitchen and wind patterns.

Consider the best view when picking a spot. Placing it near the house makes utility connections easier. Keep it at least 10 feet away to prevent fire hazards.

Choosing the Right Location

The kitchen’s location impacts its layout and how well it works. Think about these factors:

  • Proximity to the indoor kitchen for easy access and workflow
  • Wind patterns to ensure smoke and odors don’t drift into the house
  • Optimal views and aesthetics to enhance the outdoor living experience
  • Proximity to existing utilities like gas, water, and electricity

Determining Your Budget

Outdoor kitchens can cost from a few thousand to tens of thousands of dollars. Your budget should cover the grill, countertops, cabinetry, and appliances.

Include any needed construction or landscaping work. Remember, the current 8% inflation rate may affect your project’s overall cost.

Obtaining Necessary Permits

Check with local authorities about required permits before starting construction. Permit needs can vary by location. Getting them early helps avoid delays or unexpected issues.

This step ensures your outdoor kitchen follows local building codes and rules.

Essential Components of an Outdoor Kitchen

outdoor kitchen components

Creating the perfect outdoor kitchen means choosing key components wisely. The grill is the heart of any outdoor kitchen. It’s essential for cooking steaks, burgers, and vegetables.

Gas and charcoal grills are popular choices. Either option will enhance your outdoor cooking adventures.

Grills and Cooktops

Many outdoor kitchens include a dedicated cooktop. This allows for simmering sauces or boiling water. These additions create a versatile cooking space for various culinary needs.

Countertops and Prep Areas

Ample countertop space is crucial for outdoor kitchens. It provides room for food prep, plating, and small appliances.

Durable materials like granite, concrete, or stainless steel work well. These options can withstand weather and maintain their appearance over time.

Storage and Cabinets

Integrated storage solutions keep your outdoor kitchen organized. Cabinets and drawers help store grilling tools, utensils, and cookware.

These components ensure your outdoor space remains clutter-free. They make cooking and entertaining more enjoyable.

Selecting the right grill, cooktop, countertops, and storage creates a functional outdoor kitchen. It becomes a joyful space for cooking and entertaining.

Selecting Durable and Weather-Resistant Materials

Choosing the right materials is key for a long-lasting outdoor kitchen. Natural stone, sturdy metal, and weather-resistant wood offer unique benefits. These materials can boost your outdoor space’s function and style.

Stone is a top pick for outdoor kitchens. It’s beautiful and tough against harsh weather. Granite, marble, and quartzite are strong, easy-care options that add elegance.

Wood creates a warm, welcoming feel. Cedar and teak naturally resist the elements, making them great choices. Remember, wood needs regular upkeep to stay looking good.

Metal, especially stainless steel, is versatile for outdoor kitchens. It’s strong, fights rust, and cleans easily. Stainless steel works well for appliances, countertops, and storage.

Pick weather-resistant, durable materials for your outdoor kitchen. This approach ensures a stunning space that lasts for years to come.

Outdoor Kitchen Builders: A Comprehensive Guide

Creating an outdoor kitchen involves choosing between DIY or hiring professionals. Each option has pros and cons. Your decision depends on skills, budget, and desired involvement.

DIY Installation vs. Professional Installation

DIY outdoor kitchens can be rewarding but require time and expertise. Professional contractors ensure quality work and code compliance. However, they increase overall costs.

Consider your skills, project complexity, and customization needs. These factors will help you make the best choice.

Step-by-Step Guide for DIY Outdoor Kitchen Construction

DIY outdoor kitchens can be cost-effective for those with construction experience. The process involves several key steps.

  1. Preparing the site and laying a sturdy foundation
  2. Framing the kitchen structure using weather-resistant materials
  3. Sheathing the frame with durable, outdoor-friendly panels
  4. Applying a scratch coat and finishing the surfaces
  5. Installing countertops, appliances, and other necessary components

Follow a detailed guide and take safety precautions. This approach allows you to create a custom outdoor kitchen.

Your unique needs and preferences can be met with careful planning. A DIY project gives you control over every aspect.

Lighting and Shade Solutions

Proper lighting and shade make your outdoor kitchen more functional and beautiful. They enhance the ambiance beyond just cooking equipment and countertops. Various options exist for creating your perfect outdoor kitchen oasis.

Illuminating Your Outdoor Kitchen

Outdoor kitchen lighting serves two main purposes: task lighting and ambient lighting. Task lighting ensures visibility during food prep. Ambient lighting creates a welcoming atmosphere for entertaining.

Use a mix of recessed fixtures, pendant lights, and wall sconces for well-rounded lighting. Place lights near workstations and pathways to improve visibility and functionality.

Shade Structures for Comfort and Convenience

Protecting your outdoor kitchen from the sun is crucial for comfort. Shade structures like pergolas, umbrellas, and retractable awnings offer versatile sun-blocking solutions.

  • Pergolas: These overhead structures can be adorned with climbing vines or equipped with retractable canopies to provide both shade and a visually appealing design element.
  • Umbrellas: Freestanding or table-mounted umbrellas offer a portable and adjustable shade option, allowing you to target specific areas as needed.
  • Retractable Awnings: These versatile shade solutions can be extended to provide cover when the sun is high and retracted to allow for more open-air enjoyment.

Combining lighting and shade in your outdoor kitchen design creates a harmonious space. This ensures your outdoor kitchen is both functional and visually appealing.

Plumbing and Utility Considerations

Planning an outdoor kitchen requires careful thought about plumbing and utilities. Water, gas, and electricity access are crucial for a functional cooking space. These elements ensure safety and convenience in your outdoor kitchen.

  • Outdoor kitchen plumbing involves connecting a sink to your home’s water supply. This task needs expert installation of the supply pipe. For drainage, options include under-sink buckets or dry wells. Always check local rules before installing.
  • Gas lines power grills, cooktops, and pizza ovens. Natural gas offers convenience, eliminating propane tank swaps. Hire a pro to ensure proper sizing and safety compliance.
  • Electricity is needed for various appliances in outdoor kitchens. Multiple outlets power fridges, ice makers, and lighting. Use Ground Fault Circuit Interrupted (GFCI) outlets for safety.
  • Licensed professionals are key to successful utility installation. They know local codes and can secure necessary permits. Their expertise ensures a safe and compliant setup.

Addressing utilities early creates a visually appealing and functional outdoor kitchen. This approach ensures safety and enjoyment for years to come. Your outdoor space will become a true extension of your home.

Appliances and Amenities for Outdoor Entertaining

Outdoor kitchens can be enhanced with various appliances and amenities. These features support outdoor entertaining and simplify food preparation. They make outdoor cooking and gatherings more convenient and enjoyable.

Refrigeration and Storage

Outdoor kitchen refrigerators are weatherproof and have thicker insulation. They often include built-in freezers, ice makers, and kegerators. These appliances keep ingredients and drinks chilled and easily accessible.

Outdoor storage cabinets provide space for organizing cooking essentials. They’re perfect for storing utensils and serve ware.

Outdoor Sinks and Running Water

An outdoor sink with running water is valuable for any outdoor kitchen. It simplifies food preparation and cleanup tasks. Outdoor sink cabinets can house your chosen sink and faucet.

These sinks ensure easy access to water for washing hands and rinsing produce. They’re also great for cleaning cooking tools.

Other popular outdoor kitchen amenities include:

  • Side burners for simmering, sautéing, or boiling
  • Warming drawers to keep food warm until served
  • Smokers for adding a delicious, smoky flavor to meats
  • Outdoor ovens for baking, broiling, and roasting
  • Cocktail stations and beverage centers for entertaining
  • Grill exhaust hoods to manage smoke, odors, and heat
  • Outdoor dishwashers for convenient cleanup

These appliances and amenities can transform your outdoor kitchen. They create a versatile and well-equipped space. Your outdoor area becomes perfect for hosting memorable gatherings and preparing delicious meals.

Final Touches and Outdoor Kitchen Maintenance

outdoor kitchen decor

It’s time to add finishing touches to your outdoor kitchen. Integrate outdoor-friendly furniture, accessories, and landscaping elements to create an inviting oasis. Safety features, proper cleaning, and upkeep will prolong your kitchen’s lifespan.

Decor and Landscaping

Choose weather-resistant and durable furnishings for your outdoor kitchen decor. Create a cozy gathering area with comfortable seating like patio sofas or dining sets. Add personal flair with weather-proof pillows, rugs, and decorative pieces.

Blend the kitchen into your outdoor space with outdoor kitchen landscaping. Use potted plants, hanging baskets, and strategically placed greenery to create a seamless look.

Safety Features

Install a fire extinguisher within easy reach for outdoor kitchen safety. Add non-slip surfaces, proper ventilation, and secure storage for hazardous materials. Regularly check gas lines and electrical connections to maintain a safe environment.

Cleaning and Upkeep

Establish a regular outdoor kitchen maintenance routine to preserve your investment. Wipe down surfaces, empty drip trays, and clean grill grates regularly. Use high-quality outdoor kitchen cleaning products and tools to keep your space pristine.

Inspect for needed repairs or replacements often. This ensures your outdoor kitchen provides years of enjoyment and value.

FindPros: Your Outdoor Kitchen Building Experts

Looking to transform your backyard into the ultimate culinary oasis? Look no further than FindPros, your one-stop-shop for connecting with top-rated outdoor kitchen builders in your local area. By answering a few simple questions about your project, you’ll be matched with skilled professionals who can bring your dream outdoor kitchen to life.

With FindPros, you’ll get the best pricing when multiple pros compete for your job, and you can choose the one you feel most comfortable with. Take the guesswork out of your outdoor kitchen project and let FindPros handle the heavy lifting. Get started today and turn your backyard into the ultimate gathering space.

Conclusion

Outdoor kitchens are becoming more popular as people embrace outdoor living. They transform backyards into functional and appealing culinary spaces. Careful planning, durable materials, and essential components are key to creating an exceptional outdoor kitchen.

These kitchens can boost property value by up to 200%. They attract more buyers and enable quicker sales. Outdoor cooking spaces can lower utility bills and foster a connection with nature.

Investing in an outdoor kitchen is a smart move. It increases property value and improves entertainment experiences. With proper planning and maintenance, it becomes the heart of your backyard oasis.

A well-designed outdoor kitchen sets your property apart in the real estate market. It provides lasting enjoyment and enhances your quality of life for years to come.

Frequently Asked Questions (Outdoor Kitchen Builders)

An outdoor kitchen island is a standalone counter or prep area that adds extra surface space to your outdoor kitchen. It can be used for food preparation, serving, or even as a casual dining spot. Incorporating an outdoor kitchen island into your design can make your outdoor kitchen more functional and convenient for hosting outdoor parties and entertaining guests.
When planning your dream outdoor kitchen, some must-have features to consider include a pizza oven for baking delicious culinary delights, a refrigerator or ice maker to keep beverages cold, and ample counter space or kitchen islands for food prep and serving. Expert designers can help you incorporate these elements into a beautiful outdoor kitchen that aligns with your vision.
An outdoor kitchen can be a great home improvement project that increases the value of your property. Potential buyers are often attracted to homes with well-designed outdoor living spaces, and an outdoor kitchen can be a major selling point. By creating a complete and functional outdoor kitchen, you’ll not only enjoy more enjoyment in your own backyard but also add value to your home.
When building your outdoor kitchen, you can choose from a variety of durable and weatherproof materials, such as brick, stone, or stainless steel. These materials will ensure your kitchen stands up to the elements and maintains its beauty over time. You can also select from a range of styles, from sleek and modern to rustic and charming, to create the perfect outdoor kitchen that complements your home and landscape.
Your outdoor kitchen is the perfect setting for hosting outdoor parties and gatherings with friends and family. In addition to the cooking and prep areas, consider incorporating features like a fireplace or fire pit, comfortable seating, and a dedicated beverages station to create a truly inviting and enjoyable atmosphere for your guests. With the right design and amenities, your outdoor kitchen can become the centerpiece of your backyard oasis and the go-to spot for memorable outdoor parties.

Oil Tank Removal

Patio Installers Near You

Can’t find what you are looking for?

How It Works

  • Answer a few questions about your home project.
  • Within seconds, get matched with top-rated local pros.
  • Compare quotes and choose the best pro for the job.

Oil Tank Removal In Your Area

Oil Tank Removal: A Guide to Hiring the Right Professional

Meta Description: Discover expert tips for hiring the right professional for Oil Tank Removal. Learn about costs, safety, and environmental considerations to protect your property.

Oil Tank Removal

Removing an old oil tank from your property can be a big decision. This guide will help you understand the costs and process involved. We’ll explore key factors to consider when hiring a professional for this task.

Our comprehensive guide covers fuel oil, heating oil, and underground oil tanks. You’ll learn how to ensure a smooth and cost-effective removal experience. Let’s uncover the answers you need for this important home project.

Key Takeaways

  • 01

    The average cost of oil tank removal ranges from $1,000 to $3,000, including disposal.

  • 02

    Factors like tank size, location, condition, and contractor qualifications impact the final cost.

  • 03

    Hiring a licensed and insured professional is crucial for safe and proper oil tank removal.

  • 04

    Obtaining multiple quotes is recommended to find the most cost-effective solution.

  • 05

    Understanding regulations and permits is essential for a successful oil tank removal project.

What is an Oil Tank?

An oil tank stores heating or fuel oil for properties. These large containers come in two types: aboveground storage tanks (ASTs) and underground storage tanks (USTs).

ASTs are usually found in basements, crawl spaces, or outside buildings. USTs are buried underground, making them harder to access.

Types of Oil Tanks

The two primary types of oil tanks are:

  • Aboveground oil tanks: These are installed above ground, often in basements or against buildings. They’re typically made of steel or plastic and are easier to inspect.
  • Underground oil tanks: These are buried below ground on the property. They’re usually made of steel or fiberglass and can be harder to maintain.

Oil tanks can also be classified as heating oil tanks or fuel oil tanks. This classification depends on their intended use.

History of Oil Tank Usage

Oil tanks replaced coal and wood-fired heating systems in the late 1800s. Their use peaked in the 1930s but has declined since.

Natural gas and electric heating have become more popular. Yet, many older properties still use oil tanks for heating and fuel storage.

Proper maintenance and eventual removal of these tanks is crucial for homeowners and property owners.

Reasons for Oil Tank Removal

Old, unused oil tanks pose serious risks to homeowners. They can cause pollution and health hazards if they leak or corrode. A study shows 99% of closed tanks don’t meet API 2015:2018 standards for cleaning and safety.

Environmental and Health Concerns

Many tanks lack proper soil testing, leaving gaps in leak detection. This can lead to contamination, even with municipal permits for decommissioning. Tanks filled with sand, gravel, or foam may still leak if not cleaned thoroughly.

These issues make tank removal necessary. Potential risks exist for both property buyers and sellers.

Property Value Considerations

Oil tanks can lower property values due to liability concerns. Their popularity declined after 1950s when environmental rules tightened. Some homeowners unknowingly sell properties with buried tanks that weren’t tested for leaks.

Removing old, unused tanks can reduce risks and boost property value. It’s a smart move for homeowners looking to protect their investment.

Signs of a Leaking Oil Tank

oil tank inspection

Regular oil tank checks prevent costly issues. Above-ground tanks are easy to inspect. Look for stains, rust, and odd smells. Underground tanks are trickier to check.

Here are signs of leaking underground tanks:

  • Unexplained drops in your home’s oil levels, which could signify a leak.
  • Presence of oil in the soil or your basement, which can seep in from a damaged tank.
  • Oil sheens on nearby water sources, such as ponds or streams, which may be caused by tank leakage.

Professional checks help spot issues early. Quick action on signs of oil tank leaks saves money and protects the environment.

Stay alert for oil tank corrosion or oil tank damage. These can cause leaks. If you spot signs of a leaking oil tank, call a oil tank inspection expert right away.

When to Remove an Oil Tank

Old or unused oil tanks can be dangerous, even if they’re not leaking. They might cause soil and water pollution later. It’s smart to remove them if they’re not used anymore.

Consider taking out the tank when planning home upgrades or selling your house. Tanks over 30 years old are more likely to leak. New buyers often avoid homes with buried tanks.

Removing an underground oil tank costs $1,000 to $5,000. The price depends on size, condition, and how easy it is to reach. If there’s a leak, cleanup can cost much more.

It’s best to hire experts for underground tank removal. They can give you accurate cost estimates. Taking out unused tanks early can save you money and trouble later.

By dealing with old tanks now, you protect your property and the environment. This also helps you avoid future problems and costs.

Hiring a Professional Oil Tank Removal Contractor

Hiring a qualified, licensed oil tank removal contractor is essential. These experts know proper procedures, regulations, and safety protocols. They ensure safe and compliant oil tank removal.

Qualifications and Licensing

Choose oil tank removal companies with licensed and insured technicians. Ask for documentation of their qualifications, licenses, and insurance coverage. This protects you if issues arise during the removal process.

Getting Multiple Quotes

  • Get quotes from multiple oil tank removal companies to compare pricing and services.
  • Evaluate potential oil tank removal contractors based on qualifications, licensing, insurance, and customer reviews.
  • Multiple oil tank removal quotes help find competitive and reliable oil tank removal services.

The right licensed oil tank removal contractor ensures safe and compliant removal. Research and compare insured oil tank removal options for peace of mind.

This protects your property and the environment during the removal process.

Regulations and Permits for Oil Tank Removal

Oil tank removal is strictly regulated at federal, state, and local levels. Understanding these rules and getting proper permits is vital for safe, legal removal.

Federal Regulations

The EPA’s SPCC rule governs oil tanks at the federal level. It sets standards for oil storage facilities, including containment and leak detection systems.

State and Local Regulations

States and cities often have extra rules for oil tank removal. These may include soil testing and proper disposal requirements. Homeowners must follow all local regulations.

Compliance ensures a successful oil tank removal process. Research is key to understanding and following all applicable rules.

Getting permits is crucial for oil tank removal. Local fire departments or environmental agencies often require them. Working with a pro can help navigate the process.

Following regulations protects the environment and avoids legal issues. It’s essential for safe and responsible oil tank removal.

Oil tank removal regulations protect our environment and health. Proper planning and permit compliance are key to successful oil tank removal.

The Oil Tank Removal Process

oil tank removal process

Removing an oil tank requires careful planning and execution. The process includes tank closure, cleaning, extraction, and proper disposal or recycling. Let’s explore each step in detail.

Tank Closure and Cleaning

First, the tank is closed and cleaned properly. Any remaining oil is emptied from the tank. Sludge or contamination that has built up is thoroughly removed.

This step ensures safe and environmentally responsible removal. It’s crucial for the success of the entire process.

Tank Extraction and Disposal

After cleaning, the tank is extracted from the property. It’s either lifted out or cut into smaller pieces for easier removal.

The tank is then taken to an approved oil tank disposal or oil tank recycling facility. This follows local and federal oil tank decommissioning rules.

Following laws and regulations is vital during the oil tank removal process. This ensures safe handling of the tank and any contaminants.

Hiring a qualified, licensed oil tank removal contractor is recommended. They ensure efficient work that complies with all oil tank closure and oil tank cleaning requirements.

Cost Factors for Oil Tank Removal

Oil tank removal costs vary based on several key factors. Tank size and location are major price drivers. Larger, underground tanks cost more to remove than smaller, aboveground ones.

A 550-gallon aboveground tank removal averages $1,600. Underground tank removal typically costs between $1,000 and $3,500. Soil contamination can significantly increase the overall expense.

Testing for soil pollution costs $500 to $1,800. Cleanup and remediation can add thousands to the project. Soil remediation ranges from $500 to $10,000, depending on contamination level.

Other cost factors include oil disposal and required permits. Local authorities may mandate inspections. Permit costs usually range from $30 to $160.

To budget effectively, get multiple quotes and review insurance coverage. Plan for surprises with a 10-20% budget buffer. Consider bundling services for potential savings.

Tank Size and Location

  • Above-ground tank removal costs an average of $1,600 for a 550-gallon tank.
  • Underground tank removal ranges from $1,000 to $3,500, with excavation being a significant cost driver.
  • Basement tank removal typically costs $1,500 to $4,500.

Soil Contamination and Remediation

  1. Soil testing costs around $500 to $1,800.
  2. Soil remediation can range from $500 to $10,000, depending on the extent of contamination.
  3. Permit costs for oil tank removal typically range from $30 to $160.

Abandoning vs. Removing an Oil Tank

Property owners face a tough choice with old oil tanks: abandon or remove? The decision hinges on accessibility, cost, and environmental factors.

Abandoning an oil tank involves emptying, cleaning, and filling it with inert material. This method works for hard-to-reach tanks or when removal is too expensive.

However, abandonment doesn’t eliminate future leak risks or environmental contamination. It’s a temporary solution at best.

Removing an oil tank is often the better choice. It eliminates future problems completely.

The oil tank removal process includes excavation, proper disposal, and site restoration. This approach addresses long-term oil tank abandonment or oil tank decommissioning concerns.

Oil tank closure or oil tank disposal may cost more initially. But it offers peace of mind and potentially increases property value.

Consult a qualified oil tank removal contractor before deciding. They can assess your situation and recommend the best action.

Preparing Your Property for Oil Tank Removal

Homeowners must take several steps before removing an oil tank. These include finding the tank’s location and clearing nearby obstacles. It’s also crucial to ensure easy access for the removal crew.

Obtaining necessary permits is often required. Arranging proper disposal of remaining oil is important too. Securing the site helps prevent safety hazards during removal.

  • Identifying the Tank’s Location: Finding the tank is the first step. Look for visual cues like fill pipes or vent lines. You can also check with local authorities for installation records.
  • Clearing Obstructions and Ensuring Accessibility: After locating the tank, clear the surrounding area. Remove landscaping, fencing, or structures that block access. This allows the crew to work safely and efficiently.
  • Obtaining Permits and Arranging Disposal: Check local regulations for required permits. Properly dispose of or recycle any remaining oil. Your removal contractor can usually help with these tasks.
  • Securing the Site: Restrict access and post necessary signage to secure the site. This protects the removal crew and surrounding area. It helps prevent accidents during the removal process.

Taking these steps ensures a smooth and efficient oil tank removal. It also minimizes potential risks and hazards. Proper preparation is key to a successful project.

FindPros: The Easy Way to Find Oil Tank Removal Experts

Dealing with an old, leaking oil tank can be a big hassle. But FindPros makes it simple to find the right professionals for the job. Just answer a few quick questions about your heating oil tank, fuel oil tank, or tank removal needs, and we’ll match you with top-rated local experts. Compare quotes, read reviews, and choose the pro that’s the best fit.

With FindPros, you’ll get competitive pricing, quality service, and the peace of mind that comes with hiring a licensed and insured contractor to handle your oil tank repair or removal. Get started on your project today – let FindPros take the stress out of finding the right pros for the job.

Conclusion

Removing an old, unused oil tank is crucial for property safety. Hire a qualified professional and follow regulations to mitigate risks. This can increase your property’s value and protect the environment.

The oil tank removal process safeguards property integrity. It prevents costly cleanups, potential fines, and decreased property value. Removal can make your property more appealing to buyers.

Understanding the importance of oil tank removal helps homeowners address issues proactively. Knowing warning signs of tank deterioration is crucial. Hiring a professional contractor ensures proper handling.

The benefits of thorough oil tank removal are far-reaching. It protects community health and safeguards property value. Following best practices gives homeowners confidence and peace of mind.

Frequently Asked Questions (Oil Tank Removal)

Heating oil tanks are used to store oil for home heating, while fuel oil tanks store oil for other purposes like generators or vehicles. The removal process is similar for both types of tanks.
The key steps are: 1) Draining and cleaning the tank, 2) Removing the tank, 3) Disposing of the tank properly, and 4) Testing and remediating any contaminated soil. A licensed contractor should handle all of these steps.
The average cost range for underground oil tank removal is $1,000 to $3,500, depending on the tank size, location, and any needed soil remediation. Aboveground tanks are typically cheaper, around $1,600 on average.
Signs include unexplained drops in oil levels, oil stains around the tank, and oil sheens on nearby water sources. Catching a leak early is important to prevent costly soil contamination.
Proper licensing and insurance protects the homeowner if any issues arise during the tank removal process, such as a spill or damage to the property. It also ensures the job is done safely and in compliance with all relevant regulations.

Mural Painters

Patio Installers Near You

Can’t find what you are looking for?

How It Works

  • Answer a few questions about your home project.
  • Within seconds, get matched with top-rated local pros.
  • Compare quotes and choose the best pro for the job.

Mural Painters In Your Area

Hiring Mural Painters: A Guide to Finding the Perfect Artist

Meta Description: Discover how to hire skilled mural painters for your project. Learn tips on finding, vetting, and collaborating with the right artist to bring your vision to life.

Mural Painters

Ready to turn a dull wall into a stunning mural? The right painter can make your vision come alive. This guide will help you find the ideal artist for your project.

Mural creation blends artistic talent with practical know-how. Your choice of artist can greatly impact the final result. Let’s explore what makes the best mural painters stand out.

Key Takeaways

  • 01

    Defining your mural vision and goals is crucial for finding the right artist

  • 02

    Researching and evaluating local mural painters based on their portfolios and past work is essential

  • 03

    Negotiating the contract and collaborating closely with the artist during the creative process are key to a successful project

  • 04

    Preparing the mural site and overseeing the painting process ensures a high-quality, long-lasting result

  • 05

    Promoting and maintaining the completed mural helps to showcase the artwork and protect your investment

Defining Your Mural Vision and Goals

Start your mural project by defining your vision and goals. Determine the purpose and style you want. Set a realistic budget and timeline. This clarity will help you find the right artist for your project.

Determining the Purpose and Style

Think about why you want the mural. Is it to beautify a space or commemorate an event? Maybe it’s to inspire the community.

Next, consider the style you prefer. Do you want a realistic portrait or an illustrative design? Perhaps a large-scale street art piece appeals to you.

Explore different mural styles and mediums. This will help you picture the final artwork more clearly.

Establishing Your Budget and Timeline

  • Set a budget covering the artist’s fees, materials, and any necessary equipment or site preparation.
  • Create a timeline giving the artist enough time to design and execute the mural.
  • Factor in the wall size, design complexity, and artist availability when planning your timeline.

A clear vision and well-defined parameters will guide your project. They’ll help you find the perfect artist for your mural. Your planning will set the stage for a successful outcome.

Researching and Finding Local Mural Painters

Start by exploring online portfolios of mural artists in your area. Look for work that matches your vision. Check reviews to assess their professionalism and communication skills.

Create a list of potential candidates with strong mural artist portfolios. This process involves writing a brief, searching locally and online, and contacting chosen artists.

Local artists are ideal unless you have a budget for out-of-town expenses. Note the artist’s name, website, email, and work samples. You can hire a service for $500 to get six suitable local artists.

Narrow your list to three top choices before reaching out. Inform artists about the mural location, size, budget, and deadline. Always check an artist’s references or reviews before hiring.

Jill Roberts, a mural painter in Temecula, CA, creates personalized murals. She specializes in nursery murals, living room designs, and custom pet portraits. Her portfolio showcases playful children’s murals and sophisticated dining room artwork.

Contacting and Evaluating Potential Artists

It’s time to reach out to your top mural artist picks. Evaluate them to find the best fit for your project. Look for style, quality, and professionalism that match your needs.

Requesting Proposals and Concept Designs

Ask potential artists for detailed proposals. Request concept designs or sketches that show their creative vision. This will help you see how they interpret your mural’s purpose and style.

Checking References and Past Work

  • Review each artist’s past work. Look at their skills, style, and experience with large-scale murals or public art projects.
  • Contact the artist’s references. Ask about their professionalism, reliability, and ability to work well with clients.
  • Visit the artist’s studio or exhibition space. Get a firsthand look at their work and creative process.

Careful vetting helps you make an informed choice. You’ll find the artist or team that best fits your project’s goals. Your vision will come to life with the right talent.

Negotiating and Finalizing the Contract

mural painter contract

After choosing your mural painter, it’s time to negotiate and finalize the contract. This stage covers artist fees, payment schedules, timelines, and responsibilities. The contract should clearly outline the work scope, site prep, materials, and intellectual property rights.

Make sure both parties agree and the contract is fair. Taking time to review and negotiate will help your project succeed. Key considerations include:

  • Agreeing on the artist’s fees and payment structure, such as an upfront deposit and milestone-based payments.
  • Establishing a clear timeline for project completion, with specific deadlines for design approvals and painting phases.
  • Outlining the artist’s responsibilities, including any site preparation, material sourcing, and maintenance requirements.
  • Addressing intellectual property rights and usage permissions for the mural artwork.
  • Incorporating provisions for contract termination, warranty, and liability coverage.

A well-negotiated contract ensures smooth collaboration with your mural painter. It sets the stage for a successful project that meets your vision and budget. Careful planning now will benefit the entire creative process.

Collaborating with the Artist During the Creative Process

Hiring a talented mural painter is just the start. Close collaboration with the artist is key to success. This partnership allows for valuable feedback and design approval before painting begins.

Providing Feedback and Approving Designs

Schedule regular check-ins with your mural painter to review concept designs. Offer honest opinions and suggestions to shape the artwork’s direction. Be open to the artist’s ideas, as they can elevate the final mural unexpectedly.

The painter will create a detailed, scaled-up version for final review. Examine the composition, color palette, and overall aesthetic carefully. This ensures alignment with your vision and project goals.

Trust the mural painter’s expertise while voicing your preferences. Open communication and mutual respect are essential. Together, you can create a captivating mural that becomes a cherished community asset.

Preparing the Mural Site and Materials

Proper site prep is vital for a successful mural painting project. This includes cleaning and priming the wall and fixing any structural issues. The mural artist should be consulted about site needs and required materials.

Good mural site preparation is essential for a great custom mural. Fixing surface flaws and using the right primer helps ensure a smooth painting process.

  • Assess the wall’s condition and address any cracks or uneven surfaces.
  • Clean the wall thoroughly to remove dirt, grease, or existing paint.
  • Apply a suitable primer to create a smooth, uniform surface for the mural artwork.
  • Determine the needed equipment, such as scaffolding, lifts, or ladders, to access the entire mural site.
  • Consult with the mural artist on the specific mural materials required, including paints, brushes, or specialty tools.

Good prep work sets the stage for a smooth mural painting project. It helps bring the artist’s vision to life in a public space.

Overseeing the Mural Painting Process

Keeping a close eye on the mural painting process is vital. Ensure the artist stays on schedule and do regular quality checks. This helps guarantee the final outcome meets your vision and standards.

Ensuring Timely Completion and Quality Control

Communicate effectively with the artist during painting. Give clear feedback on changes needed and work together to solve issues. Watch the painting progress closely to spot delays and keep the project on track.

Regular quality checks are crucial for a well-executed mural. Inspect the artwork at different stages, looking for consistent colors and proper proportions. Address any concerns quickly to maintain high-quality standards.

Stay actively involved in the mural painting process. Prioritize quality control to ensure a successful outcome that captures your vision. The mural will showcase your dedication to public art and creativity.

Promoting and Unveiling the Completed Mural

mural

The mural is finished! Now it’s time to show it off. Plan a public celebration or ribbon-cutting ceremony. Use local media and social platforms to build excitement.

Give credit to the mural artist. Show off the project to the community. Good promotion will honor the artist’s work and boost the mural’s impact.

Try these strategies to promote your mural:

  • Organize a mural unveiling event with the artist present to engage the community and media
  • Leverage social media platforms to share updates, behind-the-scenes footage, and the final mural reveal
  • Reach out to local media outlets, such as newspapers, TV stations, and blogs, to pitch a story about the mural project
  • Create a dedicated webpage or section on your organization’s website to showcase the mural and the artist’s work
  • Consider printing and distributing mural-themed merchandise, such as T-shirts or tote bags, to further promote the artwork

Active promotion of the mural will celebrate the artist’s creation. It will also engage the community and boost your public art project’s impact.

Maintaining and Preserving the Mural Artwork

Preserving completed mural artwork is vital. Regular checks for wear, damage, or weathering are crucial. Sun, rain, temperature changes, and vandalism can affect the mural’s lifespan.

Protecting the Mural from Environmental Factors

Work with the artist to create a thorough maintenance plan. This plan should protect the artwork from environmental elements. It may include protective coatings, repairs, and anti-vandalism measures.

MuralShield™ is a popular conservation-grade coating. It guards murals against weather, UV light, chemicals, pollutants, and water damage. Experts suggest using a sprayer to apply two to three coats.

A top coat of World’s Best Graffiti Coating (WBGC) adds extra protection. This approach keeps the artwork vibrant for years to come.

Proactive maintenance allows the community to enjoy the art and creativity. It brings inspiration to public spaces and neighborhoods. Preserving murals keeps the community’s history and cultural identity alive.

Building Relationships with Local Mural Painters

Connecting with local mural painters can greatly benefit your future projects. Attend art events and stay in touch with artists in your community. This approach helps you find talent quickly when new mural opportunities arise.

Good relationships with mural painters can lead to valuable collaborations and referrals. These connections ensure a reliable network of street artists for your public art initiatives.

Building relationships with local mural painters creates a network of talented street artists. This collaborative approach leads to stunning artwork and strengthens the creative community. It also enhances the impact of your mural initiatives.

Exploring Alternative Mural Styles and Techniques

Public art is changing, offering new mural styles and techniques. 3D murals with sculptural elements are gaining popularity. Interactive installations also invite community engagement in unique ways.

3D Murals and Interactive Installations

Three-dimensional murals blend painting, sculpture, and architecture. They create an immersive experience for viewers. These artworks use bold, protruding elements or intricate bas-reliefs to challenge traditional mural boundaries.

Interactive murals encourage participation and foster community connections. They may include tactile elements, digital components, or motion-activated features. Viewers can touch, explore, and become part of the creative experience.

These installations break down barriers between art and audience. They cultivate a sense of ownership and pride within the community. Interactive murals transform public spaces into dynamic, multifaceted canvases.

3D murals and interactive installations push traditional mural art boundaries. They offer unique opportunities to inspire and delight. Embrace innovation and let your creativity soar in public spaces.

FindPros: Your Gateway to Talented Mural Painters

Searching for the perfect street artist or pop art muralist to transform your walls, house, or community space? Look no further than FindPros. Our network of best graffiti artists and mural painter inc professionals can create custom murals that will inspire and delight.

Whether you’re seeking bold, large-scale artwork or smaller, more intimate murals, our graphic designers can match you with the ideal talent. Explore financing options and get connected with top-rated local pros who can bring your vision to life. Answer a few simple questions about your project, and we’ll show you the best options to choose from.

Frequently Asked Questions (Mural Painters)

Answer: To find the best street artists or graffiti artists, research local mural painters in your area. Look at their portfolios, past work, and reviews to evaluate their skills and unique street art style. Reach out to them and request proposals or concept designs to see how they would interpret your mural project.
Answer: Newer mural styles include bold, three-dimensional sculptures and interactive installations that invite everyday people to engage with the artwork. These push the boundaries of traditional mural art and create immersive, multi-dimensional experiences for passers-by.
Answer: To promote the mural, organize a public unveiling event, share updates on social media, and pitch stories to local media. For maintenance, work closely with the mural painter to protect the artwork from environmental factors using specialized coatings and preventative measures against damage or vandalism.
Answer: Provide regular feedback on concept designs, be open to the artist’s ideas, and conduct quality checks throughout the painting process. Effective communication and mutual respect will help ensure the final mural meets your vision and standards, transforming the canvas into a captivating piece of public art.

Mudjacking Companies

Patio Installers Near You

Can’t find what you are looking for?

How It Works

  • Answer a few questions about your home project.
  • Within seconds, get matched with top-rated local pros.
  • Compare quotes and choose the best pro for the job.

Mudjacking Companies In Your Area

Mudjacking Companies: A Guide to Repairing Sinking Foundations

Meta Description: Discover how mudjacking companies can repair your sinking foundation efficiently and cost-effectively. Learn about concrete leveling techniques and find expert solutions for uneven surfaces.

Mudjacking Companies

Is your concrete sinking or uneven? You’re not alone. Many homeowners face this issue. Mudjacking companies can help restore foundations and concrete slabs to their original state.

Mudjacking is a concrete leveling technique. It can benefit your home or business. This guide will explain mudjacking and help you decide if it’s right for you.

Key Takeaways

  • 01

    Mudjacking fixes sunken or uneven concrete surfaces like driveways, sidewalks, and pool decks.

  • 02

    The process involves drilling holes and injecting a special mixture to raise and level the surface.

  • 03

    Mudjacking is quick, often completed within 48 hours, allowing immediate use after repair.

  • 04

    Choosing an experienced mudjacking contractor is crucial for a successful, long-lasting repair.

  • 05

    Sometimes, concrete replacement may be better than mudjacking, especially for major foundation damage.

What is Mudjacking?

Mudjacking, or slabjacking, lifts sunken concrete slabs back into place. It involves drilling holes and injecting a special grout mixture underneath. This grout fills voids and pushes the slab upward, restoring its original level.

Definition and Overview of Mudjacking Process

Mudjacking fixes uneven concrete surfaces like sidewalks, patios, and garage floors. Contractors inject grout to lift and level the slab, addressing cracks and trip hazards. The process typically takes just one day, causing minimal disruption.

Advantages of Mudjacking over Concrete Replacement

  • Lower cost compared to complete concrete replacement
  • Quicker turnaround time, often less than 48 hours for the surface to be usable
  • Preservation of the existing concrete, reducing the need for costly demolition and new installation
  • Environmentally friendly approach, as it avoids the waste generated by concrete replacement

Mudjacking is popular in Kansas City and nearby areas for fixing uneven concrete. It’s cost-effective and efficient, restoring concrete slab safety with minimal disruption.

Signs of a Sinking Foundation

A sinking foundation can seriously harm your home’s structure. Watch for early warning signs to avoid costly damages. Look for cracks in walls, floors, and gaps around windows and doors.

Cracks in Walls, Floors, and Foundations

Diagonal cracks wider than 1/8 inch in walls signal foundation movement. Horizontal cracks in the foundation suggest structural shifting. Floor cracks, in concrete or tile, may point to instability.

Gaps Around Windows, Doors, and Cabinets

Uneven foundation settling can misalign your home’s structure. This may cause windows and doors to stick. You might see gaps around these fixtures and between cabinets and walls.

Leaning Chimneys and Moisture Intrusion

A tilting chimney clearly shows foundation shifting. This can lead to other structural problems. Foundation issues may also cause moisture intrusion.

Moisture can lead to mold and mildew growth. This can harm your home’s air quality and structure.

Act quickly if you see signs of a sinking foundation. Consult a foundation repair expert to assess the problem. They can help determine the best solution.

Causes of Foundation Settlement

soil expansion and contraction

Foundations can sink for many reasons, often due to changing soil conditions. Temperature swings make soil expand and contract, shifting the foundation. Floods or earthquakes can also destabilize soil, causing sinking.

Even homes built to code may have shifting foundations. This can happen because of moisture intrusion or erosion. Understanding these causes helps find effective solutions.

Soil Expansion and Contraction

Soil conditions greatly affect foundation settlement. Extreme temperature changes make soil expand and contract, causing instability. This leads to foundation shifting.

Areas with freeze-thaw cycles face repeated soil expansion and contraction. Over time, this wears down the foundation’s stability.

Poor Construction and Inadequate Compaction

Bad construction practices can lead to foundation issues. These include poor soil compaction or improper footings. Even HUD-compliant homes may have shifting foundations due to these factors.

Fixing these underlying causes is key to repairing a sinking foundation. Proper construction and soil preparation are crucial.

Excess Moisture and Erosion

Moisture and erosion can weaken soil supporting a foundation. Too much water weakens soil, causing settlement. Erosion washes away soil, making the foundation sink.

Good drainage and moisture control are vital for a stable foundation. These measures help prevent soil weakening and erosion.

Knowing why foundations settle helps homeowners and contractors fix issues better. They can restore the structure’s integrity by tackling root causes. Addressing soil, construction, or moisture problems ensures long-term foundation stability.

Mudjacking Companies: Choosing the Right Contractor

Picking a mudjacking company for foundation repair requires careful thought. Look at their experience, licenses, insurance, and local reputation. A structural engineer’s inspection can help find the best solution.

Get multiple quotes to compare costs. Foundation repair can be pricey, so it’s wise to shop around.

  • Experience and Expertise: Choose companies with a solid track record in mudjacking. Seek contractors with 3-5 years in concrete leveling. Experienced pros have the know-how to fix foundation issues effectively.
  • Licensing and Insurance: Check that the company has proper licenses and insurance. They should have workers’ comp, general liability, and commercial auto coverage. Uninsured contractors can lead to costly lawsuits if accidents happen.
  • Customer Reviews and Reputation: Read customer reviews and check the company’s reputation. Look for positive testimonials and Better Business Bureau accreditation. A strong social media presence can also indicate reliability.

These factors help you pick a trustworthy contractor. They’ll ensure your foundation issues are addressed safely and effectively.

The Mudjacking Process Step-by-Step

Mudjacking fixes sunken or uneven concrete slabs. It injects grout beneath the concrete to lift and level it. Let’s look at the main steps of mudjacking.

Preparation and Marking

Contractors start by marking the concrete slab. They place marks every 6-8 feet. These marks show where to drill injection holes.

Drilling and Injection

Workers drill 2-inch holes at the marked spots. They mix grout with Portland cement, sand, and water. This mixture is pumped through the holes under the slab.

As they inject the grout, they measure and level the slab. This ensures it rises to the right height.

Leveling and Cleanup

After lifting the slab, they fill the holes with concrete. Then, they clean up the work area. This quick process often takes just a few hours.

Mudjacking is a cheap way to fix sinking concrete slabs. It’s faster than replacing the whole slab. Skilled workers can make your concrete look great again.

Concrete Lifting and Leveling Methods

Homeowners have options for fixing sinking or uneven foundations. These include push piers, helical piers, slab piers, and grout or resin injections. Each method offers unique benefits for different situations.

Push Piers and Helical Piers

Push piers and helical piers connect foundations to stable soil or bedrock. They’re driven into the ground to lift and level foundations. Push piers have straight shafts, while helical piers have spiral shapes.

Slab Piers and Grout/Resin Injections

Slab piers are designed to support and level concrete slab foundations. Grout or resin injections fill voids under slabs to stabilize them.

The process involves lifting the house and installing supportive systems. Adjustable brackets connect the foundation to the new supports for precise leveling.

Costs for these techniques range from $585 for basic mudjacking to $8,000 for extensive foam or pier installations. Factors like job size, accessibility, and materials affect the price.

It’s wise to get quotes from several reputable contractors. This helps homeowners find the best solution for their specific foundation needs.

Cost Considerations for Mudjacking

Mudjacking is often cheaper than replacing a concrete slab. It costs $3 to $7 per square foot. Labor rates for experienced contractors range from $30 to $100 per hour.

Removing and replacing an old concrete slab can cost over $2,000. Higher-end replacements may reach $5,000 or more. Mudjacking is usually more cost-effective and can last 5 to 10 years.

Poly jacking, using polyurethane-based material, can last around 10 years. The average mudjacking project costs about $850. Most homeowners spend between $500 and $1,207 for concrete lifting and leveling.

Actual costs vary based on project size and complexity. The amount of cement slurry needed and project location affect prices. Simple jobs can cost $300, while complex projects may reach $2,075.

Get quotes from several reputable contractors before deciding. Look into government assistance programs to help with costs. Avoid DIY mudjacking, as it can cause more damage and expensive repairs.

Maintaining Your Repaired Foundation

After a successful foundation repair, homeowners must maintain their fixed foundation’s integrity. Proper drainage and moisture control are vital. These steps preserve the repair’s effectiveness and prevent future issues.

Proper Drainage and Moisture Control

Grade the landscape to direct water away from your home’s foundation. Keep gutters and downspouts clean to divert rainwater effectively. Install a sump pump or French drains in high water table areas.

Regular Inspections and Monitoring

  • Conduct regular visual inspections of your foundation, looking for any new cracks, gaps, or signs of shifting.
  • Document your foundation maintenance and repair efforts, including photographs, repair estimates, and receipts, in case of future insurance claims.
  • Collaborate with reputable foundation repair experts, such as the #dirtnerds at Perma Pier, to develop a tailored maintenance plan based on your home’s specific soil conditions and needs.

Maintain proper drainage and control moisture levels around your home. Conduct regular inspections to ensure long-term stability. These steps protect your repaired foundation and home’s structural integrity.

When to Consider Replacement Instead of Mudjacking

Mudjacking can fix many concrete slab issues. But severe foundation problems may need full replacement. This includes extensive structural damage or issues requiring multiple repair methods.

Concrete raising costs about 33% less than replacing a slab. It’s cost-effective and causes less disruption. However, the material used can erode over time.

Concrete replacement provides a new, long-lasting surface. It’s ideal for severe damage beyond surface leveling. This option offers durability and visual appeal.

  • Situations that may warrant slab replacement instead of mudjacking include extensive damage, surface imperfections, and multiple problems in the slab.
  • Concrete replacement is optimal for severe concrete damage that goes beyond surface leveling.
  • Concrete replacement provides a durable and visually appealing outcome despite requiring significant investment and time.

A professional inspection can help decide between mudjacking and replacement. It will determine the best solution for your specific situation.

Risks and Limitations of Mudjacking

Mudjacking Risks

Mudjacking can fix sinking foundations cheaply, but it has risks. Polyurethane is now better, replacing old mudjacking. Not all contractors use the newer tech.

Mudjacking materials can slump, erode, and wash out. This can cause concrete failures and sinking slabs. Mudjacking mud is heavy, weighing 100 pounds per cubic foot.

High-density polyurethane weighs only 4 pounds per cubic foot. Mudjacking companies often over-lift slabs due to wet slurry shrinkage. This can cause aesthetic issues when selling property.

  • Mudjacking materials are typically the same, with mixes made up of components allowing grout to pump easily through a 1 ½ inch hose without separating water from the material.
  • Concrete compounds added to the mix to harden it could increase the risk of slab cracking in winter due to frost heaving.
  • Contractors boasting about having the strongest material may not correlate with the necessary PSI needed for lifting slabs.

Expert knowledge prevents slab cracking and over-lifting. It also stops basement walls pushing in or pool walls caving in. Don’t mudjack in winter when frost is present.

Mudjacking works best without frost. This prevents concrete slabs from shifting due to ground changes. Wait until spring for mudjacking estimates.

Spring allows better assessment of uneven concrete without frost. Ask a pro to choose the right repair method. This helps avoid mudjacking risks.

Find the Right Mudjacking Pros with FindPros

Are you still deciding on the best mudjacking contractor for your concrete repair project? Look no further than FindPros. We’ll help you find the top-rated local pros in your area, so you can get the most competitive pricing and choose the best fit for your needs. Simply answer a few questions about your home project, and we’ll match you with experienced mudjacking contractors in the rest of no time.

Additionally, you can compare quotes and select the pro that you’ll enjoy working with the most, ensuring a smooth and stress-free experience from start to finish. Don’t let a hole in your budget or a long, tiring search process hold you back – let FindPros guide you to the right mudjacking solution for your home and walking life.

Conclusion

Mudjacking is a versatile, cost-effective way to fix sinking or uneven concrete slabs and foundations. It injects special grout under the concrete to lift and level surfaces. This non-invasive process avoids disruptive concrete replacement for cracked driveways, uneven patios, or shifting garage floors.

For severe foundation issues, a pro inspection may suggest complete replacement instead. Working with experienced mudjacking companies helps homeowners find the right repair plan. This method has a proven track record and is cost-effective for concrete repairs.

Choosing between mudjacking and other repairs depends on your property’s specific needs. Trusted mudjacking pros can ensure lasting quality and safety for your home’s foundation. This approach minimizes disruption and maximizes your investment in concrete repairs.

Frequently Asked Questions (Mudjacking Companies)

Concrete repair refers to fixing cracks, chips, or other damage to a concrete surface. Slab leveling, on the other hand, is the process of lifting and leveling a sunken or uneven concrete slab, such as a driveway or patio.
In Kansas City, if the concrete slab has severe structural damage or requires multiple repair methods, replacement may be the better choice over slab leveling. This is because specialized equipment and mudjacking contractors are needed for an effective slab leveling.
To get a free quote, you can request an estimate from local mudjacking contractors. They will assess the extent of the sinking or uneven concrete, such as your driveway or sidewalk, and provide a cost estimate for the slab leveling process.
Mudjacking is a popular choice because it is a cost-effective and efficient way to repair sunken or uneven concrete slabs. It does not require the entire slab to be replaced, which can save the homeowner money and create less disruption to their property.
If you are concerned about the condition of your concrete, such as a cracked driveway or uneven patio, you can request an inspection from a mudjacking contractor. They will evaluate the extent of the issue and advise you on the best course of action, whether that is slab leveling or replacing the entire concrete surface.

Move Out Cleaners

Patio Installers Near You

Can’t find what you are looking for?

How It Works

  • Answer a few questions about your home project.
  • Within seconds, get matched with top-rated local pros.
  • Compare quotes and choose the best pro for the job.

Move Out Cleaners In Your Area

Hiring Move Out Cleaners: What to Expect and How to Prepare

Meta Description: Discover what to expect when hiring move out cleaners and how to prepare for a smooth transition. Maximize your security deposit return with professional cleaning services.

Move Out Cleaners

Moving between homes can be stressful. There’s a lot to manage, from packing to ensuring thorough cleaning. Professional move-in/move-out cleaning services offer a popular solution.

These services help tenants and homeowners clean their homes meticulously. They make the moving process smoother and less overwhelming.

Let’s explore move-out cleaning services. We’ll look at the benefits, what’s included, and how to choose the right provider.

Key Takeaways

  • 01

    Professional move-out cleaning services offer comprehensive deep cleaning services to ensure a property is left in pristine condition for the next occupants.

  • 02

    Move-out cleaning includes tasks like washing walls, appliances, furniture, and steam cleaning carpets, among other thorough cleaning tasks.

  • 03

    Hiring a reputable move-out cleaning company can provide peace of mind and help secure your full security deposit back.

  • 04

    The cost of move-out cleaning services varies based on factors like the size of the space, cleaning time, and additional services required.

  • 05

    Preparing for move-out cleaners by decluttering and organizing your space can help the process go more smoothly.

Introduction to Move Out Cleaning Services

Professional move-out cleaning services are essential for preparing rental properties. They ensure living spaces are thoroughly cleaned and sanitized before new occupants arrive. These services create a fresh start for incoming tenants or owners.

Overview of Move Out Cleaning Services

Move-out cleaning covers a wide range of tasks. This includes dusting surfaces, wiping furniture, and scrubbing windowsills and blinds. Cleaners also wash floors, sanitize bathrooms, and polish mirrors.

Additionally, they mop hardwood or tile flooring and deodorize carpets and rugs. Emptying trash cans, vacuuming, and changing bed linens are often part of the service. Deep cleaning techniques remove dirt and grime from hard-to-reach areas.

Benefits of Hiring Professional Move Out Cleaners

  • Hassle-free transition for new tenants or owners
  • Peace of mind knowing the property is thoroughly cleaned
  • Increased chances of maximizing the return of a security deposit
  • Consistent, high-quality cleaning results by experienced professionals
  • Time-saving for busy individuals or property managers
  • Use of specialized equipment and eco-friendly cleaning products

Professional move-out cleaning services offer many benefits. They save time and ensure high-quality results. These services use specialized equipment and eco-friendly products for thorough cleaning.

What is Included in Move Out Cleaning?

Professional move-out cleaning services offer a thorough approach to prepare your old home for new occupants. These services go beyond basic tidying and cover a wide range of tasks.

Cleaners dust and wipe down surfaces in every room. This includes door frames, ceiling fans, and baseboards. They vacuum carpets and upholstery, and mop hardwood or tile floors.

Bathrooms get a deep clean. Toilets, showers, and vanities are disinfected and sanitized. The kitchen receives special attention too.

  • Cleaning and disinfecting bathrooms, including toilets, showers, and vanities
  • Thoroughly cleaning kitchen appliances, countertops, and cabinets
  • Ensuring windows, mirrors, and sliding glass doors are streak-free
  • Emptying all trash cans and disposing of waste properly

The cleaning team tackles appliances, countertops, and cabinet interiors in the kitchen. This detailed approach helps maximize security deposit returns. It also gives new occupants a fresh start.

Move-out cleaning aims to leave no surface untouched. The property is left spotless and ready for the next tenant or homeowner. This meets landlord expectations and gives departing residents peace of mind.

Specialized Equipment and Products Used

cleaning tools

Professional move-out cleaners use specialized tools and high-quality products for thorough cleaning. They bring powerful vacuums with HEPA filtration to capture 99% of airborne contaminants. This ensures a healthier environment for new occupants.

The cleaning teams come with eco-friendly detergents, disinfectants, and polishes. Customers don’t need to buy these items themselves. This saves time and money for those moving out.

Types of Cleaning Tools and Products

Cleaners use microfiber cloths to remove dirt and dust effectively. This improves the overall cleanliness and shine of the home. They also partner with trusted brands like Mr. Clean for tough grease and grime.

Safety Measures Taken by Professional Cleaners

The cleaning team takes extra safety precautions. They’re trained in hazard recognition and best practices for working in occupied spaces. This addresses potential risks like slip hazards or electrical issues before cleaning begins.

Advanced technology, like powerful steamers, helps remove tough stains. This enhances the cleaning process and delivers spotless results. Professional cleaners ensure a thorough job with their specialized equipment.

How to Prepare for Professional Cleaners

Get ready for professional cleaners to make their job easier and more effective. A few simple steps can ensure a smooth cleaning experience for everyone involved.

Decluttering and Organizing Before Cleaning

Start by decluttering and organizing your space. Remove unnecessary items like old magazines, toys, or objects that block surfaces. This allows cleaners to access every area thoroughly.

Set aside fragile items and valuables. This prevents accidental damage during the cleaning process. Your home will be left spotless and your belongings safe.

Providing Necessary Supplies and Materials

Have cleaning supplies ready for the professionals. This includes detergents, brushes, cloths, and other tools they might need. Providing these items helps cleaners work faster and more efficiently.

These steps create an ideal environment for cleaners to do their best work. You’ll end up with a cleaned home that meets high standards.

This preparation makes the transition smooth for tenants, landlords, and new homeowners alike. Everyone benefits from a well-organized cleaning process.

Cost Factors to Consider

Booking a professional move-out cleaning service involves several cost factors. The expense of cleaning supplies and equipment is one key factor. Some companies may charge extra for specialized tools or products.

Time and labor costs are another major consideration. These are often billed hourly or as a flat rate. The size and condition of the property can affect these costs.

Cleaning Supplies and Equipment Costs

Typical move-out cleaning costs range from $200 to $400. The average cost per square foot is $0.20 to $0.45. Standard hourly rates fall between $30 and $250.

Time and Labor Costs

The average cleaning costs for different-sized homes can vary significantly:

  • 800 sq ft: $160 – $360
  • 1,000 sq ft: $200 – $450
  • 1,500 sq ft: $300 – $675
  • 2,000 sq ft: $400 – $900
  • 2,500 sq ft: $500 – $1,125
  • 3,000 sq ft: $600 – $1,350

Additional Service Fees

Some cleaning companies may charge extra fees for scheduling or cancellation. It’s crucial to understand the full pricing before booking a service. This knowledge helps tenants, landlords, and new homeowners plan for an affordable cleaning experience.

Choosing a Reputable Move Out Cleaners

move out cleaning

Finding the right move-out cleaning service is key for a smooth transition. Ask friends and family for recommendations. Online reviews can reveal a company’s professionalism and customer satisfaction.

Look for experienced companies with a proven track record. They should use eco-friendly products and safe practices. A good service provides detailed estimates and offers satisfaction guarantees.

Get a free estimate for move-out cleaning today. Make your move easier and focus on your new home adventure.

  1. Seek recommendations from friends, family, and neighbors.
  2. Read online reviews to assess a company’s professionalism and customer satisfaction.
  3. Look for companies with extensive industry experience and a proven track record.
  4. Ensure the cleaning service uses eco-friendly products and follows safe practices.
  5. Obtain a detailed estimate upfront and look for a satisfaction guarantee.

A good move-out cleaning service lets you enjoy your new home. You’ll leave your old place spotless for the next residents.

Kitchen Cleaning Checklist

The kitchen needs the most attention during move-out cleaning. Professional cleaners tackle this high-traffic zone with meticulous care. They ensure it’s spotless for the next occupants.

Cleaners sanitize countertops, sinks, and clean cabinets and appliances thoroughly. Their comprehensive approach leaves no area untouched.

Cleaning Cabinets and Appliances

Experienced cleaners wipe down all kitchen cabinets, removing grime and debris. They focus on cabinet interiors, eliminating crumbs, stains, and odors.

The team cleans refrigerators, ovens, and dishwashers inside and out. They use special methods to make these appliances sparkle.

Sanitizing Countertops and Sinks

Professional cleaners sanitize kitchen countertops and sinks thoroughly. They remove stubborn stains and residue, leaving surfaces gleaming.

This detailed kitchen cleaning creates a fresh start for new tenants or homeowners. It ensures a clean slate for the next occupants.

Bathroom Cleaning Checklist

The bathroom needs careful cleaning during a move-out. Professional cleaners use a thorough checklist to make it spotless. Let’s look at the main steps for bathroom cleaning.

  • Disinfecting Toilet and Shower: Cleaners start by disinfecting the toilet inside and out. They use special products to remove grime and stains. The shower or bathtub gets a deep clean to eliminate mildew and soap scum.
  • Cleaning Mirrors and Vanity: Next, they clean mirrors and the vanity area. These surfaces are wiped down to be streak-free and shiny. This creates a fresh, welcoming bathroom atmosphere.

Professional move-out cleaners know how important a clean bathroom is. Their thorough checklist ensures the bathroom looks great and is fully sanitized. This helps new residents settle in smoothly.

Other Living Areas Cleaning

Professional cleaners focus on all living areas during move-out cleaning. They ensure every corner is sparkling clean for new occupants. This attention to detail creates a welcoming environment.

  • Dusting and Vacuuming: The cleaning team meticulously dusts and wipes down all surfaces. This includes door frames, ceiling fans, and built-in shelving. They thoroughly vacuum carpets, rugs, and upholstered furniture to remove dirt.
  • Cleaning Windows and Door Frames: Cleaners tackle both interior and exterior window surfaces. They also wipe down door frames for a streak-free appearance. This thorough approach enhances the overall cleanliness of living areas.

Move-out cleaning services help maintain rental properties in top condition. This makes them attractive to new tenants, new residents, or new buyers. Expert cleaners ensure the new house or old place is ready for its next tenant.

Outdoor Spaces Cleaning

Professional move-out cleaning includes outdoor areas like balconies and patios. Cleaners sweep and wipe down surfaces to remove dirt, dust, or debris. They also clean sliding glass doors inside and out for a clear view.

This thorough approach ensures the entire property looks well-maintained. It creates a seamless transition between indoor and outdoor spaces. The result is a pristine home ready for new tenants, residents, or buyers.

Sweeping and Wiping Balconies

Cleaning teams carefully sweep and wipe balcony or patio surfaces. They remove all dirt, dust, or debris. This makes outdoor areas as clean as indoor spaces.

The result is an inviting atmosphere for the new house, home, or space. It creates a cohesive look throughout the property.

Cleaning Sliding Glass Doors

Professional move-out cleaners focus on sliding glass doors too. They clean both interior and exterior surfaces. This ensures a crystal-clear view between indoor and outdoor areas.

The sparkling doors enhance the property’s visual appeal. It’s a welcoming sight for new tenants, residents, or buyers.

FindPros: Streamline Your Move Out Clean

Looking to streamline your move out clean and find the perfect professional cleaner for the job? Look no further than FindPros. Simply answer a few questions about your property and project, and we’ll match you with top-rated local cleaners who can tackle the unique challenges of your move out clean. Compare quotes, read reviews, and choose the pro that’s the best fit – all in just a few hours.

No need to worry about a cancellation fee or last-minute surprises. With FindPros, you’ll have peace of mind knowing you’re working with a five-star service that can help you get your full security deposit back and impress your new tenant. Get started today and let FindPros take the stress out of your move out clean.

Conclusion

Hiring professional move-out cleaners can make a big difference when changing homes. These services ensure a property is spotless for new occupants. They use special tools and follow safety rules to clean even tough spots.

When picking a cleaning service, think about costs and choose a trusted provider. Custom cleaning plans can meet your property’s needs. This increases your chances of getting your full security deposit back.

Leaving a clean home shows you care about the next residents. It also helps keep a good name in real estate.

Frequently Asked Questions (Move Out Cleaners)

Hiring professional move out cleaners can take the burden off your shoulders. They can handle the entire move out cleaning process, from dusting window sills to deep cleaning the kitchen, so you don’t have to worry about it.
Move out cleanings are more comprehensive than regular house cleaning. Professional cleaners pay particular attention to every nook and cranny, ensuring the rental property is spotless for the next occupant. This is crucial for getting your full security deposit back.
When choosing a move out cleaning service, look for a dedicated team with a good rapport and extensive experience. They should use specialized equipment and eco-friendly products to deliver a thoroughly clean home, ready for the next tenant.
Move in cleaning focuses on preparing a new rental property for the incoming tenant, while move out cleaning is about restoring the previous residence to its pristine condition. Both are important for a smooth transition, whether you’re the one moving in or out.
A meticulously cleaned and move out cleaned home can make a great first impression on prospective tenants. It shows the property owner’s commitment to maintaining the apartment, and can help attract new tenants who appreciate a clean, welcoming environment – from the kitchen table to the countless family dinners that will take place there.