Home Builders

Home Builders Near You

Can’t find what you are looking for?

How It Works

  • Answer a few questions about your home project.
  • Within seconds, get matched with top-rated local pros.
  • Compare quotes and choose the best pro for the job.

Home Builders In Your Area

Hiring Home Builders: A Step-by-Step Guide

Meta Description: Discover the essential steps for hiring top-quality Home Builders. Learn how to find, evaluate, and collaborate with skilled professionals for your dream home project.

Home Builders

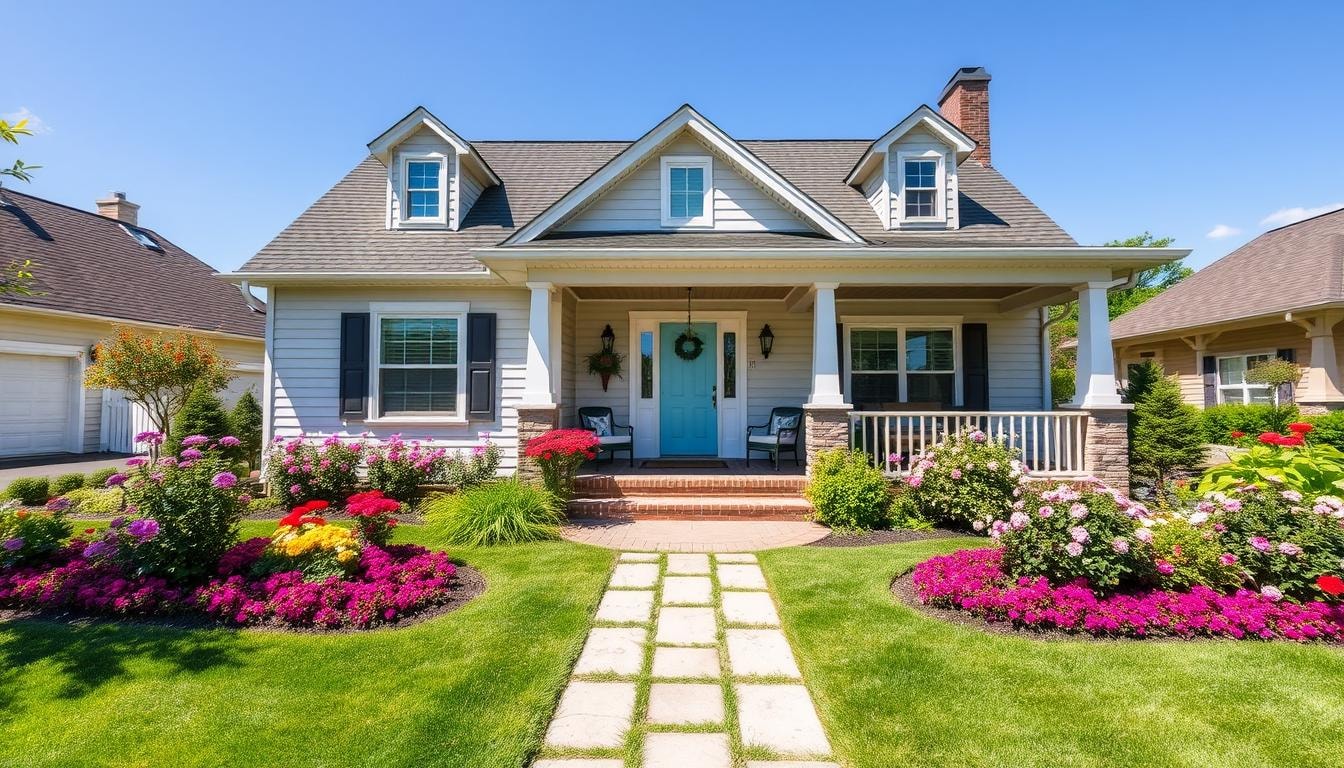
Finding the right home builder is crucial for your new construction project. It impacts quality, cost, and your overall experience. This guide will help you find, evaluate, and work with skilled home builders.

We’ll show you how to bring your dream home to life. You’ll learn to choose the best professionals for your project. Our tips will make your home-building journey smoother and more enjoyable.

Key Takeaways

  • 01

    Understand the different types of home builds to find the best fit for your needs

  • 02

    Assemble a skilled building team, including architects, designers, and contractors

  • 03

    Obtain necessary permits and approvals to ensure a smooth construction process

  • 04

    Prepare the building site and lay a solid foundation for your new home

  • 05

    Explore budgeting and cost considerations to stay within your financial goals

Understanding the Home Building Process

Building a new home requires knowledge of different types. The main categories are spec homes, tract homes, and custom homes. Each offers unique features and benefits.

Types of Home Builds

Spec homes are built without a specific buyer in mind. They offer some flexibility in choosing floor plans, bedrooms, and bathrooms. Builders often include open floor plan options.

Tract homes are built by developers on divided land. They have preset architectural options for the entire community. These homes usually have standard square footage and number of levels.

Custom homes offer the most personalization. You buy land and work with a builder to create your dream home. This option allows for complete customization of floor plan, bedrooms, and bathrooms.

When choosing a home build, consider your lifestyle needs. Think about the number of bedrooms and bathrooms you want. Decide if an open floor plan suits you.

Also, determine how many levels or floors you prefer. These factors will help you select the best home build type.

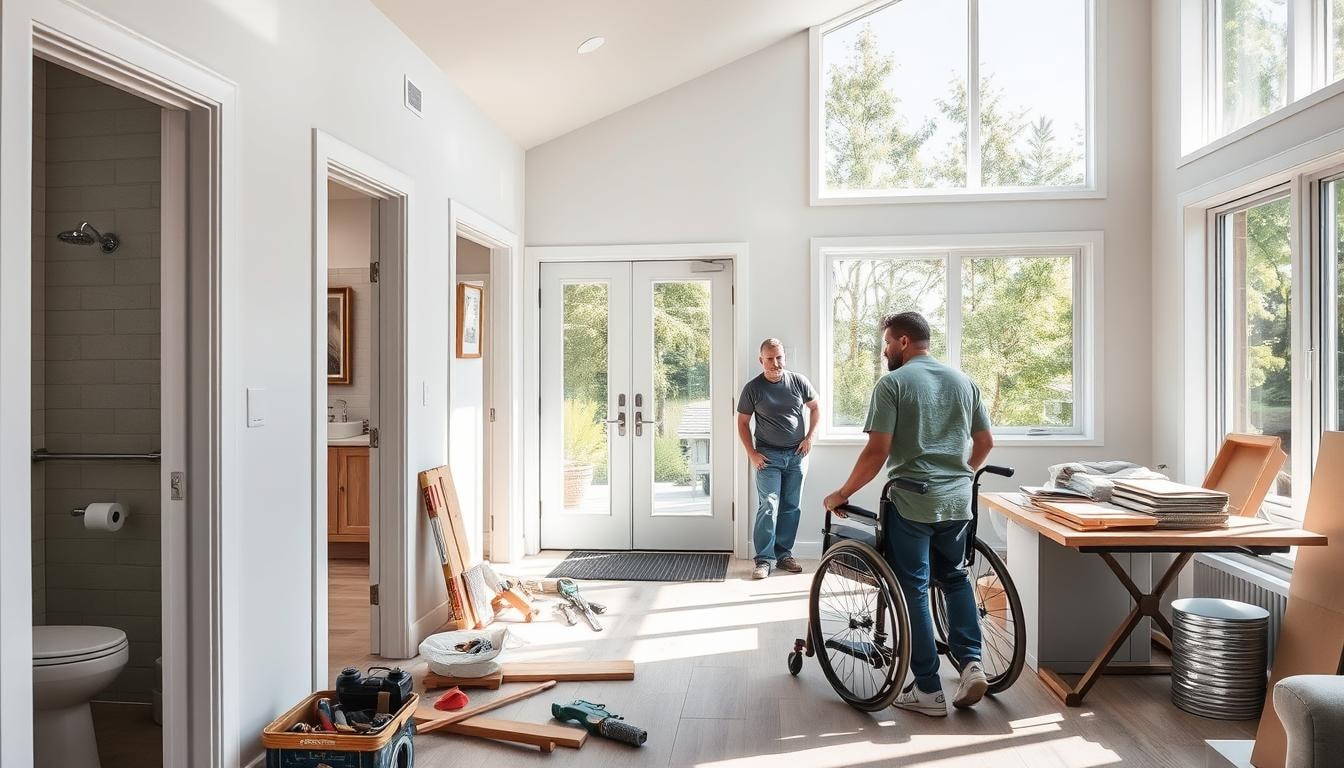
Assembling Your Building Team

Building a custom home needs a skilled team. The general contractor or custom home builder leads this team. They manage the project, get estimates, hire subcontractors, and ensure deadlines are met.

The team includes specialists for electrical, plumbing, and HVAC work. These experts bring your home’s systems to life. Careful research is key when hiring your building team.

Key Roles and Responsibilities

  • General Contractor or Custom Home Builder: Oversees the entire project, secures estimates, hires subcontractors, and manages deadlines.
  • Electrician: Responsible for installing and wiring the home’s electrical system, including lighting, outlets, and safety features.
  • Plumber: Handles the installation and maintenance of the home’s plumbing system, including water supply, drainage, and fixtures.
  • HVAC Technician: Designs, installs, and maintains the home’s heating, ventilation, and air conditioning systems for optimal comfort and efficiency.

A skilled building team keeps your project on track. They help stay within budget and create your dream home. Choose your team wisely for the best results.

Obtaining Necessary Permits and Approvals

permits

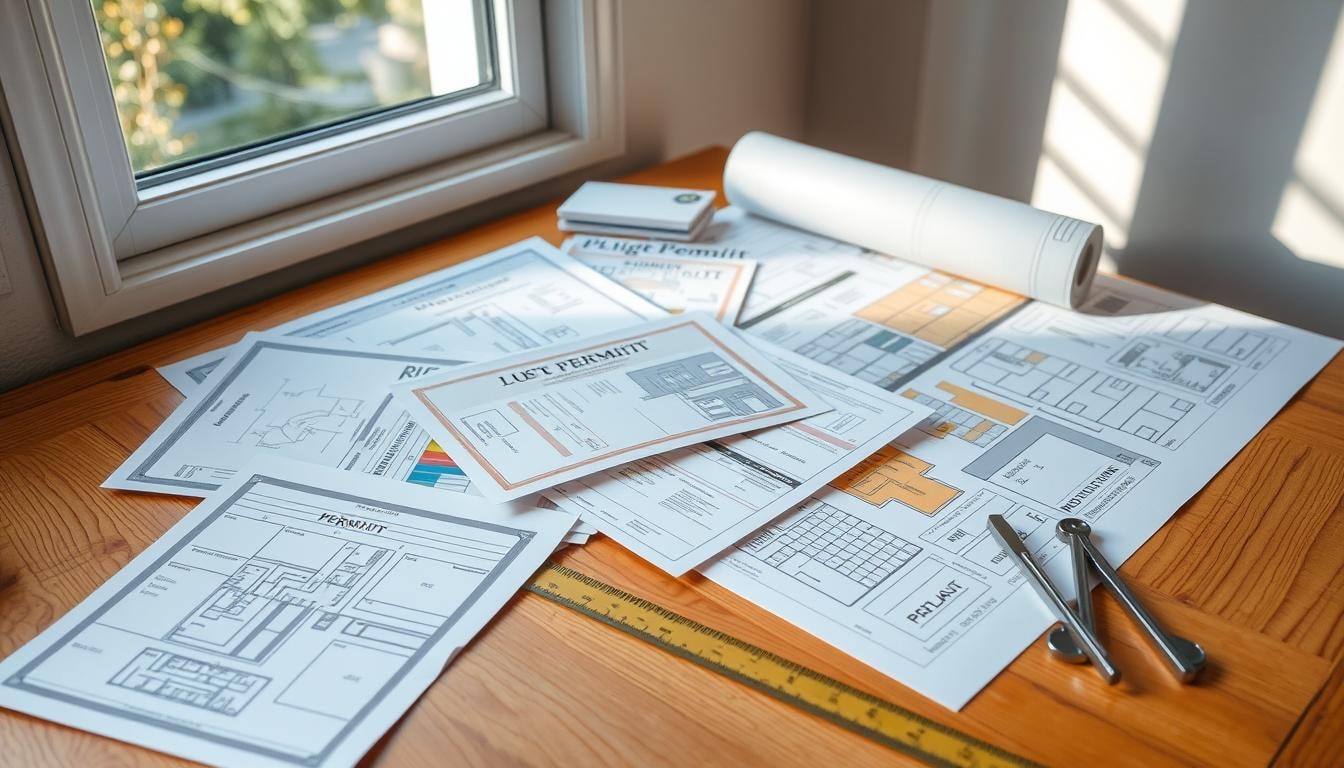
Your contractor must get all needed permits from the local office before starting construction. These permits ensure your project follows local rules and building codes. They may include building, electrical, plumbing, HVAC, and grading permits.

In the U.S., a building permit costs about $1,300 on average. Prices range from $400 to $2,000. In big cities, a new home permit can cost thousands more.

Getting proper permits is crucial. Without them, you may face higher fees and delays. You might even have to tear down finished work. Work closely with your contractor to get all required permits.

  • Building permits are mandatory for almost all building projects in California, except for smaller projects that don’t impact the structural integrity or exterior of the building.
  • In California, building permits for detached one- and two-family units and townhouses expire after two years, while permits for other projects expire after four years.
  • The average processing costs of an Accessory Dwelling Unit (ADU) application in California are typically around $2,000, and the average fee for an ADU permit is under $10,000, but costs can increase based on the project’s complexity.

Check with your local office to find out what permits you need. Not getting the right permits can lead to big problems. These may include extra costs, removal of construction, and fines.

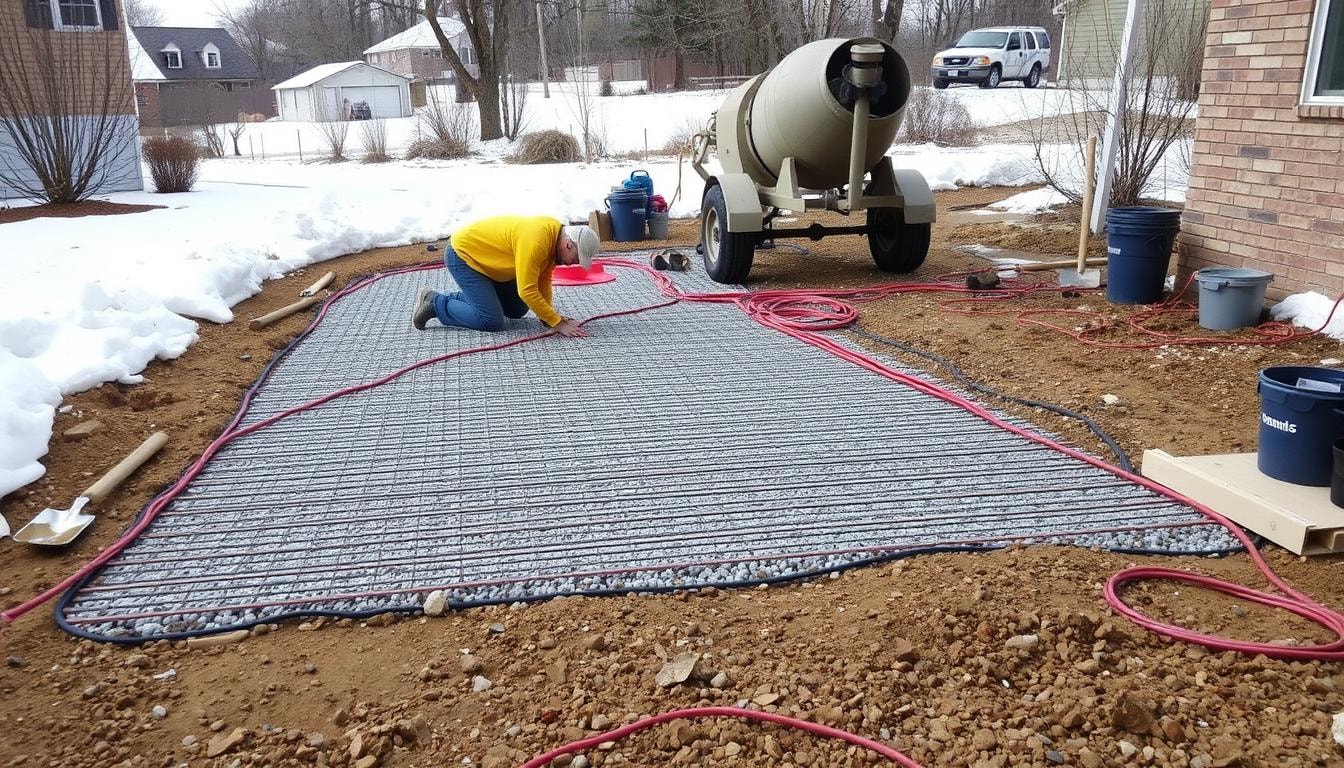
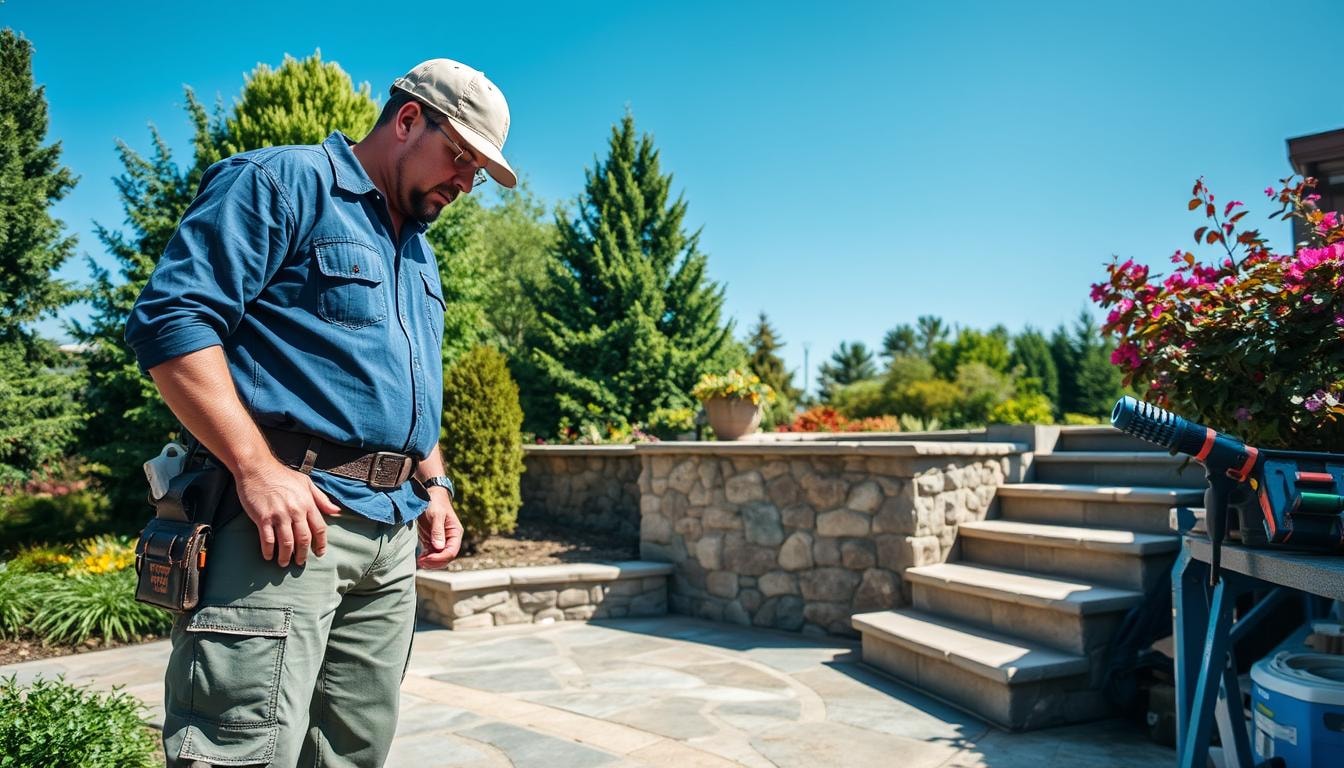
Site Preparation and Foundation

Preparing the construction site is vital for home-building. It starts after securing permits. The process involves clearing debris, vegetation, trees, and rocks from the build site.

Next, the land is carefully leveled. This creates a flat, even surface for construction. Footings are then installed to distribute the home’s weight evenly.

The foundation is poured as a slab, crawlspace, or full basement. Proper waterproofing prevents future moisture issues. An inspection ensures it meets local code requirements.

Essential Steps

  1. Site clearing: Removing debris, vegetation, trees, and rocks from the build site.
  2. Land leveling: Grading the land to create a flat, even surface.
  3. Footings installation: Pouring concrete or laying brick masonry footings to support the home’s weight.
  4. Foundation construction: Pouring a slab, building a crawlspace, or excavating a full basement.
  5. Waterproofing: Applying a waterproof membrane to the foundation to prevent moisture intrusion.
  6. Inspection: Ensuring the foundation meets local building code requirements.

Good site prep and foundation work ensure long-term home stability. Careful land assessment and sturdy foundation installation are key. These steps help create a smooth construction process.

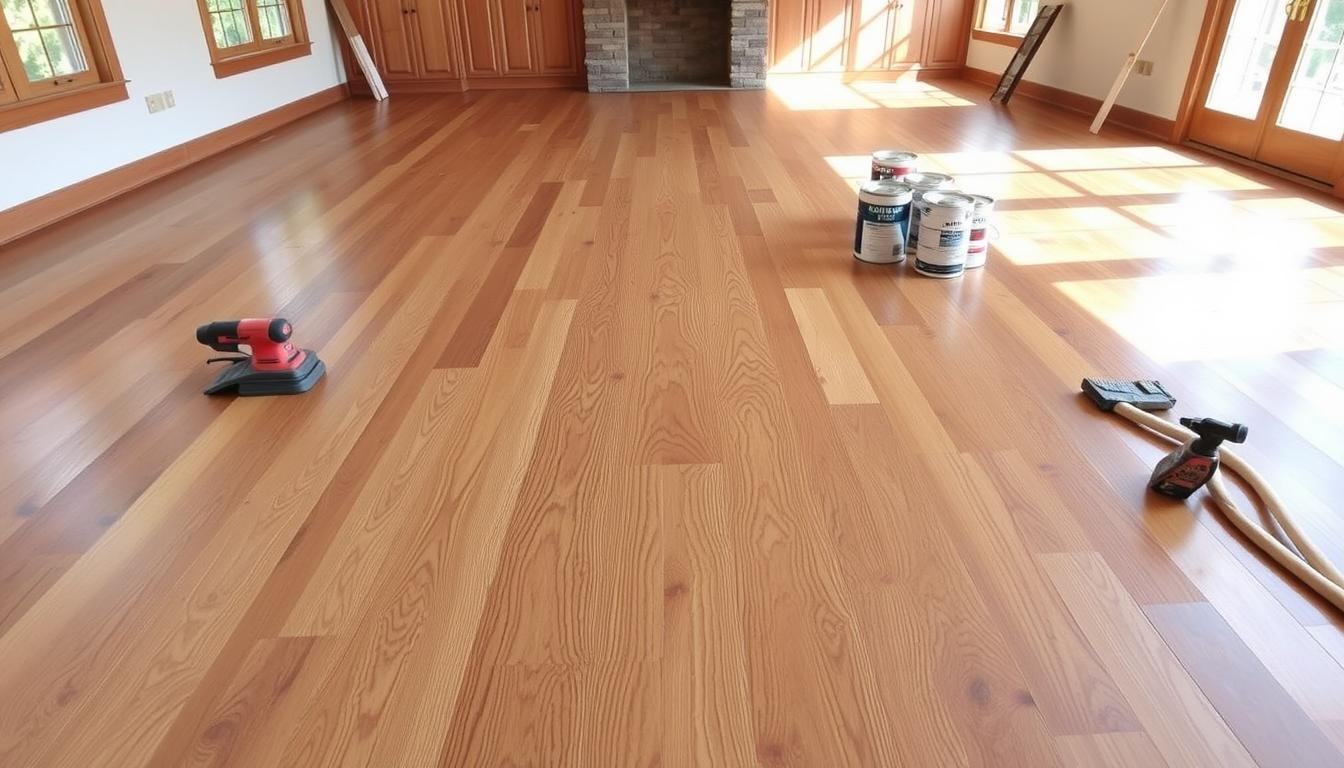
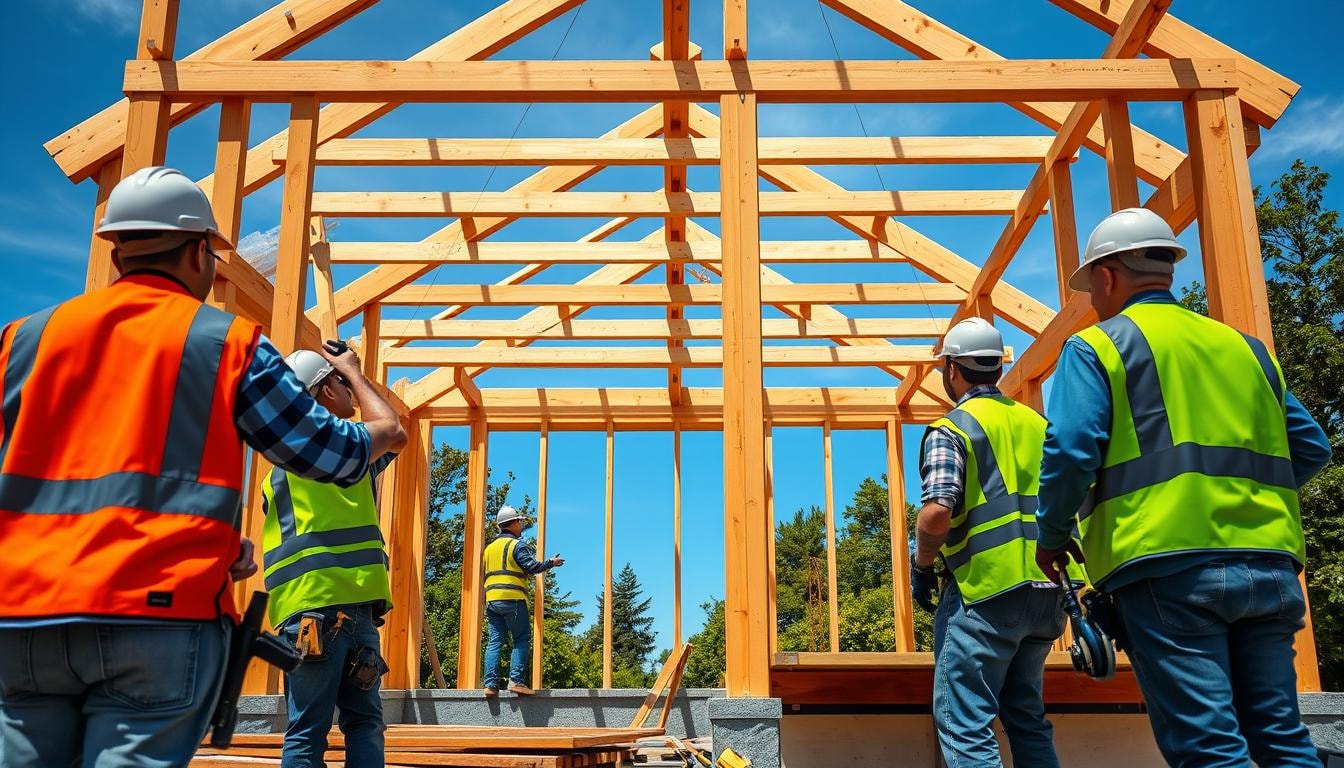
Framing and Exterior Construction

The framing crew starts work after the foundation is set. They build the basic structure using lumber for walls, flooring, and roof trusses. This stage sets the groundwork for the entire exterior construction.

Sheathing covers exterior walls, providing strength and a surface for house wrap. House wrap prevents moisture and improves energy efficiency. Energy-efficient windows and doors are then installed to maintain comfort and reduce costs.

Framing uses pressure-treated lumber for studs and bases. Joists and rafters vary based on roof weight. The example home used blown-in fiberglass insulation for walls and spray foam for the roof.

Constant monitoring during framing is crucial to avoid errors and delays. The average cost to frame a house is $7-$16 per square foot. Labor costs range from $4-$10, while materials cost $3-$6 per square foot.

Electricians, plumbers, and low voltage specialists install conduits, cabling, and pipes during framing. Thorough checking of connections and locations prevents future problems with these systems.

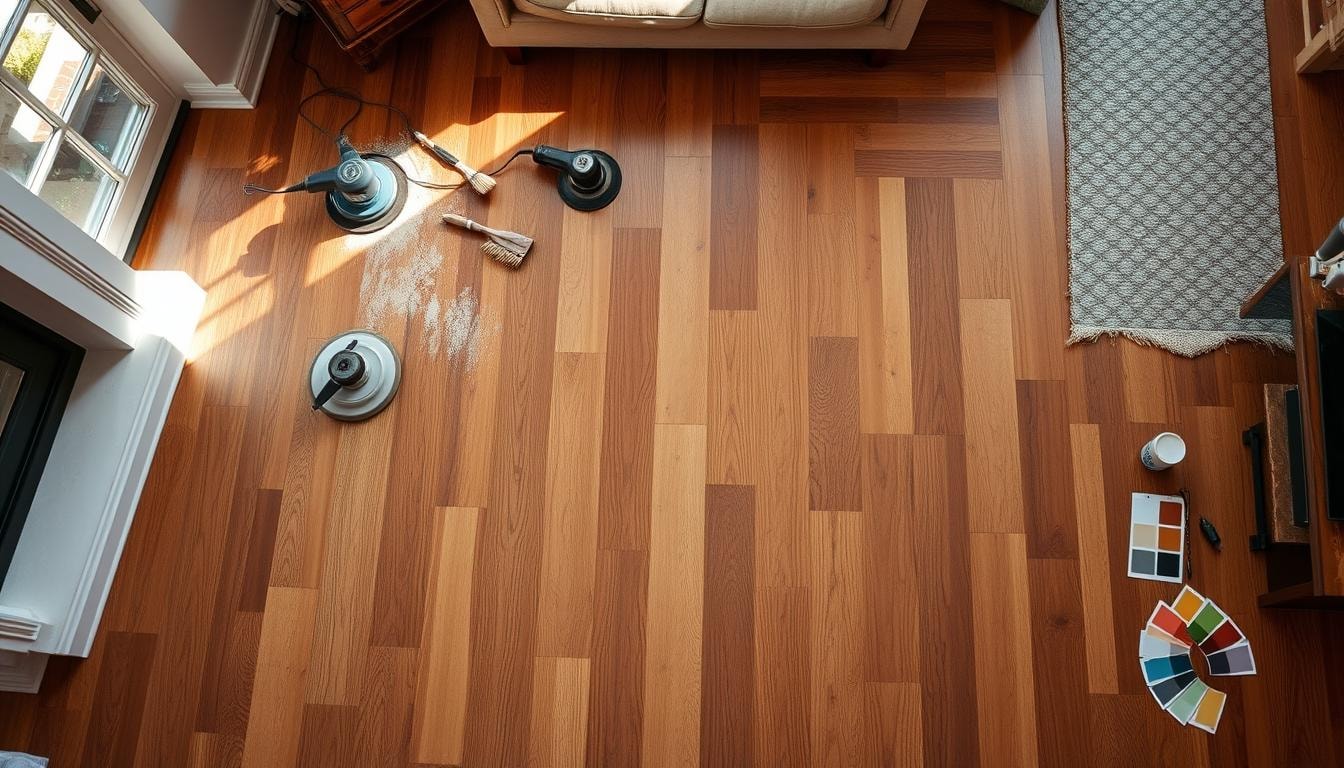
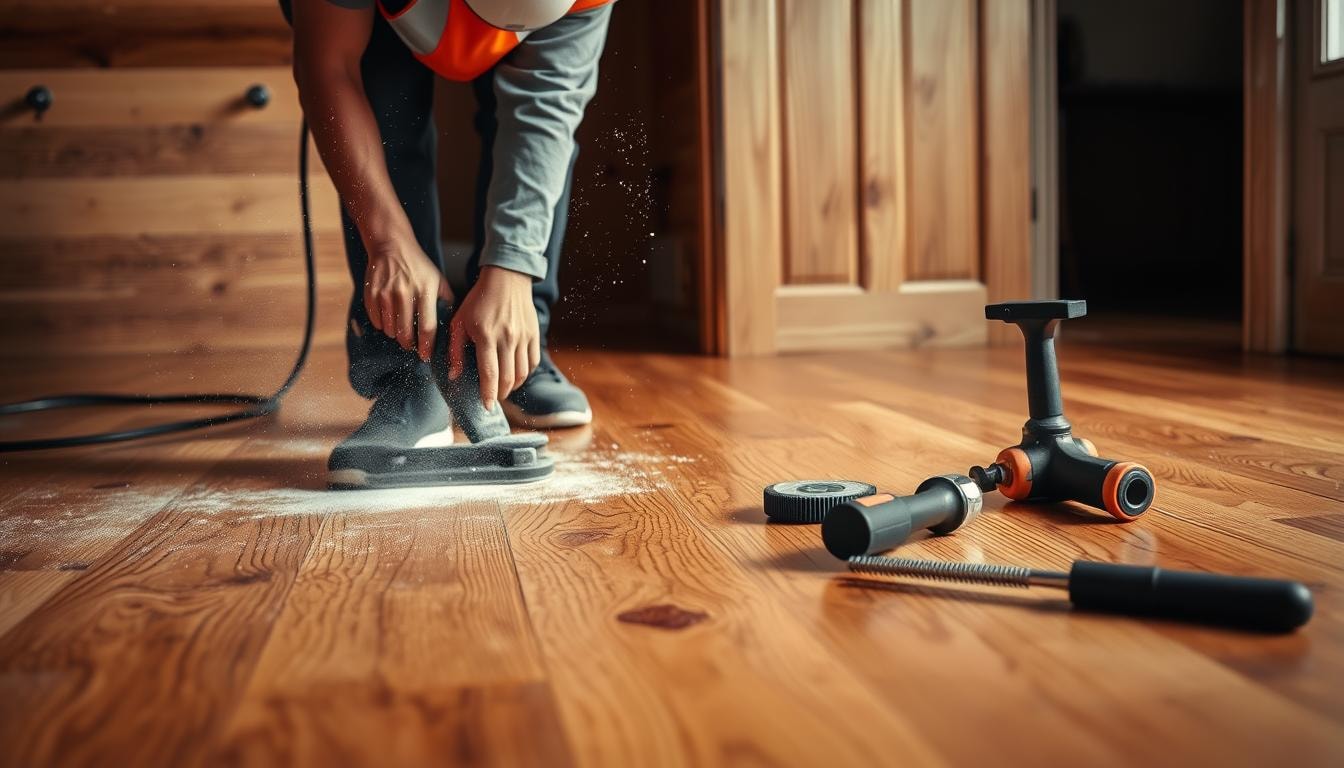
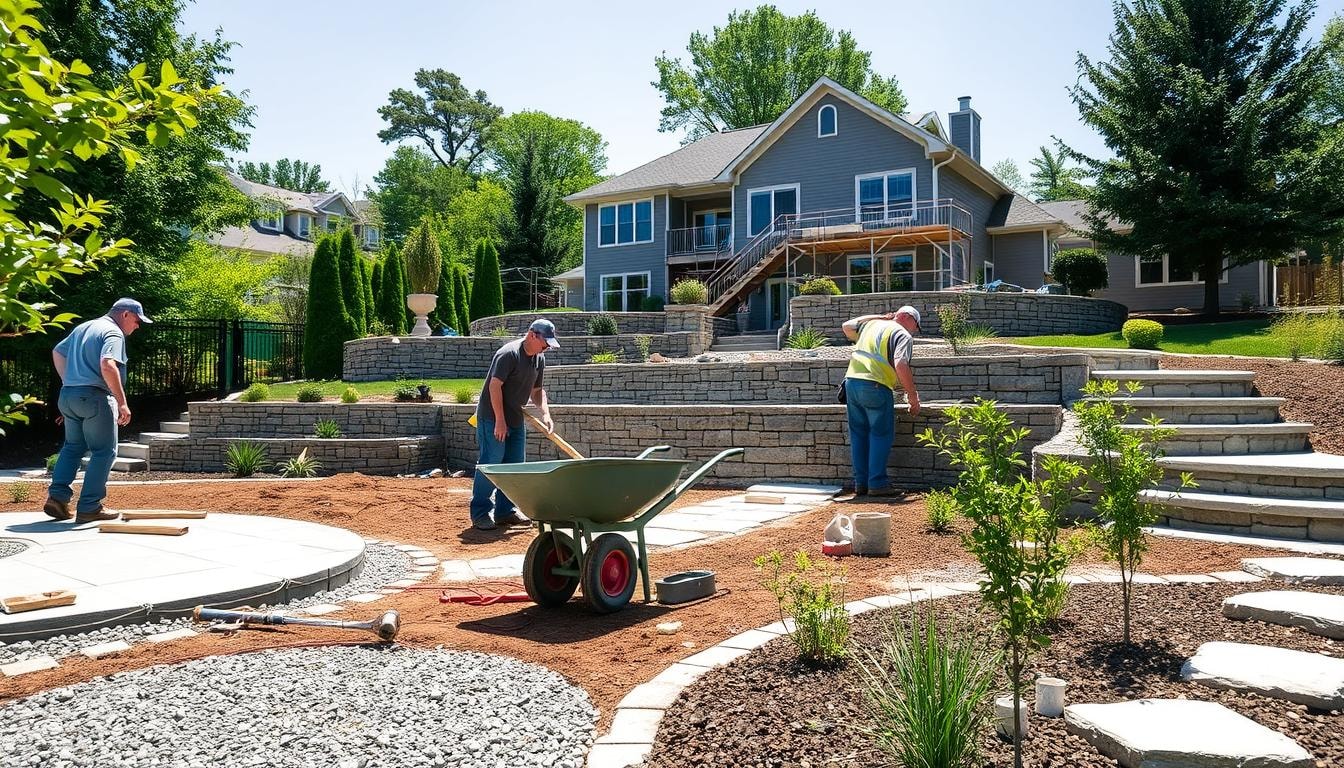
After framing and exterior construction, the process moves to interior finishes and landscaping. These final steps enhance the overall appeal and quality of the property.

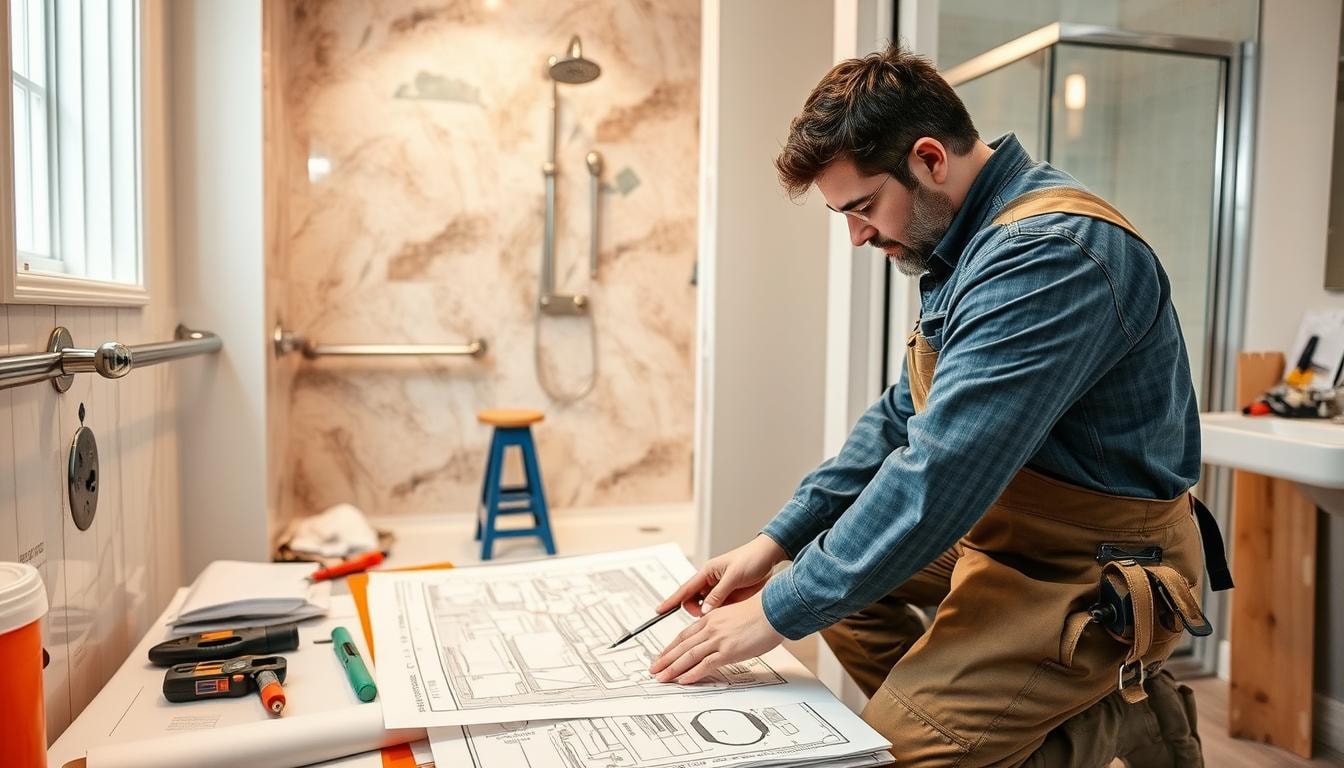
Installing Critical Systems

critical systems

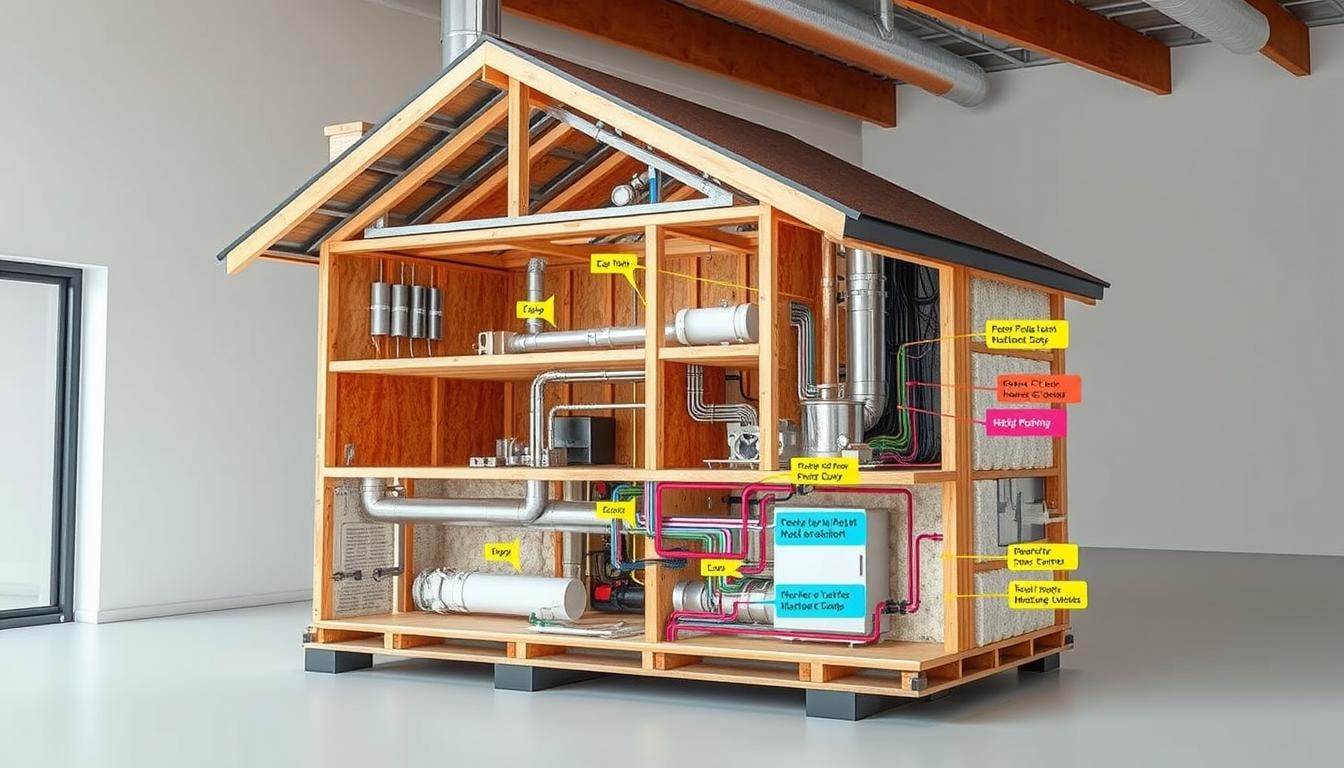
Critical systems like HVAC, plumbing, and electrical are installed as the home’s structure takes shape. The HVAC technician installs ductwork, air handler, and condenser. Plumbers run pipes to bathrooms, kitchen, and laundry room, along with sewer lines and vents.

Electricians complete wiring during this phase. After installation, the home undergoes inspections to ensure compliance with local building codes. These checks are necessary before moving to the next construction stage.

Key Components

Installing critical systems is a vital step in home-building. These systems are essential for a comfortable and functional living space.

  • HVAC: The heating, ventilation, and air conditioning system ensures comfortable indoor temperatures and air quality.
  • Ductwork: The network of air ducts that distribute heated or cooled air throughout the home.
  • Plumbing: The water supply and drainage systems, including pipes, fixtures, and sewer lines.
  • Electrical: The wiring, outlets, and other electrical components that power the home.

After installation, homes undergo inspections to ensure compliance with local building codes and regulations. These checks guarantee the safety and functionality of essential systems before construction continues.

Budgeting and Cost Considerations

Building a home is a major financial commitment. Creating a realistic budget is crucial. Costs vary based on location, builder experience, and materials.

Get multiple estimates from qualified home builders. This helps understand cost ranges and additional fees. Include a contingency budget for unexpected expenses.

Advanced budgeting tools can save thousands per project. Direct costs include worker wages and materials. Indirect costs cover administrative expenses and safety equipment.

Unexpected issues can lead to cost overruns. A well-documented budget guides decisions on materials and labor. Tracking all costs is vital for financial management.

Allocate 7-10% of the budget for contingency funds. This covers unforeseen expenses. Prioritize essential design elements to maintain budgetary discipline.

Home Builders: Qualifications and Hiring Tips

Choosing the right home builder is key to creating your dream home. Look for builders with a strong track record and positive references. These qualities ensure a smooth construction project that meets your expectations.

Qualities to Look For

Consider these qualities when hiring a home builder:

  • Qualifications: Ensure the builder is properly licensed, insured, and bonded to protect you from liability during the construction process.
  • Skills and Responsibilities: Evaluate the builder’s expertise in areas like plumbing, HVAC, and meeting building codes and safety standards.
  • Local Reputation: Check the builder’s references, reviews, and involvement in professional organizations to gauge their reputation and commitment to quality.
  • Experience: Prioritize builders who have been in the industry for at least 10 years, as they are often more financially stable and reliable.

Research potential home builders thoroughly. This effort helps you find the right partner for your project. A good builder will bring your dream home to life.

FindPros: Your Key to Savings and Customization

Looking to build your dream home but unsure where to start? FindPros has got you covered! By answering a few simple questions about your project, you can get matched with top-rated local pros who offer the best pricing when they compete for your job. Forget about sifting through endless options – FindPros helps you find the pros you’ll love working with, saving you time and money. FindPros has a wide network of builders ready to customize your home to your exact specifications. Don’t settle for less – let FindPros help you live in the home you’ve always wanted, on your schedule.

Conclusion

Building a new home is exciting but complex. Hiring the right home builders is crucial. Understanding different home builds, assembling a skilled building team, and obtaining necessary permits are essential steps.

Carefully managing budgeting and cost considerations is important. These steps help you navigate the home construction process confidently. Thoroughly vet potential home builders and check their qualifications and references.

Ensure builders are properly licensed and insured. The right builder will guide you through each project stage. They’ll help turn your dream home into reality.

Choose a custom, semi-custom, production-built, spec, or green home builder. Find a partner who understands your vision. Look for someone committed to delivering a high-quality, personalized living space.

Frequently Asked Questions (Home Builders)

Homebuyers can expect a variety of affordable new homes designed to meet different household needs. Builders in West Virginia offer homes with customizable dimensions and features, allowing buyers to create a space that reflects their love for togetherness and privacy.
Homeowners can lower their interest rate by shopping around for the best mortgage offers, taking advantage of promotions from lenders, and improving their credit score. This balance can help them save money over the life of their loan.
The value of a newly constructed home is determined by factors such as location, the reputation of the builder, the quality of materials used, and the overall design. Communities with desirable amenities can also enhance a home’s value.
When choosing between builders, consider their experience, customer reviews, and the types of homes they offer. Meeting with other builders and discussing your needs can help you find a builder you trust to bring your vision to life.
The lot size matters because it affects the dimensions of the home you can construct and the outdoor space available for activities. A larger lot allows for more customization and the potential for additional features, such as gardens or patios, enhancing your living experience.

Home Audio Repair

Home Builders Near You

Can’t find what you are looking for?

How It Works

  • Answer a few questions about your home project.
  • Within seconds, get matched with top-rated local pros.
  • Compare quotes and choose the best pro for the job.

Home Audio Repair In Your Area

Professional Home Audio Repair: Your Sound System Solution

Meta Description: Expert home audio repair services to revive your sound system. We diagnose and fix amplifiers, speakers, and stereos. Trust our skilled technicians for quality Home Audio Repair.

Home Audio Repair

Is your home theater system or vintage stereo losing its spark? Professional home audio repair services can help. Expert technicians can fix malfunctioning amplifiers, faulty speakers, and outdated equipment.

They’ll breathe new life into your sound system, restoring its former glory. You’ll enjoy crisp, clear audio once again.

This guide explores professional home audio repair. We’ll uncover key steps to diagnose and fix common issues. You’ll learn the benefits of trusting skilled technicians with your sound system.

We’ll cover reviving vintage audio gear and optimizing modern home theater setups. Get ready to enhance your audio experience!

Key Takeaways

  • 01

    Discover the importance of maintaining your audio equipment for optimal sound quality and longevity.

  • 02

    Learn how to identify common problems with home audio systems and the steps to troubleshoot effectively.

  • 03

    Explore the factors to consider when selecting a reliable home audio repair service provider.

  • 04

    Understand the art of restoring vintage audio equipment and the benefits of professional repair services.

  • 05

    Gain insights into the long-term advantages of investing in professional home audio repair for your sound system.

Introduction to Home Audio Repair

Keeping your audio equipment in good shape is vital for great sound. Components like speakers and amplifiers can develop issues over time. Let’s look at why regular maintenance matters and common problems you might face.

The Importance of Maintaining Your Audio Equipment

Taking care of your home audio system ensures it performs well. Regular cleaning and inspection can prevent problems. Neglecting maintenance may lead to poor sound quality or equipment failure.

Common Issues Faced by Home Audio Systems

Home audio systems can have various problems. These include malfunctioning speakers and distorted audio from amplifiers. Connectivity issues and degraded sound quality are also common.

  • Malfunctioning speakers or subwoofers
  • Distorted or crackling audio from amplifiers and receivers
  • Connectivity issues, such as faulty cables or ports
  • Degraded sound quality due to outdated or worn-out components
  • Interference or noise caused by electromagnetic fields or other electronic devices

Understanding these issues helps you diagnose and fix problems. This knowledge ensures your audio system stays in top shape. You’ll be better equipped to keep your system sounding great.

Identifying the Problem: Troubleshooting Your Audio System

Diagnosing audio system problems is crucial for effective repair. A methodical approach can pinpoint the root cause of issues. This helps get your sound system back on track quickly.

Let’s explore some common techniques to identify and address audio problems. These methods will help you troubleshoot various issues effectively.

Audio system troubleshooting begins with a thorough equipment inspection. Check for loose connections, which can cause intermittent sound or signal loss. Faulty cables may lead to distortion, crackling, or no sound.

Dust and dirt on speaker connections can cause poor conductivity. Clean and secure connections are vital for optimal performance. Using incompatible connectors or cables can result in subpar sound quality.

  • Inspect all cables and connections for signs of damage or wear.
  • Check for proper connectivity between components, such as speakers and amplifiers.
  • Clean any accumulated dust or oxidation from speaker terminals and ports.
  • Ensure you’re using the correct cables and connectors for your audio system.

If basic checks don’t solve the problem, explore more advanced troubleshooting techniques. Don’t hesitate to seek professional help if you’re unsure about the issue’s cause.

A methodical approach to home audio repair diagnostics helps isolate problems. This allows you to choose the right repair service for your sound system. With patience and the right tools, you’ll soon enjoy crystal-clear audio again.

Choosing the Right Repair Service

home audio repair service

Picking the right audio repair service is key for fixing your home equipment. Consider factors like expertise, turnaround time, warranty, and customer service. These elements ensure your sound system gets proper care.

Factors to Consider When Selecting a Repair Provider

Find a provider with specialized knowledge in your equipment’s make and model. Quick and efficient service is vital for getting your system working again.

Look for repair services offering warranties from 90 days to two years. This protects your investment. Choose a provider who values clear communication and personalized service.

The Benefits of Professional Audio Repair Services

  • Access to specialized tools and manufacturer-approved parts
  • Expert-level troubleshooting and restoration capabilities
  • Cost savings compared to purchasing new equipment
  • Faster turnaround time than do-it-yourself repairs
  • Warranty coverage for peace of mind

A home audio repair service ensures your equipment gets expert care. The right audio repair technician can keep your system in top shape.

Professional audio repair services offer many benefits. They help maintain your sound system’s quality for years to come.

Restoring Vintage Audio Equipment

Vintage audio equipment restoration captivates audiophiles and music lovers. Our retro audio system repair service excels in reviving classic sound systems. Our expert technicians have mastered the art of restoring vintage sound systems.

The Art of Reviving Classic Sound Systems

Repairing vintage audio gear demands a gentle touch and deep technical knowledge. Our technicians meticulously inspect each component, diagnose issues, and perform necessary repairs.

We align intricate turntable mechanisms and recap critical capacitors in tube amplifiers. This ensures we preserve or enhance the original sound quality.

  • Expertise in repairing and restoring vintage audio equipment, including tube amplifiers, turntables, and reel-to-reel players
  • Techniques for preserving the original sound quality and enhancing the performance of classic sound systems
  • Meticulous attention to detail and a deep understanding of vintage audio technology

Our audio repair services can breathe new life into cherished equipment. We’re here to help preserve the timeless beauty of your vintage audio gear.

Contact us today to learn how we can assist with your classic sound systems.

Amplifier and Receiver Repair

amplifier repair

Amplifiers and receivers are vital to home audio setups. When they malfunction, sound quality suffers. Our expert technicians can fix power supply failures, blown output stages, and faulty controls.

We ensure your audio components work at their best. Our team is ready to diagnose and repair various issues.

Troubleshooting Amplifier Issues

Our experts can handle complex amplifier repairs. We fix common problems like distortion or hum. We also restore vintage amplifiers to their original condition.

Our focus is on precision and attention to detail. We find the root cause of the problem and make necessary repairs.

Restoring Receiver Functionality

Receivers manage input signals and distribute them to speakers. When they malfunction, sound quality suffers or the system fails completely.

Our technicians use advanced diagnostic techniques for receiver repair. We fix faulty power supplies, control issues, and outdated components.

Trust us with your amplifier and receiver repairs. We’ll restore your audio components to their full potential. You’ll enjoy exceptional sound quality from your home entertainment system.

Home Audio Repair: An Investment in Quality

Professional home audio repair services preserve your sound system’s quality and longevity. Skilled technicians can unlock long-term benefits that elevate your listening experience for years.

The Long-Term Benefits of Professional Repair Services

Expert repairs address immediate issues and invest in your equipment’s future performance. Professional services offer valuable benefits that enhance your audio experience.

These benefits improve sound quality and extend component lifespan. They also provide peace of mind, knowing your system is in good hands.

  • Improved sound quality: Expert technicians have the knowledge and tools to diagnose and address the root cause of audio issues, ensuring your system delivers the high-fidelity performance you expect.
  • Extended component lifespan: Proper repair and maintenance can significantly extend the life of your audio components, allowing you to enjoy your sound system for longer without the need for frequent replacements.
  • Peace of mind: Knowing that your audio equipment is in the hands of experienced professionals gives you the confidence that your system is in good care, allowing you to relax and immerse yourself in the music.

Quality repair and maintenance ensure exceptional performance from your home audio setup. This makes it a smart investment for long-term enjoyment of your music.

How to Hire Home Audio Repair Experts

A well-maintained home audio system offers an immersive listening experience. When your equipment needs fixing, finding the right repair service is crucial. Skilled technicians can restore your sound system to its best performance.

Here are steps to hire the best home audio repair experts:

  1. Assess Your Repair Needs: Identify issues with your audio equipment. This could include malfunctioning parts or sound quality problems. Knowing your needs helps find a service that can fix them.
  2. Research Reputable Providers: Check online reviews and industry forums. Ask friends or local audio fans for recommendations. Look for providers with a history of quality work and happy customers.
  3. Evaluate Technician Credentials: Choose a service with certified, experienced technicians. Check their qualifications and training. Make sure they can handle your specific audio system issues.
  4. Consider Warranty and Guarantees: Ask about warranty policies and work guarantees. A good provider should stand behind their services. This gives you peace of mind.
  5. Communicate Your Expectations: Clearly explain the repair work needed and your timeline. Discuss any specific requirements or budget concerns. Good communication helps ensure a satisfactory outcome.

Following these steps will help you hire expert technicians. They can bring your sound system back to life. You’ll enjoy amazing sound for years to come.

FindPros: Your Solution for Home Audio Repair

At FindPros, we understand the importance of quality audio in your home. Our business connects you with top-rated local pros who specialize in electronics and audio repair. By filling out a simple survey, you can quickly figure out the best options for your needs. With multiple pros competing for your job, you are assured the best pricing and can easily pick the right technician you feel comfortable with.

Whether you need help with a vintage stereo or modern sound system, let us help you change your audio experience. Answer a few questions about your home project, and within seconds, you’ll have quotes to compare and choose from. Don’t let audio issues keep you from enjoying your favorite tunes; get started today and listen to the difference.

Conclusion

Professional home audio repair services are vital for maintaining your sound system’s quality. They ensure your equipment delivers exceptional sound for years to come. Understanding repair, maintenance, and the importance of expert services is crucial.

Investing in quality repair is an investment in your audio enjoyment. Trust experts to handle your system’s needs. They’ll unlock your music and entertainment experience’s full potential.

Prioritize the care of your home audio system. This ensures you can enjoy your favorite tunes with richness and clarity. Audio professionals keep your equipment performing at its best.

Frequently Asked Questions (Home Audio Repair)

If your vintage audio equipment is not working, start by checking for loose connections and inspecting cables for damage. If everything seems in place but the sound is still wrong, consider taking it to a professional for stereo repair. Many businesses specialize in fixing vintage models, ensuring they are repaired properly.
To restore vintage audio equipment, you can begin by cleaning all connections and replacing any worn-out components, like capacitors. If you’re unsure, it’s best to consult a technician who can figure out what needs to be fixed. Many people love the process of restoring these items, as it allows them to listen to music in a unique way.
The price for repairing vintage audio equipment can vary. Generally, you can expect to pay between $50 to $70 for basic repairs, while high-end restorations may cost between $100 to $350, depending on the age and condition of the equipment. It’s a lot more affordable than buying new models.
Regular maintenance is crucial because it helps prevent issues before they become serious. By taking the time to inspect and clean your equipment, you can ensure it continues to work well and lasts longer. This proactive approach can save you a lot of hassle and money in the long run.
When picking a home audio repair service, look for businesses with good reviews and experience in fixing vintage equipment. Ask about their process and what they will do to ensure your equipment is repaired correctly. A reliable service will assure you that they can handle your specific model and any issues it may have

Home Appraisers

Home Builders Near You

Can’t find what you are looking for?

How It Works

  • Answer a few questions about your home project.
  • Within seconds, get matched with top-rated local pros.
  • Compare quotes and choose the best pro for the job.

Home Appraisers In Your Area

Home Appraisers: A Step-by-Step Guide to the Appraisal Process

Meta Description: Discover the essential role of home appraisers in real estate transactions. Learn about the appraisal process, costs, and how it impacts your property’s value.

Home Appraisers

The housing market has seen a 47% price increase since 2020. This makes understanding home appraisals vital for buyers and sellers. Home appraisers play a key role in determining property values.

They assess a property’s worth using various factors. This guide will reveal the appraisal process secrets. It will also provide keys to successful real estate deals.

Key Takeaways

  • 01

    Home appraisal is a crucial step in the home buying or refinancing process, ensuring the property’s value aligns with the loan amount.

  • 02

    Appraisers use a sales comparison approach or a cost-based approach to determine a home’s value, considering factors like location, condition, and recent comparable sales.

  • 03

    The home appraisal process typically takes a few days to a week and can cost between $300 to $450, depending on the property’s location and unique features.

  • 04

    Preparing your home for the appraiser’s visit by addressing minor repairs and enhancing curb appeal can positively impact the appraised value.

  • 05

    Strategies are available for buyers and sellers to address low appraisal values, including renegotiating the purchase price or appealing the appraisal report.

Understanding the Home Appraisal Process

A home appraisal is vital in real estate transactions. It’s an unbiased assessment of a property’s fair market value. This evaluation is usually needed for mortgage loans and is done by appraisers.

These professionals use various methods to evaluate the home. They look at features, condition, and recent comparable sales in the real estate market. Their goal is to determine the property’s appraised value.

What is a Home Appraisal?

A home appraisal is an independent evaluation of a property’s worth. It considers location, size, condition, and amenities. The assessment also looks at prices of similar properties sold recently in the area.

The appraised value is crucial in the home purchase and closing process. It helps lenders decide on the right purchase price and loan amount.

The Role of Home Appraisers

Home appraisers are licensed experts who assess property values. They use methods like analyzing recent comparable sales and evaluating home features. They also consider the property’s location and overall market trends.

The appraiser’s report gives an unbiased view of the home’s worth. This is key for getting a mortgage and ensuring a fair home purchase price.

Reasons to Get a Home Appraisal

Home appraisals provide unbiased estimates of property value. They’re crucial for real estate transactions. Appraisals offer insights for selling, refinancing, or evaluating home improvements.

Selling Your Home

A pre-listing appraisal helps price your home competitively. It considers property size, square footage, and recent sales. This information helps set an asking price that matches true market value.

An accurate price makes your home more appealing to potential buyers. It can lead to a quicker sale and better offers.

Refinancing Your Mortgage

Refinancing often requires a new appraisal to justify the mortgage amount. It ensures the lender isn’t lending more than the home’s worth. This step is crucial for the appraisal contingency in refinancing.

Evaluating Home Improvements

Appraisals can determine the return on investment for renovation projects. They consider square footage, condition, and amenities, including recent improvements. This information helps plan future enhancements and understand their impact on value.

Finding a Qualified Home Appraiser

A skilled appraiser is key to determining your home’s fair market value. Their assessment is vital for selling, refinancing, or understanding your property’s worth.

Checking Licenses and Certifications

Ensure your appraiser is licensed and certified. U.S. appraisers must meet specific educational and experience requirements. Look for Certified Residential or General Appraiser designations.

Check for disciplinary actions or complaints against the appraiser. Find this info on Appraisal Institute or state real estate regulatory agency websites.

Local Market Expertise

The appraiser’s familiarity with the local real estate market is crucial. A local expert understands recent sales, trends, and situations affecting home values.

Ask your lender, real estate agent, or trusted sources for referrals. They can help find a qualified appraiser with the right experience.

Choose a licensed, certified, and locally knowledgeable appraiser for an accurate home value assessment. This selection ensures a thorough evaluation that supports your real estate goals.

Preparing for the Appraiser’s Visit

curb appeal

Homeowners can take steps to ensure the best possible appraisal outcome. This includes addressing minor repairs and enhancing curb appeal. These measures can positively influence the appraiser’s assessment and potentially increase the property’s value.

Minor Repairs and Maintenance

Fix safety hazards, broken fixtures, and maintain landscaping to impress the appraiser. Ensure all areas are accessible and well-maintained. Address issues like leaky faucets, missing door handles, and peeling paint.

For FHA/VA loans, appraisers often recommend specific actions. These include installing smoke detectors, handrails on stairways, and providing attic and crawl space access.

Enhancing Curb Appeal

  • Maintain a well-manicured lawn and trim overgrown shrubs or trees to enhance the landscape maintenance and curb appeal of the property.
  • Consider minor renovations or remodeling projects, such as a fresh coat of paint or minor repairs, to improve the home’s look.
  • Keep the home’s exterior clean and free of safety hazards to create a positive first impression.
  • Showcase the property’s tree care and lawn care to highlight well-maintained curb appeal.

Addressing these areas can increase the chances of a favorable appraisal. It may also boost the perceived value of the property.

Home Appraisers: Key Factors to Consider

Home appraisers analyze various factors to determine a property’s value. They look at recent sales of similar homes nearby. The condition and amenities of the property are also important.

Recent Comparable Sales

Appraisers focus on recent sales within a half-mile of the property. They usually look at sales from the past 90 days, but no more than six months ago.

They compare factors like location, size, and features of these homes. This helps them assess the market value of the property being appraised.

Property Condition and Amenities

The home’s condition and amenities greatly impact its value. Appraisers look at the building’s age, recent updates, and system upgrades.

They also consider major features like pools or extra rooms. The lot size, usability, and any special hazards are evaluated too.

These factors are compared to similar properties. This helps determine the market value of the home being appraised.

Appraisers use a systematic process to find a fair market value. They weigh recent sales against the home’s unique traits.

Understanding these factors can help you prepare for a successful appraisal. This applies to both homeowners and buyers.

The Appraisal Report: What to Expect

The Uniform Residential Appraisal Report is vital when buying, selling, or refinancing a home. It outlines the appraiser’s findings and conclusions. This report gives a detailed overview of the property.

It includes a street map, exterior building sketch, and square footage calculation. The report also features an extensive collection of photographs. These elements provide a comprehensive picture of the property.

The report’s core is the analysis of market data and public records. This data helps determine the home’s fair market value. Appraisers review recent sales, land records, and tax records.

  • The street map helps the appraiser and lender understand the property’s location and surrounding neighborhood.
  • The exterior building sketch provides a visual representation of the home’s dimensions and layout.
  • The square footage calculation is a crucial factor in determining the property’s value.
  • The collection of photographs documents the condition of the home, both inside and out.

This data helps the appraiser determine the home’s fair market value. The value serves as a key reference for buyers, sellers, and lenders. It ensures all parties understand the property’s worth.

This understanding allows for informed decision-making throughout the process. The report is a crucial tool in real estate transactions.

Low Appraisal Value: Strategies for Buyers

A low home appraisal can be a powerful tool for buyers to renegotiate the purchase price. Lenders won’t provide loans exceeding the appraised value. Buyers should team up with sellers to find a price that matches the appraisal.

Renegotiating the Purchase Price

Imagine an appraiser values a home at $270,000, but the buyer offered $300,000. The buyer may need to renegotiate because the lender will only approve a loan based on the lower value.

This leaves the buyer responsible for the $30,000 difference. To avoid overpaying, buyers can use the low appraisal to negotiate a better price with the seller.

Strategies for buyers facing a low appraisal include:

  • Disputing the appraisal and requesting a second opinion
  • Asking the seller to lower the price to match the appraised value
  • Seeking seller concessions, such as covering some of the closing costs
  • Increasing the down payment to cover the appraisal gap
  • Finding a new lender with a more favorable appraisal

These tactics help buyers navigate low appraisal challenges and avoid overpaying. Cash-rich buyers may have an advantage in these scenarios. They can more easily cover the appraisal gap without relying on lender financing.

Low Appraisal Value: Strategies for Sellers

cash buyer

A low appraisal can be a frustrating setback for sellers in a competitive housing market. Savvy homeowners have several strategies to overcome this challenge. One option is to appeal the appraisal by providing extra information to support a higher valuation.

This may include recent comparable sales or a list of home improvements. Professional assessments of the property’s unique features can also help.

Sellers can consider finding a cash buyer who doesn’t require an appraisal. Cash buyers may pay more for a property, even with a lower appraised value.

However, even cash-rich buyers won’t want to overpay. Sellers must still price their property competitively to attract these buyers.

In some cases, sellers may need to hold out for a cash buyer. This strategy works well in distress sales or short sales.

Cash buyers can help sellers bypass the appraisal process. This approach may lead to a higher sale price in certain situations.

The best strategy depends on market conditions and the property’s unique features. The seller’s financial situation and goals also play a role.

Understanding the options available is key. Working closely with a real estate agent can help sellers navigate this challenge.

With the right approach, sellers can overcome a low appraisal. A successful sale is still possible with careful planning and strategy.

Refinancing and Appraisal Values

A home’s appraised value is vital for mortgage refinancing. Low equity can result in private mortgage insurance (PMI). This can increase the refinance cost and monthly payments.

FHA Streamline Refinance Option

FHA mortgage holders might benefit from the streamline refinance program. It often skips new appraisals, making the process simpler and cheaper. This allows homeowners to get lower interest rates without a full appraisal.

The FHA streamline refinance simplifies the process for FHA borrowers. It helps lower monthly payments or switch from adjustable-rate to fixed-rate mortgages. This option saves time and money on new home appraisals.

  • The FHA streamline refinance option can help homeowners with existing FHA mortgages refinance without a new appraisal.
  • This can be particularly beneficial if the home’s equity has decreased, as it allows the homeowner to avoid the need for private mortgage insurance (PMI).
  • Homeowners can take advantage of lower interest rates and potentially reduce their monthly payments through the FHA streamline refinance program.

Knowing how appraisals affect refinancing helps homeowners make smart choices. The FHA streamline refinance can be a great option. It helps achieve financial goals and meets refinancing needs effectively.

The Appraisal Timeline

Home appraisals are key in real estate deals. The process usually takes 7 to 10 days to finish. This includes property inspection and the final report delivery.

The appraiser’s visit is vital. It can last from 30 minutes to a few hours. They check the home’s condition and features during this time.

After inspection, the appraiser researches comparable sales and market data. This step can take several days. They use this info to create the appraisal report.

The full appraisal report is usually ready in 6 to 20 days. This starts from the beginning of the appraisal timeline.

Several factors can affect the appraisal timeline. These include appraiser availability, home complexity, and local market activity. Busy seasons may cause longer wait times.

Knowing the typical appraisal timeline helps buyers and sellers prepare better. It allows for smoother transactions. This knowledge sets the stage for successful real estate deals.

Typical Home Appraisal Costs

Home appraisals are vital in real estate transactions. They determine a property’s fair market value. The cost varies based on location, size, and condition.

In the U.S., home appraisals usually cost $300 to $450. Appraisers may charge a flat fee or hourly rate. Avoid appraisers paid by percentage of home value.

Several factors can affect the appraisal cost:

  • Location: Properties in desirable areas may have higher fees.
  • Size: Larger homes often cost more to assess.
  • Condition: Homes needing repairs may require detailed inspections, increasing costs.

Buyers typically pay for appraisals as part of closing costs. Sellers may sometimes get appraisals before listing, but it’s less common.

Appraisal costs impact real estate transactions significantly. Understanding typical costs and influencing factors helps prepare for this step. It’s crucial for both buyers and sellers in the process.

After the Appraisal: Next Steps

After the home appraisal, mortgage underwriting begins. The underwriter reviews the loan file and assesses the risk. This evaluation determines if the loan will be approved or denied.

Underwriting and Loan Approval

Mortgage underwriting usually takes 2 to 4 weeks. Some lenders may finish in as little as 2 weeks. The underwriter examines the borrower’s finances, credit history, and the property’s value.

If the loan risk is acceptable, it gets approved. The buyer can then move to the closing phase. If significant risks are found, the loan may be denied.

Buyers might need to find other financing options. They may also need to renegotiate the purchase price. Understanding this process helps borrowers address any concerns that come up.

Factors that Can Lower a Home’s Appraisal Value

Several factors can negatively impact your property’s value during a home appraisal. These include your home’s location, condition, and appearance. Understanding these issues can help you boost your home’s appraised value.

Your home’s location is a key factor in its appraisal value. Undesirable neighborhoods or nearby features can lower its worth. These may include a nearby junkyard, power lines, or a busy street.

Your home’s condition and appearance also affect its appraisal. Curb appeal, cleanliness, and routine maintenance are crucial. Address any clutter or issues that could harm the appraiser’s view of your property.

Even an appraiser’s bias can influence your home’s final value. Their unconscious assumptions may lead to a lower appraisal. This can happen regardless of your home’s actual condition or features.

Taking steps to address these issues can help ensure a fair appraisal. This can maximize your home’s value and potential in the long run.

Let FindPros Help You Find the Best Real Estate Appraisers

Are you in need of a licensed residential appraiser or certified residential appraiser for your property? FindPros can help you find the best professional appraisers in your area. Simply answer a few questions about your home project, and within seconds, you’ll be matched with top-rated local property appraisers.

Compare quotes from multiple professionals and choose the best one for the job. With FindPros, you’ll get the best pricing when professional appraisers compete for your project, and you’ll find the appraisers you get along with best. Don’t settle for less – let FindPros help you find the perfect licensed appraiser for your real estate appraisal needs.

Conclusion

A smooth home appraisal is just another step in the closing checklist. However, a lower-than-expected value can delay or cancel the transaction. Understanding the appraisal process helps homebuyers, sellers, and refinancing homeowners navigate this crucial component.

We’ve explored finding a qualified appraiser and preparing for their visit. We’ve also discussed factors they consider in their valuation. This knowledge is vital for selling, refinancing, or evaluating home improvements.

A basic grasp of the appraisal process is key for a smooth transaction. Staying informed and proactive can lead to the best possible outcome. With proper preparation, the appraisal becomes a seamless step in your real estate journey.

Frequently Asked Questions (Home Appraisers)

A real estate appraiser provides an unbiased estimate of a property’s value, which is crucial for mortgage lenders to ensure that the home loan amount aligns with the home’s worth. They assess the property by considering its condition, location, and comparable properties in the area.
The home appraisal cost typically ranges from $300 to $450, depending on the property’s size and location. Generally, the buyer pays the appraisal fee as part of the home buying process.
Property appraisers consider several factors, including the home’s size, condition, location, current market trends, and the sales price of comparable properties. They also evaluate any needed repairs and improvements made to the home.
A home appraisal is an evaluation of the property’s market value, while a home inspection focuses on identifying any needed repairs or issues within the home. The appraiser considers the overall condition and features of the home, whereas the inspector looks for defects that may need addressing.
Yes, if the home appraised value is lower than the agreed sales price, the buyer can use the appraisal as a negotiating tool to renegotiate the price with the seller. This can help ensure that the buyer does not overpay for the property.

Heat Pump Repair

Home Builders Near You

Can’t find what you are looking for?

How It Works

  • Answer a few questions about your home project.
  • Within seconds, get matched with top-rated local pros.
  • Compare quotes and choose the best pro for the job.

Heat Pump Repair In Your Area

Heat Pump Repair: What to Expect and How to Find a Reliable Technician

Meta Description: Discover expert heat pump repair services to keep your system running efficiently. Learn what to expect and how to find a reliable technician for your HVAC needs.

Heat Pump Repair

Heat pumps are popular for efficient heating and cooling. Like any HVAC system, they can develop issues needing professional repair. Let’s explore what homeowners should know about heat pump repairs.

We’ll also discuss how to find a trustworthy technician for your needs. Understanding these aspects ensures your home stays comfortable year-round.

Key Takeaways

  • 01

    Heat pumps are a cost-effective heating and cooling solution, but they can experience various issues over time.

  • 02

    Common heat pump repair needs include refrigerant leaks, capacitor problems, electrical issues, and defrost cycle failures.

  • 03

    Proper maintenance and prompt repairs are essential to ensuring the longevity and efficient operation of heat pumps.

  • 04

    Hiring a licensed and experienced HVAC technician is crucial for safe and effective heat pump repairs.

  • 05

    Comparing quotes, reviewing certifications, and checking customer feedback can help homeowners find the right repair professional.

Understanding Heat Pump Repair: An Overview

Heat pumps can face various issues over time, just like other HVAC systems. Regular upkeep and quick fixes help extend their lifespan. This ensures your heat pump runs efficiently for years to come.

Why Heat Pumps Need Repairs

Heat pump repairs are often needed due to wear and tear, poor installation, or lack of maintenance. Issues with the refrigerant system can also cause problems. Heat pumps typically last 12-16 years.

To keep them running well, schedule maintenance twice a year. Spring and fall are the best times for these check-ups.

Common Issues Requiring Heat Pump Repairs

  • Refrigerant leaks
  • Capacitor problems
  • Electrical issues, such as blown fuses or tripped circuit breakers
  • Short cycling, where the unit turns on and off frequently
  • Defrost cycle failures, leading to ice buildup
  • Inconsistent heating or cooling

Watch for signs of these common issues in your heat pump. Look out for reduced energy efficiency and insufficient heating or cooling. Unusual noises or cycling patterns are also red flags.

If you notice these signs, it’s time to call a pro. An HVAC technician can properly diagnose and repair your heat pump.

Refrigerant Leaks: A Common Culprit

Refrigerant leaks can greatly affect a heat pump’s efficiency and performance. These leaks often stem from wear and tear or poor installation. Damage to the system and its lines can also cause leaks.

Causes of Refrigerant Leaks

Most refrigerant leaks, about 90%, happen in the evaporator coil’s copper tubing. Indoor coils are more likely to leak due to indoor air pollutants.

Corrosion, often from formic acid attacking copper tubing, is a main cause of leaks. Physical damage from weather, animals, or people can also lead to leaks.

Professional Refrigerant Handling and Repair

If you think you have a refrigerant leak, call a professional HVAC technician. They can find the leak, fix it, and add the right amount of refrigerant.

Trying to fix refrigerant issues yourself can be dangerous. HVAC techs need an EPA certification to handle and dispose of refrigerants safely.

A 10% change in refrigerant level can cause a 10-20% drop in energy efficiency. Low refrigerant might not always mean a leak.

Sometimes, incorrect coolant levels are set during installation. Proper setup is key for optimal HVAC system efficiency and capacity.

Capacitor Problems and Heat Pump Repair

capacitor

Your heat pump’s capacitor is vital for starting and running the motor smoothly. A failed capacitor can cause starting issues or unexpected shutdowns. Age, electrical surges, or overheating can lead to capacitor failure.

Signs of a failing capacitor include humming noises or starting difficulties. It’s crucial to address these issues quickly. Only HVAC technicians should diagnose and replace faulty capacitors.

Capacitor replacement costs range from $160 to $180. This is much cheaper than replacing the entire compressor, which costs $1,800 to $2,500.

HVAC technicians use multimeters to measure capacitance within specified ranges. They also perform tests after repairs to ensure correct component function. Proper maintenance and replacement are key for heat pump performance.

Some contractors may suggest unnecessary replacements or inflate repair costs. Choose a licensed, reputable technician who follows safety protocols and offers clear pricing. Quick action on capacitor problems keeps your heat pump running efficiently.

Electrical Issues: Blown Fuses and Tripped Circuit Breakers

Heat pumps need steady electricity to work well. Blown fuses or tripped breakers can stop power flow. This can shut down the system or make it work poorly.

Knowing common causes and fixes is key. It helps keep your heat pump running smoothly.

Troubleshooting Electrical Problems

Fuses and breakers can trip for many reasons. These include power surges, short circuits, overloads, or faulty parts.

Sometimes, resetting the breaker or changing the fuse fixes it. But if it keeps happening, there’s a bigger problem.

This means you need a pro to look at it.

When to Call a Professional

  • If breakers trip often or new fuses blow, call an HVAC technician. They can check for electrical issues.
  • Don’t try to fix complex electrical problems yourself. It’s dangerous and could make things worse.
  • A skilled HVAC technician can find the real problem. They’ll fix it safely to get your heat pump working right.

Keep your heat pump’s electrical parts in good shape. It’s vital for safe, reliable use.

Know when fuses blow and breakers trip. Call a pro when needed. This keeps your heat pump heating and cooling well.

Short Cycling: A Frustrating Heat Pump Issue

Short cycling happens when a heat pump turns on and off too often. This can make your home uncomfortable and increase energy bills. It’s important to fix short cycling to keep your HVAC system running well.

Causes of Short Cycling

Many things can cause heat pump short cycling. These include wrong-sized units, broken thermostats, and blocked airflow. Refrigerant leaks and compressor problems can also be to blame.

Faulty thermostats and clogged air filters are common issues. They can stop the system from controlling temperature and airflow correctly.

Resolving Short Cycling Problems

  • Check and replace air filters if they are dirty or clogged. Dirty filters can restrict airflow and cause the system to short cycle.
  • Ensure that there is no debris or obstructions around the outdoor unit, as this can also impede airflow and lead to short cycling.
  • If the issue persists, have a qualified HVAC technician perform a thorough diagnostic inspection to identify and repair any underlying problems, such as refrigerant leaks or a malfunctioning compressor.
  • If the heat pump is incorrectly sized for your home, the unit will need to be replaced with one that is appropriately sized to prevent short cycling.

Fixing the causes of short cycling can help your heat pump work better. This will give you steady heating and cooling in your home.

Defrost Cycle Failures and Ice Buildup

ice buildup on heat pump

Heat pumps need a defrost cycle to remove ice from the outdoor coil in cold weather. When this cycle fails, ice can build up. This reduces heating efficiency and may damage the system.

Malfunctioning sensors, faulty controls, or a stuck valve can cause defrost cycle problems. Poor airflow or low refrigerant levels are also common issues.

Check if the defrost cycle works when you see ice on the outdoor unit. A normal cycle lasts 10 to 15 minutes. It’s vital for keeping your system running well.

If defrost problems continue, call a professional HVAC technician. They can diagnose and fix the issue quickly.

Regular maintenance helps prevent defrost cycle failures and ice buildup. This keeps your heat pump efficient and extends its life. It also avoids costly repairs down the road.

Act fast if your heat pump’s defrost cycle isn’t working right. Ignoring it can lead to higher energy bills and system damage. Quick action ensures reliable heating all winter long.

Heat Pump Repair: What to Expect and How to Find a Reliable Technician

Your heat pump’s efficiency is key to year-round home comfort. Noisy operation and inconsistent temperature control are common issues needing expert attention. These problems may require an HVAC technician’s skills to resolve.

Investigating Noisy Operation

Unusual heat pump noises might signal problems with parts or debris. Check the outdoor unit for visible damage or foreign objects. Remove any debris and tighten loose components if possible.

If noise persists, call a qualified HVAC technician. They can diagnose and fix the underlying issue causing the disturbance.

Addressing Inconsistent Heating or Cooling

Uneven temperature control can stem from airflow issues, refrigerant problems, or faulty components. Start by examining air filters and ductwork for blockages or leaks. Make sure your thermostat is correctly calibrated.

If the problem continues, seek professional help. An HVAC expert can assess your heat pump and overall heating and cooling needs.

Quick action on these issues helps maintain your heat pump’s efficiency. Working with a trusted HVAC technician ensures smooth operation and expected comfort levels.

Choosing the Right HVAC Technician for Heat Pump Repair

Finding a reliable HVAC technician is vital for heat pump repair. Verify their licensing to ensure they meet safety and knowledge standards. A licensed technician is legally certified to handle HVAC systems.

Review customer feedback to understand what to expect from a technician or company. Pay attention to punctuality, work ethic, and repair quality in the comments.

Verifying Licensing and Certifications

Check that your HVAC technician has the right licenses and certifications for heat pump work. Look for NATE-certified technicians or those with ASHRAE, AHRI, or ASME certifications.

Reviewing Customer Feedback

Online reviews offer insights into an HVAC company’s reputation and customer service. Choose a provider with many positive reviews and happy customers.

Comparing Quotes and Pricing

Ask for detailed quotes from several providers to ensure fair pricing. Compare them to find the best value and market rate.

Be careful about payment terms and agreements. Make sure all contracts are in writing to protect yourself.

Securing Written Agreements and Contracts

Review the contract or written agreement carefully before hiring an HVAC technician. It should clearly state the work scope, timeline, pricing, and any warranties.

A well-defined contract helps avoid misunderstandings and ensures smooth repairs. Make sure to sign it before work begins.

Trust FindPros for Your Heat Pump Needs

Having trouble with your heat pump’s thermostat, heating mode, or indoor coil? Dealing with a broken reversing valve and dealing with cold air instead of the heat you need? Don’t sweat it – the experts at FindPros can help. Simply answer a few questions about your home project, and we’ll match you with top-rated local professionals for your heat pump service and cooling system needs. Determine the right solution to keep your home comfortable all year round, whether it’s in heat mode or cooling mode. FindPros ensures you get the best pricing when multiple pros compete for your job, and you can choose the pro you get along with best. Maintain your heat pump’s life expectancy and avoid costly replacement parts by trusting the qualified technicians in our network. Get the job done right the first time by letting FindPros inspect your system and recommend the ideal service.

Conclusion

Heat pumps are efficient for heating and cooling homes. However, they may need repairs over time. Common issues include refrigerant leaks, capacitor problems, and electrical faults.

Finding a reliable HVAC technician is crucial for heat pump repairs. Check their licensing and customer feedback. Compare quotes and get written agreements before starting work.

Stay proactive with heat pump maintenance to extend its lifespan. Address problems quickly to improve energy efficiency. This approach helps keep your home comfortable and energy bills low.

Partnering with the right HVAC pro makes a big difference. They can handle simple repairs or complex solutions. This ensures your home stays cozy and your energy costs remain manageable.

Frequently Asked Questions (Heat Pump Repair)

A heat pump system is used for both heating and cooling a home. It efficiently transfers heat between the indoor and outdoor air to provide comfortable temperatures year-round.
A dirty air filter can restrict airflow, causing the heat pump to work harder and less efficiently. This can lead to increased energy bills and wear on the system over the long run.
The reversing valve is responsible for switching the heat pump between heating and cooling modes. If the valve is broken, the system will not be able to properly change from heating to cooling or vice versa.
It’s recommended to have a heat pump system serviced by a professional at least once a year, typically in the spring or fall, to ensure it’s running at its best before the peak heating or cooling seasons.
A programmable thermostat allows you to automatically adjust the temperature settings based on your schedule, ensuring the heat pump only runs when needed. This can lead to significant energy and cost savings, especially during periods when the home is unoccupied.

Heated Driveways & Floors

Home Builders Near You

Can’t find what you are looking for?

How It Works

  • Answer a few questions about your home project.
  • Within seconds, get matched with top-rated local pros.
  • Compare quotes and choose the best pro for the job.

Heated Driveways & Floors In Your Area

Heated Driveways Floors: A Guide to Hiring the Right Installer

Meta Description: Discover the benefits of heated driveways floors and find expert installers for your home. Learn about costs, maintenance, and energy efficiency in this guide.

Heated Driveways Floors

Imagine a winter without shoveling snow from your driveway. Heated driveways make this a reality. They use radiant heating to melt snow, keeping your driveway clear.

But how do you find the right installer? This guide covers benefits, costs, and installation of heated driveways. It’ll help you make a smart choice for your home.

Key Takeaways

  • 01

    Heated driveways use radiant floor heating systems to melt snow and ice, eliminating the need for manual shoveling.

  • 02

    Hiring the right installer is crucial to ensure proper installation and long-term performance of the heated driveway system.

  • 03

    Heated driveways can significantly reduce the cost of snow removal services, which can reach up to $400 per snowfall.

  • 04

    Proper maintenance and repair of heated driveways are essential to maintain their efficiency and longevity.

  • 05

    Choosing the right heating system (electric or hydronic) and driveway material can impact the overall cost and performance of the heated driveway.

What are Heated Driveway Systems?

Heated driveways keep outdoor spaces free from snow and ice. They use radiant heat to warm paving materials. This ensures safe and well-maintained driveways all winter long.

Two main types of heated driveway systems exist: electric and hydronic. Both offer innovative solutions for homeowners and businesses.

Electric Coil Heated Driveways

Electric coil systems use metal rods or mats beneath the driveway. An electric current runs through these elements, generating heat to melt snow.

These systems are easy to install. Homeowners can control them with a thermostat to adjust temperature preferences.

Hydronic Heated Driveways

Hydronic systems use PEX tubing beneath the driveway surface. A boiler heats water and antifreeze, which circulates through the tubing.

This warms the pavement and melts snow. Hydronic systems are more complex to install but may offer lower operating costs.

Both systems are designed to be maintenance-free. When installed correctly, they keep driveways clear and accessible throughout winter.

Benefits of Installing a Heated Driveway

Heated driveways offer more than just convenience. They boost your home’s health and safety. They also cut salt damage and save you money.

  • Health and Safety: Heated driveways prevent slip-and-fall accidents. This lowers the risk of fractures, muscle strains, and hypothermia. You protect your family and avoid legal problems. You also dodge fines for not shoveling your walkway.
  • Reduced Salt Damage: Heated driveways need less rock salt and de-icing chemicals. This protects concrete, vehicles, and landscaping from damage. You save money by avoiding costly repairs and replacements. Your property stays in better shape for longer.
  • Cost-Savings: The initial cost may be high. But heated driveways save money over time. You won’t need to pay for plowing. Repair costs from freeze-thaw cycles go down. Your home’s market value may increase. This makes it a smart long-term investment.

Costs Involved in a Heated Driveway

Heated driveways offer safety, convenience, and lower maintenance costs. Understanding the expenses is crucial before installation. The main costs include installation, operation, and potential repairs.

Installation and Operating Costs

A two-car heated driveway typically costs between $9,600 and $19,200. The average price is $12,800 for 640 square feet. Smaller driveways may cost $4,800, while larger ones can exceed $25,000.

Electric heating systems cost $3,200 to $5,800 for the system alone. Total costs double when adding driveway materials and labor. Hydronic systems are pricier, costing $4,200 to $8,700 for the system.

Expect to pay $15 to $30 per square foot for a heated driveway. Electric systems cost $5 to $9 per square foot, excluding labor and materials.

Heated concrete driveways average $12,800, while heated asphalt driveways cost around $9,900. Ongoing costs include higher utility bills and occasional snow removal services.

Repair Cost

Heated driveways usually need little maintenance. Problems may occur if the system wasn’t installed correctly. Fixing issues might require partial or full driveway excavation.

Hire a professional contractor with warranties to reduce risks. This ensures long-term performance of your heated driveway.

Determining if You Need a Heated Driveway

heated driveway

A heated driveway can revolutionize snow and ice management on your property. It’s crucial to assess your area’s winter weather conditions before making this investment.

Heated driveways are ideal for regions with heavy snowfall and frequent ice buildup. These systems melt snow and ice, keeping your driveway and sidewalk clear and safe for walking.

They eliminate the need for strenuous shoveling or using a snowblower. However, in areas with mild snow and ice conditions, traditional snow removal methods may suffice.

To decide if a heated driveway suits your home, consider these factors:

  • Average snowfall and ice accumulation in your area
  • Frequency of shoveling or using a snowblower to clear your driveway and sidewalk
  • Difficulty and safety concerns when walking on your driveway and sidewalk during the winter
  • The potential cost savings from reduced snow removal efforts and materials like salt or de-icing agents

Evaluating these factors will help you determine if a heated driveway is worth the investment. Consider your specific winter weather conditions and home needs.

Advantages of Owning a Heated Driveway

A heated driveway offers amazing benefits. The main perk is little to no shoveling. You can stay warm inside with family instead of clearing snow in the cold.

Another plus is safer walking conditions. Melting ice and snow cuts down on slips and falls. This makes your driveway safer for everyone, including visitors.

Prolonged Pavement Life

A heated driveway can prolong the life of your pavement. It reduces the freeze-and-thaw cycle that damages surfaces. Your driveway will last longer, saving you money on future repairs.

Heated driveways offer many perks. They save time, boost safety, and protect your investment. Consider one to make winter upkeep easier and safeguard your property.

Types of Radiant Heated Driveway Systems

Radiant heated driveways use two main systems: hydronic and electric. Both melt snow and ice but differ in technology and installation.

Hydronic System

Hydronic systems use a boiler to heat water and antifreeze. This mixture flows through PEX pipes under the driveway. The warm liquid radiates heat upwards, melting snow and ice.

These systems are efficient and can use various energy sources. Gas, electricity, or solar power can fuel hydronic systems.

Electric System

Electric systems use heat-generating mats or cables. They’re easier to install than hydronic systems. No boiler or extensive plumbing is needed.

Thermostats control electric systems, adjusting heat based on weather. Solar energy can power these systems, reducing reliance on traditional electricity.

Both systems effectively clear snow and ice from driveways and sidewalks. Your choice depends on preference, budget, and project needs.

Snow Melting Capacity of Heated Driveways

Radiant heated driveways can melt up to 2 inches of snow per hour. This keeps your driveway clear and safe during heavy snowfall. These systems work non-stop to handle even the heaviest storms.

The heated driveway keeps melting snow until it’s all gone. This means less shoveling for you. You’ll save time and effort during winter months.

Snow melting capacity is key when choosing a heated driveway. It ensures your driveway stays clear in harsh winter weather. Both electric coil and hydronic systems can keep your driveway accessible.

A heated driveway offers peace of mind during winter. It makes dealing with snow much easier. You’ll enjoy a clearer, safer driveway all season long.

Using Solar Power for Heated Driveways

Solar power can heat your driveway in an eco-friendly way. It connects solar panels to your heating system. This method uses the sun to melt snow and ice on your driveway.

Solar thermal evacuated tubes are five times more efficient than traditional photovoltaic panels. They’re great for solar-powered heated driveways. A solar snow melt system costs only $0.03 per day for pre-heating.

This is much cheaper than using harmful snow and ice melting agents. Solar-powered heated driveways offer many benefits.

  • Increased safety for friends and family
  • Ease of maintenance
  • Environmental friendliness

One drawback is the system’s dependence on sunlight. Cloudy days might not charge the batteries enough. This could leave your driveway unheated.

To avoid this, choose the right solar panel system. Work with a specialist to optimize your heated driveway for solar power.

Solar power for heated driveways offers many benefits. It saves money and helps the environment. You’ll enjoy a safe, eco-friendly driveway that’s easy to maintain.

Factors Affecting Heated Driveway Costs

Heated driveway costs can vary based on several key factors. Understanding these can help you estimate the investment needed. You’ll be able to decide if a heated driveway suits your needs.

  • Cost of Living: Your local area’s cost of living affects heated driveway installation costs. Higher cost regions may have pricier labor and materials. This can lead to a bigger overall investment.
  • Project Scope: The size and complexity of your driveway project impact the cost. Removing an old driveway before installation increases expenses. Unique shapes or layouts also add to the project’s scope and cost.
  • Contractor vs. DIY: Hiring a pro to install your heated driveway usually costs more than DIY. But DIY installation may require renting special equipment and tools. This can increase your overall expenses.
  • Heating System Type: Your choice between electric or hydronic heating systems affects costs. Electric systems are typically cheaper to install. However, they may have higher energy costs over time.
  • Pavement Choice: The pavement type for your heated driveway impacts the overall cost. Options include concrete, asphalt, or pavers. Some materials need special installation methods or cost more than others.

Knowing these factors helps you estimate heated driveway costs better. You can then decide if this investment fits your budget and needs.

Average Costs for Installation and Operation

Installing a heated driveway is a big investment. Costs range from $10 to $25 per square foot. The average total cost is about $8,500.

A hydronic system has minimal operating costs after installation. The main expense is a yearly boiler check. An electric system can increase your electric bill by $100 to $650 yearly.

Yearly maintenance for a heated driveway is usually under $100. This covers basic inspection and cleaning. Regular upkeep ensures the system works well for years.

A heated driveway is a long-term investment. It can reduce snow removal costs and improve safety. It may also increase your property value.

Understanding installation and operating costs helps you decide if it’s right for you. Consider these factors when making your choice.

Additional Costs to Consider

Installing a heated driveway comes with extra expenses. These include removing the old driveway, tree removal, and potential future repairs.

Old Driveway Removal

Removing an existing driveway costs $1 to $3 per square foot. This can add up quickly for larger driveways. Proper disposal of old materials is also important.

Tree Removal

Trees or large shrubs near the driveway may need removal. This prevents damage to the heating system. Costs range from $50 for small trees to $1,500 for larger ones.

Repair Costs

Incorrect installation can lead to future repair costs. Minor issues may cost hundreds, while major problems can reach thousands. Hiring a reputable contractor helps minimize these risks.

Understanding these costs helps homeowners plan better. Good preparation and working with experts ensures a smooth project.

Heated Driveways Floors: Installation Process

Heated driveway installation process

Installing a heated driveway is a complex task. It needs careful planning and execution. The process is similar for concrete, asphalt, or paver-based heated driveways.

The first step is removing the existing driveway. This allows contractors to check soil conditions and ensure proper compaction. A stable base is crucial for the heating elements and pavement surface.

  1. Removing the existing driveway
  2. Compacting the soil
  3. Laying the heating materials, such as electric cables or hydronic tubing
  4. Installing the control systems and electrical components
  5. Pouring the concrete, laying the asphalt, or installing the pavers

The installation process varies slightly based on the pavement type. Concrete driveways have heating elements embedded within the slab. Asphalt driveways have heating cables installed beneath the asphalt layer.

Paver-based heated driveways often have heating elements in the base beneath the pavers. The goal is to integrate the heating system seamlessly with the driveway materials.

This results in a functional and efficient heated driveway. It can melt snow and ice with ease, making winter maintenance much simpler.

Hiring Professionals vs. DIY

Homeowners can install heated driveways themselves or hire professionals. For larger driveways, hiring experts is usually better. Professionals have the tools and know-how to do the job well.

Concrete contractors understand proper mixing and curing times. They can prevent costly mistakes and handle unexpected issues. Their expertise ensures high-quality, long-lasting results.

Hiring professionals can save money in the long run. They work quickly and offer warranties. This gives peace of mind and protection against future problems.

Portable heated mats are a cheaper option. But they have shorter warranties and need manual placement. For larger driveways, professional installation is often better.

DIY projects may work for some homeowners. However, professionals offer efficiency, cost-savings, and warranties. This makes them a smart choice for complex installations.

The FindPros Advantage

Are you considering a heated driveway to melt snow and ice this winter? FindPros can help you find the perfect driveway heating system for your home. Our network of energy-efficient, trusted professionals can install a radiant heating system that works seamlessly with your existing driveway or a brand-new construction. Whether you need to prevent snow buildup, deal with extreme temperatures, or melt ice on your whole driveway, FindPros can match you with the right pros who use the latest snow melting systems and products.

From electric heating mats to hydronic tubing powered by natural gas or renewable energy, we’ll help you find the ideal built-in system for your snowy climate. Get started by answering a few questions about your project, and we’ll connect you with top-rated local professionals who can provide competitive quotes to ensure you get the best value.

Conclusion

Heated driveways offer many perks for homeowners in snowy areas. They reduce shoveling, make walking safer, and extend pavement life. While costly to install, the long-term benefits make them a smart choice.

When thinking about a heated driveway, weigh all costs carefully. This includes setup, running, and possible repair expenses. Consider whether to hire pros or do it yourself.

A heated driveway can be a safe and eco-friendly way to manage snow and ice. It can boost your property’s appeal and value. With good care, it can last up to 20 years or more.

Frequently Asked Questions (Heated Driveways & Floors)

The heated driveway cost can vary based on several factors, including the size of the driveway, the type of heating system (electric or hydronic), the driveway material (concrete, asphalt, or pavers), the complexity of the installation, and the local cost of labor and materials. Homeowners should also consider the long-term operating costs, such as increased energy bills, when budgeting for a heated driveway.
Heated driveways use a radiant heating system to melt snow and ice on the driveway’s surface. This snow melting system can be electric, with heating elements embedded in the pavement, or hydronic, with heated water or antifreeze circulating through a closed-loop system. The radiant heat from these systems warms the driveway, preventing the buildup of snow and ice.
Heated driveways offer several benefits, including improved safety by reducing slip and fall hazards, decreased reliance on manual snow shoveling or the use of ice melt chemicals, and increased energy efficiency compared to traditional snow removal methods. These driveway heating systems can also help extend the lifespan of the driveway by preventing damage from freeze-thaw cycles.
Maintaining a heated driveway system typically involves periodically checking the heating elements or tubing, the control system, and the electrical connections to ensure the system is working properly. In the event of any heating system malfunctions, such as a faulty heating mat or heat cable, it’s important to address the issue promptly to prevent further damage to the driveway’s surface.
Heated driveway systems can be easily customized to fit the specific needs and requirements of a homeowner’s property. Factors like the size of the driveway, the local climate and snowfall patterns, and the homeowner’s physical ability to shovel snow can all be taken into account when designing and installing the radiant heat systems. Professional builders can work with homeowners to create a built-in heated system that is tailored to the surrounding area and the homeowner’s desired level of snow and ice prevention.

Hardwood Floor Refinishing

Home Builders Near You

Can’t find what you are looking for?

How It Works

  • Answer a few questions about your home project.
  • Within seconds, get matched with top-rated local pros.
  • Compare quotes and choose the best pro for the job.

Hardwood Floor Refinishing In Your Area

Hardwood Floor Refinishing: What to Expect and How to Find a Pro

Meta Description: Discover the essentials of hardwood floor refinishing, from process to costs. Learn how to find skilled professionals for a flawless finish that revitalizes your home.

Hardwood Floor Refinishing

Hardwood floors add timeless beauty to homes. Over time, they can show wear and tear. Dull, discolored, or scratched floors may need refinishing.

Refinishing restores the appearance of existing hardwood floors. It involves sanding, staining, and applying new protective coatings. This process can revive tired floors and costs less than replacing them.

Let’s explore the steps, costs, and factors of hardwood floor refinishing. We’ll also guide you in finding the right professional for your home.

Key Takeaways

  • 01

    Hardwood floor refinishing is the process of restoring the appearance and condition of existing hardwood floors.

  • 02

    Refinishing is often more cost-effective than fully replacing the flooring.

  • 03

    The refinishing process involves sanding, staining, and applying new protective coatings to the floors.

  • 04

    The average cost of hardwood floor refinishing ranges from $3 to $8 per square foot.

  • 05

    Finding a skilled and experienced professional is crucial for a successful refinishing project.

Introduction to Hardwood Floor Refinishing

Hardwood floor refinishing can revive your living spaces. Over time, beautiful hardwood floors may become scratched, dented, and worn. Refinishing restores floors to their former glory at a fraction of replacement costs.

The process involves sanding down the existing finish to expose bare wood. Then, a new stain and protective coatings are applied. This method can transform your floors, making them look brand new.

Importance of Refinishing Hardwood Floors

Refinishing hardwood floors offers more than just visual improvements. It removes imperfections and damage, ensuring your floors look their best. A fresh finish also protects the wood from future wear and tear.

Benefits of Refinishing vs. Replacing Hardwood Floors

Updating hardwood floors through refinishing is often more cost-effective than replacement. DIY refinishing costs range from $500 to $1,000. Full replacement can cost between $2,475 and $7,031.

Refinishing typically takes just a day or two to complete. A floor replacement can disrupt your home for several days or weeks. You can also change the stain color and finish type during refinishing.

This allows you to update your space to match your personal style. Hardwood floor refinishing is a smart investment for your home. It can restore original luster or create a fresh, modern look.

Signs Your Hardwood Floors Need Refinishing

Hardwood floors need regular care to stay beautiful. Certain signs show it’s time for refinishing. These include scratches, wear, discoloration, and fading.

Scratches, Dents, and Wear Patterns

High-traffic areas often show visible damage over time. Scratches and dents mean the protective finish has worn down. Refinishing can restore your floors’ smooth, uniform look.

Discoloration and Fading

Sun exposure and foot traffic can cause floors to fade. Your once-vibrant wood may now look dull or uneven. Refinishing can bring back the original color and vibrancy.

Regular inspections help catch these issues early. Addressing them quickly can extend your floors’ life. It also keeps your living space looking great.

Steps Involved in the Refinishing Process

Refinishing hardwood floors requires careful preparation, sanding, and finishing. Let’s explore the key stages involved in this process.

Preparation and Floor Clearing

First, clear the room of all furniture and decor. This gives full access to the hardwood floors. Baseboards and shoe moldings may need removal for a thorough job.

Sanding and Dust Management

Professional sanders remove the old finish and smooth the wood. Drum and orbital sanders handle this task efficiently. Dust management is crucial, using vacuums and containment systems.

Staining and Finishing

After sanding, floors are ready for staining and finishing. Homeowners can choose from water based, stained, or varnish options. Multiple coats are applied, paying attention to edges and larger areas.

The final step involves applying a protective polyurethane sealant. This safeguards the oak or other hardwood materials from water damage and wear.

These steps transform worn or outdated hardwood floors. The result is a beautiful, sanded, stained, and varnished surface that adds value to your home.

Hardwood Floor Refinishing Costs

hardwood floor refinishing cost

Refinishing hardwood floors is often cheaper than replacing them. Professional refinishing costs $3 to $8 per square foot. The national average for a typical project is around $1,828.

Average Cost per Square Foot

Hardwood floor refinishing costs vary based on several factors. Prices range from $3 to $8 per square foot. The total cost depends on the area size being refinished.

Factors Affecting the Cost

  • Size of the area: Larger spaces generally have a lower cost per square foot.
  • Condition of the existing floors: Floors in good condition with minimal damage will be less expensive to refinish.
  • Choice of stain and finish: Selecting premium stains and finishes can increase the overall cost.
  • Need for repairs: Addressing issues like gaps, cracks, or deep scratches will add to the total expense.
  • Labor costs: Hourly rates for professional refinishers can vary based on location and experience.

Wood type and sanding needs can affect refinishing costs. Preparation work may also increase expenses. Always get multiple quotes to ensure the best value for your investment.

Choosing the Right Stain Color and Finish

Refinishing wood floors offers a chance to update old finishes and stain colors. The chosen stain color and finish type greatly impact the floor’s look. Many popular stain color trends range from rich, dark tones to lighter, natural shades.

Glossy and satin/matte finishes each have unique advantages. Glossy finishes create a high-shine, reflective look for a luxurious appearance. Satin finishes provide a subtle, low-luster look that’s better for homes with kids or pets.

Popular Stain Colors and Trends

The Bona DriFast Stain Color Chart offers a variety of wood colors. It ranges from dark ebony to golden browns for oil-based floors. Grey is a classic choice for hardwood floors, fitting various decor styles.

When picking a stain color, consider the wood’s natural traits. Different woods absorb stain differently based on humidity levels and sanding grade.

Glossy vs. Satin Finishes

  • Glossy finishes offer a high-shine, reflective look that can create a dramatic, luxurious appearance.
  • Satin finishes provide a more subtle, low-luster appearance that can be better suited for homes with young children or pets, as they are less prone to showing scratches and scuffs.
  • The type of polyurethane used (oil vs water-based) can also impact the color and finish of the floor, with water-based products often providing a clearer, more natural look.

Carefully choosing stain color and finish creates a floor that matches your style. It also complements your living space’s overall design. The right choice greatly impacts the final look of refinished floors.

Preparing for the Refinishing Process

To start hardwood floor refinishing, clear the room of all items. This gives full access to the floors. Cover nearby surfaces with plastic to protect from dust and debris.

Good air flow is key during sanding and finishing. These steps create lots of dust and fumes. Set up temp vents or ask the town about trash pickup for the waste.

Clearing the Area and Protecting Furniture

  • Completely clear the room of all furniture, rugs, and decor.
  • Cover adjacent surfaces, such as walls and cabinets, with plastic sheeting to prevent dust and debris from settling.
  • Consider having professional movers handle heavy or delicate items, like pianos or grandfather clocks.
  • Empty out cabinets and drawers to protect their contents.
  • Document any pre-existing damages to furniture or the wood to avoid disputes later.

Ventilation and Air Quality Considerations

  1. Ensure adequate ventilation in the work area to minimize the impact of dust and fumes.
  2. Consider using a high-efficiency particulate air (HEPA) filter system to capture and remove airborne particulates.
  3. Coordinate with the township for bulk trash collection or arrange for the crew to handle the waste disposal for an additional fee.
  4. Prepare the electrical setup, which may require a generator or special electrical box for the heavy sanding equipment.
  5. Keep small pets away from the work environment, as oil-based finishes can be hazardous to their health.

Caring for Newly Refinished Hardwood Floors

Keeping your new hardwood floors beautiful requires a good cleaning routine. Many people forget to care for their floors properly. This can lead to early wear and damage.

Follow these easy steps to keep your floors looking great for years. Your floors will thank you!

Cleaning and Maintenance Routine

Clean your floors often to keep them looking their best. Sweep, vacuum, and damp mop with a safe cleaner for hardwood.

Don’t use oil soaps or wax. These can leave a residue or change the finish. Instead, use Squeaky™ by Basic Coatings to protect the new finish.

Protecting Floors from Future Damage

  • Use felt pads under furniture legs to prevent scratches and dents.
  • Avoid wearing high heels, which can damage the floor’s surface.
  • Promptly address any new scratches, dents, or spills to prevent further damage.
  • Consider using a protective sheeting like “Ramboard™” for floors with heavy pet traffic or during moves.
  • Utilize a Bona™ style micro-fiber dust mop or vacuum with soft bristles to clean the floors.
  • Avoid walking barefoot for at least 7 days, especially with water-based finishes.
  • Implement protectors under furniture feet and minimize rolling chair or suitcase usage.
  • Use exterior track-off mats at all entry points to keep floors clean.
  • Wipe feet thoroughly to remove sand, dirt, and soils to maintain the floors.
  • Address water spills, pet urine, or plant water immediately to avoid damage.

Follow these tips to keep your hardwood floors looking great. Your floors will stay beautiful for years, no matter where you live.

DIY Hardwood Floor Refinishing vs. Professional Service

Refinishing hardwood floors offers two options: DIY or hiring professionals. Both have advantages and drawbacks. Let’s explore these choices to help you decide.

Pros and Cons of DIY Refinishing

DIY refinishing can save up to 50% compared to professional services. However, it comes with risks. Inexperienced homeowners might face issues like uneven staining and messy edging.

These problems can lead to more expenses later. It’s crucial to weigh the potential savings against possible mistakes.

When to Hire a Professional

Professional services are ideal for large projects or floors with deep scratches or exposed nails. They have the expertise and tools for high-quality, lasting finishes.

Professionals often use water based polyurethane and apply multiple coats for better protection. They can handle sanding and refinishing projects more efficiently, saving you time and stress.

Consider project size, floor condition, and your experience with wood type and kitchen cabinets. Weigh these factors to make the best choice for your needs and budget.

Finding a Professional Hardwood Floor Refinisher

hardwood floor refinishing

Refinishing hardwood floors requires a skilled professional. Vet contractors carefully by checking their credentials and customer feedback. This ensures quality work and value for your money.

Checking Credentials and Reviews

Research local hardwood floor refinishers. Look for licensed, insured contractors with successful project histories. Check their websites, online reviews, and industry certifications.

These steps will help you gauge their expertise. You’ll also learn about their service quality.

Getting Multiple Quotes

  • Request detailed quotes from promising candidates. Compare labor costs, materials, and specific refinishing steps.
  • Ask about their experience and product types. Inquire about warranties or guarantees they offer.
  • Multiple quotes help find the best value. You’ll avoid overpaying while still getting high-quality results.

Thorough research helps you save money. It ensures your floors are restored properly. The right materials and techniques will be used.

Repairing Hardwood Floor Damage

Fixing hardwood floor damage is crucial before refinishing. This includes filling gaps and cracks between floorboards. It also means fixing deep scratches and other wear issues.

Skilled contractors use various methods to repair these problems. They employ wood filler and putty to create a smooth surface. This ensures the new finish looks great.

Filling Gaps and Cracks

Gaps and cracks in hardwood floors happen for many reasons. These include wood shrinkage, temperature changes, and poor installation. Contractors often use a mix of sawdust and clear resin filler.

They apply this mixture with a spatula to fill gaps. This method keeps the natural wood look. It also creates a seamless surface for the new finish.

Addressing Deep Scratches and Gouges

Deep scratches and gouges are harder to fix. Sometimes, sanding isn’t enough, and damaged boards need replacement. For small gouges, a brown crayon can work well.

Contractors may use orbital sanders for ultra-smooth finishes. This helps blend repaired areas with the rest of the floor.

Fixing hardwood floor damage can save money and extend floor life. It’s a smart choice before full refinishing. Proper prep ensures a successful, long-lasting refinish job.

Environmental Considerations for Hardwood Floor Refinishing

Hardwood floor refinishing projects need to consider their environmental impact. Modern water based polyurethane finishes offer low-VOC formulations. These reduce harmful fumes and chemicals in the air.

Low-VOC options are better than traditional oil based finishes. They help you save money and protect the environment. These finishes match the quality of older products.

Low VOC Finishes and Products

Low-VOC finishes are key for good indoor air quality. They minimize the environmental impact of your refinishing project. Many are water-based and contain no solvents.

These products are safe for people and the planet. They deliver the same quality and durability as older formulations.

Proper Disposal of Sanding Dust

Floor refinishing creates a lot of sanding dust. This dust may contain wood particles and old finish. Don’t just sweep it into the trash.

Collect sanding dust carefully. Dispose of it responsibly to avoid air or soil pollution.

Choose low-VOC products and responsible disposal methods for your project. This approach helps you save money and protect the environment. Follow this step by step guide for an eco-friendly refinishing project.

Tips for Matching Existing and New Hardwood Floors

Matching new and old hardwood floors is key for a seamless look. Choose a stain color that blends with existing flooring. Skilled contractors can help integrate different wood types visually.

Blending Stain Colors

Try various stain colors to find the best match for your floors. Bring a sample of your current flooring when shopping. Consider the texture of existing floors for inspiration.

Pick a matching sheen so all flooring reflects light similarly. This helps create a unified appearance throughout your home.

Transitioning Between Different Wood Types

Ensure smooth transitions if your home has mixed wood types. Find new flooring that matches the width of existing boards. Stick to the same wood species for a consistent look.

Contractors can use transitional pieces to blend different wood types. This creates a cohesive look throughout your space.

Matching hardwood floors takes careful planning and attention to detail. With the right approach, you can achieve a beautiful, unified look. Your living space will be enhanced by a seamless transition.

Finding The Right Hardwood Floor Pro with FindPros

Searching for a trusted professional to refinish or replace your hardwood floors? FindPros can help. Simply answer a few questions about your home project, and we’ll match you with top-rated local pros in seconds. Get the best pricing when multiple pros compete for your job, and find the professionals you get along with best.

Compare quotes, review portfolios, and choose the perfect fit for your wood flooring needs, whether it’s sanding, staining, or a complete replacement. FindPros takes the guesswork out of your home improvement project, from the first coat to the final edge and corners. Get started today and see how our additional services can transform your house.

Conclusion

Hardwood floor refinishing can breathe new life into worn, outdated floors. It’s a transformative project that can enhance your home’s beauty. Understanding the process, costs, and considerations helps homeowners make informed decisions.

Homeowners can choose to refinish floors themselves or hire professionals like Weles Hardwood Flooring. With proper preparation and care, refinished hardwood floors provide a beautiful, long-lasting foundation for any home.

Refinishing is ideal for floors with superficial damage. However, significant damage may require complete replacement. Replacing floors offers the chance to modernize with contemporary styles and wood types.

Refinishing is generally more cost-effective and eco-friendly. It reduces waste and extends the life of existing wood floors. The decision depends on floor condition, budget, and desired look.

Weighing pros and cons, considering repairs, and choosing the right finish can transform living spaces. These improvements can also increase the overall value of your property.

Frequently Asked Questions (Hardwood Floor Refinishing)

The process of refinishing hardwood floors involves sanding down the existing finish, applying a new stain color, and then applying several coats of a protective final coat, such as polyurethane. This restores the look of the wood floor.
If your hardwood floors have significant damage, such as deep scratches, gaps, or severe discoloration, it may be better to replace the entire floor instead of refinishing. Replacement is also an option if you want to change the wood type or layout of your flooring.
When choosing a wood stain color, consider the existing wood tone and the overall style of your home. Bring a sample of your current flooring to the store to help you find a matching or complementary stain. Many homeowners also like to use this as an opportunity to update the look with a different stain color.
The cost to refinish hardwood floors can range from $3 to $8 per square foot, depending on factors like the size of the area, the condition of the existing floors, and the geographic location. For a typical-sized room, the total cost is usually around $1,800.
Before the refinishing process begins, you’ll need to clear the entire floor area by removing furniture, rugs, and decor. You may also need to remove baseboards or shoe molding to ensure the sanding and finishing can reach all the edges. It’s important to cover any adjacent surfaces, like walls or cabinets, to protect them from dust and debris during sanding.

Hardscape Contractors

Home Builders Near You

Can’t find what you are looking for?

How It Works

  • Answer a few questions about your home project.
  • Within seconds, get matched with top-rated local pros.
  • Compare quotes and choose the best pro for the job.

Hardscape Contractors In Your Area

Hardscape Contractors: Essential Questions to Ask Before Hiring

Meta Description: Discover key questions to ask hardscape contractors before hiring. Learn about services, costs, and project timelines to ensure your outdoor space is transformed perfectly.

Hardscape Contractors

Choosing the right hardscape contractor is crucial for your outdoor space transformation. Asking the right questions can ensure your project’s success. Let’s explore what you should ask potential contractors.

Delve into their experience, qualifications, and past work. This will help you make an informed decision. Your dream outdoor space is within reach with the right professional.

Key Takeaways

  • 01

    Licensing and insurance are crucial indicators of a reputable hardscape contractor.

  • 02

    Reviewing examples of previous work can provide insight into the contractor’s capabilities and attention to detail.

  • 03

    Understanding the materials used and the overall cost breakdown can help you make an informed decision.

  • 04

    Checking references and online reviews can shed light on a contractor’s reputation and customer satisfaction.

  • 05

    Discussing warranty coverage and maintenance responsibilities can give you peace of mind about the long-term quality of the project.

Take time to ask the right questions. This helps you find a contractor who meets and exceeds your needs. Your outdoor living space deserves expert attention.

Hardscape Contractors: Essential Questions to Ask

Finding the right hardscape contractors is key to transforming your outdoor spaces. Ask the right questions to ensure your hardscaping services project succeeds. Here are some important things to consider:

  1. What is your experience with hardscape landscaping? Look for contractors with a proven track record, preferably with at least 10 years in the industry. This ensures they have the expertise to handle your new patio, fire pits, or any other project.
  2. Do you have liability insurance? This is essential to protect you and your property in case of any accidents or damages during the patio installation process.

These questions will help you assess the contractor’s qualifications and professionalism. They set the stage for a successful hardscape project.

Ask about the contractor’s previous work, materials used, and overall pricing. This will give you a full picture of their skills and help you decide.

Picking the right hardscape contractors is vital for your dream outdoor space. Ask smart questions to find a team that meets your homeowner needs.

A dedicated crew will create a beautiful, long-lasting hardscape solution. They’ll serve you well in bringing your vision to life.

Evaluating Experience and Qualifications

hardscape contractors

Experience is crucial when hiring hardscape contractors. Look for professionals with a strong portfolio of patios, walkways, and retaining walls. Their work should showcase expertise and craftsmanship.

What Is Your Experience With Hardscape Landscaping?

Ask about a contractor’s background in hardscape landscaping. Seek professionals with at least four years of experience. This is the minimum for obtaining a contractor’s license.

Verify their experience by requesting documentation from previous employers or supervisors. Union representatives can also provide this information.

Do You Have Liability Insurance?

Ensure your chosen hardscape contractor has liability insurance. This protects you from damages or accidents during the project. Ask for proof of their insurance policy.

An experienced and qualified contractor leads to a successful project. Evaluate their background, expertise, and insurance coverage carefully. This helps create your dream outdoor living space.

Assessing Previous Work and References

hardscape contractor

Evaluating a hardscape contractor’s previous work is essential. Ask for a portfolio of their past projects. This will show their design style and craftsmanship quality.

Do You Have Any Examples of Your Work That I Can See?

Request photos or videos of previous hardscaping projects. These might include new patios, fire pits, or outdoor kitchens. This helps you visualize how they can transform your space.

A skilled contractor should proudly showcase their past work. Their portfolio will help ensure their style matches your vision.

Ask for references from the contractor’s previous clients. Speaking with past customers provides insights into their professionalism and attention to detail.

Pay attention to comments about communication and adherence to deadlines. Note feedback on the final results of each project.

Reviewing portfolios and speaking with references helps you make an informed decision. This process ensures you hire a professional who can create your dream outdoor space.

Understanding Materials and Costs

Ask potential hardscape contractors about their materials. Hardscape features use concrete, stone, or brick. Each has pros and cons. A good contractor can help you choose the best material for your project and budget.

What Type of Materials Do You Use?

Material choice affects your project’s cost. Concrete patios cost $8 to $15 per square foot. Flagstone patios range from $15 to $25 per square foot. Stamped concrete patios run $12 to $20 per square foot.

Concrete block retaining walls cost $20 to $30 per square foot. Natural stone retaining walls can reach $30 to $50 per square foot.

How Much Do You Charge for Your Services?

Hardscaping services also impact total cost. Design complexity, area size, and skilled labor all affect the price. Get estimates from several hardscape contractors to understand average costs for your needs.

A well-designed landscape boosts your property’s appeal and value. It’s a smart investment. Understanding materials and costs helps you create a beautiful, functional outdoor space within budget.

Finding the Right Hardscape Contractor with FindPros

Are you ready to transform your outdoor living spaces? FindPros can help you connect with top-rated hardscape contractors in your local areas. Simply answer a few questions about your home project, and we’ll match you with professionals who fit your needs and preferences.

With FindPros, you can compare quotes from multiple contractors, ensuring you get the best pricing for your hardscape project. Our platform allows you to find pros that you’ll enjoy working with, whether it’s for a new patio, fire pit, or pool area. Get the details you need to make an informed decision and craft the outdoor oasis of your dreams.

Interested homeowners can contact FindPros to get started. We’ll help you gather the information you need to connect with the perfect hardscape contractor for your family’s needs. Enjoy your perfect outdoor living space with the help of FindPros.

Conclusion

Hiring the right hardscape contractor is vital for transforming your outdoor space. Ask the right questions to vet potential contractors thoroughly. This ensures your project meets high standards and stays within budget.

Key factors include experience, liability insurance, and examples of previous work. Material selection and pricing are also important considerations. Research helps you find a reputable professional who can bring your vision to life.

The right contractor can create a beautiful, functional outdoor oasis. They can build patios, install fire pits, or handle other hardscaping services. Your dream outdoor space can become a reality.

Not all contractors are equal. Do your homework to find one that fits your needs and budget. Use these guidelines to confidently choose the perfect hardscape contractor for your project.

Frequently Asked Questions (Hardscape Contractors)

Answer: Look for a contractor with a strong business presence, such as a professional website, social media profiles, and online reviews. This shows they are reliable and take pride in their work.
Answer: Ask the contractor to provide examples of their previous work, such as photos or videos of completed projects. This will give you a better idea of their craftsmanship and design capabilities.
Answer: Be sure to ask about the materials they use and get a detailed breakdown of the pricing. This will help you understand the overall cost and make an informed decision that fits your budget.
Answer: Check for online reviews and ask the contractor for references from past clients. This will give you insight into their communication, professionalism, and ability to address any issues that may arise during the project.
Answer: Look for a contractor who is licensed, insured, and has experience working in your local area. This ensures they understand any unique regional requirements or building codes that may apply to your project.

Handicap Remodeling Contractors

Home Builders Near You

Can’t find what you are looking for?

How It Works

  • Answer a few questions about your home project.
  • Within seconds, get matched with top-rated local pros.
  • Compare quotes and choose the best pro for the job.

Handicap Remodeling Contractors In Your Area

Handicap Remodeling Contractors: Find the Best for Your Home

Meta Description: Discover top-rated handicap remodeling contractors for your accessible home needs. Expert services to enhance safety, comfort, and independence in your living space.

Handicap Remodeling Contractors

Living with physical limitations can be tough. But the right accessibility solutions can help reclaim independence at home. Professionals work with clients to identify needs and create custom solutions. They focus on enhancing safety, comfort, and independence for those with mobility issues.

Key Takeaways

  • 01

    Contractors have expertise in accessibility solutions like wheelchair-friendly bathrooms and ramps

  • 02

    CAPS Remodeling offers 40+ years of residential building experience and 20+ years of barrier-free remodeling expertise

  • 03

    Contractors work closely with clients to identify needs and implement customized solutions

  • 04

    Homeowners can compare contractor qualifications, reviews, and pricing to find the right fit

Understanding the Need for Handicap Remodeling

Physical challenges can make moving around at home difficult for some people. Standard homes often don’t meet the needs of disabled or elderly individuals. Handicap remodeling contractors can help improve safety and independence by adapting homes.

Identifying Accessibility Challenges

Narrow doorways, missing grab bars, and tricky stairs can pose problems. These obstacles make it hard for people with mobility issues to move safely. They can also limit independence for those with disabilities.

Adapting Homes for Improved Safety and Independence

Handicap remodeling can include installing wheelchair ramps and widening doorways. Modifying bathrooms and adding assistive devices can also help. These changes allow residents to age in place more easily.

The FHA and HUD offer home loan options for accessibility improvements. These include the 203(k) Rehabilitation Mortgage and Streamlined 203(k) Refinancing. Medical tax deductions can also help with costs.

The VA and USDA provide grants for those needing handicap remodeling. These resources can offer financial support for necessary home modifications.

Certified Aging in Place Specialists (CAPS)

Certified Aging in Place Specialists (CAPS) are experts in barrier-free home remodeling. They create accessible living spaces for the physically challenged, disabled, and elderly. Their goal is to help people age comfortably in their homes.

Expertise in Barrier-Free Home Remodeling

CAPS remodeling contractors have over 40 years of combined residential building experience. They also have 20 years of barrier-free home remodeling expertise. These professionals understand the unique needs of those with physical limitations.

CAPS experts work closely with clients to assess their accessibility needs. They develop custom solutions to boost safety, comfort, and independence at home. Their skills cover a wide range of modifications.

CAPS professionals can widen doorways and lower light switches. They also install walk-in showers and add assistive technologies. Their aim is to create homes that work for people of all ages and abilities.

The National Association of Home Builders lists Certified Aging-in-Place Specialists across the United States. This makes it easy for consumers to find experts in universal design and aging-in-place changes.

Working with a CAPS professional ensures your home meets your specific needs. They can help you age in place with confidence and comfort.

Handicap Remodeling Contractors

Finding the right contractor for handicap remodeling is crucial. Look for experienced ADA contractors who specialize in adapting homes for the physically challenged. These experts can make homes safer and more comfortable for disabled individuals.

Specialized contractors evaluate unique accessibility needs and create custom solutions. Their expertise allows people with mobility issues to live independently at home. They focus on enhancing safety and comfort for residents.

Handicap remodeling goes beyond wheelchair accessibility. It includes grab bars, accessible showers, and specialized kitchen layouts. These features cater to people with visual impairments, cognitive challenges, or other physical limitations.

Contractors in this field must understand Universal Design and ADA guidelines. They need expertise in accessible remodeling techniques for safe and effective modifications.

handicap remodeling contractors

Accessible Home Modifications and Solutions

Home modifications can improve safety and independence for people with physical limitations. Handicap remodeling contractors transform living spaces to accommodate mobility issues. They focus on bathroom modifications and wheelchair ramps with widened entryways.

Bathroom Modifications

Bathrooms can be challenging for those with disabilities. Contractors can install grab bars and lower countertops to make these spaces more accessible. They can also add roll-in showers, guided by ADA guidelines for accessibility standards.

Wheelchair Ramps and Entryways

Wheelchair ramps and wider entryways make it easier to move in and out of homes. These changes help residents with mobility issues maintain their independence. Contractors design solutions that blend with the home’s existing architecture and layout.

Handicap remodeling contractors help people with disabilities live safely in their homes. They address specific accessibility needs through various modifications. These changes contribute to the overall well-being and independence of their clients.

Working with Experienced ADA Contractors

Collaborating with skilled ADA contractors is vital for handicap remodeling. These experts know ADA guidelines and local building codes well. They ensure home modifications meet accessibility requirements and comply with regulations.

Understanding ADA Guidelines and Local Building Codes

ADA contractors handle complex guidelines while meeting homeowners’ unique needs. They know specific requirements for ADA-compliant toilets, doorways, and bedrooms. Their expertise covers dimensions set by the Department of Justice and state laws.

These professionals modify kitchens, countertops, and other areas to meet ADA standards. Homeowners can trust that their projects will improve safety and follow ada guidelines.

ADA contractors offer more than just compliance expertise. They know the latest accessible home remodeling trends and practices. Their knowledge helps create safe, comfortable spaces that boost quality of life.

Customized Solutions for Unique Needs

Handicap remodeling isn’t a one-size-fits-all solution. Each person has specific accessibility needs. Experienced contractors work with clients to understand their challenges and develop tailored modifications.

These solutions may include bathroom updates, wheelchair ramps, and home automation technologies. These changes help residents maintain independence and quality of life as they age.

customized solutions

Creating Safe and Comfortable Living Spaces

Handicap remodeling contractors transform homes for residents with physical limitations. They make changes like widening doorways, lowering countertops, and installing grab bars. These modifications enhance accessibility throughout the home.

Accommodating Physical Limitations

People with disabilities face challenges navigating their homes. Contractors work with clients to identify limitations and develop solutions. They address barriers and add helpful features to create independent living spaces.

Assistive Devices and Home Automation

Handicap remodeling includes assistive devices and smart home tech. Specialized lighting and voice-controlled systems empower individuals with disabilities. These technologies enhance accessibility and promote comfort for residents.

Contractors address structural and tech needs in homes. They create safe, comfortable spaces that support aging in place. These changes help people with disabilities live independently.

The Importance of Communication and Collaboration

Handicap remodeling projects thrive on effective communication between contractors and clients. Contractors must understand clients’ unique needs, physical limitations, and desired outcomes. This ensures a successful remodel that enhances safety, comfort, and independence.

Working as a team, contractors develop plans to address accessibility challenges. They implement customized solutions that meet specific household requirements. This dedication to collaboration puts the client’s needs first.

Effective communication is crucial throughout the remodeling process. It includes understanding physical limitations and discussing design options. Regular updates and addressing concerns promptly are also important.

  • Clearly understanding the client’s physical limitations and accessibility requirements
  • Discussing design options and recommendations that cater to the client’s unique needs
  • Providing regular project updates and addressing any concerns or questions promptly
  • Collaborating on a timeline that accommodates the client’s schedule and preferences
  • Seeking feedback and input from the client to ensure the final result meets their expectations

A collaborative environment allows contractors to create empowering home modifications. These changes help individuals with disabilities live independently and confidently. The partnership between client and contractor forms the foundation for transformative remodeling.

Planning for Future Accessibility Needs

Handicap remodeling must consider current and future accessibility needs. Certified Aging in Place Specialists (CAPS) can help evaluate these requirements. They implement modifications supporting aging in place with ease.

A proactive approach involves universal design principles and home automation systems. It also includes assistive devices for an adaptable living space. This forward-thinking stance ensures a safe, comfortable, and independent living environment.

Aging in Place with Ease

Prioritizing future accessibility needs can greatly impact one’s ability to age in place. It promotes comfort and independence. Key considerations include universal design, home automation, and assistive devices.

  • Incorporating universal design elements that cater to a wide range of abilities, ages, and sizes
  • Installing home automation systems to enhance safety and independence
  • Incorporating assistive devices like grab bars, wheelchair-friendly features, and adjustable-height surfaces

Planning for future accessibility needs creates an adaptable living environment. It allows homeowners to age in place with ease. This approach helps maintain their desired quality of life.

Finding the Right Handicap Remodeling Contractor

Choosing the best handicap remodeling contractors or ADA contractors requires careful consideration. Look for providers with the right mix of expertise, experience, and customer service. Research potential accessible home remodeling contractors thoroughly.

Review their qualifications, past projects, and customer reviews. This ensures they have the specialized knowledge to address your home’s unique accessibility needs.

Expertise, Experience, and Customer Service

A handicap remodeling contractor should have a strong track record of successful accessible home remodeling projects. They need deep understanding of ADA guidelines and local building codes for compliant renovations.

Look for contractors who prioritize clear communication and collaborative problem-solving. They should be committed to meeting your unique needs for a successful project.

  • Choose handicap remodeling contractors with extensive expertise in barrier-free home modifications.
  • Check the contractor’s qualifications, including Certified Aging in Place Specialist (CAPS) certifications.
  • Review their portfolio of past projects and customer reviews.
  • Discuss their approach to communication and collaboration.
  • Ask about their pricing structure and ability to work within your budget.

Selecting the right handicap remodeling contractor ensures a successful accessible home remodeling project. It meets your specific requirements and enhances your quality of life.

Finding the Right Handicap Remodeling Pros with FindPros

Looking for the best accessible home remodeling services for your handicap remodeling project? FindPros can connect you with top-rated local pros specializing in accessible design and handicap bathroom renovations. Whether you’re part of the baby boomer generation or need safer access, our remodeling services experts will work closely with your family to understand your unique job requirements. Simply contact us to get matched with the right pros who can complete your home modification project.

Conclusion

Handicap remodeling creates safe, comfortable living spaces for people with physical limitations. Experienced handicap remodeling contractors help homeowners identify challenges and develop custom solutions. They enhance home functionality and livability through thoughtful modifications.

Certified Aging in Place Specialists (CAPS) bring expertise in barrier-free home remodeling. They work closely with clients to address unique needs and plan for future accessibility requirements.

Effective communication and focus on safety are key in handicap remodeling. These efforts transform living spaces, allowing residents to age in place comfortably.

As demand for accessible homes grows, skilled professionals ensure homes meet evolving needs. They create secure, comfortable environments that last for years.

Handicap remodeling empowers individuals with disabilities to maintain independence. It enhances quality of life and creates a sanctuary where they can thrive.

Universal design principles and qualified contractors help create truly accessible homes. These welcoming spaces support unique needs and aspirations of homeowners.

Frequently Asked Questions (Handicap Remodeling Contractors)

Accessible home remodeling contractors offer services like creating customized solutions for home wheelchair accessibility, installing accessible bathrooms, and building wheelchair ramps. They focus on making homes fully wheelchair accessible and meeting the unique needs of each client.
Handicap remodeling projects aim to create customized solutions that make homes more wheelchair accessible and safer for those with physical limitations. This includes modifications like widening doorways, adding grab bars in bathrooms, and installing ramps for easier entry and exit.
It’s crucial for contractors to fully understand the design requirements of a handicap remodel because each individual has unique needs based on their disability. By completely understanding the client’s requirements, contractors can create a tailored home modification plan that enhances safety, comfort and independence.
Home renovations for wheelchair users can incorporate features like accessible bathrooms with roll-in showers, lowered countertops, and grab bars. Contractors may also install wheelchair ramps, widen doorways, and add other modifications to make the entire home wheelchair accessible.
Hiring an experienced handicap accessible contractor can benefit families dealing with disability by providing an unwavering commitment to creating a safe, comfortable and fully wheelchair accessible home. These disability contractors have the expertise to handle the complete installation and construction process, ensuring the final result meets all the family’s design requirements.

Gutter Installation

Home Builders Near You

Can’t find what you are looking for?

How It Works

  • Answer a few questions about your home project.
  • Within seconds, get matched with top-rated local pros.
  • Compare quotes and choose the best pro for the job.

Gutter Installation In Your Area

Need Gutter Installation? Here’s What You Should Know

Meta Description: Discover the essentials of gutter installation, from costs to materials. Learn how to protect your home with the right gutters and expert tips for a successful project.

A properly functioning gutter system is crucial for your home or commercial property. An inch of rain can pour 1,900 gallons of water onto your property quickly.

Without reliable rain gutters and protection, this deluge can damage your roofing, walls, and insulation. It can even harm your home’s foundation.

Gutter Installation

Key Takeaways

  • 01

    Reliable gutter systems are essential for protecting your home from water damage.

  • 02

    Gutter installation costs can range from $2 to $6 per linear foot, with copper gutters costing over $20 per linear foot.

  • 03

    Gutter installation typically takes 6 to 8 hours to complete.

  • 04

    Choosing the right gutter material, such as aluminum or vinyl, can impact the overall cost and longevity of your gutter system.

  • 05

    Proper gutter maintenance, including regular cleaning and inspections, is crucial for ensuring their ongoing effectiveness.

The Importance of a Reliable Gutter System

Proper gutter installation protects your home from water damage, rot, mildew, and mold. Faulty gutters can let water seep into your home’s foundation. This weakens the structure and compromises your property’s integrity.

Preventing Water Damage

Gutters divert rainwater away from your home’s walls and foundation. Without them, water can build up around your house. This leads to serious water issues over time.

Uncontrolled water flow can cause rot, mildew, and mold. These problems harm your home’s structure and affect indoor air quality. Your family’s health may also suffer as a result.

Protecting Your Home’s Foundation

A good gutter system safeguards your home’s foundation. It channels water away, preventing soil erosion and instability. Without it, water can cause cracks and settling in the foundation.

These structural problems are expensive to fix. Professional gutter installation helps avoid these issues. It protects your home’s foundation for years to come.

Benefits of Installing New Gutters

Quality gutters are a smart home improvement project. They can boost your home’s curb appeal and increase its resale value. Well-maintained gutters keep your home dry and damage-free, extending its lifespan.

Enhanced Curb Appeal

New gutters can greatly improve your home’s appearance. They add a polished, modern touch to your property. This makes your home more attractive to potential buyers.

Increased Home Value

A new gutter system can boost your home’s value. Buyers look for functional, well-maintained gutters. They protect against water damage and related issues.

New gutters improve both your home’s looks and value. This makes them a worthwhile investment for homeowners.

better looking gutters

Choosing the Right Gutter Material

Gutter material affects your home’s drainage system durability, look, and performance. Vinyl, aluminum, steel, and copper each have unique benefits. Let’s explore these options to help you make the best choice for your home.

Vinyl Gutters

Vinyl gutters are affordable and easy to install. They’re lightweight, low-maintenance, and come in various colors. These gutters are great for DIY projects.

However, vinyl may not be as durable as metal gutters. This is especially true in areas with extreme weather conditions.

Aluminum Gutters

Aluminum gutters are cost-effective and resist rust. They come in many colors and can match your home’s exterior. These gutters are durable, lasting about 20 years.

This makes aluminum a practical investment for many homeowners. They can also enhance your home’s curb appeal.

Steel Gutters

Steel gutters are known for their exceptional strength. They can withstand harsh weather, making them popular in severe climate areas. Steel offers long-lasting protection for your home.

While more expensive than other materials, steel gutters are a worthy investment. They provide superior durability and peace of mind.

Types of Gutter Profiles

Homeowners can pick from various gutter profiles. Each profile has its own features and benefits. Half-round and K-style gutters are two popular options.

Half-Round Gutters

Half-round gutters have a classic, semicircular trough. They sport a curled front lip, giving them a traditional look. These gutters work well with older homes’ architecture.

Half-round gutters drain water effectively. However, they may handle less runoff than K-style gutters of the same width.

K-Style Gutters

K-style gutters are the most common in modern homes. They make up about 80% of the market. These gutters have a flat bottom and a crown molding-like face.

K-style gutters come in 5-inch and 6-inch sizes. The 5-inch size is the industry standard. They can handle more water runoff than half-round gutters.

K-style gutters are often chosen for homes with larger roofs. They’re more cost-effective and easier to install than half-round gutters.

Your choice depends on your home’s style and your needs. Consider both options before deciding.

Seamless vs. Sectional Gutters

Homeowners can choose between seamless and sectional gutters for their homes. Each type has unique features and benefits. Let’s explore the differences to help you make the best choice.

Seamless gutters are custom-made to fit your home’s exact dimensions. They have no seams or joints, making them less prone to leaks and clogs. Seamless gutters cost $6 to $50 per linear foot installed.

These gutters can last over 20 years, making them a solid long-term investment. For just the materials, expect to pay $2 to $43 per linear foot.

Sectional gutters come in standard lengths and need seams to connect pieces. This design makes them more likely to leak and collect debris. They cost $3 to $35 per linear foot installed.

For materials only, sectional gutters range from $1 to $31 per linear foot. They’re cheaper upfront but need more maintenance. Sectional gutters also have a shorter lifespan than seamless ones.

  • Seamless gutters are less prone to leaks and clogging, enhancing their overall performance and longevity.
  • Sectional gutters are more vulnerable to leaks and debris buildup due to their seams and joints, necessitating regular maintenance.
  • Seamless gutters have a higher initial cost but offer a better long-term investment, while sectional gutters are more budget-friendly upfront.
  • Seamless gutters require professional installation, while sectional gutters can be a DIY project for capable homeowners.

Consider your budget, maintenance needs, and home’s look when choosing gutters. Think about long-term performance and upkeep requirements. This will help you pick the best gutter system for your home.

Gutter Installation Tips

Installing gutters can be a DIY project for some homeowners. But it’s important to consider several key factors. Proper measurement, hanger spacing, and pitch are crucial for effective gutter function.

Professional installation ensures the job is done safely and correctly. However, it will cost more than doing it yourself.

Professional Installation vs. DIY

Hiring a pro is best to get the job done right. They have the skills and tools to measure, level, and secure gutters properly.

If you’re handy, installing gutters yourself can save money. But make sure you’re comfortable with the task before starting.

Tools and Materials Needed

  • Ladder
  • Measuring tape
  • Tin snips
  • Drill
  • Screws
  • Level

For a DIY gutter project, you’ll need specific tools and materials. These include a ladder, measuring tape, tin snips, and a drill.

You’ll also need screws and a level. These items help you measure, cut, and install gutters correctly.

Gutter Protection Systems

Clean gutters are vital for a well-functioning system. Gutter guards and heating cables prevent clogging. These protection systems channel water away from your home effectively.

Gutter Guards

Gutter guards protect your gutters from debris. Made of stainless steel, aluminum, or plastic, they keep leaves and twigs out. LeafFilter®, America’s top gutter-guard system, uses micromesh screens.

Their 275-micron openings block even tiny debris like pollen. This ensures your gutters stay clear and functional year-round.

Heating Cables

Gutter heating cables prevent ice dams. Installed in gutters, they melt ice and snow. This keeps water flowing and prevents damage.

These cables are especially useful in areas with harsh winters. They help avoid common problems caused by ice dams.

Gutter protection systems may increase initial costs. However, they save time and effort in the long run. They reduce the need for frequent cleaning.

Investing in these solutions protects your home. They keep your gutters working as intended. This helps prevent water-related damage to your property.

Factors Affecting Gutter Installation Cost

Gutter installation costs can vary greatly. Several key factors influence the total price. Understanding these can help you plan your budget wisely.

Material Costs

Gutter material is a major cost factor. Vinyl gutters cost around $4 per linear foot. Copper gutters are pricier at $40 per linear foot.

Aluminum and steel gutters range from $5 to $20 per linear foot. Wood and zinc options cost between $20 and $32 per linear foot.

Labor Costs

Professional installation is often necessary, especially for complex systems like seamless gutters. The average labor cost is about $2.50 per linear foot. Home height and job difficulty can affect labor expenses.

Other costs include downspouts, end caps, flashing, and potential repairs. Homeowners typically spend between $1,450 and $2,970 on gutter installation. The national average is around $2,200.

Knowing these cost drivers helps you plan your gutter project. This knowledge ensures a successful outcome for your home. You’ll be better prepared to budget for your new gutters.

Hiring a Professional Gutter Contractor

Hiring a professional gutter contractor is crucial for installing or repairing your home’s gutter system. Look for proper licensing, insurance, and credentials. This ensures safe, efficient work that follows local rules.

A trustworthy contractor should be bonded with valid liability coverage. This protects both homeowners and workers on the job.

Warranties and Guarantees

Choose a gutter contractor offering full warranties and guarantees on their work. This gives homeowners added peace of mind. Any issues will be fixed quickly at no extra cost.

Ask about warranty coverage, length, and what it includes. This ensures you get the protection you need.

When talking to possible gutter contractors, ask about their credentials and safety practices. Check their liability coverage too. Good contractors will gladly share this info.

Take time to research your options. This helps you find the right gutter contractor for your home project.

Hiring a professional gutter installer ensures proper installation of your new gutter system. It provides lasting protection for your home.

Maintaining Your Gutter System

Proper gutter care keeps your home’s rainwater system working well. Regular cleaning and checks prevent debris buildup and water damage. This extends the life of your gutters.

Regular Gutter Cleaning

Clean your gutters every few months to remove leaves and twigs. This allows rainwater to flow freely through the system. Neglecting this task can cause water damage to your home’s walls.

It may also harm your home’s structure. Regular cleaning prevents these problems.

Seasonal Gutter Inspections

Check your gutters each season for cracks or sagging. Look for signs of wear that might need repair. Also, make sure downspouts aren’t clogged.

Clogged downspouts can cause water to back up during rainstorms. This can lead to overflow and damage.

Gutter guards can help reduce the need for frequent cleaning. They block leaves and debris from building up. Even with guards, inspect your gutters twice a year.

Spring and fall are good times for these checks. Regular maintenance keeps your gutters working well.

Proper gutter maintenance is key to a working rainwater system. Regular gutter cleaning and seasonal inspections preserve gutter lifespan. These tasks prevent debris buildup and clogging.

They also protect your home from costly water damage. Stay on top of these tasks to keep your gutters in good shape.

Find the Best Pros for Your Gutter Project with FindPros

Need help with your gutter installation, replacement, or DIY project? FindPros can connect you with top-rated local professionals to handle any gutter-related task, from measuring and installing to repairing and cleaning. Answer a few simple questions about your gutter needs, such as material type, linear feet, and any issues like pooling water or small cracks.

Within seconds, FindPros will match you with vetted pros in your area who can provide competitive quotes. Compare options, choose the best fit, and get your gutter system working like new – all while taking the hassle out of finding the right contractor. Whether you need a simple gutter section replacement or want to tackle a DIY installation, FindPros makes it easy to find the perfect pro for your project and budget.

Conclusion

Gutters are vital for protecting your home from water damage. They maintain your property’s structural integrity and boost its curb appeal. A reliable gutter system can increase your home’s long-term value.

Consider factors like gutter material, profile, and protection systems when choosing. Proper installation and regular maintenance are key to an effective gutter system. This ensures water is channeled away from your home for years.

Seamless gutters offer a durable, low-maintenance solution. They typically need replacement every 20-30 years. These gutters have fewer clogs and leaks than sectional ones.

Seamless gutter materials excel in weathering ability. With proper care, they often last beyond the standard replacement period. The upfront cost may be higher, but maintenance costs are lower over time.

A quality gutter system is crucial for long-term home protection. Regular maintenance and knowledge of new gutter tech safeguard your property. This contributes to your home’s overall value and appeal.

Frequently Asked Questions (Gutter Installation)

The key cost factors for a gutter installation project include the material type (such as aluminum, vinyl, or copper), the length of the gutter run, labor costs for professional installation, and any additional accessories like gutter guards or downspouts. The type of gutter profile (like half-round or K-style) can also impact the overall cost.
Most gutter systems have an average lifespan of 20-30 years, but this can vary depending on the material. Aluminum and galvanized steel gutters tend to last longer, while vinyl or wood gutters may need replacement sooner. Regular maintenance and cleaning can also extend the lifespan of your gutters.
Key steps include properly measuring the length of the gutter run, ensuring the correct slope and pitch for proper drainage, securely attaching the gutters to the fascia boards using hangers and screws, and connecting downspouts to carry water away from the foundation. Using the right safety equipment and following local building codes are also crucial.
Galvanized steel gutters are durable and corrosion-resistant, but can be more expensive. Wood gutters have a classic look but require more maintenance. Pre-weathered zinc gutters are long-lasting and low-maintenance, but also costlier than some other options. The material you choose will depend on your budget, home’s style, and personal preferences.
DIY gutter installation is possible for some homeowners, especially with simpler gutter systems in pre-cut lengths. However, professional installation is often recommended to ensure proper measurement, leveling, and secure attachment of the gutters. Pros also have the specialized tools and experience to avoid common issues like leaks, standing water, and peeling paint. The exact cost will depend on the project complexity and whether you choose DIY or professional services.

Gutter Cleaners

Home Builders Near You

Can’t find what you are looking for?

How It Works

  • Answer a few questions about your home project.
  • Within seconds, get matched with top-rated local pros.
  • Compare quotes and choose the best pro for the job.

Gutter Cleaners In Your Area

Need Gutter Cleaners? Here’s What to Look For

Meta Description: Discover the key factors to consider when hiring gutter cleaners. Learn about professional services, costs, and why regular maintenance is crucial for your home’s protection.

Clogged gutters can cause costly water damage, foundation issues, and roof problems. Hiring professionals may be the answer to maintaining your home’s gutter system. Let’s explore key factors to consider when choosing gutter cleaners.

Gutter Cleaners

Key Takeaways

  • 01

    Regular gutter cleaning is essential for protecting your home from water damage and costly repairs.

  • 02

    Professional gutter cleaners have the right tools and expertise to thoroughly clean your gutters and downspouts.

  • 03

    Hiring a reputable gutter cleaning service ensures the job is done safely and correctly.

  • 04

    Beware of warning signs like cracks, rust, and sagging that indicate your gutter system needs repair or replacement.

  • 05

    Proper gutter cleaning techniques, such as using gutter scoops and flushing the system, are crucial for effective debris removal.

Why Gutter Cleaning is Important

Clean gutters are vital for protecting your home. They direct rainwater away from your roof, walls, and foundation. Without proper maintenance, debris can clog your rain gutters, disrupting water flow.

Protecting Your Home

Neglected gutters clean can cause serious problems. Clogged gutters may lead to water overflowing into your home’s foundation. This can result in mold growth and water leaks, potentially damaging your home’s structure.

Preventing Costly Repairs

Regular gutter maintenance helps avoid expensive fixes later. Ignored gutters can sag or detach from the roof, requiring gutter replacement. Trapped water can damage the roof pitch, causing leaks inside your home.

Keeping gutters clean ensures your home’s long-term protection. It helps you avoid costly gutter repairs or replacements. Regular maintenance is a small investment with big returns.

gutter maintenance

When to Clean Your Gutters

Clean gutters protect your home. Experts suggest cleaning them twice a year, in spring and fall. This removes leaves, twigs, and debris that can clog gutters and downspouts.

Homes near pine trees may need more frequent gutter cleaning. Clean every three months to prevent pine needle buildup. This keeps your gutter cleaning system working properly.

Clean gutters after heavy storms or intense rainfall. Water and debris can quickly overwhelm your gutter maintenance system. This can lead to blockages and water damage.

Regular gutter cleanings maintain your home’s look. They also prevent costly repairs later. Clean gutters protect your roof, foundation, and ensure proper drainage.

gutter cleaning

Consider gutter guards or professional gutter cleaning for best results. These options save time and effort. They keep your gutters in top shape all year.

Signs Your Gutters Need Repair or Replacement

Gutters protect your home, but they wear out over time. Look for these signs to know when repairs or replacements are needed:

  • Cracks or Splits: Cracks in gutters can cause water leaks and damage. Loose or separated seams worsen the problem. Fix cracks quickly to prevent further issues.
  • Paint Damage and Rust: Peeling paint may mean standing water problems. Rust can weaken gutters and cause leaks. Address these issues to keep your gutters working well.
  • Pools of Water and Mold: Water pools and mold show that gutters aren’t working right. These can damage your home and attract pests. Fix these problems fast to protect your house.
  • Water Damage or Water Marks: Water marks on your home’s exterior suggest gutter problems. Ignoring these signs can lead to rotting wood and peeling paint. Act quickly to avoid costly repairs.
  • Sagging Gutters: Sagging gutters are overloaded with water and debris. This can cause water damage and foundation problems. Fix sagging gutters right away to prevent more damage.

Watch for these signs to catch gutter problems early. Take action to repair or replace your gutters when needed. This will keep your home safe from water and weather damage.

Gutter Cleaners: Preparing for the Task

Preparing for gutter cleaning requires essential tools and materials. You’ll need gloves, safety glasses, buckets, gutter scoops, and a garden hose. Clean gutters after dry spells for easier debris removal.

Not comfortable with heights? Consider hiring a professional gutter cleaning service. They have the know-how and tools for thorough, safe gutter cleaning.

Good preparation ensures successful gutter maintenance. With the right tools and timing, you can prevent water damage to your home.

Ladder Safety for Gutter Cleaning

Clean gutters protect your home, but often require ladder use. Safety is key when cleaning gutters from a ladder. Proper setup and use are crucial for your well-being.

Don’t climb above the second-to-last rung when using a ladder. This keeps you stable and prevents accidents. Avoid reaching too far, as it can tip the ladder.

For single-story homes, use a sturdy step ladder on level ground. Two-story homes need an extension ladder that can hold 150kg.

A ladder stabilizer can boost stability and keep the ladder in place. If you’re unsure about ladder work, hire a pro gutter cleaning service.

Safety comes first when cleaning gutters. Follow proper ladder protocols to prevent accidents. This ensures a safe and successful gutter cleaning experience.

Removing Debris from Gutters

Clean gutters are vital for your home’s protection. The process involves manual removal and flushing. This ensures gutters are thoroughly cleaned and functioning properly.

Using Gutter Scoops and Trowels

Begin by removing large debris like leaves and twigs by hand. Use specialized tools such as gutter scoops or trowels for compacted material. These tools reach deep into gutters to remove stubborn dirt.

Flushing the Gutters

After manual cleaning, flush the gutters. Use a garden hose or pressure washer to spray water. Start at the far end and work towards the downspout.

This helps dislodge and flush out any remaining dirt or small particles. It ensures all debris is removed from the gutters.

Check your work by inspecting the gutters visually. Ensure water flows freely through the downspouts. For persistent clogs, use a plumber’s snake to clear blockages.

Unclogging Downspouts

Clean downspouts are vital after gutter cleaning. Blocked downspouts can cause soil erosion and foundation damage. Use a garden hose at full pressure to clear blockages.

If water doesn’t work, try a plumber’s snake. It can break up tough clogs. For underground systems, remove the bottom to reach the full downspout.

Regular upkeep prevents clogs. Data shows 67% of downspout clogs clear with water pressure. If problems continue, hire a pro gutter cleaning service.

Maintain gutters and downspouts to avoid costly water damage. Regular downspout and gutter cleaning protects your home’s health and looks. Keep your drainage system in top shape.

Checking Gutter Drainage and Slope

Inspect your gutter system’s drainage and slope after cleaning. Proper drainage prevents water damage by directing water away from your home’s foundation.

Look for standing water in the gutters. This shows a slope issue. Gutters should have a 1/4-inch decline every 10 feet towards the downspout.

Adjust gutter hangers to fix incorrect slopes. This ensures proper water flow through the system.

  • Gutters should slope down towards the downspout at a rate of 1/16-inch per foot, or 1/4-inch per 5 to 10 feet.
  • Downspouts should be securely attached to the gutter system and the home’s exterior, with no leaks or disconnections.
  • Inspect gutter seams and joints for any cracks or separation that could cause water leaks.

Check for erosion under gutters. This may mean you need splash blocks or other drainage solutions.

Regular maintenance prevents water damage, mold, and pest problems. It keeps your gutter system working well.

Professional gutter services can spot hidden issues. They ensure your system works correctly. Well-maintained gutters protect your home from water damage.

Gutter Cleaners: Finalizing the Job

The final steps after gutter cleaning are vital for your home’s gutter system. Sealing leaks and adding gutter guards can extend their life. These actions also reduce future maintenance needs.

Sealing Leaks

Check gutters for cracks, splits, or gaps along seams and end caps. These areas often cause leaks, leading to water damage. Use a top-quality gutter sealant to fix these problem spots.

Gutter Guards

Gutter guards can greatly reduce the need for frequent cleaning. They minimize debris buildup, making cleaning easier and faster. Various styles and materials are available for gutter guards.

Choose the option that best fits your home’s needs. Research different types to find the right one. Proper gutter guards can save you time and effort in the long run.

Sealing leaks and installing guards extend your gutter system’s lifespan. These steps provide long-term benefits and peace of mind. Your home’s gutters will be protected for years to come.

Finding the Right Gutter Pros with FindPros

Hiring the right gutter cleaning or repair professionals is crucial to protect your home from water damage. With FindPros, you can easily get connected with top-rated local pros in your area. Just answer a few simple questions about your gutter project, whether it’s a single story or two story home, and we’ll provide you with multiple competitive quotes.

FindPros takes the hassle out of finding reliable gutter cleaners or installers of gutter guards. Forget about the mess and manual labor – let our network of vetted professionals handle everything from leaf blower cleanup to using only water for a spotless finish. Get the job done right the first time and avoid potential issues like a damaged foundation. Find the perfect pro for your gutter needs with FindPros.

Conclusion

A well-functioning gutter system protects your home from water damage and costly repairs. Regular gutter cleaning is crucial for home maintenance. Homeowners should know when gutters need repair or replacement and follow safe cleaning practices.

Ignoring gutter maintenance can cause foundation damage, basement flooding, and mold growth. Regular cleaning prevents these issues and boosts curb appeal. It also reduces the risk of accidents and injuries.

A proactive approach to gutter maintenance is a smart investment. It saves time and money in the long run. Homeowners can choose between professional gutter cleaning services or DIY methods.

By keeping gutters in top condition, homeowners ensure their homes are well-protected. This attention to detail brings peace of mind and a sense of security.

Frequently Asked Questions (Gutter Cleaners)

A gutter cleaning attachment can be connected to a garden hose or pressure washer to help flush out debris from the gutters without needing to use ladders. This makes the gutter cleaning process easier and safer, as it allows you to reach the gutters from the ground.
When hiring a gutter cleaner, it’s important to look for one that provides excellent service and follows the manufacturer’s instructions for safely cleaning the gutters. The gutter cleaning cost may vary depending on factors like the linear footage of the gutters and whether it’s a single story, two story, or multi-level home.
Gutter guards are covers that fit over the gutters to minimize debris buildup from sources like pine needles and leaves. By installing gutter guards, most homeowners can reduce the number of times they need to manually clean the gutters each year, saving time and effort.
Signs that the gutters may need repair or replacement include cracks, rust, paint damage on the siding or fascia, water pooling around the home’s foundation, and mold growth – all of which can indicate potential water damage to the roof shingles, decking, and even the home’s structural integrity.
When using ladders to clean the gutters, it’s important to place them on stable, level ground and avoid climbing above the second-to-last rung to maintain balance. For homes with two stories or more, an extension ladder that can safely hold the weight of the gutter cleaner is recommended. Using a ladder stabilizer can also help prevent the ladder from shifting while on the edge of the roof.