Gas Fireplace Installers

Gas Fireplace Installers Near You

Can’t find what you are looking for?

How It Works

  • Answer a few questions about your home project.
  • Within seconds, get matched with top-rated local pros.
  • Compare quotes and choose the best pro for the job.

Gas Fireplace Installers In Your Area

Gas Fireplace Installers: Tips for a Safe and Efficient Installation

Meta Description: Discover expert tips for a safe and efficient gas fireplace installation. Trust professional Gas Fireplace Installers for a cozy, low-maintenance heating solution in your home.

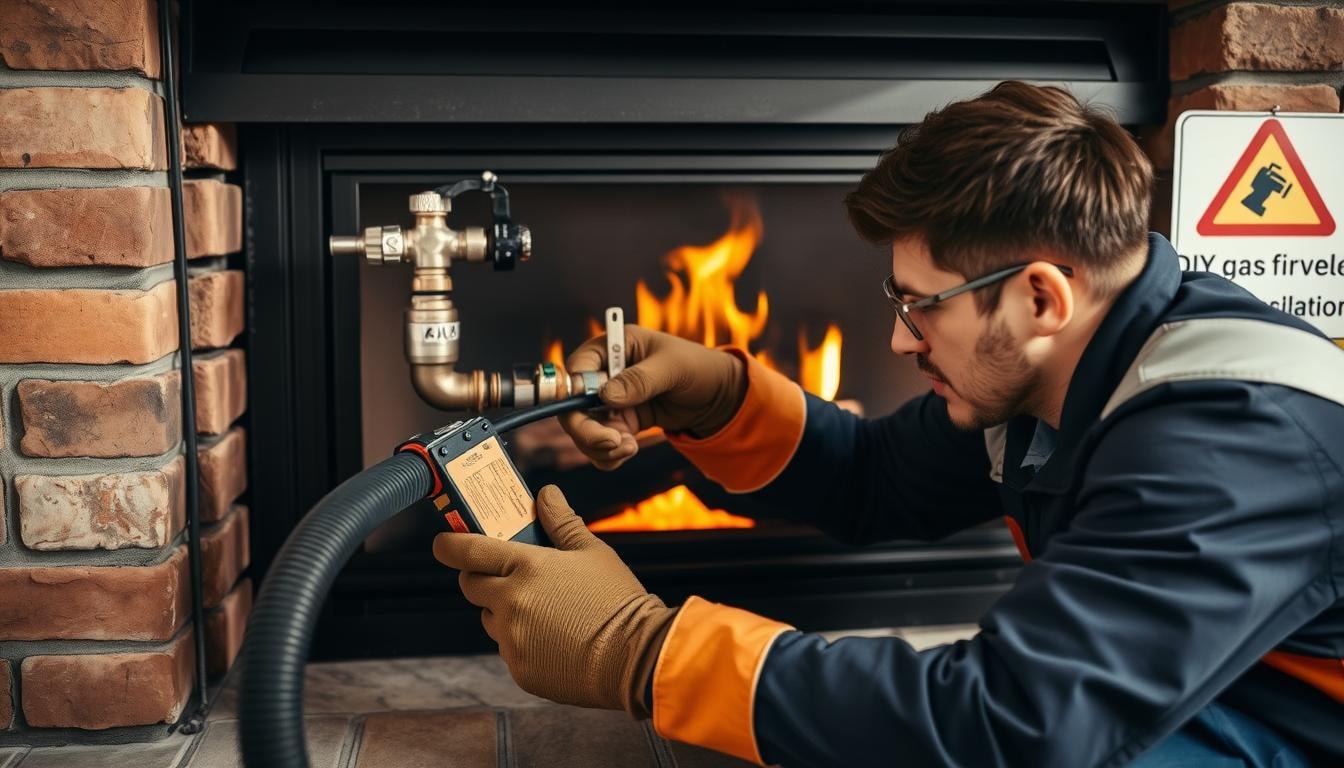
Imagine having a cozy gas fireplace but at a risk to your family’s safety. Many homeowners think about doing it themselves to save money. But, the dangers of a DIY gas fireplace installation are much bigger than any savings.

Experts in gas fireplace installation know how to make your fireplace safe and efficient. They focus on safety and efficiency, not just saving money.

Gas Fireplace Installers

Key Takeaways

  • 01

    Professional gas fireplace installers follow strict safety rules. This lowers the risk of gas leaks, fire dangers, and harmful gases.

  • 02

    Trying to install a gas fireplace yourself can lead to fire risks. This is because gas lines, ignition systems, or burners/logs might be set up wrong.

  • 03

    Manufacturers need a pro to install your fireplace to keep the warranty valid. DIY installs can make the warranty useless.

  • 04

    Choosing a pro installer can save you time and money later. Fixing DIY mistakes can cost more than hiring a pro from the start.

  • 05

    Right venting, gas line connections, and following local building codes are key for a safe and efficient gas fireplace.

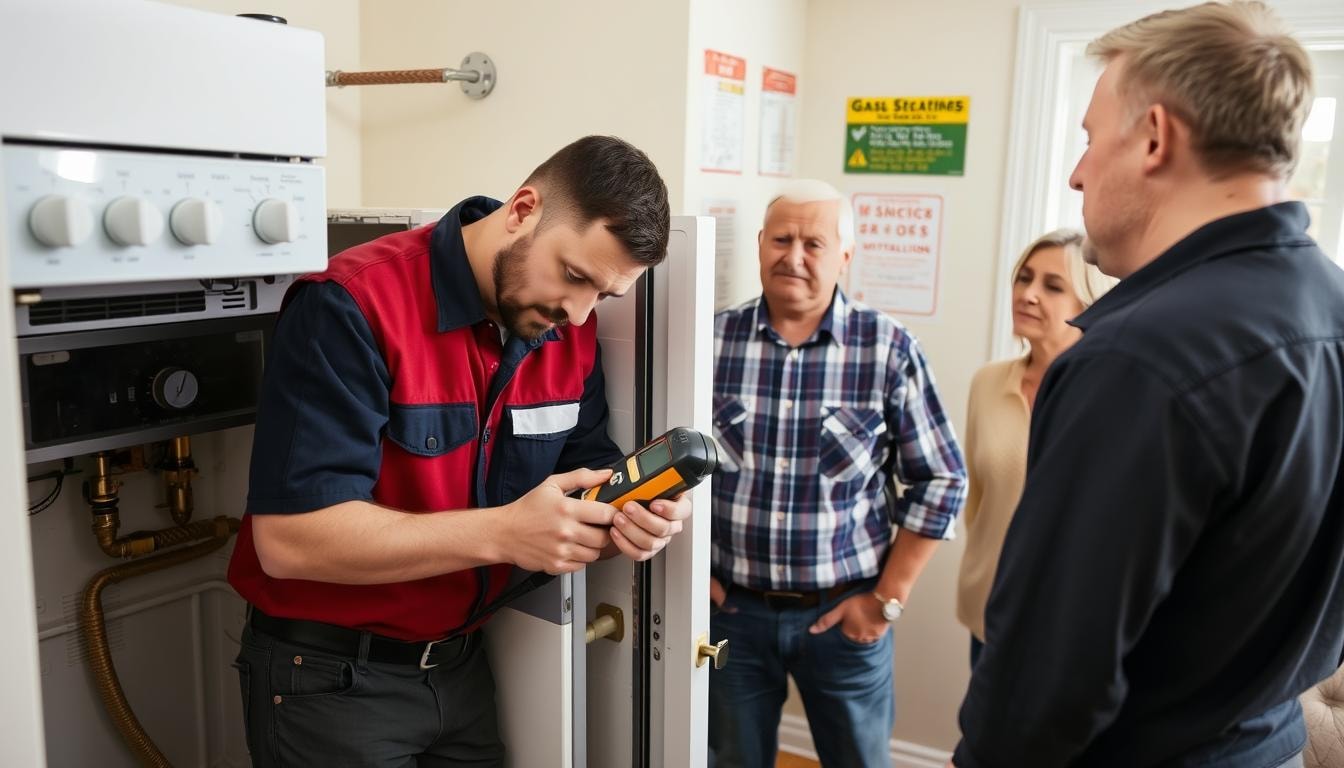
The Importance of Professional Gas Fireplace Installation

Homeowners might want to install a gas fireplace by themselves. But, this can be risky. Installing a gas fireplace needs special knowledge and skills for safety and to follow the rules. Trying to do it yourself can lead to big dangers like gas leaks, carbon monoxide poisoning, and fires.

Safety Risks of DIY Installation

Handling gas lines wrong, not having good ventilation, and not knowing the building codes can be very dangerous. Gas leaks can make explosive gases build up. Not enough ventilation can cause carbon monoxide poisoning, which can be deadly. Also, installing it yourself can lead to fires because of not keeping a safe distance from things that can burn.

Benefits of Professional Installation

  • Following strict safety rules and building codes
  • Correctly connecting gas lines and vents
  • Ensuring the fireplace works well and heats efficiently
  • Keeping the manufacturer’s warranty, giving you peace of mind
  • Using energy wisely, which can save money on bills

Choosing a professional to install your gas fireplace is a smart move. It ensures your safety, follows the rules, and gives you a fireplace that works well for a long time. Their skills make the installation smooth and safe, letting you enjoy your fireplace safely.

Dangers of DIY Gas Fireplace Installation

Installing a gas fireplace on your own might seem easy, but it’s risky. If not done right, it can cause gas leaks. These leaks can lead to carbon monoxide poisoning, a silent killer.

Gas Leaks and Carbon Monoxide Exposure

Bad ignition systems or wrong burner placement can be dangerous. They can also cause fires. Not enough ventilation can lead to carbon monoxide buildup, which is deadly.

Fire Hazards

Not keeping enough space around the fireplace is risky. Wrong burner placement means it won’t heat well. Bad electrical work can cause fires or short circuits.

Inadequate Ventilation

Ventilation is key to getting rid of harmful gases. DIY jobs often forget this, risking your family’s health.

Trying to install a gas fireplace yourself is risky. A pro like Chimney TEK can do it safely and right. They make sure it meets all the rules, keeping your home and family safe.

Gas fireplace installation

Gas Fireplace Installers: Ensuring Safety and Code Compliance

Installing a gas fireplace needs safety and following local codes. Professional installers are key here. They know how to work with gas lines and ventilation safely.

Good installers know all about the rules set by authorities. This means they can avoid fines or expensive changes later. Homeowners should choose installers with the right certifications and good reviews.

Doing it yourself can be risky. Gas fireplaces can be more dangerous than wood ones because they keep burning without stopping. If installed wrong, they can cause serious problems like carbon monoxide poisoning or fires.

  • Following NFPA and the maker’s rules is key for a safe fireplace. It must work right and not rust, cutting down fire and other risks.
  • Gas line and wiring jobs are best for experts. This avoids mistakes and the need for repairs later.
  • Choosing a trusted installer means your fireplace works well and meets safety codes. It also gets the right permits.

With a certified installer, your fireplace will be safe and meet all rules. This keeps your home and family safe. It also keeps the warranty valid and makes sure it works well for a long time.

gas fireplace installer

Optimal Performance Through Expert Installation

A gas fireplace works best with expert setup. Pros know how to make sure it runs well. They make sure the fireplace heats your home evenly and efficiently.

When you let experts install your gas fireplace, you get many benefits. You’ll save energy and have a steady heat source. This is safer than trying to do it yourself. Experts offer many services, like:

  • Precise calibration of the gas burner for optimal performance
  • Proper adjustment of ignition systems and pilot lights
  • Ensuring efficient venting to maintain consistent warmth
  • Verifying the fireplace’s compliance with local codes and safety standards

Experts make sure your gas fireplace works great. You’ll have a warm and cozy home. This makes your living space more enjoyable.

Preserving Manufacturer Warranties

Keeping the warranty on a gas fireplace is key. Many makers offer strong warranties, but there’s a catch. The installation must be done by a certified pro. Trying to do it yourself can cancel the warranty, leaving you without coverage for repairs or replacements later.

By hiring a skilled installer, you keep your warranty. This gives you peace of mind and long-term value. The warranty will cover repairs or replacements if any issues come up with the unit.

Gas fireplaces are complex and need special skills for the right setup. Ignoring small problems can cause big, expensive issues. That’s why warranties often require a pro installation. Choosing a certified technician means your fireplace is well-protected and you get full warranty coverage.

Professional installation also makes sure the fireplace follows local building codes and safety rules. This is key for the fireplace’s long-term work and your safety. With experienced installers, you can be sure your investment is safe and your home is secure.

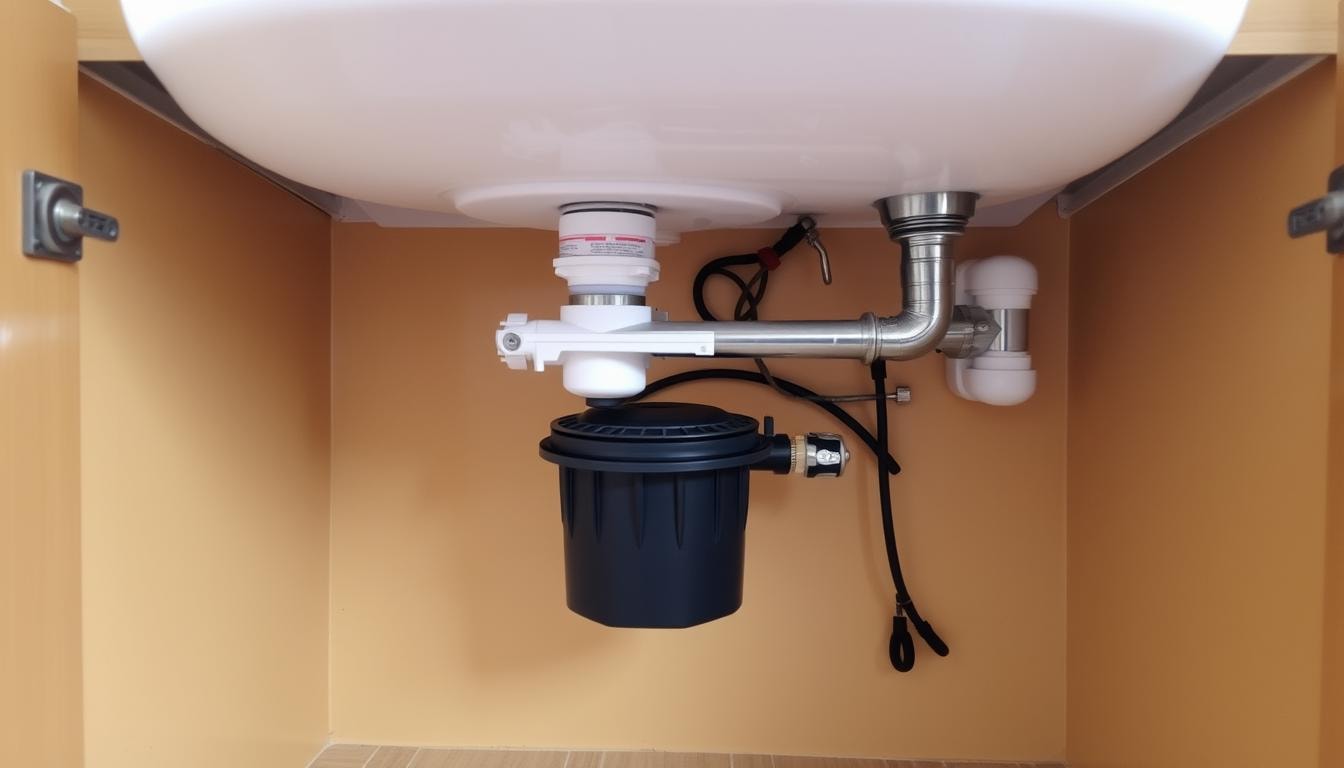
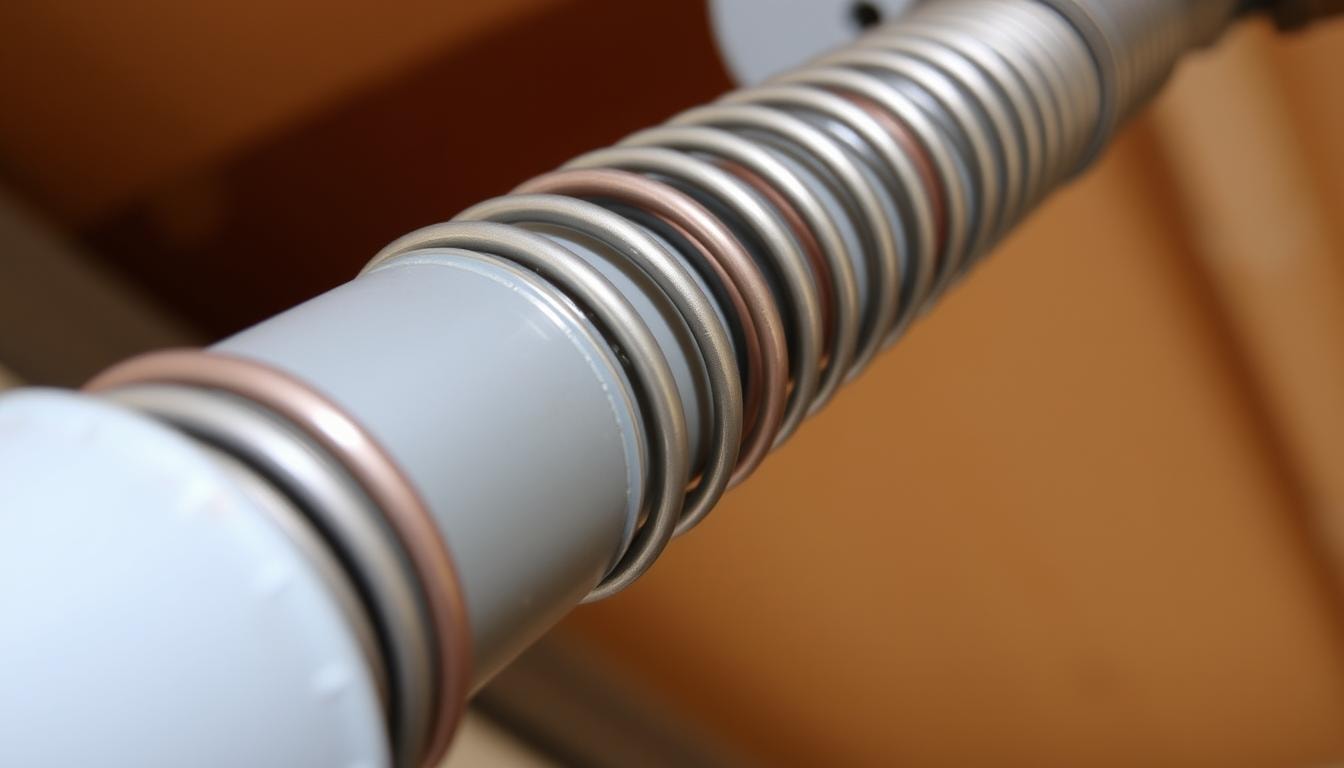
Venting Your Gas Fireplace: Key Considerations

Proper venting is key for gas fireplaces. It makes sure the home stays safe and the fireplace works well. Experts know the venting needs based on the fireplace type and model.

Understanding Venting Requirements

Homeowners should check the fireplace manual and work with pros. This ensures the fireplace vents right, keeping everyone safe and heating efficiently. Common vent sizes are a 4″ inner pipe in a 6 5/8″ outer, or a 5″ inner in an 8″ outer.

Horizontal vs. Vertical Venting Options

Venting can be horizontal or vertical, each with its own benefits. Vertical vents go up through the roof, fitting houses with chimneys. Horizontal vents are better for walls. The venting needs depend on the fireplace type, and the maker’s vent profiles help with setup.

Talking about venting is important for safety and performance. It’s best to get help from pros when installing. Right venting means a safe, efficient, and reliable heating source for your home.

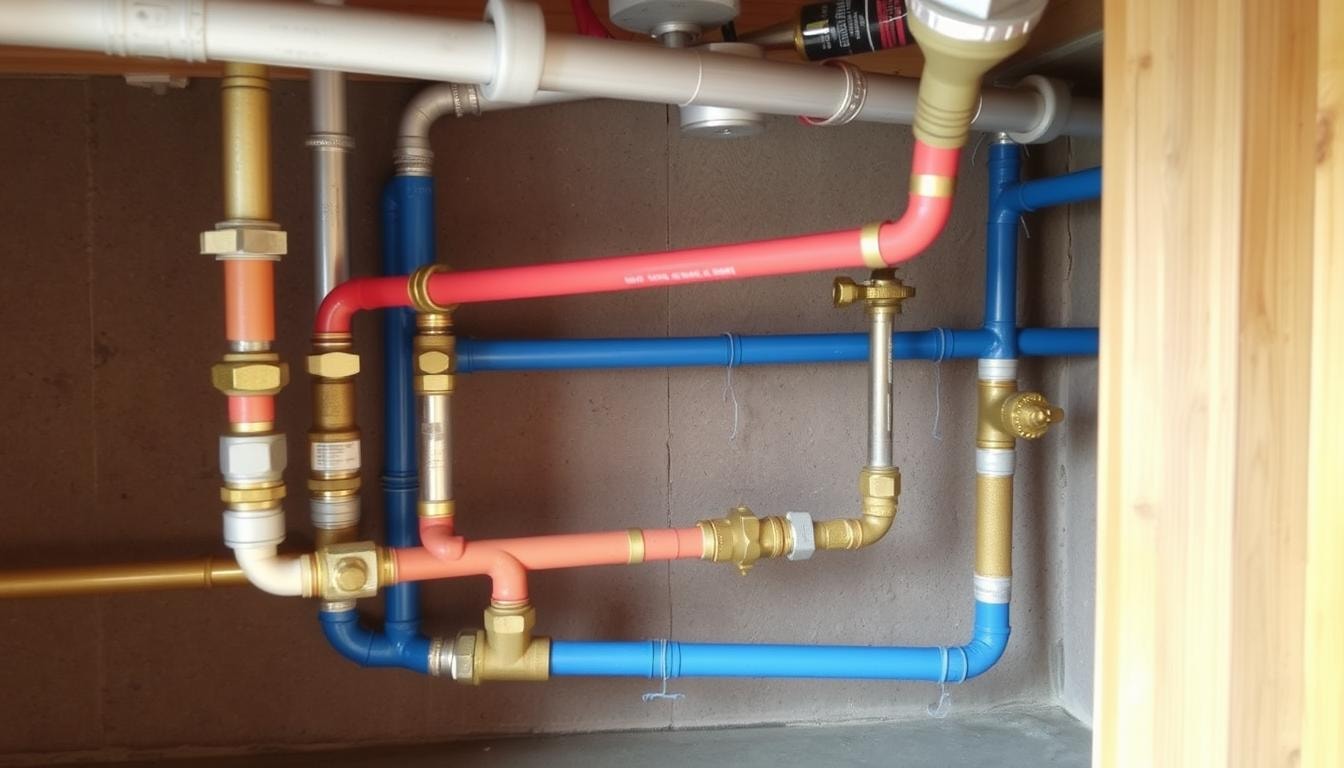
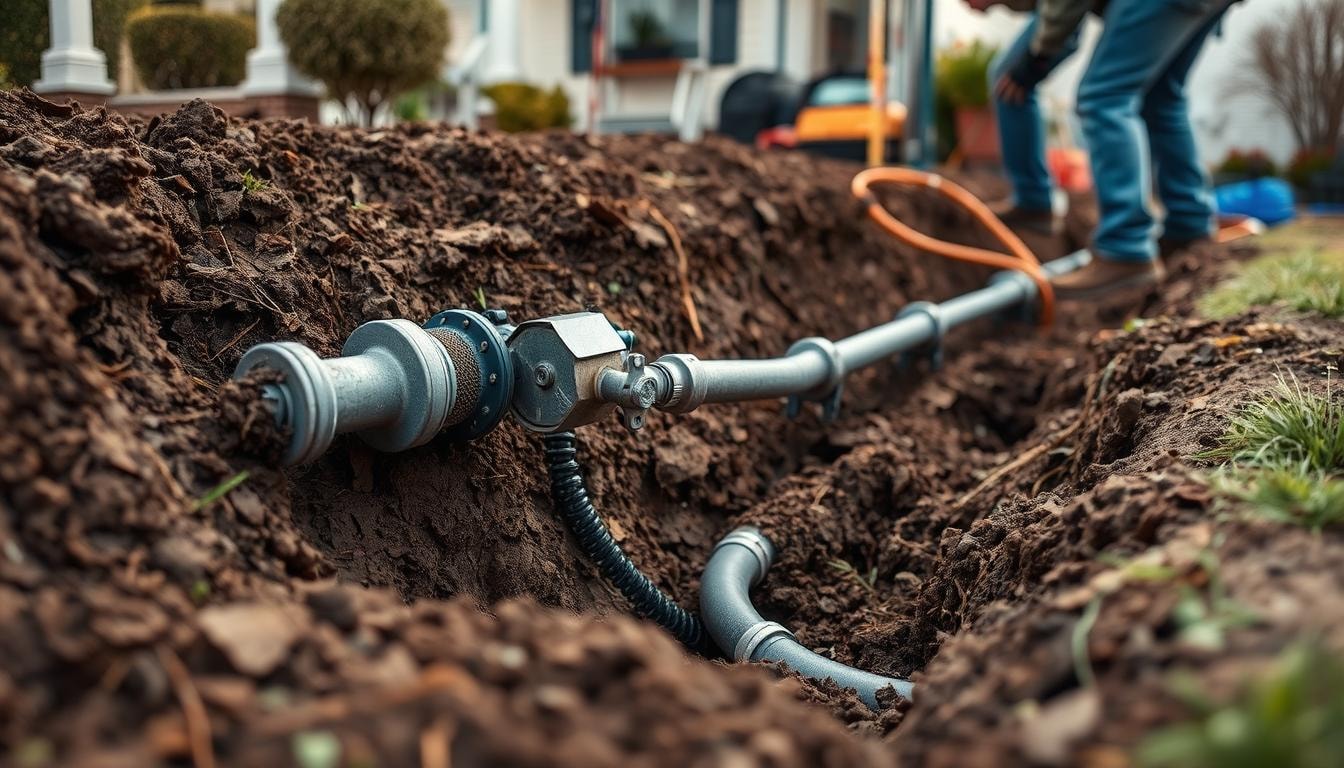
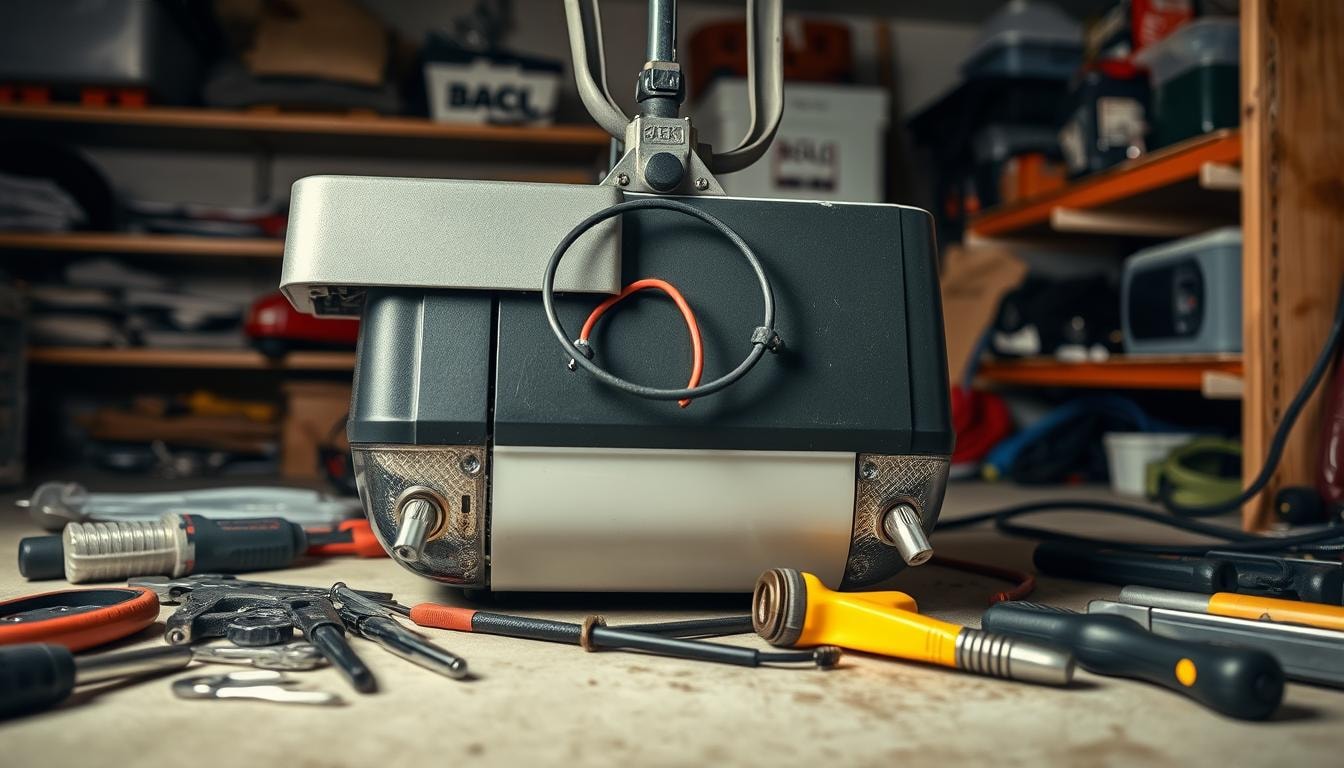
Gas Line and Electrical Connections

Getting gas line and electrical connections right is key for a safe, working gas fireplace. Experts work with homeowners and builders to make sure these parts fit together right. They follow the fireplace maker’s exact instructions.

The gas line must be in the right spot, and electrical wires need to be set up correctly. By using the fireplace manual and working with experts, installers make sure the gas fireplace is safe and works well.

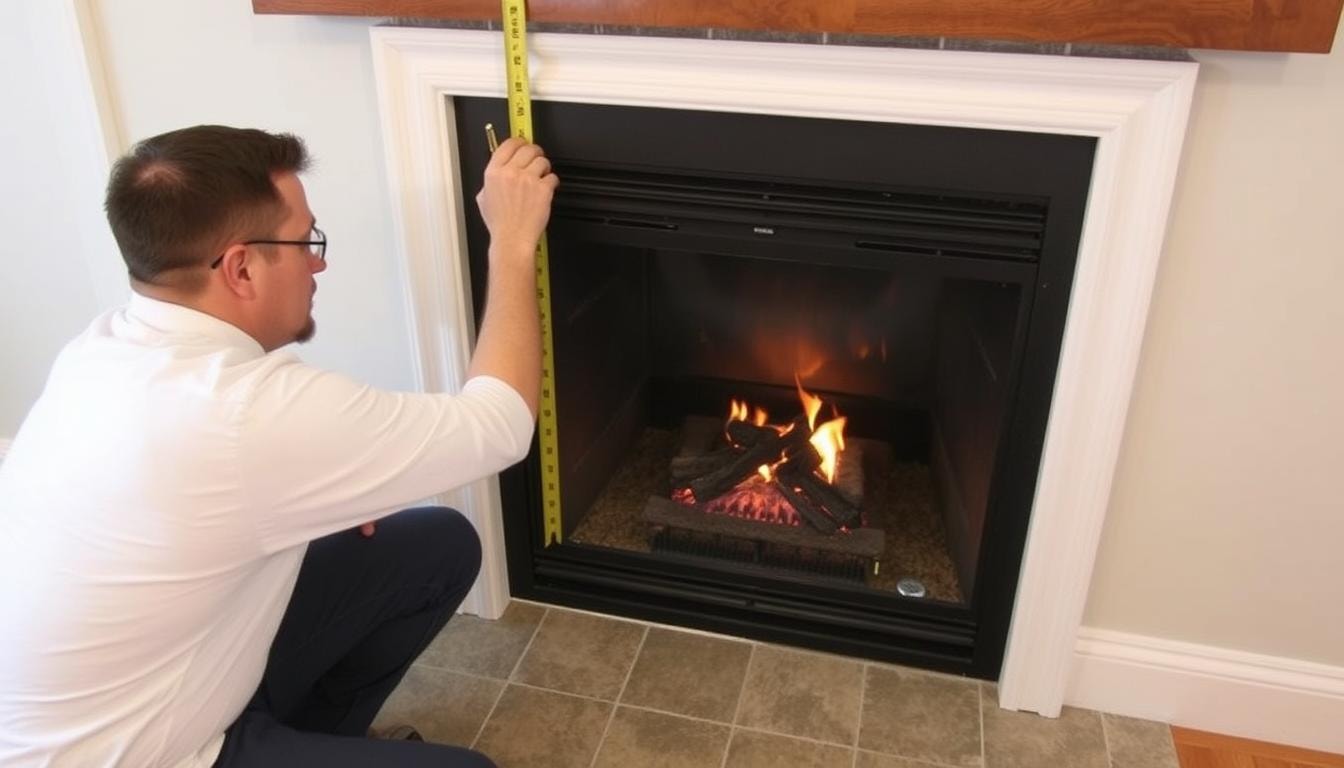
Framing and Clearance Requirements

Installing a gas fireplace needs careful attention to framing and clearance. Experts know the exact specs from the fireplace manual. They make sure the fireplace fits safely and works well. This follows the maker’s rules for safety.

Framing Dimensions

The frame for a gas fireplace must match the manual’s exact sizes. This includes the height, width, and depth, plus any extra support needed. Not following these sizes can make the install unsafe and risky.

Distances to Combustible Materials

It’s also key to keep the fireplace away from things that can burn, like wood or paper. Experts know how much space is needed, as the manual says. This keeps fires from starting. They make sure the fireplace is installed right, following all the rules.

Experts are key for a safe and good fireplace install. They follow the maker’s guide and all the rules for framing and space. This makes sure the fireplace works well, is safe, and gives warmth for many years.

Find the Best Gas Fireplace Installer for Your Home

Are you ready to upgrade your home with a safe and efficient gas fireplace? Let the experts at FindPros help you find the perfect professional for the job. By answering a few simple questions about your project, we’ll match you with top-rated local installers who can provide competitive pricing. Take the guesswork out of your home improvement project – let FindPros connect you with gas fireplace services that fit your needs and budget. Get started today and enjoy the cozy ambiance of a brand new gas fireplace in your home.

Conclusion: The Value of Professional Gas Fireplace Installers

Installing a gas fireplace needs the skills of experts. Trying to do it yourself can be risky and costly. Professionals have the right knowledge and care to install your fireplace safely and correctly.

By hiring certified experts, homeowners get the most out of their fireplace. They enjoy better performance, keep the warranty, and feel secure. This choice also makes their home look better and can raise its value.

Professional installers save time and money by focusing on safety and efficiency. Choosing them means your fireplace will work well for a long time. It will keep your home warm and cozy for many years.

Frequently Asked Questions (Gas Fireplace Installers)

The main differences involve safety and emissions. Ventless gas fireplaces have fewer harmful emissions than a wood fireplace, but require proper ventilation. Direct vent fireplaces use a flue to vent fumes outside, while ventless fireplaces recirculate the air in the room. Professional gas fireplace services ensure safe installation and operation of any type.
Replacing an old wood fireplace with a new gas fireplace or gas logs insert can provide a more contemporary look and style, while operating on natural gas for greater convenience and fewer emissions. Professional installation is key to connect the gas line properly and optimize the fireplace’s performance and efficiency.
Hiring a professional for gas fireplace services ensures safety, code compliance, and customer satisfaction. They have the expertise to handle the complete installation process, from connecting the gas line to verifying proper venting. DIY ventless gas fireplaces carry risks like gas leaks and carbon monoxide if not installed correctly.
While wood-burning fireplaces provide a classic, rustic ambiance with the glow and sparks of firewood, gas fireplaces offered through professional services can still create a cozy, warm atmosphere. Gas fireplaces are typically easier to operate and maintain, with no need for ash cleanup or firewood storage.
Homeowners should consider their budget, the desired look (traditional vs contemporary), and the room’s layout when choosing between a free-standing stove, a direct vent fireplace, or a ventless gas fireplace insert. Professional gas fireplace services can provide a free estimate and guidance to help select the best option that fits the homeowner’s needs, ambiance preferences, and home design.

Gas Appliance Installation

Gas Fireplace Installers Near You

Can’t find what you are looking for?

How It Works

  • Answer a few questions about your home project.
  • Within seconds, get matched with top-rated local pros.
  • Compare quotes and choose the best pro for the job.

Gas Appliance Installation In Your Area

Gas Appliance Installation: A Guide for Homeowners

Meta Description: Discover the essentials of Gas Appliance Installation for your home. Learn about safety, efficiency, and proper techniques to ensure optimal performance of your natural gas appliances.

Thinking about getting new gas appliances or upgrading your old ones? It’s key to install them right for safety and efficiency. This guide covers the basics of gas lines, picking the right pipes, and getting a professional to install them safely.

Gas Appliance Installation

Key Takeaways

  • 01

    Proper gas appliance installation is vital for safety, efficiency, and optimal performance.

  • 02

    Understanding gas line basics, including the types of gases used and common pipe materials, is essential for a successful installation.

  • 03

    Factors like distance, terrain, and local building codes can impact the cost of gas line installation.

  • 04

    Safety should be the top priority, with professional testing and leak detection checks to ensure the integrity of the gas lines.

  • 05

    Hiring a professional can streamline the installation process and ensure compliance with safety standards.

Understanding Gas Line Basics

Installing a gas line is key for homes using natural gas or propane. It gives a safe and steady fuel supply for heating, cooking, and more.

Purpose and Importance of Gas Line Installation

Gas lines are made from strong materials like steel, copper, or flexible plastic. The choice depends on local rules, cost, and the project’s needs.

Types of Gas Lines: Natural Gas and Propane

There are two main gas line types for homes: service lines and interior lines. Service lines go from the gas meter to the house. Interior lines spread gas around the home.

gas line installation

Installing these lines is different because of their roles and needs. Service lines are buried underground as per local laws. Interior lines go through walls and floors in the home. Knowing these details is key for safe and proper use.

Cost Factors for Home Gas Line Installation

Thinking about installing a gas line at home? Several things can change the cost. The distance from the gas source to your house matters a lot. Longer distances mean more materials and work, making the cost go up.

Obstacles like trees or rocks can also increase costs. They make digging harder.

The size of the gas line is important too. Big homes or those using a lot of energy need bigger pipes. This means more material costs and a harder installation.

Local building codes and permits can add to the cost. You might need to pay for inspections too.

Getting quotes from different pros is a smart move. This way, you can see who offers the best deal. You’ll know you’re getting a good price for materials, work, and other costs.

Key Cost Factors to Consider

  • Distance from gas source to home
  • Terrain and obstacles between gas source and home
  • Size of the gas line required
  • Compliance with local building codes and regulations
  • Permits and inspection fees
  • Obtaining multiple quotes for competitive rates
gas line installation

Knowing these cost factors helps homeowners plan for the gas line project. Talking to experts ensures a smooth, affordable setup that follows safety and legal rules.

Safely Installing a Gas Line: Essential Steps

Installing a gas line safely is very important. It’s key to avoid gas leaks that can cause fires and explosions. Always hire a skilled and licensed pro for this job to keep your home and family safe.

Importance of Safety Guidelines

Experts know how to follow all safety rules and building codes. They use special tools and gear to measure and connect gas pipes right. After installing, they test the gas line to make sure it’s safe. They also check it meets all rules.

  • Thorough assessment of the property
  • Precise measurements for accurate pipe sizing
  • Careful cutting and connecting of gas pipes
  • Utilization of specialized tools and equipment
  • Rigorous testing to verify gas line integrity
  • Comprehensive inspections for regulatory compliance

Choosing a skilled pro for your gas line work means your home is in good hands. They follow strict safety rules to lower the risk of leaks, fires, and explosions. This keeps your property safe and your family healthy.

Types of Pipes for Gas Appliance Installation

Homeowners have many pipe materials to pick from for gas line installations. Each has its pros and cons. The top choices are steel, copper, and flexible (CSST) pipes.

Selecting the Appropriate Pipe Material

Steel pipes are strong and handle high pressure well. They’re good for underground use. But, they can rust over time, causing problems.

Copper pipes don’t rust and bend easily during setup. They’re pricier than other types. Flexible (CSST) pipes bend well around obstacles. They need fewer joints and fittings. Yet, they can get damaged by lightning.

Choosing the right pipe material depends on your needs, local laws, and a pro’s advice. Think about durability, resistance to rust, flexibility, and cost. This helps make sure your gas line is safe and works well.

Homeowners have many pipe materials for gas line setups, each with pros and cons. The top choices are:

  • Steel pipes: Strong and can handle high pressure, good for underground, but can rust.
  • Copper pipes: Don’t rust and bend easily, but cost more.
  • Flexible (CSST) pipes: Bend well around obstacles, fewer joints needed, but can be damaged by lightning.

Choosing the right pipe material depends on your needs, local laws, and a pro’s advice. Consider durability, rust resistance, flexibility, and cost. This ensures a safe and efficient gas line setup.

Safety Considerations for Gas Line Installations

Installing gas lines needs a lot of care and skill because natural gas is flammable and toxic. It’s very important to follow safety rules and use the right materials. This helps stop leaks and corrosion.

Marking Underground Gas Lines

It’s key to mark underground gas lines well to avoid damage during digging or building. Gas leaks can be dangerous, even leading to explosions. Homeowners should know where their gas lines are and tell the utility companies before digging.

  • Schedule routine inspections of gas lines to identify and address potential safety hazards.
  • Detect gas leaks early to prevent accidents and ensure the safety of households.
  • Contact a professional for significant installation or repair work related to gas lines, including new installations, suspected gas leaks, or damage requiring repair or replacement.

It’s best to have licensed pros do gas line work. They know all about safety rules and how to handle gas lines. They can make sure everything is done right.

Before installing or fixing gas lines, experts use special tools to find leaks. Even small leaks can be dangerous. Pros check things like space, size, and how to install safely to stop leaks and keep things safe.

Benefits of Hiring a Professional for Gas Appliance Installation

When you need to install gas appliances, it’s smart to hire a pro. They must be licensed and have lots of experience. They also need to have liability insurance and be bonded. This makes sure your system is safe and works well for a long time.

Here are the main benefits of hiring a pro for your gas appliance:

  • Expertise and Qualifications: Pros have the right training and tools for gas line installs. They follow safety and building codes.
  • Liability Coverage: Installers have insurance for accidents or damage during the job.
  • Comprehensive Estimates: Pros give detailed estimates. This means you know the full cost and what’s included.
  • Warranty and After-Service Support: You get warranties and maintenance help with professional installs.

Choosing a licensed and qualified professional means your gas appliance install is done right. It’s safe, follows all building codes and regulations, and is of high quality and safety. This gives you peace of mind.

Hire the Right Pro for Your Gas Appliance Installation

Ready to get your gas appliance installed safely and efficiently? Let FindPros help. Our service connects you with top-rated local professionals who will compete for your job, ensuring you get the best pricing. Simply answer a few questions about your project, and we’ll match you with skilled contractors who are the right fit for your needs. Compare quotes, read reviews, and choose the pro you get along with best. Take the guesswork out of finding the perfect gas appliance installer for your home.

Conclusion

Getting your gas lines installed and maintained right is key for your home’s safety and how well things work. Working with a licensed pro makes sure your gas line is set up right and meets all the rules. This gives you peace of mind and makes your home more comfy and efficient.

It’s important to check on your gas lines often and know the signs of a leak. This keeps your home and family safe over time.

Choosing between natural gas and propane is a big decision. Think about what you need and like best. Gas appliances are great because they work well, perform well, and save money. But, always pick safe options by finding skilled techs who know your gas system.

Follow the advice in this article to get the most out of gas appliances safely. With the right steps and focus on safety, you can make your home a cozy, efficient, and safe place for everyone.

Frequently Asked Questions (Gas Appliance Installation)

Common natural gas appliances in homes include natural gas space heaters, natural gas water heaters, natural gas furnaces, gas stoves, and gas dryers. These major appliances provide heat, hot water, and power for many homeowners.
Proper installation of natural gas appliances is critical for safety and efficient combustion. Improper installation can lead to gas leaks, inefficient operation, and potential fire or explosion hazards. A skilled contractor should always install new or existing appliances.
Homeowners can determine if they need to upgrade their natural gas appliances by considering factors like the age of the appliance, its energy efficiency, and whether it is adequately powering and heating the home. Older, less efficient appliances may need to be replaced with new, more efficient models.
When purchasing and installing new natural gas appliances, homeowners should hire a qualified contractor, ensure proper ventilation, check gas pressure, and complete all necessary permitting and inspections. This ensures the appliance operates safely and efficiently.
Yes, natural gas appliances can be used outdoors, such as for a patio or outdoor kitchen. However, it’s important to ensure the appliance is designed and installed for outdoor use, with proper ventilation and safeguards to prevent gas leaks or other hazards when operating the appliance in an open-air environment.

Garden Designers

Gas Fireplace Installers Near You

Can’t find what you are looking for?

How It Works

  • Answer a few questions about your home project.
  • Within seconds, get matched with top-rated local pros.
  • Compare quotes and choose the best pro for the job.

Garden Designers In Your Area

Hiring Garden Designers: A Comprehensive Guide

Meta Description: Discover how professional garden designers can transform your outdoor space. Learn about their expertise, services, and the benefits of hiring a landscape architect.

Do you dream of turning your outdoor area into a beautiful oasis? One that boosts your property’s value and helps local wildlife? Look no further than professional garden designers. This guide will show you the benefits and best ways to hire the right person for your project.

Garden Designers

Key Takeaways

  • 01

    Professional garden designers offer many services, like design and project management. They make outdoor spaces just for you.

  • 02

    Choosing a garden designer can really up your property’s value. You could see gains of up to 77%, says research.

  • 03

    Planning your budget well and finding ways to save can make your garden design pay off more.

  • 04

    Working closely with your designer is key. It makes sure your dream garden comes to life and you’re happy with it for years.

  • 05

    Being creative and open to new ideas can make your garden stand out. It can also make it more useful.

The Role of Garden Designers

Garden designers make outdoor spaces beautiful and useful. They know a lot about making gardens. They can change a small backyard or a big property into something amazing.

What is a Garden Designer?

A garden designer makes outdoor areas special with their skills. They are trained and recognized by groups like the Society of Garden Designers and the Joint Council of Landscape Industries. They offer many services, like making plans and helping with the building process.

These designers come from different backgrounds. Some studied landscape architecture or garden design. They work full-time or part-time, based on their clients’ needs. Their main job is to make outdoor spaces look great, work well, and match what the client wants.

Garden Designer

They start by learning what the client likes and needs, like places to sit or gardens for kids. They can also help find the right people to build the garden. This makes the whole process easier and less stressful.

If you want a garden that’s full of color or easy to take care of, a landscape and garden designer can make it happen. They can make your outdoor space more valuable and fun to be in.

The Benefits of Hiring a Garden Designer

Working with a professional garden designer brings many benefits. It’s not just about making your garden look good. It can also make your home a better place to live.

A garden designer can help increase your property’s value. A well-designed garden can add up to 77% to your home’s value. This is more than a new kitchen or adding more rooms.

But there’s more to it than just money. A garden designer can make a garden that fits your needs and looks great. They use their knowledge to create a garden that looks good and works well with your home.

Being in a nice garden can make you feel better. It connects you with nature and encourages you to enjoy the outdoors. This can make you happier and healthier.

garden designer

Working with a garden designer can change your outdoor space for the better. It can make your home more valuable and your life more enjoyable. With their help, your garden can become a peaceful place that brings you joy for years.

Finding the Right Garden Designer

Looking for a garden designer? Start with the Association of Professional Landscape Designers or the Society of Garden Designers. These groups check if designers are skilled and professional.

Getting tips from friends can help too. But make sure the designer’s style matches yours. A first meeting lets you see if you’ll work well together and if they get what you want.

Sources for Garden Designers

  • The American Society of Landscape Architects (ASLA) and Association of Professional Landscape Designers (APLD) have tools to find experts.
  • The AD PRO Directory lists AD-approved landscape pros.
  • Landscape architects need a bachelor’s degree and a state license. Landscape designers don’t need a state license.

Finding the right garden designer means they make your dream garden, stay within your budget, and meet your timeline. Research and find the best match for your outdoor oasis.

Evaluating Garden Designers

When you’re looking for a garden designer, it’s key to check their skills and how they work. A good designer should have designer’s qualifications, technical skills, creativity, and problem-solving skills. They should make your outdoor space both beautiful and useful.

Choose designers with practical experience in making gardens. They should be good at communication and collaboration. This means they’ll work well with you to make your garden dream come true.

  1. Look at the designer’s qualifications: Even if formal training isn’t a must, find designers with degrees or memberships in groups like BALI, APL, and SGD. These show they’re serious about their work and keep up with the latest in gardening.
  2. Check their technical skills: A great designer can make detailed plans and solve problems. They should think about your garden’s special features and come up with new ideas.
  3. See how creative they are: Pick designers who can think creatively and make designs just for you. They should use your garden’s unique features to make something special.
  4. Look at their problem-solving skills: Good designers can fix issues like drainage or soil problems. They make sure your garden looks great and works well.
  5. Ask about their experience: Talk about their past projects and the problems they solved. Experienced designers can give you advice on making your garden real.
  6. Check their communication skills: A top designer should be great at talking and listening. They’ll work with you to make your garden vision come to life.

By looking at a designer’s skills, creativity, problem-solving, experience, and how they communicate, you can find the right person for your garden. They’ll turn your outdoor space into a beautiful garden.

Budgeting for a Garden Designer

Hiring a garden designer can change how your outdoor space looks. Their services cost money, but they’re worth it. Garden designers charge 10-15% of the total cost. They give you a clear list of fees and what you’ll pay for construction.

Cost Considerations

Garden designers get quotes from several contractors for you to compare. This makes things clear and helps you decide. You’ll pay a deposit first, then more after each design step is done. They also let you review and give feedback on the design before finalizing it.

The cost of a garden design varies a lot. It can be from $4 to $7 per square foot for simple designs. Things like the land’s shape, plant choices, and permits affect the price. A garden designer can increase your property’s value by up to 20%.

To save money, plan your project in stages. Use young plants and do some work yourself. Choose plants that need little care and use what you already have. Working with your designer, you can make your dream garden without spending too much.

Creating Cost Savings

Professional garden designers can help save money in many ways. They use what’s already there, like hardscaping, trees, and shrubs. This saves money by not needing to replace everything.

Designers suggest doing things step by step to save money. They might use cheap gravel for some areas. They also suggest picking a few top-quality plants instead of many cheap ones.

Experts give advice on keeping gardens low-cost over time. They help avoid spending too much on plants that won’t last. They know which plants are best for the weather and how to keep them healthy with less water.

Working with a garden designer means getting help from someone who knows how to make your garden look great and save money. They help make your outdoor space more valuable and attractive to others.

  1. Retain existing elements like hardscaping, trees, and shrubs to build on a foundation of mature elements.
  2. Implement the design in a phased approach over time to manage costs.
  3. Utilize inexpensive but effective materials, such as gravel, for certain areas.
  4. Invest in a few high-quality plants or features rather than trying to do everything at once.
  5. Benefit from expert guidance on long-term maintenance and plant selection to minimize ongoing expenses.

Using these tips, homeowners can make a beautiful and useful outdoor area. It will make their property more valuable and save money over time with smart design and care.

Pushing the Design Boundaries

Garden designers get to push their clients to try new things. They suggest mixing plants, materials, and features in new ways. This helps clients see their gardens in a new light.

Thinking of the garden as a whole is key. Things like height, color, texture, and how it changes with the seasons matter. Designers help clients pick plants and features that work well together.

Taking risks and being open-minded is important with plants and seasons. Designers might suggest plants or arrangements that are not usual. This helps clients see beauty in new ways, making gardens unique.

It’s tricky to balance what’s needed and what looks good. But, by working with clients and pushing their ideas, designers can make ordinary spaces special. These gardens inspire and make people happy.

Bringing Inspiration to the Process

Garden designers look for inspiration when making the perfect outdoor space. They start with the client’s aesthetic preferences and the style of their home and interiors. Talking with the client helps the designer make a garden that fits the client’s life and style.

Sharing Your Vision

The collaboration between the client and designer is key. The designer uses their guidance and expertise to make the client’s ideas real. They listen to what the client likes, from garden styles to specific features.

This way, the designer can make a plan that shows off the client’s vision. Working together, they make sure the garden looks just like the client imagined. It becomes a beautiful place that reflects the client’s taste.

Creating a beautiful garden is all about mixing the client’s wishes with the designer’s skills. This mix turns a simple space into a stunning garden. It makes sure the client’s aesthetic preferences and the style of their home and interiors work together perfectly.

Long-Term Considerations

When designing a garden, think about more than just how it looks at first. Experienced garden designers know how the space might change to fit your future needs. They also know how plants and features will grow over time. Being flexible is important because your garden’s use and your needs may change.

The designer’s knowledge helps guess how your needs might change, making sure the garden still suits you. Building a strong bond with your designer is key for the garden’s long-term success. This bond lets the designer make changes as needed, keeping the garden useful and nice-looking for years.

As the garden grows, the designer’s skill in picking and placing plants matters a lot. They know how plants will work together and compete. This ensures a balanced and beautiful design that lasts. By thinking about the garden’s future, the designer can make a space that fits your current wants and changes over time.

The client-designer relationship is very important. The designer’s experience and grasp of your vision can lead to a garden that lasts. It changes well with the garden’s growth and your new likes.

Finding the Perfect Garden Designer for Your Outdoor Oasis

Are you looking to transform your outdoor space into a beautiful, sustainable oasis that reflects your personal style and supports local wildlife? Look no further than FindPros, a service that can connect you with the best garden designers in your area.

Our team understands the importance of finding the right professional for your project, whether you’re creating a lush native garden, revitalizing your front yard, or incorporating sculptural elements into your landscape design. By answering a few simple questions about your home, land, and project goals, we’ll match you with top-rated local designers who can bring your vision to life.

The benefits of using FindPros are clear – you’ll get the best pricing when multiple pros compete for your job, and you can choose the designer you feel most comfortable working with. Our platform emphasizes the importance of sustainability, creativity, and personal expression, ensuring your outdoor space becomes a true reflection of your passions and the world around you.

Conclusion

Hiring a professional garden designer can change your outdoor spaces for the better. They can make your property more valuable and make you enjoy your home more. A skilled designer brings many benefits.

Working with a garden designer means getting the most out of your outdoor areas. You’ll get a beautiful, useful, and green space that brings joy for years.

Frequently Asked Questions (Garden Designers)

Native plants help support local wildlife, are better adapted to the climate, and require less maintenance and watering. They can create beautiful, sustainable gardens that are good for the environment.
Garden designers can incorporate native plants, natural elements, and sustainable practices to make landscapes more environmentally friendly. This includes things like reducing water usage, improving soil health, and promoting biodiversity.
Well-designed landscapes can help mitigate the effects of climate change. Garden designers can choose plants that are resilient to changing conditions, incorporate features like rain gardens to manage stormwater, and create green spaces that absorb carbon dioxide.
In addition to creating beautiful outdoor spaces, garden designers can help increase property values, provide functional and practical elements, and even support wildlife conservation efforts. The right design can be both visually appealing and environmentally beneficial.
Garden designers can use unique hardscaping materials, sculptural elements, and creative planting arrangements to make each garden a true reflection of the homeowner’s personality and style. They can draw inspiration from the client’s interior design preferences or incorporate the client’s own artistic passions into the outdoor space.

Garbage Disposal Installation

Gas Fireplace Installers Near You

Can’t find what you are looking for?

How It Works

  • Answer a few questions about your home project.
  • Within seconds, get matched with top-rated local pros.
  • Compare quotes and choose the best pro for the job.

Garbage Disposal Installation In Your Area

Need a Garbage Disposal Installation? Here’s What You Need to Know

Meta Description: Learn the essentials of garbage disposal installation, from tools and steps to safety precautions. Get expert tips for a successful DIY project or professional help.

Thinking about getting a new garbage disposal or replacing an old one? Installing a garbage disposal might seem hard, but it’s easier with the right info and prep. We’ll cover the key tools, materials, and steps for a successful install. This way, your kitchen will work better and handle food waste well.

Garbage Disposal Installation

Key Takeaways

  • 01

    Garbage disposals come in a range of horsepower ratings, from 1/3 HP to 1 HP, to suit different household needs.

  • 02

    Batch feed disposals operate differently from continuous feed models, with specific advantages for certain applications.

  • 03

    Basic disposal models typically range from 1/3 HP to 1/2 HP, while larger households may benefit from a more powerful 1 HP unit.

  • 04

    Proper installation can generally be completed in under 3 hours with the right tools and following manufacturer instructions.

  • 05

    Sink and disposal drain sizes are standardized, ensuring compatibility during the installation process.

Tools and Materials Required

Installing a garbage disposal needs the right tools and materials. Having them ready will make the job easier and faster.

Essential Tools

  • 1-quart bucket
  • Hammer
  • Putty knife
  • Screwdriver
  • Safety glasses

Necessary Materials

You’ll also need these materials for the job:

  1. The garbage disposal unit itself
  2. Plumber’s putty
  3. Any extra plumbing supplies you need

Having all the tools and materials ready will make the garbage disposal installation go smoothly. Make sure you have the hammer, putty knife, screwdriver, and safety glasses to work safely and well.

Garbage disposal installation tools

Types of Garbage Disposals

Choosing a garbage disposal for your kitchen comes down to two main types: batch feed and continuous feed. Knowing the differences helps you pick the best one for your home.

Batch feed disposals work in “batches.” You need a special stopper or grinding plate to start them. This makes them safer, as they won’t start unless the stopper is in place. They are quieter and more controlled, great for homes with kids or pets.

Continuous feed disposals keep running when you turn them on. You can add waste as you go. They’re more powerful and good for big households or lots of use. But, they can be louder than batch feed models.

Garbage disposals vary in horsepower (HP), from 1/3 to 1 HP. A higher HP means finer grind and less clogs. If you have a septic system, pick a disposal safe for septic systems.

Think about your home’s needs, kitchen size, and what features matter to you. The right disposal makes cleaning up easier and keeps your home running well.

types of garbage disposals

Removing the Old Garbage Disposal

Before you put in a new garbage disposal, you must take out the old one. This means you need to be careful and disconnect some parts. Here are the steps to remove the old garbage disposal safely.

Safety Precautions

First, make sure you’re safe. Turn off the power to the disposal at the circuit breaker. This stops any chance of electrical shock while you work.

Disconnecting the Disposal

Then, you need to take apart the drain trap from the disposal’s tube. If it’s hooked up to a dishwasher, disconnect the drain pipe too. Unplug the electrical connections to the disposal, remembering where they go for later.

Removing the Mounting Assembly

With the disposal off, take it out of the mounting ring. Use pliers or a wrench to loosen and remove it. Then, take off the cover plate over the electrical connections. Finally, pry the flange from the sink drain. You can do this by gently pulling it off or using pliers to turn it a quarter turn to get rid of any plumber’s putty.

By doing these steps, you’ll safely take out the old garbage disposal. This clears the way for your new one.

Garbage Disposal Installation

Installing a new garbage disposal in your kitchen is easy and makes your sink work better. You need to prepare the sink and mount the disposal right for a good install. Here’s how to do it:

Preparing the Sink

Start by putting plumber’s putty on the drain flange for the new garbage disposal. This makes a tight seal. Then, put the fiber gasket, backup flange, and mounting ring under the flange and fit them together. End by putting the snap ring on and snapping it into place for a secure fit.

Installing the Drain Flange

After getting the sink ready, put the drain flange in the drain hole. Make sure the plumber’s putty seals well. Then, use a wrench to tighten the mounting assembly screws slowly and evenly.

Mounting the Disposal Unit

Next, hang the garbage disposal unit by lining up the tabs with the mounting ring slots. Use the wrench to turn the tabs clockwise and lock the disposal in place.

With these steps done, you’ve got a new garbage disposal ready to use in your kitchen.

Wiring the Garbage Disposal

Properly wiring your new garbage disposal is key. It’s important whether you’re replacing an old one or installing a new one. Knowing how to connect the wires is crucial for safety and proper function.

First, make sure the power is off at the circuit breaker before starting. This is a key safety step to avoid electric shock. If your disposal has a power cord, wiring is easy. Just match the wire colors – white to white, black to black, and green to the ground screw.

  1. Locate the cover plate on the underside of the disposal and remove it.
  2. Carefully insert the power cord through the opening and secure it with the cord clamp.
  3. Connect the wires, matching the colors – white to white, black to black, and green to the ground screw.
  4. Tuck the wires neatly back into the disposal and replace the cover plate.

For hardwired garbage disposals, the process is a bit more complex. But, it’s still doable for DIY fans. You’ll need to connect the disposal to the electrical circuit. This usually requires a licensed electrician to follow local building codes.

It’s important to work carefully, double-check your connections, and make sure the power is off. With the right safety steps and focus, you can wire your new garbage disposal well. This way, it will work without problems for many years.

Connecting the Drain Pipes

After mounting the new garbage disposal, it’s time to connect the drain pipes. This step is key to avoid leaks and ensure good drainage. Begin by putting the gasket into the disposal’s outlet. Then, attach the discharge tube with the flange and bolts.

Attaching the Discharge Tube

If your disposal connects to the dishwasher, remove the plastic drain plug first. Then, attach the dishwasher discharge tube to the inlet. Make sure it’s securely connected.

Connecting to the Dishwasher

To finish, line up the discharge pipe and use a tee pipe before the P-trap. This makes sure the drain pipe connection works well for your garbage disposal and dishwasher.

If you’re not sure about installing it, get help from a professional plumber. They can make sure the connection of the discharge tube and dishwasher drain is right. They’ll also check your new garbage disposal works well.

Testing and Troubleshooting

After putting in your new garbage disposal, make sure to test it well. Start by putting a stopper in the sink drain and filling it with water. Look for any leaks around the mounting assembly, discharge pipe, or dishwasher connection. If you find leaks, tighten the connections or adjust them as needed.

Then, plug in the disposal and turn on the power to see if it works. If it doesn’t start, check the circuit breaker to see if it tripped. Don’t use chemical drain cleaners, as they can harm the disposal and void the warranty.

  1. Test the disposal by running it with a cup of ice cubes. This keeps the blades sharp and the unit running well.
  2. If the disposal jams or makes strange noises, try resetting it by pressing the reset button on the bottom or side.
  3. If the disposal still doesn’t work or you have ongoing issues, consider hiring a professional plumber or electrician for help.

Remember, testing and troubleshooting are key to making sure your new garbage disposal works right. It should run smoothly and without leaks or power problems. If you’re not sure how to fix issues, it’s best to get help from a skilled professional installation expert.

Need a Reliable Garbage Disposal Pro? FindPros Can Help.

When it comes to your garbage disposal replacement or any other home project, FindPros can make the process simple and stress-free. Just answer a few questions about your needs, and we’ll match you with top-rated local professionals who can handle the job.

With FindPros, you’ll get the best pricing when multiple pros compete for your business. And you can choose the pro you feel most comfortable working with, based on their qualifications and customer reviews. Whether you need help with the sink surface, drain opening, air gap, hose clamp, or any other aspect of the installation, FindPros has you covered.

Our network of experienced professionals can handle the electrical work, old wiring, and ensure proper installation, so you don’t have to worry about permits or additional costs. From basic model replacements to more complex kitchen sink projects, FindPros connects you with the right pro for the job. Get started today and find the perfect match for your garbage disposal or home improvement needs.

Conclusion

Installing a new garbage disposal needs careful planning and the right tools. You must follow a step-by-step guide for success and safety. Each step is key for a working garbage disposal system.

Start by removing the old disposal and then wire the new one. Make sure to connect the drain pipes correctly. Always follow the manufacturer’s instructions and be safe.

If you’re not sure, you can hire professionals to do it. They have the skills for a smooth installation.

When installing a garbage disposal, know the different types available. Make sure to remove the old one safely and prepare the sink well. Mount and wire the new unit right.

Pay attention to details and ensure good drainage to avoid leaks. This keeps your kitchen clean and sanitary.

Whether you do it yourself or hire a pro, it’s worth it for less kitchen clean-up and better waste management. Think about the motor strength, brand, and how it affects the environment. Choose the right disposal that fits your needs and budget.

With the right steps, you’ll enjoy a working garbage disposal for many years. It makes kitchen tasks easier and more efficient.

Frequently Asked Questions (Garbage Disposal Installation)

The sink mounting assembly includes the drain flange, fiber gasket, backup flange, and mounting ring. This assembly creates a secure and watertight connection between the sink and the new garbage disposal.
To replace an old garbage disposal, you need to disconnect the electrical cover plate, remove the mounting screws, and detach the sink flange. Then, you can install the new disposal by aligning the three tabs on the new unit with the mounting ring and locking it in place.
The electrical cover plate provides access to the disposal’s electrical connections. It needs to be removed to access the wiring and properly connect the new disposal to the electrical outlet.
After mounting the new disposal, you need to connect the drain pipes and ensure there are no leaks around the sink flange or discharge tube. Then, test the disposal by running it with water and listening for any unusual noises.
The key steps are: 1) Turn off power at the electrical outlet, 2) Disconnect the old disposal, 3) Apply plumber’s putty to the new sink flange, 4) Secure the mounting assembly with the three mounting screws, 5) Align and lock the new disposal in place, and 6) Connect the electrical wiring and drain pipes.

Garage Organizers

Gas Fireplace Installers Near You

Can’t find what you are looking for?

How It Works

  • Answer a few questions about your home project.
  • Within seconds, get matched with top-rated local pros.
  • Compare quotes and choose the best pro for the job.

Garage Organizers In Your Area

Garage Organizers: Your Guide to a Clutter-Free Space

Meta Description: Discover the best garage organizers to maximize space and efficiency. Transform your cluttered garage into an organized haven with our expert tips and solutions.

Is your garage a mess? Do you spend too much time looking for tools or seasonal items? Garage organizers can change that. This guide will give you tips to declutter and organize your garage. You’ll learn how to make the most of your space.

Garage Organizers

Key Takeaways

  • 01

    Discover how garage organizers can increase your storage space and improve safety in your home

  • 02

    Learn the essential steps to decluttering and categorizing your garage belongings

  • 03

    Explore innovative ways to maximize vertical space with shelving, racks, and other storage solutions

  • 04

    Discover flexible rolling storage options to keep your garage organized and accessible

  • 05

    Uncover specialized organizers for tools, garden equipment, and other garage essentials

  • 06

    Develop a maintenance routine to maintain a clutter-free and functional garage space

  • 07

    Get inspired by creative wall utilization ideas to optimize every inch of your garage

The Importance of an Organized Garage

A messy garage can cause a lot of stress. But, organizing it can change everything. It gives you more storage space, makes it safer, and makes it more useful.

Increased Storage Space

Getting help to organize your garage can make the most of every corner. It makes the garage look calm and tidy. This means you won’t waste time looking for things anymore.

Improved Safety

Putting things in their place makes the garage safer. You won’t trip over things or have objects fall on you. It also helps you be more creative and productive.

Organizing your garage means you take better care of your tools. This makes them last longer and keeps maintenance easy.

Enhanced Functionality

A tidy garage can make your home worth more. It shows you take good care of your property. This good habit can spread to other parts of your life, making everything more organized.

With everything in its place, cleaning is a breeze. This keeps your garage clean and easy to maintain.

organized garage

Decluttering: The First Step to Organization

Decluttering is the key to making your garage organized and useful. Begin by checking every item and asking, “Do I really need this?” If not, it’s time to let it go. Be strict – don’t keep things just because you might need them later.

Sort and Categorize

After getting rid of what you don’t need, sort what’s left. Put similar items together, like tools, sports gear, and seasonal decorations. This makes finding things easier and keeps everything in its place. Use shelves, bins, and cabinets to keep your garage neat.

Donate or Discard Unused Items

  • Declutter your garage by donating or discarding any unused items.
  • Sort through your belongings and create three piles: keep, donate, and discard.
  • Donate gently used items that are still in good condition to local charities or thrift stores.
  • Safely dispose of any damaged or unusable items to prevent them from taking up valuable space.

By decluttering and sorting your garage, you’re on your way to a tidy, efficient space.

decluttering

Zoning and Categorizing Your Space

To make your garage a tidy place, focus on zoning and categorizing your stuff. Set up different areas for things like cars, bikes, gym gear, outdoor games, and more. This way, organizing gets simpler and finding things later becomes a breeze.

Begin by sorting and grouping similar items together. Decide what to keep, give away, or throw out. After sorting, assign each group a spot in your garage.

  • Store household maintenance items on higher shelves.
  • Place bulky outdoor equipment near the garage door.
  • Designate areas for outdoor games and beach gear on the side walls.
  • Reserve higher shelves for seasonal decor and memorabilia.
  • Keep gardening supplies close to the garage entrance.
  • Organize small sporting goods against the walls near the car.

Think about getting storage solutions like shelves, closets, hooks, organizers, bins, and baskets. These will help you use every bit of space and keep things in their place.

Keeping your garage organized means always putting things back where they belong. This habit stops clutter from coming back. It keeps your garage a place of peace and functionality.

Maximizing Vertical Space

Organizing your garage is key to making the most of your space. Use wall-mounted shelves and overhead racks to free up floor space. This makes your garage clean and tidy.

Wall-Mounted Shelves

Wall-mounted shelves are great for storing many items in your garage. They can hold tools, gardening stuff, sports gear, and more. By placing them at different heights, you can tailor your storage to your needs.

Overhead Storage Racks

Overhead racks are perfect for using vertical space in your garage. They go above your car, saving floor space. They’re great for storing big items like camping gear, holiday decorations, or car parts.

Using wall shelves and overhead racks together boosts your garage’s storage. It cuts down on clutter and makes finding things easier. This makes your garage work better and more efficient.

Experts say using vertical storage can increase garage space by up to 50%. Keeping things within reach also makes you up to 30% more efficient. This turns your garage into a better place to work and hang out.

Rolling Storage for Flexibility

Rolling storage cabinets can change the game in your garage. They offer flexibility, letting you change your space easily. If you’re working on a project or need to move things around, these cabinets make it simple.

Rolling storage helps you use your space better. You can store many items, like tools or car parts, on vertical racks and shelves. These cabinets move easily, so getting to what you need is quick.

  • Enhance flexibility with rolling storage cabinets
  • Optimize vertical space with adjustable shelves and racks
  • Easily rearrange your garage layout as storage needs change

Rolling storage cabinets come in many sizes and styles. They fit any garage size, from small to big workshops. You can move these cabinets around to make your storage better as your needs change.

Rolling storage cabinets are great for any project or keeping your garage tidy. They offer the flexibility and ease you need for a clutter-free garage. Start using mobile storage to make your garage better organized.

Garage Organizers for Specific Items

Looking for a clutter-free garage? Specialized organizers can help a lot. They fit the storage needs of different items, making space better and more useful. Let’s look at two areas where these organizers are great: tool storage and garden tool management.

Tool Organizers

It’s important to keep your tools organized for better work flow and easy reach. Find tool organizers that hold many tools, like power and hand tools. Wall-mounted chests with lockable drawers are good choices, offering safe storage and lots of space.

Add pegboards or slatwall panels to hang tools and accessories. This saves floor space and keeps things tidy.

Garden Tool Storage

Garden lovers can really benefit from garden tool storage solutions. A Garage Garden Tool Organizer Wall Mount is perfect for storing rakes, shovels, and more. It keeps tools handy while saving floor space. These specialized organizers can be mounted on walls, keeping your garage neat and organized.

Using these garage organizers can change your space into a well-organized place. Every tool will have its spot. This means your garage will look good, work better, and make you happier.

Labeling and Maintaining Organization

After picking a spot for everything in your garage, the next step is to label your shelves, bins, and boxes. This helps you find things fast, even in a busy space. Use a label maker or sticky labels to show what’s inside each container.

Keeping your garage organized is not just for now. Make a plan to check and reorganize it regularly. This organization routine keeps things tidy and lets you change things as needed. Set a time each year or every six months to make sure everything is where it should be.

Labeling and keeping your garage organized is easy but powerful. It keeps your space neat and easy to get into. By spending a bit of time on it, you’ll have a garage that works well for you.

Remember, sticking to an organization plan is key for a clean and useful garage. With some effort, you can make your garage a place that makes your life better.

Creative Wall Utilization

Garage walls are often ignored in organizing. But, using them well can change the game. Pegboards and slatwall panels are great for this.

Pegboards and Slatwall Panels

Pegboards are great for tools, gardening gear, and small items. They let you hang hooks, baskets, and shelves easily. Slatwall panels offer a strong and flexible option. They have grooves for many storage accessories, like bike racks and shelves.

Slatwall panels look better and can hold more weight than pegboards. They can take up to 40 lbs per square inch. This makes them good for big or heavy items. You can choose accessories for your needs, from sports gear to garden tools.

Choosing a top-notch wall storage system, like a slatwall or pegboard, makes your garage better. It uses vertical space, freeing up floor space for cars, workbenches, or other things. This makes your garage organized and useful.

Simplify Your Garage Transformation with FindPros

Ready to take your garage organization to the next level? Introduce FindPros, a service that makes it easy to find the best local professionals for your home project needs. Simply answer a few quick questions about your garage storage goals, and we’ll match you with top-rated pros in your area.

Compare competitive quotes, read verified reviews, and choose the perfect fit for your project – all without the hassle. FindPros streamlines the process, ensuring you get the best pricing when multiple pros compete for your business. Enjoy a stress-free experience and a transformed, clutter-free garage that suits your lifestyle. Get started today and let FindPros handle the heavy lifting.

Conclusion

Putting time and effort into your garage is a smart move. It helps you simplify your life, boost your productivity, and feel better overall. A clean, organized garage can change everything for the better.

Use the tips and tricks from this article to make your garage better. You can add wall shelves, overhead racks, or modular shelving. These options help you use your space well and keep it tidy.

Start organizing your garage and see the big changes it makes. With garage organization, you’ll change your space and get many benefits. You’ll have more room, be safer, and things will work better. Start this journey and make your garage and life better.

Frequently Asked Questions (Garage Organizers)

Overhead racks and wall-mounted shelves are great for storing bulky items like camping gear or holiday decorations. They maximize vertical space and keep the floor clear.
Look for garage storage products made with strong, durable materials like metal or high-quality plastic. This ensures they can withstand the wear and tear of a garage environment for many years.
Slatwall panels and pegboards are excellent options for workshops. They allow you to customize the placement of hooks, shelves, and other accessories to neatly organize your tools and materials.
The cost can vary depending on the size of your garage, the type of products you choose, and whether you install them yourself or hire a professional. Shop around to find the best value and stay within your budget.
Consider features like adjustable shelves, lockable drawers, and a variety of color options to create a storage system that suits your style and needs. Modular designs also allow you to build out your system as your storage requirements change.

Garage Door Spring Repair

Gas Fireplace Installers Near You

Can’t find what you are looking for?

How It Works

  • Answer a few questions about your home project.
  • Within seconds, get matched with top-rated local pros.
  • Compare quotes and choose the best pro for the job.

Garage Door Spring Repair In Your Area

Garage Door Spring Repair: What You Need to Know

Meta Description: Learn about garage door spring repair, safety precautions, and when to call professionals. Discover essential tips for maintaining your garage door springs and avoiding costly repairs.

Imagine this: You’re pulling into your garage, but the door doesn’t move or slams back down. This is likely a broken garage door spring issue. These springs are key for your garage door’s smooth work. If they break, you face safety risks and expensive fixes.

This guide covers garage door springs from types to maintenance and replacement. It helps whether you like to fix things yourself or prefer a pro. You’ll learn how to handle your garage door spring problems.

Garage Door Spring Repair

Key Takeaways

  • 01

    Garage door springs are vital for your door’s smooth work. A broken spring can cause safety issues and high repair costs.

  • 02

    There are two main types: torsion springs and extension springs. Each has its own needs and installation ways.

  • 03

    Regular lubrication and checking door balance can make your springs last longer.

  • 04

    Fixing garage door springs yourself is risky and not wise for beginners. It can lead to serious injuries.

  • 05

    Using a professional service saves time, money, and avoids injury risks. They have the right tools and knowledge for safe, quick fixes.

Understanding Garage Door Springs

Garage doors are key to our homes, offering safety, ease, and style. At the core of a working garage door are the springs. These springs help the door move smoothly. They come in two main types: extension springs and torsion springs, each with its own benefits.

Types of Garage Door Springs

Extension springs are the older type. They are long and skinny, running along the door’s tracks. They store energy by stretching when the door moves.

Torsion springs are wider and sit on a shaft above the door. They twist when the door closes and help it open quickly and smoothly.

Extension Springs vs. Torsion Springs

The choice between extension and torsion springs depends on the door’s size and weight. Torsion springs work best on heavy doors, offering smooth motion and less stress on the opener. They are also cheaper to maintain and quieter than extension springs.

Torsion springs are safer too. They are built around a tube, so they don’t become dangerous if they break.

Types of garage door springs

Both types of springs help open and close the garage door. Keeping them in good shape is key to their safety and long life.

Signs of a Broken Garage Door Spring

Knowing when your garage door spring is broken is key for safety and keeping your door working right. Watch for these signs that mean it’s time for a new spring:

  • Loud snapping or banging noise when the door is operated
  • Difficulty lifting the garage door or the door refusing to open completely
  • The door closing too quickly or unevenly
  • A visibly stretched or damaged spring
  • Imbalance or an uneven appearance of the garage door

If you see any of these signs of broken garage door spring, act fast. Ignoring garage door spring problems can cause more damage and safety risks. Don’t wait – identifying broken garage door springs early can save you time, money, and prevent injuries.

Broken garage door spring

Trying to fix or replace garage door springs yourself is risky because of the high tension. For safety, talk to a professional garage door technician. They have the right tools and knowledge to do the job safely.

Dangers of Broken Garage Door Springs

Broken garage door springs are very dangerous and should be taken seriously. If a garage door spring breaks, it can cause big problems. It puts homeowners and their families at risk. The dangers of broken garage door springs include risks from extension springs and torsion springs.

Safety Hazards of Extension Springs

If an extension spring breaks, it might hit something or someone hard. This can cause serious injury or even death. The spring can move very fast and be very dangerous.

Safety Hazards of Torsion Springs

Torsion springs are also very dangerous if they break. They can send metal flying and make the garage door close by itself. This is very risky for people nearby.

The risks from broken garage door springs show why fixing them quickly is important. If ignored, these problems can lead to big troubles. Homeowners should get help from experts to keep their families and homes safe.

Purchasing Replacement Garage Door Springs

When your garage door springs break, it’s important to get the right parts. This ensures your door works well and safely. You should think about what type of springs you need, like extension or torsion springs.

First, figure out what kind of springs your door uses. Most homes have 1 3/4″ or 2″ diameter springs. For torsion springs, you usually need two, one wound each way, to balance the door.

Then, measure the wire size of the torsion springs. Measure 10 coils and then 20 coils. Use a chart to compare these sizes. It’s key to make sure coils don’t overlap for accurate measurements.

After picking the right spring type and size, look for the right springs. Many springs have colors that show their weight. You can buy these parts online or at stores that sell home improvement items.

Talking to a pro or doing your homework on your door’s specs helps pick the best springs. Choosing the right ones avoids future problems and keeps your door working well and safely.

Steps to Replace Extension Springs

Replacing extension springs on your garage door is easy if you do it yourself. Just follow these simple steps. You’ll be able to replace your springs safely and make your garage door work smoothly again.

Prepare the Garage Door

  1. First, turn off the garage door opener to stop it from moving by accident.
  2. Use C-clamps or a vice grip to hold the door up. This stops it from closing and lets go of the spring tension.
  3. Take off any decorations or panels to show the springs and hardware.

Identify the Spring Type

Look at the old springs to see their size, length, and where they connect. You’ll need this info to get the right springs.

Install the New Spring

  1. Take out the old springs carefully, noting how they were attached to the pulleys and brackets.
  2. Put a safety cable through the new spring and attach it to the track bracket and pulley.
  3. Make sure the new spring is securely fastened to the right spots and is tight enough.
  4. Put back any cables or parts you took off.

Test the Door

Plug in the garage door opener and check how the door works. It should open and close smoothly without any trouble. If it doesn’t, you might need to adjust the spring tension or other parts.

By doing these steps, you can replace your garage door extension springs by yourself. This will make your garage door work safely and smoothly again. Always put safety first and get help if you’re not sure or feel unsafe at any step.

Reasons to Replace Garage Door Springs

Replacing garage door springs is safer than fixing them. It’s key to avoid dangers from broken springs, especially with extension springs. New springs last longer than old ones, making the door system last longer.

Replacing both springs together stops future problems. This way, the other spring won’t break soon after.

Safety Concerns

Broken garage door springs are risky, especially with extension springs. They can suddenly snap, causing the door to slam or detach. This can damage property, hurt people, or be deadly.

Replacing old springs stops these dangers. It gives homeowners peace of mind.

Extended Lifespan

Garage door springs last between 7 to 20 years, based on type and use. Replacing them early extends the door’s life. This saves homeowners from often fixing or replacing parts.

Avoid Future Breakdowns

When one spring breaks, the other gets stressed and might break soon. Replacing both springs together stops this. It keeps the door working well for a long time.

Getting new garage door springs has many benefits. It makes the system safer, lasts longer, and prevents future problems. Knowing when to replace springs keeps a garage door safe and working well for years.

When to Hire a Professional

Replacing extension springs can be done by homeowners. But, it’s best to leave torsion spring replacement to pros. Professional garage door spring replacement experts save you time and money. They have the skills, tools, and experience to do the job right.

Save Time and Money

Trying to replace torsion springs yourself can be risky. It can lead to injury. Pros have the right tools and know-how. This means the job gets done right the first time, avoiding costly mistakes.

Reduced Risk of Injury

Garage door springs are very tense and can snap suddenly. This can make the door slam shut and hurt someone nearby. Hiring a professional for garage door spring replacement is safer. They know how to do these dangerous tasks safely.

Access to Proper Tools

Pros have the right tools and knowledge for the job. They measure springs correctly for your door’s size and weight. Without the right tools, you might damage your door.

Warranty on Services

Good garage door services offer warranties on their work. This gives you peace of mind if problems come up later. Homeowners can’t offer this when they do it themselves.

In conclusion, while homeowners can replace extension springs, it’s best to leave torsion springs to pros. Hiring a professional for garage door spring replacement ensures the job is done safely and with a warranty.

Common Causes of Garage Door Spring Breaks

Garage door springs are key to your garage door working well. But, they can break, causing trouble and safety risks. Knowing why garage door springs break helps prevent these problems and makes your door last longer.

  • Wear and Tear: Garage door springs work hard, opening and closing the door many times. This can wear them down over time. They usually last 7-9 years, but this can change based on how often you use them and their quality.
  • Rust and Corrosion: Moisture and other environmental factors can damage garage door springs. Rust and corrosion make the springs weak and more likely to break. This is especially true in humid areas or near the coast.
  • Lack of Maintenance: Keeping garage door springs in good shape needs regular care. Not lubricating and checking them can make them wear out faster. A study found that not installing or maintaining them well caused over 30% of spring breaks.

Knowing the causes of garage door spring breaks, why garage door springs break, and factors that contribute to garage door spring failure helps homeowners prevent these problems. This way, you can keep your garage door system working well for longer.

Maintaining Garage Door Springs

Keeping your garage door springs in good shape is important. Make sure to lubricate them and check the door’s balance often. This helps your springs work well and last longer.

  • Regular Lubrication: Lubricate your garage door springs 3-4 times a year to stop rust. Use a good white lithium or silicone spray. This keeps them running smoothly. Don’t use WD-40 because it can remove the lubricant and make them wear out faster.
  • Checking Door Balance: It’s important to check your garage door’s balance often. An unbalanced door can harm your springs. Make sure the door moves easily up and down. If it feels heavy or off-balance, get a pro to fix it.

Regular maintenance can make your garage door springs last 7-10 years or 10,000 cycles. Just lubricate and check the balance often. These steps are easy but very effective for maintaining garage door springs, garage door spring maintenance, and care for garage door springs.

Signs You Need to Replace Garage Door Springs

It’s important to watch for signs to know when to replace garage door springs. These parts are key for your garage door’s smooth and safe use. So, it’s crucial to fix any problems quickly.

One clear sign is an uneven or unbalanced door. If the door moves up or down unevenly, the springs might be worn out. Another sign is loud squeaking or rattling. This happens when springs lose their tension and flexibility.

  • The door takes longer to open and close: Worn-out springs make the door move slowly.
  • The door refuses to lift at all: If springs can’t support the door’s weight, opening the garage door is hard.

These problems come from springs wearing out over time. Extension springs last about 10,000 cycles before needing a new one. Torsion springs can last 15,000 to 20,000 cycles. Watch for these signs and fix them quickly to avoid more damage and keep your garage door safe.

If you see these signs, talk to a professional garage door technician. They can check your springs and replace them safely and right. This ensures your garage door works well for a long time.

DIY vs. Professional Garage Door Spring Replacement

Keeping your garage door in good shape is key. You can either try to replace the springs yourself or get a pro to do it. DIY might save you money, but think about the risks first.

For some, DIY can work for extension springs. But, don’t try to replace torsion springs yourself. They’re very tight and need special skills and tools. Trying it without the right knowledge can hurt you badly.

  • Professional garage door spring replacement typically costs between $200 and $500.
  • Trained technicians ensure proper spring selection and installation for optimal safety and performance.
  • Professional work comes with warranties and guarantees, providing confidence in the investment.

DIY can save you a lot of money, maybe over $500. But, it’s risky and might not be as safe or reliable as hiring a pro.

Choosing between DIY and a pro depends on your skills and how much risk you’re okay with. If you’re not sure or don’t want to risk it, it’s safer to hire a skilled technician. This way, you’ll be sure your garage door is safe and works well for a long time.

Garage Door Spring Replacement Cost

The cost of replacing garage door springs can be a big part of home upkeep. Many things affect the cost of garage door spring replacement. These include the type of springs, your garage door’s size and weight, and if you do it yourself or hire a pro.

On average, hiring a pro to replace garage door springs costs between $150 and $350. This price includes the springs and the work to put them in. The average cost for garage door spring repair is about $250 nationwide.

Things that can change the cost of replacing garage door springs include:

  • Type of springs (extension springs vs. torsion springs)
  • Size and weight of the garage door
  • Labor rates in your area
  • If you need to replace cables too
  • If you do it yourself or hire a pro

For a DIY cost of garage door spring replacement, parts can start at $50. But think about the risks and effort of doing it yourself. Also, consider the savings from hiring a pro.

Choosing to replace garage door springs yourself or hiring a pro depends on your skills, the project’s complexity, and cost savings. Knowing what affects the cost of garage door spring replacement helps you make a smart choice for your needs and budget.

Let the Experts at FindPros Handle Your Garage Door Spring Replacement

Dealing with a broken or worn-out garage door spring can be a hassle, especially for heavy doors that require specialized skills and equipment. Rather than risk injury trying to replace the springs yourself or overpaying for subpar work, let the experts at FindPros match you with the right garage door installers and technicians for the job.

By answering a few simple questions about your garage door size, any existing issues like a broken torsion spring or cable, and your budget, FindPros will connect you with top-rated local professionals who can properly assess your needs, provide competitive quotes, and safely handle the replacement of one or both springs, the winding cones, center bearing, and any other necessary repairs.

They’ll ensure your garage door opens and closes smoothly, without the risks of trying to DIY with a winding bar or ending up in the emergency room.

Conclusion

Garage door springs keep your home safe and make life easier. They come in different types and show signs when they need work. It’s key to keep and replace them right to make sure your garage door works well and safely.

Doing regular checks and upkeep can make your springs last longer and save you money. Choosing good quality springs and a trusted service helps your garage door work better. With the right care, your garage door can stay in good shape for many years.

Here are the main points for taking care of garage door springs: know the spring types, watch for wear, and get help when needed. Keeping up with garage door spring repair keeps your home safe and handy.

Frequently Asked Questions (Garage Door Spring Repair)

The two main types of garage door springs are torsion springs and extension springs. Garage door torsion springs are wider and mounted above the door, while extension springs run along the tracks.
Signs that your garage door springs may need replacing include the door being unbalanced, making loud noises like a broken torsion spring, or not opening and closing smoothly. If you notice these issues, it’s best to have a garage door technician inspect the two springs.
Replacing garage door torsion springs yourself can be very dangerous and is generally not recommended for most homeowners. Torsion springs are under extremely high tension and require special winding bars and other tools. It’s much safer to have a professional garage door installer or technician replace the two torsion springs.
The typical cost to have a professional replace the garage door springs ranges from $150 to $350. This includes the cost of the correct springs as well as the labor. Attempting a DIY replacement of just one spring using a garage door lubricant may be cheaper, but carries significant safety risks.
To help your garage door springs last longer, be sure to regularly lubricate them with a quality garage door lubricant 3-4 times per year. You should also periodically check the balance of the whole door and make any adjustments needed to the other garage door parts. If just one spring is starting to wear out, it’s recommended to have both springs replaced by a technician to avoid future issues with a broken torsion spring.

Garage Door Opener Repair

Gas Fireplace Installers Near You

Can’t find what you are looking for?

How It Works

  • Answer a few questions about your home project.
  • Within seconds, get matched with top-rated local pros.
  • Compare quotes and choose the best pro for the job.

Garage Door Opener Repair In Your Area

Need Garage Door Opener Repair? Here’s What to Expect

Meta Description: Discover expert garage door opener repair services. From troubleshooting to replacement, we’ll get your garage door working smoothly again. Fast, reliable solutions.

Are you having trouble with your garage door opener? You’re not alone. Garage door problems happen often. Knowing what causes them and what to do next can help a lot. We’ll cover garage door opener repair in this article, giving you the info to handle it yourself.

Garage Door Opener Repair

Key Takeaways

  • 01

    Garage door openers can experience a range of issues, from sensor malfunctions to trolley carriage and main gear drive problems.

  • 02

    Proper maintenance, including lubrication and tension adjustments, can extend the lifespan of your garage door opener.

  • 03

    Recognizing when it’s time to replace the entire system can save you from costly and recurring repairs.

  • 04

    Professional garage door repair services can diagnose and address complex issues, ensuring your door operates safely and efficiently.

  • 05

    Staying informed about the latest garage door opener technologies and safety features can help you make informed decisions for your home.

Check Your Door First

Before you start fixing your garage door opener, check the door itself. Use the emergency release cord to lift the door. See if it moves easily. If it doesn’t, the issue might be with the door, not the opener.

Examine the Door’s Movement

Watch how the door moves when you open and close it by hand. Look for resistance, strange sounds, or if it hesitates. This can tell you if the problem is with the door’s parts, not the opener.

Identify the Problem Source

If the door acts up, it’s probably not the opener’s parts. The issue could be with torsion springs, rusted rollers, or a faulty circuit breaker. Figuring out the main problem helps you know what to fix first.

Checking the door first can save you time and avoid extra work on the opener. This way, you fix the right issue and get your door working right again.

Safety Considerations

Always put safety first when working on a garage door opener. Make sure the door stays down to prevent it from falling. Also, unplug the opener to avoid electrocution or injury from the remote button.

The garage door is the biggest moving thing in your home. If it’s not set right, it can be deadly. Adults should not play “beat the door” to avoid serious harm.

Keep the pushbutton wall control at least 5 feet off the ground. This keeps accidents away from moving parts.

  • Tension-related Safety: Extension springs carry high tension when the garage door is down, which can lead to potential injuries if the spring breaks.
  • Safety Cable Importance: Safety cables are essential for extension springs to prevent injuries in case of spring breakage. Lack of a safety cable might lead to hazardous situations.
  • Finger Injuries Statistics: Many homeowners every year suffer finger injuries by placing them between door sections, indicating a common safety concern among users interacting with garage doors.

Check your garage door system every month to avoid accidents. Always put safety first for safe use of garage doors and openers.

It’s best to have a pro install your garage door. DASMA says so because DIY can be dangerous. Checking and maintaining garage door springs stops injuries from broken springs.

Putting a new door on old tracks might not work well. This shows why using the right parts is key for safety. Always follow safety tips for your door and opener model. Keep the manual handy for quick safety checks.

Troubleshooting Common Issues

Garage door openers can have many problems, but most can be fixed easily. A common issue is when the remote works but the wall switch doesn’t. This is often because the wall switch or wiring is faulty. Fixing the wall switch or checking the wiring usually solves this.

If the wall switch works but the remote doesn’t, the problem might be with the batteries or the garage door opener’s receiver. Try changing the batteries or reprogramming the remote. Also, if the door goes up but only comes down with the wall switch, the safety sensors might be the issue.

Remote Works, Wall Switch Doesn’t

If your remote works but the wall switch doesn’t, it could be a faulty switch or wiring issue. Try replacing the wall switch or checking the wiring for damage or loose connections.

Wall Switch Works, Remote Doesn’t

When the wall switch works but the remote doesn’t, check the batteries first. If that doesn’t work, the receiver might need checking or reprogramming.

Door Goes Up but Comes Down Only When Holding Wall Switch

If your door goes up but only comes down with the wall switch, the problem is with the safety sensors. Make sure they’re aligned right and clear of any blockages.

Garage door safety sensors

Trolley Carriage and Main Gear Drive Issues

Garage door opener repairs often deal with trolley carriage or main gear drive problems. If the trolley moves but the door stays still, it might need a new carriage. If the opener makes noise but the door doesn’t budge, the main gear drive is probably broken and must be replaced.

Industry data shows that a garage door motor running but not moving the door often means a broken main gear drive. This part is key for moving the door. Without it, the door won’t open or close right.

Fixing trolley and main gear drive issues usually means checking and possibly replacing them. Always follow the maker’s advice and steps to keep your garage door opener safe and working right.

Sometimes, you might need to adjust the up or down force settings. This can fix problems like the door not opening fully or closing fast. Always look at your owner’s manual for the right steps for your opener.

Lubrication and Maintenance

Keeping your garage door opener working well needs regular care. This care makes sure it runs smoothly and quietly. It also makes it last longer.

Lubricating the Rail

Use a silicone-based spray to lubricate the rail. This reduces friction and helps the trolley move easily. It’s good to spray silicone lubricant on it every six months.

Adjusting Chain Tension

Chain-driven openers need their chain tension checked often. If the chain gets loose, it can make noise and not work right. Experts say to use lithium grease on the chain. Adjust it as the maker says for quiet, smooth use.

Regular upkeep and lubrication keep your garage door opener running great. Follow the maker’s advice and use the right stuff, like silicone sprays and lithium grease. This way, your garage door will work quietly and well for many years.

Recognizing When to Replace

Many garage door opener problems can be fixed, but sometimes it’s better to replace the whole system. Older openers might not have safety features like automatic reverse and battery backup. These are now needed by law in some places. Getting a new opener can give you energy-efficient features, smart home integration, quiet operation, and better reliability.

A garage door opener usually lasts 10-15 years. But, with regular upkeep, you can make it last longer. You should check and maintain it once or twice a year. Here are signs it’s time for a new opener:

  • Unusual sounds during operation
  • Difficulty in opening the door smoothly
  • Unreliable functioning where the opener works inconsistently
  • Outdated technology that lacks features like smart features and battery backup

Getting a new garage door opener has big perks. Modern ones have cool features like internet connectivity and remote control through smartphones. They also send notifications and have better security systems.

These new openers are safer, more convenient, and make your home look fresh. By replacing your old opener with a new, energy-efficient, and quiet one, you get all these benefits.

Finding the Right Garage Door Experts with FindPros

Are you in need of reliable garage door repair or replacement services? Look no further than FindPros, the trusted platform that connects homeowners with top-rated local professionals. By answering a few simple questions about your home project, you’ll be matched with the best-fit pros who can provide competitive quotes and ensure your garage door operates smoothly and safely.

At FindPros, we understand the importance of finding the right service provider for your specific needs. Our platform allows you to compare quotes from multiple pros, ensuring you get the best possible pricing. Plus, you’ll have the opportunity to find the professionals you feel most comfortable working with, building a positive relationship for any future garage door-related tasks.

Conclusion

Fixing a garage door opener can be tricky, but you can do it yourself with the right tools and knowledge. Start by checking how the door moves and find the problem. Knowing how to maintain and fix your garage door helps keep it working well.

If you can’t fix the issue yourself, call a garage door repair service. Find a trusted company as they should be open 24/7 and have many parts to fix your door fast and safely.

Whether you fix it yourself or get help from a professional service, fix the problem quickly. This keeps your garage door safe, secure, and working right.

Frequently Asked Questions (Garage Door Opener Repair)

If your garage door is not opening properly, the first thing you should check is the door itself. Try manually lifting the door to see if it moves easily. If it doesn’t, the issue might be with the door’s parts, not the opener. You should also check the remote button and the track for any obstructions that might be preventing the door from opening fully.
Regular maintenance, such as lubricating the rail with a silicone-based spray and checking the chain tension, can help extend the lifespan of your garage door opener. It’s recommended to perform this maintenance every six months. Make sure to use white lithium grease on the chain and other moving parts to prevent them from attracting dirt and pop noises.
If you notice unusual noises during operation, difficulty in opening the door smoothly, or if the opener is unreliable, it may be time to replace the entire system. Outdated technology that lacks features like smart connectivity and battery backup is also a sign that it’s time for a replacement. Contacting a reputable garage door company can help you find the right equipment for your residential needs.
Safety should always be the top priority when working on a garage door opener. Make sure to unplug the opener, keep the door down to prevent it from falling, and avoid placing your fingers between the door sections. It’s best to have a professional garage door company handle any complex issues, as they are equipped with the right tools and expertise to ensure your safety.
When looking for a garage door repair service, look for a company that offers exceptional service, 24/7 availability, and a wide selection of parts to fix your door quickly and efficiently. Checking online reviews and asking for recommendations from friends or neighbors can also help you find a trusted garage door company. If you notice any issues with your garage door, such as it being stuck or not fully opening, don’t hesitate to contact a professional who can access the problem and provide the necessary repairs.

Garage Door Installers

Gas Fireplace Installers Near You

Can’t find what you are looking for?

How It Works

  • Answer a few questions about your home project.
  • Within seconds, get matched with top-rated local pros.
  • Compare quotes and choose the best pro for the job.

Garage Door Installers In Your Area

Hiring Garage Door Installers: A Complete Guide

Meta Description: Discover how to choose the best garage door installers for your home. Learn about qualifications, services, and what to expect during the installation process.

The garage door is key to your home’s security and functionality. But what if it needs fixing or replacing? How do you find the right pros for the job? This guide will show why hiring skilled garage door installers is important. We’ll give you tips to choose wisely.

Garage Door Installers

Picture this: your garage door breaks down, leaving you stuck and worried about your home’s safety. Would you fix it yourself, or would you hire a pro? This article will tell you why hiring skilled garage door installers is vital for your home.

Key Takeaways

  • 01

    Skilled garage door installers know how to install safely and correctly.

  • 02

    Choosing a licensed and insured pro gives you peace of mind and protects your wallet.

  • 03

    Good companies offer warranties and guarantees, protecting your investment over time.

  • 04

    Doing your homework and talking to potential installers helps you make a smart choice.

  • 05

    Putting professionalism and detail first makes garage door installation smooth and worry-free.

Understanding the Significance of Hiring Professionals

Hiring a pro for garage door repair is key for many reasons. They bring expertise and experience to fix a wide range of issues. Trying to fix it yourself can lead to serious injury from the heavy parts. Pros have the right tools and know-how to work safely.

Choosing a pro means getting quality workmanship and peace of mind. It also saves time and money by avoiding mistakes or future big repairs. In the last ten years, about 22,000 people got hurt from garage doors, mostly from falling doors.

Expertise and Experience Matters

A pro-installed garage door can last 15 to 30 years with little upkeep. DIY installs might not last as long and could have problems right away. Pros test garage doors thoroughly to make sure they work right.

Safety First: Avoid the Risk of Injury

Garage doors can be really heavy, and accidents can cause serious injuries. These injuries can lead to long casts, paralysis, or even death. Professionals do careful assessments and install with precision to keep your garage door safe.

Quality Work and Peace of Mind

Professional garage door installs add more safety and security. They make sure the door works well and lasts longer. This means less need for repairs and safety issues.

Save Time and Money in the Long Run

Choosing a professional for installation can save you money over time. It avoids the costs of fixing or replacing doors you installed yourself. Pros make sure your garage door lasts longer, cutting down on repairs.

garage door repair professional

Identifying Your Garage Door Needs

Before you hire a garage door installer, look closely at your garage door. Check for any issues or needs. This will tell you if you need maintenance, repair, or a new door. Knowing what your door needs is the first step to finding the right professional.

Garage doors usually last 10 to 15 years. If your door is getting close to that age, it’s time for a check-up. Look out for these signs that your door needs help:

  • Refusing to open or close properly
  • Shaking when opening
  • Resting unevenly against the ground
  • Having dents or being unbalanced
  • Falling off the tracks
  • Operating unusually slowly
  • Being extremely loud
  • Exhibiting electrical damage

An expert in garage door repair or installation will have many solutions for different problems. Reading customer reviews and testimonials can help you see if a company is good. This way, you can find a service that fits your garage door needs.

Verifying Credentials: Licensed, Bonded, and Insured

When you’re looking for a garage door installer, check their credentials. This means looking at their licensing, bonding, and insurance. These steps make sure the contractor can work in your area. They also give you security and peace of mind during the installation.

The Importance of Licensing

A license shows the garage door installer knows their stuff and can do the job right. In places like California, contractor’s license numbers don’t have letters and are very short. You can check if a contractor’s license is real using online tools. For example, the Contractors State License Board (CSLB) in California has tools for this.

The Security of Bonding and Insurance

Bonding and insurance are key for your safety as a homeowner. Bonding means the contractor has money set aside to finish the job right. Insurance covers accidents or problems during the installation. In Washington State, contractors must have a special bond and insurance. This gives you more trust in their security and dependability.

Checking the licensed, bonded, and insured credentials of your garage door installer makes you trust them more. It means you know they’re professional and their work will be good. This protects your money and gives you peace of mind.

Evaluating Experience and Expertise

When hiring a garage door installer, experience and expertise matter a lot. Choose a contractor with a good history of successful installs. They should have years of experience in the field.

Such installers know how to solve problems during the install. They make sure the job is done well and safely.

Look at the references and reviews of the installer you’re thinking about. A good company will have happy customers who talk about their work and service. Happy reviews from past customers tell you about the installer’s experience and care for customers.

Don’t just believe what the installer says. Ask for examples of their expertise and past projects they’ve done well. A skilled installer will show you their skills and give examples to back up their claims.

By checking the experience and expertise of the garage door installer, you pick a true pro. This way, you get the peace of mind and quality work you want.

Garage Door Installers: Warranties and Guarantees

When you hire a garage door installer, think about the warranties and guarantees they offer. Good professionals give you warranties and guarantees on their work. This means your new garage door is well-protected.

Installation warranties cover many things, like:

  • Defects in the installation or repair work for a year
  • Replacing any bad parts for 90 days after you buy them
  • Fixing service or repair issues for 30 days after finishing the job
  • Quickly replacing any missing parts or hardware in 5 business days

Also, garage door brands offer their own manufacturer warranties. For example, Wayne Dalton’s steel doors have a 10-year warranty against rust, cracking, and paint issues. Their Models 8300 and 8500 even have a lifetime warranty.

Choosing an installer with strong warranties and guarantees means you’re sure your garage door will work well for a long time. You’ll have confidence in the quality and performance of your new door.

Interviewing Potential Garage Door Installers

When hiring a garage door installer, it’s key to ask the right questions. This helps you check their skills, experience, and if they’re a good fit for the job. A thorough interview ensures the installer has what it takes for a safe, reliable, and quality installation.

General Interview Questions

Start with general questions to learn about the installer’s background and how they solve problems. You might ask:

  • What is your experience in the garage door installation industry?
  • Why are you interested in this role, and what do you enjoy most about your work?
  • How do you approach problem-solving on the job?
  • Can you provide examples of challenging installations you’ve handled and how you resolved them?

Technical Interview Questions

Then, ask technical questions to see how much they know about garage door systems and installation. Some questions could be:

  1. Can you explain the key components of a garage door system and their functions?
  2. What steps do you follow to ensure a proper and secure installation?
  3. How do you ensure the safety of the installation process, both for yourself and the homeowner?
  4. Can you describe the types of materials and hardware typically used in garage door installations?

Situational and Soft Skills Questions

Lastly, ask questions about customer service, teamwork, and flexibility. These help you see if they’re a good match for your needs. Examples include:

  • How would you handle a customer who is dissatisfied with the installation?
  • Can you share an experience where you had to adapt to a change in the project scope or timeline?
  • Describe a time when you had to work closely with a team to complete a garage door installation.
  • What steps would you take to ensure clear communication with the homeowner throughout the installation process?

Using these interview questions helps you choose the right garage door installer. The installer’s skills and professionalism greatly affect the quality and life of your garage door. For more interview questions to ask a garage door installer, check the Trade Academy blog.

Finding the Right Garage Door Installer

Looking for the best garage door installer for your home? Let FindPros help. Simply answer a few quick questions about your project, and we’ll match you with top-rated local professionals. Get competitive quotes from multiple pros who are the right fit for your needs and budget. Take the stress out of hiring by letting our service do the work to find the perfect garage door installer for your home. Get started today and see how easy it is to find the right pro for the job.

Conclusion

Hiring skilled garage door installers is key for your safety and the door’s performance. It’s important to know why professional installation matters. This helps you choose wisely, saving time and money later.

Look for installers who are licensed, bonded, and insured. They should have the right training and skills for the job. These pros follow safety rules and take the right steps to keep you and your family safe.

Also, good installers offer warranties and guarantees. These protect you from problems or defects later on. It gives you peace of mind.

Choosing professional installation can save you from big mistakes. It makes sure your garage door works well and saves energy. By picking the right installer, you can trust your door will last a long time.

Frequently Asked Questions (Garage Door Installers)

Professional installers have the expertise to properly install your garage door, ensuring it stands securely and safely. This helps protect your house from potential damage or break-ins.
Before the installation, it’s important to verify the measurements of your garage door opening and ensure the installer has all the necessary hardware. This helps the process go smoothly.
Look for an installer who is respectful, communicative, and willing to answer all your questions. They should be transparent about their process and materials used, enhancing your confidence in their work.
Don’t feel rushed. A great installer will be happy to continue the conversation, provide updates, and work with you to ensure you feel comfortable with the process.
Asking around your community or checking online reviews can help you find a reputable installer who has worked on similar homes and types of garage doors. Their positive experiences can give you peace of mind.

Furniture Removal

Gas Fireplace Installers Near You

Can’t find what you are looking for?

How It Works

  • Answer a few questions about your home project.
  • Within seconds, get matched with top-rated local pros.
  • Compare quotes and choose the best pro for the job.

Furniture Removal In Your Area

Stress-Free Furniture Removal: A Comprehensive Guide

Meta Description: Discover expert tips for hassle-free furniture removal. Learn about services, costs, and eco-friendly disposal options to declutter your space efficiently.

Are you worried about moving heavy furniture? Don’t be – this guide will make furniture removal easy. It doesn’t matter if you’re moving or just decluttering. With the right tips and expert advice, you can make it stress-free.

Furniture Removal

Key Takeaways

  • 01

    Professional furniture removal services offer efficiency, convenience, and safety measures to handle the process with ease.

  • 02

    Proper disposal and recycling options can help reduce waste and support local charities.

  • 03

    Hiring experts can significantly reduce the stress associated with moving or decluttering.

  • 04

    Researching and verifying the credentials of furniture removal companies is crucial for a successful experience.

  • 05

    Advance planning and organization are key to a smooth furniture removal process.

Understanding Furniture Removals

Furniture removals are more than just moving items from one place to another. They are a detailed process that makes sure each item gets to its new home safely. This needs careful planning, the right packing stuff, and skilled handling.

What Furniture Removals Involve

When moving furniture, we look at the size, weight, and how fragile each item is. This helps us move it safely. We use special techniques and tools to avoid damage during the move.

Handling and Transportation Considerations

  • Assessing the size and weight of furniture items to determine the appropriate moving methods
  • Utilizing specialized equipment, such as dollies, straps, and padding, to secure and protect furniture during transport
  • Navigating tight spaces, stairs, and narrow doorways without causing any damage
  • Ensuring the safety of both the furniture and the movers throughout the entire removal process

Knowing what furniture removals involve helps people get ready for a smooth move. This way, they can have a stress-free and successful move.

Furniture Removal

Planning Your Move

Planning is key for a smooth furniture move. Start by listing your furniture and measuring big items. This makes sure everything fits and helps you plan better. It’s also a chance to get rid of items you don’t need anymore.

Most Americans move about 11.7 times in their lives. When moving, think about the costs like packing materials, moving companies, and any home changes. Start cleaning out early to move less stuff, and set aside time to sell items online or at garage sales.

Make a list of moving supplies and label boxes for easy unpacking. Plan your move eight weeks ahead. Include cleaning, setting up utilities, and changing locks at your new place. This way, moving day will be less stressful.

How much you spend on moving depends on if you hire movers or go it alone and how far you’re moving. Moving your stuff is usually the biggest cost. Then comes hiring movers for packing and temporary housing and storage. Think about your budget and look for cheaper ways to move, like doing it yourself.

Packing and Protecting Your Furniture

Getting your furniture to its new home safely is key for a smooth move. You need the right packing supplies and to wrap your items carefully.

Gathering Supplies

First, gather important packing supplies like strong boxes, tape, bubble wrap, and protective covers. Don’t forget furniture blankets, sofa and mattress covers, and resealable bags for extra protection.

Disassembling and Wrapping Items

Try to disassemble furniture to make moving easier and protect each piece. Wrap fragile things like glass tabletops and antiques with bubble wrap. Use protective covers to keep furniture safe from scratches and damage.

For wood furniture, use wood treatment products and other wood treatment products to keep the finish and avoid damage. Make sure to label all parts and keep them together for easy reassembly.

Preparing your furniture well for the move ensures a smooth and damage-free move to your new home.

furniture removal services

Hiring Professional Furniture Removal

For a stress-free furniture removal, think about hiring pros. They have the right tools and people to move your furniture safely. They know how to handle the tricky parts of moving furniture.

Look for a company with a good name and happy customers. They offer many services, like packing and unpacking. Their trained team will protect your furniture and your home.

Hiring pros can save you money and time. They know how to move things fast and right. Plus, they care for the planet by recycling and donating furniture.

Talk to the furniture removal company about what you need. Ask about their ways and rules. Make sure you get a full quote for a smooth move.

Moving Day

On moving day, it’s key to talk well and watch over things. Make sure the movers know how to handle your furniture, like if it’s fragile or valuable. Watch as they load and unload to make sure everything is placed right. Check that all your stuff is there after the move.

Communicating with Movers

Talking clearly with the movers makes moving smooth. Tell them about any special needs for your furniture, like:

  • Handling of fragile or valuable items
  • Placement of furniture in the new home
  • Disassembly and reassembly of larger pieces

Give the movers a full list of what you have to move. This helps them not to miss anything during loading and unloading.

Supervising Loading and Unloading

Watch closely as your furniture is loaded and unloaded. Make sure the movers handle it carefully. Check the loading and unloading process closely. Make sure everything is safely moved and in its right spot in your new home.

Talking well with the movers and watching the loading and unloading helps make moving day easy. It also ensures your furniture gets to your new place safely.

Cost-Effective Furniture Removal Options

Furniture removal can be expensive, but you have options. Look for affordable furniture removal that doesn’t cut corners on quality. Get multiple quotes to compare prices and find the best deal. This way, you can have a good service without spending too much.

For instance, Fast Act Junk Removal in Mishawaka, IN, is a top-rated service with over 300 five-star reviews. They give instant quotes by just texting a photo of your furniture. They promise to stick to the price after checking in person or with your photo.

Their team works fast to remove different furniture like mattresses, sofas, chairs, and couches at affordable rates.

Fast Act Junk Removal also helps realtors, property managers, and contractors. They offer cost-effective furniture and junk removal for cleanouts, turnovers, and construction projects. Their Load & Go Service for garage cleanouts is a cheap way to remove junk instead of renting a dumpster.

By choosing cost-effective furniture removal like Fast Act Junk Removal, moving can be easy and won’t empty your wallet. Always get multiple quotes and talk about prices to get the best deal on quality service and affordability.

Office Furniture Removal

Office furniture removal can seem hard. But, with the right team, it can be easy and stress-free. Desks and filing cabinets are big and need special care to move safely.

Choosing the right removalists is key to keep your business running smoothly. They know how to move big, heavy furniture without damage. This means less trouble for you.

Experts with lots of experience and special vehicles make moving office furniture easy and quick. This means less trouble for your business. You can relax, knowing your stuff is in good hands.

Office furniture removal can also save you money. Prices are often 30% lower than other companies. Plus, they recycle old furniture in an eco-friendly way.

Need to move your whole office or just a few pieces? The right service makes it easy and stress-free. Your business will move smoothly.

Post-Move Furniture Care

After moving, it’s key to take good care of your furniture. Inspecting, arranging, and maintaining your items helps them stay in great shape. This way, they’ll keep serving you well in your new spot.

First, inspect each piece for damage from the move. Check for scratches, dents, or loose parts. Fixing these problems quickly keeps your furniture in top condition.

  1. Arrange your furniture well in your new space, thinking about how it looks and moves.
  2. Be kind to the planet by recycling or reusing packing stuff when you can.
  3. Once everything is set, clean and maintain your furniture. Dust off any dirt, and use the right polishes or treatments on wood to keep it shining.

Good care after moving makes your furniture look great and last longer. By doing these easy steps, your furniture will stay a key part of your home or office for many years.

Tips for a Smooth Furniture Removal Experience

Planning early makes furniture removal stress-free. Start getting ready a few weeks before your move. This lets you get supplies, take apart big items, and find reliable help.

When picking a furniture removal service, choose quality over price. Cost matters, but a good service means your furniture is moved safely. Look at online reviews and ask for references to find the best one.

Keep everything organized during the move. Make a detailed list of your furniture and keep track of it. Use furniture sliders or gliders for heavy items. Wrap fragile pieces in bubble wrap or pads to protect them.

  • Take apart big furniture before moving to make it easier to carry and less likely to get damaged.
  • Try cost-saving delivery options like Porta for shared costs and ease.
  • Pick removal services that recycle and donate unwanted items.

Remember to take care of yourself during this stressful time. Drink water, eat well, and rest when you need to. Taking care of yourself helps you handle furniture removal better.

Finding the Right Removal Pros for Your Furniture

Are you worried about the furniture removal costs and the hassle of dealing with unwanted junk? Don’t fret – FindPros can simplify the process and connect you with the best local professionals for the job.

By answering a few quick questions about your furniture removal needs, home project, and preferences, FindPros will match you with top-rated local pros who can handle everything from old furniture removal to responsible disposal of hazardous waste. No more guessing about pricing or struggling to find the right fit – our platform lets you compare quotes from multiple providers and choose the one that’s the best match.

Whether you need to haul away a few office chairs or clear out an entire house full of household furnishings, treated wood furniture, or appliances, the FindPros network of college hunks hauling junk and other trusted experts can make the process quick, easy, and stress-free. Get started today and let us handle the heavy lifting while you focus on what’s next.

Conclusion

Getting furniture moved without stress is possible with the right steps and prep. This guide has given you tips and strategies to make moving furniture easy. Use professional services when you can, and ask friends and family for help too.

Plan well and pay attention to details for a smooth move. With the right mindset, you can move furniture easily and settle into your new place without trouble.

Understanding the moving process and picking the right service is key to a stress-free move. Use the tips from this guide to make your move efficient and less disruptive. This guide has given you the knowledge to move furniture well, whether it’s for your home or office.

A smooth move is not just about the work. It’s also about staying positive and enjoying the change. Use the advice in this guide to make your move professional, stress-free, and rewarding.

Frequently Asked Questions (Furniture Removal)

Using a junk removal service can make furniture removal stress-free. They can handle the heavy lifting, transportation, and responsible disposal or donation of your unwanted furniture. This saves you time and effort compared to trying to do it yourself.
Look for junk removal services that focus on sustainability and give back to the community. They should have partnerships with charities and recycling facilities to ensure gently used furniture is donated, and hazardous materials are properly disposed of.
The costs can vary based on the size and quantity of furniture, the distance it needs to be transported, and whether any specialty handling is required for valuable or fragile items. Be wary of hidden fees and ask the service provider for a detailed, no-obligation estimate upfront.
Before the scheduled pickup, disassemble any large furniture like bed frames or dining tables to make the removal process easier. Clear a path from the entry to the items being removed to allow the professional team easy access. This will help the junk removal service complete the job quickly and efficiently.
Reputable junk removal services will make every effort to responsibly dispose of or donate the furniture collected. This includes partnering with local charities, like Habitat for Humanity, to give gently used furniture a second life. Items that cannot be donated are taken to recycling facilities to prevent them from ending up in landfills.

Furniture Painters

Gas Fireplace Installers Near You

Can’t find what you are looking for?

How It Works

  • Answer a few questions about your home project.
  • Within seconds, get matched with top-rated local pros.
  • Compare quotes and choose the best pro for the job.

Furniture Painters In Your Area

Hiring Furniture Painters: A Comprehensive Guide

Meta Description: Discover expert furniture painters who can transform your pieces with custom finishes. Learn about techniques, costs, and how to choose the right professionals for your project.

Making your furniture look new can change your home’s look. But finding the right furniture painters can be hard. This guide will give you key tips and strategies to find skilled painters. They can give your furniture a unique look that matches your style.

Furniture Painters

Ever wondered what makes a furniture painter professional? It’s their skill, eye for detail, and great results. We’ll cover what to look for in furniture painters. This way, you can pick the right one for your project and budget.

Key Takeaways

  • 01

    Understand the value of hiring professional furniture painters for custom finishes and transformations

  • 02

    Explore the diverse techniques and specialty finishes that furniture painters can offer

  • 03

    Learn how to assess the experience and skills of prospective furniture painters

  • 04

    Discover the factors that influence the cost of furniture painting services

  • 05

    Gain insights into the differences between refinishing, restoring, and refurbishing furniture

Introduction: The Value of Hiring Professional Furniture Painters

Hiring professional furniture painters can change the game. They know how to make old furniture look new again. They turn vintage pieces into unique treasures that tell stories.

They refinish and add custom finishes to furniture. This makes ordinary items into special masterpieces.

Preserving History Through Refinishing Furniture

Furniture is more than just something to sit on. It shows us the past and the skills of old times. Professional painters know how important it is to keep this history alive.

They fix and paint old furniture carefully. They make sure it keeps its beauty and adds modern touches.

The Heritage Craft of Furniture Painting

Furniture painting is an old craft that has been passed down for years. Professional painters keep this tradition alive. They use old techniques and new ideas to make furniture look new again.

They know how to distress and finish furniture in special ways. This makes old furniture both useful and a piece of art.

furniture painting

Understanding the Role of Furniture Painters

Furniture painters are key in making wood furniture look new. They do more than just paint. They have special skills for making custom finishes. This brings old or worn furniture back to life.

They start by checking the wood’s condition. Then, they decide how to make it look the way they want. This might mean sanding, staining, or adding special effects for a unique look. Knowing about different woods and finishes is important for a great job.

  • Furniture painters know a lot about wood types. This helps them pick the right paint or stain.
  • They can get the surface ready for paint or finish. This makes sure the finish lasts a long time.
  • They can make custom finishes in many colors. This matches what the client likes and the room’s style.
  • They can fix and restore broken or old furniture. This makes it look like new again.

Furniture painters do more than just paint. They turn ordinary furniture into something special. They keep the history and skill of wood furniture alive. They also add personal style to homes and lives.

furniture painters

Factors to Consider When Hiring Furniture Painters

When looking for furniture painters, think about a few key things. The painter’s experience and skills are very important for a great finish. Also, knowing what they charge helps you stay on budget.

Experience and Skills

Check how much experience the painter has. Find ones who have done many furniture projects well. They should know how to work with different materials and finishes.

Ask about their training and what projects they’ve done before. This will help you know if they’re right for your job.

Pricing and Rates

Look into the prices of furniture painters in your area. The cost can change based on the project size, materials, and the painter’s skills. Get quotes from several painters to find a good deal.

Watch out for prices that seem too low. They might mean the painter is not very skilled or is cutting corners.

Thinking about these things helps you pick a furniture painter who gives great results. They should match your project needs and budget.

Furniture Painters: The Importance of Interviewing Candidates

Finding the right furniture painter is key to a successful project. It’s vital to interview them well to check their skills, work habits, and how they treat customers. This way, you can pick the best painter for your job.

Key Questions to Ask Prospective Furniture Painters

  1. Can you show me your past work and give me references?
  2. What experience do you have with different furniture types like wood, metal, or antiques?
  3. How do you match colors and finish to get the look I want?
  4. What steps do you take to prepare furniture, and what paints or stains do you use?
  5. How do you safely handle and dispose of dangerous materials during the project?
  6. What’s your timeline for finishing the job, and how will we stay in touch?
  7. Can you give me a detailed cost breakdown, including materials, labor, and any extra charges?

These questions help you understand the painter’s skills, work style, and quality focus. This info lets you choose the right person for your project.

Refinish vs. Restore vs. Refurbish: Understanding the Terminology

When you want to change furniture, you might hear “refinish,” “restore,” and “refurbish” used a lot. But they mean different things. Knowing what each means can help you pick the right way to fix your furniture.

Furniture restoration is about making it look nice again. It means fixing small cosmetic issues and cleaning it lightly. This keeps the furniture’s original value and structure safe.

Refinishing means taking off the old finish and putting a new one on. It’s a big change, not just a quick fix. Refurbishing is even wider, covering things like new floors, painting, and fixing broken parts.

To restore furniture, you might use sandpaper, stain, glue, safety gear, and finishing stuff. Refinishing is about putting new finishes on things to make them look new again. Refurbishing can be anything from changing hardware to redoing the whole look of a piece.

  • Restoration keeps the furniture’s original look and value.
  • Refinishing takes off the old finish and puts a new one on for a fresh look.
  • Refurbishing means doing many things, from small fixes to big design changes.

It’s important to know these differences when you’re thinking about fixing your furniture. Whether you decide to restore, refinish, or refurbish, it can make your furniture look new and add character to your home.

The Comprehensive Guide to Refinishing Wood Furniture

Refinishing wood furniture can make old pieces look new again. It’s a great way to update an antique dresser or fix a family treasure. This guide will help you with the tools, materials, and steps needed for a successful project.

Tools and Materials Needed

Having the right tools and materials is key for refinishing furniture. You’ll need:

  • Safety gear: eye goggles, chemical-resistant gloves, and a mask or respirator
  • Sandpaper in various grits (80, 120, 180, and 220 grit)
  • Paint or finish stripper
  • Wood putty or filler
  • Screwdrivers and other basic hand tools
  • High-quality paintbrushes or foam applicators
  • Stain, paint, or polyurethane finish

Preparing the Workspace for Furniture Refinishing

Before starting, set up a well-ventilated workspace. Lay down a tarp or drop cloth to protect the floor. Make sure the area is well-lit and clear of clutter.

Look over the furniture to see what it needs. You might need to remove old finish, fix damage, or sand it smooth. Proper preparation leads to a professional finish.

With the right tools and a ready workspace, you’re set to refresh your wood furniture. Enjoy the process and be proud of your DIY work!

Furniture Painters: A Cost-Effective Solution for Your Home

Hiring professional furniture painters can change your home’s look and value. These experts have the skills and techniques to make your furniture look new. They are great for homeowners who want to save money.

Refinishing old furniture keeps its sentimental value and makes it last longer. It can look better than new furniture. By using skilled painters, you can fix damaged furniture and add value to your home without spending a lot.

Refinishing furniture is good for the environment too. It means you don’t need to make new furniture, saving resources and reducing waste. This is a smart choice for those who care about the planet.

Hiring furniture painters is also a smart choice for your wallet. They have the right tools and skills to do a great job quickly. This saves you time and effort, giving you beautiful furniture without the hassle.

If you want to update your home or fix a special piece, furniture painters are a great option. They offer great value and can make your furniture look amazing. You can improve your home’s look without spending too much.

Find the Perfect Furniture Painter with FindPros

Looking to transform your furniture with a custom paint job or unique finish? FindPros can help you find the best local furniture painting professionals for the job. With decades of experience, our network of certified painters can create the perfect texture, color, and finish to breathe new life into your tables, chairs, and other furniture pieces.

Simply answer a few questions about your home project, and within seconds, we’ll match you with top-rated local pros. Compare quotes, read reviews, and choose the painter you feel most comfortable with – all without any upfront deposit. Whether you’re refreshing a room or repairing a cherished family heirloom, FindPros makes it easy to find the right furniture painter to bring your vision to life. Get started today and let the world of possibilities open up for your furniture.

Conclusion: The Benefits of Hiring Professional Furniture Painters

Professional furniture painters bring special skills to the table. They know how to keep your furniture’s history alive. Their expertise helps transform and refresh your furniture beautifully.

These pros also save you money. They buy materials in bulk and give you clear price quotes. This means you get great results without spending too much. Plus, they work fast, so you can move on to other projects.

Choosing professional furniture painters gives you more than just a new look for your furniture. You get expert advice on colors and materials. You also feel secure knowing the work is insured. These pros help your furniture look its best and make your home better for years to come.

Frequently Asked Questions (Furniture Painters)

Hiring professional furniture painters can help you transform your furniture with custom finishes and unique looks. They have the skills, experience, and tools to refinish, restore, or refurbish your furniture and make it look brand new.
Professional furniture painters can create custom paint jobs, textures, and finishes to match your style and the decor of your home. They can use spray paint, brushes, and various techniques to achieve the perfect look for your tables, chairs, and other furniture.
When selecting a furniture painting service, look for experienced professionals who offer free quotes, clear pricing, and a wide range of supplies and patterns to choose from. Check their website, read reviews, and ask about their turnaround time, pickup/delivery options, and any deposits required.
Experienced furniture painters have the skills to repair and restore your cherished, vintage furniture. They can sand, stain, and refinish your pieces to preserve their history and character, while also updating the look to fit your modern decor.
The process typically starts with you contacting the furniture painting service, either by phone or through their website, to get an estimate. They’ll discuss your project, color preferences, and any repairs needed. Once you approve the quote, you can arrange to drop off or have your furniture picked up from your home or a designated workshop. The painters will then complete the work and deliver the refreshed furniture back to you.