Furniture Builders

Furniture Builders Near You

Can’t find what you are looking for?

How It Works

  • Answer a few questions about your home project.
  • Within seconds, get matched with top-rated local pros.
  • Compare quotes and choose the best pro for the job.

Furniture Builders In Your Area

Furniture Builders: Your Guide to Personalized Home Decor

Meta Description: Discover expert furniture builders crafting custom, high-quality pieces for your home. From rustic to modern, explore personalized designs that reflect your unique style and needs.

Are you tired of furniture that doesn’t match your style? Custom-made furniture is the answer. Skilled furniture builders can make your design dreams come true. This guide will show you how to make your home unique with custom furniture.

Furniture Builders

Key Takeaways

  • 01

    Discover the definition and benefits of custom-made furniture

  • 02

    Understand the advantages of choosing custom over ready-made options

  • 03

    Learn the factors to consider before ordering custom furniture

  • 04

    Explore the design process and find the right furniture builder for your needs

  • 05

    Discover innovative ways to incorporate personalized elements into your home decor

Mass-produced furniture often doesn’t match your personal style. Furniture builders offer a unique alternative. They can make anything from rustic furniture to solid wood furniture or office furniture that fits your needs.

Join us on a journey to create your own handcrafted furniture. This will make your home truly yours. Let’s explore how to make your home decor personal and special.

What is Custom-Made Furniture?

Custom-made furniture lets you create a space that’s all your own. It’s not like the furniture you find in stores. Custom-made furniture is made just for you. You can pick the size, style, materials, and finishes you like.

Defining Custom-Made Furniture

Custom-made furniture means pieces made just for you. These items show off your unique style. They make your home special. You can get everything from custom cabinets to sofas made just for you.

Benefits of Custom-Made Furniture

Custom-made furniture has many perks, like:

  • Personalization: You get to design the piece to fit your space and style.
  • Unique design: Each piece is one-of-a-kind, making your home stand out.
  • Superior quality: It’s made with top-notch materials for lasting use.
  • Perfect fit: The size and shape are made just for you, fitting your home perfectly.
  • Flexible design: You can change the piece as your needs and tastes change.
custom-made furniture

Choosing custom-made furniture lets you make your dream space come true. It shows off your style and meets your needs perfectly.

Advantages of Custom-Made Furniture

Buying custom-made furniture has many benefits over ready-made options. It lets customers make a piece that fits their needs and style perfectly. This means the furniture not only works well but also shows off the owner’s unique taste.

Custom furniture also means you get a design that’s all your own. Working with furniture makers, you can make pieces that are truly special. These items are unique and show off your personal style.

Also, custom furniture is made with better materials and care. This means it lasts a long time and looks great. It’s a smart choice for your home because it’s built to last.

Plus, you can change many parts of the design. This lets you make furniture that really shows off your style. Choosing custom furniture means you get a piece that’s all about you.

custom furniture

In short, custom-made furniture offers many perks. These include personal touches, unique looks, quality, a perfect fit, and the chance to make something special. Working with skilled furniture makers helps bring your ideas to life. This makes your home look and feel better.

Factors to Consider Before Ordering

Designing custom furniture is exciting, but think about a few key things before you order. You need to plan well to make sure your furniture fits your space and meets your needs.

Budget and Timeline

Custom furniture is a big investment. So, set a realistic budget early on. Also, remember that custom orders take longer than buying off the shelf. Plan for extra time for design and making your furniture.

Designers suggest adding more time to what furniture makers say. This helps manage your expectations better.

Design Preferences and Space Measurements

Your design style and the space’s exact size are key. Make sure designers check all measurements twice to avoid mistakes. It’s also good to double-check the unit of measurement to avoid errors.

Good planning and talking with the furniture maker will help. This way, your custom piece will fit just right and look great in your space.

Don’t forget to think about the return policy, how much you can customize, and the quality of materials. By considering these things, you can choose custom furniture that will make your space better for a long time.

Designing Custom-Made Furniture

Making custom furniture is a team effort. It needs good teamwork between the customer and the designer. With an expert custom furniture designer, you can make your dream furniture. It will fit your space and meet your needs.

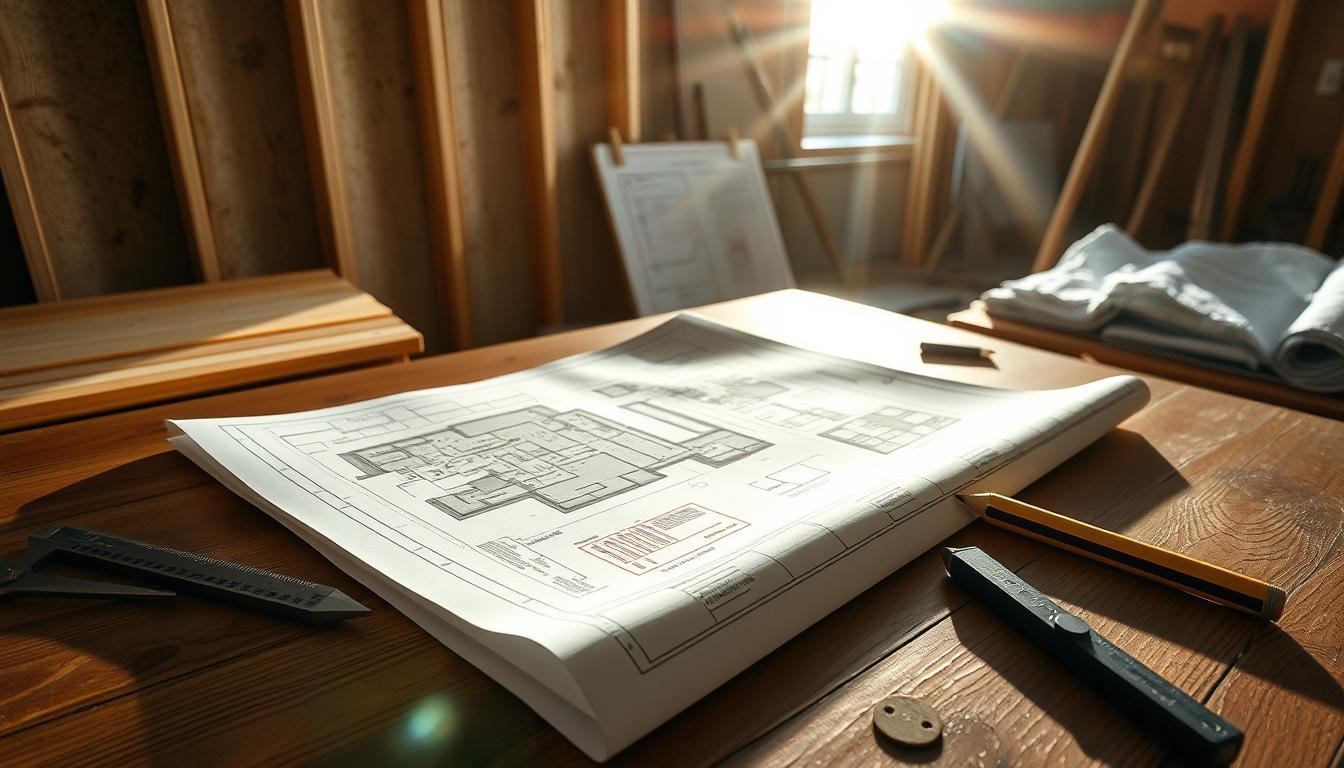
Steps Involved in Designing

The design process has several steps to make sure you love the final product:

  1. Identifying the specific requirements and preferences for the custom piece
  2. Determining the desired style, dimensions, and functionality
  3. Selecting the most appropriate custom furniture materials and finishes
  4. Creating a detailed sketch or custom furniture CAD design plan
  5. Finalizing the design and preparing for custom furniture manufacturing and construction

The designer uses their skills to help you. They offer great advice. This makes sure your furniture shows your style and meets your needs.

Working with the designer means your furniture will look great. It will also be perfect for you.

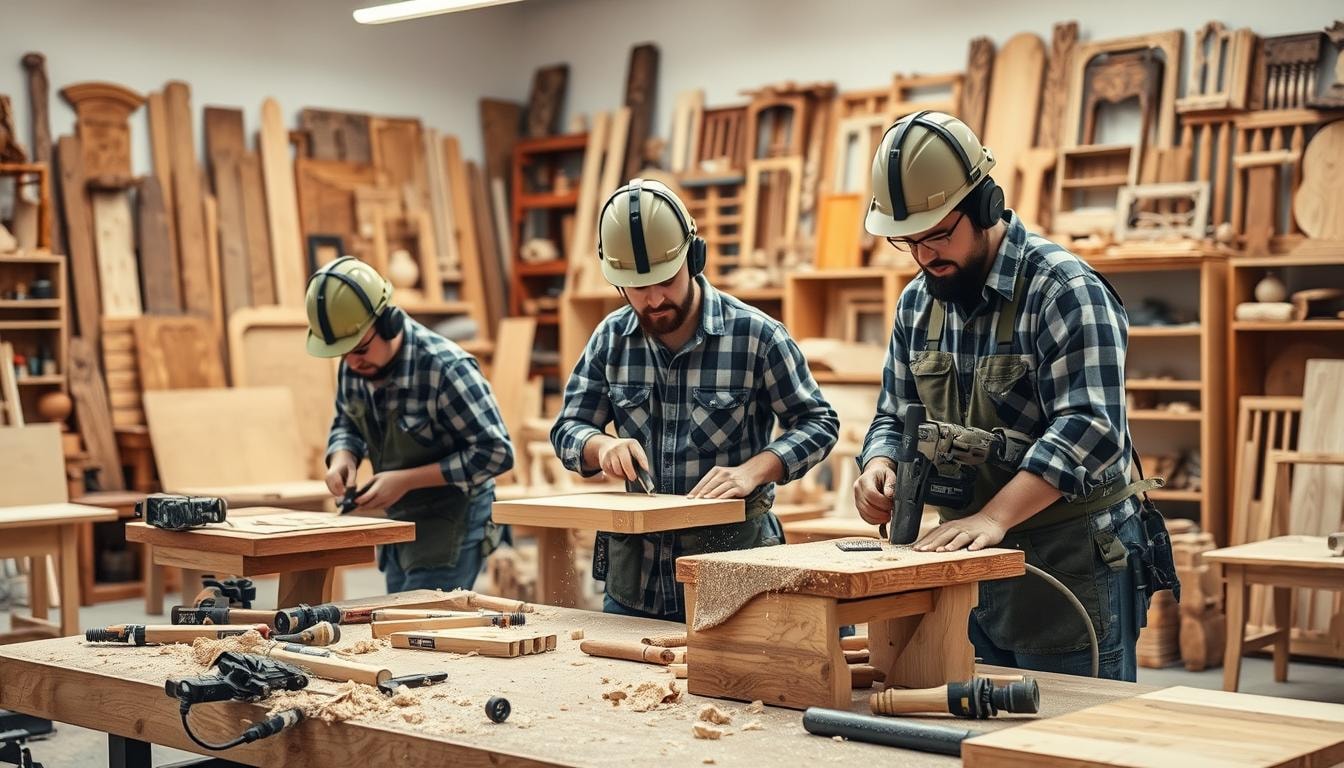
Finding a Furniture Builder

Looking for a custom furniture builder is important. You want someone with experience, expertise, and great design skills. Make sure they have a good track record of making quality, custom pieces for their clients.

Experience and Expertise

Choose a custom furniture maker with lots of experience. They should have happy customers to show for it. Look for someone who can give you references and reviews from past clients. This shows their focus on details, craftsmanship, and serving customers well.

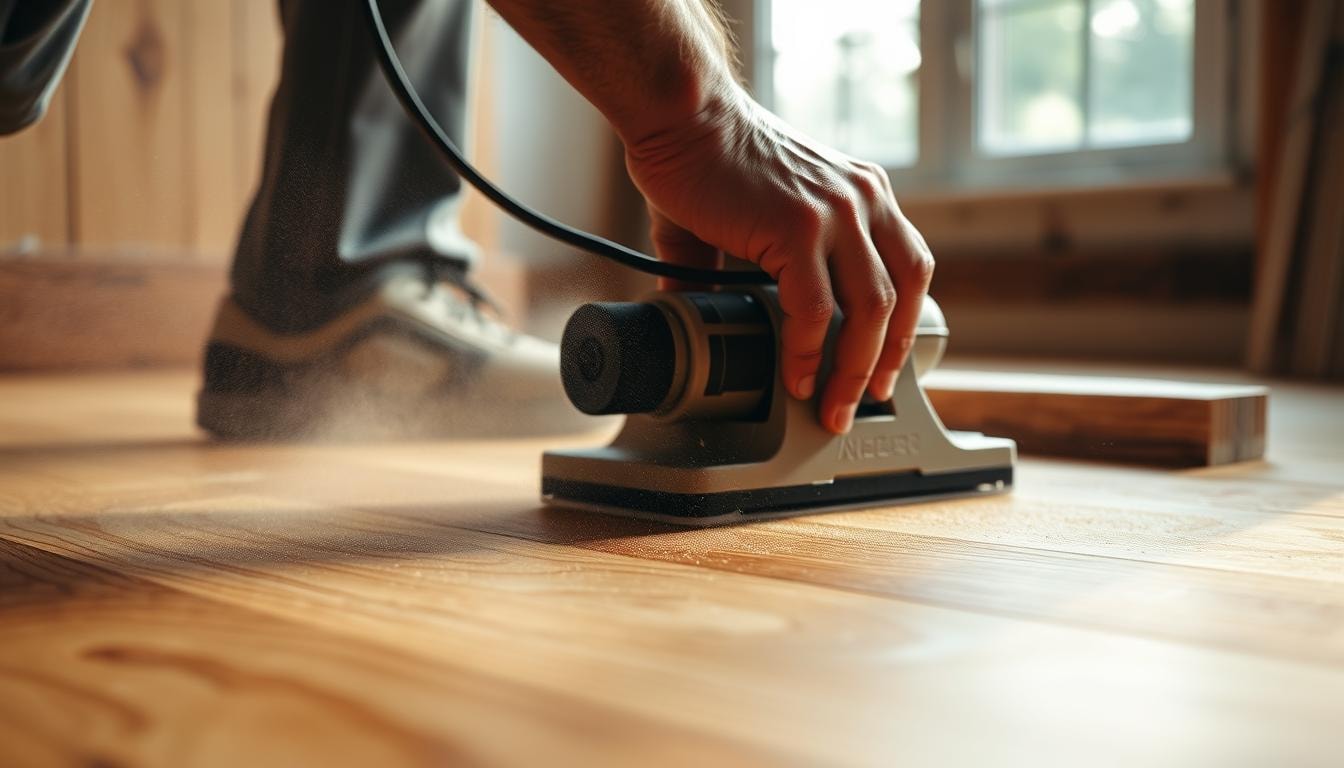
Design Capabilities and Materials

Experience is key, but so is design skill and quality materials. Check out their workshop and how they make their furniture. Make sure their design fits your style and the quality is high.

When you see a showroom with furniture that looks great and fits your needs, you’re on the right track. If they have happy customer references, you know you can trust them for your project.

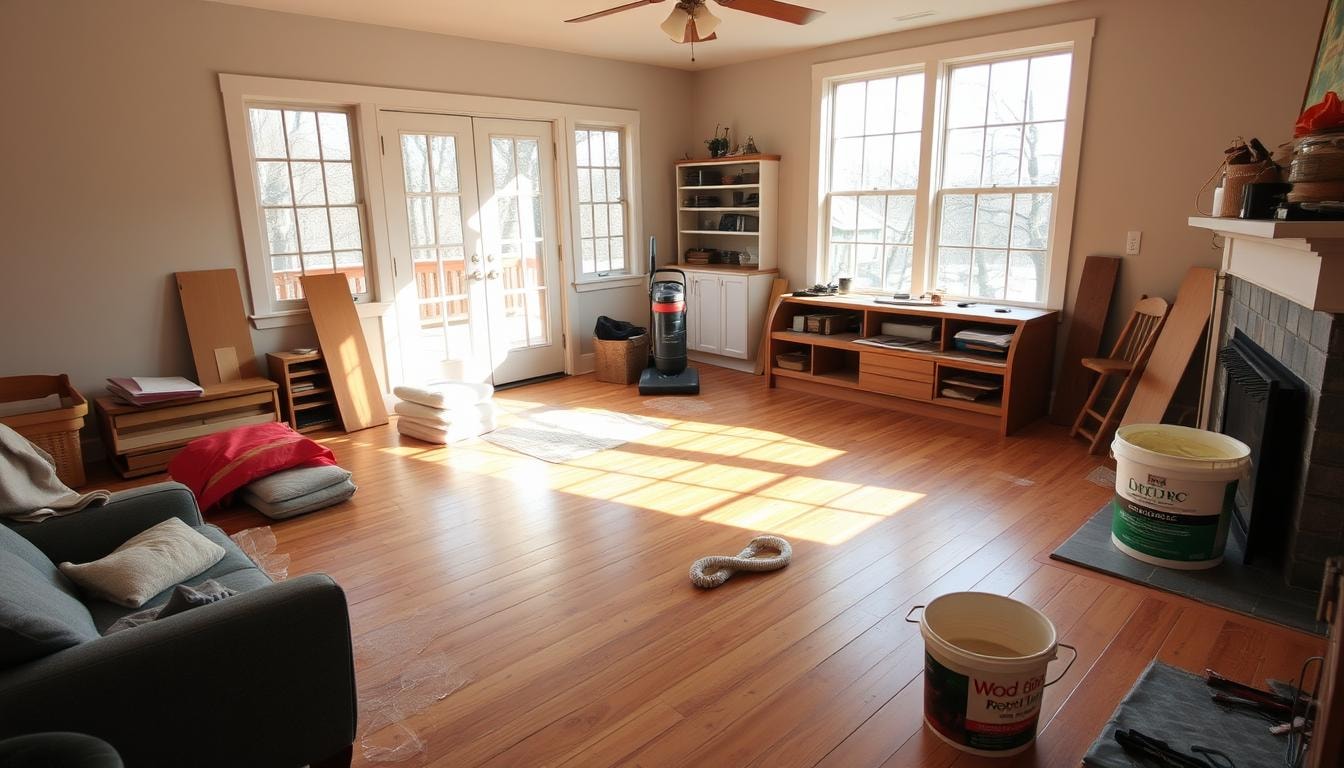
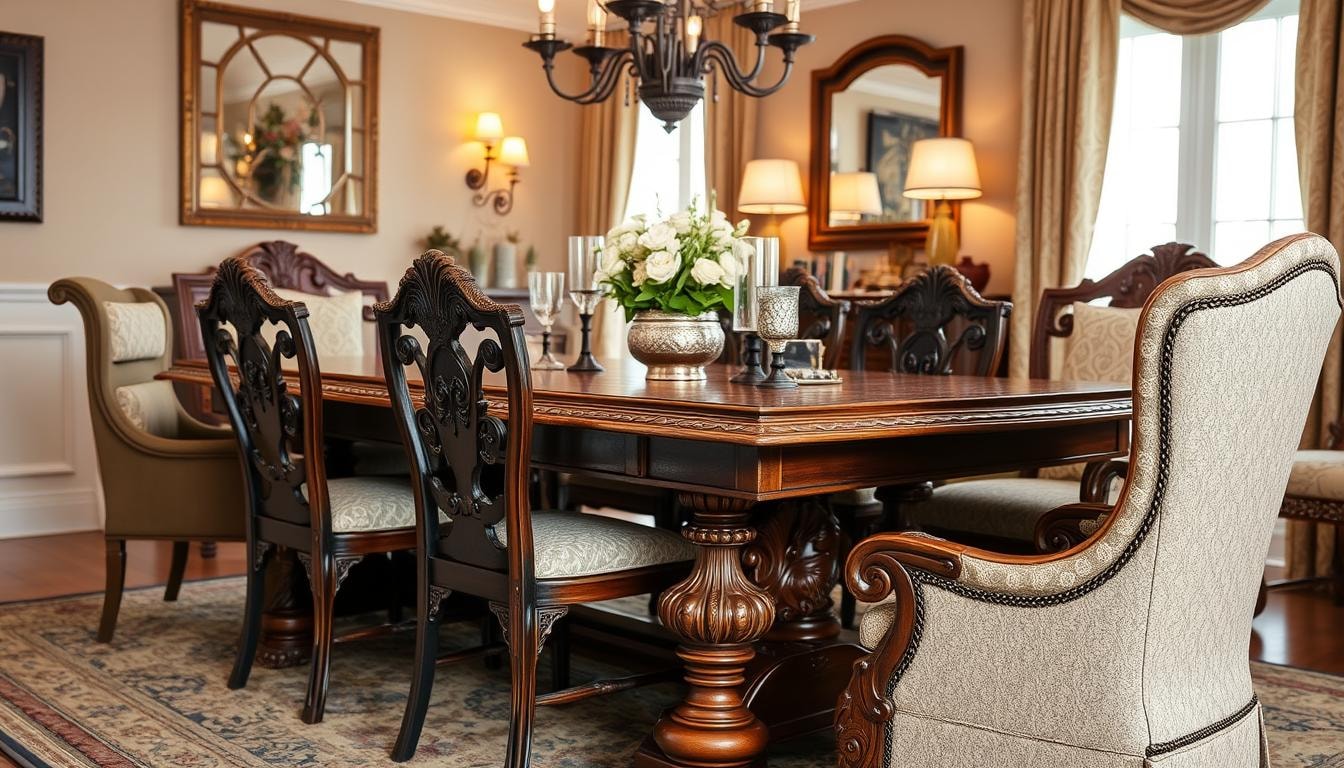
Creating Your Personal Style

Adding custom-made furniture to your home is a great way to make it truly yours. By working with skilled furniture makers, you can create pieces that fit your style. This could be rustic, modern, or something else.

You can pick the size, shape, materials, and finishes for each piece. This lets you add your special touch. Your home will look unique and show off your style. Custom furniture helps you avoid generic items and brings your story to life in your space.

Customizing your furniture lets you share your style and change your home into a reflection of you. With skilled furniture builders, you can make personalized home decor, custom furniture that shows your custom furniture style. You can also have unique furniture pieces that show off your custom furniture aesthetic, custom furniture personality, custom furniture expression, custom furniture individualism, and custom furniture customization.

Whether you like a minimalist, rustic, or eclectic look, custom furniture design has many options. You can make a personalized furniture collection that means a lot to you. Enjoy the freedom to customize and turn your home into a work of art with your custom furniture.

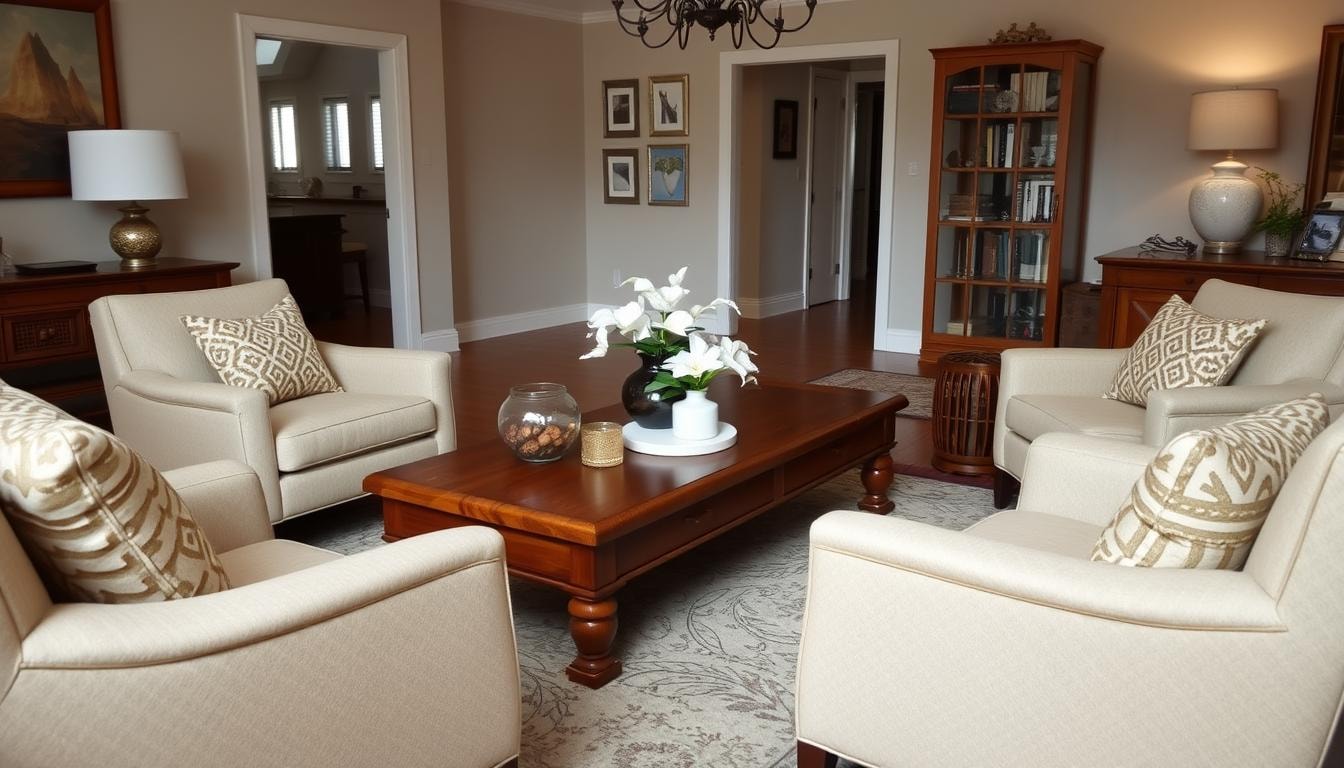
Incorporating Meaningful Items

Adding meaningful items to your living space makes it special and shows off your style. You can use family heirlooms, mementos, or artwork that means a lot to you.

Just putting a stack of favorite books on a custom-built shelving unit can make a room feel cozy. Adding meaningful elements to your custom furniture makes your home beautiful and full of stories.

  • Showcase family heirlooms on custom-made shelves or tables
  • Display cherished mementos and personal artwork on custom-designed walls
  • Incorporate a collection of meaningful items into the design of your custom furniture
  • Allow your unique personality and experiences to shine through in the custom furniture and home decor

Adding meaningful items to your home shows off your individual style and story. This way of custom furniture design and home decor turns a house into a cherished, sentimental space.

DIY Feature Walls

Turning a blank wall into a stunning focal point is a fun way to make your space your own. You can create a unique feature wall with your own custom wall decor. This might mean framing your personalized wall art or photos, adding handmade wall decor, or setting up custom wall shelves or custom wall hangings.

To make a beautiful DIY home decor feature wall, think about what you like and the space you have. You can mix different sizes, shapes, and styles of custom wall decor. This can lead to an eclectic wall display or a neat gallery wall look. Try making your own DIY wall art, like painting a mural or putting together a collage of custom photo wall pieces.

For a great feature wall design, pick items that mean something to you and fit your style. With a collection of handmade wall decor and custom art wall pieces, you can turn a bare wall into a standout piece. It will show off your creativity and uniqueness.

Colors That Inspire

Adding your favorite colors to your home can change the look and feel. It shows off your unique style and sets the mood. Whether you like bright colors or a calm color scheme, the right colors make your space inspiring.

Some colors can really affect how we feel and work. For example, blue colors help us think better and focus. Green colors make us feel balanced and calm, great for relaxing. Choosing colors that match your style makes your home a place that feeds your soul and sparks creativity.

Painting a wall in a bold color or picking colorful accessories can change your space. Whether you go for a unique color mix or a single color, using bright colors shows who you are. It makes your home a place that lifts your spirits every day.

Knowing how colors affect us can help you design a space that makes you feel good. Colors like soothing blues, calming greens, and bright yellows can make your home a happier place. They can bring joy and creativity into your life.

Bringing Nature Indoors

Bringing nature inside is key to making a peaceful and healthy home. By adding natural things to your decor, you can make a calm and refreshing space. This connects you to the outdoors. Using things like plants, wood furniture, and crystals can make you feel more calm and well.

Biophilic design is all about bringing nature into our homes. It’s become very popular because it shows how nature can make us healthier. Being around natural things, light, and views can lower stress and make us happier and more productive.

To follow biophilic design, try these ideas:

  • Add indoor plants and indoor greenery to clean the air and make your space lively.
  • Choose natural materials like wood furniture, live edge furniture, and crystals for their feel and look.
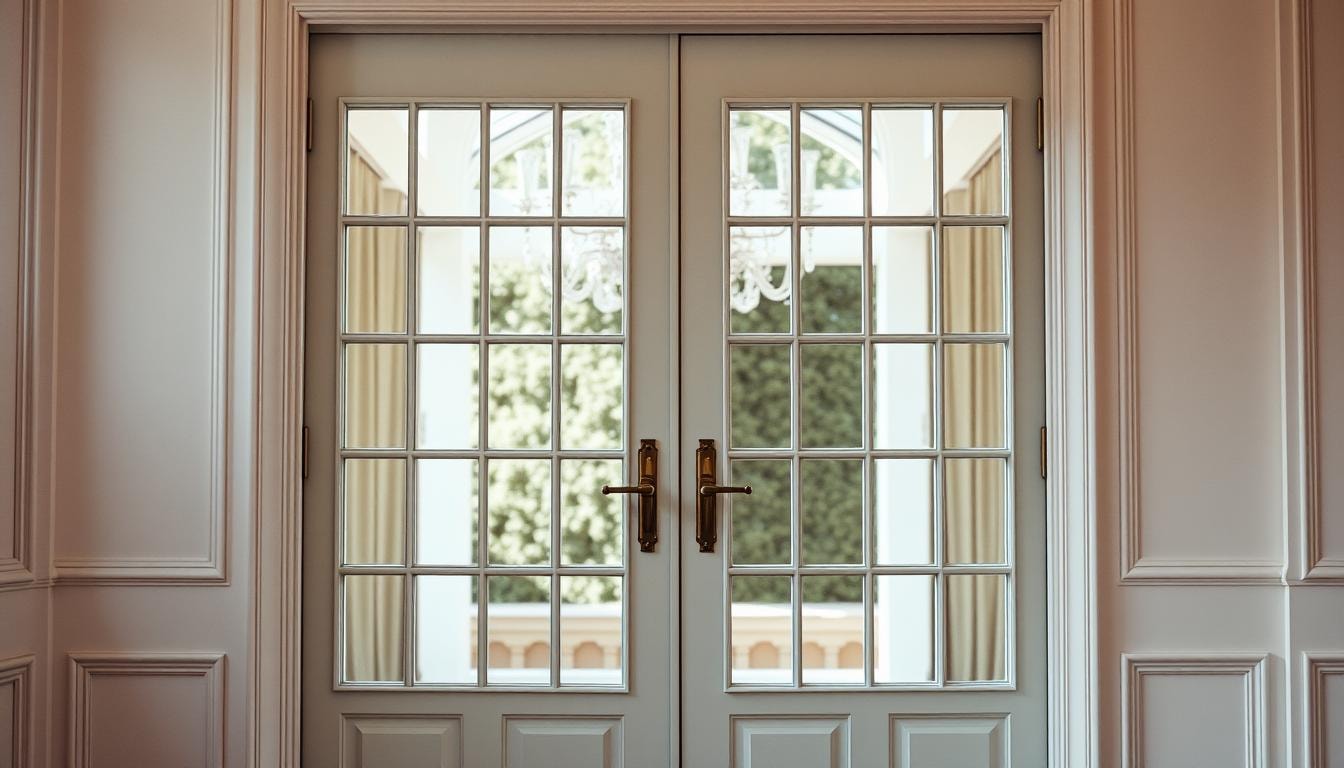
  • Use natural light by having big windows, skylights, and glass doors.
  • Mix indoor-outdoor living by making your home and yard feel like one.

Adding natural elements in home design makes your decor more organic. This can lead to a space that’s relaxing, inspiring, and good for your well-being. Let biophilic design improve your living space with nature’s healing touch.

Find the Perfect Pro for Your Custom Furniture Needs

Are you excited to create custom, high-end furniture for your home, but unsure where to start? Look no further than FindPros, your trusted resource for connecting with top-rated local furniture manufacturers and craftspeople.

Simply answer a few questions about your project, whether it’s a unique live edge piece, small accent furniture, or a complete home furnishings overhaul. Within seconds, FindPros will match you with skilled pros who can bring your vision to life. Compare detailed quotes, read verified reviews, and choose the perfect fit for your budget and style.

Conclusion

Buying custom furniture is a great way to make your home unique. It shows off your personal style. You can work with skilled furniture makers to create pieces just for you.

They will listen to what you want and make sure the furniture fits your space perfectly. You get to pick the materials and finishes. This means your furniture will look exactly how you want it to.

Adding special items, wall decor, and natural elements can make your home even more unique. Whether you want a standout piece or a complete look, custom furniture can make it happen. It lets you turn your house into a place that reflects your style and lifts your spirits every day.

The furniture industry is facing big challenges like being more sustainable and dealing with supply chain issues. But custom furniture makers are up for the task. They use new design tools, precise making methods, and work closely with clients. This is changing how we see and enjoy our homes.

Frequently Asked Questions (Furniture Builders)

Custom furniture builders can create high-quality, personalized pieces that perfectly fit your space and style. They offer the ability to customize materials, sizes, and designs to your exact preferences, resulting in unique furniture that reflects your personality.
Look for custom furniture builders with extensive experience, positive client reviews, and a strong portfolio showcasing their craftsmanship. Consider visiting their workshop or showroom to see the quality of their work firsthand. A reputable builder will be transparent about their process and timeline.
Custom furniture builders can create a wide range of pieces, from small accent furniture like chairs and benches to larger items like bookshelves, tables, and live edge furniture. They can also work with you to design and build custom storage solutions, home office furniture, and other specialized pieces.
Work with your furniture builder to incorporate personal touches, such as using wood from a family property or including special engravings. You can also request the builder to incorporate recycled or reclaimed materials into the design, making your furniture truly one-of-a-kind.
When ordering custom furniture, be sure to discuss your budget, timeline, and design preferences with the builder. Provide accurate measurements of the space the furniture will occupy, and be prepared to wait for the piece to be manufactured and shipped. A reliable builder will guide you through the process and ensure your custom furniture is worth the wait.

Furnace Repair

Furniture Builders Near You

Can’t find what you are looking for?

How It Works

  • Answer a few questions about your home project.
  • Within seconds, get matched with top-rated local pros.
  • Compare quotes and choose the best pro for the job.

Furnace Repair In Your Area

Choosing the Best Furnace Repair Company: Key Factors to Consider

Meta Description: Find reliable furnace repair services to keep your home warm. Learn key factors for choosing the best company and ensure efficient, cost-effective furnace maintenance.

Keeping your heating system in good shape is key for comfort and saving energy at home. If your furnace breaks down, picking the right repair company is crucial. They need to fix the problem fast and well. This article will cover what to look for in a good furnace repair service.

Furnace Repair

Key Takeaways

  • 01

    Make sure the repair company is licensed and certified. This shows they have the right skills and qualifications.

  • 02

    Check out online reviews and testimonials to see what others think of their work and customer service.

  • 03

    Look at how long the company has been in business. This shows they have the experience and knowledge needed for your furnace.

  • 04

    See how the company treats customers. They should be quick, clear, and helpful in their communication.

  • 05

    Compare prices from different companies to find a good mix of quality and cost.

Importance of Hiring a Furnace Repair Professional

When you need your heating fixed, it’s smart to call a pro. They know how to install, keep up, and fix your furnace right. This makes your furnace work better and last longer.

Ensure Proper Installation and Maintenance

HVAC pros keep up with new trends and rules. They know how to put in your furnace right. They make it work better and keep it safe from gas leaks or electrical malfunctions.

Benefit from Expertise and Knowledge

Trying to fix your furnace yourself can lead to big problems. Experts can find and fix issues fast. They know all about furnaces and have the right parts to keep it running well.

Choosing a HVAC contractor means your heating is in good hands. You’ll feel safe and save money on your heating bills.

Checking Licenses and Certifications

When picking a furnace repair company, check their licenses and certifications. Having the right licenses means they follow the law. Certifications show the techs are well-trained and skilled. Look for companies with the right licenses and certified techs, like NATE or ACCA certified ones. This ensures they follow industry standards and do quality work.

Verify Necessary Licenses

In Texas, HVAC contractors must have a license to work on HVAC systems. They must be 18 or older and work under a licensed contractor to get experience. The test to become a contractor is tough, so make sure the furnace repair company you pick has the right licenses.

Look for Reputable Certifications

  • HVAC technicians in Texas need an EPA 608 HVAC certification for refrigerant handling and AC work.
  • Texas HVAC contractors must take eight hours of continuing education, with 60 minutes of class, to keep their license.
  • Certifications like NATE or ACCA show the qualified technicians have special training and skills.
HVAC certifications

Checking the furnace repair company’s licenses and certifications makes sure they meet industry standards. It also means they have qualified technicians for quality service. This is key to picking the best furnace repair company for you.

Reading Reviews and Testimonials

Looking for a furnace repair company? Check out online reviews and customer testimonials. They give you key insights. By reading what others say, you learn about the company’s service quality and reliability.

Search for reviews in your area to see how customers feel. Look at both good and bad feedback. This helps spot common problems or issues.

Also, visit the company’s website for testimonials. These are stories from real customers. They help you choose the right furnace repair service.

Read Online Reviews

Check out reviews on Google, Yelp, or the company’s site. You’ll find info on service timeliness, technician professionalism, and work quality. More positive reviews mean a good reputation and happy customers.

Look for Testimonials on the Company’s Website

Good furnace repair companies share customer testimonials on their sites. These stories highlight their strengths, like quick response, technical skills, and customer care. Review these to understand their success and how they help clients like you.

Doing your homework on reviews and testimonials helps you pick a great furnace repair company. This way, you get top-notch service and a good experience.

Assessing Company Experience and Reputation

Choosing a furnace repair company means looking at their experience and reputation. A good HVAC company offers efficient and reliable services. They should have been in business for many years, showing they know how to make customers happy and understand heating and cooling systems well.

It’s important to check their reputation too. Look at their online reviews, business listings, and any awards they’ve won. A company with a strong reputation and good reviews is likely to fix your furnace well.

Also, think about how long the company has been around and the skills of their technicians. Experienced technicians can fix many furnace problems, from simple upkeep to big repairs. Companies that keep training their staff are likely to know the newest ways to fix furnaces.

Look for HVAC companies with certifications from groups like the North American Technician Excellence (NATE). This shows their technicians are committed to quality and know their stuff.

By looking at a company’s experience and reputation, you can choose a reliable and trustworthy one. This way, you’ll get the quality service you need to keep your home cozy.

Furnace Repair: Common Issues and Services

Furnaces can have many problems that need professional help. These include things like broken blower belts, old bearings, and faulty thermostats. Dirty air filters, blocked airflow, and even high carbon monoxide levels are also common issues.

Problems that Require a Professional

These furnace problems often need a skilled HVAC technician to fix them. For example, a broken thermostat or circuit board can cause the furnace to stop working. A cracked heat exchanger is very dangerous because it can leak carbon monoxide.

Preventive Maintenance and Tune-ups

  • Regular tune-ups and maintenance can make your heating system last longer and work better.
  • Changing air filters, lubricating the blower motor, and cleaning the burners helps a lot.
  • Fixing problems early and keeping up with maintenance saves you from expensive repairs later.

Being proactive with furnace care helps you dodge common problems. This keeps your home warm and cozy all winter.

Evaluating Customer Service and Communication

Choosing a furnace repair company means looking at their customer service and how they talk to you. A good HVAC contractor listens well, is quick to respond, and cares about your concerns. How they talk to you shows how much they value your satisfaction.

Here’s what to look for in a furnace repair company:

  • Responsiveness: They should answer quickly and set up service visits fast. Good communication helps fix furnace problems fast.
  • Professionalism: The team should be professional and treat you with respect. They should explain things clearly about fixing your furnace.
  • Clear Explanations: A good HVAC company will explain furnace issues and what to do next. They make sure you understand the problem and the fix.

Checking how a company talks to you can tell you a lot about their trustworthiness and skill. It helps you pick the best HVAC contractor for your furnace repair needs.

Comparing Pricing and Estimates

When you need furnace repair, it’s key to look at prices and get several quotes. The cost is important, but don’t just pick the cheapest option. Make sure you’re getting a good deal for the work you need.

Ask for written quotes from a few trusted furnace repair companies. Check each estimate to see what work is included and any extra costs.

But don’t just pick the lowest price. Think about the quality of work and how well the company treats customers. Choose a company that is clear about its prices and offers great service at a fair cost.

Factors to Consider When Comparing Estimates

  • Hourly labor rates and total labor costs
  • Cost of replacement parts and materials
  • Any additional fees, such as trip charges or disposal fees
  • Warranty coverage on parts and labor
  • Discounts or promotional offers

Looking at estimates from different companies helps you make a smart choice. You’ll find a balance between good service and cost. This way, you get the best deal for your furnace repair.

Emergency Furnace Repair Services

When your furnace breaks down in the cold, finding quick repair services is key. Look for a company that offers 24/7 HVAC help and can come fast.

If your furnace stops working, first make sure it’s safe. Turn off the gas and electricity if you can. While waiting for help, use portable heaters to stay warm.

A good emergency furnace repair team will come fast, figure out the problem, and fix it quickly. They should know how to fix many furnace issues, from simple thermostat problems to complex electrical or mechanical issues.

  • HVAC emergency repair services available 7 days a week, 365 days a year
  • Technicians restore gas heat or electric heat service promptly
  • Common HVAC emergencies include furnaces not producing heat, leaking refrigerant, electrical problems, and frozen coils

Choosing a reliable 24/7 HVAC services provider keeps your family safe and warm during furnace problems. Their quick help and skilled techs will fix your heating fast.

Furnace Replacement vs Repair

Choosing between furnace replacement and repairs is important for your home’s heating. Furnaces last about 16 to 20 years. If yours is getting old, it might be time for a new one.

Signs Your Furnace Needs Replacement

Here are signs your furnace might need replacing:

  • Frequent breakdowns and malfunctions
  • Steadily increasing energy bills due to reduced efficiency
  • Noticeable reduction in heating performance or uneven heating throughout your home
  • Furnace is over 15 years old and in need of costly repairs

Cost Considerations for Replacement

Replacing your furnace costs a lot, but it’s worth it. A new, energy-efficient furnace saves money on bills over time. Plus, it’s more reliable and needs less upkeep, saving you more money.

Think about rebates or tax credits for energy-efficient models when looking at costs. A professional HVAC contractor can guide you on what’s best for your budget and situation.

Finding the Right Furnace Repair Professional

Having problems with your furnace can be stressful, especially during cold winter months. It’s important to choose a reliable repair company. FindPros can help you find the best option.

By answering a few simple questions about your home and project needs, FindPros will quickly match you with highly-rated local furnace repair professionals. Contractors will then compete for your job by providing free quotes for the work. This allows you to easily compare furnace repair costs and choose the contractor that best fits your budget and needs.

Whether you need a replacement part for your furnace’s draft inducer motor or full repair on an older model, FindPros ensures you’ll get options from pros with experience on your specific type of heating system. Don’t waste time searching online directories or pages of ads. Let FindPros handle the work so you can stay warm while we find the best qualified professionals for the job.

Conclusion

Finding the right furnace repair company is key for your home’s comfort and safety. Look for licenses and certifications, read reviews, and check the company’s experience and reputation. Good customer service and fair prices are also important.

Regular preventive maintenance and quick fixes can make your furnace last longer. This saves you money on energy bills and avoids expensive repairs.

With a trusted furnace repair company, you’ll stay warm and cozy in the cold winter. Focus on home comfort and energy efficiency. Talk to licensed HVAC pros to know what to do with your furnace. Think about getting a new one when it’s needed.

Choosing top-notch furnace repair services and regular upkeep is smart. It leads to a dependable and efficient heating system. This keeps your home warm and comfy all year.

Frequently Asked Questions (Furnace Repair)

Many homeowners should have their furnace tuned up before each winter to ensure it is working properly. A yearly furnace tune-up can help catch small issues before they become bigger problems. During cold months, when the furnace is running frequently to keep your home warm, it’s best to have it inspected.
Common parts of the furnace that may need repair or replacement due to age include the blower fan, circuit boards, flame sensor, gas valve, and pilot light. Having your furnace technician inspect these parts during a yearly tune-up can detect issues with the parts so they can be fixed before becoming a bigger problem and interrupting your heating.
To help keep your furnace running smoothly through the cold months, homeowners should replace or clean the furnace’s filter monthly. A dirty filter can cause the blower fan to work harder and pull less heated air. Homeowners should also keep the area around the unit clear of dust and have an HVAC technician inspect it before each heating season for proper maintenance.
A limit switch or pressure switch are important safety features that act as the furnace’s “brain”. If the furnace or ANY of its parts get too hot, these switches sense it and tell the unit to shut down. This prevents overheating and potential fires. Having these switches checked during a regular tune-up helps ensure this important safety feature keeps working properly.
Furnace repair costs can vary depending on the model of furnace and the particular parts needing replacement. Older furnace models may have parts that are more difficult to find, increasing repair costs. The costs will also depend on the specific part needing replacement, for example a faulty flame sensor or broken gas valve. The repair company may also charge more for older unit types they service less frequently. Having regular maintenance can reduce long term repair costs.

Front Door Repair

Furniture Builders Near You

Can’t find what you are looking for?

How It Works

  • Answer a few questions about your home project.
  • Within seconds, get matched with top-rated local pros.
  • Compare quotes and choose the best pro for the job.

Front Door Repair In Your Area

Need a Front Door Repair? Here’s What to Expect

Meta Description: Discover expert tips for front door repair, from minor fixes to full replacements. Learn what to expect and how to enhance your home’s security and curb appeal.

Your front door is the first thing people see when they come to your home. It’s key for both keeping your home safe and making it look good. But what do you do when your front door starts to wear out? How can you fix or replace it easily and well?

This guide will show you why keeping your exterior doors in good shape is important. We’ll give you tips to fix your front door right.

Front Door Repair

Key Takeaways

  • 01

    Properly maintained front doors enhance a home’s curb appeal and property value.

  • 02

    Damaged or drafty doors can compromise energy efficiency and indoor comfort.

  • 03

    Prompt front door repair helps maintain home security and deter potential intruders.

  • 04

    Seeking professional assistance ensures high-quality door repair and installation services.

  • 05

    Understanding the various door materials and styles can help homeowners make informed decisions.

Importance of Exterior Doors

Exterior doors are key to a home’s look, safety, and saving energy. They welcome visitors first, making them vital for a home’s look. A nice exterior door can make a big difference, leaving a good impression on guests and buyers.

Curb Appeal

Exterior doors make a big impact on a home’s look. A bad door can make a house look worse. But a good door can make it look better right away.

Keeping doors in good shape can make a home look more welcoming. It also makes a strong first impression on visitors.

Protection from Intruders and Weather

Exterior doors keep out intruders and protect from the weather. They keep the inside safe and warm. Doors that work right keep the cold out and save on energy bills.

Maintaining Home Comfort

Doors that fit well and are kept up are key to a comfy home. Doors that don’t seal well let cold air in, making the house less comfy. Fixing door issues can make a home cozier and save on energy.

Exterior Doors

Types of Exterior Doors

Choosing the right exterior doors can make your home look better and work better. In the U.S., you can pick from many styles, like classic or modern. The material matters too, affecting upkeep and how well it saves energy.

Front Door Styles

Front doors are key to your home’s look. They set the style’s mood. You can choose from elegant French doors or rustic wooden ones to boost your home’s appeal. Modern doors with simple lines and less hardware are also popular for a sleek look.

Patio Doors

Patio doors connect your inside to outside living. Sliding glass and French-style doors let in lots of light and make getting outside easy. They come in different materials, each with its own pros for lasting long, saving energy, and being easy to care for.

Material Options

  • Wood doors are classic and welcoming. But, they need regular upkeep to stay looking good.
  • Steel doors are a good deal. They’re strong, secure, and easy to keep up with.
  • Fiberglass doors are great for lasting long, saving energy, and needing little care. They can look like wood too.

Choosing the right exterior doors changes your home’s look, security, and energy use. Knowing your options helps you pick what’s best for you.

front door styles

Energy Efficiency Considerations

Choosing the right exterior door is key to saving energy. Fiberglass doors are better at keeping heat in than wood doors. Doors with windows can lose a lot of heat, so picking the right material and windows is important.

Energy Performance Ratings

Doors have energy ratings based on how well they keep heat in or out. The SHGC measures how much solar heat a door lets in. In hot places, you want a low SHGC. In cold places, a higher SHGC is better.

The R-value shows how well a door insulates. Fiberglass doors usually have an R-value of 5 to 7. Steel or aluminum doors are around 5 to 6, and wood doors are 2 to 3.

Importance of Energy Efficiency

  • Choosing the right door can lower your bills and make your home more comfortable. It also helps the environment.
  • Air leaks from the door can lose up to 20 percent of your home’s heat, says the U.S. Department of Energy.
  • Energy Star® doors are 15% more efficient than others. This shows how good certified doors are.
  • Using caulking and foam insulation helps keep air out and in. This makes doors more energy efficient.
  • Weatherstripping and door sweeps stop air leaks. They help keep your home at a steady temperature.

Thinking about the energy efficiency of exterior doors helps homeowners make smart choices. These choices improve comfort, cut bills, and help the planet.

Replacing Door vs. Frame

When updating your home’s exterior doors, you can choose to replace just the door or the whole door frame. The choice depends on the door frame’s condition.

If the frame is in good shape, you can just replace the door slab. This saves money because it doesn’t need extra work or materials. Yet, it’s wise to hire professionals. They know how to make sure the new door fits right.

But, if the frame has big damage like deep scratches or rot, you should replace the whole door unit. This makes sure everything fits well and boosts security.

For patio doors, the same rules apply. If the frame is okay, you might just replace the door slab. But if you want a new look or better performance, go for a full door unit replacement.

Checking the door and frame closely is key to deciding between a simple door swap or a full replacement. With expert help, you can get doors that look great, are secure, and save energy for a long time.

Installation Process

Replacing an exterior door is a step-by-step process. It starts with proper preparation. Then, the old door system is removed. Finally, the new door and its trim are put in place.

  • Preparation: First, prepare the area. Measure the door frame to make sure the new door fits. Gather tools and materials like shims, foam, and caulk.
  • Removing Existing Door: Next, take out the old door. Remove the hinges, threshold, jambs, and hardware. Be careful not to damage the walls.
  • Installing New Door: Put in the new door after removing the old one. Level the slab and attach the hinges. Make sure it fits well and works smoothly.
  • Exterior Trim: Finally, add the exterior trim. This includes the threshold, jambs, and more. Pay attention to details for a good look and function.

This process might take a few days and needs some skill. Costs vary by the materials and needs. But, with careful planning and skill, your new door will look great and work well for years.

Find the Right Pro for Your Door Project

Deciding on front door repairs or replacement can involve many options to consider. Let FindPros simplify the process. By answering a few brief questions about your project needs, location and budget, FindPros will quickly match you with high-quality local door specialists. These pros will compete for your job by providing free quotes and proposals.

You can then easily compare estimated costs and professionals’ profiles to find the best fit for your home and budget. Choosing FindPros allows homeowners to make informed decisions with confidence. Contact approved door experts directly through our platform to discuss your project details and schedule any necessary repair or installation work.

Conclusion

Keeping the exterior doors of a home looking good and working right is key. Homeowners have many choices for fixing or replacing their front doors and other entryways. Knowing about energy efficiency, door types, and how to install them helps make smart choices. This can improve security, curb appeal, and comfort.

There are many ways to fix or replace exterior doors affordably. Talking to a trusted company ensures doors look good and keep out intruders and bad weather. They also save energy. With the right steps, homeowners can make their homes more welcoming, safe, and cozy.

Fixing small issues or replacing doors fully can boost a home’s value and happiness. Taking care of exterior doors brings many benefits. It makes the entryway look better and work better.

Frequently Asked Questions (Front Door Repair)

You should contact door repair services for professional help if you notice big cracks, tears or misalignment that you cannot fix yourself. A repair pro has the right tools and experience to properly assess and fix issues.
A steel patio door would be a good, durable choice to withstand direct sunlight and rain compared to wood. Steel doors last longer with less maintenance needed.
Inspect your front door for gaps around the edges where air could come in when it’s windy or cold. Large gaps mean it’s time to replace the worn door to save on energy bills.
Common repairs include tightening loose screws, adjusting the door if it’s off alignment, adding fresh paint to protect the material, and recaulking around the door frame if there are drafty gaps.
The door material, size and extra features can affect installation costs. A professional can look at your door and wall to discuss budget and options so you get the door best suited for your home. It’s important to talk with them.

French Door Installation

Furniture Builders Near You

Can’t find what you are looking for?

How It Works

  • Answer a few questions about your home project.
  • Within seconds, get matched with top-rated local pros.
  • Compare quotes and choose the best pro for the job.

French Door Installation In Your Area

French Door Installation: A Step-by-Step Guide

Meta Description: Discover the essential steps for French Door Installation: A Step-by-Step Guide. Learn how to enhance your home with elegance and natural light.

Have you thought about adding French doors to your home but didn’t know how? French doors can make your home look great and help you move easily between inside and outside. But, is it hard to put them in yourself? We’re here to guide you through the steps for a successful French door installation at home.

French Door Installation: A Step-by-Step Guide

Key Takeaways

  • 01

    French doors usually don’t need a middle support, making the doorway wider.

  • 02

    Think about the space around the doorway to make sure the French doors fit and work well.

  • 03

    Clear glass on French doors lets you see outside, but textured or frosted glass gives you privacy.

  • 04

    Use magnetic or retractable screen doors instead of regular ones to avoid problems with French doors.

  • 05

    If a standard kit won’t fit your doorway, you might need custom-made French doors.

Understanding French Doors

French doors are a timeless and elegant choice for both inside and outside your home. They have a unique style with two hinged doors in a double frame. The glass lets in lots of natural light, making rooms bright and airy.

Defining French Doors

French doors can be inside or outside your home, connecting indoor and outdoor areas smoothly. They are made from wood, fiberglass, and engineered composites. Each type has its own durability and upkeep needs.

Benefits of French Doors

  • They make your home look classic and sophisticated.
  • They help save energy by having many glass panes for insulation.
  • They let in lots of natural light, making rooms bright and open.
  • They make moving between indoor and outdoor areas smooth.
french doors

Looking to update your home or make your outdoor area more welcoming? French doors are a great pick. They mix style, function, and save energy.

Preparation and Planning

Before you start, make sure to measure the space where the French doors will go. Use a tape measure to find the doorway’s height and width. Don’t forget to remove any door trim for accurate measurements. This will help you pick the right French door kit.

Measuring the Rough Opening

Pay close attention to the door frame size when measuring. The frame must fit well in the opening for a secure installation. Think about the room’s size and the look you want. Choose a French door kit that matches these needs.

Choosing the Right French Door

Think about the size of the opening, the door type, and the materials when picking French doors. Make sure the door kit fits the space and meets your style and needs. Look at all the options carefully to choose the best one for your project.

measuring rough opening

Necessary Tools and Materials

Getting the right tools for french door installation and materials for french door installation is key for a good project. You’ll need power tools and special hardware. This makes the installation easier and looks professional.

For installing French doors, you’ll need a power drill, saws (hand saw, jigsaw, or circular saw), screwdrivers, hammers, mallets, a pry bar, chisel, tape measure, carpenter’s square, and a bubble level. Don’t forget safety glasses to keep your eyes safe.

You’ll also need a French door kit with the door frame, knobs, and locks. It’s important to have insulation materials, sealing tape, and construction foam. These help make the door frame energy-efficient and airtight.

  • Power drill
  • Saws (hand saw, jigsaw, or circular saw)
  • Screwdrivers
  • Hammers and mallets
  • Pry bar
  • Chisel
  • Tape measure
  • Carpenter’s square
  • Bubble level
  • Safety glasses
  • French door kit (frame, knobs, locks)
  • Insulation materials
  • Sealing tape
  • Construction foam

With these tools for french door installation and materials for french door installation, you’re ready to start. You’ll be able to install French doors like a pro.

Removing Existing Doors and Trim

If you’re putting in French doors, start by taking out the old door and trim. Use a pry bar to remove the door trim without harming the wall. After removing the trim, you can take out the old door.

Be careful with the hardware and hinges when removing the door. Remove the hinges and save any screws or hardware for later. If the door came with a frame, you’ll need to take that down too. This makes room for your new French doors.

  1. Use a pry bar to carefully remove the door trim, taking care not to damage the surrounding wall.
  2. Disconnect the hinges and set aside any screws or hardware for potential future use.
  3. If the existing door is a pre-hung unit, remove the entire frame, including the jamb and threshold.

Getting rid of the old doors and trim is key to installing French doors. It helps you prepare for a smooth setup of your new French doors.

Installing the Sill Pan

Installing a sill pan is key when you put in exterior French doors. It acts as a water barrier to keep your home safe from water damage. Here’s how to install the sill pan for your French door project.

  1. Measure the Width: First, measure your door frame’s width. This tells you the sill pan size you need.
  2. Cut the Sill Pan: Use a hacksaw to cut the sill pan to fit your door frame’s width. This makes sure it fits perfectly.
  3. Apply Waterproof Caulk: Put waterproof caulk along the door frame’s base. This seals it tightly against water.
  4. Position the Sill Pan: Place the sill pan in its spot, making sure it lines up with the door frame. Press it down to lock it in place.

Installing the sill pan right is key to a successful French door setup. It keeps water out and helps your doors last longer. This step is very important for your new French doors.

The sill pan is just one part of French door installation. We’ll cover more steps in our guide, like setting the door frame and hanging the doors. With careful planning and detail, you’ll soon enjoy your new French doors.

Positioning the Door Frame

Now, let’s focus on placing the door frame right. This step is key for a good French door setup.

For outside French doors, begin by putting waterproof glue around the sill pan’s edge. This keeps water out. Then, tilt the door frame up and put it in the right spot, making sure it fits well.

For inside French doors, do things a bit differently. Just tilt the frame up and push the sides against the doorway’s edge. Make sure it fits tightly and evenly.

  1. Apply waterproof adhesive caulk along the sill pan perimeter for exterior French doors.
  2. Tilt the door frame up and position it securely within the opening.
  3. For interior French doors, tilt the frame up and slide the sides back against the doorway edge.
  4. Ensure a snug, flush fit is achieved to maintain the frame’s stability.

Getting the door frame in the right spot is key for a good door frame installation. Follow these steps for a smooth and lasting French door setup.

Hanging the French Doors

Installing french doors is a big step. You must hang them right for a good fit. If your doors come pre-hung, still pay close attention. Let’s look at the main things to think about for hanging french doors and attaching hinges and hardware.

Attaching Hinges and Hardware

If your french doors aren’t pre-hung, you’ll need to attach hinges and hardware yourself. Make sure the door’s weight is supported during installation. This prevents damage or misalignment.

Once the doors are in place, use a drill to attach the hinges. Put 3-inch screws into both the frame and the door.

  1. Ensure the doors are properly aligned and supported.
  2. Use the provided hinges and attach them to the door and frame with 3-inch screws.
  3. Check that the doors are hanging securely and can open and close smoothly.

Properly hanging french doors and adding the right hardware is key. By following these steps, you’ll get a smooth and useful installation. This will make your home look better and work better too.

Securing the Door Frame

Securing the door frame is key for a stable French door installation. After hanging the doors, attach the frame to the doorway firmly. This step is very important.

Use a drill to screw each hinge with a 3-inch screw. This connects the doors and frame to the wall studs. It keeps the doors from moving or sagging. Also, use shims to make sure the frame is straight and level.

  1. Drive 3-inch screws through each hinge to secure the door frame to the wall studs.
  2. Use shims to level and plumb the door frame, making adjustments as necessary.
  3. Check for any gaps between the frame and the wall, and fill them with caulk or spray foam insulation to create a tight seal.

By following these steps to secure the door frame, you’re on your way to a lasting French door installation. A well-secured frame is the key to a smooth and lasting door system.

Installing Strike Plates

Securing your French doors is key to the installation. You need to put strike plates at the top and bottom of the door frame. This adds protection and keeps your door system strong over time.

Start by marking where the shoot bolt will hit the frame. This shows where to put the strike plates. Then, use a drill to attach the strike plates to the frame. Make sure they fit well and match your door’s needs.

  • High-security strike plate options feature larger, thicker designs with steel housings for increased door security.
  • Standard strike plates typically have two screws, while high-security models may have a four-screw configuration for a more secure attachment to the doorjamb.
  • Longer screws are recommended for a more secure attachment to the doorjamb.
  • The recommended pilot hole size for drilling is no bigger than 3/32nds of an inch for a precise fit.

After putting in the strike plates, check if the door latch fits well with the strike plate. It’s important for smooth door use and to avoid problems. A good fit means your French door will be more secure and give you peace of mind.

Sealing and Caulking

Sealing and caulking are key steps in French door installation. They stop moisture and air from getting through gaps. Use waterproof caulk on the door frame’s top and sides for a tight seal. This makes the installation more weatherproof.

Start by sealing the sill pan with the right sealant, following the maker’s guide. Then, put a lot of caulk around the door opening on both sides. This keeps air and water out, making your home comfy and saving energy.

  • Use a high-quality, flexible caulk that is right for outside use.
  • Make sure the caulk forms a continuous, smooth bead, without gaps or voids.
  • Wait for the caulk to fully cure before moving on, as the product says.

Pay close attention to sealing and caulking. Doing it right makes your French doors look better and work better for a long time.

Follow these tips to seal and caulk your French doors well. This creates a weatherproof barrier that keeps your home safe from the weather and saves energy.

Finishing Touches

Now, it’s time to add the final touches to your French door installation. This includes putting on the door trim and attaching the doorknobs and locks. These steps will make your doors both work better and look great.

Installing Door Trim

After the caulk dries, you can put back the door trim or choose new, decorative trim that fits the French door style. The right door trim hides any gaps and makes the doors look better.

Attaching Doorknobs and Locks

The last step is to attach the doorknobs and locks to the French doors. If the kit didn’t include these, buy them and follow the instructions to install them correctly.

Adding these final touches makes sure your French doors work well and look good. Enjoy your new doors and the beauty they add to your home.

Consider FindPros For Your French Door Project

If you would like help finding experienced, professional installers for your French door project, consider using FindPros. By filling out a basic survey about your home and project details, FindPros can quickly match you with top-rated pros in your area. These pros will compete for your business by providing free quotes and work schedules.

You can then compare prices, warranties, and customer reviews to choose the installer that best fits your budget and timeline. Using FindPros ensures you only work with insured, background-checked pros. It also allows you to make an informed choice on who to hire—saving both time and money.

Conclusion

Installing French door installation can change your home for the better. It brings elegance, more light, and better functionality. This guide shows you how to do it right.

Just remember to be safe, use the right tools, and follow the instructions. This makes the installation smooth and easy.

French doors come with a 10 YEAR GUARANTEE against manufacturing defects. They cost between £499 to £999. Adding them to your interior design is a smart choice.

Professional installers charge £80 to £100 a day. Customers are very happy with the work, giving it a top rating of Excellent 4.7 / 5.

To start, you’ll need tools like a drill, tape measure, and a saw. Don’t forget safety gear like goggles and gloves. This guide will help you install French doors in about two to three hours with a friend’s help.

Frequently Asked Questions (French Door Installation)

The most common types are sliding french doors, swinging interior french doors, and hinged exterior french doors. Sliding french doors are a popular option for both interior and exterior use. They provide easy access while taking up less space than doors that swing open.
Many french doors feature decorative glass panels. Options include clear glass for maximizing light, frosted or textured glass for privacy, and triple pane glass for increased energy efficiency. Higher-end exterior french doors may use triple pane low-E glass to further improve insulation.
Replacing an interior door that swings with a sliding french door can save space and create a more open feel. Sliding doors also have frame tracks on opposite sides so the door slides neatly to either side, leaving the entire doorway open. This makes traffic flow better between rooms.
Fiberglass is a good material for exterior french doors in situations where moisture or temperature changes will be frequent, such as a patio door. Its water resistance and low maintenance makes it preferable to wood in many cases. It also won’t rot, crack, peel or split like wood can over time.
Both vinyl and wood have pros and cons for exterior french door materials. Vinyl has very low maintenance but won’t have the same aesthetic appeal as wood. It also has less customizable options. Wood requires more upkeep like painting, but can be customized in styles and has a beautiful, classic look. The course of the weather and longevity needed influences the best choice.

Framing Contractors

Framing Contractors Near You

Can’t find what you are looking for?

How It Works

  • Answer a few questions about your home project.
  • Within seconds, get matched with top-rated local pros.
  • Compare quotes and choose the best pro for the job.

Framing Contractors In Your Area

Framing Contractors: A Guide to Finding the Best Fit

Meta Description: Discover how to find and hire the best framing contractors for your construction project. Learn key factors to consider and ensure quality workmanship.

Framing contractors are vital for your home’s structure and foundation. They ensure your project’s quality and longevity. This guide will help you find the best local framing contractors.

House framers can cost between $7 and $16 per square foot. How can you get the best value? Understanding pricing factors and contractor qualifications is key.

This article will equip you with knowledge to make an informed decision. You’ll learn how to choose the ideal framing contractor for your project.

Framing Contractors

Key Takeaways

  • Hiring the right framing contractor is crucial for the safety, stability, and longevity of your home’s structure.
  • Framing contractors can specialize in residential or commercial projects, working alone or with a team of general contractors and subcontractors.
  • When evaluating potential framing contractors, it’s important to consider their licensing, insurance, years of experience, and portfolio of past work.
  • Online reviews and referrals can provide valuable insights into a framing contractor’s reputation and competency.
  • Collaboration with a general contractor can help ensure cohesive design and accurate cost estimates for your framing project.

The Importance of Choosing the Right Framing Contractor

A building’s framing is its structural foundation. Hiring the right framing contractor is vital for a safe, stable structure. Errors during framing can cause serious problems like uneven floors or safety hazards.

A reliable contractor ensures correct framing to the highest standards. This safeguards the building’s integrity and prevents future issues.

Why a Reliable Framing Contractor is Crucial

The framing provides stability and support for the entire building. A skilled contractor installs framing with precision, following safety protocols and quality standards.

This ensures long-term stability of the building. It also contributes to the overall safety of the structure.

Potential Risks of Hiring an Inexperienced Contractor

  • Substandard framing work that compromises the building’s structure and stability
  • Unsafe practices that put workers and occupants at risk
  • Costly mistakes and shortcuts that require extensive and expensive repairs down the line
  • Lack of expertise and experience in addressing complex framing challenges
  • Potential delays in the construction timeline due to the need to correct framing issues

A reliable framing contractor ensures a solid, safe foundation. They build to the highest quality standards.

This initial investment can prevent future headaches. It also saves you from significant financial burdens down the road.

framing contractor

Define Your Project Requirements

Clearly define your project requirements before searching for a framing contractor. Determine the scope of work for your new construction, renovation, or addition. Set a realistic timeline and budget that matches your financial abilities.

Scope of Work

Detail your project’s specific needs to find the right contractor. Are you building a new home or adding to an existing structure? Maybe you’re renovating an older building.

Outlining the work needed helps you find a contractor with suitable expertise. This ensures they can handle your project effectively.

Timeline

Create a realistic timeline for your project. Think about the work’s complexity, material and labor availability, and possible delays. Share your timeline expectations with potential contractors to ensure they can meet them.

Budget

Set a budget that fits your finances. This will guide your contractor search and help manage project costs. Include all expenses like materials, labor, permits, and unexpected issues.

Defining these aspects will lead you to the best framing contractor. You’ll be ready to start your project with confidence.

project requirements

Start Your Search Locally

Begin your hunt for a reliable framing contractor in your area. Local pros know building codes and regulations well. They can easily source materials and ensure compliance.

Ask friends, family, and coworkers for referrals. They may have had similar projects done. Check local building supply stores and construction shows for recommendations.

Online directories like Yelp, Angie’s List, and the Better Business Bureau list reputable contractors. These can be helpful in your search.

Request Referrals

Asking for referrals is a great way to find skilled framing contractors. Reach out to people you trust for recommendations. Their insights can reveal a lot about a contractor’s work.

Personal referrals offer valuable information on work ethic and professionalism. They also shed light on the quality of craftsmanship you can expect.

Check Local Listings and Directories

Online directories are another good resource for finding local contractors. Websites like Yelp and Angie’s List list pros in your area. These sites also feature reviews and ratings from previous clients.

Visit local building supply stores to get recommendations. Attend construction shows to connect with local contractors directly. These events offer great opportunities to meet professionals in person.

Evaluate Credentials and Experience

Choosing the right framing contractor is vital. Look for a reliable professional who can handle your project well. This ensures efficient and effective work.

Licensing and Insurance

Check if the contractor is licensed in your area. Some states only require commercial contractors to be registered. Verify their industry association memberships.

Make sure the contractor has liability and workers’ compensation insurance. This protects you from potential legal issues.

Years of Experience

  • Look for contractors with a minimum of 5 years of experience in the framing industry.
  • Experienced contractors are more likely to have the skills and expertise to handle various challenges that may arise during the project.
  • The past performance of commercial contractors is considered the best indicator of future results in the industry.

Portfolio of Past Work

Ask to see the contractor’s previous projects. This helps you assess their work quality and relevance.

Check online reviews on Google, Manta, Yelp, and the Better Business Bureau. These can provide insights into the contractor’s reputation.

Carefully review the contractor’s credentials, experience, and past work. This helps you make a smart choice. You’ll partner with a skilled framing professional.

Ask for References and Check Reviews

When choosing a framing contractor, ask for references and review their past work. Reliable contractors gladly provide a list of satisfied clients. These references offer valuable insights into the contractor’s work quality and professionalism.

Contact references to learn about their experiences. Ask if projects were completed on time and within budget. Find out if they’d hire the contractor again. This indicates their reliability and skill level.

  • Conduct reference checks via phone or email to get a comprehensive understanding of the contractor’s performance.
  • Verify employment history, job duties, and skill sets through the reference checks to ensure accuracy.
  • Review the contractor’s portfolio and past projects to assess their experience and expertise in the type of work you require.
  • Check online reviews and ratings to gauge the contractor’s reputation and customer satisfaction levels.

Carefully examining a contractor’s references and reviews helps you make a smart choice. You’ll find a trustworthy partner who delivers quality work. They’ll stay within budget and finish on time.

Request Detailed Estimates

Ask potential framing contractors for detailed estimates. A good estimate breaks down costs for materials, labor, and permits. It should also outline the project timeline with start and end dates.

Cost Breakdown

The estimate should clearly show expenses for different parts of the project. Material costs can vary widely, from $6k to $7.5k in bids. However, actual costs might be lower, under $4k in some cases.

Labor costs are often a big part of the budget. One contractor charged $1,000 per day for labor. This can add up quickly depending on the project’s length.

Timeline and Schedule

Look for a detailed timeline in the estimate. One contractor estimated a month for the job. The homeowner chose a flat 4-week labor contract to save money.

The framing work took longer than planned. The contractor’s flexibility in returning to help shows good customer service.

Payment Terms

The estimate should explain payment terms, including deposit and final payment due. Contractors should be clear about payment schedules and possible extra costs.

Experienced contractors might offer different pricing options. This can help cover unexpected expenses or changes in the project.

Get estimates from multiple framing contractors to make a smart choice. This helps keep your project on budget and on time.

Clear Communication and Asking Questions

Effective communication is vital when working with a framing contractor. Watch how they listen and respond to your needs. Ask about their problem-solving methods, on-site crew, and project contact person.

  • Problem-Solving Approach: A good framing contractor should have a clear plan for tackling challenges. Ask how they identify and fix issues during the project. This can affect your timeline and budget significantly.
  • On-Site Crew and Point of Contact: Learn about the on-site crew structure and your main contact person. Knowing key staff helps ensure smooth communication and timely updates. This keeps you informed throughout the project.
  • Handling Changes and Additions: Discuss how the contractor will manage project changes or additions. Clear talks about schedule and budget impacts help set realistic expectations. This can prevent costly surprises later on.

Look for contractors who address concerns and communicate openly. These qualities show professionalism and reliability. Consider them when choosing your framing contractor.

Finding the Right Framing Contractor with FindPros

Tired of the hassle of finding reliable framing contractors? Let FindPros simplify the process. Our platform connects homeowners like you with top-rated local pros who can handle your wood framing needs. Just answer a few quick questions about your project, and we’ll match you with multiple companies that can frame your space.

Compare their quotes and portfolios to find the perfect fit for your budget and preferences. No more guesswork – let the pros at FindPros take the stress out of your home project. Continue your search for the ideal framing contractor today.

Conclusion

Finding the right framing contractor takes time, but it’s crucial for your home’s safety and stability. Define your project needs and search locally for qualified professionals. Check their credentials and references carefully.

Request detailed estimates from potential contractors. Keep communication clear throughout the process. This approach helps you choose a skilled framer who’ll meet your expectations.

A reliable contractor ensures your home’s framing is done correctly and to high standards. This provides a solid base for your construction or renovation project.

Careful selection of a framing contractor leads to a successful project. It creates a strong foundation that will serve your family for years to come.

Frequently Asked Questions (Framing Contractors)

Wood framing refers to the structural skeleton that supports the walls, floors, and roof of a building. It’s crucial because it ensures the stability, safety, and longevity of the entire structure.
Start by asking for referrals from friends, family, or local building supply stores. Check online directories and reviews to research contractors in your area. Look for those with the right licenses, insurance, and a proven track record of quality work.
Look for contractors with at least 5 years of experience, a portfolio of past projects, and good references. Communicate clearly about the project scope, timeline, and budget. Make sure they have the right crews and equipment to deliver quality work.
A detailed estimate should break down the costs for materials, labor, permits, and any potential extras. It should also include a clear timeline with start and end dates. Discuss payment terms and how they handle changes or additions to the project.
Choose a framing contractor who is licensed and insured to operate in your state. They should be familiar with local building codes and able to deliver work that is guaranteed to meet all necessary requirements. Don’t hesitate to ask for references and check their past projects to verify the quality of their services.

Foundation Installation

Furniture Builders Near You

Can’t find what you are looking for?

How It Works

  • Answer a few questions about your home project.
  • Within seconds, get matched with top-rated local pros.
  • Compare quotes and choose the best pro for the job.

Foundation Installation In Your Area

Foundation Installation: A Guide to a Strong and Stable Building

Meta Description: Discover the essentials of Foundation Installation for a secure building. Learn about types, costs, and best practices to ensure a stable structure for your project.

The foundation is crucial for a lasting, sturdy structure. It’s the unsung hero that ensures success. This guide explores foundation installation and best practices for a strong, stable base.

Foundation Installation

Your entire structure rests on the foundation. Its importance can’t be overstated. A well-designed, expertly installed foundation provides structural support and protects your investment.

It shields against time, weather, and soil conditions. A strong foundation will stand for generations to come.

Key Takeaways

  • 01

    The foundation is the critical component that supports the entire structure, ensuring stability and longevity.

  • 02

    Proper foundation installation requires careful planning, site preparation, and the use of high-quality materials.

  • 03

    Understanding the different types of foundations and their suitability for various soil conditions is essential for making an informed decision.

  • 04

    Hiring a professional foundation contractor can ensure a higher quality of work, faster completion, and peace of mind.

  • 05

    Maintaining and repairing the foundation is crucial to prevent costly structural issues down the line.

Understanding the Importance of a Solid Foundation

A solid foundation is crucial for any building. It provides essential structural support and stability. The foundation transfers the structure’s weight evenly into the ground, preventing damage and costly repairs.

Providing Structural Support and Stability

A building’s foundation must handle two main loads. The dead load is the structure’s constant weight. The live load includes changing weights of occupants and contents.

A solid foundation needs four in-ground wall footings. These footings must connect to bear the loads. The foundation should be rigid enough to transmit weight to the ground safely.

Protecting Against Soil Movement and Settlement

Different foundation types suit various ground conditions. These include soft soil, wet soil, and sloping locations. A well-designed foundation guards against soil movement and settlement.

Soil type, moisture changes, and weather can cause these issues. Investing in a strong foundation is vital for structural safety. Proper design can cut structural risks by up to 50%.

Structural Support

Types of Foundations for Residential Construction

Residential buildings need a stable foundation for structural integrity. Homeowners can choose from several foundation types. Each type suits different soil conditions and building needs.

Shallow Foundations: Spread Footings, Mat Slabs, and Floating Slabs

Shallow foundations work well for structures on stable soil. They’re cheaper to install and common in warmer climates. Spread footings are concrete pads that support the building’s weight.

Mat slabs and floating slabs are continuous concrete bases. They spread the load across a larger area. These types are ideal where soil movement is minimal.

Deep Foundations: Piles, Piers, and Caissons

Deep foundations are needed for buildings on weaker soil. They go deeper into the ground for better stability. Piles are long, slender structures driven into the ground.

Piers and caissons are larger structures drilled into the soil. They provide greater load-bearing capacity for the building.

Foundation choice depends on soil type, building size, and local codes. A professional should evaluate the site to determine the best option.

Site Preparation and Planning

Site prep is key for foundation installation. It involves site evaluation, soil testing, and getting permits. These steps ensure a strong foundation for your building.

Soil Testing and Evaluation

Soil testing is the first step in site prep. It checks soil type, load-bearing capacity, and potential issues. Engineers use this info to design a stable foundation.

They look at slope stability and underground water levels. They also check for excavation hazards. All these factors help create a solid foundation design.

Obtaining Necessary Permits and Approvals

Getting the right permits is crucial before starting construction. You may need building, electrical, grading, and zoning permits. These ensure your project follows local laws and safety rules.

Proper planning helps avoid costly delays. It also protects the environment. Getting approvals early can make the foundation process smoother.

Good site prep sets the stage for success. It helps create a strong, stable building. Your foundation will stand the test of time with proper planning.

Essential Tools and Materials for Foundation Installation

A sturdy foundation is crucial for any construction project. Professionals use specialized tools and materials to ensure a strong, stable structure. These items are key for successful foundation installation.

  • Concrete: The primary material used in modern foundations, typically with a strength of around 3,000 pounds per square inch (psi).
  • Concrete Curing Compound: Used to aid the curing process and prevent premature drying of the concrete.
  • Concrete Finishing Tools: Such as trowels, floats, and edgers, to smooth and level the surface.
  • Concrete Pump or Mixer: For efficiently transporting and pouring the concrete.
  • Drainage Pipes: To divert water away from the foundation and prevent moisture issues.
  • Formwork: Wooden or metal forms, stakes, and braces to shape the concrete.
  • Gravel: Provides a stable, well-draining base for the foundation.
  • Moisture Barrier: Helps protect the foundation from water and soil moisture.
  • Reinforcement: Steel bars, wire mesh, or fiber to strengthen the concrete.

Safety gear is vital for foundation installation. Gloves, safety glasses, and hard hats protect workers during the process.

Preparing all needed tools and materials ensures smooth foundation installation. This preparation sets the stage for a strong, stable building.

Foundation types

Step-by-Step Guide to Laying a Foundation

Building a sturdy home foundation involves several crucial steps. First, the site undergoes thorough foundation excavation and foundation grading. Then, workers construct foundation formwork and position rebar reinforcement.

Finally, concrete is carefully poured and cured. This creates a durable base for your structure.

Excavation and Grading

Excavation and grading are vital for a strong foundation. Teams use heavy equipment to dig out the site. They remove soil, rocks, and debris that could weaken the foundation.

The area is then graded. This ensures a level surface for building the foundation.

Constructing Formwork and Rebar Reinforcement

After site prep, workers build the foundation formwork. This temporary structure holds concrete as it dries. Skilled workers measure and construct the formwork carefully.

They position rebar reinforcement within the formwork. This adds extra strength to the foundation.

Pouring and Curing Concrete

The final step is concrete pouring and concrete curing. Contractors pour concrete into the formwork evenly. They ensure it’s free of air pockets.

The concrete then cures. This process can take days or weeks, depending on weather.

These steps ensure a strong, stable foundation. It will support the structure for years to come.

Choosing the Right Foundation Type

The right foundation ensures your building’s stability and performance. Each option has unique advantages for different needs. Some provide extra living space, while others suit specific soil conditions or aesthetic preferences.

Basement Foundations for Additional Living Space

Full basements can almost double a home’s square footage. They offer tall walls matching the floor space above. This provides ample living space but comes at a high cost.

Basements require significant maintenance and extensive excavation. They’re one of the pricier foundation options. However, they remain popular for the extra living or storage space.

Elevated Foundations: Crawl Spaces and Pier Foundations

Elevated foundations suit certain soil conditions and aesthetic preferences. Crawl space foundations are cost-effective, with wall heights from 18 inches to 4 feet.

They’re ideal for warmer climates and earthquake-prone areas. These foundations offer easy access to utilities but have limited storage options.

Pier foundations spread weight over a larger area. They need ongoing maintenance and work well in areas with weak topsoil.

Your ideal foundation type depends on climate, soil, budget, and structural needs. A professional can help you choose the best option.

DIY vs. Hiring a Professional Contractor

Foundation installation is a complex task that requires careful thought. DIY methods might save money, but they come with significant risks. DIY foundation installation can be challenging and potentially dangerous for inexperienced homeowners.

Evaluating Your Skill Level and Experience

Foundation installation demands high-level construction skills and experience. Tasks like getting permits and preparing the site can be overwhelming for homeowners.

Professional foundation contractors have the expertise to handle these complex jobs efficiently. They ensure compliance with local building codes and use specialized tools effectively.

Cost Considerations and Potential Savings

  • DIY foundation installation may involve costs for tools, materials, and potential fixes if mistakes occur.
  • Professionals already possess necessary tools and might acquire materials at better rates, plus provide insurance coverage for faulty work.
  • Homeowners should set aside about 1% of their home’s value every year for home improvements.
  • The best DIY projects for homeowners include installation of blinds, shelves, and curtains, drywall repair, painting, basic flooring installation, basic landscaping, drain cleaning, and toilet tank repair.

Your decision depends on your skill level and construction experience. Consider the potential cost savings and risks involved carefully.

Weigh these factors thoroughly before starting a foundation installation project. Your home’s safety and value are at stake.

Maintenance and Repair of Foundations

A strong foundation is vital for your building’s health. Regular checks can spot issues early, saving time and money. Quick action on problems ensures your building stays stable.

Signs of Foundation Issues

Watch for cracks in walls or floors. Uneven floors and sticking doors are also warning signs. These can result from soil movement, water damage, or natural aging.

Common Repair Methods and Solutions

Quick action is key if you spot these signs. Various repair methods can restore your foundation’s strength. The best fix depends on the damage and soil conditions.

Work with a pro to assess and fix foundation issues. They can suggest preventive steps like proper drainage and regular checks.

Stay alert to protect your investment. Prompt action on foundation problems ensures building safety. A solid base is crucial for a strong, lasting structure.

Sustainable and Energy-Efficient Foundation Options

The construction industry is shifting towards sustainable and energy-efficient building practices. This includes using innovative foundation systems. One solution that combines strength with efficiency is the insulated concrete form (ICF) foundation.

Insulated Concrete Form (ICF) Foundations

ICF foundations have a rigid foam insulation core between two layers of concrete. This design enhances structural integrity and improves the building’s energy-efficient performance. It also provides superior thermal performance and resilience against environmental stresses.

Using green building materials can boost a foundation’s sustainability and environmental impact. This approach creates foundations that are durable, stable, energy-efficient, and environmentally responsible.

Green Building Materials and Practices

Faswall blocks are a green building material suitable for foundations. They’re made with concrete and 60% recycled wood. These blocks resist mold, mildew, and pests while providing excellent insulation.

Rubble trench foundations are another sustainable approach. They use local materials and reduce the need for energy-intensive concrete production.

Choosing sustainable foundation options and green building practices benefits the environment. It also improves the building’s energy efficiency.

Cost Factors in Foundation Installation

Foundation installation costs can vary greatly due to several key factors. Homeowners and builders need to understand these factors for effective project planning and budgeting.

Labor Costs and Material Expenses

Labor costs usually make up 40-60% of total project expenses. The work’s complexity and local labor market can impact the overall price.

Material expenses, like concrete and reinforcement costs, also play a big role in determining the total project cost.

Factors Affecting Total Project Cost

  • Foundation type: The type of foundation, such as shallow foundations (spread footings, mat slabs, or floating slabs) or deep foundations (piles, piers, or caissons), can significantly affect the overall cost.
  • Site conditions: The condition of the soil, the presence of groundwater, and the need for excavation or site preparation can all influence the final price tag.
  • Permit requirements: Building permits are necessary for any foundation work, and the cost can vary depending on the local regulations and the size of the project.
  • Geographical location: The time of year and the region can also impact the foundation installation costs, with fluctuations in labor and material prices.

Knowing these cost factors helps in making smart decisions for construction projects. This knowledge ensures a strong and stable foundation for building projects.

It also helps align financial and construction goals for homeowners and builders.

Let FindPros Handle Your Foundation Project

Are you in need of a concrete slab foundation, poured concrete foundation, or any other type of foundation for your home? FindPros can help you find the right foundation contractor for the job. Simply answer a few questions about your home project, and we’ll match you with top-rated local professionals who can provide competitive quotes.

Our platform connects you with experienced contractors who specialize in foundation construction, repair, and installation, whether you need a concrete block foundation, pier and beam foundation, or any other type. FindPros ensures you get the best pricing when multiple pros compete for your project, and helps you find the perfect fit in terms of expertise, cost-effectiveness, and compatibility.

Take the guesswork out of your foundation work and let the pros at FindPros handle it. Get started today and take the first step towards a strong, stable foundation for your home.

Conclusion

A strong foundation is vital for any construction project. It provides crucial structural support and guards against soil movement. Understanding foundation types, gathering tools, and following best practices ensure a reliable base.

DIY foundation installation is possible, but hiring a professional is often safer. Experts have the knowledge to handle this complex construction stage. They can create sturdy structures that are environmentally responsible and cost-effective.

A high-quality foundation is key to a successful construction project. It lays the groundwork for a building that will last. Investing in a solid base ensures a reliable support system for years to come.

Frequently Asked Questions (Foundation Installation)

The main types of foundations include concrete slab foundations, concrete foundations, pier and beam foundations, basement foundations, and slab on grade foundations. These foundations vary in their construction, materials used, and suitability for different soil conditions.
Hiring a professional contractor for foundation installation offers several advantages, such as their specialized skills and extensive experience in ensuring a strong, stable foundation. They can properly handle the excavation, grading, and poured concrete process, while also ensuring the project follows all necessary building codes and regulations.
Signs that your foundation may require repair include cracks in the concrete slab or walls, uneven or sloping floors, sticking doors and windows, and gaps around the foundation. These issues can indicate structural problems that need to be addressed by a professional.
The key cost factors for a foundation project include the type of foundation (e.g., concrete slab, pier and beam), site conditions and soil quality, labor and material expenses, permit requirements, and the geographic location. These factors can significantly impact the overall foundation cost.
Some sustainable and energy-efficient foundation options include insulated concrete form (ICF) foundations, Faswall block foundations, and rubble trench foundations. These alternatives can improve the building’s energy efficiency and environmental impact compared to traditional foundation types.

Floor Sanding

Furniture Builders Near You

Can’t find what you are looking for?

How It Works

  • Answer a few questions about your home project.
  • Within seconds, get matched with top-rated local pros.
  • Compare quotes and choose the best pro for the job.

Floor Sanding In Your Area

Floor Sanding: A Guide to Restoring Your Hardwood Floors

Meta Description: Discover the art of floor sanding to revive your hardwood floors. Learn techniques, tools, and tips for a professional finish in our comprehensive guide.

Hardwood floors can be sanded and refinished up to 10 times. This extends their lifespan significantly. Proper care and attention are key to achieving this longevity.

Hardwood floors are beautiful and durable but can get damaged over time. Scratches, sun exposure, and foot traffic can take their toll. Refinishing can revive their appearance and extend their life.

This guide will help you restore your hardwood floors step-by-step. You’ll learn about floor preparation, sanding techniques, and applying the final finish. With these tips, you can achieve a professional-looking result.

Floor Sanding

Key Takeaways

  • Hardwood floors can be sanded and refinished up to 10 times, extending their lifespan.
  • Proper preparation, including securing loose boards and nails, is crucial for a successful refinishing project.
  • Sanding the floor in a specific sequence and using the right grit sandpaper is essential for achieving a smooth, even finish.
  • Choosing the right floor stain and finish, whether water-based or oil-based, can make a significant difference in the final look and durability of your hardwood floors.
  • Prioritizing safety, including wearing personal protective equipment and working in well-ventilated areas, is key during the refinishing process.

Preparing the Floor

Check your floor’s condition before sanding. Do a water droplet test to see if refinishing is needed. Clear the room of furniture and rugs for full access.

Inspect the floor for any issues. Use a putty knife to find loose boards or protruding nails. Fix these problems to prevent damage during sanding.

Securing Loose Boards and Nails

Hammer down loose nails and fill gaps with wood filler. This creates a smooth surface for sanding. It also prevents further damage to your floor.

Sealing Vents and Doors

Keep sanding dust contained by sealing air vents and doors. Use plastic sheeting and painters’ tape to cover openings. This makes cleanup easier and prevents dust from spreading.

Preparing for Dust Removal

Vacuum the floor to remove loose debris before sanding. This ensures a clean surface for the process. Set up a dust collection system or use a HEPA vacuum.

Preparing the Floor

Removing Base Molding

Remove the base molding before sanding your hardwood floors. This step ensures a smooth, consistent finish. You’ll need a pry bar and scrap wood to protect the baseboards.

Gently pry the base molding away from the wall. Be careful not to damage the baseboards. Label each piece as you remove it for easier reinstallation later.

  • Carefully insert the pry bar under the base molding and gently pry it away from the wall, taking care not to damage the baseboards.
  • As you remove each piece of molding, label or number it to make reinstallation easier once the floor refinishing is complete.
  • Set the removed base molding pieces aside, keeping them organized and labeled for easy reinstallation.

By following these steps, you’ll prepare your floor for sanding. This process helps achieve a professional-looking finish on your hardwood floors.

Removing base molding

Rough Sanding

Rough sanding is a key step in refinishing hardwood floors. It creates a smooth base for the new finish. Let’s explore this important process.

Wielding the Drum or Belt Sander

Start by choosing a drum sander or belt sander. Drum sanders work well for large areas. Belt sanders are better for tight spaces.

Adjust your chosen tool carefully. Operate it with caution to protect the wood surface.

Sanding Sequence and Grit Progression

  • Start with a coarse 36- or 40-grit sandpaper to aggressively remove old finishes, dents, and scratches, leveling the floor.
  • Gradually progress to a 60-grit paper, followed by a 100-grit, refining the surface with each step.
  • Be sure to replace the abrasive belt after sanding approximately 250 square feet to maintain optimal performance.
  • Work the sander back and forth along the length of the boards, using overlapping strokes to ensure even coverage.
  • Sweep and vacuum the floor between each grit change to remove dust and debris, preparing the surface for the next stage.

This sanding method strips away old layers. It reveals your floor’s true beauty. You’ll be ready for a perfect finish.

Sanding Edges and Corners

Drum or belt sanders handle most of your hardwood floor. But edges and corners need special attention. Edge and orbital sanders help achieve a smooth, uniform look.

Using an Edge Sander

Use an edge sander for walls and baseboards. Start with 80-grit sandpaper to remove old finish. Then switch to 100-grit for a smooth appearance.

Reaching Tight Spaces

  • For closets, bathrooms, or tight stairways, use a handheld scraper and careful hand-sanding.
  • Use a sanding block to maintain even pressure and prevent gouging the wood.
  • Pay attention to edges and corners. The wood is most vulnerable to damage here during sanding.

Proper sanding of edges and corners ensures a professional-looking result. It seamlessly ties the entire room together.

Screen Sanding

After rough and edge sanding, it’s time to smooth your hardwood floors. Screen sanding brings a smooth, even finish. Use a floor buffer with a fine-grit screening pad to level minor unevenness.

Make broad, sweeping arcs with the buffer across the floor. This creates a seamless surface ready for staining and finishing. The open-weave nylon webbing removes old finishes without damaging the wood.

Sanding screens come in sizes from 17 to 20 inches. Edger screens are available for tight spaces along the edges. These tools help achieve a professional-grade, blemish-free finish.

Screen sanding is more efficient than traditional floor sanding. The webbing design makes screens waterproof and suitable for wet environments. You can rinse them between uses for longer life.

This cost-effective solution maintains hardwood floors in top condition. It reduces the need for extensive manual sanding. Screen sanding is a smart choice for floor care.

Dust Removal

Stunning hardwood floors start with thorough dust removal. After sanding, sweep and vacuum to eliminate lingering dust, hair, and imperfections. This step ensures a seamless, professional-grade result.

Sweeping and Vacuuming

Start by sweeping the floor to gather larger dust particles. Then, use a high-powered vacuum with specialized attachments for finer debris. Cover every inch of the floor, leaving no area untouched.

Using a Tack Cloth

After sweeping and vacuuming, use a tack cloth to catch remaining dust or hair. Gently wipe the surface to pick up even the smallest imperfections. This creates a smooth foundation for staining and finishing.

Leftover dust and hairs can cause blemishes in the final finish. A clean surface is crucial for flawless restoration. These steps set the stage for a professional-looking hardwood floor.

Floor Staining

Wood stain can transform your hardwood floors. The right stain greatly affects your floors’ final look. Some woods like maple and pine don’t take stains well.

Choosing the Right Stain

Wood stains offer various shades, from light to bold. Consider your floor’s current color and desired outcome. Light stains make subtle changes, while deep colors create dramatic transformations.

Applying the Stain

Use a foam applicator pad to apply stain along the wood grain. Wipe excess stain with clean cloths or paper towels. This ensures an even finish.

For unstained floors, use a sanding sealer before the final finish. This creates a smooth surface and enhances the wood’s natural beauty.

Proper preparation is key for professional-looking stained floors. Follow these steps to refresh your hardwood floors’ appearance.

Applying Floor Finish

The final step in restoring hardwood floors is applying a protective wood finish or oil. This seals and protects the freshly sanded surface. It ensures your floors look great for years to come.

Water-Based vs. Oil-Based Finishes

Floor finishes come in two main types: water-based and oil-based polyurethane. Water-based finishes dry fast and provide a clear, non-yellowing look. Oil-based polyurethane offers a richer finish but takes longer to dry.

Other popular wood oils include Danish, teak, tung, cedar, ipe, and mineral oil. Each oil has unique properties and aesthetics.

Application Techniques

  • Apply the finish using a lamb’s wool applicator, working in smooth, even strokes to avoid drips and ensure consistent coverage.
  • Depending on the product, you may need 3-4 coats, sanding lightly between each coat and thoroughly vacuuming up the dust before applying the next layer.
  • Water-based polyurethane typically dries to the touch in about 2 hours and can be recoated in 4 hours, while oil-based finishes take twice as long to dry.
  • Allow the recommended curing time, usually 8 hours, before allowing foot traffic on the newly finished floors.

Proper application of the right floor finish protects your hardwood investment. It results in a beautiful, long-lasting finish for your floors.

Floor Sanding Tips

Restoring hardwood floors requires a consistent sanding sequence for a flawless finish. Use the same grit paper on your edger and drum sander. This creates a uniform surface across the entire floor.

Dust is unavoidable during floor sanding. Most equipment has built-in dust collection systems. Sweep and vacuum often to reduce airborne particles and prevent respiratory issues.

Before applying stains or finishes, do a spot test on a small area. This helps you assess the color and finish. You can ensure it meets your expectations before treating the whole floor.

Floor Refinishing Safety

Safety is crucial when restoring hardwood floors. Proper precautions prevent accidents and ensure success. Follow these guidelines to protect yourself and your home.

Personal Protective Equipment

Wear a high-quality dust mask when using loud sanding equipment. Safety goggles and ear protection are vital. Read and follow manufacturer’s instructions carefully.

Ventilation and Dust Control

Make sure your work area has good airflow. Cover vents and grates to stop dust from spreading. Open windows and doors to improve ventilation.

Use proper dust control to reduce exposure to harmful wood particles. This helps keep your workspace safe and clean.

Handling Rags and Finishes

Store and dispose of oil-soaked rags properly. The heat they generate can cause fires. Be careful with solvent-based finishes, as they release harmful fumes.

Choose water-based or low-VOC options when possible. These alternatives are safer and reduce exposure risks.

These safety tips will protect you during floor refinishing. Taking precautions ensures a safe and successful project. Your newly restored floors will be worth the effort.

DIY vs. Professional Refinishing

Refinishing hardwood floors is a big job. Homeowners must choose between DIY and hiring pros. DIY saves money, but requires skills, time, and effort.

Cost Considerations

DIY floor sanding and refinishing costs 0 to ,000. Factors include area size and materials needed. Professionals charge ,150 to ,500 for the same job.

Hiring pros often pays off long-term. They have expertise to handle severe floor damage. Pros ensure a seamless, blended finish.

Skill Level and Time Commitment

  • Professional crews can sand and refinish around 1,000 square feet of hardwood floors per day, while it can take homeowners 2 to 4 times longer to complete the same area.
  • DIY sanding and refinishing may lead to common mistakes, such as uneven sanding, improper polyurethane adhesion, and floors needing to be redone due to poor initial application.
  • The cost savings for DIY sanding increase as the floor size becomes larger, but hiring a professional generally results in a time-efficient and cost-effective outcome.

Consider cost, skill level, and time when deciding. DIY saves money but takes longer. Pros work faster and provide better results.

Hiring experts may be best for a lasting finish. They offer an efficient timeline and high-quality outcome.

FindPros: Your Hardwood Floor Sanding Partner

Embarking on a wood floor refinishing project can be a daunting DIY task. But you don’t have to go it alone. FindPros can connect you with experienced floor sanders who fit your personal preferences and home needs. Simply answer a few questions about your project, and we’ll match you with top-rated local professionals. Compare their quotes, availability, and reviews to find the perfect fit for your house, whether it’s the living room, bedroom, or even stairs. Take the guesswork out of your floor sanding job and let FindPros handle the legwork of finding the right machine, abrasives, and expert for the task. Get started on your hardwood floor refresh today.

Conclusion

Reviving hardwood floors is achievable with the right techniques and tools. This guide helps transform your floors, enhancing your home’s overall look. By following these steps, you’ll get professional-looking results.

The key is a methodical approach with proper preparation. Each step is crucial for ensuring your flooring’s longevity and beauty. From sanding to applying the final protective coating, every action matters.

Investing time in floor maintenance can increase your property’s value. It also helps reduce dust, allergens, and pests. This improvement boosts your home’s indoor air quality.

With the right approach, you’ll enjoy your hardwood floors for years. Their timeless charm will continue to enhance your living space. Regular care ensures your floors remain beautiful and functional.

Frequently Asked Questions (Floor Sanding)

The main steps are: preparing the floor by securing loose boards and nails, rough sanding with coarse grits, edge sanding, screen sanding for a smooth finish, applying wood stain, and finally applying a protective floor finish.
The essential tools are a floor sander (drum or belt), edge sander, orbital sander, and sanding belts or screens in various grits. You’ll also need a vacuum, broom, and tack cloth for dust removal.
Doing it yourself can save you money compared to hiring a professional, especially for larger floor spaces. However, it requires more time and skill to avoid common mistakes like chatter marks, swirl marks, or uneven sanding.
Key factors are your skill level, available time, and the square footage of the area. Professionals work faster and provide a more polished finish, but DIY can save you money if you have the necessary tools and experience.
Regular sweeping, vacuuming, and occasional buffing or polishing can help maintain the finish and prevent new marks or gouges. It’s also important to address any loose nails or filling in gaps promptly to protect the wooden floor.

Flooring Installers

Furniture Builders Near You

Can’t find what you are looking for?

How It Works

  • Answer a few questions about your home project.
  • Within seconds, get matched with top-rated local pros.
  • Compare quotes and choose the best pro for the job.

Flooring Installers In Your Area

Hiring Flooring Installers: A Step-by-Step Guide

Meta Description: Discover how to hire the best flooring installers for your project. Our step-by-step guide covers everything from research to final selection, ensuring a smooth installation process.

Planning a home renovation with new flooring? Hiring professional installers can greatly impact your investment’s success and longevity. This guide will help you find the right flooring installer for your project.

We’ll cover essential steps to ensure you make the best choice. You’ll learn about different flooring options and their benefits. We’ll also explore how to research local contractors effectively.

Flooring Installers

Key Takeaways

  • Understand the importance of hiring professional flooring installers to ensure a successful and long-lasting project.
  • Learn about the different types of flooring options and their unique benefits to make an informed choice.
  • Discover the crucial factors to consider when researching and vetting local flooring contractors.
  • Discover how to obtain detailed estimates, compare quotes, and understand the cost factors involved.
  • Explore the steps to prepare for the installation process and protect your home during the project.

The Importance of Hiring Professional Flooring Installers

Professional flooring installers ensure a successful and durable flooring project. They are specialists who can remove, install, and repair any type of flooring. Flooring contractors offer services like floor removal, repair, and installation.

Verify a contractor’s credentials and licenses to ensure they’re qualified. This step is essential as state regulations may require specific certifications.

Overview of the Flooring Installation Process

Professional flooring installers have the skills for a seamless, long-lasting result. They handle various materials like hardwood, vinyl, tile, laminate, and carpet. They follow industry standards to guarantee quality installation.

These experts offer warranties on labor and materials. This provides peace of mind and protects your investment.

Hiring professionals saves time and money. They work efficiently, completing projects faster than DIY attempts. Their supplier relationships often lead to cost savings on materials.

Safety standards and building code compliance are priorities for professional installers. They create a secure work environment and meet legal requirements.

Professionals handle all aspects of installation. This includes consultations, measurements, material selection, installation, and cleanup. Their comprehensive service ensures a stress-free experience for homeowners.

Professional flooring installers deliver high-quality solutions that enhance your home’s look and value. Their expertise and warranties make them the right choice for your flooring project.

Understanding Types of Flooring

Choosing the right flooring is key for home renovations. Homeowners have many options to consider. Each type has its own benefits and features.

Your choice should match your needs, budget, and style. Understanding flooring types helps you make a smart decision.

  • Hardwood Flooring: Hardwood floors offer a warm, natural look. They’re durable and can be refinished multiple times. However, they need regular upkeep to stay beautiful. The initial cost of hardwood can be higher than other options. But their longevity often makes up for it.
  • Vinyl Flooring: Vinyl is affordable, versatile, and resists moisture well. It’s great for high-traffic areas and homes with pets or kids. Vinyl can mimic wood or tile. This makes it a budget-friendly choice for specific looks.
  • Tile Flooring: Tile is durable and long-lasting. It’s perfect for kitchens, bathrooms, and busy areas. Ceramic and porcelain tiles resist water well. Tiles offer many design options. Installation can be pricey, but the floors are easy to maintain.
  • Laminate Flooring: Laminate looks like wood but costs less. It’s scratch-resistant and easy to install. This option is great for updating your home’s look. Laminate needs less maintenance than hardwood. It’s a cost-effective choice for many homeowners.
  • Carpet Flooring: Carpet adds coziness to bedrooms and living rooms. It comes in various pile types for different needs. Carpet needs more care than other options. But it creates a warm, inviting feel in any room.

Understanding each flooring type helps homeowners make smart choices. Consider looks, budget, and upkeep when deciding.

flooring types

Researching Local Contractors

Thorough research is vital when hiring flooring installers for your home project. The Greater Cincinnati area offers many flooring contractors, flooring installation companies, and flooring professionals. Start by finding home improvement contractors who specialize in your desired flooring type.

Begin with a online search to explore contractors’ flooring specialties and flooring expertise. Local hardware stores can also provide valuable recommendations for contractor research and contractor selection.

  • Identify contractors with extensive experience in your desired flooring type
  • Utilize online searches to explore the local flooring contractors’ areas of expertise
  • Seek recommendations from hardware stores and other local home improvement resources

Careful research helps you find the right professional for your project. This ensures exceptional results that meet your specific needs and budget.

Checking Reviews and Testimonials

Past client feedback is crucial when hiring a flooring installer. It offers insights into their reliability, craftsmanship, and professionalism. Homeowners can make informed decisions by examining these experiences.

Start by checking online platforms like Google, Yelp, and the contractor’s website. These sources provide flooring installer reviews and flooring contractor testimonials. You’ll get a sense of customer feedback and online reviews.

Look for common themes in past client experiences. Focus on the reliability of installers and their quality of craftsmanship. Note their level of professionalism too.

Watch out for red flags or complaints. These may point to issues with the contractor’s reputation or performance. Prioritize contractors with a history of satisfied customers and positive reviews.

Taking time to check reviews and testimonials can lead to a successful flooring project. It helps reduce the risk of unexpected problems during installation.

Verifying Credentials and Licenses

Ensuring flooring contractors have proper credentials and licenses is crucial. Reputable installers should hold valid licenses from relevant state boards. This guarantees their competency and safeguards the installation process.

Importance of Proper Licensing

Licensing requirements for flooring contractors vary by state. Some states may not have licensing laws for contractors. Others, like New York City, require professionals to be city-licensed for certain projects.

Understanding local licensing requirements is vital when hiring flooring contractor credentials and flooring installer licenses.

How to Check Contractor Licenses

Homeowners can visit their state’s official state licensing boards website to verify a contractor’s licensing requirements. This allows for license verification and confirms the validity of a contractor’s qualifications.

Checking a contractor’s background and performing a license check helps homeowners make informed decisions. It also helps avoid hiring unqualified or unlicensed professionals.

Thoroughly verifying credentials and licenses protects homeowners and ensures high-quality flooring projects. This due diligence guarantees safety and success during the installation process.

Local flooring contractors

Requesting Work Samples and Portfolio

Reviewing a flooring installer’s work examples offers insights into their craftsmanship and design skills. Experienced professionals often proudly showcase their past projects. This gives homeowners a clear picture of the quality they can expect.

Requesting work samples helps you understand the installer’s expertise better. You can examine their attention to detail and seamless design integration. This will help you determine if their style matches your preferences.

A well-curated portfolio highlights the installer’s ability to meet client needs. It also shows their success in delivering great outcomes. Client references and testimonials can further boost your confidence in their skills.

By reviewing an installer’s previous work, you can make a smarter choice. This ensures the chosen professional has the skills to execute your project well. You’ll be more likely to achieve the quality and precision you desire.

Obtaining Detailed Estimates

Gathering multiple detailed estimates from flooring contractors is crucial for your project. Get quotes from at least three qualified professionals. Ensure they provide a comprehensive breakdown of costs for your specific project.

Factors influencing pricing should be clearly outlined in the estimates. These include square footage, linear footage, material costs, and labor costs.

Comparing the quotes and cost breakdowns helps you make an educated decision. This approach allows for a thorough value assessment of your home improvement needs.

Understanding Cost Factors

Flooring installation estimates should include a detailed cost breakdown. This breakdown outlines various pricing factors that influence the overall project cost.

These factors may include:

  • Square footage of the area to be floored
  • Linear footage of trim or baseboards required
  • Material costs for the selected flooring type
  • Labor costs for the installation process
  • Any additional expenses, such as subfloor preparation or disposal of old flooring

Comparing Quotes from Multiple Contractors

Obtaining multiple quotes allows you to compare the cost breakdowns. This ensures you’re receiving competitive pricing for your flooring project.

The comparison process helps with thorough budget consideration. It guides you in making an informed decision that aligns with your financial goals.

Detailed estimates provide a clear understanding of overall project costs. This enables you to make a well-informed decision that maximizes your investment’s value.

Interviewing Potential Contractors

Interviewing flooring contractors is key to a successful project. Prepare questions to assess their experience, expertise, and professionalism. This will help you find the right installer for your flooring needs.

Preparing Interview Questions

Ask questions about these areas when interviewing flooring contractors:

  1. Communication Skills: Check how clearly they explain services, timelines, and potential challenges.
  2. Professionalism: Look at their customer service, responsiveness, and openness in addressing your concerns.
  3. Project Management: Ask about their approach to project management, including coordinating subcontractors and meeting deadlines.
  4. Experience and Expertise: Inquire about their industry experience and skills with your chosen flooring types.
  5. Problem-Solving and Decision-Making: Assess their problem-solving abilities when faced with unexpected challenges or changes.
  6. Responsiveness and Transparency: Check their responsiveness and transparency about timelines, materials, and potential extra costs.

Assessing Communication and Professionalism

Notice the contractor’s communication style and professionalism during the interview. Watch how they respond and listen to your concerns.

See if they give clear, detailed explanations. This will show if their decision-making process and customer service meet your needs.

Reviewing and Signing Contracts

Homeowners must carefully review the contract before finalizing a flooring installation project. This legal document outlines the work terms and conditions. It defines the responsibilities of both the homeowner and the contractor.

Understanding the contract helps homeowners protect their interests. It ensures the project is completed as expected.

Key Contract Terms to Consider

Homeowners should focus on several key elements when reviewing the flooring installation contract. These include the scope of work, warranty information, and payment schedules.

Other important aspects are the project timeline and dispute resolution process. Paying attention to these details can prevent future issues.

  • Scope of work: Ensure the contract clearly defines the work to be performed, including the type and quantity of flooring materials, installation methods, and any additional services.
  • Warranty information: Understand the warranty coverage provided by the contractor and the manufacturer for the flooring materials and installation.
  • Payment schedules: Review the agreed-upon payment terms, including any deposit requirements, progress payments, and the final balance.
  • Project timeline: Verify the estimated start and completion dates, as well as any provisions for addressing delays.
  • Dispute resolution: Familiarize yourself with the process for resolving any conflicts or disagreements that may arise during the project.

Ensuring Clear Understanding of Responsibilities

Homeowners should establish clear communication with the contractor to avoid misunderstandings. They need to fully comprehend the contract terms. This includes discussing any unclear provisions.

Seeking clarification on the homeowner’s and contractor’s obligations is crucial. A shared understanding of the contract helps prevent disputes.

This approach ensures a smooth flooring installation process. It keeps both parties on the same page throughout the project.

Preparing for Installation Day

Get ready for your new flooring by preparing your home. Clear the work area and protect your belongings. These steps ensure a smooth installation process.

  • Clearing the Work Area: Remove all furniture, rugs, and items from the rooms getting new floors. This helps installers work efficiently and prevents damage. Disconnect gas appliances and electronics in the work area.
  • Protecting Furniture and Belongings: Cover items that can’t be moved with plastic sheeting or tarps. This protects them from dust and debris. Label and organize items for easy reinstallation later.

Talk to your flooring contractor about the timeline and special requirements. This helps ensure a smooth project completion.

Proper preparation leads to a seamless and stress-free flooring installation. Your efforts will result in a beautiful new floor that lasts for years.

Discover FindPros for Your Flooring Installation

Looking for reliable and efficient flooring installers? FindPros can help. Simply answer a few questions about your home project, and we’ll match you with top-rated local professionals. Get the best pricing when multiple pros compete for your job, and find the ones you get along with best. Worried about the installation process? Our vetted experts can handle stairs, basements, and any other tricky areas. Have additional questions? Our team is available to provide answers and guide you through the process. Get started with FindPros today and find the perfect person to install your new floors, no matter the material or location.

Conclusion

Hiring the right flooring installer is crucial for transforming your living space. It ensures the longevity of your flooring installation project. Understanding flooring options and researching local contractors helps you make an informed decision.

A reputable flooring installer can greatly improve the quality and durability of your floors. They provide exceptional workmanship and save you time and money. Professional installers prevent issues like buckling and warping.

Skilled installers can boost your property value with polished, customer-satisfying floors. They transform living spaces with durable floors that match your style. Trust their expertise for your next home renovation or home improvement project.

Frequently Asked Questions (Flooring Installers)

The first step is to research and hire professional flooring installers. This ensures the job is done properly and your investment lasts.
The flooring installation cost can vary based on factors like the square footage, material type, and labor. Getting detailed estimates from multiple contractors is important to find the best value.
Professional installers can work with a range of flooring materials, including vinyl, tile, laminate, and carpeting. They have the expertise to install any type of flooring properly.
Before the installers arrive, clear the work area by removing furniture, rugs, and appliances. Cover any remaining items to protect them from dust and debris. This helps the job go more efficiently.
Hiring a reputable flooring installation company is the best way to get floors that will withstand heavy foot traffic and last for years. Their expertise and warranties provide peace of mind and protect your investment.

Flea Exterminators

Furniture Builders Near You

Can’t find what you are looking for?

How It Works

  • Answer a few questions about your home project.
  • Within seconds, get matched with top-rated local pros.
  • Compare quotes and choose the best pro for the job.

Flea Exterminators In Your Area

How to Find the Right Flea Exterminators for Your Home

Meta Description: Discover expert flea exterminators to eliminate infestations in your home. Learn how to choose the right professional for effective, long-lasting flea control solutions.

Battling a stubborn flea infestation in your home? The right flea exterminator can make a huge difference. They can effectively eliminate these pests and prevent future problems.

With many pest control options, finding the best fit can be tricky. Let’s explore how to choose the perfect flea exterminator for your home.

Flea Exterminators

Key Takeaways

  • Conducting thorough research on prospective flea exterminators is crucial to ensure their reputation, experience, and use of an Integrated Pest Management (IPM) approach.
  • Companies offer comprehensive flea control services, including home inspections, customized treatment plans, and a money-back guarantee.
  • When choosing a flea exterminator, consider factors like their location, pricing, insurance coverage, and eco-friendly solutions.
  • Professionals use a range of safe and effective methods to treat flea infestations, targeting both the adult fleas and their eggs.
  • Ongoing preventative measures, such as treating pets and maintaining a clean home, can help keep flea populations at bay.

Understanding Flea Infestations

Flea infestations can be a frustrating problem for pet owners and households. These small, agile insects thrive in warm, humid environments, especially where pets spend time. Understanding their life cycle is key to tackling an infestation.

Life Cycle and Behavior

The flea’s life cycle has four stages: egg, larva, pupa, and adult. Adult fleas lay up to 50 eggs daily on pet fur. These eggs fall off and hatch into larvae.

Larvae feed on organic matter before pupating and becoming adult fleas. Adult fleas feed on the blood of pets, humans, and other mammals.

Fleas reproduce rapidly, creating a significant challenge. A single pair can produce over a million offspring in weeks. Depending on species, fleas live from 8 days to over a year.

Signs of an Infestation

  • Frequent pet scratching or grooming behavior
  • Presence of flea dirt (small, dark specks) on the pet’s fur or in the home
  • Small, red bites on people, especially around the ankles and legs
  • Seeing live fleas on the pet or in the home

Untreated flea infestations can quickly spiral out of control. This can lead to health issues for both pets and humans. Quick action and a thorough approach are vital for solving a flea problem.

flea life cycle

The Importance of Professional Flea Exterminators

Getting rid of fleas can be tricky. DIY methods often fall short. Professional pest control is key for safe and effective flea removal.

Fleas have tough exoskeletons and thrive in carpets. Experts have the right tools and methods to tackle flea problems. They keep pets and people safe.

Professional flea services can cost as little as .95 monthly. This is a smart investment for long-term results. Experts use Integrated Pest Management for better outcomes.

Fleas can spread serious illnesses like plague and typhus. Professional help is crucial to protect your health. Experts offer follow-up visits and advice to prevent future problems.

Hiring a trusted pest control pro ensures peace of mind. They provide effective and responsible flea extermination. Your home or business stays flea-free with their help.

Professional flea exterminator

Choosing the Right Flea Exterminator

Finding the right flea exterminators is vital for tackling a flea infestation. Skilled pest control pros can effectively eliminate these pesky critters from your home.

Experience and Reputation

Look for flea exterminators with a proven track record of successful pest control services. Check their website, online reviews, and ask for references. A reputable exterminator will have expertise to identify infestation sources.

Treatment Methods and Safety

Ask about the exterminator’s approach to flea control. Good exterminators use integrated pest management (IPM) techniques for effective and safe elimination. Inquire about specific treatments and safety protocols for your family and pets.

Flea exterminators who prioritize safety and use eco-friendly solutions offer comprehensive pest control. Choosing a reliable pro ensures a flea-free home and careful treatment process.

Integrated Pest Management (IPM) Approach

Integrated Pest Management (IPM) is the best way to tackle flea infestations. It combines prevention and treatment to solve current problems and stop future ones. IPM looks at the whole flea life cycle and their habits.

IPM focuses on watching pest numbers and finding out which species they are. It then uses a mix of control methods. These can include mechanical, physical, biological, and chemical ways to get rid of fleas.

  • Mechanical control: Vacuuming carpets, furniture, and pet bedding to remove eggs, larvae, and adult fleas.
  • Physical control: Using pest control barriers, such as caulking and sealing cracks and crevices, to eliminate potential breeding grounds.
  • Biological control: Introducing natural predators or parasites that can help reduce the flea population.
  • Chemical control: Treating carpets, furniture, and pet bedding with approved insecticides to eliminate the current infestation.

IPM helps pest control experts fix the main causes of flea problems. It’s a smart, eco-friendly way to get rid of fleas for good. This method kills current fleas and stops new ones from moving in.

Preparing for Flea Extermination

Getting ready for flea extermination involves key pre-treatment steps. Vacuum carpets and furniture thoroughly to remove existing fleas and eggs. Wash your pet’s bedding in hot water to eliminate any fleas.

Pre-Treatment Steps

Follow these important steps to prepare for flea extermination:

  • Vacuum thoroughly: Clean carpets, upholstered furniture, and other flea-prone areas. This removes existing fleas and eggs, boosting the extermination’s effectiveness.
  • Wash pet bedding: Use hot water to clean your pet’s bedding. This kills any fleas or eggs present.
  • Dispose of vacuum contents: Seal the vacuum bag in plastic and discard it outdoors. This prevents fleas from spreading.
  • Sweep outdoor areas: Clean porches, steps, and decks to remove any fleas or eggs outside.
  • Prepare the yard: Mow the lawn short and remove tall vegetation. This makes your yard less welcoming to fleas.

These pre-treatment steps boost the success of flea extermination. They help eliminate fleas more effectively. Proper flea control combines these steps with professional flea extermination services.

Post-Treatment Care and Prevention

Keep fighting fleas after the initial extermination. Vacuum often and wash your pet’s bedding regularly. Throw away the vacuum bag outside to remove any captured fleas or eggs.

Follow-up Treatments

You might need more treatments to fully eliminate fleas. It can take 1-2 weeks to see results. Pest control pros may suggest extra visits for complete flea removal.

Preventative Measures

  • Use flea collars or topical treatments on pets to help keep fleas at bay.
  • Maintain yard cleanliness by mowing lawns, trimming bushes, and inspecting secondhand items for potential flea harboring.
  • Vacuum regularly, especially in high-traffic areas, to remove any remaining flea eggs or larvae.
  • Wash pet bedding and soft furnishings frequently to eliminate any hidden flea infestations.

A complete approach to flea care and prevention is key. Follow these steps to keep your home flea-free. This will protect your family and pets from flea-related risks.

Finding the Right FindPros Flea Exterminator

Don’t let flea bites, flea bombs, and pet allergies ruin your home. FindPros can match you with the best local pest control professionals to exterminate fleas and control flea populations for good. Simply answer a few questions about your flea infestation, and we’ll provide you with top-rated flea exterminators in your area. Compare flea extermination costs and find the professional that’s the perfect fit for your home and furry friends. Get started on eliminating those pesky fleas today with FindPros.

Conclusion

Eliminating fleas in your home requires expert help. Understanding flea behavior and signs of infestation helps homeowners make informed decisions.

When choosing an exterminator, consider their experience, reputation, and methods.

Preparing for extermination and following up with prevention is crucial. This helps maintain a flea-free home and avoid costly, recurring infestations. Professional flea exterminators are a smart choice for effective and safe elimination.

Frequently Asked Questions (Flea Exterminators)

The first sign of a flea infestation is usually frequent pet scratching or grooming behavior. You may also notice small, red bites on people, especially around the ankles and legs, as well as the presence of flea dirt (small, dark specks) on the pet’s fur or in the home.
Hiring a professional pest control expert is crucial for safe and effective flea removal. Fleas have tough exoskeletons and can be difficult to eliminate using DIY methods. Professionals have the right tools, methods, and expertise to tackle the entire flea life cycle, including eggs, larvae, and adult fleas, ensuring a long-lasting solution.
An Integrated Pest Management (IPM) approach combines prevention and treatment to solve current flea problems and stop future infestations. IPM focuses on understanding the flea life cycle and using a mix of mechanical, physical, biological, and chemical control methods to get rid of fleas effectively and safely.
Before flea extermination, it’s important to vacuum carpets, upholstered furniture, and other flea-prone areas thoroughly to remove existing fleas and eggs. Washing your pet’s bedding in hot water can also help eliminate any fleas or larvae present. Sealing the vacuum bag and discarding it outside prevents fleas from spreading.
To prevent future flea infestations, pet owners should continue using flea collars or topical treatments on their pets. Maintaining a clean yard by mowing, trimming bushes, and inspecting secondhand items can also help. Regularly vacuuming and washing pet bedding and soft furnishings is crucial to eliminate any remaining flea eggs or larvae.

Flat & Foam Roof Repair

Furniture Builders Near You

Can’t find what you are looking for?

How It Works

  • Answer a few questions about your home project.
  • Within seconds, get matched with top-rated local pros.
  • Compare quotes and choose the best pro for the job.

Flat & Foam Roof Repair In Your Area

Flat Foam Roof Repair: A Guide to Finding the Best Contractor

Meta Description: Discover expert tips for flat foam roof repair and find the best contractor for your project. Learn how to maintain and extend your roof’s lifespan efficiently.

Keeping your flat foam roof in top shape requires the right contractor. This guide will help you choose wisely. We’ll cover common roof issues, maintenance tips, and key factors for selecting a qualified contractor.

Your commercial or industrial building deserves expert care. Learn how to spot problems and find the best roofing professional. This knowledge will help you protect your investment for years to come.

Flat Foam Roof Repair

Key Takeaways

  • Spray polyurethane foam (SPF) roofs offer superior insulation, durability, and longevity, but may require repair over time.
  • Identifying and addressing common issues with flat foam roofs is crucial for maintaining their performance and lifespan.
  • Choosing the right contractor with the proper certifications and experience is essential for successful flat foam roof repair.
  • Regular maintenance and periodic recoating are key to maximizing the lifespan of your spray foam roofing system.
  • Understanding the unique benefits and drawbacks of SPF roofs can help you make an informed decision about the best roofing solution for your building.

What is Spray Polyurethane Foam Roofing?

Spray polyurethane foam (SPF) is a popular roofing material in commercial and industrial sectors. It’s sprayed as a liquid onto roofs, then expands into a solid foam layer. SPF roofing offers many benefits for building owners and contractors.

Definition and Overview

SPF roofing mixes two chemicals on-site and sprays them onto the roof. The mixture expands, forming a solid foam layer that sticks to the existing roof. This foam provides great insulation, waterproofing, and structural strength.

History and Development

SPF roofing began in the 1960s for industrial and commercial buildings. Over time, the technology improved in chemistry, application, and performance. Now, SPF is widely used for various commercial and industrial structures.

spray foam roof

SPF roofing can last over 30 years when applied correctly. It creates a seamless barrier that reduces ponding and leaks. This enhances the roof’s overall performance and durability.

Benefits of Spray Foam Roofs

Spray polyurethane foam (SPF) roofing systems offer many benefits for homeowners and building owners. They provide energy-efficient and durable roofing solutions. SPF roofs deliver impressive performance and long-term value.

High R-Value and Energy Efficiency

Spray foam roofs have the highest R-value of any common roofing material. It’s typically around 6.6 per inch. This excellent insulation helps reduce heating and cooling costs significantly.

The initial investment often pays for itself in less than 10 years through energy savings. SPF maintains a building’s interior temperature, improving comfort and energy efficiency.

Seamless and Self-Flashing

SPF roofing systems are completely seamless, eliminating potential leaks at seams. The foam also has self-flashing properties, conforming to irregular shapes and penetrations easily.

This design doesn’t need custom flashing components. A properly installed SPF roof ensures a watertight system that protects your building.

Durability and Longevity

When properly installed and maintained, spray foam roofs can last 30 to 40 years or more. The durable SPF membrane needs periodic recoating every 10-15 years.

Recoating protects the foam from UV damage and maintains the roof’s performance. Regular inspections and maintenance help spray foam roofs provide decades of reliable service.

spray foam roof

Drawbacks of Spray Foam Roofs

Spray polyurethane foam (SPF) roofing has some notable drawbacks. One main weakness is its sensitivity to ultraviolet (UV) rays. Unprotected SPF degrades within 72 hours of UV exposure.

To prevent this, SPF roofs need a protective coating. An elastomeric acrylic coating shields the foam from damaging UV rays.

Limited Installation Window

Spray foam roofing systems have a narrow installation window. They must be applied in specific weather conditions. The ideal temperature is 50°F and rising, with minimal wind.

This can delay or prevent SPF application in unpredictable weather. Sudden changes can interrupt installation, causing scheduling issues and delays.

Consider these drawbacks when choosing a spray foam roof. Work with experienced contractors for successful installation. This ensures long-term performance of your SPF roof.

Flat Foam Roof Repair

Common Issues and Causes

Spray polyurethane foam (SPF) roofs can develop problems over time. These include cracking, blistering, delamination, and ponding water. Poor installation, UV exposure, or failed roofing layers can cause these issues.

Inspection and Assessment

Fixing a flat foam roof starts with a thorough check. This helps find the problem’s cause and extent. Experts look at the foam, coatings, and roof base closely.

Quick action on needed repairs is key. It stops more damage and keeps the SPF system working well.

Regular care by skilled roofers can make spray foam roofs last longer. These roofs need cleaning and new coatings every five to ten years. Yearly checks help catch small problems before they grow.

Fixing issues like branch punctures or moss damage is crucial. It keeps the flat foam roof strong. Unrepaired holes can let water break down the foam.

Sunlight and weather can harm exposed foam. Fix any holes in a spray foam roof within 6 months. Regular checks and quick fixes help flat foam roofs last.

Choosing the Right Contractor

Hiring a skilled contractor is key for successful flat foam roof repair. Look for certified pros experienced in SPF roofing systems. The Spray Polyurethane Foam Alliance (SPFA) offers certification for contractors.

This ensures they have expertise in spray foam materials. SPFA-certified contractors meet high standards for safety and installation techniques.

Credentials and Certifications

Certified contractors have special training in spray foam roofing. They possess qualifications that show their competence in the field. SPFA certifications indicate they meet top industry standards.

Experience and Portfolio

Evaluate a contractor’s experience and past work. Ask to see their portfolio of similar projects. Request references from past clients to verify their skills.

This helps ensure they can address your roof’s issues. It also guarantees high-quality, long-lasting repairs.

An experienced contractor with a proven record can make a big difference. Take time to carefully vet potential candidates. This helps you find the best fit for your needs.

Maintenance and Recoating

Maintaining a spray polyurethane foam (SPF) roof is vital for its long-term performance. Regular inspections and preventative maintenance help ensure proper adhesion and protection. Neglecting upkeep can lead to serious problems and early roof failure.

Importance of Regular Maintenance

The protective coating on an SPF roof degrades due to weather exposure. To maintain UV protection and waterproofing, the coating must be reapplied every 10-15 years. This process involves cleaning the surface and applying a new layer of coating.

Recoating Process and Frequency

Commercial properties should have roof inspections twice a year to catch issues early. In Phoenix, foam roofs should be recoated in spring and fall for best protection.

Licensed roofing contractors should handle recoating, especially if there are pre-existing issues. Use at least two gallons of elastomeric coating per 100 square feet, applied in two coats.

With proper care and recoating, a polyurethane foam roof can last 30-50 years or more. Its ability to expand and contract with temperature changes contributes to its longevity.

Spray Foam vs. Other Roofing Systems

Spray polyurethane foam (SPF) roofing has unique benefits over traditional systems. It offers better insulation and a seamless design. This guide will help you choose the best roofing for your needs.

Comparison with Built-Up Roofing

SPF roofs outshine built-up roofing (BUR) systems in many ways. They need less material and install faster, causing less disruption. With proper care, spray foam roofs can last 50 years or more.

Comparison with Single-Ply Membranes

Spray foam roofs have no seams, unlike single-ply membranes. This prevents leaks and water damage. SPF also provides better insulation and improves building strength.

While SPF costs more upfront, it saves money long-term. It improves energy efficiency and needs less maintenance over time.

Spray foam roofing offers top-notch insulation and durability. It’s seamless design prevents leaks and enhances building structure. Consider these benefits when choosing your next roofing system.

Installation Process

Site preparation is vital for spray foam roofing. The existing roof needs thorough cleaning with a pressure washer. Any holes or defects must be repaired for a smooth surface.

Site Preparation

Rooftop coverage is key for a spray foam roof. It ensures a uniform layer without seams to stop leaks. The roof should dry to a grey color after application.

A clean, even surface helps the SPF stick well. Any yellow areas may show poor application.

Application Techniques

Spray foam application needs special equipment and skilled workers. Two chemicals are heated and sprayed under high pressure to create foam. The right temperature and pressure help the foam stick to the roof.

Foam roofs are usually 1.5 to 2.5 inches thick. A protective coating must be applied within 72 hours to prevent UV damage. Closed-cell foam is often used for flat roofs.

Experts offer training on spray foam application. SprayWorks Equipment provides hands-on courses for proper adhesion. Their founder, Jim Davidson, has over 50 years of industry experience.

Environmental Impact

Spray polyurethane foam (SPF) roofing systems are eco-friendly and sustainable. They can be recoated many times, reducing the need for costly replacements. This extends the roof’s life and minimizes environmental impact.

SPF’s superior insulation improves a building’s energy efficiency. It lowers carbon footprints and can cut heating and cooling costs by up to 40%. This makes SPF ideal for commercial facilities aiming to boost sustainability.

Sustainability and Renewable Features

  • SPF roofs can be recoated every 20 years, reducing the need for replacement and associated resources.
  • SPF offers over 500% greater energy efficiency than conventional roofing systems, according to a Texas A&M University case study.
  • The production of SPF has lower overall energy demands compared to traditional built-up roofing material manufacturing.
  • SPF significantly reduces reliance on fossil fuels associated with ongoing maintenance and future replacements.
  • SPF is formulated with minimal volatile organic compounds (VOCs), reducing harmful emissions.
  • SPF’s exceptional wind resistance and UV-stable reflective coating further enhance its sustainability.

SPF’s sustainable features make it a smart choice for commercial buildings. It helps reduce carbon footprints and environmental impact. Facility owners can benefit from its long-lasting, eco-friendly properties.

FindPros: Your Trusted Partner for Flat Roof Repair

Maintaining your commercial building’s spray polyurethane foam (SPF) roof or flat roofing system requires expert care. Look no further than FindPros, your one-stop-shop for connecting with top-rated local contractors who specialize in commercial roofing restoration. Simply fill out our quick survey, and we’ll match you with professionals who can assess your roof’s surface, identify any issues, and provide the necessary repairs or recoating services.

With FindPros, you’ll get the best pricing when multiple pros compete for your job, ensuring you find the right fit for your commercial facility’s needs. Get started today and protect your investment in your building’s flat roofing system.

Conclusion

Spray polyurethane foam (SPF) roofing is a durable solution for commercial properties. It offers impressive insulation, seamless design, and long-term performance. SPF roofing has become popular due to its many benefits.

Even well-installed SPF roofs may need repairs over time. Weathering, damage, and wear can affect these roofs. Understanding common issues with foam roofs helps owners protect their buildings.

Working with a skilled contractor is key for fixing problems. Regular inspections and recoating are also important for maintaining foam roofing. Proper care ensures the roof’s longevity and performance.

A proactive approach to roof health benefits commercial property owners. It protects buildings and improves energy efficiency. This investment also supports a more sustainable future for all.

Frequently Asked Questions (Flat & Foam Roof Repair)

The most important factors are the contractor’s certifications, experience with similar projects, and a proven track record of high-quality work. Look for contractors certified by the Spray Polyurethane Foam Alliance (SPFA) as they have specialized training in proper spray foam application techniques.
The foam roof coating generally needs to be reapplied every 10-15 years to maintain its UV protection and waterproofing properties. Regular inspections and preventative maintenance are key to ensuring the long-term performance of the foam roof system.
Some common issues include cracking, blistering, delamination, and ponding water. These problems can be caused by poor initial installation, exposure to UV rays, or failure of the underlying roofing layers. Prompt identification and repair of these issues is crucial to prevent further damage.
Spray foam roofing offers superior insulation, a seamless design to prevent leaks, and greater durability compared to traditional flat roof systems. While the upfront cost may be higher, SPF can provide long-term energy savings and lower maintenance requirements over the life of the roof.
The key steps in recoating a foam roof include thoroughly cleaning the roof surface, addressing any necessary repairs, and applying a new layer of the protective elastomeric coating. This helps restore the UV resistance and waterproofing properties of the foam roof system. It’s important to work with a professional roofing contractor to ensure the process is done correctly.