Siding Repair

Siding Repair Near You

Can’t find what you are looking for?

How It Works

  • Answer a few questions about your home project.
  • Within seconds, get matched with top-rated local pros.
  • Compare quotes and choose the best pro for the job.

Siding Repair In Your Area

Siding Repair: Signs You Need It and How to Find a Pro

Meta Description: Discover signs your home needs siding repair and learn how to find a reliable professional. Protect your property and boost curb appeal with expert Siding Repair services.

Siding Repair

Is your home’s siding showing signs of wear? Damaged siding can lead to water damage, mold, and structural issues. Let’s explore indicators that your siding needs attention.

We’ll also guide you on finding a professional siding contractor to address these problems effectively.

Key Takeaways

  • Siding plays a crucial role in protecting your home from the elements and maintaining its structural integrity.
  • Recognizing the signs of siding damage, such as cracks, gaps, and increased energy costs, is essential for timely repairs.
  • Repairing siding is generally less expensive and disruptive than replacing entire panels, making it a cost-effective solution in many cases.
  • Hiring a professional siding contractor is recommended to ensure proper installation and avoid issues like moisture infiltration and rotting.
  • Upgrading to new siding materials with improved insulation properties can help lower energy consumption and improve your home’s overall efficiency.

Introduction to Siding and Its Importance

Siding is vital for a home’s exterior. It protects against weather, moisture, and pests. Common materials include vinyl, wood, and fiber cement.

Siding safeguards the home’s structure and insulation. It ensures both functional and aesthetic appeal.

Types of Siding Materials

Homeowners can choose from various siding materials. Wood offers a classic look but needs regular upkeep. Vinyl is low-maintenance but can be damaged by extreme weather.

Fiber cement siding withstands impact and harsh temperatures. Stone and brick veneer provide a premium look but cost more.

Functions of Siding

  • Home Protection: Siding shields the home’s interior from elements like wind, rain, and UV radiation.
  • Structural Integrity: Proper siding installation enhances a home’s stability and longevity.
  • Energy Efficiency: Some materials, like LP® SmartSide® Trim & Siding, improve insulation and reduce energy costs.
  • Curb Appeal: Siding material and condition impact a home’s aesthetic and resale value.

Choosing the right siding is crucial for your home. It affects functionality, energy efficiency, and visual appeal.

Understanding siding options helps homeowners make informed choices. Consider your needs and preferences when selecting siding material.

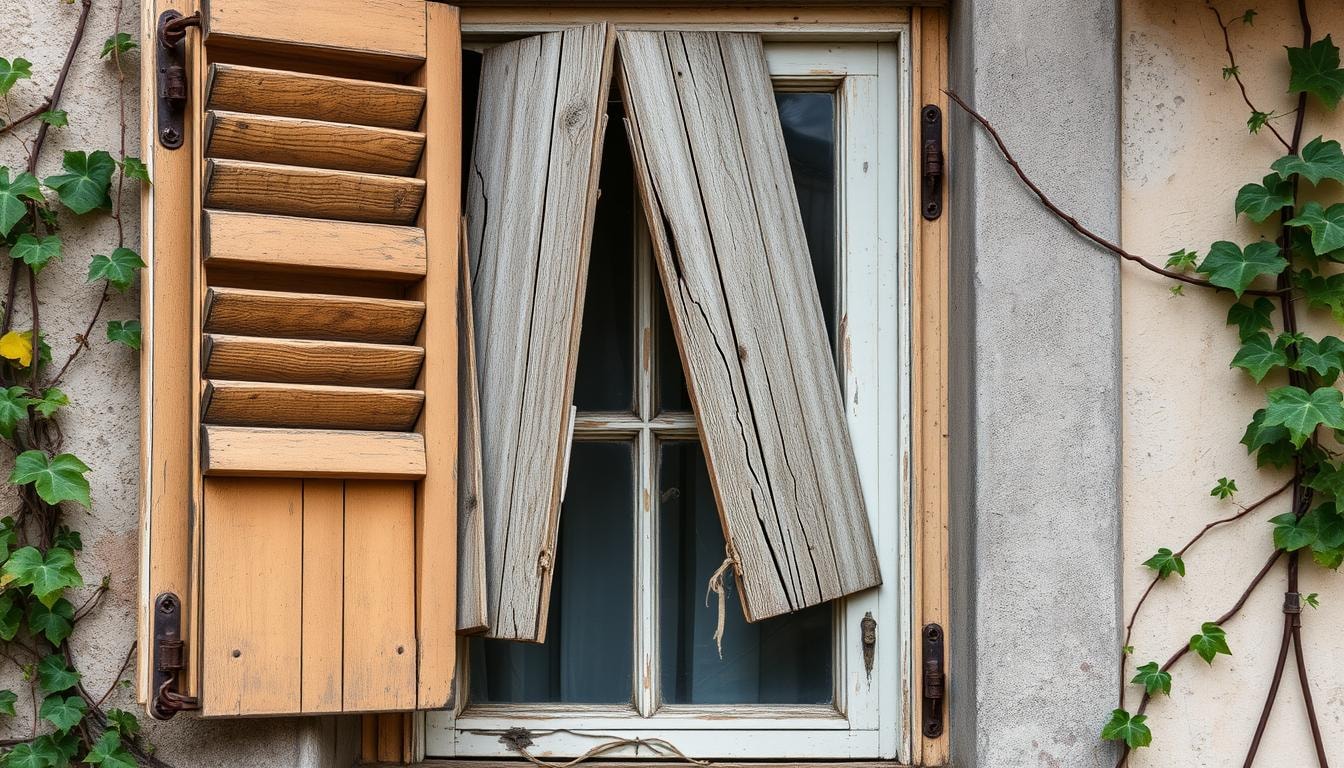
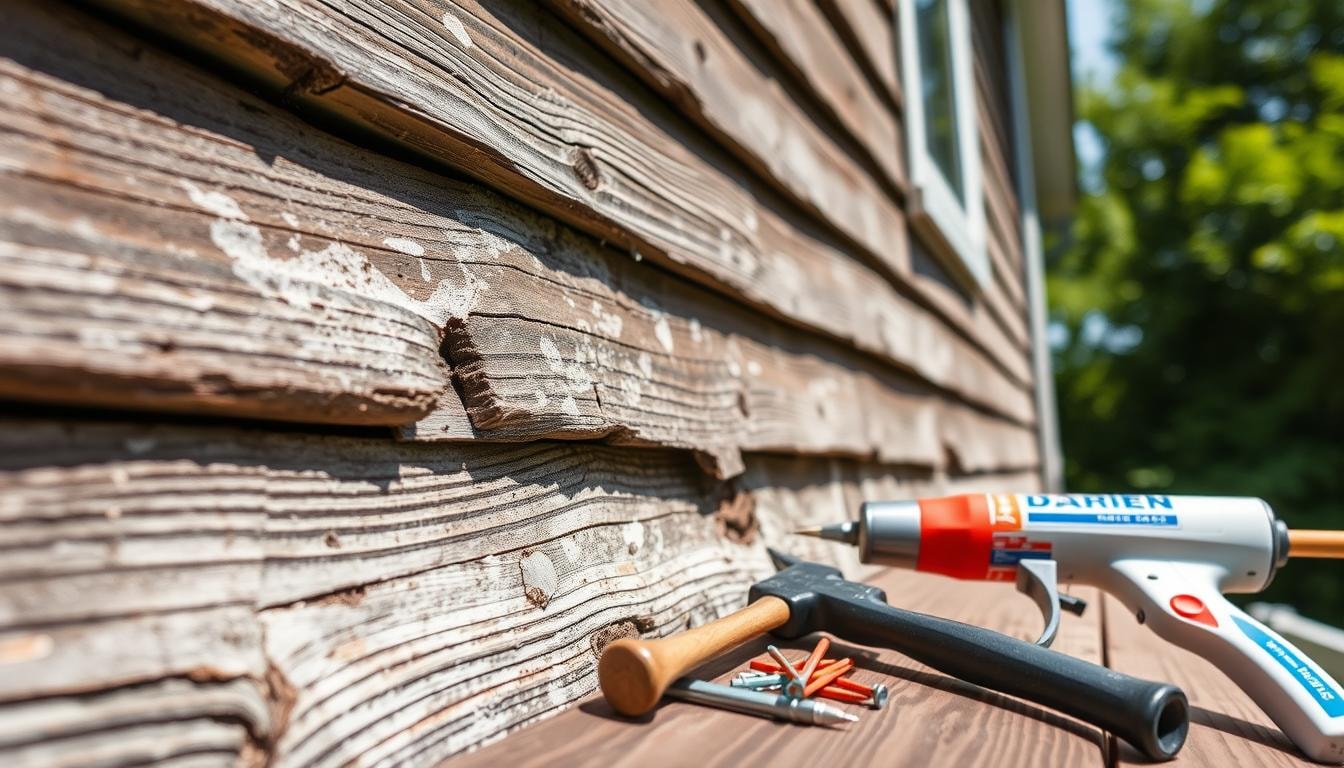
Signs Your Siding Needs Repair

Your home’s siding may need fixing if it looks worn out. Cracks, gaps, or holes can let water, pests, and air in. This can lead to moisture damage, rot, and mold.

These problems can weaken your home’s structure. They can also make it less energy-efficient and less attractive.

Cracks, Gaps, or Holes

Small openings in siding can signal bigger issues. They let water in, causing damage and mold growth. Pests can also enter, leading to infestations.

Quick action is key to avoid costly repairs later. Fixing these problems early can save you money and headaches.

Increased Energy Costs

Higher utility bills might mean your siding needs help. Damaged siding can make your home less insulated and weatherproof. This leads to more energy use and higher heating and cooling costs.

New, energy-efficient siding can cut your bills. Options like insulated vinyl siding improve your home’s energy efficiency.

Check your siding often for wear and tear. Early action prevents bigger issues and expensive fixes. Look for cracks, gaps, holes, or sudden energy bill increases.

These signs may mean it’s time to repair or replace your siding. Taking care of your siding protects your home and investment.

Warped or Bulging Siding

Warping or bulging siding signals underlying issues. It often relates to moisture damage or poor installation. These problems can indicate structural concerns that need quick attention.

Siding panels should slide horizontally about half an inch. If not, it might mean improper nailing during installation. This is a common issue with poor siding installation.

Moisture can make siding warp and rot. It may also lead to mold growth. Gray, white, or black spots might show mildew or mold presence.

Older homes may have siding issues due to structural settling. A structural engineer can assess the problem and suggest solutions.

Heat sources can also cause vinyl siding to warp. These include nearby grills or UV rays from high-efficiency windows.

Fixing warped siding is vital for your home’s structure and look. Choose quality materials and skilled installers. This can help prevent these problems from happening.

Interior Water Damage Signs

Interior water damage signs can reveal hidden moisture issues. Bubbling wallpaper, peeling paint, or mold growth may indicate exterior siding problems. Don’t ignore these warnings, as they can lead to severe issues.

Bubbling Wallpaper or Paint

Bubbling or blistering wallpaper and paint often signal water infiltration behind siding. This happens when moisture seeps through cracks or gaps. The interior materials become saturated and start to bubble up.

Mold and Mildew Growth

Mold and mildew on interior walls can indicate water damage from exterior siding. These fungi thrive in damp environments and pose health risks. Quick identification and removal of mold is crucial for a healthy home.

Addressing water damage signs quickly prevents further deterioration and costly repairs. Regular siding inspections and proper maintenance protect your home’s integrity. These actions also safeguard the health of everyone living there.

Maintenance Hassles

low maintenance siding

Home siding maintenance can be a big factor to consider. Some materials, like wood siding, need more frequent care than others. Low-maintenance vinyl siding is a popular alternative.

If your current siding is a constant hassle, consider replacing it. A more durable, low-maintenance option could save you time and effort.

Vinyl siding is known for its durability and low upkeep. Unlike wood, it doesn’t warp or rot. It keeps its looks with little effort.

Low-maintenance siding saves time and money on repairs. This allows homeowners to focus on other aspects of home care.

Benefits of Low-Maintenance Siding

  • Reduced time and effort spent on siding maintenance
  • Potential cost savings compared to high-maintenance siding options
  • Longer-lasting siding that retains its visual appeal over time
  • Eco-friendly solution that minimizes waste from frequent replacements

Think about the long-term benefits of low-maintenance siding. It may cost more upfront but can save money over time.

Low-maintenance siding can lead to a carefree home ownership experience. It may also boost your property’s value and curb appeal.

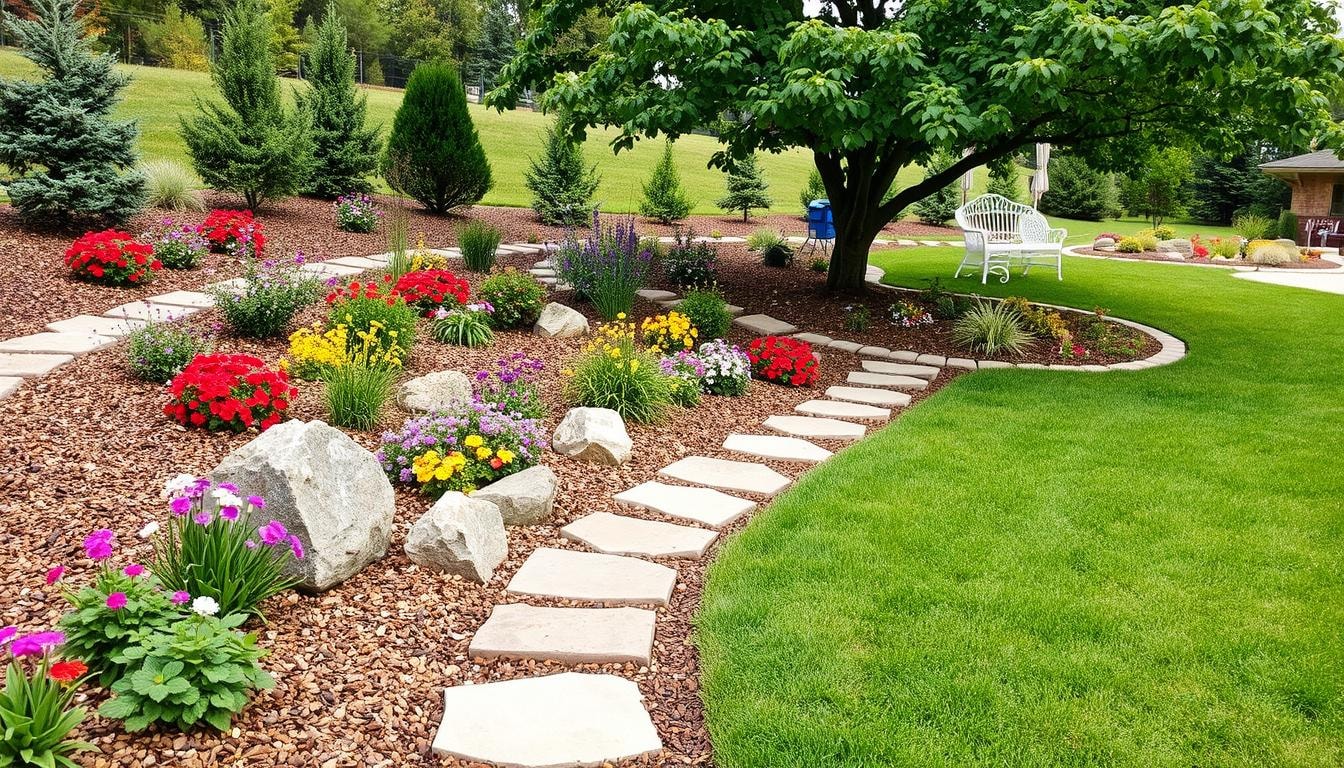
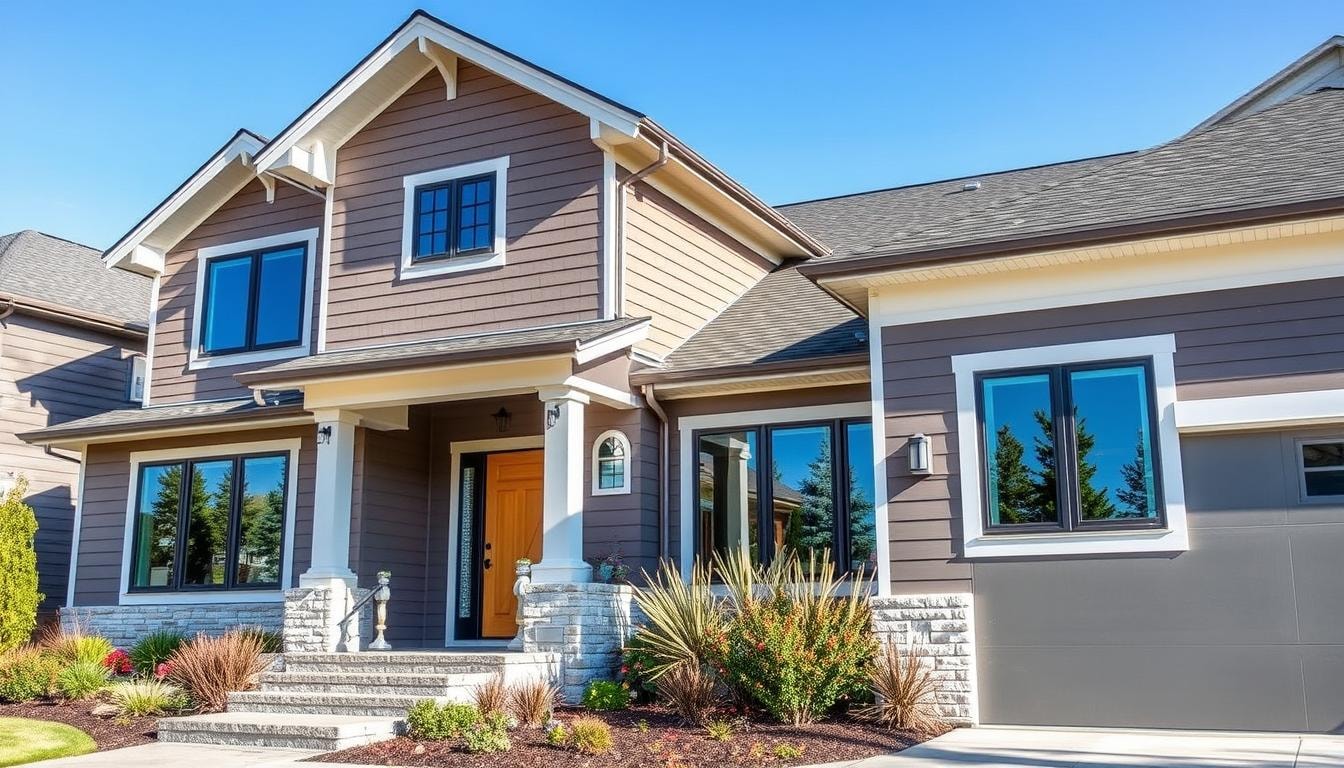
Boosting Curb Appeal and Property Value

First impressions matter when selling a home. New siding can boost curb appeal, making a house more attractive to buyers. A study shows curb appeal can account for up to 7% of a home’s value.

Replacing old siding can increase home value cost-effectively. Homeowners typically recoup about 75% of siding replacement costs when selling. There are budget-friendly ways to enhance siding and overall curb appeal.

  • A full exterior paint job typically costs between $6,242 and $11,617.
  • Repainting just the doors can cost between $112 and $205.
  • Professional window washing typically ranges between $190 and $460.
  • Power washing the driveway can cost between $180 and $240 professionally.

Homeowners should avoid excessive upgrades and consider the return on investment. Neutral shades for exterior paint can appeal to more potential buyers. Those in HOA-governed homes should check rules before making changes.

Exterior features greatly impact a home’s value, say 90% of real estate agents. 30% believe enhancing curb appeal can increase overall value by 20% or more. Investing in siding curb appeal can be a smart move for sellers.

Siding Repair: Warning Signs to Watch For

Your home’s siding is crucial for protecting its exterior. Damaged siding can cause moisture problems, pest infestations, and structural issues. Watch for these warning signs to prevent costly repairs.

Interior Moisture Damage

Interior moisture damage is a key sign of siding problems. Look for bubbling wallpaper, peeling paint, or mold growth. These issues suggest water is seeping through the siding into your home’s interior.

If left unchecked, this can lead to more serious damage. Address these problems quickly to protect your home.

Holes and Entry Points

Cracks, gaps, or holes in siding allow water and pests to enter. These openings can compromise your home’s exterior integrity. They also create potential hazards for your living space.

Rotting or Warping

Wood rot or warping in siding indicates moisture exposure. This damage can weaken your home’s structure. Contact a professional siding contractor promptly to address these issues.

Regular inspections help catch siding problems early. Proactive maintenance preserves your home’s exterior and curb appeal. Stay alert to these warning signs to protect your investment.

Utility Bill Spikes

Sudden increases in utility bills may signal ineffective home siding insulation. Damaged siding can cause air leaks, reducing energy efficiency and raising costs.

Americans pay an average of $118 monthly for electricity. This adds up to over $1,400 yearly. Windows account for 25%-30% of heating and cooling energy use.

Insulation is key for temperature control and preventing energy waste. Good insulation can last up to 80 years. However, water damage, mold, and debris can harm its effectiveness.

Cracks, gaps, or holes in siding greatly affect your home’s energy efficiency. These openings let air escape, making your HVAC system work harder. This leads to more energy use and higher bills.

Fixing siding problems quickly can lower utility costs. It also improves your home’s overall energy efficiency. Don’t ignore unexpected rises in energy bills.

Addressing siding issues promptly helps control energy costs. It also creates a more comfortable, energy-efficient home environment.

Mold, Mildew, and Fungus Growth

Mold, mildew, and fungus growth can signal moisture issues from damaged siding. These microorganisms thrive in damp environments. Their presence on your home’s interior or exterior requires attention.

Mold can cause allergic reactions and breathing problems. It also damages building materials like wood, drywall, and insulation. Excess moisture from faulty gutters or poor drainage leads to mold on siding.

  • Mold typically accumulates more on the north side of a home, where it receives less direct sunlight and remains damp for longer periods.
  • Shaded areas around the home, as well as soffits, dense bushes, and vines, can create ideal conditions for mold growth by limiting airflow and drying.
  • Regular maintenance, such as clearing gutters, fixing leaks, and using moisture-resistant siding materials like James Hardie, can help prevent mold and mildew growth.

Stopping moisture buildup is key to preventing mold and mildew spread. This protects your home’s siding from damage. Proper prevention and cleaning keep your home’s exterior mold-free.

Loose or Missing Siding Panels

loose siding

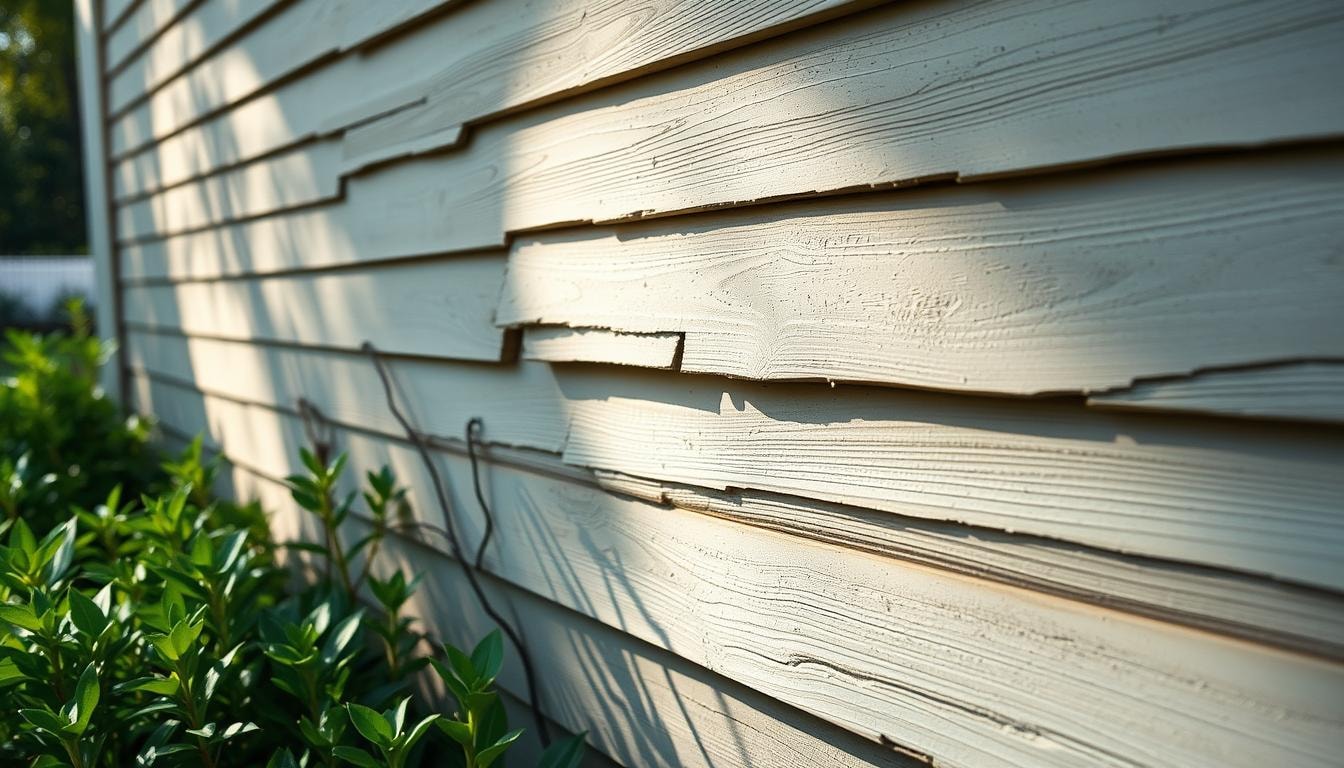
Properly installed siding shields your home from the elements. Loose or missing panels can cause serious problems. They allow water, pests, and air to enter, potentially damaging your home.

Extreme weather often causes siding issues. Aging and poor installation can also lead to problems. Check for gaps, cracks, or unsecured panels regularly.

Address these issues quickly through repair or replacement. This will protect your home’s integrity and security.

  • Loose or missing siding panels can compromise the overall protection and integrity of your home.
  • Cracks, gaps, and detached panels can allow water, pests, and air to infiltrate, leading to water damage, energy inefficiency, and other problems.
  • Addressing loose or missing siding panels through panel repair or replacement is crucial to maintaining your home’s security and energy efficiency.

Keep your home safe by checking your siding often. Look for any signs of damage. Work with a professional siding contractor to fix issues quickly.

Siding Fading and Wear

Siding can fade and wear as it ages. This happens due to UV rays and weather exposure. Cracked or discolored siding affects a home’s look and protection.

UV Fading

Sun exposure can make siding look dull over time. This fading is more common in lighter-colored materials like vinyl. Lighter shades absorb more UV radiation than darker ones.

Cracks from Weather

Weather changes can cause siding to crack and break down. These cracks hurt curb appeal and let water and pests in. Homeowners should check for cracks often and fix them quickly.

Fixing faded and worn siding is key for home upkeep. Regular checks help spot UV damage and cracks early. Quick repairs protect your home and keep it looking good.

Taking care of siding helps maintain your home’s value. It ensures your house stays safe and attractive for years to come.

Pest Infestations

Damaged siding can let pests into your home. Insects and rodents may enter through gaps or holes. They can nest and cause more harm to your home’s exterior and interior.

Pests leave signs of their presence on siding. Look for visible holes, chewed areas, and nests. Rats and mice gnaw through siding. Termites and woodpeckers slowly eat away at the material.

Unchecked pest problems can lead to costly home repairs. Regular siding checks are key to stopping infestations. Fix any cracks or holes quickly to keep pests out.

Protect your home by inspecting your siding often. Look for damage that might let pests in. Quick repairs help maintain your home protection against unwanted visitors.

Signs for Siding Replacement

Your home’s siding protects it from the elements. Ignoring siding problems can cause serious damage to your house. Here are key signs that suggest you need new siding.

Interior Wall Damage

Check for bubbling wallpaper, peeling paint, or mold growth inside your home. These issues may mean moisture is getting through your siding. Such damage can weaken your home’s structure and lead to costly fixes.

Widespread Siding Damage

Look for extensive cracking, warping, or rotting on your home’s exterior. These problems leave your house open to weather, moisture, and pests. Ignoring such damage can cause structural issues and higher energy bills.

If you see these signs, act fast to protect your home. Replacing your siding might be the best way to safeguard your property. Talk to a siding expert to assess the damage and find the right solution.

Siding Repair vs Replacement

Homeowners often struggle with siding maintenance choices. Should they fix existing siding or get a full replacement? This choice affects your home’s look, energy efficiency, and value.

Siding repair can save money for minor damages. Vinyl siding often allows fixing small sections instead of full panels. But hidden damage may lead to future costs.

A complete replacement can boost energy efficiency and curb appeal. It can also increase your home’s value. New siding materials offer better insulation and weather protection.

Your decision depends on damage extent and long-term goals. Localized damage may only need targeted repair. Worn, warped, or pest-infested siding might require full replacement.

Replacement lets you customize your home’s exterior. You can choose from various colors, styles, and materials. Consider costs, benefits, and potential return on investment.

Energy savings and overall siding condition are key factors. A professional siding contractor can help you make an informed choice.

Siding maintenance is crucial for your home’s appearance and efficiency. It also preserves your home’s value. Investing in siding provides long-term benefits and peace of mind.

Finding a Professional Siding Contractor

Hiring a top-notch siding contractor is key for repair, installation, or replacement. Research local experts, verify their credentials, and gather multiple quotes. This helps you pick the best pro for your project.

Search for licensed professionals who focus on siding installation and repair. These experts have the skills to do the job right. They ensure your siding protects your home properly.

  • Consider companies with industry certifications which signify their expertise in siding installation and commitment to quality.
  • Ask about the contractor’s experience, portfolio of past projects, and customer reviews to gauge their reliability and the quality of their home improvement services.
  • Get multiple quotes to compare prices and find the best value for your budget, but don’t sacrifice quality for the lowest price.

A pro siding contractor can save you from expensive errors. They make sure your siding works as it should. This protects your property and boosts its curb appeal.

Finding the Right Siding Pro with FindPros

Struggling with siding repairs or replacement? FindPros can help. Our platform connects you with top-rated local professionals for all your siding needs – from fixing small cracks in vinyl or wood siding to full-scale structural work. Simply answer a few questions about your project, and we’ll provide you with competitive quotes from experienced pros. Compare costs, review their qualifications, and choose the best match for your home. Get the right siding repair or replacement service at the right price – no hassle, just a seamless process.

Conclusion

Maintaining siding is crucial for protecting homes and boosting curb appeal. Recognizing signs of needed siding repair or replacement helps prevent costly damage. Working with skilled contractors ensures proper home protection.

Regular siding upkeep can cut utility bills by 30%, according to the U.S. Department of Energy. Well-maintained siding increases property value and improves indoor comfort. Addressing minor issues promptly prevents expensive problems down the road.

Frequently Asked Questions (Siding Repair)

Common signs include cracks, gaps, holes, warping, and increased energy costs. These indicate potential moisture damage, pest entry points, and structural issues that require attention.
Yes, for small, simple holes or cracks, most homeowners can do a DIY vinyl siding repair using a specialized service or patch kit. However, extensive damage or structural issues may require professional siding repair services.
The cost of siding repairs can vary widely depending on the extent of the damage, the siding material (e.g., wood, vinyl, aluminum), and whether it’s a small patch or a more extensive repair. On average, most homeowners can expect to pay between 0 to ,000 for siding repairs.
If you have widespread damage, such as rotting, warping, or missing pieces across a large area of your home’s siding, replacement may be the better long-term solution. Extensive repairs can add up quickly, and new replacement siding can improve your home’s energy efficiency and curb appeal.
Look for licensed, experienced contractors who specialize in siding installation and repair. Check their credentials, reviews, and portfolio of past projects. Get multiple quotes to find the best value, but don’t sacrifice quality for the lowest price. A skilled contractor can ensure proper installation and weather resistance for your home.

Shutter Repair

Siding Repair Near You

Can’t find what you are looking for?

How It Works

  • Answer a few questions about your home project.
  • Within seconds, get matched with top-rated local pros.
  • Compare quotes and choose the best pro for the job.

Shutter Repair In Your Area

Shutter Repair: How to Find the Best Contractor

Meta Description: Discover expert tips for finding the best shutter repair contractor. Learn what to look for, questions to ask, and how to ensure quality service for your home’s shutters.

Shutter Repair

Is your home’s exterior looking dull? Damaged shutters can harm your property’s curb appeal. Professional shutter repair can revitalize your home’s look and boost its overall aesthetic.

Choosing the right contractor is crucial for this project. Let’s explore key factors to help you make a smart decision.

Key Takeaways

  • Investing in professional shutter repair can protect your home’s exterior and maintain curb appeal.
  • Look for experienced, licensed, and insured contractors with a proven track record of quality work.
  • Compare multiple quotes and review contractor portfolios to find the best fit for your shutter repair needs.
  • Understand the shutter repair process, including options for painting, louver replacement, and hardware updates.
  • Work with a contractor who provides a warranty and guarantees their workmanship.

Understanding the Importance of Shutter Repair

Exterior wooden shutters can deteriorate over time due to environmental factors. These include changing temperatures, rain, and harsh UV exposure. This can cause the shutter finish to crack, allowing moisture damage to harm the wood.

Regular shutter inspection and maintenance are key to protecting your home’s exterior. They also help maintain its curb appeal.

Protecting Your Home’s Exterior

Fixing shutter damage quickly helps preserve your home’s value. It also keeps your house looking well-maintained and attractive. Ignoring shutter maintenance can lead to warping and cracking.

Regular shutter repair and maintenance keeps your home’s exterior in top shape. It shields your house from weathering and boosts its curb appeal.

Maintaining Curb Appeal

Working shutters protect your home and make it look great. Well-kept exterior shutters can boost your property’s curb appeal. This can have a positive effect on your home value.

Regular shutter maintenance and expert shutter repair keep your home looking stunning. This attracts potential buyers and impresses passersby.

Signs Your Shutters Need Repair

Warped and Broken Shutters

Check your exterior shutters often for damage or wear. Ignoring shutter upkeep can lead to costly problems. It can harm your home’s look and protection.

Cracked or Peeling Paint

Cracked or peeling paint shows moisture damage and shutter decay. This happens due to sun, rain, and temperature changes. Fix paint issues quickly to prevent more damage.

Quick action also keeps your home looking good. Don’t let paint problems ruin your curb appeal.

Warped or Broken Louvers

  • Warped or broken louvers hurt shutter function and looks.
  • Moisture, wood rot, or impacts often cause this damage.
  • Check shutters regularly for warping or broken louvers.

Fix shutter damage like cracked paint, peeling paint, and warped louvers right away. Quick repairs prevent more decay. They keep your shutters working well and looking great.

Shutter Repairing Process

Fixing your home’s shutters requires careful attention to detail. The process can restore both beauty and function. It can handle minor issues like cracked paint or major problems such as warped louvers.

The first step is to check how bad the damage is. For small problems, you might just need to fill cracks and repaint. This approach can save money and keep the current shutter structure.

For bigger issues, you might need to replace parts of the shutter. This could mean fixing warped or broken pieces. The goal is to make the shutter strong again.

  1. Wood Repair: This involves replacing damaged parts. Techniques like patching and sanding help restore the shutter’s strength.
  2. Sanding and Priming: Good surface prep is key. Sanding smooths the surface. Priming helps paint stick better and last longer.
  3. Painting and Finishing: After repairs, it’s time to paint or stain. This makes your home look better and protects the shutters.

Sometimes, the damage is too much to fix. In these cases, you might need new shutters. This means taking off the old ones and putting up new ones.

You may also need to replace hardware like hinges. This ensures the new shutters fit well and work smoothly.

Understanding this process helps you make smart choices about your shutters. The end goal is to make your home look great and stay protected.

Types of Shutter Repair Services

shutter repair services

Shutter repair services help restore your home’s exterior beauty. Common services include painting, refinishing, louver replacement, and hardware replacement.

Painting and Refinishing

Shutter paint can crack, peel, or fade over time. Repair services offer solutions to fix these issues.

The process involves sanding the existing finish and applying fresh paint. This ensures a seamless and durable result for your shutters.

Louver Replacement

Shutter louvers or slats may warp or break, affecting their function. Experts can replace individual louvers or the entire unit.

This restores the shutter’s original look and improves light and airflow control. Your shutters will look and work like new again.

Hardware Replacement

Shutter hardware like hinges, dogs, bolt locks, and pulls can wear out. Repair services replace these parts for smooth operation.

This is crucial for historical restorations and homes with custom shutters. Your shutters will function securely and efficiently.

Proper shutter repair preserves your home’s character and curb appeal. It also enhances your property’s protection and value.

Choosing the Right Contractor

Picking the best shutter repair contractor is key for a great project outcome. Take time to check potential shutter repair contractors thoroughly. Make sure they’re licensed, insured, and qualified professionals.

Checking Licenses and Insurance

Start by verifying the contractor’s licenses and insurance coverage. A licensed contractor proves their expertise and dedication. Proper insurance protects you from liability if accidents happen during repairs.

Reviewing References and Portfolio

Look at the contractor’s references and past work. This shows their skill level and how happy their customers were. You’ll get a good idea of their qualifications and work quality.

By carefully checking contractors, you can feel confident in your choice. This ensures your shutter repair project will be a success.

The FindPros Advantage for Shutter Repair

Looking for reliable and affordable shutter repair services? FindPros can connect you with top-rated local professionals to handle your shutter needs. Simply answer a few questions about your window openings, missing staples, and other replacement parts, and we’ll match you with experienced shutter repair experts who can efficiently install, inspect, and tighten your shutter frames.

Compare multiple quotes to find the best price and the pro that best matches your preferences. Get the job done right, from sanding and gluing to blending the repaired shutters for a seamless look. Trust FindPros to help you find the perfect shutter repair service that arrives on time and leaves you satisfied.

Conclusion

Proper shutter repair is vital for home maintenance. It protects your home’s exterior and keeps up its curb appeal. It also helps maintain your property value.

Minor shutter issues can be fixed through DIY efforts. However, it’s often better to hire a pro for bigger repairs or replacements.

Choosing the right contractor is key for long-term shutter care. This ensures your shutters stay in great shape for years to come.

Regular checks and quick shutter repair can prevent costly replacements. They also keep your shutters secure and working well.

Maintaining your shutters is a smart investment. It pays off by keeping your home looking good and valuable.

Make shutter repair a priority in your home care plan. You’ll enjoy a well-protected and attractive property for years to come.

Shutter Repair: How to Find the Best Contractor

Meta Description: Discover expert tips for finding the best shutter repair contractor. Learn what to look for, questions to ask, and how to ensure quality service for your home’s shutters.

Shutter Repair

Is your home’s exterior looking dull? Damaged shutters can harm your property’s curb appeal. Professional shutter repair can revitalize your home’s look and boost its overall aesthetic.

Choosing the right contractor is crucial for this project. Let’s explore key factors to help you make a smart decision.

Key Takeaways

  • 01Investing in professional shutter repair can protect your home’s exterior and maintain curb appeal.
  • 02Look for experienced, licensed, and insured contractors with a proven track record of quality work.
  • 03Compare multiple quotes and review contractor portfolios to find the best fit for your shutter repair needs.
  • 04Understand the shutter repair process, including options for painting, louver replacement, and hardware updates.
  • 05Work with a contractor who provides a warranty and guarantees their workmanship.

Understanding the Importance of Shutter Repair

Exterior wooden shutters can deteriorate over time due to environmental factors. These include changing temperatures, rain, and harsh UV exposure. This can cause the shutter finish to crack, allowing moisture damage to harm the wood.

Regular shutter inspection and maintenance are key to protecting your home’s exterior. They also help maintain its curb appeal.

Protecting Your Home’s Exterior

Fixing shutter damage quickly helps preserve your home’s value. It also keeps your house looking well-maintained and attractive. Ignoring shutter maintenance can lead to warping and cracking.

Regular shutter repair and maintenance keeps your home’s exterior in top shape. It shields your house from weathering and boosts its curb appeal.

Maintaining Curb Appeal

Working shutters protect your home and make it look great. Well-kept exterior shutters can boost your property’s curb appeal. This can have a positive effect on your home value.

Regular shutter maintenance and expert shutter repair keep your home looking stunning. This attracts potential buyers and impresses passersby.

Signs Your Shutters Need Repair

Warped and Broken Shutters

Check your exterior shutters often for damage or wear. Ignoring shutter upkeep can lead to costly problems. It can harm your home’s look and protection.

Cracked or Peeling Paint

Cracked or peeling paint shows moisture damage and shutter decay. This happens due to sun, rain, and temperature changes. Fix paint issues quickly to prevent more damage.

Quick action also keeps your home looking good. Don’t let paint problems ruin your curb appeal.

Warped or Broken Louvers

  • Warped or broken louvers hurt shutter function and looks.
  • Moisture, wood rot, or impacts often cause this damage.
  • Check shutters regularly for warping or broken louvers.

Fix shutter damage like cracked paint, peeling paint, and warped louvers right away. Quick repairs prevent more decay. They keep your shutters working well and looking great.

Shutter Repairing Process

Fixing your home’s shutters requires careful attention to detail. The process can restore both beauty and function. It can handle minor issues like cracked paint or major problems such as warped louvers.

The first step is to check how bad the damage is. For small problems, you might just need to fill cracks and repaint. This approach can save money and keep the current shutter structure.

For bigger issues, you might need to replace parts of the shutter. This could mean fixing warped or broken pieces. The goal is to make the shutter strong again.

  1. Wood Repair: This involves replacing damaged parts. Techniques like patching and sanding help restore the shutter’s strength.
  2. Sanding and Priming: Good surface prep is key. Sanding smooths the surface. Priming helps paint stick better and last longer.
  3. Painting and Finishing: After repairs, it’s time to paint or stain. This makes your home look better and protects the shutters.

Sometimes, the damage is too much to fix. In these cases, you might need new shutters. This means taking off the old ones and putting up new ones.

You may also need to replace hardware like hinges. This ensures the new shutters fit well and work smoothly.

Understanding this process helps you make smart choices about your shutters. The end goal is to make your home look great and stay protected.

Types of Shutter Repair Services

shutter repair services

Shutter repair services help restore your home’s exterior beauty. Common services include painting, refinishing, louver replacement, and hardware replacement.

Painting and Refinishing

Shutter paint can crack, peel, or fade over time. Repair services offer solutions to fix these issues.

The process involves sanding the existing finish and applying fresh paint. This ensures a seamless and durable result for your shutters.

Louver Replacement

Shutter louvers or slats may warp or break, affecting their function. Experts can replace individual louvers or the entire unit.

This restores the shutter’s original look and improves light and airflow control. Your shutters will look and work like new again.

Hardware Replacement

Shutter hardware like hinges, dogs, bolt locks, and pulls can wear out. Repair services replace these parts for smooth operation.

This is crucial for historical restorations and homes with custom shutters. Your shutters will function securely and efficiently.

Proper shutter repair preserves your home’s character and curb appeal. It also enhances your property’s protection and value.

Choosing the Right Contractor

Picking the best shutter repair contractor is key for a great project outcome. Take time to check potential shutter repair contractors thoroughly. Make sure they’re licensed, insured, and qualified professionals.

Checking Licenses and Insurance

Start by verifying the contractor’s licenses and insurance coverage. A licensed contractor proves their expertise and dedication. Proper insurance protects you from liability if accidents happen during repairs.

Reviewing References and Portfolio

Look at the contractor’s references and past work. This shows their skill level and how happy their customers were. You’ll get a good idea of their qualifications and work quality.

By carefully checking contractors, you can feel confident in your choice. This ensures your shutter repair project will be a success.

The FindPros Advantage for Shutter Repair

Looking for reliable and affordable shutter repair services? FindPros can connect you with top-rated local professionals to handle your shutter needs. Simply answer a few questions about your window openings, missing staples, and other replacement parts, and we’ll match you with experienced shutter repair experts who can efficiently install, inspect, and tighten your shutter frames.

Compare multiple quotes to find the best price and the pro that best matches your preferences. Get the job done right, from sanding and gluing to blending the repaired shutters for a seamless look. Trust FindPros to help you find the perfect shutter repair service that arrives on time and leaves you satisfied.

Conclusion

Proper shutter repair is vital for home maintenance. It protects your home’s exterior and keeps up its curb appeal. It also helps maintain your property value.

Minor shutter issues can be fixed through DIY efforts. However, it’s often better to hire a pro for bigger repairs or replacements.

Choosing the right contractor is key for long-term shutter care. This ensures your shutters stay in great shape for years to come.

Regular checks and quick shutter repair can prevent costly replacements. They also keep your shutters secure and working well.

Maintaining your shutters is a smart investment. It pays off by keeping your home looking good and valuable.

Make shutter repair a priority in your home care plan. You’ll enjoy a well-protected and attractive property for years to come.

Frequently Asked Questions (Shutter Repair)

The common shutter repair services include painting and refinishing, louver replacement, and hardware replacement. These services can restore the appearance and function of damaged wood shutters or plantation shutters.
To prepare for a shutter repair, you should measure the window openings and shutter length, as well as check for any missing shutter staples or tilt bars. Provide the contractor with details on the material (wood, vinyl, etc.) and style of your existing shutters.
When inspecting repaired shutters, check that the tilt bars and shutter staples are secure, the louvers are aligned, and the paint or finish has been properly applied to create a seamless, blended appearance. Ensure the shutters open, close, and function smoothly.
To ensure a quality shutter repair, work with a licensed and insured contractor who can provide references and a portfolio of their previous work. Ask about warranties on the repair materials and workmanship. Schedule a follow-up inspection to verify the job was done to your satisfaction.
The cost of shutter repair can vary based on the extent of the damage, the materials needed (wood, vinyl, etc.), and the labor required. Factors like replacing louvers, tightening tilt bars, or installing new shutter staples can all affect the final price. Be sure to get multiple quotes to find the best value.

Shrub Removal & Trimming

Siding Repair Near You

Can’t find what you are looking for?

How It Works

  • Answer a few questions about your home project.
  • Within seconds, get matched with top-rated local pros.
  • Compare quotes and choose the best pro for the job.

Shrub Removal & Trimming In Your Area

Need Shrub Removal Trimming? Here’s What to Expect

Meta Description: Learn about shrub removal trimming costs, techniques, and benefits. Discover how professional services can transform your landscape and improve your property’s overall health and appearance.

Shrub Removal Trimming

Shrub removal and trimming are vital for a healthy, attractive landscape. This guide covers costs, DIY options, and professional services. We’ll explore factors affecting prices, pros and cons, and post-removal care.

Understanding the process helps you make smart choices for your property. You’ll learn about preparation, disposal, and landscaping options. We’ll also share tips for hiring pros and maintaining your yard after removal.

Key Takeaways

  • Shrub removal and trimming are essential for maintaining a healthy, attractive landscape.
  • Factors like shrub size, accessibility, and disposal requirements can impact the cost of professional services.
  • DIY shrub removal may save money but requires careful planning and physical labor.
  • Hiring a professional can ensure the job is done safely and efficiently, with proper disposal and landscaping follow-up.
  • Proper maintenance after shrub removal is crucial for the long-term health of your property.

Introduction to Shrub Removal and Trimming

Proper shrub removal and trimming are vital for a healthy landscape. These tasks prevent hazards, promote growth, and enhance your property’s beauty. Regular maintenance keeps your outdoor space safe and attractive.

Why Trimming and Removal are Important

Overgrown or dead shrubs can damage structures and block views. They may also attract pests. Regular trimming controls growth and improves air flow.

Sometimes, complete removal is necessary. This applies to shrubs that are too large or unhealthy. It’s also needed when they interfere with other plants.

Common Reasons for Shrub Removal

  • Shrubs with deep root systems that can cause damage to underground utilities, foundations, or sidewalks
  • Overgrown shrubs that block views, encroach on power lines, or obstruct pedestrian and vehicle traffic
  • Unhealthy or hazardous shrubs, such as those infested with pests or disease, that pose a threat to other plants or structures
  • Shrubs that are too large for their designated space and interfere with the growth of nearby plants
  • Fruit trees or shrubs that are no longer producing well or have become a nuisance
  • Shrubs that need to be removed to accommodate new landscaping, fence installation, or other outdoor projects

Knowing why shrubs need removal helps you make smart choices. You can decide the best approach for your property. This ensures your landscape stays safe and beautiful.

Factors That Affect Shrub Removal Costs

Shrub removal costs can vary greatly depending on several key factors. Homeowners need to understand these factors to budget accurately for their project.

The size and type of shrub are major cost drivers. Smaller bushes may cost $15 to $45 per plant. Larger, established shrubs can range from $80 to over $300 each.

Soil conditions and accessibility also impact the price. Clay soil can increase labor expenses and equipment needs. Hard-to-reach shrubs may require more time and effort.

Disposal of removed bushes is another cost to consider. It can add $20 to $50 per cubic yard of debris. Many landscaping companies include this service in their quotes.

Additional landscaping work after removal can increase the overall cost. This may include soil replacement, grass seeding, or new plant installation.

Understanding these factors helps homeowners prepare for their project. Careful planning can lead to a successful and cost-effective shrub removal process.

Average Costs for Shrub Removal

shrub removal

Shrub removal typically costs around $800 for most homeowners. The price range can vary from $400 to $1,150. Factors like shrub size, soil type, and labor costs affect the final price.

Smaller shrubs may cost only $150 to remove. Extensive projects with extra-large shrubs or challenging terrain could reach $2,300. Professional arborists usually charge $50 to $70 per hour for labor.

  • Small shrubs (1 to 2 feet): $15 – $40 per bush
  • Medium shrubs (2 to 4 feet): $40 – $80 per bush
  • Large shrubs (4 to 6 feet): $70 – $150 per bush
  • Extra-large shrubs (taller than 6 feet): $130 – $300 per bush

Homeowners should also consider hauling and disposal fees, ranging from $25 to $75. The project’s total cost depends on the size, location, and number of plants removed.

DIY vs. Professional Shrub Removal

Shrub removal can be done by homeowners or professionals. DIY works for small, easy-to-reach shrubs if you have the right tools and skills. Larger projects are better left to experienced professionals with proper equipment and expertise.

Pros and Cons of DIY Removal

DIY shrub removal can be satisfying and cost-effective. However, it’s crucial to exercise caution and understand potential risks.

The main advantage is saving money on professional fees. But DIY removal may be dangerous, especially for large or deeply rooted shrubs.

When to Hire a Professional

Professional shrub removal often benefits your landscaping’s health and long-term care. Experts have the skills to remove shrubs safely and prepare soil for new plantings.

This is particularly important during the dormant season when shrubs are vulnerable. While pricier, professional services offer valuable expertise and equipment for many homeowners.

Preparing for Shrub Removal

Getting ready for shrub removal is key. Clear the area around shrubs first. Remove any power lines, grass, or soil that could cause problems.

Mark underground utilities to avoid damage. This step is crucial for a safe removal process. Timing matters too.

Plan removal during the plant’s dormant season. Shrubs have less foliage then, making them easier to handle. This makes the whole process smoother.

  • Clear the area around the shrubs, removing power lines, grass, and soil.
  • Mark any underground utilities or structures to avoid damage.
  • Time the removal during the plant’s dormant season for better manageability.

Understanding these steps helps ensure a successful project. Good planning minimizes landscape disruption. It paves the way for smooth shrub removal.

Waste Removal and Disposal

After removing shrubs, proper disposal of organic waste is crucial. Costs range from $25 to $100 per bush. Homeowners can save money by chipping branches or composting material themselves.

Yard waste includes leaves, grass clippings, tree debris, shrubs, mulch, weeds, and hedge trimmings. Professional junk removal services offer yard waste removal based on volume and type.

Tree debris removal services handle non-hazardous materials that two team members can lift. Homeowners have various disposal options to choose from.

These include hiring a junk removal company, renting a roll-off dumpster, or arranging yard debris pickup. Mulch mowing, leaf drop-off sites, and composting are also great choices.

Fallen tree debris should be chopped for recycling or disposal at green waste facilities. Stump removal requires professionals with specialized equipment like stump grinders.

Yard waste doesn’t belong in regular trash or recycle bins. It can violate disposal rules and disrupt recycling processes.

Recycling options for yard trimmings include compost piles, mulching, and grasscycling. Local recycling companies often schedule pickups for yard waste.

Understanding waste management options and costs is key to a smooth shrub removal process. It ensures an environmentally responsible outcome for your yard project.

Soil Replacement and Landscaping

Landscaping options after shrub removal

After removing shrubs, gaps in the landscape may need new soil. Soil replacement costs vary from $20 to $180 per cubic yard. This chance lets homeowners explore new landscaping options for better looks and health.

Choosing the Right Soil

Pick high-quality, nutrient-rich soil to support new plants. Options include topsoil, compost, or specialized soil blends. Check the soil’s pH, drainage, and nutrients for successful plantings.

Landscaping Options After Removal

Homeowners can fill new spaces with various plants. Trees, shrubs, or ground cover can suit the new growth area and boost aesthetic appeal.

Adding different species creates visual interest and a diverse landscape. This approach can result in a beauty blog-worthy outdoor space.

Good planning ensures a smooth transition and improves pro cost for most homeowners. Careful choices can transform landscapes into stunning outdoor spaces, even in late winter.

Tips for Hiring a Professional Shrub Removal Service

Hiring a reputable shrub removal service is key for a safe and efficient project. The right provider ensures minimal disruption to your landscape. Here are some tips to help you choose wisely.

  1. Look for necessary skills and the right tools. Check if the service has proper expertise and equipment for safe shrub removal.
  2. Consider the project size and pricing guide. Compare quotes and services from multiple companies. Many offer free estimates.
  3. Verify licensing, insurance, and certifications. Reliable services are licensed, insured, and have certified arborists on staff.
  4. Ask about the disposal process. Find out how they’ll handle waste and debris from shrub removal.
  5. Check for references and reviews. Contact past clients to gauge the provider’s reliability and work quality.

Careful research helps you find the right shrub removal service for your property. This ensures proper care for your plants and landscape during pruning and removal.

A good service will also help minimize pests and other issues. Your yard will thank you for making a smart choice.

Maintenance and Care After Removal

After shrub removal, proper maintenance is key. It ensures your property’s health and appearance. New plants or landscaping need special attention.

Add mulch where shrubs were removed. It keeps moisture, stops weeds, and improves soil health. Use one to four inches of bark, leaves, or pine needles.

Monitor the area for regrowth or issues. Water young plants regularly. Mature plants need water only when soil is dry. Avoid over-trimming to prevent plant stress.

Consider replanting grass or ground cover to restore the area. This helps prevent erosion. Ask a service provider about suitable landscaping options for your property.

These tips help maintain your property’s overall health and appearance. They prevent property damage and enhance your outdoor space’s visual appeal.

FindPros: Simplify Your Shrub Removal and Landscaping Needs

Need help with shrub removal, tree planting, grass replacement, or other landscaping projects? FindPros can connect you with top-rated local professionals to handle the job efficiently and cost-effectively. Simply answer a few questions about your home project, and we’ll match you with experienced contractors who can provide competitive quotes.

No more guesswork or overpaying – let the pros compete for your business and find the best fit for your budget and preferences. Whether it’s dealing with large bushes, tackling hedge trimming, or addressing issues like oak wilt, FindPros makes navigating these simple home improvement projects a breeze. Avoid the hassle of trip fees, high labor prices, and exercising caution with basic equipment.

Let our network of qualified professionals handle the engineering job while you focus on the end result. Get started with FindPros and take the stress out of your next landscaping or removing bushes project.

Conclusion

Shrub removal and trimming are key to a healthy, attractive landscape. Understanding cost factors and weighing DIY versus professional options help homeowners make informed decisions. This guide covers everything from overgrown shrubs to outdated plants.

We’ve explored shrub trimming, tree removal, and bush removal cost considerations. Working with a reputable tree service company or tackling the task yourself ensures a well-maintained landscape.

Regular shrubs pruning and tree trimming boost your property’s appeal and plant health. This guide equips you to handle bush removal or specific shrub removal issues effectively.

Frequently Asked Questions (Shrub Removal & Trimming)

The size and type of the bush, soil conditions, accessibility, and disposal requirements are the key factors that affect the bush removal cost estimator.
You should consider using tree removal services for large, overgrown, or hazardous trees that pose a risk to your property or structures. Professional services can safely remove large branches or the entire tree.
Bush removal costs can range from $150 for small bushes up to $2,300 for extra-large, difficult-to-remove bushes. The national average price is around $800 for most homeowners.
Tree pruning and planting new trees or shrubs can promote healthy growth and improve the overall appearance of your landscape after removing unwanted bushes. This helps fill gaps and restore the visual appeal of your property.
Hiring a professional landscaping company is recommended for extensive root removal and stump grinding, especially for large trees. They have the proper equipment and expertise to handle these more complex home improvement projects safely.

Shower Installers

Siding Repair Near You

Can’t find what you are looking for?

How It Works

  • Answer a few questions about your home project.
  • Within seconds, get matched with top-rated local pros.
  • Compare quotes and choose the best pro for the job.

Shower Installers In Your Area

Hiring Shower Installers: A Guide to Finding the Best Fit

Meta Description: Discover how to find the best shower installers for your bathroom renovation. Learn key factors to consider and questions to ask for a successful installation.

Shower Installers

Dreaming of a bathroom makeover? The right shower installation pros can make it happen. They can boost your home’s value and improve your daily life. This guide will help you find the best shower installers for your project.

Key Takeaways

  • Bathroom remodeling can significantly impact your quality of life and home value, with a potential return on investment of up to 67%.
  • Choosing the right shower installation contractor is crucial for a successful and satisfactory bathroom renovation.
  • This guide will provide you with the essential steps to find the best shower installers for your project.
  • Professional shower installers possess the expertise, tools, and experience to handle unexpected complications, delivering flawless results.
  • Hiring professional installers ensures a warranty on their work, providing peace of mind and adherence to timelines and budgets.

The Importance of Choosing the Right Shower Installer

A well-executed shower installation can boost your daily bathing experience. It can also increase your home’s resale value. Industry data shows that a bathroom remodel can raise home value by 67% of the project cost.

The average price for a moderate bathroom update is around $10,000. This makes it an investment worth careful consideration. Picking the right shower installation contractor is key to a successful renovation.

Impact on Quality of Life and Home Value

Finding the best fit is essential for a successful bathroom remodel. In fact, 86% of homeowners agree with this statement. However, 75% of customers have reported issues with the wrong contractor.

These problems include leaks, poor functionality, or mismatched products. A qualified shower installer can transform your bathroom into a relaxing space. You’ll enjoy this functional and visually appealing area for years.

Remodeling Costs and Return on Investment

Bathroom remodeling is a popular home improvement project. Shower installation stands out for its aesthetics and functionality. The average cost of a bathroom remodel is around $10,000.

However, the potential return on investment can be significant. Experts say a successful renovation can increase home value by 67% of the project cost. Choosing the right installer ensures your investment pays off in the long run.

Start with a Clear Project Plan

Planning is key for a bathroom remodel or shower installation. Define your goals, budget, and timeline before talking to contractors. This helps communicate your vision and keeps the project on track.

Define Your Goals, Budget, and Timeline

Outline your main objectives for the bathroom remodel or shower installation. Do you want to improve looks, function, or home value? Set a realistic budget that matches your goals.

Research average costs for similar projects in your area. Establish a timeline for your project. Minor updates may take weeks, while major remodels can last months.

Plan for key phases like pre-measure, design, and installation. Each phase can take one to several weeks. Good planning helps keep your project on schedule.

Determine If Additional Professional Services Are Needed

Complex bathroom remodel or shower installation projects may need an architect or designer. Many bathroom contractors offer these services in-house. The right expertise ensures a smooth and successful renovation.

Finding Qualified Shower Installers

qualified shower installers

Choosing the right shower installer is key for your bathroom remodel. They should have valid licenses and current insurance. This protects you and your home during the project.

Contractor Credentials and Experience

Seek installers who belong to groups like NKBA or NARI. These organizations uphold industry standards. Members follow best practices for quality work.

Check the contractor’s portfolio to see their bathroom remodeling skills. Look for experience with different shower types. This shows their ability to meet your needs.

Personal Referrals and Professional Associations

  • Ask friends who’ve had bathroom renovations for recommendations. Their experiences can guide your choice of a qualified shower installer.
  • Contact NKBA and NARI members to find contractor credentials and contractor experience matching your needs.
  • Use online directories to check personal referrals and professional associations of potential installers.

Careful vetting ensures your project is done expertly. This improves your home’s quality and your satisfaction. Choose wisely for the best results.

Conducting Interviews and Vetting Contractors

Thoroughly vet potential shower installers through phone interviews and reference checks. This process helps find the right fit for your bathroom remodeling project.

Phone Interviews and Reference Checks

Conduct phone interviews with top contractor candidates. Ask about their experience, team, and relevant certifications or training. Verify their contractor license and insurance coverage with the state licensing board.

Reach out to the references provided by the contractors. Speaking with past clients gives insights into work quality and project management skills. This step helps you understand the contractor’s capabilities before hiring.

Verifying Licenses and Insurance

  • Confirm the contractor’s license is valid and in good standing with the state licensing board.
  • Ensure the contractor carries the necessary liability and workers’ compensation insurance to protect your home and your project.
  • Request copies of the contractor’s insurance certificates for your records.

Vetting shower installers thoroughly helps ensure a successful bathroom remodeling project. You can feel confident in your selection with proper research.

Site Visits and Project Details

Invite top contractor candidates to your home for a site visit. This step is crucial for a successful shower installation project. During the visit, share your detailed project plan with the contractors.

Walk through the site with contractors to answer questions. Discuss your specific requirements and ensure clear communication. This helps avoid misunderstandings and unexpected delays during the installation process.

Providing Detailed Project Specifications

Share your bathroom’s measurements and the type of shower you want. Explain any special features or requirements you have. Give contractors a full overview of materials and timeline.

Ensuring Clear Communication and Alignment

Clear communication is key to a successful bathroom remodel. Make sure everyone understands the project’s scope, timeline, and budget. Address any concerns or questions the contractors may have.

Thorough site visits and detailed project specs ensure a smooth shower installation. This approach leads to a beautiful, high-quality result that meets your expectations.

Evaluating Written Estimates and Contracts

bathroom remodel

Written estimates and contracts are vital for bathroom remodel projects. They outline project scope, pricing, and terms. Review these documents carefully to ensure you’re getting the best value.

Reviewing Project Scope and Pricing

Examine estimates from potential shower installers closely. Check that measurements and specifications match your initial plan. Look at the pricing breakdown for labor, materials, and additional services.

Compare quotes from multiple contractors. This will help you understand market rates for your shower installation project.

Understanding Contract Terms and Conditions

After approving the scope and pricing, review the contract terms. A good contract includes total price, payment schedule, and scope of work. It should also cover task schedule, change order clause, and warranty information.

Understanding these elements is crucial. They can greatly impact the success of your bathroom remodel.

Careful evaluation of estimates and contracts helps you choose the right installer. This attention to detail ensures a smooth renovation process.

Shower Installers’ Expertise and Versatility

Choosing the right shower installer is crucial for your bathroom remodel. Professional installers have extensive shower installers expertise and shower installers versatility. They can guide you towards the best bathroom products and shower installation options.

Knowledge of Various Shower Solutions

Skilled installers know the latest industry trends and product offerings. They understand prefabricated shower systems and custom-designed solutions. Their knowledge helps you create your dream bathroom remodel.

  • Prefabricated and acrylic showers
  • Tile and custom-tiled showers
  • Engineered marble and granite/quartz showers
  • Rainfall and specialty shower heads
  • Innovative storage and accessibility features

Keeping Up with Industry Trends and Products

Top shower installers stay current with industry trends and bathroom products. They know about cutting-edge shower systems and water-efficient fixtures. Their expertise helps you make smart decisions for your shower installation.

Assessing Portfolios and Customer Reviews

Hiring the right shower installer requires more than checking credentials. Review their portfolios and customer feedback for a complete picture of their expertise and work quality.

Reviewing Online Galleries and Contractor Directories

Explore the contractor’s online galleries and portfolios. These showcases offer insights into their design skills and shower installation solutions. Look for high-quality work that matches your desired style and needs.

Check the contractor’s listings on reputable contractor directories. These often include details about their experience, services, and customer feedback. This information helps you make a well-informed choice.

Checking Online Reviews and Ratings

Consider online customer reviews and ratings when assessing a shower installer. Read feedback from previous clients about work quality, professionalism, and overall satisfaction. Look for recurring themes in reviews to get a balanced view.

Reviewing portfolios, customer reviews, and online presence helps you choose wisely. This approach ensures you find the right installer for your bathroom remodel or shower installation project.

Find the Best Pros with FindPros

Tired of your outdated shower or existing tub? Seeking professional shower replacements or a full bathroom remodel? Let FindPros simplify the process. Just answer a few questions about your home project, and we’ll match you with top-rated local pros that fit your needs and budget. Enjoy free design consultations, in-home consultations, and a limited lifetime warranty on their work.

Get credit approval and precise measurements – we’ll have your new dream shower or bath installed in as little as one day. FindPros connects you with licensed, insured professionals who will transform your space into a sleek, accessible, and affordable luxury. No more settling for less – let us help you find the right pros to bring your bathroom upgrade dreams to life.

Conclusion

Picking the right shower installers is key for a great bathroom remodel. This guide helps you find the best contractor for your project. Follow these steps to make a smart choice.

A skilled team can turn your bathroom into a dream space. A poor choice might cause problems. Do your homework and talk about what you want clearly.

Pick an installer that fits your needs and budget. Focus on quality, know-how, and good talk. This way, you’ll get a smooth shower setup.

A good installation can make your home worth more. It can also make your life better. Take time to choose wisely for the best results.

Frequently Asked Questions (Siding Repair)

Common signs include cracks, gaps, holes, warping, and increased energy costs. These indicate potential moisture damage, pest entry points, and structural issues that require attention.
Yes, for small, simple holes or cracks, most homeowners can do a DIY vinyl siding repair using a specialized service or patch kit. However, extensive damage or structural issues may require professional siding repair services.
The cost of siding repairs can vary widely depending on the extent of the damage, the siding material (e.g., wood, vinyl, aluminum), and whether it’s a small patch or a more extensive repair. On average, most homeowners can expect to pay between 0 to ,000 for siding repairs.
If you have widespread damage, such as rotting, warping, or missing pieces across a large area of your home’s siding, replacement may be the better long-term solution. Extensive repairs can add up quickly, and new replacement siding can improve your home’s energy efficiency and curb appeal.
Look for licensed, experienced contractors who specialize in siding installation and repair. Check their credentials, reviews, and portfolio of past projects. Get multiple quotes to find the best value, but don’t sacrifice quality for the lowest price. A skilled contractor can ensure proper installation and weather resistance for your home.

Shower Door Installers

Siding Repair Near You

Can’t find what you are looking for?

How It Works

  • Answer a few questions about your home project.
  • Within seconds, get matched with top-rated local pros.
  • Compare quotes and choose the best pro for the job.

Shower Door Installers In Your Area

Hiring Shower Door Installers: A Step-by-Step Guide

Meta Description: Discover the essential steps for hiring expert shower door installers. Learn how to choose professionals who ensure a perfect fit and flawless installation for your bathroom.

Shower Door Installers

Planning a bathroom makeover? Want to ensure your new shower doors are installed perfectly? This guide will help you hire top-notch shower door installers.

We’ll show you how to blend style and function in your bathroom renovation. You’ll learn to choose experts who can transform your space.

Key Takeaways

  • Hiring professional shower door installers can significantly impact the quality of life and home value.
  • Experienced and insured contractors ensure proper installation and functionality of shower doors.
  • Proper preparation, including determining project scope and gathering design ideas, is crucial for a successful installation.
  • Vetting and hiring the right contractor involves conducting thorough interviews, site visits, and evaluating written estimates and contracts.
  • Attention to details, such as accurate measurements and wall materials, can make or break the success of a shower door installation project.

The Importance of Hiring Professional Shower Door Installers

Installing a new shower door can transform your bathroom. It adds elegance and instantly improves your home’s value. A well-installed shower door brightens the room and boosts functionality.

Impact on Quality of Life and Home Value

Glass shower doors are a valuable investment for your home. They can increase your property’s worth and make it more appealing to buyers. Professional installers have the skills to set up shower doors quickly and efficiently.

Experts ensure a seamless, high-quality result without gaps or leaks. This enhances both the look and function of your bathroom. Their work guarantees safety and correct installation.

Ensuring Proper Installation and Functionality

  • Professional installation services are insured, meaning homeowners won’t be liable for any damages or injuries during the installation process.
  • Professional installation services typically offer warranties on their work, allowing for repairs or replacements at no additional cost if issues arise post-installation.
  • Specialized knowledge and technical expertise are crucial for achieving the perfect alignment of glass shower doors, hinges, and handles, ensuring optimal functionality.
  • Manufacturers and suppliers often require professional installation for warranties to remain valid, underscoring the importance of adhering to warranty terms for consumer protection.

Hiring experts for shower door installation is a smart choice. It improves your daily life and boosts your home’s value. Their skills ensure a smooth and successful bathroom renovation project.

Shower Door Installers

shower door installers

Experience and expertise are vital for shower door installation. Research contractors’ backgrounds and qualifications before hiring. Ask about their experience, references, photos, insurance, and warranties.

Experience and References

Skilled installers have a history of excellent workmanship. Look for professionals with impressive portfolios and customer testimonials. These showcase their reliability and work quality.

Insurance and Warranties

Protect your investment by hiring insured installers. Check their liability coverage and installation warranties. This ensures your project is safeguarded against potential issues.

Carefully evaluate installers’ experience, references, insurance, and warranties. This helps you choose a contractor who delivers top-notch, dependable service.

Preparing for the Installation Process

shower door installation

Plan ahead for your shower door installation project. Determine your project scope, set a budget, and gather design ideas. This approach will ensure a smooth and successful installation.

Determining Your Project Scope and Budget

Define your goals for the shower door installation. Measure the shower opening carefully and consider size, style, and features. Research different types of shower doors and their costs.

Set a realistic budget that matches your needs. Factor in any additional bathroom remodeling work that may be necessary.

Gathering Design Ideas and Materials

  • Explore design ideas that complement your bathroom’s aesthetic, taking into account the fixtures, tiles, countertops, and flooring you plan to use.
  • Gather samples or images of the materials you intend to use, such as tiles, countertops, and shower door hardware.
  • Consider the placement of electrical components, such as lighting or outlets, to ensure they align with your shower door installation plan.
  • Prepare a detailed list of the materials and tools required for the installation, including the shower door kit, silicone caulk, wall anchors, and stainless steel screws.

Planning your project scope and budget is crucial. Gather design ideas and materials beforehand. This preparation will help your contractor understand your vision clearly.

Vetting and Hiring the Right Contractor

Conduct thorough phone interviews and on-site visits with at least three different contractors. Ask about their experience, certifications, licenses, and insurance coverage. Contact their references to get feedback on their work quality and reliability.

Evaluating Written Estimates and Contracts

Review written estimates and contracts carefully. Look for clear project details, scope of work, and payment schedules. Make sure change order clauses, warranties, and dispute resolution processes are included.

  1. Scrutinize estimates to understand project costs and potential extra fees.
  2. Examine the contract to ensure it covers all project aspects, including scope of work, payment schedule, change orders, warranty, and dispute resolution.
  3. Check that the contractor is licensed, insured, and has good references.

Choosing the right shower door installer ensures a smooth installation process. It leads to a beautiful shower enclosure that boosts your home’s value. Your careful selection will pay off in the long run.

FindPros: The Easiest Way to Hire Pros for Your Shower Door Installation

Are you ready to take the hassle out of your shower door installation project? Look no further than FindPros, the premier service that connects you with top-rated local professionals. With our simple survey, we’ll match you with the best options tailored to your specific needs. Get the best pricing when multiple pros compete for your business, and find the pros you’ll get along with best.

Answer a few questions about your home project, and within seconds, we’ll provide you with top-rated local pros. Compare quotes and choose the pro that’s right for the job, ensuring a smooth and completed installation. Take the stress out of your shower door replacement – let FindPros handle it.

Conclusion

Hiring skilled shower door installers is key to a successful bathroom remodel. Professional installation ensures a stress-free experience and enhances your space. A well-executed shower door installation boosts your home’s value and improves your daily life.

Find an installer who delivers top-notch workmanship and pays attention to details. This ensures your shower door installation is done with expertise and looks great. Careful planning and choosing the right contractor will transform your bathroom.

A properly installed shower door improves your bathroom’s function and appearance. It also increases your home value and enhances your family’s quality of life. Choose shower door installers who offer excellent service and craftsmanship.

Frequently Asked Questions (Shower Door Installers)

When hiring a mirror installation team, consider their experience, references, insurance coverage, and warranties. Ensure they can properly measure and install the mirrors to match your bathroom’s style and layout.
To ensure a smooth shower enclosure installation, work closely with your chosen contractor. Discuss the project details, including measurements, location, and the type of shower enclosure (frameless or framed). A professional team will handle the complete installation process, leaving you with a beautiful, functional shower area.
When replacing bathroom mirrors, consider the size, shape, and style that best matches your space. Work with your installation team to ensure the new mirrors are properly measured and securely installed to avoid any issues.
To prepare for a mirror installation, make sure the area is ready for the team to work. Clear the space around the mirror location and provide any necessary access or equipment they may need to complete the job efficiently.
Hiring experienced professionals ensures your mirrors and shower enclosures are installed correctly, without any leaks or structural issues. They have the expertise to handle the entire installation process, from measurement to final placement, providing you with a hassle-free and complete solution for your bathroom.

Shed Builders

Siding Repair Near You

Can’t find what you are looking for?

How It Works

  • Answer a few questions about your home project.
  • Within seconds, get matched with top-rated local pros.
  • Compare quotes and choose the best pro for the job.

Shed Builders In Your Area

Looking for Shed Builders? Here’s What You Need to Know

Meta Description: Discover expert shed builders for your custom storage needs. Learn about quality materials, design options, and how to choose the right professionals for your project.

Shed Builders

Building a shed can transform your backyard and boost storage space. With many options available, making smart choices is vital. Let’s explore how to find the ideal shed builders for your project.

Key Takeaways

  • Prefabricated and built-on-site sheds offer different customization and flexibility options.
  • Local regulations, utility lines, and your specific needs should guide the shed selection process.
  • Hiring experienced and licensed shed builders ensures quality work and compliance with safety standards.
  • Evaluating quotes and customer reviews helps identify the best value and quality for your investment.
  • Proper maintenance is crucial to preserving the long-term value and functionality of your new shed.

Understanding the Two Main Types of Sheds

Homeowners have two main options for adding storage space: prefabricated sheds and built-on-site sheds. Each type has its own benefits. Let’s explore these options to help you choose the best one for your needs.

Prefabricated Sheds

Prefabricated sheds are a popular choice for quick storage solutions. You can find them in home improvement stores, often fully assembled or needing minimal setup.

These sheds are easy to install, making them great for hassle-free storage. However, they offer less customization due to their standard sizes and shapes.

Built-on-Site Sheds

Built-on-site sheds are constructed directly on your property. This option allows for more customization to fit your exact needs and local requirements.

While they take longer to complete, you can design them to your specifications. You can consider factors like utility lines, local rules, and your property’s look.

Your choice depends on your priorities, budget, and project needs. Both options provide valuable storage solutions. Consider your needs carefully to find the best fit for your property.

Preparing for a Built-on-Site Shed

Building a custom shed on your property requires careful planning. Check with your homeowner’s association for specific guidelines. This helps avoid future conflicts.

Consult local authorities about building codes and ordinances. These may include setback requirements and window placement restrictions. Understanding these rules is crucial for a smooth process.

  • Familiarize yourself with local building permit requirements and the necessary paperwork.
  • Engage with utility companies to have the location of underground lines marked, preventing any potential damage during the construction phase.
  • Carefully assess the shed’s placement to ensure it doesn’t encroach on property lines or interfere with utility access.

Proper planning prevents costly mistakes and delays. It also helps avoid conflicts with local authorities or your homeowner’s association.

A well-thought-out plan ensures a successful custom shed project. With local regulations in mind, you can confidently begin construction.

Designing the Perfect Custom Shed for Your Needs

The design process is crucial when building a custom shed. You can tailor it to suit your specific needs. Draft detailed blueprints and select the right building materials for your project.

Consider utility connections in your design. Do you need power or water access? Plan for these during the design stage. Think about the shed’s purpose and how its layout can support that.

For a workshop, incorporate workbenches, shelving, and pegboards. This will create an efficient workspace. Your shed should meet practical requirements and complement your property’s aesthetic.

  • Electrical packages for storage buildings may include a standard breaker box, interior GFCI outlets, light fixtures, and light switches.
  • Premium electrical packages could feature exterior outlets and light fixtures.
  • Spray foam insulation offers superior thermal resistance and gap-sealing properties.
  • Ventilation options like cupolas, ridge vents, and louvered vents can prevent moisture buildup.
  • Workshop features such as workbenches, shelving, and pegboards can optimize the shed’s functionality.

You have many design options for your custom shed. Choose from traditional to modern styles to match your home. Many providers offer online configurators to preview different designs and features.

Consider your storage needs, purpose, and aesthetic preferences carefully. This will help you create a shed that serves its function well. Your custom shed can enhance your property’s overall look and feel.

The Construction Process

Building a custom shed involves crucial steps for a sturdy structure. It starts with preparing the foundation. The site is marked, cleared, and leveled before pouring concrete.

Framing provides structural integrity for walls and roof. Builders use wall studs spaced 16 or 24 inches apart. A double top plate adds stability and strength.

Roofing and siding protect the shed and enhance its look. Gable-style sheds are popular, making up 45% of builds. Siding options include vinyl, fiber cement, and metal.

Choosing between DIY and hiring a professional contractor depends on your skills and project complexity. DIY can be rewarding but requires time and effort. A local shed builder offers expertise for a tailored shed.

A thorough process includes site evaluation, design, and plans approval. It also covers foundation pouring, framing, progress checks, and permit handling. Following these steps ensures a quality, long-lasting custom shed.

Considering Additional Features

Custom sheds can be enhanced with various features for better functionality and comfort. Proper ventilation, strategic window placement, and climate control systems can greatly improve your storage or workspace.

Ventilation, Windows, and Climate Control

Adding vents or windows can boost airflow and regulate temperature in your shed. This is especially useful if you plan to use it as a workspace or retreat.

Installing an electrical system for fans or air conditioning can help maintain a comfortable environment. Proper insulation is crucial for year-round temperature regulation and comfort.

By adding these features, your shed becomes more than just storage space. It transforms into a functional and cozy area tailored to your specific needs and preferences.

Keeping Your Shed Pest-Free

pest-free shed

A pest-free shed protects your belongings and ensures comfort. Spiders, insects, and other pests can quickly become a nuisance. However, there are effective ways to keep them away.

Install 20-mesh screens on your shed’s windows and doors. This promotes ventilation while keeping unwanted visitors out. Seal visible cracks or gaps with construction caulk to prevent pest entry.

Secure windows and doors properly for a bug-proof environment. Mesh screens allow airflow while keeping insects outside when openings are in use.

Try fragrance-based pest control methods. Peppermint oil deters spiders when applied strategically. A bug zapper can reduce the overall bug population around your shed.

Regular inspection and maintenance are key. Sweep, vacuum, or hose down the interior often. This deters insects and spiders from settling in.

Keep the area around your shed free of overgrown vegetation. Remove potential nesting spots to discourage pests from approaching.

Shed Maintenance Checklist

To keep your shed pest-free and in top shape, use this maintenance checklist:

  • Areas to Inspect: Roof, doors, floor, corners, and foundation
  • Pest Control: Recommended quarterly cleaning, prevention of standing water and garbage storage
  • Shed Interior: Routine cleanings to avoid dampness, mold, and durability issues
  • Organization: Use of magnet strips, hooks, and shed organization tips for reorganization
  • Exterior Care: Regular exterior washing, removal of excessive vegetation and debris to prevent rot
  • Roof Inspection: Check for moss growth and shingle deterioration
  • Rust and Mildew Prevention: Keep tools dry, ensure adequate ventilation to prevent mold spread
  • Window Maintenance: Check for gaps and damage to prevent water and pest intrusion

Follow these steps to keep your shed pest-free and well-maintained. You’ll create a secure storage space for all your belongings.

Shed Builders: Ensuring Quality and Expertise

Choosing the right shed builder is vital for a successful project. Look for experts who deliver top-notch workmanship. Examine their portfolio, read customer reviews, and check references before deciding.

Experienced shed builders guide you from design to construction. They ensure your custom shed exceeds expectations. Top custom shed builders blend traditional methods with modern techniques.

Amish-made sheds are renowned for exceptional quality and durability. These sheds meet strict quality standards. Seek builders with a solid reputation and excellent customer service.

A comprehensive portfolio showcases a builder’s expertise. Verified references offer insights into their work’s quality and reliability. Investing in a reputable builder ensures a successful custom shed project.

Timelines for Shed Construction

Shed construction timelines vary based on the type you choose. Prefab sheds can be installed in days. Custom sheds may take weeks or months to complete.

Design and planning usually takes 5-15 business days. Getting a building permit can take up to 25 business days. Additional planning approval might take 60-90 days.

Shed fabrication typically lasts 6-8 weeks. Construction takes about 2 weeks, depending on size. The entire process can span 4-7 months from start to finish.

Professional builders like Spinifex Sheds offer expertise and time-saving services. They ensure high-quality sheds built to standards and local regulations.

Shire approval for sheds can take 12 to 90 days. Building permits may require up to 25 working days. Concrete and earthworks need 4 to 7 days to cure.

Getting a shed kit together usually takes about 4 weeks. Actual construction lasts 1 to 5 days, depending on size and features.

The entire process can take up to 22 weeks. This timeline may vary based on shire approval. Plan ahead and work with professionals for efficient completion.

Tips for Hiring the Best Shed Builders for Your Project

hiring shed builders

Choosing the right shed builders is crucial for your project’s success. Experienced professionals can turn your vision into reality. Here are some valuable tips for hiring shed builders:

  1. Research and Reviews: Investigate local shed builders with proven track records. Look for quality craftsmanship and positive customer feedback. A strong portfolio of past projects indicates their expertise.
  2. Communication and Transparency: Seek companies that respond quickly and provide clear timelines. They should be open about the construction process and potential challenges.
  3. Budget and Timeline: Discuss your budget and create a realistic project timeline. Ensure costs and schedules meet your expectations to avoid surprises.
  4. Customer Service: Choose builders who prioritize your needs and deliver high-quality experiences. This shows they’re trustworthy partners for your project.

Following these tips improves your chances of hiring excellent shed builders. Quality workmanship pays off in the long run.

A well-built shed will be durable and functional. It will meet your specific needs for years to come.

Discover the FindPros Advantage for Your Shed Project

Searching for the perfect shed builder can be a daunting task. But with FindPros, you can easily connect with a network of pre-built and custom shed experts in your local market. Simply answer a few questions about your project, and we’ll match you with top-rated professionals that fit your needs and budget.

Enjoy the convenience of comparing multiple quotes, exploring a huge selection of vinyl siding, build quality, and custom build options, all without extra charges or hidden fees. FindPros takes the hassle out of your shed project, so you can focus on creating more space, impressing your friends, and enjoying your wonderful new outdoor structure. Visit us today and let our incredible team of professionals serve you with the utmost professionalism and pleasure.

Conclusion

Selecting the right shed builders is crucial for your custom sheds and storage solutions. Consider local rules, design for your needs, and pick a trusted builder. Look for quality work and great customer service.

This guide helps you find top shed builders for your backyard project. It covers shed types and prep for construction. Use this info to make smart choices for a smooth design and construction process.

A quality shed offers lasting storage solutions and improves your outdoor space. Team up with skilled shed builders to maximize your backyard’s potential. Create a useful, strong, and attractive addition to your property.

Frequently Asked Questions (Siding Repair)

Common signs include cracks, gaps, holes, warping, and increased energy costs. These indicate potential moisture damage, pest entry points, and structural issues that require attention.
Yes, for small, simple holes or cracks, most homeowners can do a DIY vinyl siding repair using a specialized service or patch kit. However, extensive damage or structural issues may require professional siding repair services.
The cost of siding repairs can vary widely depending on the extent of the damage, the siding material (e.g., wood, vinyl, aluminum), and whether it’s a small patch or a more extensive repair. On average, most homeowners can expect to pay between 0 to ,000 for siding repairs.
If you have widespread damage, such as rotting, warping, or missing pieces across a large area of your home’s siding, replacement may be the better long-term solution. Extensive repairs can add up quickly, and new replacement siding can improve your home’s energy efficiency and curb appeal.
Look for licensed, experienced contractors who specialize in siding installation and repair. Check their credentials, reviews, and portfolio of past projects. Get multiple quotes to find the best value, but don’t sacrifice quality for the lowest price. A skilled contractor can ensure proper installation and weather resistance for your home.

Sewer Line Cleaning

Siding Repair Near You

Can’t find what you are looking for?

How It Works

  • Answer a few questions about your home project.
  • Within seconds, get matched with top-rated local pros.
  • Compare quotes and choose the best pro for the job.

Sewer Line Cleaning In Your Area

Need Sewer Line Cleaning? Here’s What You Need to Know

Meta Description: Discover expert sewer line cleaning services to keep your plumbing system flowing smoothly. Learn about common issues, prevention tips, and when to call a professional.

Sewer Line Cleaning

Sewer lines quietly carry away wastewater, keeping our homes running smoothly. But what if we ignore these vital components? A simple cleaning might prevent costly disasters.

Let’s explore why maintaining sewer lines is important. We’ll also discuss signs that show it’s time for professional cleaning.

Key Takeaways

  • Regular sewer line cleaning is crucial to prevent clogs, backups, and costly repairs.
  • Warning signs like slow drains, gurgling sounds, and water backup indicate the need for sewer line cleaning.
  • Common causes of sewer line clogs include flushing inappropriate items, tree root intrusion, and damaged pipes.
  • Professional sewer line cleaning methods like hydro jetting and snaking are more effective than DIY solutions.
  • Proper preventative maintenance and choosing a reputable plumbing company can help ensure the longevity of your sewer system.

Signs You Need Sewer Line Cleaning

A well-functioning sewer line is vital for your home’s plumbing system. Over time, even the best sewer lines can develop issues. Knowing the signs that indicate cleaning is needed can prevent costly repairs.

  • Water Backing Up in Tub or Toilet: Water backing up in your tub or toilet is a clear sign of trouble. This happens when a clogged sewer line blocks wastewater from draining properly. Quick action is crucial to avoid damage and flooding.
  • Gurgling Sounds from Drains: Gurgling noises from your drains can signal sewer line problems. These sounds occur when air bubbles form in a partially blocked line. Professional cleaning may be necessary to resolve this issue.
  • Slow Draining in Shower or Sinks: Slow draining in showers or sinks often points to sewer line blockages. If water takes longer than usual to drain, it’s time to address the problem. This could indicate a need for sewer line cleaning.

Recognizing these signs helps you tackle sewer line issues early. Regular cleaning maintains your home’s plumbing health. It ensures your drains work efficiently and prevents more serious problems.

Common Causes of Sewer Line Clogs

Sewer line clogs can be frustrating and costly for homeowners. Knowing what causes these blockages helps prevent them. Let’s look at the main reasons for sewer line clogs.

Flushing Inappropriate Items

A top cause of sewer line clogs is flushing wrong items down the toilet. Diapers, paper towels, and feminine products can build up in the sewer line. These items don’t break down like toilet paper, leading to clogs.

Tree Root Intrusion

Tree roots often cause sewer line clogs. As trees grow, their roots can break into sewer pipes. This creates cracks and holes in the pipes.

The roots keep growing, forming a mess that blocks wastewater flow. Regular checks and upkeep are key to stop root problems early.

Cracked or Damaged Pipes

Sewer pipes can crack or break due to age, soil movement, and pressure. These damages let debris build up, causing clogs and blockages.

Regular sewer line checks can find pipe issues early. This allows for timely fixes or replacements.

Knowing these common causes helps homeowners prevent sewer line clogs. Good upkeep, careful flushing, and quick action on problems keep sewer lines flowing well.

DIY vs Professional Sewer Line Cleaning

Professional sewer line cleaning

Sewer line issues can be tempting to fix yourself. But hiring a professional plumber is usually the best choice. DIY cleaning might seem cheaper, but the risks often outweigh the benefits.

Sewer systems are complex, with problems from various sources. Tree roots, grease buildup, or pipe damage can cause issues. Cleaning without proper tools can lead to more damage and expensive repairs.

Professional plumbers have specialized equipment for effective cleaning. They use high-pressure water jetting machines, motorized augers, and video inspection cameras. These tools are essential for thorough sewer line maintenance.

Handling hazardous materials during cleaning can be risky. Chemical cleaners and raw sewage pose health dangers if not managed correctly. Professionals have safety gear and proper disposal methods for these materials.

Hiring a professional plumber is the smart choice for sewer line cleaning. They provide thorough, lasting solutions and peace of mind. The long-term benefits often outweigh the initial cost of their services.

Sewer Line Cleaning Methods

A well-functioning sewer line is vital for your plumbing system’s health and efficiency. Professional plumbers use various methods to clear blockages and restore proper flow. Let’s explore some common sewer line cleaning techniques.

  • Hydro Jetting: Hydro jetting uses high-pressure water to blast away debris, grease, and obstructions. This method effectively removes stubborn clogs and restores optimal flow. Powerful water jets reach deep into pipes, dislodging even the toughest blockages.
  • Snaking: Snaking, or rodding, uses a flexible metal cable to break up and remove blockages. It’s effective for clearing localized clogs and accessing hard-to-reach areas. Homeowners often use snaking for slow drains or recurring clogs.
  • Rodding: Rodding uses long, flexible rods to navigate through pipes and remove obstructions. It’s useful for clearing blockages in the main sewer line. This method targets tree root intrusion, debris, and other common causes of clogs.

The best cleaning method depends on the clog’s severity, location, and the plumbing system’s condition. Experienced plumbers evaluate the situation to select the most effective technique for restoring proper function.

Sewer Line Inspections

A well-functioning sewer system is crucial for every homeowner. Regular sewer line inspections are vital for maintaining this system. Plumbers use sewer cameras to examine pipes and identify potential issues.

Sewer inspections help detect blockages, cracks, or damage in pipes. They can uncover signs of root intrusion or other problems. Regular checks help homeowners avoid costly repairs in the future.

The inspection process uses a specialized camera inserted into the sewer line. It captures high-quality images and video footage of the pipes. The plumber reviews this to assess the pipes’ condition.

  1. Sewer inspections are crucial for maintaining a well-functioning wastewater collection system and minimizing the risk of serious issues like sewer backups and overflows.
  2. Inspections can be part of routine maintenance programs or in response to unexpected blockages, with the aim of identifying potential blockages and monitoring pipe structural health.
  3. Factors influencing inspection frequency and cleaning include equipment availability, budget for services, and availability of trained workers.
  4. Inspection frequency can vary based on pipe size, risk factors, and historical issues such as root penetration or grease accumulation.
  5. Different technologies like CCTV inspections and pipe penetrating radar systems offer various cost points and levels of information for sewer inspections.
  6. AI integration in sewer inspections is growing, helping utilities process and interpret large amounts of inspection data efficiently.

Regular sewer line inspections keep homeowners informed about their plumbing system. They can make smart decisions about maintenance and repairs. This helps prevent costly issues and ensures long-term sewer system health.

Preventive Maintenance

preventive maintenance

Maintaining your sewer line’s health is vital to avoid costly plumbing issues. Regular care keeps pipes in top shape and prevents clogs and backups. Preventive maintenance is key to a healthy plumbing system.

Homeowners can pour baking soda and vinegar down drains every few months. This natural remedy helps break down buildup in pipes. Enzyme-based cleaners also target organic matter that can cause clogs.

Be mindful of what you flush or pour down drains. Avoid flushing wipes, feminine products, or grease. These items can get stuck and cause blockages.

Schedule professional sewer line cleanings every 2-3 years. Plumbers have tools to clean pipes and spot issues early. This care extends your sewer line’s life and prevents costly repairs.

Taking care of your sewer line saves you trouble and money. Don’t wait for a major backup to address plumbing problems. Stay on top of maintenance to keep pipes flowing smoothly.

Sewer Line Repair vs Replacement

Homeowners often face a tough choice with sewer line issues. Should they repair or replace the line? The decision depends on the problem’s severity and long-term benefits.

Sewer line repair is often cheaper for minor issues. Pros can use hydro-jetting or snaking to clear blockages. But severe damage may need a bigger fix.

Sewer line replacement costs more but offers a long-term solution. A new line ensures optimal plumbing function. It can reduce future problems, especially in older homes.

Consider the system’s age and issue frequency when choosing. Video inspections help pros assess the line’s condition. They can then suggest the best action.

Consult a pro plumber to make the best choice. They can assess your situation thoroughly. Their guidance ensures the best outcome for your home’s plumbing.

Tips for Hiring a Professional Sewer Line Cleaning Company

Sewer line cleaning is vital for your home’s plumbing health. If you suspect issues, hire a reputable company to address them. Here’s how to make the right choice.

Consider these tips when hiring a plumber for sewer line cleaning:

  • Look for licensed and insured plumbing companies with a proven track record of quality work in the community.
  • Check online reviews and ask for references to ensure you’re choosing a reliable provider with a good reputation.
  • Get multiple quotes to compare prices and services, as the cost of professional sewer line cleaning can vary widely.
  • Inquire about the company’s expertise in using specialized equipment like hydro-jetting or snaking to effectively clear sewer line blockages.
  • Ask about any warranties or guarantees they offer on their work, giving you peace of mind that the job will be done right.

Finding the right plumbing expert is crucial. It ensures your sewer line is well-cared for. This can help you avoid costly future repairs.

Find the Right Pros for Your Sewer Line Cleaning

Need expert sewer line cleaning but not sure where to start? FindPros can help. Simply answer a few quick questions about your home project, and we’ll match you with top-rated local professionals. Get multiple competitive quotes to find the right pro at a reasonable price. Our vetted experts have the specialized equipment and expertise to properly clean your drain lines and sewer pipes, restoring smooth water flow. No more guesswork – just reliable service and peace of mind. When it’s time to address sewer problems, let FindPros connect you with the best pros for the job.

Conclusion

Maintaining a home’s sewer line is crucial for proper plumbing care. Knowing problem signs, clog causes, and cleaning methods helps homeowners keep their plumbing system running smoothly. Regular care prevents costly issues down the line.

Minor maintenance can be DIY, but extensive sewer line cleaning needs a professional plumber. Staying on top of sewer line maintenance helps avoid expensive repairs and ensures long-term plumbing health.

Bi-annual sewer line inspections can catch potential issues early. Preventive maintenance, like cleaning the entire sewer system every three years, saves money.

These proactive steps protect your home’s plumbing system. They help you avoid the hassle of sewer line repair or replacement. Regular care keeps your plumbing functioning well for years to come.

Frequently Asked Questions (Siding Repair)

Common signs include cracks, gaps, holes, warping, and increased energy costs. These indicate potential moisture damage, pest entry points, and structural issues that require attention.
Yes, for small, simple holes or cracks, most homeowners can do a DIY vinyl siding repair using a specialized service or patch kit. However, extensive damage or structural issues may require professional siding repair services.
The cost of siding repairs can vary widely depending on the extent of the damage, the siding material (e.g., wood, vinyl, aluminum), and whether it’s a small patch or a more extensive repair. On average, most homeowners can expect to pay between 0 to ,000 for siding repairs.
If you have widespread damage, such as rotting, warping, or missing pieces across a large area of your home’s siding, replacement may be the better long-term solution. Extensive repairs can add up quickly, and new replacement siding can improve your home’s energy efficiency and curb appeal.
Look for licensed, experienced contractors who specialize in siding installation and repair. Check their credentials, reviews, and portfolio of past projects. Get multiple quotes to find the best value, but don’t sacrifice quality for the lowest price. A skilled contractor can ensure proper installation and weather resistance for your home.

Septic Tank Installation

Siding Repair Near You

Can’t find what you are looking for?

How It Works

  • Answer a few questions about your home project.
  • Within seconds, get matched with top-rated local pros.
  • Compare quotes and choose the best pro for the job.

Septic Tank Installation In Your Area

Septic Tank Installation: A Guide for Homeowners

Meta Description: Learn everything about septic tank installation, from costs and types to regulations and maintenance. Essential guide for homeowners considering a new septic system.

Septic Tank Installation

Curious about septic system installation? It’s a vital step for effective home wastewater management. Let’s explore the key steps and best practices for this complex process.

This guide will help you understand the essentials of septic tank installation. You’ll learn what to consider and how to ensure a successful setup.

Key Takeaways

  • Septic systems require regular maintenance, including inspection and pumping every 3-5 years.
  • Concrete, fiberglass, and plastic tanks each have their own advantages and disadvantages for installation.
  • Site evaluation, including soil analysis and setback requirements, is critical for a successful septic system installation.
  • Obtaining the necessary permits and following local regulations is a crucial first step in the installation process.
  • Proper installation techniques, such as excavation and safety measures, are essential to avoid issues down the line.

Understanding Septic Systems

Septic systems treat wastewater in homes without municipal sewer connections. They handle water from sinks, toilets, showers, and washing machines. A typical system includes a septic tank and drain field.

Components of a Septic System

The septic tank is a large, underground container made of concrete, fiberglass, or plastic. It separates solid waste from liquid waste. Solid waste settles at the bottom, while liquid waste flows into the drain field.

Advantages and Disadvantages of Septic Systems

Septic systems offer cost-effective wastewater treatment, especially in rural areas. They can be customized to fit specific property needs. However, these systems require regular maintenance to function properly.

Soil conditions can impact system performance. Homeowners may need permits and inspections before installation. Regular pumping and inspections are necessary for optimal functioning.

Understanding septic systems is vital for homeowners considering this wastewater solution. Regular upkeep and following local rules ensure long-term efficiency. Proper care keeps these systems working well for years.

Site Evaluation

A thorough site evaluation is crucial before installing a septic tank. It helps identify the best location for the system. This process analyzes soil, topography, and the surrounding area.

Soil Analysis: The Foundation for Success

Soil analysis is the first step in site evaluation. Experts examine soil type, texture, structure, and consistency. These factors affect wastewater absorption and filtration rates.

The analysis also spots limiting conditions like high water tables. This data helps size the septic system correctly. Proper sizing ensures effective wastewater treatment.

Topography and Setbacks: Ensuring Compliance and Safety

Experts evaluate the site’s topography to find the best elevation. The septic system should be higher than the surrounding area. This prevents contamination of the environment.

Setbacks are also carefully assessed. These are minimum distances between the system and other structures. Proper setbacks ensure compliance with local laws.

Proposed Elevations: Optimizing System Function

Proposed elevations are based on soil and topography evaluations. These elevations are vital for the system’s intended function. They help treat wastewater effectively and prevent environmental issues.

A thorough site evaluation identifies the best septic system location. It ensures long-term efficiency and compliance with local rules. This approach can prevent future environmental and financial problems.

Permits and Regulations

Installing a septic tank requires proper permits and compliance with regulations. These can differ based on your location. Check with your local health or building department for specific standards.

Key permits and regulations include:

  • Septic system permit: Homeowners will need to obtain a permit from the local authorities to install a new septic system or make significant repairs to an existing one.
  • Zoning and land use regulations: The proposed septic system must comply with local zoning laws and land use regulations, which may dictate the size, location, and type of system allowed.
  • Environmental regulations: Septic systems may be subject to environmental regulations, particularly if the property is located near sensitive areas like wetlands or water bodies.
  • Construction regulations: The septic system installation must adhere to building codes and construction standards, including safety measures and proper excavation.
  • Inspection and maintenance regulations: Regular inspections and maintenance of the septic system may be required to ensure continued compliance and proper functioning.

Not following the rules can lead to fines and legal problems. Research local requirements before starting your septic tank project.

Understanding these rules helps ensure a smooth installation process. It also keeps you on the right side of the law.

Choosing the Right Septic Tank

Selecting the perfect septic tank involves considering several key factors. The tank’s size and construction materials are crucial aspects to think about.

Tank Size

Your septic tank size depends on your household size and daily water use. It should hold at least two days’ worth of wastewater.

Single-family homes typically need a 750 to 1000-gallon tank. Multi-family properties may require 250 gallons per bedroom.

Local regulations and soil conditions affect tank size requirements. Consult local authorities and septic professionals for proper sizing.

Tank Materials

  • Concrete: Durable and long-lasting, but heavy and difficult to install.
  • Fiberglass: Lightweight and easy to install, but can be more expensive.
  • Plastic: Affordable and lightweight, but may not be as durable as other materials and can be prone to cracking.

Each material has unique pros and cons for durability, installation, and cost. Consider your specific needs when choosing the right septic tank material.

Installation Preparation

Homeowners must take crucial steps before installing a septic tank. Excavation is the first step, creating space for the tank and drain field. The location must be identified, often with help from local health departments.

Necessary permits may be required from local government before starting. Homeowners must clear the area of obstacles like rocks and trees. This ensures a smooth installation process.

Heavy machinery like backhoes are often needed for excavation. Safety measures must be followed when using such equipment. Homeowners should be aware of these safety requirements.

Safety Measures

Safety is paramount during septic tank installation. Following OSHA regulations ensures worker safety throughout the process. The site must be secured to prevent unauthorized access.

Identifying underground utilities is crucial to avoid accidents. These safety precautions are vital for a successful installation. They help prevent mishaps and ensure efficiency.

  • Comply with OSHA regulations for worker safety
  • Secure the site to prevent unauthorized access
  • Identify and avoid any underground utilities

These steps ensure a safe and successful septic tank installation. They minimize risks and maximize efficiency. Proper preparation leads to a smooth installation process.

Types of Septic Systems

Septic system components

Homeowners can choose between conventional and alternative septic systems. Conventional systems use natural wastewater flow through a septic tank and drain field. The soil then further treats the partially treated wastewater.

Conventional Septic Systems

Gravity and pressure systems are two types of conventional septic systems. Gravity systems rely on natural forces to move wastewater. Pressure systems use pumps to distribute wastewater throughout the system.

Alternative Septic Systems

Alternative systems are used when soil conditions aren’t suitable for conventional systems. They may also be used in areas with too many systems. These systems use new technology to improve treatment processes.

Some alternative systems use sand, peat, or plastic media instead of soil. Others may use wetlands, lagoons, aerators, or disinfection devices. These systems often have electrical or mechanical parts requiring yearly inspection.

About 20% to 30% of American households use septic systems. In some states, over 40% of residents rely on septic tanks. The Gravity Fed Septic System is the most common type.

Alternative systems are becoming popular for challenging soil conditions. These include Chamber, Mound, Recirculating Sand Filter, and Aerobic Treatment Unit systems. They offer cost-effective and efficient options for homeowners with limited space.

Maintenance and Inspection

Proper maintenance is vital for a septic system’s long-term function. Professionals should inspect it every 3 years. Tank pumping is recommended every 3 to 5 years.

Household size, water usage, and tank levels affect pumping frequency. Regular care can extend system life and prevent costly repairs.

Regular Pumping

Service providers check for leaks and measure tank levels during inspections. They determine if pumping is needed. Homeowners should keep records to plan future services.

Inspections

  • In addition to regular pumping, homeowners should also have their septic systems inspected regularly, at least every 3 years.
  • During an inspection, the service provider will locate the septic system, uncover the access holes, check for signs of backup, measure the sludge and scum levels, and inspect any mechanical or electrical components.
  • Regular inspections help ensure that the septic system is functioning properly and can identify any issues before they become major problems.
  • Inspections of septic systems are often necessary when buying or selling a house to ensure the system is in good working order.

A regular maintenance schedule helps ensure septic system health. Inspections identify issues early. This approach keeps the system running efficiently for years.

Cost Considerations

The cost of installing a septic system varies based on several factors. Material costs for the tank itself play a crucial role. Concrete tanks are usually the cheapest, ranging from $700 to $2,000.

Fiberglass and plastic tanks are more durable but pricier, costing $1,200 to $2,500. Steel tanks are less common and generally more expensive.

The size of the septic system also affects material costs. Larger tanks for 5-6 bedroom homes can cost $1,200 to $2,500. Smaller systems for 1-2 bedrooms may range from $500 to $1,200.

Labor Costs

Labor costs for septic system installation are significant, often 50-70% of the total project cost. These costs vary by location, installation complexity, and site requirements. Homeowners typically pay $1,500 to $4,000 for labor.

Landscaping work and site accessibility can also impact labor costs. Budget $2,000 to $5,000 or more for a complete new septic system installation. Specialized or engineered systems may cost even more.

Tips for Hiring the Best Septic Tank Installation Professionals

septic tank installation

Hiring skilled septic tank installation professionals is vital for your system’s success. Seek licensed contractors who know local permits and regulations. They should excel in site evaluation and proper installation.

Here are some tips to find the right experts:

  1. Check the contractor’s local expertise in your area. This ensures they know your location’s specific needs.
  2. Read customer reviews and check the Better Business Bureau. This helps gauge their reputation and work quality.
  3. Verify that licensed contractors know current regulations and permit requirements. This is crucial for legal compliance.
  4. Ask about the company’s credentials, insurance, and warranties. These protect your investment in the long run.
  5. Get quotes from multiple providers. This helps you find the best value for your installation needs.

The right professionals ensure your septic system works well for years. They’ll install it correctly, giving you peace of mind.

Finding the Right Pros for Your Septic Project

If you’re considering a new septic tank system, replacement, or any other septic project, FindPros can help. Quickly answer a few questions about your home and septic needs, such as the type of system (conventional, chamber, aerobic, or mound), soil conditions, water table, and any special requirements from your local health inspector or government.

Within seconds, FindPros will match you with top-rated local professionals who can provide accurate quotes, factoring in labor costs, installation expenses, and landscaping as needed. Save money by letting pros compete for your business, and find the right septic expert you feel most comfortable working with, whether it’s for a steel, concrete, or plastic septic tank. Take the stress out of your septic project and let FindPros handle the hard work of finding the perfect pros for the job.

Conclusion

Septic tank installation needs careful planning and compliance with local rules. Homeowners must understand septic system parts, installation steps, and maintenance needs. Choosing the right septic tank and hiring experts ensures successful installation.

Proper maintenance of your septic system protects your investment and the environment. It also keeps your household safe. With care, homeowners can install a septic tank confidently.

Success comes from knowing your property’s needs and local regulations. Working with skilled professionals is key. This approach ensures your septic system works well for years.

A well-installed system reduces repair costs and environmental impact. It provides a lasting solution for managing wastewater. By following these steps, you’ll have an efficient septic system.

Frequently Asked Questions (Septic Tank Installation)

The main types of septic tank systems include conventional septic systems, which use gravity or pressure to move wastewater, as well as alternative systems like aerobic systems, chamber septic systems, mound septic systems, and anaerobic systems. These alternative septic tank systems often utilize special equipment like perforated pipes, distribution boxes, and septic filters to treat wastewater when the soil conditions are poor.
The septic tank installation cost can vary greatly, but generally falls between $2,000 to $10,000 or more. Factors that impact the septic tank costs include the size and material of the septic tank (concrete, fiberglass, plastic, or steel), the labor costs which can make up 50-70% of the total project, and any additional site preparation or landscaping that may be required.
Concrete septic tanks are durable and relatively affordable, but can be heavy and difficult to install. Fiberglass septic tanks are lightweight and easy to install, but tend to be more expensive. Plastic septic tanks are affordable and lightweight, though they may not be as durable as other options. Steel septic tanks are less common and generally more costly than the other materials.
Before installing a new septic tank system or replacing an existing one, homeowners must obtain the necessary permits from their local health department or other governing authorities. This ensures the septic system design and construction process complies with all zoning laws, environmental regulations, and building codes in that area. Failing to get the proper permits can result in fines and other legal issues.
Proper maintenance is crucial for a septic tank system to function well for many years. This includes regular inspections every 3 years to check for leaks and measure sludge/scum levels, as well as septic tank pumping every 3-5 years depending on household size and water usage. Homeowners should also avoid flushing non-biodegradable items like paper towels down drains to prevent clogging the septic filter or perforated pipes. Staying on top of septic system maintenance helps prevent costly repairs down the line.

Septic System Repair

Siding Repair Near You

Can’t find what you are looking for?

How It Works

  • Answer a few questions about your home project.
  • Within seconds, get matched with top-rated local pros.
  • Compare quotes and choose the best pro for the job.

Septic System Repair In Your Area

Septic System Repair: A Guide to Hiring the Right Professional

Meta Description: Learn how to identify and hire the right professional for septic system repair. Ensure your home’s wastewater management is in expert hands and avoid costly mistakes.

Septic System Repair

A faulty septic tank can cause expensive repairs and health risks. Hiring the right professional can prevent these issues. Let’s explore how to find the best septic system repair service.

Key Takeaways

  • Hiring a licensed and insured septic repair contractor is crucial to avoid costly mistakes and potential liability.
  • Extensive experience in septic system maintenance and repair is a critical factor in selecting the right professional.
  • Requesting references and verifying a contractor’s reputation can help you make an informed decision.
  • Regular septic tank pumping and maintenance are essential for preventing major issues down the line.
  • Attempting complex septic system repairs on your own can lead to further damage and increased costs.

Importance of Hiring a Professional for Septic System Repair

Septic system repair is complex and requires licensed professionals. DIY repairs can lead to costly consequences like system failure and health hazards. Hiring a skilled septic contractor ensures the job is done correctly and efficiently.

Consequences of DIY Septic System Repairs

DIY septic repairs can cost more in the long run. Improperly installed systems may not meet local codes or have the wrong capacity. These issues can delay installation and exceed budgets.

Benefits of Hiring a Licensed and Insured Contractor

Professional contractors know the latest building codes and requirements. They have specialized knowledge and equipment to diagnose and fix septic issues. Licensed contractors protect homeowners’ property and provide warranties on repairs.

Experts perform crucial soil and perc testing for the best system design. Choosing the wrong system can lead to costly mistakes. Trusting professionals helps protect your investment and meet your property’s needs.

Identifying Common Septic System Repair Issues

septic system

Keep an eye on your septic system for trouble signs. Foul odors, slow drains, and gurgling sounds can indicate problems. Soggy patches or standing water in the yard are also red flags.

These symptoms may point to various issues. They can range from simple clogs to serious leaks. A failed leach field is another possible problem.

Signs of Septic System Failure

  • Slow-draining sinks and toilets
  • Gurgling sounds from plumbing fixtures
  • Foul odors around the septic tank or drain field
  • Soggy or wet areas in the yard near the septic system
  • Standing water or sewage surfacing in the drain field

Types of Septic System Problems

  1. Structural damage to the septic tank or pipes
  2. Corrosion of the septic tank or system components
  3. Tree root infiltration into the septic system
  4. Clogged pipes or a failed leach field
  5. Overloading the system with excessive water use

Knowing these signs can help you spot septic system issues early. Understanding potential problems is key to maintaining your wastewater treatment system. Call a pro when you notice these warning signs.

When to Repair or Replace Your Septic System

Fixing or replacing a septic system depends on the problem’s size. Small issues like cracks may be fixable. But older systems with frequent problems might need full replacement.

A new drainfield can cost $3,000 to $15,000. Alternative treatment systems range from $10,000 to $20,000. Septic tank pumping averages $420. Fixing a broken pipe costs about $1,500.

Homeowners should ask a septic contractor to check their system. They’ll help find the best solution. Consider the system’s age, problem frequency, and long-term costs.

  • Beneficial microbes in the soil can clog the drainfield over time, normally after around 30 years of use.
  • Once a drainfield fails, it typically needs to be abandoned and replaced.
  • Advanced treatment systems may need part adjustments or replacements for maintenance.
  • Municipalities may offer low-interest loans for septic system repairs, funded by the federal Clean Water Act.

Well-kept septic systems can last up to 30 years. Watch for slow drains, odd smells, or standing water. Quick action and expert help keep your system working well.

Hiring a Professional Septic System Repair Company

Hiring a professional for septic system repair is crucial. Choose a contractor with proper qualifications and licensing. This protects your property and provides a warranty on the work.

Checking Qualifications and Licensing

In Washington State, licensed designers and professional engineers must design new installations, alterations, and repairs. Installers must be approved by the local health department for installations. Verify that your contractor is licensed and insured in your state.

Importance of Experience and References

Consider a contractor’s level of experience when hiring. Look for a proven track record of successful septic system repairs. Seek positive references from past customers to ensure quality work.

This approach helps avoid costly mistakes and future problems. Contact at least three professionals before selecting a septic system repair company. Thorough research will give you peace of mind about your septic system.

Septic System Maintenance Tips

Septic System Maintenance

Proper septic system care is vital for long-term performance. Regular pumping and avoiding harmful substances prevent costly repairs. These steps ensure your system works well for years.

Regular Septic Tank Pumping

Experts suggest pumping your septic tank every 3-5 years. This depends on tank size and household waste amount. Skipping this can lead to system failure.

System failure is expensive and disruptive to fix. Regular pumping helps avoid these issues.

Avoiding Harmful Substances in Your Septic System

  • Don’t flush or pour grease, chemicals, or non-biodegradable items down the drain.
  • Avoid flushing coffee grounds, diapers, sanitary products, condoms, and other clogging items.
  • Use fewer harsh chemicals like bleach or drain cleaners. They kill helpful bacteria in your tank.

These simple tips can extend your septic system’s life. Regular pumping keeps things running smoothly. Avoiding harmful substances protects your system’s balance.

By following this advice, you’ll save money on repairs. Your septic system will thank you!

When to DIY or Call a Professional for Septic System Repair

Homeowners often wonder if they should fix their septic system or hire a pro. Minor issues like small clogs or replacing damaged parts can be DIY projects. However, complex problems need expert help.

DIY repairs can cause more damage if done wrong. Septic systems have complex parts that need special knowledge and tools to fix properly.

  • Minor clogs or replacing damaged parts: DIY possible
  • Major clogs, leach field repairs, or tank replacements: Seek professional help
  • Improper DIY repairs can lead to further damage and costly mistakes

Septic pros have the skills and tools to solve issues correctly. They ensure repairs follow local rules and building codes. Trying complex fixes without proper know-how can be risky.

It’s best to ask a qualified septic repair contractor when unsure. They can check the problem and give an accurate estimate. Their work protects your investment and the environment.

FindPros: Your Septic System Repair Solution

Overwhelmed by the complexities of septic tank repair? FindPros can simplify the process and connect you with the right local professionals for the job. Our network of licensed and insured contractors specializes in all aspects of septic system maintenance, from unclogging drains to replacing entire drain fields. Answer a few quick questions about your home project, and we’ll match you with top-rated pros who can provide competitive quotes.

Forget the hassle of sifting through endless options – let FindPros handle the heavy lifting and ensure your septic tank, garbage disposal, washing machines, and other on-site systems are working efficiently, without the risk of costly repairs or environmental damage down the line.

Conclusion

Septic system repair requires professional expertise. Hiring a licensed septic contractor ensures correct work and protects property and the environment. Regular maintenance and septic tank pumping can extend system life and prevent major issues.

Homeowners should know when to do minor repairs and when to call professionals. This keeps septic systems running smoothly and efficiently. Proper septic system maintenance is crucial for homeowners’ investments and community health.

Failed septic systems can pollute water sources and spread diseases. Prompt action and regular septic tank pumping prevent these problems. This ensures the system effectively treats household waste.

Recognizing septic system failure signs allows homeowners to address issues early. Professional help is best for repairs like fixing broken pipes or replacing a damaged septic tank.

Installing a new drainfield also requires expert assistance. Regular septic system maintenance and timely repairs prevent complete system failure. This makes it a smart long-term investment for homeowners.

Frequently Asked Questions (Septic System Repair)

Common signs of a failing septic system include foul odors, slow draining sinks and toilets, gurgling sounds from plumbing fixtures, soggy or wet areas in the yard, and standing water or raw sewage surfacing in the drain fields.
Experts recommend having your septic tank pumped every 3-5 years, depending on the tank size and amount of household waste. Skipping regular septic tank pumping can lead to system failure, which is expensive and disruptive to fix.
You should avoid flushing or pouring down the drain items like grease, harsh chemicals, coffee grounds, diapers, feminine hygiene products, and other non-biodegradable items. These can kill the helpful bacteria in the septic tank and clog the system.
Minor issues like small clogs or replacing damaged parts may be DIY-able for a homeowner. However, complex problems like major clogs, leach field repairs, or full septic tank replacements should be handled by a qualified septic repair contractor. Improper DIY repairs can lead to further damage and costly mistakes.
Hiring a licensed and insured septic repair contractor is crucial to ensure the job is done correctly, up to local codes and regulations, and with a warranty on the work. They have the specialized knowledge, equipment, and expertise to properly diagnose and fix septic tank issues, protecting your property and investment.

Security Camera Installation

Siding Repair Near You

Can’t find what you are looking for?

How It Works

  • Answer a few questions about your home project.
  • Within seconds, get matched with top-rated local pros.
  • Compare quotes and choose the best pro for the job.

Security Camera Installation In Your Area

Security Camera Installation: A Comprehensive Guide

Meta Description: Learn how to install security cameras effectively. Our guide covers placement, wiring, and setup for optimal home protection. Enhance your security with expert tips on camera installation.

Security Camera Installation

The need for strong home and business security is more important than ever. This guide will help you navigate the world of security cameras. You’ll learn how to transform your property into a safe haven.

We’ll show you how to select the right security cameras for your needs. You’ll also master the art of installation with our expert tips.

Key Takeaways

  • Discover the different types of security cameras and their unique features to make an informed decision.
  • Learn the advantages and disadvantages of wired versus wireless security systems to find the best fit for your property.
  • Understand the importance of strategic camera placement to maximize coverage and minimize blind spots.
  • Explore the integration of security cameras with smart home ecosystems for enhanced convenience and control.
  • Gain practical tips on powering your security cameras, whether through batteries, solar panels, or traditional power sources.

Understanding the Security Camera Landscape

The security camera market offers many options for home and business protection. From fixed to PTZ models, choosing the right cameras is vital for thorough surveillance. Consider factors like durability and positioning for maximum coverage and protection.

Types and Features of Security Cameras

Security cameras come in various forms with unique capabilities. Fixed cameras offer wide viewing angles for open areas. PTZ cameras allow active surveillance, following suspicious activity and zooming in for details.

Outdoor cameras must withstand harsh weather conditions. Indoor cameras can be more discreet, focusing on entry points and common areas. Outdoor lighting integration and low-light performance are crucial for outdoor security cameras.

Choosing Between Indoor and Outdoor Cameras

  • Outdoor cameras should be weatherproof and strategically positioned to deter and detect potential threats, complemented by outdoor lighting for optimal coverage.
  • Indoor cameras serve as discreet guardians, monitoring entry points and common areas while respecting the privacy of your living and working spaces.
  • Factors like durability, positioning, and low-light performance are crucial for outdoor cameras, while indoor cameras focus more on discreet placement and privacy preservation.

Understanding security cameras helps homeowners and business owners make smart choices. They can improve their surveillance and create safer spaces for families, employees, and customers.

Wired vs. Wireless Security Cameras

Choosing between wired and wireless security cameras is crucial for protecting your property. Both options have unique benefits and challenges. Let’s explore them to help you make the best choice.

Wired cameras are known for reliability and stability. They offer consistent performance with direct power connections. These cameras provide high-quality video and audio without wireless network reliance.

However, wired camera installation can be complex. It often requires extensive wiring and professional help for proper setup.

Wireless cameras offer flexible and convenient installation. They don’t need extensive cabling, making them attractive for homes and small businesses. These cameras are affordable and easy to expand as needed.

Wireless cameras integrate seamlessly with smart home systems. This allows for comprehensive security monitoring from a single platform.

Yet, wireless cameras have drawbacks. Their reliability can suffer during internet outages. They’re also more vulnerable to digital breaches, requiring strong encryption measures.

Consider your property’s needs, security level, and budget when choosing. Weigh reliability, flexibility, installation complexity, and security factors. This will help you make an informed decision that meets your requirements.

Integrating with Smart Home Ecosystems

Security cameras are key parts of home automation systems. They work with platforms like Amazon Alexa, Google Assistant, and Apple HomeKit. This creates a responsive security setup that works well together.

Most modern security cameras fit into popular smart home systems. Wireless cameras are great at this. They connect to your home’s Wi-Fi for remote access and control.

Voice control through Alexa or Google Assistant allows hands-free camera management. You can view live feeds and get alerts just by speaking. Motion detection can even trigger actions like turning on lights.

To keep your data safe, review your smart home device settings. Limit access to camera feeds and recordings. Use strong encryption to protect your information from unwanted eyes.

Strategic Camera Placement

strategic camera placement

Planning is key for a strong security camera system. Smart positioning maximizes coverage and reduces blind spots. Focus on entry points, staircases, and common areas to create a solid defense.

Maximizing Coverage and Minimizing Blind Spots

Effective camera placement is vital for home security. Cover ground-floor doors, windows, and main stairs or hallways. Include common spaces like the living room and kitchen.

Don’t forget outdoor areas such as the driveway and yards. Add cameras to second-floor hallways, garages, and detached buildings. This ensures you watch over your property’s most vulnerable spots.

Respecting Privacy

While strategic placement matters, respect private spaces. Avoid putting cameras in bedrooms and bathrooms. Be mindful of your neighbor’s privacy when setting up your system.

Balance convenience, reliability, and privacy for successful camera installation. Smart positioning creates a thorough system that deters intruders. It also respects personal and shared space boundaries.

Powering Your Security Cameras

Powering security cameras is key when picking wired or wireless options. Wired cameras use direct power, ensuring non-stop surveillance. Wireless cameras depend on batteries and Wi-Fi, needing careful upkeep for constant protection.

Wired cameras often use Power over Ethernet (PoE) tech. PoE powers cameras and sends data through one Ethernet cable. This makes setup easier and cuts down on power sources needed.

The Reolink Duo 3 PoE camera shows off PoE’s perks. It boasts 16MP UHD, dual-lens, motion tracking, and color night vision.

Wireless cameras are easy to install. They don’t need wires or holes drilled. But you must watch their battery life and Wi-Fi connection closely.

  • Wired security cameras provide a reliable and uninterrupted power source, making them suitable for critical surveillance applications.
  • Wireless security cameras offer flexibility in placement but require regular battery replacements and consistent Wi-Fi connectivity to maintain surveillance coverage.
  • Careful consideration of power sources, battery life, and Wi-Fi connectivity is essential when choosing between wired and wireless security camera options.

Know the power needs of both types. This helps you choose the right camera for your security needs.

The Installation Process

Installing security cameras requires careful planning and attention to detail. Key steps involve mounting and focusing cameras, and establishing wired connections. This ensures reliable and consistent surveillance.

Mounting and Focusing Cameras

Proper mounting of security cameras is crucial for optimal coverage and deterring intruders. Place cameras about 9-10 feet high to prevent tampering and provide clear views.

Focusing camera lenses is important for sharp, high-quality images. This helps with identification and investigation if needed.

Establishing Wired Connections

For reliable connectivity, connect cameras to a DVR or NVR using wired connections and cables. This ensures stable data transfer and eliminates potential interference.

Properly concealing and maintaining cables is crucial for the CCTV system’s integrity. This step helps protect your property and loved ones effectively.

Configuring and Customizing Your System

security camera system

Now it’s time to set up your security camera system. You’ll need to ensure enough storage space for footage. Adjust motion detection sensitivity to avoid false alarms. Create a recording schedule that captures important events efficiently.

Some systems offer facial recognition. This feature can be enabled through the camera’s app or computer interface. It adds an extra layer of security to your setup.

Optimizing Storage and Recording

Choose between local storage on microSD cards or NVRs/DVRs. Cloud storage is another option, but it comes with subscription fees. Calculate storage needs based on camera count, video quality, and retention time.

1080p cameras balance quality and bandwidth well. 4K cameras are becoming more affordable for those needing higher detail.

Configuring Motion Detection and Alerts

Balance motion detection to catch important events without too many false alarms. Focus on key areas and exclude unnecessary regions. Set up custom alerts to get notified of potential security issues quickly.

Enabling Advanced Features

Explore features like facial recognition in your security camera system. This tech can identify known people and alert you to strangers. Consider integrating cameras with smart home systems for added convenience and security.

By customizing your security camera system, you’ll meet your specific needs. You can optimize storage, recording, and use advanced features. This will boost protection for your home or business.

Performance Optimization and Enhancements

Boosting your security camera system’s power is crucial. Place Wi-Fi cameras close to your network for better performance. Use range extenders and outdoor lighting to improve surveillance.

  • Addressing Wi-Fi and Connectivity Issues: Position Wi-Fi cameras within your network’s optimal range. Use range extenders to keep connections strong. This helps avoid potential disruptions in your surveillance system.
  • Fine-tuning Motion Detection and Video Quality: Adjust motion detection for the right balance of sensitivity. Tweak video quality for clear footage without overloading storage. This ensures you capture important details effectively.

Tackle connectivity issues to unlock your system’s full potential. Optimize motion detection and video quality. These steps will take your surveillance capabilities to new heights.

Why It Is Better To Hire Professionals for Security Camera Installation

Security cameras are vital for protecting homes and businesses. Professional installers offer significant advantages that make a real difference in the long run.

These experts know legal requirements, ensure proper camera placement, and provide ongoing maintenance. Their industry experience optimizes your security system for maximum effectiveness.

  1. Legal Compliance: Professional installers know legal requirements for security systems in your area. They ensure your installation follows all applicable regulations.
  2. Optimal Placement: Experts maximize coverage and minimize blind spots by positioning cameras strategically. This provides comprehensive surveillance and deters potential threats.
  3. Ongoing Support: Professionals offer maintenance and troubleshooting services. They keep your system running smoothly and address issues that may arise.

DIY security camera installation might seem cost-effective at first. However, the risks and long-term drawbacks often outweigh initial savings.

Investing in professional security camera installation ensures proper setup and optimal performance. It provides the peace of mind you deserve.

Getting the Right Home Security Pros with FindPros

Are you looking to install the most security cameras or set up a Blink Outdoor cam at your home? Searching for the top picks in your area can be a daunting task. Let FindPros be your tool to point you in the right direction. Simply answer a few questions about your home project, and we’ll match you with local pros that you’ll get along with best. Within seconds, compare quotes from multiple professionals competing for your job, ensuring you get the best pricing.

Don’t settle for a limited selection or a security camera box that doesn’t quite fit. Let the FindPros network lead you to the right installer, whether you need a Lorex system mounted on your window or just want to set up a cam to monitor your sidewalk. Secure your home and your budget – search, download our app, and record your project details to get started.

Conclusion

Security camera installation is crucial for a complete home security system. Understanding camera types, selecting the right system, and strategic placement are key. These steps enhance your home’s safety and protection.

Integrating cameras with smart home systems allows for easy monitoring and control. Whether you install them yourself or hire professionals, security cameras are a wise investment.

They deter crime, provide real-time monitoring, and can boost employee productivity. Cameras also offer strong proof against crimes and help prevent workplace harassment.

The video surveillance industry is growing rapidly. It’s expected to reach $62 billion by 2027. This shows how important security camera installation has become.

Professionals offer thorough risk assessments and tailored setups. They ensure full coverage without blind spots. Expert installation provides quality, reliability, and peace of mind.

Frequently Asked Questions (Security Camera Installation)

The main types of home security cameras are analog cameras, IP cameras, and video doorbells. Analog cameras are wired and provide reliable footage, while IP cameras connect to your Wi-Fi for wireless installation. Video doorbells combine a camera with a doorbell for monitoring entries.
When choosing the location, focus on covering the most vulnerable areas of your house, such as entryways, windows, and the front door. Avoid placing cameras in private spaces like bedrooms. Consider the camera’s angle and potential for obstructions or glare from the sun.
Hiring a professional installer has several advantages. They ensure your cameras are placed strategically to provide the most coverage, follow local regulations, and handle the technical setup properly. Professionals can also provide ongoing maintenance and troubleshooting support.
Many modern security cameras can connect to smart home platforms like Amazon Alexa, Google Assistant, or Apple HomeKit. This allows you to monitor camera feeds, receive alerts, and control your security system using voice commands or a mobile app.
Wired cameras offer reliable, uninterrupted power and data transmission, while wireless cameras provide more flexibility in placement but require battery maintenance and stable Wi-Fi connectivity. Consider your home’s layout, power sources, and the level of security you need when choosing between wired or wireless home security cameras.