Heat Pump Installers

Heat Pump Installers Near You

Can’t find what you are looking for?

How It Works

  • Answer a few questions about your home project.
  • Within seconds, get matched with top-rated local pros.
  • Compare quotes and choose the best pro for the job.

Heat Pump Installers In Your Area

Hiring Heat Pump Installers: A Step-by-Step Guide

Meta Description: Find qualified heat pump installers to efficiently upgrade your HVAC system. Learn the key steps for hiring professionals and ensure a smooth installation process for your home.

Heat Pump Installers

Upgrading to an energy-efficient heat pump can be daunting. Finding reliable installers is crucial as demand surges across the United States. The growing industry has led to an influx of new contractors.

Many lack proper training and experience for quality installations. This guide will help you hire the right heat pump installers. We’ll cover necessary qualifications and navigate the installation process.

Key Takeaways

  • 01

    Understand the surge in demand for heat pump installers and the impact of government incentives on the industry

  • 02

    Learn about the critical qualifications and training required for heat pump installers to ensure a successful installation

  • 03

    Discover the step-by-step process for hiring a reputable contractor, including tips for vetting potential installers

  • 04

    Explore the financial considerations, from installation costs to available rebates and tax credits, to make an informed decision

  • 05

    Uncover the long-term benefits of a properly installed heat pump, including energy savings and reduced maintenance

Understanding the Demand for Heat Pump Installers

heat pump installers

Heat pump installers are in high demand due to two main reasons. The U.S. government aims to achieve net-zero carbon emissions by 2050. Heat pumps play a vital role in this green energy transition.

Homeowners are also looking for energy-efficient HVAC solutions to reduce their carbon footprint. This growing interest offers a great opportunity for skilled heat pump installers. The industry is expanding rapidly, creating more jobs in this field.

The US’s Net-Zero Carbon Emissions Goal

The U.S. government’s net-zero carbon emissions goal by 2050 boosts demand for heat pump installations. Heat pumps are more energy-efficient than traditional HVAC systems. They are crucial for reducing the nation’s carbon emissions.

The government is promoting renewable energy through various initiatives. This push is expected to increase the need for qualified heat pump installers. The job market for these professionals is likely to grow significantly.

Increased Homeowner Interest in Energy-Efficient Solutions

Homeowners are seeking energy-efficient HVAC solutions to cut costs and help the environment. This rising interest in heat pumps creates opportunities for installers. The market for skilled professionals is expanding as more people learn about heat pump benefits.

Government initiatives and homeowner demand have created a booming market for heat pump installers. Installers can secure a strong position by becoming experts in this growing field. The industry is set for significant expansion in the coming years.

Qualifications and Training for Heat Pump Installers

heat pump installer training

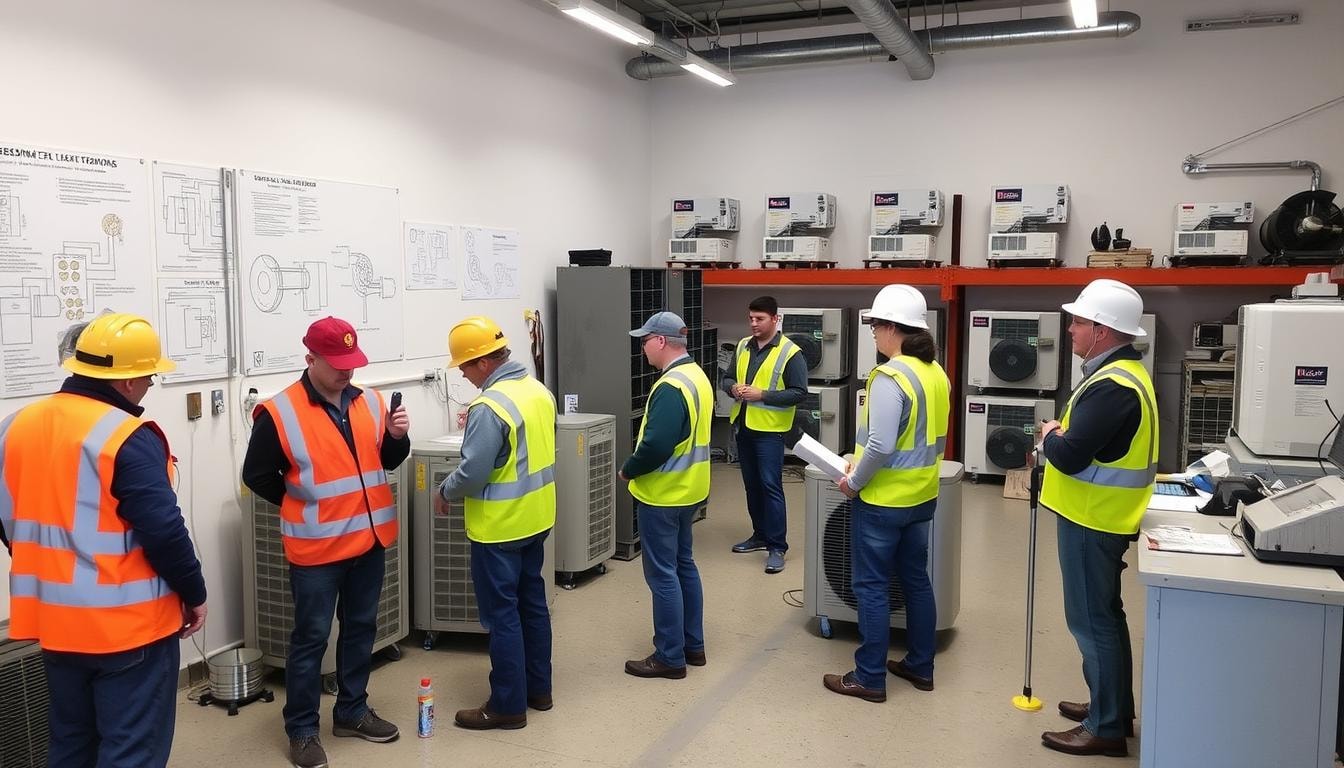
Heat pump installers need technical qualifications and specialized training. Two paths exist: installer and fully qualified installer. Each requires different certifications and skills.

Installer vs. Fully Qualified Installer

Installers need a technical plumbing certificate like NVQ2 or NVQ3. They also need Water Regulations and Unvented qualifications. Additional training from Heat Geek or Heating Academy Northampton is often necessary.

Fully qualified installers must have an N/SVQ Level 3 in heat pump installation. This includes certifications in gas, oil, and F-Gas. MCS certification is crucial for accessing government grant schemes.

Course Options and Costs

Training courses for heat pump installers cost between $700 and $900. They can be completed in 3 to 5 days. Government grants of up to $500 are available to help with costs.

Both paths require a mix of qualifications, training, and certifications. These are essential for success in the growing heat pump installation market.

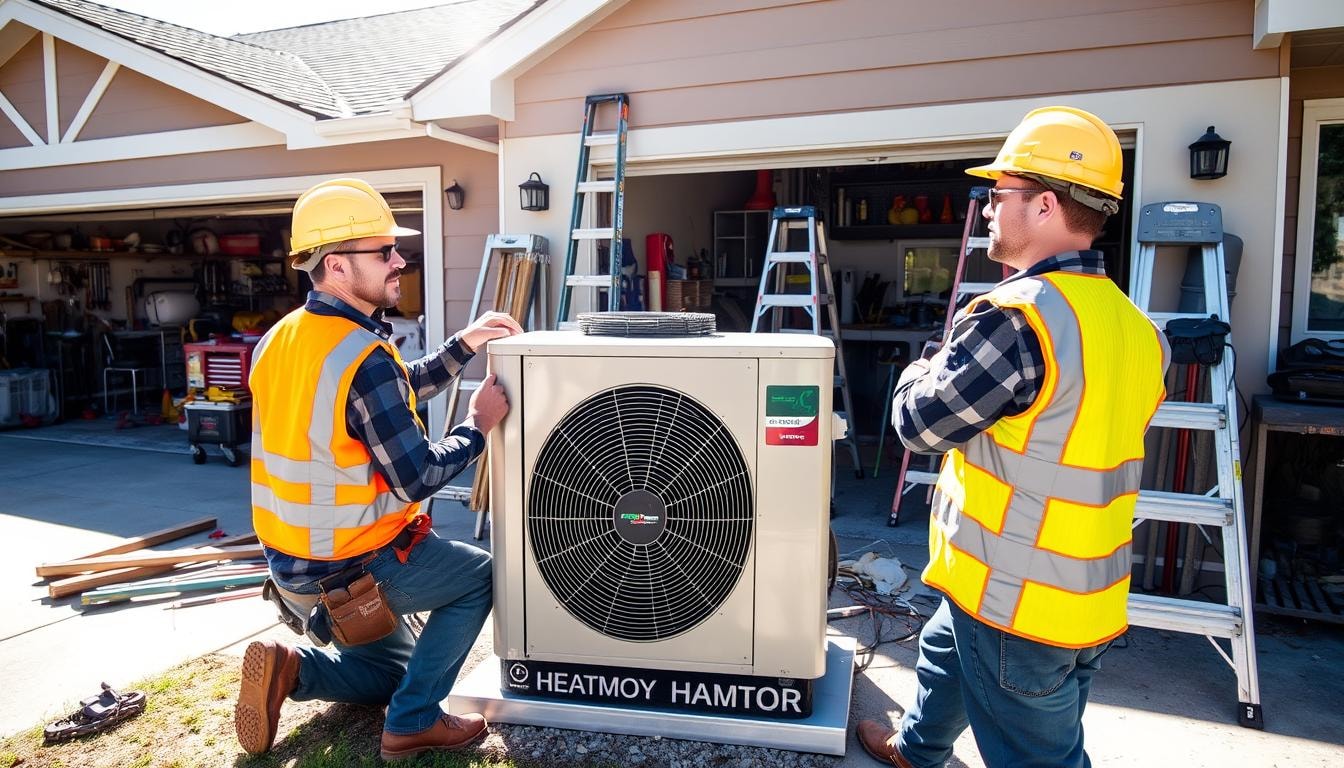
The Heat Pump Installation Process

Heat pump installation time varies based on the type of system. Air source pumps take 1-5 days, while ground source pumps need a week or more. With proper training and experience, installers can manage this complex task efficiently.

The main challenge is assessing a home’s suitability for the chosen pump type. This assessment affects the installation timeline and project success. Professional installers focus on correct sizing for optimal comfort and system longevity.

Technicians use power tools, refrigerant gauges, and electrical testers during installation. They ensure proper system function and maintain a clean work area. Safety is crucial, so technicians wear protective equipment throughout the process.

After installation, technicians test the heat pump and train homeowners on system use. They provide documentation detailing the installation process and warranty information.

The installation usually takes four to eight hours to complete. Homeowners should clear their schedule for the day. Keeping pets away from work areas ensures a smooth process.

Bidding and Estimating for Heat Pump Jobs

Heat pump installers need a smart plan for bidding. They must review job specs and drawings to grasp the work scope. This helps them count all materials and labor needed.

Perform Quantity Takeoff and Labor Cost Calculations

Installers should do a detailed quantity takeoff for materials and costs. They need to figure out labor costs based on time and workers needed. Overhead costs and profit margin are key factors too.

HVAC estimating software can make bidding easier. These tools help installers win more jobs and boost profits on heat pump projects.

Precise bidding and estimating keep heat pump installers competitive. Reviewing specs, drawings, and doing thorough takeoffs and cost calculations is crucial. This helps them submit winning bids that maximize their profits.

Streamline Your Heat Pump Installation with FindPros

Are you looking to upgrade your HVAC system with an energy-efficient heat pump? Finding the right installers can be a challenge, but let FindPros simplify the process. By answering a few quick questions about your cooling needs and project details, we’ll match you with top-rated local pros who can provide competitive quotes. Take advantage of available rebates and incentives – our experts will guide you through the details. Choosing the perfect heat pump installer has never been easier. Enter your project details and let FindPros connect you with the best professionals for the job.

Conclusion

Heat pump installers are in high demand across the United States. This presents a great opportunity for skilled HVAC professionals. The need for energy-efficient solutions is growing, driven by government initiatives and homeowner interest.

Installers can succeed by understanding qualifications, mastering installation, and developing effective bidding strategies. They can contribute to green energy transition while building a rewarding career. Heat pumps are often less expensive than other heating systems, offering potential savings.

Professional installation ensures safety and optimal system efficiency. Properly installed heat pumps use less energy, resulting in lower electricity bills. Regular maintenance and proper filter care help maintain performance over time.

The field of heat pump installation offers a promising future for HVAC professionals. It’s ideal for those committed to delivering safe, energy-efficient solutions to homeowners. As demand grows, so do opportunities in this expanding industry.

Frequently Asked Questions (Heat Pump Installers)

Heat pumps work by transferring heat from the outdoor air or ground into your home. They have an outdoor unit that connects to an indoor unit, allowing them to both heat and cool your home efficiently.
An air source heat pump uses the outdoor air to transfer heat, while other types like ground source heat pumps use the ground or a body of water. Air source heat pumps are the most common and easiest to install.
The installation time can vary, but typically it takes 4-8 hours to install an air source heat pump. The process involves connecting the indoor and outdoor units, running refrigerant lines, and ensuring proper electrical and ductwork connections.
Many state and local governments offer rebates and tax credits to encourage the installation of energy-efficient heat pumps. Customers should check with their utility company or local authorities to see what applicable incentives are available in their area.
Customers should research qualified heat pump installers in their area, get multiple quotes, and ask detailed questions about the installation process, warranty, and expected energy savings. This will help them make an informed decision and ensure their new heat pump is designed to work efficiently in their home.

Hardwood Floor Repair

Heat Pump Installers Near You

Can’t find what you are looking for?

How It Works

  • Answer a few questions about your home project.
  • Within seconds, get matched with top-rated local pros.
  • Compare quotes and choose the best pro for the job.

Hardwood Floor Repair In Your Area

Hardwood Floor Repair: A Guide to Restoring Your Home

Meta Description: Discover expert tips for hardwood floor repair to restore your home’s beauty. Learn how to fix scratches, dents, and water damage for stunning results.

Hardwood Floor Repair

Hardwood floors add warmth and character to any space. They can also suffer wear and tear over time. Scratches, dents, water damage, and warping are common issues.

Don’t worry – you can restore your floors’ natural beauty. With the right approach, you’ll breathe new life into your hardwood floors.

Key Takeaways

  • 01

    Assess the extent of the damage to determine the appropriate repair method

  • 02

    Repair minor surface imperfections like scratches and dents using wood filler and sanding

  • 03

    Address warping and buckling issues promptly to prevent further structural damage

  • 04

    Properly remove and replace damaged floorboards for a seamless, cohesive look

  • 05

    Implement a regular cleaning and maintenance routine to protect your investment

Assessing the Extent of Floor Damage

Careful evaluation of hardwood floor damage is crucial before starting repairs. This assessment helps determine the right approach. It also shows if you need professional help.

Types of Hardwood Floor Damage

Common hardwood floor issues include scratches, gouges, dents, stains, warping, and buckling. Heavy foot traffic, furniture, or pets often cause scratches and dents. Water damage or subfloor problems can lead to warping and buckling.

Identifying the Cause of the Damage

Finding the damage’s root cause is key for effective repair. Moisture, humidity, water leaks, and subfloor issues can cause severe problems. A thorough inspection helps identify the main cause.

Assessing the damage helps you decide on the best repair method. You’ll know whether to fix minor surface issues or tackle complex structural problems. This evaluation sets the stage for successful hardwood floor repairs.

Repairing Minor Surface Imperfections

Minor scratches and dents on hardwood floors can be fixed easily. With the right tools and methods, you can bring back your floors’ original beauty.

Cleaning and Filling Scratches and Dents

Clean the damaged area thoroughly to remove dirt and loose wood. Use a putty knife to apply wood filler into scratches and dents. Ensure a smooth finish and let it dry completely.

Sanding and Finishing

After the filler dries, sand the repaired area to blend it with the floor. Start with coarse sandpaper and move to finer grits for an even surface.

Apply matching stain and finish to the sanded area. This will restore your hardwood floors’ uniform look.

Using wood filler, a putty knife, and sandpaper can effectively repair your floors. These tools help maintain the natural beauty of your hardwood floors.

Dealing with Warping and Buckling

Hardwood floors can warp and buckle, causing various issues. These problems include cracks, board separation, cupping, crowning, and lifting from the subfloor. Flooding often leads to extreme buckling, while damp environments cause other damage types.

Hardwood floors swell when exposed to moisture, resulting in warping and buckling. High humidity areas make floors more prone to these problems. Temperature changes can cause wood to expand and contract, leading to buckling.

Improper installation or damp subfloors without barriers can also cause warping. For minor buckling, placing a heavy weight on the dry area may help. Major damage might require replacing affected boards, which can be tricky to match.

Preventing future issues means addressing root causes like moisture exposure. Proper installation and ventilation are key to maintaining hardwood floors. Tackling these problems helps extend your floor’s lifespan and keep it beautiful.

  • Prioritize prompt cleaning of spills and leaks to prevent moisture absorption.
  • Use proper cleaners and avoid constant exposure to high-heeled shoes to maintain hardwood floors.
  • Evaluate temperature and humidity conditions in a home before installing hardwood floors to ensure suitability.
  • Engage professional services for full floor replacements, ensuring proper subfloor preparation and dust-free removal.

Process of Hardwood Floor Repair

water damage

Hardwood floors add beauty and durability to homes. However, they can suffer from water damage if exposed to moisture. Repairing water-damaged wood floors involves several steps to restore their appearance and integrity.

  • Removing Standing Water: The first step is to quickly remove standing water from the affected area. Use towels, mops, or a wet-dry vacuum to soak up excess moisture. This helps prevent further damage to the wood.
  • Drying the Affected Area: After removing water, thoroughly dry the affected area. Increase air circulation and use dehumidifiers to speed up the process. Allow sufficient time for the floor to dry completely. Proper drying is crucial to prevent mold or mildew growth. These issues can make the damage worse if left unchecked.
  • Inspecting for Mold: Once the floor is dry, check for signs of mold or mildew. Address any issues right away to stop wood deterioration. This step also ensures a healthy indoor environment.
  • Sanding and Refinishing: The final step is to sand and refinish the damaged area. Sand the affected section to remove discoloration, warping, or other visual flaws. Then, apply a new protective finish to blend the repaired area with the rest.

Skilled sanding and refinishing can bring back the floor’s beauty and strength. Following these steps helps homeowners fix water-damaged hardwood floors effectively.

Repairing Damaged Floorboards

Damaged floorboards may need replacement due to water damage, warping, or excessive wear. Address the root cause to prevent further damage and ensure a lasting repair.

  • Removing Damaged Boards: Start by carefully removing the damaged floorboards. Use a pry bar, sharp chisel, or oscillating saw to cut out affected sections. Be careful not to harm surrounding boards during removal.
  • Installing Replacement Boards: Matching new floorboards with existing ones can be tricky. Focus on wood type, grain pattern, and color. Stain and finish new boards to match exactly.

Secure new boards with wood glue and finishing nails. Make sure they’re level with surrounding flooring. This helps maintain your hardwood floor’s structural integrity.

Replacing damaged floorboards takes time and effort. If you’re unsure about your skills, consult a professional. A hardwood floor repair specialist can ensure a seamless, long-lasting fix.

Refinishing and Restoring Floors

Is your hardwood floor looking dull? It might be time for a refresh. Refinishing involves preparing, sanding, staining, and protecting the floor.

Preparation for Refinishing

Start by deep cleaning your floor. This ensures the new finish sticks well. Next, sand the surface lightly. Use different grits: 36-40 for coarse, 60 for medium, and 100 for fine sanding.

Sanding and Staining

Use a drum sander and edger on the floor. Cover 3-4 foot lengths at a time. Replace the sanding belt after 250 square feet. Vacuum thoroughly after sanding.

Choose a stain that fits your needs. Think about foot traffic and your desired look. Apply the stain evenly, following the maker’s instructions.

Applying Finish

  • Apply a polyurethane finish to protect the floor. Oil-based finishes need 3 coats, water-based ones need 4.
  • Use a brush for edges and a roller for even coverage.
  • Let each coat dry fully before walking on it or moving furniture back.

These steps can bring your hardwood floors back to life. Use the right tools and follow instructions carefully. Your floors will thank you with renewed beauty.

Protecting Your Hardwood Floors

Hardwood floors need a proactive approach to stay beautiful. Preventive maintenance can extend their life and reduce repair costs. A routine cleaning plan and targeted protection for high-traffic areas will preserve their timeless charm.

Routine Cleaning and Maintenance

Regular cleaning is key to protecting hardwood floors. Use a microfiber mop or hardwood-specific vacuum for routine cleaning. Avoid wet mopping, as excessive moisture can damage the wood.

Pay attention to seasonal changes affecting your floors. Use a humidifier in winter and dehumidifier in summer. This helps maintain proper humidity levels and prevents warping.

Preventive Measures for High-Traffic Areas

  • Place doormats at all entry points to capture dirt, grit, and debris before they can be tracked onto your hardwood floors.
  • Use area rugs or runners in high-traffic zones, such as hallways, living rooms, and entryways, to shield the floors from excessive wear and tear.
  • Install felt pads or furniture sliders under the legs of heavy furniture to prevent scratches and dents.
  • Adopt a no-shoes policy to keep dirt, salt, and other outdoor contaminants off your hardwood floors.

These proactive steps will protect your hardwood floors for years. Regular upkeep and preventive care preserve your home’s investment. Your floors will stay beautiful with consistent attention.

Replacing the Finish

Dull hardwood floors may need a new finish. Choose the right finish based on foot traffic and desired look. Pick between water-based or oil-based polyurethane.

Step-by-Step Finish Replacement

Start by clearing the room and cleaning the floor thoroughly. Remove all dirt and grime to prepare the surface.

Lightly sand the floor to ensure proper adhesion. Apply the new finish evenly, following the manufacturer’s instructions.

Allow the recommended drying time before using the room. This will protect your floors from damage.

A new finish can revitalize your hardwood floors. It restores shine and protects against wear and tear.

Preventive Maintenance Strategies

Keeping hardwood floors beautiful requires a proactive approach. Smart strategies can extend floor life and reduce repair costs. Let’s explore some effective methods.

Scheduled Cleaning Routine

Set up a regular cleaning routine for your hardwood floors. Use a microfiber mop or hardwood-specific vacuum to remove dust and dirt. Avoid wet mopping to prevent moisture damage.

Seasonal Care for Wood Floors

Seasonal changes affect hardwood floors. Use a humidifier in winter to prevent drying and cracking. In summer, a dehumidifier controls humidity and prevents swelling.

Doormats and Area Rugs

Place doormats at entry points and area rugs in high-traffic zones. These capture dirt and reduce wear on your hardwood floors. Such measures effectively extend floor lifespan.

These strategies protect your hardwood floor investment. They help maintain the beauty of your floors for many years.

DIY vs. Professional Hardwood Floor Repair

Homeowners often debate between DIY and professional hardwood floor repair. DIY can save money, but professional help may be necessary for complex issues.

DIY works well for minor surface imperfections like scratches and small dents. However, severe problems like water damage or structural issues require professional expertise.

Professionals have specialized tools and materials for high-quality, durable finishes. They can handle larger projects efficiently, potentially saving time and money.

  • Professional floor restoration experts have access to specialized tools and materials that can produce a higher-quality, more durable finish compared to the average DIYer.
  • They also have the experience and knowledge to efficiently handle larger repair projects, potentially saving time and money in the long run.
  • Many reputable floor restoration companies even offer warranties on their work, providing added peace of mind for homeowners.

DIY hardwood floor repair can be fulfilling for home improvement enthusiasts. With the right tools and patience, many repairs can be done at home.

Research specific techniques and safety precautions to avoid costly mistakes. Consider the damage extent, your skill level, and desired outcome when choosing between DIY and professional repair.

When to Hire a Professional

Some wood floor repairs can be DIY projects. However, certain situations call for professional help. Hire experts for water damage, subfloor issues, large repairs, or detailed patterns.

Professionals have specialized tools and materials for better results. They can match wood and finishes seamlessly. Some restoration companies even offer warranties for their work.

Expert installers can finish a standard room quickly. Many provide warranties and guarantees. This ensures customer satisfaction and peace of mind.

Proper subfloor preparation by professionals prevents future costly repairs. They understand different hardwood species well. This helps in choosing the right material for your space.

Professional installers ensure compliance with local building codes. This helps avoid legal problems. While DIY may seem cheaper, professional installation often offers greater long-term value.

Tips for Successful DIY Repairs

Repairing hardwood floors can be a rewarding DIY project. It needs proper preparation, tools, and attention to detail. Follow these tips to tackle minor floor repairs and restore your home’s beauty.

Proper Preparation is Key

Inspect the damaged area and remove the affected section. Clean the subfloor and make it ready for the new board. Gather all necessary tools and materials before starting.

You’ll need wood filler, sandpaper, stain, and a finishing product. Having everything ready avoids interruptions during the repair process.

Patience and Precision

Patience and attention to detail are crucial for professional-looking results. Take time to fit the replacement board properly. Ensure it blends seamlessly with the surrounding flooring.

Some epoxies dry quickly, so work efficiently. Place the new board correctly to avoid mistakes.

Refinishing for a Flawless Finish

Sand the affected area to make it level with the existing floor. Apply matching wood stain and finish for a uniform look. Protect surrounding areas to prevent any collateral damage.

Maintain Your Hardwood Floors

Regular cleaning and using furniture pads can prevent future DIY repairs. Address issues promptly to keep your hardwood floors looking their best. Routine maintenance is key to long-lasting beauty.

Successful DIY hardwood floor repairs are possible with the right approach. Use proper preparation, tools, materials, patience, and attention to detail. These tips will help you restore your home’s floors effectively.

Cost Considerations for Repairs

hardwood floor repair cost

Hardwood floor repair costs vary based on damage extent and repair method. Prices range from DIY to professional services. Understanding potential expenses helps homeowners plan effective floor restoration.

The average cost of repairing hardwood flooring is about $375. However, prices can fluctuate depending on area size and repair complexity. Small room repairs may cost $6,500 to $10,500.

Surface repairs typically range from $100 to $500. Structural repairs, like fixing warped floors, can be pricier. Floor joist repairs may cost $6,000 to $10,000.

In some cases, joist repairs could reach $20,000 if jacks are needed. Replacing damaged floorboards in an entire room can cost $3,000 to $5,000.

DIY repairs save money but require time and effort. Professional services offer higher quality and efficiency. They may also provide warranties for their work.

Consider your project’s specific needs when budgeting for hardwood floor repair. This will help you make informed decisions for the best outcome.

FindPros: Your Hardwood Floor Repair Solution

Having trouble with your existing flooring, whether it’s red oak, solid piece, or the top layer? Don’t worry, most homeowners face similar challenges in multiple areas, from cabinets to tile. When it’s time to replace or repair your hardwoods, FindPros can help. Simply answer a few questions about your home project, and we’ll match you with top-rated local pros who can handle everything from small area fixes to full floor replacements. Compare quotes, choose the best oak plank, and seal the deal with the pro that’s the perfect fit. Get started today and find the solution for your hardwood floor needs.

Conclusion

Hardwood floors add timeless elegance to homes. They need careful upkeep to stay beautiful. This guide gives you tools to restore your floors’ former glory.

You’ve learned about common floor damage types. You now know proper repair methods and preventive care strategies. These insights help you make smart choices for your home.

Keeping floors healthy requires diligent care. Address issues quickly to maintain their value. Follow these tips to preserve your floors’ warmth and charm.

Your home will remain inviting for years to come. With proper care, hardwood floors will continue to enhance your living space.

Frequently Asked Questions (Hardwood Floor Repair)

For regular cleaning, use a microfiber mop or a hardwood-specific vacuum to remove dust and dirt. Avoid wet mopping, as excessive moisture can damage the wood.
For deeper scratches or gouges, you’ll need to use wood fillers to fill the damaged areas. Sand the repaired spots to blend them with the surrounding bare wood, then apply a matching stain and finish.
The refinishing process involves thoroughly cleaning the floor, lightly sanding it, applying a new stain, and then finishing it with multiple coats of polyurethane. This can restore the natural beauty of your wood flooring.
You can often replace just the damaged planks, as long as the new wood matches the existing floors in terms of color and grain pattern. Be sure to prepare the subfloor and install the new wood planks properly for a seamless look.
If you have water damage or warping, it’s important to address the root cause, such as a leak or high humidity. Quickly remove any standing water, dry the area thoroughly, and inspect for mold or mildew. You may need to replace multiple boards or even the entire floor, depending on the extent of the damage.

Hardwood Floor Installers

Heat Pump Installers Near You

Can’t find what you are looking for?

How It Works

  • Answer a few questions about your home project.
  • Within seconds, get matched with top-rated local pros.
  • Compare quotes and choose the best pro for the job.

Hardwood Floor Installers In Your Area

Hiring Hardwood Floor Installers: A Step-by-Step Guide

Meta Description: Discover how to hire expert hardwood floor installers with our comprehensive guide. Learn key steps to ensure a flawless installation for your home’s new flooring project.

Hardwood Floor Installers

Hardwood floors can transform your home with timeless beauty. The quality of installation is crucial for the best results. This guide will help you find and hire the right flooring professionals.

Knowing what to look for in a reliable contractor is key. We’ll cover essential steps to make an informed decision. You’ll learn how to verify licenses, check references, and understand their services.

Key Takeaways

  • 01

    Hiring professional hardwood floor installers is crucial for a successful renovation or customization project.

  • 02

    Knowing what to look for in a reliable flooring contractor, such as their qualifications and credentials, is essential.

  • 03

    Understanding the range of services offered by hardwood floor installers, including removal, repair, and installation, can help you make an informed decision.

  • 04

    Checking references and verifying licenses are important steps in the hiring process to ensure you find the right professionals for your project.

  • 05

    Familiarizing yourself with the cost of hardwood floor installation can help you budget and plan your project effectively.

The Importance of Professional Hardwood Floor Installation

New hardwood floors can transform your home’s look and feel. The quality of installation is key to success. Hiring professional installers is crucial for the best results.

Understanding the Benefits of Hiring Professionals

Professional installers have the skills to ensure flawless installation. They know various wood types and techniques. Their expertise helps avoid costly mistakes often seen in DIY projects.

Certified contractors can address potential issues during the process. This knowledge is invaluable for a smooth installation experience.

Ensuring Long-Lasting Quality and Durability

  • Professional installers use high-quality tools for successful installation. This ensures long-lasting quality and durability of your hardwood floors.
  • Many flooring warranties require professional installation to remain valid. This provides extra protection against future repairs or replacements.
  • Experienced installers prioritize safety during the process. They reduce accident risks when handling heavy materials and sharp tools.

Hiring professionals ensures beautiful, durable hardwood floors. Your new floors will enhance your home’s value for years to come.

Choosing the Right Hardwood Floor Installers

Hardwood Floor Installers

Finding skilled hardwood floor installers is key to a successful, long-lasting project. Start by researching hardwood floor installers in your area. Consider several important factors to make a smart choice.

Look for installers who focus on your chosen type of hardwood flooring. Ask about their pricing structure and if it includes material costs. Find out if they charge by square footage or linear footage.

Check the contractor’s business license and insurance policy. This ensures they operate legally and have proper coverage. Request references from past customers and photos of their previous projects.

Seek contractors certified by the National Wood Flooring Association (NWFA). This shows their commitment to industry training and education.

Carefully evaluating potential installers helps you find the right professionals. They can bring your vision to life and ensure high-quality, durable new floors.

Hardwood Floor Installers and their Services

Professional hardwood floor installers are key to beautiful flooring. They offer various services to make your project successful. Their expertise ensures stunning results that last.

Removal and Preparation Services

Installers start by removing existing flooring like carpet or tile. They prepare the subfloor, making it level and clean. This ensures a perfect foundation for new hardwood.

Hardwood Floor Installation Expertise

These experts handle all types of hardwood flooring. They seamlessly integrate new floors with existing spaces. Their care minimizes issues during installation, guaranteeing quality results.

Refinishing and Repair Services

Installers can also refinish and repair existing hardwood floors. They sand, stain, and seal wood to restore its natural beauty. Damaged areas are fixed, bringing floors back to their original glory.

Skilled installers transform spaces with confidence. They create stunning floors that stand the test of time. Homeowners and businesses can trust their expertise for amazing results.

Understanding the Costs of Hardwood Floor Installation

Hardwood floor installation is a big investment for homeowners. The average cost ranges from $6 to $25 per square foot. Prices can go up to $45 per square foot depending on materials and labor.

Wood type greatly impacts the overall cost. Maple costs $4 to $15 per square foot. Brazilian walnut ranges from $9 to $15 per square foot.

Room size also affects the price. Smaller rooms may cost $600, while larger homes can reach six figures.

Labor costs make up about 50% of the total budget. They typically range from $3 to $6 per square foot. Floor pattern, trends, and wood quality can influence the final cost.

Homeowners have various financing options for hardwood floor installation. These include home improvement loans and home equity options.

The total cost for a 200 to 500 square foot room is usually $2,000 to $12,000. This includes both materials and labor.

Choosing the Right Hardwood Flooring Material

Selecting the right material is crucial for hardwood floor installation. Homeowners have many hardwood floor options, each with unique characteristics. Understanding different hardwood species helps ensure a floor that complements your home’s style.

Popular Hardwood Species and their Characteristics

Oak is the top choice for hardwood flooring, known for durability and timeless appeal. White oak is often preferred over red oak for its neutral tones.

Walnut, with its deep color, suits darker rooms well. Other popular North American hardwoods include hickory, cherry, maple, and ash.

Each wood type has distinct grain patterns and color variations. These features add character to your floor.

Solid vs. Engineered Hardwood Floors

Homeowners must choose between solid and engineered hardwood flooring. Solid hardwood is made from a single piece of wood.

Engineered hardwood has a real hardwood top layer over plywood or composite core. It’s more stable and moisture-resistant than solid wood.

Your choice depends on budget, installation needs, and space requirements. Consider these factors carefully.

Choosing the right hardwood flooring material involves many factors. Consider style preferences, durability, and maintenance needs.

Understanding hardwood species and types helps make an informed decision. This knowledge ensures a floor you’ll enjoy for years.

Preparing for Hardwood Floor Installation

Hardwood floor installation

Careful preparation is key for a successful hardwood floor installation. Several essential steps must be taken before the pros can start their work.

The first task is to ensure the subfloor is clean, dry, and level. This stable base is crucial for long-lasting hardwood floors.

For concrete subfloors, a moisture barrier may be needed to prevent future problems.

  1. Thoroughly clean and sweep the subfloor to remove any debris or contaminants.
  2. Check the subfloor’s moisture content and address any damp areas.
  3. Ensure the subfloor is level by using a floor leveling compound if necessary.
  4. Apply a moisture barrier, such as plastic sheeting or a liquid membrane, for concrete subfloors.

Homeowners should gather all necessary materials and tools for the installation. This includes hardwood planks, underlayment, nails or adhesive, and cutting tools.

Having everything ready will help installers work efficiently and avoid interruptions.

These steps will set the stage for a smooth installation. They’ll ensure new floors in Atlanta homes will last for years to come.

The FindPros Advantage

Looking to find the best hardwood floor installers for your new floor project? Look no further than FindPros. Our service makes it easy to get the job done right, without the hassle. Simply answer a few quick questions about your home project, and we’ll match you with top-rated local professionals in no time. You’ll get the best pricing when multiple pros compete for your job, and you can choose the one you get along with best.

With FindPros, you can avoid costly mistakes and ensure a high-quality, long-lasting flooring installation – all while saving time and money. Get started today and let us connect you with the perfect hardwood floor installer for your home.

Conclusion

This guide offers a detailed look at hiring hardwood floor installers in San Diego. It covers the benefits of professional installation and services from qualified contractors. You’ll also learn about costs and choosing the right hardwood flooring material.

With this knowledge, you can hire top hardwood floor installers confidently. Hardwood floors enhance room beauty and boost property value. This makes them a smart investment for any home.

This guide helps with both new floors and refinishing existing ones. Working with experienced pros helps avoid common mistakes. You’ll enjoy a space with the timeless appeal of hardwood floors.

Frequently Asked Questions (Hardwood Floor Installers)

Hiring professional installers ensures a flawless installation, avoids costly mistakes, and provides long-lasting quality and durability for your new floors.
Look for installers certified by the National Wood Flooring Association, check their licenses and insurance, and ask for references and photos of their previous work.
They can remove existing flooring, prepare the subfloor, install new hardwood, and even refinish and repair existing floors to restore their beauty.
Costs can range from $6 to $25 per square foot, depending on the wood type, labor, and the size of the project. Smaller rooms may cost around $600, while larger homes can reach six figures.
Make sure the subfloor is clean, dry, and level, and apply a moisture barrier if necessary. Gather all the required materials and tools to ensure a complete and efficient installation.

Handyman Services

Heat Pump Installers Near You

Can’t find what you are looking for?

How It Works

  • Answer a few questions about your home project.
  • Within seconds, get matched with top-rated local pros.
  • Compare quotes and choose the best pro for the job.

Handyman Services In Your Area

Handyman Services: Your One-Stop Shop for Home Repairs

Meta Description: Discover reliable handyman services for all your home repair needs. From drywall repair to furniture assembly, our skilled professionals are ready to tackle any job efficiently.

Handyman Services

Managing home repairs can often feel overwhelming, especially when coordinating multiple contractors for various tasks. Handyman services offer a convenient solution, streamlining the process by providing a single point of contact for a wide range of home maintenance and repair needs.

From fixing leaky faucets to executing intricate renovations, these versatile professionals are equipped to tackle projects of all sizes. By consolidating services, homeowners can enjoy a more efficient and stress-free experience, transforming their living spaces into well-maintained havens. Whether it’s routine maintenance or significant improvements, handyman services cater to diverse needs, ensuring homes remain comfortable and functional.

Key Takeaways

  • 01

    Handyman services provide a convenient and efficient solution for a variety of home repair and maintenance tasks.

  • 02

    These services are delivered by skilled and experienced professionals who can handle everything from minor repairs to major renovations.

  • 03

    The flexibility of handyman services allows homeowners to schedule work at their convenience, making it easier to manage busy lifestyles.

  • 04

    With a focus on reliability and high-quality workmanship, handyman services ensure that projects are completed to a high standard, giving homeowners peace of mind.

  • 05

    Overall, handyman services serve as a one-stop solution for maintaining and improving homes, making them an invaluable resource for homeowners.

The Convenience of a Handyman Service

Professional handyman services offer a one-stop solution for home repairs and improvements. These skilled teams handle various tasks, from plumbing to painting. Their efficient coordination saves time and ensures seamless project completion.

One-Stop Solution for All Home Repairs

Handyman services provide comprehensive solutions for home maintenance. Their technicians can fix leaky faucets, repair drywall, and assemble furniture. This convenience allows homeowners to address all repairs through a single contact.

Efficient Coordination of Work

Professional handyman services handle home repairs with efficient coordination. They manage the entire process, eliminating the need to juggle multiple schedules. This approach ensures prompt completion of improvements with minimal disruption.

Handyman services are game-changers for homeowners. Their extensive expertise covers a wide range of tasks. You can trust them to meet your needs with efficiency and professionalism.

Expertise and Experience You Can Trust

Skilled Handyman

When you need reliable home repair services, you can trust the expertise of skilled handyman professionals. These experienced handymen bring extensive knowledge to every project, handling tasks from minor fixes to major renovations.

Whether you need to book handyman service for odd jobs like tile installation, hanging pictures, or installing ceiling fans, or for more complex tasks like window repair or door replacement, their skill set ensures that the job is done correctly and efficiently.

The team is backed by a renowned construction company, committed to quality workmanship and reliable solutions. Their licensed and insured professionals guarantee that all handyman tasks are performed safely and to a high standard.

From installing lighting fixtures to performing baby-proofing upgrades, you can count on their expertise to get the job done right.

One of the most common services handymen charge for is assisting with interior remodels, including carpentry work and wall installation. Many handymen specialize in very common services like hanging doors, installing fixtures, and performing general repairs.

Most handymen are equipped with all the tools needed to complete a variety of tasks, making them your go-to professionals for any home repair or improvement project.

When you hire a handyman, you can rest assured that your home is in experienced and capable hands. Whether you need help with a to-do list of odd jobs or a comprehensive overhaul of your entire house, these professionals will assist you in performing all necessary tasks efficiently.

By choosing a reliable handyman service, you can search for peace of mind knowing that your home is in good hands.

Cost-Effective Home Repairs

Maintaining a comfortable and valuable home doesn’t have to break the bank. Handyman services offer affordable solutions that help homeowners save money without sacrificing quality or efficiency. By bundling services and offering package deals, these professionals streamline the process, passing the savings on to you.

Package Deals and Bundled Services

One of the key advantages of hiring a handyman is their ability to handle multiple tasks in a single visit. Instead of paying for individual contractors for each job, handyman services offer bundled services at a lower cost. This approach not only saves you money but also reduces the time and hassle of coordinating multiple projects.

Efficient and Quality Work

Experienced handymen take pride in their work and strive to complete jobs with care and attention to detail. Their efficient workmanship ensures that tasks are done right the first time, minimizing the risk of costly mistakes or the need for additional repairs. Regular maintenance performed by a skilled handyman can help preserve your home’s value and prevent expensive, last-minute fixes down the line.

Professionalism and Reliability

Professionalism and Reliability

Homeowners seek handyman services that prioritize professionalism and reliability. These services are designed to ensure that every task meets high-quality standards and is completed on time.

Customer satisfaction is at the forefront of these services, with a commitment to providing personal attention to each project. Skilled professionals listen carefully to homeowners’ needs and preferences, ensuring that the work aligns with their expectations.

Utilizing the right tools and methods, handyman professionals work efficiently and accurately, fostering lasting relationships with clients. This reliability means that homeowners can trust experienced and honest workers to handle their home repairs with care.

Clear communication and transparency are essential aspects of a reliable handyman service. Homeowners can expect no surprises, as work is completed on time and within budget, whether for small fixes or significant renovations.

The quality of workmanship shines through in every project, allowing homeowners to relax knowing their home is in capable hands. This approach provides a stress-free experience and peace of mind, making handyman services an excellent choice for maintaining and improving any house.

The Benefits of Hiring a Professional Handyman Service

A professional handyman service offers many perks for homeowners. These include convenience, time-saving, expertise, and cost-effective solutions. Let’s explore these benefits in detail.

Convenience and Time-Saving

A handyman service provides unmatched convenience. Homeowners can use a one-stop-shop for various home repair and improvement tasks. This saves time and effort, allowing focus on other important life aspects.

Expertise and Quality Workmanship

Professional handymen bring vast expertise and experience. They excel in many home repair and maintenance tasks. Their high-quality workmanship ensures reliable solutions for your home needs.

Cost-Effective Solutions

Hiring a professional handyman can be more cost-effective than DIY or individual contractors. They often offer package deals and bundled services, resulting in savings. Their efficiency helps prevent costly mistakes and repeat repairs.

A professional handyman service offers a hassle-free approach to home maintenance. It’s a smart choice for homeowners seeking quality work and value for money.

Why Choose a Handyman Service for Your Home Repairs

Need home repairs? A professional handyman service might be your best bet. They offer many perks that make fixing up your home easier and better.

Handyman services are like a one-stop shop for home repairs. They can handle small fixes and big renovations. This saves you time and hassle.

These pros know their stuff. They have the skills and tools for many home projects. From electrical work to painting, they’ve got you covered.

Handyman services often offer package deals. These can save you money compared to hiring different contractors. You can fix multiple things at once for less.

Good handyman services focus on making customers happy. They show up on time and charge fair prices. Their goal is to do great work for you.

For easy, expert, and affordable home repairs, a handyman service is a smart choice. They’ll help keep your home in top shape.

Preventive Maintenance with a Handyman Service

Hiring a professional handyman service can help homeowners maintain their living spaces proactively. Regular upkeep can extend the lifespan of home systems and components. This approach saves money on costly repairs and protects your investment.

Partnering with a handyman service for preventive maintenance offers convenience and peace of mind. The service coordinates all necessary work in a timely manner. Homeowners can focus on other priorities while professionals handle their home maintenance needs.

Investing in preventive maintenance safeguards your most significant investment – your home. This approach ensures your home remains in optimal condition. It provides a comfortable living space for years to come.

FindPros: Your Trusted Handyman Solution

Searching for reliable and experienced handymen for your home projects? Look no further than FindPros. Our platform connects you with top-rated local professionals who can handle a wide range of tasks, from the most popular services like interior remodeling and fixture installation to very common services like hanging pictures and baby-proofing your home.

Simply answer a few questions about your handyman job, and we’ll match you with the best contractors in your area. Get competitive quotes, choose the pro you feel most comfortable with, and enjoy a stress-free experience, all at fair, transparent prices. FindPros – the seamless solution for your home repair and maintenance needs.

Conclusion

Handyman services provide a comprehensive solution for homeowners’ repair needs, ensuring that every project is handled with expertise and reliability. Homeowners can trust that their living spaces are in capable hands, whether they require minor fixes or major renovations.

These services excel in transforming homes and safeguarding homeowners’ investments. With flexible scheduling and a proven track record, they stand out as an ideal choice for maintaining and improving residential properties.

Choosing a handyman service means accessing cost-effective solutions and exceptional service. These professionals are dedicated to keeping homes functional and aesthetically pleasing for years to come. With their assistance, homeowners can enjoy a well-maintained and inviting living space, free from the stress of ongoing repairs and upkeep.

Frequently Asked Questions (Handyman Services)

An experienced handyman can perform a variety of tasks, including fixing leaky faucets, repairing drywall, assembling furniture, installing light fixtures, hanging pictures, and even baby-proofing the home.
Some of the most popular handyman services include interior remodeling, carpentry work, wall installation, hanging doors, installing fixtures, and performing general home repairs and maintenance.
The cost of handyman services can vary depending on the specific task, the complexity of the job, and the expertise of the handyman. Many handyman services offer package deals and bundled services to provide cost-effective solutions for homeowners.
Homeowners can typically request handyman services by contacting the local business or checking their website. Many handyman services serve the local community and are readily available to assist with a wide range of home repair and maintenance needs.
The key benefits of hiring a professional handyman service include convenience, time-saving, expertise, and cost-effective solutions. Handyman services provide a one-stop-shop for various home repair and improvement tasks, ensuring quality workmanship and reliable solutions for homeowners.

Gutter Repair Services

Heat Pump Installers Near You

Can’t find what you are looking for?

How It Works

  • Answer a few questions about your home project.
  • Within seconds, get matched with top-rated local pros.
  • Compare quotes and choose the best pro for the job.

Gutter Repair Services In Your Area

Gutter Repair Services: Everything You Need to Know

Meta Description: Discover expert gutter repair services to protect your home. Learn about repairs, cleaning, and installation options for a well-maintained gutter system.

Faulty gutters can cause major problems for your home. They may lead to leaks, foundational damage, and costly water intrusion. Gutter repair services can help keep your home’s exterior in top shape.

This guide covers the importance of working gutters and signs that indicate repair needs. We’ll also explore the repair process and associated costs. You’ll gain knowledge to make smart decisions about your home’s gutter system.

Gutter Repair Services

Key Takeaways

  • 01

    Gutters play a crucial role in protecting your home’s foundation and structure from water damage.

  • 02

    Signs that you need gutter repair include visible leaks, sagging gutters, and water overflowing during rainstorms.

  • 03

    The gutter repair process involves assessment, determining the best course of action, and providing transparent pricing estimates.

  • 04

    Gutter repair costs can range from $75 to $150 for minor issues, or prompt the need for gutter replacement costing $1,500-$2,500.

  • 05

    Investing in new seamless gutters can offer improved functionality, durability, and long-term value to your home.

The Importance of Well-Functioning Gutters

Well-functioning gutters protect your home’s foundation and structure. They collect and channel rainwater away from your home. This prevents water damage and costly repairs.

Protecting Your Home’s Foundation and Structure

Faulty gutters can cause water to overflow around your home. This can hurt your home’s structure. Clogged gutters may damage siding and landscaping.

Overflowing water can soak the soil near your foundation. This puts pressure on your home’s sides and may cause cracks.

Preventing Water Damage and Leaks

Good gutter systems stop leaks, cracks, holes, and clogs. These issues can lead to serious problems. Clogged gutters from leaves and debris can cause water pooling.

Leaks often happen at gutter joints due to temperature changes. Seamless gutters can help reduce leaks and repairs.

Gutter guards like Gutter Helmets and Leaf Screens prevent debris buildup. This ensures smooth water flow and less manual cleaning. Regular inspections keep gutters working well.

home's foundation

Signs You Need Gutter Repair

Spotting gutter problems early is key to keeping your home in good shape. Look out for leaks, sagging gutters, and overflowing water during rain. These issues often mean it’s time for repairs.

  • Visible Leaks or Gaps: Leaks and gaps let water seep into your home’s walls and base. This can cause costly damage. Even small cracks can quickly get worse, so fix them fast.
  • Sagging or Displaced Gutters: Sagging gutters can cause water to build up and overflow. This may harm your home’s exterior and garden. Loose brackets or poor installation often cause this problem.
  • Water Overflowing During Rainstorms: Water spilling over gutter sides during rain shows they’re not working right. This could be due to clogs or poor drainage. It might also mean your gutters aren’t right for your home.

Fixing gutter issues quickly helps protect your home. Regular checks and timely repairs keep your gutters working well. This safeguards your home and your investment.

Sagging gutters

Gutter Repair Services: Complete Process

Gutter repair is crucial for addressing home issues. It involves assessment, inspection, and finding the best solution. This process ensures gutters work well and protect your home.

  • Assessment and Inspection: Gutter repair starts with a thorough check by experts. They look for wear, damage, and installation problems. This includes spotting leaks, sagging, and signs of water overflow.
  • Determining the Best Course of Action: After inspection, the repair team decides on the best fix. This might involve minor repairs like sealing leaks. Or it could mean bigger jobs like unclogging or fixing structural issues.
  • Providing Transparent Pricing Estimates: Clear pricing is vital in gutter repair services. The company gives detailed estimates to homeowners. These include repair needs, materials, and labor costs.

This information helps homeowners make smart choices. They can decide what’s best for their home’s needs and budget.

Common Gutter Repair Options

A well-functioning gutter system protects your home’s foundation and structure. Gutter repair companies offer solutions to fix common issues. These fixes keep your gutters working well to channel water away from your home.

Sealing Leaks and Reinstalling Sections

Leaks and loose gutter sections need quick attention. Repair specialists find and seal leaks with special sealants. They also reinstall any damaged or loose sections.

This process stops water damage and aligns the gutter system properly. It ensures your gutters work as they should.

Unclogging Gutters and Downspouts

Clogged gutters can cause water overflow and foundation damage. Repair pros use special tools to clear out leaves, twigs, and dirt.

This service helps water flow correctly through your gutters. It prevents costly damage to your home.

Addressing Minor Issues

Gutter repair companies also fix small problems. They tighten loose hangers, replace old end caps, and fix small dents or cracks.

These small fixes help your gutters last longer. They also stop bigger problems from happening later.

The repair method depends on the damage and best long-term solution. Pros can seal leaks, reinstall sections, unclog gutters and downspouts, and address minor issues. These fixes keep your gutter system working its best.

Gutter Repair vs. Replacement: Which is Better?

Homeowners often wonder whether to repair or replace their gutters. Minor gutter repair can work sometimes. But it’s important to think about long-term solutions. A gutter replacement might be better if damage is extensive.

Cracked gutters can harm shingles, fascia boards, and foundations. These issues can cost more than gutter repair or replacement. Peeling paint on gutters may signal rust. This could be from water damage or retention.

Mildew or water pools near foundations can indicate gutter problems. These issues might need fixing or replacement. Water marks under gutters could mean overflow or leaks. This can damage fascia boards and soffits.

Sagging gutters may show blockages or poor fit. Multiple broken fasteners might mean extensive wear. These problems could require gutter replacement.

Choose between gutter repair and replacement based on damage extent. Consider the long-term viability of repairs. Gutter replacement often provides a more durable solution to protect your home.

The Benefits of New Seamless Gutters

New seamless gutters offer more than just a fresh look. They boost functionality and durability, making them a wise choice. These gutters protect your home’s foundation and structure effectively.

Improved Functionality and Durability

Seamless gutters are custom-made on-site, without the seams of traditional gutters. This design reduces leaks and ensures better water flow. They can last over 20 years with little upkeep.

Regular gutters typically last up to 20 years but need more maintenance. Seamless gutters provide better protection against water damage and foundation issues.

Gutter Warranties and Maintenance

Many companies offer warranties on seamless gutter systems. This gives homeowners peace of mind about their investment. These companies often provide maintenance services to keep gutters working well.

Seamless gutters need less upkeep than traditional ones. This saves you time and money over the years.

Fascia Board Inspection and Repair

Installing seamless gutters usually includes checking and fixing fascia boards. This helps spot and solve any hidden problems. It also improves the protection and lifespan of your home’s exterior.

Gutter Guards: A Long-Term Solution

Gutter guards offer a reliable fix for Covington, GA homeowners facing frequent storms and heavy rainfall. These devices prevent clogs and debris buildup in gutters. They eliminate the need for frequent cleaning and maintenance.

Preventing Clogs and Debris Buildup

Gutter guards block leaves, twigs, and other debris from clogging gutters. This barrier ensures water flows away from your home’s foundation. It protects against water damage and costly repairs.

Eliminating the Need for Frequent Cleaning

  • Gutter guards reduce the need for cleaning, which is typically required twice a year.
  • This saves time and effort while lowering the risk of injury from ladder work.
  • They add strength during winter, reducing damage from snow, ice, and falling debris.

Mesh gutter guards offer effective protection against clogging elements. They require less upkeep and provide comprehensive coverage. Investing in quality gutter guards is smart for Covington homeowners.

These guards ensure your gutters work well and protect your home from water issues. They’re a wise choice for long-term home care and maintenance.

Gutter Repair Costs: What to Expect

Gutter repair costs can vary widely based on the work needed. Minor fixes like sealing leaks or unclogging gutters usually cost $75 to $150. More extensive damage requiring gutter replacement can reach $1,500 to $2,500 or higher.

Factors Affecting Gutter Repair Costs

Home size, gutter type, and work complexity impact repair costs. Taller homes or steep roofs may lead to higher labor costs due to increased danger.

Gutter material also affects expenses. Copper and zinc gutters typically cost more than vinyl or aluminum options.

  • Material choices like aluminum, copper, and vinyl impact repair costs
  • Labor costs vary based on complexity, location, and technician expertise
  • Factors like roof pitch, home size, and additional parts can increase costs

DIY repairs may seem cheaper at first but carry risks and hidden costs. Professional repairs offer quality work, warranties, and expert problem-solving.

Regular upkeep and prompt fixes help avoid costly repairs later on. Installing gutter guards can save money by reducing cleaning and repair needs.

Get quotes from multiple contractors when considering gutter repairs. Discuss any hidden or unexpected costs to make a well-informed choice.

Choosing the Right Gutter Repair Company

Picking the best gutter repair company involves weighing several key factors. These include their experience, reputation, and insurance coverage. The quality of their work and warranties also matter for your gutter system’s long-term health.

Experience and Reputation

Seek out a gutter repair company with a solid track record in the industry. About 90% of customers value a service provider’s experience and reputation highly. Companies with over five years of expertise are often preferred for their knowledge.

Licensing and Insurance

Choose a gutter repair company that is licensed and insured. Look for credentials from respected associations like MBA or HIA. These show commitment to industry standards and local laws.

The company should have good insurance coverage. This protects you from liability if accidents happen during repairs.

Warranties and Guarantees

Gutter repair companies offering solid warranties are often better choices. These protect your gutter system long-term. Customers of such companies report 30% fewer post-repair issues.

By weighing these factors, you can pick a skilled gutter repair company. This ensures your gutter system stays in top shape for years to come.

Discover FindPros for Gutter Solutions

Looking for reliable gutter installation or repairing gutters at your house? FindPros can help. As a homeowner, you want the job done right, but also at the best price. With FindPros, you can get matched with top-rated local professionals who will compete for your project. Simply answer a few questions about your gutter needs, and we’ll provide you with multiple quotes from qualified pros. This ensures you find the right person for the job, whether it’s repairing, replacing, or installing new gutters. Take the guesswork out of your home improvement project and let FindPros connect you with the best solution.

Conclusion

A well-functioning gutter system is vital for protecting your home. It safeguards the foundation, structure, and overall integrity of your property. Understanding gutter damage signs and repair processes helps homeowners make smart decisions.

Professional gutter repair services preserve your home’s value. They also protect against costly water damage and mold growth. These issues often stem from neglected or malfunctioning gutters.

Gutters direct rainwater away from your home’s foundation and walls. This reduces the risk of structural damage and water-related problems. Prompt gutter maintenance and gutter guards can enhance your property’s curb appeal.

Well-maintained gutters improve indoor air quality. They also minimize the need for expensive repairs in the future. By taking care of your gutters, you ensure long-term protection for your home.

Frequently Asked Questions (Gutter Repair Services)

Gutter cleaning is essential to ensure that rainwater is properly directed away from the home’s foundation and walls. Clogged gutters can cause water damage, leaks, and even foundation issues if left unchecked.
For most homeowners, it’s better to hire professionals for gutter repair services, especially for more complex issues. Professionals have the necessary tools, experience, and expertise to properly diagnose and fix gutter problems, ensuring the job is done correctly and safely.
Some signs that it’s time to replace old gutters include visible leaks, sagging or displaced gutters, and water overflowing during rainstorms. If the gutters are heavily damaged or have been improperly installed, it may be more cost-effective in the long run to install new, properly installed gutters.
To ensure rain gutters are working properly, homeowners should regularly inspect them for any signs of damage or blockages, and consider installing gutter guards to prevent debris buildup. Hiring a professional gutter repair service to assess and maintain the gutters can also help keep them working effectively.
Copper gutters offer several benefits, including increased durability and longevity compared to other materials like aluminum or vinyl. Copper gutters can last for decades with proper maintenance and installation, and they also add a unique, attractive aesthetic to a home.

Grout Repair

Heat Pump Installers Near You

Can’t find what you are looking for?

How It Works

  • Answer a few questions about your home project.
  • Within seconds, get matched with top-rated local pros.
  • Compare quotes and choose the best pro for the job.

Grout Repair In Your Area

Grout Repair: How to Find the Best Contractor for Your Home

Meta Description: Discover expert tips for finding the best grout repair contractor. Learn what to look for, questions to ask, and how to ensure quality results for your home’s tile work.

Is your home plagued by cracked, discolored, or loose tiles? Grout is the key to beautiful, long-lasting tile surfaces. When grout fails, it’s time to find a repair expert.

A skilled contractor can restore your tile floors, walls, and countertops. This guide will help you understand grout’s role and spot damage signs.

We’ll also show you how to find the best professional for your home improvement project.

Grout Repair

Key Takeaways

  • 01

    Proper grout repair is essential to maintain the longevity and appearance of your tile surfaces.

  • 02

    Identifying the signs of grout damage, such as cracks, discoloration, and loose tiles, is the first step in seeking professional assistance.

  • 03

    Researching and vetting potential grout repair contractors is crucial to ensure you find a qualified, experienced professional for the job.

  • 04

    Effective communication with your contractor and understanding the repair process can help you achieve the desired results and maintain your tile surfaces long-term.

  • 05

    Regular cleaning and sealing of repaired grout can help extend the lifespan of your tile floors, walls, and countertops.

Understanding the Importance of Grout Repair

Grout protects your tile surfaces by filling spaces between tiles. It creates a strong, waterproof seal. But grout can get damaged, cracked, or discolored over time.

Grout’s Role in Protecting Your Tile Surfaces

Grout bonds tiles to the surface beneath them. It forms a water-resistant barrier, stopping moisture from seeping through. This prevents damage to subfloors or walls.

Good grout installation keeps tiled surfaces looking great for years. It also ensures they stay strong and durable.

Signs of Grout Damage and the Need for Repair

  • Missing grout: Gaps between tiles can allow water penetration and lead to further deterioration.
  • Crumbling grout: Cracked or crumbling grout compromises the structural integrity of the tile installation.
  • Water seepage: If water is able to seep through the grout, it can cause mold growth, staining, and other water-related damage.

These signs show you need to fix your grout soon. Ignoring grout problems can lead to bigger, more expensive issues.

You might end up with loose tiles or water damage. In some cases, you may need to replace all your tiles.

Fixing grout keeps your floors, walls, and countertops stable and attractive. It’s a key part of tile maintenance.

grout damage

Preparations Before Hiring a Grout Repair Contractor

Assess the damage and identify the grout type before starting a repair project. This info helps create an effective plan with your contractor. It ensures a successful outcome for your tile surfaces.

Assessing the Extent of Grout Damage

Inspect your tile areas for cracks, missing grout, and water infiltration signs. This helps the contractor provide an accurate estimate. Grout repair typically takes 1 to 3 days, including drying time.

Determining the Type of Grout Used

Identify if your grout is sanded, unsanded, epoxy, or acrylic latex. This info is crucial as repair processes vary by grout type. Sanded grout should be used for spaces larger than ⅛ inch.

Unsanded grout works best for spaces ⅛ inch or smaller. Knowing the grout type ensures the right materials and techniques are used.

Proper preparation leads to better results in your grout repair project. Costs range from $180 to $420, depending on area size and work complexity.

Wear eye protection and a dust mask during repairs. This prevents grout dust inhalation and mold exposure. Allow repaired grout to dry for 24 to 48 hours before sealing.

Researching and Vetting Grout Repair Contractors

Finding the right grout repair contractor is key to a successful tile restoration project. Research local grout repair contractors online or ask friends for referrals. Check their websites, portfolios, and reviews to gauge their expertise and customer satisfaction.

When vetting grout repair professionals, focus on these important factors:

  • License and Insurance: Verify proper licensing and insurance coverage to protect yourself from potential liabilities.
  • Experience and Specialization: Seek contractors with extensive grout repair experience, especially in your home’s grout type. Inquire about their techniques and methods.
  • Warranties and Guarantees: Look for contractors offering work warranties or guarantees for peace of mind.
  • Communication and Professionalism: Assess their responsiveness and attentiveness to your needs throughout the selection process.

After shortlisting potential grout repair contractors, schedule consultations to discuss project details and pricing. Compare quotes and reviews to find the best match for your needs.

Thorough research helps you choose a skilled and reliable contractor for your tile restoration. This ensures high-quality results and a smooth experience for your project.

Grout Repair: Common Methods and Techniques

Professional grout repair contractors use various techniques to restore tile surfaces. Two popular approaches are grout cleaning and sealing, and grout replacement and regrouting. These methods help improve both looks and function.

Grout Cleaning and Sealing

Grout cleaning and sealing enhances tile floors and walls. Contractors clean existing grout, removing dirt, grime, and discoloration. They then apply a protective sealant to prevent future staining and damage.

The sealant can also boost the grout’s color. This gives it a fresh, vibrant appearance that revitalizes your tile surfaces.

Grout Replacement and Regrouting

For severe grout damage, replacement and regrouting may be necessary. This includes cracking, crumbling, or water damage. Contractors remove old, damaged grout and replace it with new material.

This process ensures a strong bond between tiles. It also restores the overall integrity of the surface, improving both function and appearance.

The best repair method depends on your tiles’ condition and desired outcome. Consulting a professional can help you choose the right approach for your needs.

Grout Repair

Factors to Consider When Selecting a Grout Repair Contractor

Choosing the right grout repair contractor is vital for restoring your tile surfaces. Several key factors can help you find a professional who delivers high-quality results.

Experience and Expertise

Find a contractor with extensive experience in tile and grout restoration. These experts can assess grout conditions and determine proper repair methods. Their proven track record ensures confidence in their workmanship.

Licensing and Insurance

Hire a grout repair contractor who is licensed, bonded, and insured. Licensing shows compliance with local regulations and industry standards. Insurance protects you from liability during repairs.

Reputable contractors are upfront about their credentials. This transparency provides peace of mind for homeowners.

When choosing a grout repair contractor in Houston, Texas, consider their qualifications carefully. A professional can assess damage, provide a detailed quote, and ensure long-lasting results.

  1. Look for a contractor with extensive experience in tile and grout repair.
  2. Verify the contractor’s licensing, bonding, and insurance coverage.
  3. Review the contractor’s portfolio and customer testimonials.
  4. Obtain a detailed quote that covers the scope of work and warranty information.
  5. Communicate openly with the contractor to set clear expectations and timelines.

Communicating with Your Grout Repair Contractor

Good communication is vital for a successful grout repair project. Talk with your contractor about work scope, timelines, and possible disruptions. This helps set clear expectations from the start.

Setting Expectations and Timelines

Make sure you and the contractor agree on project details. Discuss areas needing repair, grout type, and completion timeline. Ask about prep work and access needs.

Clear expectations help avoid misunderstandings and ensure smooth repairs. This approach leads to a better grout repair process overall.

Discussing Maintenance and Care

Talk with your contractor about caring for repaired grout. They can share tips on cleaning and sealing to extend its life. Ask about recommended products and techniques.

Follow their advice to keep your tile surfaces looking great. Proper maintenance ensures your grout stays in top shape.

Keep communication open throughout the project. Address concerns or questions quickly. Working closely with your contractor leads to long-lasting grout repairs.

Preparing Your Home for Grout Repair Work

Getting your home ready for grout repair is key to a smooth project. Clear the work areas of furniture and personal items. Cover nearby surfaces to prevent damage or staining.

Talk to your contractor about access and power needs. Make sure the work area has good air flow. These steps will help the project go well.

  • Clear the work areas of furniture, decor, and personal items
  • Cover and protect nearby surfaces, such as floors and walls
  • Discuss access and power requirements with the contractor
  • Ensure proper ventilation in the work area

Good prep work sets the stage for success. It helps the contractor work faster and better. Your living space will also face less disruption during the repair.

Evaluating the Work After Completion

After grout repair, inspect the final results carefully. Look for uneven application, cracks, or discoloration. Check if grout lines are sealed and tiles are clean.

Inspecting the Repaired Grout

Feel the grout lines for unevenness or rough spots. Look for consistent color and smooth appearance. Ensure proper tooling and no gaps between tiles.

Addressing Any Concerns or Issues

If you spot problems, talk to your contractor right away. Good professionals will fix issues to ensure you’re happy. Clearly explain your concerns and work together on solutions.

Careful evaluation ensures the repair meets your expectations. It provides long-term protection for your tile surfaces. Taking time to inspect helps achieve a successful project.

Maintaining Your Repaired Grout

Keep your tile surfaces in top shape after grout repair with proper maintenance. Regular cleaning and sealing protect grout from stains and damage. This routine is crucial for long-lasting results.

Regular Cleaning and Sealing

Clean grout lines every few months with a mild, pH-neutral cleaner and soft-bristle brush. Avoid harsh chemicals or abrasives that can erode grout. Reapply a high-quality grout sealer every 1-3 years for protection.

Avoiding Harsh Chemicals and Abrasives

  • Steer clear of harsh chemicals, such as bleach or acidic cleaners, which can break down the grout and cause further damage.
  • Similarly, abrasive scrubbing pads or tools can scratch and wear down the grout, compromising its integrity.
  • Opt for a mild, pH-neutral cleaner and a soft-bristle brush to gently clean the grout lines without causing any harm.

These maintenance practices will keep your repaired grout looking great. Your tile surfaces will stay protected for years to come. Remember, gentle care is key to lasting results.

Considering Long-Term Solutions for Grout Repair

Grout repair can provide a quick fix. However, sometimes more comprehensive solutions are needed. These ensure long-term integrity and aesthetic appeal of your tile surfaces.

If your tile area has widespread grout damage, consider tile replacement or complete grout replacement. This can be more cost-effective in cases of crumbling or deeply discolored grout.

These long-term solutions offer several advantages:

  • A fresh, updated look for your tile surfaces
  • Improved structural integrity and protection for your floors or walls
  • Opportunity to upgrade to higher-quality tile or grout materials

Investing in tile or grout replacement can be wise. It provides a lasting, high-quality finish. This enhances your home’s overall aesthetic and value.

Work with a reputable grout repair contractor. They can assess the damage and recommend suitable actions. An experienced pro ensures seamless installation that meets your expectations and budget.

Finding the Right Grout Repair Pros with FindPros

Having trouble with old, damaged grout in your shower, on your marble tiles, or between your floor tiles? FindPros can help you find the right grout repair professionals for the job. Just answer a few quick questions about your project, and we’ll match you with top-rated local pros who can restore your grout to its original bright white color.

These experienced contractors can thoroughly clean, regrout, and properly seal the tile underlayment to ensure the repair is done right and continues to look great. No need to worry about using the correct type of grout or pressing it in firmly – our vetted pros have you covered. Get a professional check on your grout repair project with FindPros, it’s comparatively easy.

Conclusion

Proper grout repair keeps tile surfaces beautiful and functional. It’s vital to spot damage early and find a trustworthy contractor. This approach protects your home investment and ensures quality results.

Prepare well and assess the work carefully. Maintain the repaired grout regularly. With expert help, your tiled areas will look great and last long.

Fixing grout is key for contractors and DIY fans. Quick action on cracked grout stops moisture damage. It also improves looks and keeps tiled areas strong.

Frequently Asked Questions (Grout Repair)

For spaces larger than 1/8 inch between tiles, sanded grout is typically used.
To clean up excess grout, use a damp sponge and tile grout cleaner to wipe away the remaining residue. Lightly scrub with a scrub brush for a thorough cleaning.
If you have broken or damaged shower grout, it’s important to repair the grout line. Use a grout saw to remove the old, broken grout, then fill the space with new, premixed grout. Ensure the new grout is pressed firmly into the tile joints.
After the new grout dries completely, you may need to seal it to protect against stains and damage. Use a grout float to apply a colored grout sealer, following the manufacturer’s instructions. Periodically sponge the grout lines to keep them looking their best.
If you have widespread, broken grout between your marble or bathroom tiles, you may need to completely replace the grout. First, use a grout saw to remove the old, damaged grout. Vacuum up any debris, then use a damp sponge and clean water to wipe the tile joints. Allow the area to dry completely before applying new, sanded grout using a grout float. Once the new grout dries, you may need to seal it to make it highly resistant to moisture and stains.

Gravel Driveway Repair

Heat Pump Installers Near You

Can’t find what you are looking for?

How It Works

  • Answer a few questions about your home project.
  • Within seconds, get matched with top-rated local pros.
  • Compare quotes and choose the best pro for the job.

Gravel Driveway Repair In Your Area

Gravel Driveway Repair: A Guide to Fixing Your Driveway

Meta Description: Discover effective gravel driveway repair techniques to restore your driveway’s functionality and appearance. Learn expert tips for long-lasting results and cost-effective solutions.

Is your gravel driveway full of potholes and uneven spots? Don’t worry, we have a great solution for you. This guide will show you how to fix and keep your gravel driveway looking great. It will also help it last for many years.

Gravel driveways are popular because they look good, save money, and are easy to install yourself. But, they can get damaged over time. They might get potholes and become rough because of weather and cars. But, you can fix this with the right tools, materials, and methods. You can make your gravel driveway look new and improve your property’s look.

Gravel Driveway Repair

Key Takeaways

  • 01

    Gravel driveways need regular care to stop them from getting worse and getting potholes.

  • 02

    Checking the driveway’s condition is important for fixing and restoring it right.

  • 03

    Fixing drainage problems is key to keeping your gravel driveway in good shape.

  • 04

    Using the right materials and tools is important for a successful gravel driveway repair.

  • 05

    Regularly grading, compacting, and edging can make your gravel driveway last longer.

Are you ready to make your gravel driveway smooth and well-kept? Let’s start learning how to keep your driveway looking great.

Introduction to Gravel Driveway Repair

Gravel driveways are both charming and affordable for many homeowners. But, they can get damaged over time. Issues like potholes and uneven surfaces can happen because of weather and cars.

Fixing a gravel driveway can make it work better and look new. It makes sure the surface is smooth and can handle traffic well for many years.

Benefits of Gravel Driveways

Gravel driveways are loved for their look and are easy and cheap to put in. They’re also good for other areas like gravel roads. With some care and fixing when needed, a gravel driveway can last a long time.

Common Issues and the Need for Repair

Gravel can move over time, causing potholes and uneven spots. This makes the driveway look bad and can be dangerous. Fixing these problems is key to keeping the driveway in good shape.

Repairing a gravel driveway fixes its surface, stops grass from growing, and makes it safe and smooth. This way, it lasts longer and looks better.

gravel driveway repair

Assessing the Condition of Your Gravel Driveway

Before fixing your gravel driveway, check its current state. This helps you see what needs fixing. It makes the repair process more effective and lasting.

Walk the Driveway and Inspect the Surface

Walk along your gravel driveway and look for damage. Check for potholes, ruts, and where gravel is missing. These problems make driving hard and get worse over time.

Check for Drainage Issues

Notice where water pools on the driveway. Bad drainage causes potholes, erosion, and weeds. Fixing these spots during repair will stop future problems.

Examine the Gravel Surface and Base

See if the gravel is thin or missing in some spots. Check if it’s spread evenly. Make sure the base under the gravel is solid and packed well. A strong base is key for a lasting driveway.

Assessing your driveway well lets you fix specific problems. You can make a repair plan that completely removes potholes and eliminates potholes. It also makes your driveway affordable green technology opportunity to fix, making previously inaccessible areas easier to get to with numerous advantages. This careful check also spots restoration machine issues like standing water that need extra work during repair.

Gravel Driveway Inspection

Gravel Driveway Repair: Materials and Tools Needed

To fix your gravel driveway, you’ll need the right materials and tools. The right gear makes fixing your driveway quicker and more efficient. It also makes sure the fix lasts a long time.

Essential Materials

Here are the key materials you’ll need:

  • Gravel or aggregate: Pick high-quality gravel or crushed stone that looks good with your driveway.
  • Geotextile fabric: This fabric stops weeds and helps with drainage by keeping the gravel separate from the soil.
  • Rake: A strong rake is key for leveling and spreading the gravel evenly.
  • Shovel: You’ll need a heavy-duty shovel for digging, shoveling, and moving gravel.
  • Wheelbarrow: A wheelbarrow makes carrying gravel and other stuff easier around your driveway.

Recommended Tools

Here are some extra tools that can be useful:

  1. Work gloves: Keep your hands safe from cuts and scrapes.
  2. Safety glasses: Protect your eyes from debris and dust.
  3. Rake or grader: Use these to level and smooth the gravel.
  4. Heavy-duty garden hose: Wet the gravel and compact it with a hose.
  5. Heavy roller: A heavy roller, like a lawn roller or a tractor attachment, compacts the gravel for a smooth surface.

For big repairs or installing a new driveway, you might need heavy machinery. Things like a skid-steer loader or a tractor with a box blade can speed up the work. They help you get a professional-looking finish.

Preparing the Driveway for Repair

Before fixing your gravel driveway, make sure it’s ready. Start by removing any debris, loose gravel, or weeds. Cleaning the driveway well is key for a good repair that lasts.

Clearing Debris and Vegetation

Use a rake and shovel to clear the driveway of loose stuff. This includes sticks, leaves, rocks, and other debris. Focus on the edges and corners where things tend to pile up.

Weeds need to go too. They can make the driveway unstable and cause more damage. Use a weed killer or pull them out by hand to keep the surface clean.

After getting rid of debris and weeds, you’re ready for the next step. This prep work makes fixing your driveway smooth and efficient.

Repairing Potholes, Ruts, and Uneven Surfaces

Fixing potholes, ruts, and uneven surfaces is key to making your gravel driveway look great. These problems can make your driveway hard to use and look bad. But, you can fix them easily and make your driveway smooth again.

For small potholes and ruts, just add more gravel and use a shovel to even it out. This quick fix can make your driveway look better. But for big potholes, you might need to use a plate compactor to pack down the gravel. This makes the hole disappear and your driveway even.

Fixing these issues makes your driveway work better and look nicer. It’s all about paying attention to details. This can really change how your driveway looks and lasts over time.

Regular care and fixing problems fast is important for a good gravel driveway. With the right steps, you can get rid of potholes and have a smooth driveway for years.

It’s also smart to check your driveway’s overall condition. Adding fresh gravel and grading it can fix uneven spots. This keeps your driveway smooth and stops potholes from coming back. It makes driving on it more fun.

Fixing potholes and uneven surfaces is key to keeping your gravel driveway in top shape. With the right tools and regular care, your driveway can be smooth, nice-looking, and useful for your property.

Leveling and Compacting the Gravel Surface

After fixing any potholes or ruts, level the gravel surface with a rake or grader. Make sure it has a slight crown in the middle for water drainage. It’s key to compact the gravel well for its durability. Use a heavy roller to compact it, paying extra attention to uneven spots. This makes the driveway solid and stable, avoiding future problems.

Importance of Proper Compaction

Compaction is vital for a gravel driveway’s strength and life. Company’s revolutionary recycling solution can make gravel surfaces smooth and rut-free. This time efficient and cost-effective method beats traditional equipment, like graders, in keeping the driveway in top shape.

  • Good compaction makes the driveway solid and stable, avoiding potholes and ruts.
  • Regular re-leveling and compacting of the gravel driveway can make it last longer and cut down on upkeep.
  • Keeping the driveway slightly peaked by raking and removing debris is key for good water drainage.

Choosing a unique restorative solution helps keep gravel driveways, roadways, and other surfaces in top shape. It ensures a smooth and lasting surface for any property.

Edging and Defining the Driveway Boundaries

Keeping your gravel driveway neat and attractive is key for looks and function. Edging your driveway helps with this. It makes your property look better and keeps the gravel from spreading onto your lawn or paths.

Belgian blocks are a great choice for edging. These strong stones make a neat border. They cost about $9–$11 per foot and professional installation for a big driveway is around $1,350.

Concrete curbing gives a modern look with smooth edges. Brick pavers are cheaper and let you pick colors and patterns that match your driveway.

For a unique edge, try natural stones like fieldstone or cobblestone. These give your driveway a special look. Make sure they’re installed and maintained right to avoid problems.

Keep your driveway clean with regular sweeping and rinsing. Don’t use harsh chemicals and fill gaps with sand to avoid ants.

Edging your gravel driveway makes it look better and keeps the gravel in place. This means a smooth surface for years.

Finding the Best Pros for Your Gravel Driveway Needs

Are you looking for reliable and affordable professionals to restore your gravel driveway or other unpaved surfaces? Look no further than FindPros, the trusted resource for connecting homeowners with top-rated local pros.

With FindPros, you can quickly and easily find the experts who specialize in economical surface restoration, gravel driveway repair, and recycling existing gravel. Unlike traditional methods that require heavy equipment, our verified professionals use innovative techniques to instantly compact the material, eliminating potholes and creating a smooth, durable finish.

Simply answer a few questions about your home project, and we’ll match you with the best-suited pros in your area. Compare quotes, read reviews, and choose the one that fits your needs and budget.

Conclusion

Fixing a gravel driveway takes some work and materials. But, with good planning and doing it right, you can make it look and work great. It’s important to keep up with maintenance to stop small problems from getting bigger.

Whether you fix it yourself or hire someone, this guide will help you. You’ll get a gravel driveway that lasts a long time and looks good.

Gravel driveways need more care than concrete or asphalt. But, they are cheaper and better for the planet. You can fix them easily and use the old gravel again. This makes gravel driveways a favorite for many homeowners.

By taking care of your gravel driveway, it will look great and make your house look better.

This guide shows how to fix potholes, ruts, and uneven spots in your gravel driveway. With a little time and effort, your gravel driveway will stay in good shape for many years.

Frequently Asked Questions (Gravel Driveway Repair)

The unique recycling solution can quickly restore gravel driveways, gravel roadways, and other unpaved surfaces in an economical and efficient manner. It recycles the existing gravel to create a beautifully restored driveway with a smooth, fully restored surface.
Regular driveway maintenance is key to keeping your gravel driveway in top shape. The rut-resistant surface restoration process can eliminate potholes and create a smooth, long-lasting driveway. This easy solution is unlike traditional graders and heavy equipment.
The unique recycling technology can restore gravel parking lots, driveways, and other unpaved surfaces in a cost-effective way. It recycles the existing gravel to create a smooth, compacted surface, eliminating the need for a fresh layer of gravel or heavy equipment.
By using the surface restoration process, you can beautifully restore your gravel driveway and make the adjacent areas look neat and well-maintained. This solution helps grass disappear and creates a uniform, rut-resistant surface.
The recycling solution is an economical, efficient, and easy-to-use option for restoring gravel driveways and other unpaved surfaces. Unlike traditional methods that require heavy equipment, the process instantly compacts the existing gravel to create a smooth, durable surface that can withstand commercial activity and the rainy season.

Granite Restoration

Heat Pump Installers Near You

Can’t find what you are looking for?

How It Works

  • Answer a few questions about your home project.
  • Within seconds, get matched with top-rated local pros.
  • Compare quotes and choose the best pro for the job.

Granite Restoration In Your Area

Granite Restoration: How to Repair and Maintain Your Granite Surfaces

Meta Description: Discover expert tips for granite restoration, repair, and maintenance. Learn how to bring back the shine and protect your natural stone surfaces for years to come.

Granite is a popular choice for many places like kitchens and restaurants. It’s known for being tough and looking great. But, it needs the right care to stay that way. So, what’s the best way to keep your granite looking new?

We’ll share expert tips on how to fix and care for your granite surfaces. These tips will help your granite look good for many years.

Granite Restoration

Key Takeaways

  • 01

    Granite countertops need resealing often because they get worn out and can stain easily.

  • 02

    A pH-neutral cleaner keeps granite countertops shiny.

  • 03

    Granite polishing powder and cream can make your granite look new again, removing stains and scratches.

  • 04

    Keeping up with maintenance stops damage and keeps granite looking great.

  • 05

    Granite resists stains but isn’t stain-proof. Clean and seal it regularly to stop stains.

Understanding the Importance of Granite Maintenance

Granite is a tough natural stone that looks great and is often used for countertops. It needs the right care to stay looking good and avoid damage. Cleaning, polishing, and resealing it regularly keeps it looking new for a long time.

Granite’s Durability and Aesthetic Appeal

Granite is a top pick for modern kitchens, especially for countertops. It’s tough and easy to care for. Light-colored granite may need more sealers than dark colors. Taking good care of it can make it last a lifetime.

Preventing Damage and Preserving Luster

  • If granite absorbs water quickly, you should use a sealer.
  • Using sealer too much can harm the granite, making it look bad.
  • Don’t put hot things directly on granite to avoid damage.
  • Using the wrong cleaners can hurt the granite and mess up the sealer.
  • Avoid using ammonia, vinegar, and citrus on granite countertops.

To keep granite looking great, use safe cleaners and warm water. Don’t sit or lean on it, and keep toiletries off. This helps prevent damage.

granite maintenance

Daily Cleaning and Care for Granite Countertops

Keeping granite countertops clean and looking great needs a daily cleaning plan. Start by wiping the surface with a soft cloth to get rid of dirt or spills. Then, use a pH-neutral granite cleaner and a soft sponge for a deeper clean.

Wiping and Scrubbing the Surface

First, wipe the granite countertop with a soft, microfiber cloth to remove dirt, crumbs, or spills. This keeps the granite from getting dull. For a deeper clean, use a pH-neutral granite cleaning solution and a soft sponge. Don’t use harsh cleaners or rough pads, as they can scratch the granite.

Disinfecting and pH-Neutral Solutions

It’s also key to disinfect granite countertops now and then. Make a mix of equal parts water and isopropyl alcohol. Then, use a clean cloth to wipe down the surface. This kills bacteria and germs, making your granite disinfected and clean. Always pick a pH-neutral granite cleaner to keep the stone safe and undamaged.

granite surface scrubbing

By cleaning your granite countertops every day, you keep them looking great for years. Regular granite countertop cleaning is the secret to keeping them in top shape.

Restoring the Shine to Dull Granite Surfaces

Granite surfaces can lose their shine over time. But, there are ways to make them shine again. Using granite polishing powders and creams can remove scratches and stains. Or, you can use cooking oil on a soft cloth for a quick fix.

  • Granite Polishing Powder and Creams: Granite polishing powders and creams are made to make dull granite shine again. They gently buff out the dullness with fine abrasives. This helps remove residue and minor flaws, making the granite look new.
  • Using Cooking Oil for a Temporary Shine: For a quick fix, try using cooking oil on your granite. Just put a few drops on a soft cloth and wipe it over the granite. This makes the granite look shiny by filling in tiny scratches.

Keeping your granite shiny is key to its beauty and long life. You can use powders, creams, or cooking oil to restore its shine. This way, your granite countertops, floors, or other areas will look great again.

Granite Restoration: Addressing Stains and Scratches

Granite surfaces can get stains and scratches over time. Some stains can be cleaned with regular polish. But, deep stains or scratches might need granite restoration from pros. Trying to fix them yourself can make things worse, so knowing when to get help is key.

For granite stain removal, act fast. Leaving spills on the stone can make stains hard to get out. Experts use special techniques to remove tough stains. This might take a few tries, but it’s the best way to fix the granite.

Dealing with granite scratch repair depends on how deep the scratch is. Light scratches can be cleaned with gentle polish. But deep scratches might need diamond polishing pads or even resurfacing by pros.

Choosing to get granite restoration help should depend on the damage and your repair skills. Working with pros ensures your granite looks great again.

Resealing Granite Countertops

Granite countertops are known for their strength and beauty. But, they need to be resealed now and then. This keeps them resistant to stains and protects the stone from harm.

Signs of a Weakened Sealant

Homeowners should watch for signs that their granite’s sealant is getting weak. Look out for:

  • Water absorption, resulting in dark spots or rings on the surface
  • Appearance of stubborn stains or discoloration that are difficult to remove
  • Decreased repellency of liquids and foods on the countertop

Professional Sealing Services

If you see these signs, it’s time for professional granite sealing. Experts will clean the surface well. They will check the sealant’s condition and apply a new, quality sealer for granite.

The sealing process uses a special sealant. It can protect your granite for 5 to 10 years. This is longer than other sealants, which last from 6 months to 3 years.

Getting regular professional granite sealing is key to keeping your countertops looking great. By fixing any sealant issues, you keep your granite beautiful and functional for many years.

Preventing Future Damage to Granite Countertops

Granite is a popular choice for kitchen countertops because it’s durable and timeless. But, it can still get damaged if not taken care of. To keep your granite looking great, you need to prevent future damage.

Avoiding Cutting and Hot Pans

Don’t use your granite as a cutting board. It can scratch and chip the stone. Always use a separate cutting board to protect it.

Also, don’t put hot pans or dishes on the granite. This can make it discolored or even crack. Use heat-resistant trivets or hot pads instead.

Using Granite-Safe Cleaners

Cleaning your granite right is key to keeping it looking good. Avoid harsh chemicals or rough cleaners. They can damage the sealant and the stone.

Use cleaners made just for granite. These are gentle and won’t harm the stone. They help keep your countertops looking new.

Follow these tips to keep your granite countertops looking great. Simple care and maintenance will help them last a long time. This way, you can enjoy the beauty of granite for years.

When to Seek Professional Granite Restoration Services

Some granite care tasks can be done at home. But, there are times when you need a pro. If your granite looks dull, rough, or has cracks and chips, get a pro to check it out. Trying to fix it yourself can make things worse.

  • Repolishing Rough or Dull Surfaces: Granite floors need a pro check-up every year or two. Things like UV rays, heat, and acidic foods can make them dull. If your granite looks dull and feels rough, it’s time for a pro to make it shine again.
  • Repairing Cracks and Chips: Granite can stain easily if its sealant is weak. Scratches and etching mean it’s time for a pro to fix it. DIY fixes can make things worse, so it’s best to call a granite restoration expert.

Routine Maintenance for Long-Lasting Granite Beauty

Keeping granite surfaces looking great needs regular cleaning, polishing, and resealing. Homeowners should follow granite cleaning schedules and granite polishing schedules. Also, granite countertop resealing is needed now and then to stop stains and damage.

Cleaning and Polishing Schedules

Deep cleaning and polishing your granite countertops often keeps them shiny and strong. Experts say spring and fall are the best times for a deep clean. This might include using special granite polishing powder or creams to make them shine.

Resealing Granite Countertops Periodically

Granite countertops need resealing once a year, but this can change based on the stone and your kitchen use. If you don’t reseal, your granite might get dull, chip, stain, or crack. For big resealing jobs, it’s best to get professional help. They can do it right and avoid harming your granite.

Following these granite cleaning schedules, granite polishing schedules, and granite countertop resealing tips helps keep your granite looking great. This makes your home both useful and beautiful.

Improve Your Granite Restoration with FindPros

Restoring and maintaining your granite surfaces can be a complex task, but you don’t have to do it alone. FindPros can connect you with top-rated local professionals who specialize in granite restoration and care. Simply answer a few questions about your home project, and we’ll match you with skilled pros who can provide competitive quotes. This way, you can find the best fit for your needs and budget, without the hassle of searching through endless options. Get started today and let FindPros simplify your granite restoration journey.

Conclusion: Preserving the Timeless Elegance of Granite

Granite is a strong and lovely stone that makes any kitchen or living area look better. To keep it looking great and avoid big repair costs, it’s key to follow a good granite restoration and maintenance routine. By knowing how to care for it, cleaning it every day, fixing stains and scratches, and getting help from pros when needed, you can keep your granite looking new for many years.

Keeping up with maintenance and restoration helps granite last longer. Experts in stone restoration know how to check the stone’s condition and make plans to fix dull or damaged spots. They use eco-friendly methods like water-based sealants and green cleaners. This helps the planet and brings back the granite’s natural beauty.

Keeping granite looking great is about more than just its looks. It’s also about keeping it real and true over time. Granite adds beauty and value to any place, old or new. By cleaning it right every day, fixing stains and scratches fast, and getting help from pros when you need it, you can make sure your granite stays a beautiful, lasting part of your home.

Frequently Asked Questions (Granite Restoration)

To bring back the original luster to your dull granite countertops, you can use a granite polishing powder or cream. These products contain fine abrasives that gently buff out the dullness, removing residue and minor flaws from the stone surface. Be sure to follow the polishing process carefully, using a hogs hair pad to polish the entire countertop.
The best way to clean and maintain your natural stone countertops, such as granite or marble, is to use a pH-neutral granite cleaner and a soft sponge or cloth. Avoid harsh chemicals or abrasive cleaners, as they can damage the stone surface. Wipe up spills promptly and disinfect the countertops regularly using a mix of water and isopropyl alcohol.
You should consider getting professional granite restoration services if your stone surfaces are severely damaged, with deep scratches, cracks, or stubborn stains that you can’t remove on your own. Trying to fix these issues yourself can often make the problem worse, so it’s best to have a stone restoration expert assess the damaged area and determine the appropriate polishing process to restore the stones.
Granite countertops typically need to be resealed every 5 to 10 years, depending on the amount of use and wear they receive. Signs that it’s time to reseal include water absorption, the appearance of stubborn stains, and decreased liquid repellency on the stone surface. Periodic resealing helps protect the granite from stains and damage, so be sure to check for any excess sealer or wet, stained areas that may indicate it’s time to reseal.
To prevent future damage to your stone surfaces, such as your stone countertops or vanities, avoid using them as cutting boards, and always use heat-resistant trivets or hot pads to protect the stone from hot pans and dishes. Additionally, be sure to clean the countertops with granite-safe cleaners and avoid using harsh chemicals or abrasive scrubbers, as these can damage the sealant and the stone itself, creating a porous surface that’s prone to wear and staining.

Granite Countertop Installers

Heat Pump Installers Near You

Can’t find what you are looking for?

How It Works

  • Answer a few questions about your home project.
  • Within seconds, get matched with top-rated local pros.
  • Compare quotes and choose the best pro for the job.

Granite Countertop Installers In Your Area

Hiring Granite Countertop Installers: A Step-by-Step Guide

Meta Description: Discover how to hire expert granite countertop installers for your home. Learn key factors to consider, questions to ask, and tips for a successful installation project.

Are you looking for the perfect granite countertops for your kitchen or bathroom? The right installers can change your project’s outcome. But how do you find the best ones? This guide will help you find expert granite countertop installers for your space.

Granite Countertop Installers

Key Takeaways

  • 01

    Hiring skilled granite countertop installers is crucial for a successful kitchen or bathroom renovation.

  • 02

    Understanding the role of granite countertop fabricators and the benefits of using their services can lead to a seamless installation process.

  • 03

    Carefully considering key factors like reputation, prices, and expertise when hiring a granite countertop fabricator is essential.

  • 04

    Proper planning, preparation, and communication with installers can ensure a smooth and efficient granite countertop installation project.

  • 05

    Attention to detail, from material selection to installation, is vital for achieving a high-quality, long-lasting granite countertop.

Understanding the Role of Granite Countertop Fabricators

A granite countertop fabricator is key when installing granite countertops. They cut, fit, and finish granite slabs for your kitchen or bathroom. These pros have the skills and tools needed for a great countertop installation.

Overview of Granite Countertop Fabricator

Granite countertop fabricators are vital in the installation process. They measure and cut slabs to fit your space and polish the edges for a top-notch look. They also seal the stone to protect it from stains and damage.

Benefits of Using a Granite Countertop Fabricator

  • Expertise in granite installation: Fabricators know how to make sure your granite countertop lasts a long time.
  • Customized solutions: They make sure the countertop fits your space perfectly.
  • Quality assurance: They use top materials and methods for a countertop that looks great and lasts.
  • Cost savings: Working with a fabricator helps avoid mistakes and gets it right the first time.

Choosing a skilled granite countertop fabricator is key for your project. Their know-how and focus on details can give you a countertop that looks amazing, works well, and lasts a long time.

Granite Countertop Fabricator

Key Considerations When Hiring a Granite Countertop Fabricator

Looking for the right granite countertop fabricator means paying attention to a few important things. You should look at their reliability, reputation, and experience. Also, think about the price, the quality of materials, and how well they install them.

About 85% of the best granite countertop makers are certified by groups like the Marble Institute of America and the National Kitchen and Bath Association. This shows they are serious about quality and professionalism.

Granite countertop makers usually offer 3-5 different pricing plans. These include costs for labor, materials, and installation. It’s good to compare these to find the best deal for your kitchen update.

  • More than 70% of good granite countertop makers have a quality check process. This makes sure the countertops last a long time.
  • Over 90% of top fabricators offer warranties. This means they promise the installation is done right and the granite is top quality.

When picking a granite countertop maker, check their experience, licenses, and certifications. Good ones will show off their skills and know-how about new technology.

granite countertop fabricator

Being professional, good at design, and having a wide selection of granite slabs is key. Choose makers who care about customer service and are part of industry groups. This way, you’ll get a great installation for your kitchen.

By looking at these important points, you can find a trustworthy granite countertop maker. They will give you a quality product and a good installation experience for your kitchen.

Planning Your Granite Countertop Installation Project

Upgrading your kitchen with granite countertops needs careful planning for a smooth process. Start by picking a trusted granite vendor. Look for one that offers top-notch materials and great service. Check their reputation, granite quality, and installation costs.

Select a Granite Vendor

Find a vendor with a wide range of granite slabs. This means you can easily find the perfect granite for your kitchen’s look and style.

Choose a Granite Pattern

After picking a good vendor, choose the right granite pattern for your kitchen. Granite has many colors, patterns, and finishes. Take your time to look at all your options and pick the one that matches your kitchen’s style. Think about your cabinets, flooring, and kitchen design when deciding. Talking to the vendor can also give you great advice to help you choose.

Planning well is key for a successful granite countertop project. By picking a reliable vendor and the right granite pattern, your new countertops will look great and last long. They’ll make your kitchen more beautiful and functional.

Preparing for Granite Countertop Installation

Before you start installing your granite countertop, make sure you have all the tools you need. Having the right tools makes the job easier and ensures a professional look. You’ll need a tape measure, level, saw, jigsaw, clamps, grinder, drill, safety gear, adhesive, epoxy, and sealer. You might also need a helper to help with the heavy granite slabs.

Gather the Essential Tools and Equipment

  • Tape measure: Accurate measurements are key for a perfect fit.
  • Level: Ensure your countertop is level and even.
  • Circular saw or wet saw with a diamond blade: For cutting the granite to size.
  • Jigsaw: Useful for making intricate cuts around sinks or other fixtures.
  • Clamps: Securely hold the granite in place during the installation process.
  • Grinder: Smoothen and polish the edges of the granite.
  • Drill: Necessary for creating any needed holes for faucets or other accessories.
  • Safety gear: Wear gloves, eye protection, and a mask to protect yourself.
  • Adhesive: High-quality adhesive to bond the granite to the countertop base.
  • Epoxy: Used to fill any gaps or seams between the granite pieces.
  • Sealer: Apply a sealer to protect the granite’s surface and prevent staining.

Installing granite countertops can be hard, so having a helper is a good idea. They can help with lifting and placing the granite slabs. With all the tools ready, you’re set to start your granite countertop project with confidence.

The Installation Process

Installing a granite countertop is a detailed process. First, measure your countertop and make a template. You can do this yourself or get a free in-home measurement from a granite expert. This makes sure the granite fits your kitchen just right.

Then, the granite slab gets cut to fit your template safely. After that, remove the old plumbing, backsplash, and countertop. Also, take out any appliances in the way. With a friend’s help, place the granite slab on the cabinets carefully.

Once the slab is set, the seams are joined, and the countertop is secured. This is done with adhesive and fasteners. Finally, a sealer is applied to protect the granite and make it last longer.

The whole installation takes about 4 hours. But, it can take longer if your kitchen is big or complex. Smaller kitchens might only need 2-3 hours. But bigger kitchens could take up to 7 hours.

Getting ready and paying attention to details is important for a good granite countertop installation. By following these steps, you can make your kitchen look beautiful and last longer with a granite countertop.

Find the Right Granite Countertop Installer with FindPros

Choosing the perfect granite countertop installer is crucial for a successful home renovation project. Let FindPros help you find the best local professionals for the job. Simply answer a few questions about your granite countertop needs, and we’ll match you with top-rated installers in your area. Compare competitive quotes, read verified reviews, and select the pro you connect with best. Take the stress out of the process and get the granite countertops of your dreams with the help of FindPros.

Conclusion

Finding the right granite countertop installers is key for a great kitchen makeover. Knowing what granite countertop fabricators do and what to look for in a fabricator helps. Also, planning well for the installation makes sure you get the beautiful, lasting granite countertops you want.

This guide shows you how to handle the installation step by step. With the right experts helping you, your dream kitchen is closer than you think.

Frequently Asked Questions (Granite Countertop Installers)

When hiring a countertop installer, consider their reputation, expertise, pricing, quality of materials, and installation process. Look for certified and experienced installers who can customize the granite to your space and preferences.
The amount of granite needed depends on the square footage of your countertop space. Work closely with the installer to accurately measure your room and get a custom-fit granite slab. They can help you decide the best size and shape to create the look you want.
Granite comes in a wide range of prices per square foot. Explore different grades and colors to find an option that fits your budget. The installer can guide you towards more affordable yet high-quality granite choices that will complete your dream kitchen or bathroom.
Communicate closely with the installer and ask plenty of questions. Discuss your style preferences, any special requirements, and your timeline. This ensures they can complete the project to your full satisfaction without overlooking any crucial details.
It’s best to decide on the granite color and pattern before the installation begins. However, if you do change your mind, communicate this to the installer as soon as possible. They may be able to accommodate some adjustments, but major changes after the process starts could incur additional costs or delays.

Glaziers

Heat Pump Installers Near You

Can’t find what you are looking for?

How It Works

  • Answer a few questions about your home project.
  • Within seconds, get matched with top-rated local pros.
  • Compare quotes and choose the best pro for the job.

Glaziers In Your Area

Glaziers: Your Guide to Glass Repair and Replacement

Meta Description: Discover expert glaziers for all your glass repair and replacement needs. From windows to mirrors, trust our skilled professionals for quality craftsmanship and service.

Ever wondered who keeps the glass in city buildings looking great? It’s the glaziers, the experts in glass work. They make sure windows, storefronts, and more look perfect. But what do they do, and why are they so important? Let’s explore the world of fixing and replacing commercial glass.

Glaziers

Key Takeaways

  • 01

    Glaziers are experts in installing, fixing, and replacing commercial glass.

  • 02

    They learn a lot through apprenticeships to work safely at heights and fix glass challenges.

  • 03

    Glaziers keep buildings safe, efficient, and looking good.

  • 04

    They’re key for fixing windows, storefronts, and adding special glass features.

  • 05

    Companies count on glaziers for energy-saving glass, upkeep, and fixing glass damage.

Introduction to Commercial Glass Repair

Commercial glass repair fixes cracks, chips, seals, and leaks in glass on commercial buildings and high-rises. Keeping high-rise windows replaced right is key. It keeps the building strong, safe for workers and people inside, and saves energy.

Importance of High-Rise Window Replacement and Maintenance

Using top-notch glass and glazing cuts a building’s energy use and lowers costs for HVAC and lights. Good glass care and energy-saving glass treatments, like tinting, make buildings greener and better for the planet.

Energy Savings with High-Performance Glass

Switching to high-performance glass cuts energy bills and boosts a building’s energy use. These advanced glazings control the building’s temperature. This reduces HVAC work and lowers energy use for heating and cooling.

high-rise window replacement

What is Commercial Glass Repair?

Commercial glass repair is a special service for fixing glass in big buildings and skyscrapers. It’s different from fixing glass at home because it needs experts who can work safely up high. [https://classicglassandglazing.com/]

This service is for places like apartments, offices, and big buildings with lots of glass. It’s important for keeping people safe and saving money on big repairs.

Experts in commercial glass repair have the right skills and tools for the job. They work on big buildings and know how to fix complex glass problems.

What do commercial glass repair pros do?

  • They replace broken glass panels
  • Fix glass doors and windows
  • Keep the glass strong and safe
  • Make buildings more energy efficient
  • Do emergency repairs to stop more damage

Working with a trusted company, businesses can keep their glass looking good and save money. They also get better energy efficiency.

commercial glass repair

Causes of Damage to Commercial Glass

Commercial glass in tall buildings and big structures can get damaged in many ways. This includes damage from the environment and natural forces. It also includes damage from poor upkeep and accidents.

At high places, glass windows and panes get hit by extreme weather. This includes strong winds, lots of rain, intense sun, and big changes in temperature. These can cause cracks, chips, and other damage.

Environmental Elements and Natural Forces

Natural disasters like hurricanes and hailstorms can really hurt commercial glass. They can break panes and cause a lot of damage. Even without big weather events, wind, rain, and sun can slowly make glass weak.

This can cause scratches that get worse over time.

Poor Window Maintenance and Accidents

Not cleaning windows well and letting dirt and grime build up can weaken commercial glass. It can also make it less able to handle damage. Accidents, like hitting the glass with something or something falling on it, can also break glass right away.

These need quick fixing or replacing to keep things safe and strong.

Minor Damage Escalation

Small scratches or chips can get worse if not fixed quickly. They can turn into big cracks or breaks. It’s important to fix small damage fast to stop it from getting worse.

This saves money and trouble for those who own or manage commercial properties.

Repair vs Replace: When to Choose Each Option

When dealing with damaged commercial glass, owners and managers must decide to repair or replace it. If the damage is minor, like leaks or small scratches, repair might be cheaper than replacing the glass.

Conditions for Glass Repair

Repairing glass is often cheaper for minor damages. Here are some cases where repair works:

  • Small cracks or chips that don’t affect the glass’s strength
  • Leaking seals or coatings that can be sealed or refinished
  • Fogging or condensation in insulated glass units (IGUs) that can be cleared out

Situations Requiring Glass Replacement

But, if the glass has big damage, like large cracks or deep scratches, it needs to be replaced. This keeps the building safe and strong. It’s important to replace high-rise windows quickly if they’re damaged. This prevents big risks and keeps people safe.

Here are reasons to replace glass:

  1. Big cracks or breaks that make the window unstable and unsafe
  2. Seals that have broken, letting in air and water
  3. Permanent fog or condensation in insulated glass units (IGUs) that can’t be fixed
  4. Need for new energy-saving glass coatings or units for better heat and savings

Choosing to repair or replace windows depends on many things. This includes the window’s condition, cost, energy use, and looks. Repairing glass is cheaper for small damages. But, big problems might need a full replacement for safety, stability, and saving energy.

Considerations for Commercial Glass Work

Working on high-rise buildings and big structures with commercial glass is tricky. It’s very important to keep workers safe. They face complex equipment, high places, and bad weather to fix glass panels.

Worker Safety at Heights

Only skilled and licensed pros should do this work. Glaziers must wear the right gear and know how to use special tools. They need good training and a certificate to stay safe in tough conditions.

Financial Impact of Ignoring Damage

Not fixing glass problems can cost a lot for building owners. Bad windows make heating and cooling bills go up. Fixing glass quickly saves money and keeps the building strong and efficient.

Fixing glass on tall buildings needs special skills and gear. This keeps workers safe and saves money for building owners. By focusing on safety and fixing problems early, buildings stay efficient and strong.

Glaziers: Skilled Professionals for Glass Repair

Glaziers are the go-to experts for fixing, replacing, and putting in commercial glass. They learn a lot through apprenticeships. This training helps them work safely at heights and tackle the challenges of commercial glass work.

Glaziers must be licensed and follow strict rules to keep buildings safe and sound. They keep high-rise buildings, offices, and stores looking good and working well.

  • Glaziers often finish an apprenticeship to get better at their job.
  • Some places make glaziers get a license to show they’re up to standard.
  • They need to be strong to carry heavy glass and have great hand-eye coordination for cutting.
  • They also need to be balanced, working on high places like scaffolds and ladders.
  • Good at details, talking, and working with others is key to doing well.

Skilled glaziers are very important. They know a lot about glass repair and commercial glass work. Their skills help keep commercial buildings in good shape and efficient.

Replacing Window Glass: Step-by-Step Guide

Replacing broken window glass in commercial buildings is a detailed process. It starts with safely removing the old glass and ends with installing a new pane or IGU. Each step is key for a good window glass replacement.

Removing Broken Glass

The first step is to remove the old, broken glass safely. This means covering the glass with tape to keep sharp edges and shards from spreading.

Measuring for New Glass

Then, the opening is measured carefully. This ensures the new glass or IGU fits well. It’s important to get the height, width, and thickness right for a good fit.

Replacing Glass in Wood and Aluminum Frames

For wood frames, the old glue is removed and the frame is prepared. Then, the new glass is set in and held with glazing points. Aluminum frames are different. The glass can be replaced without taking out the whole window. The contractor removes old sealant or tape and puts in the new glass.

During the replacement, safety is key. Wearing protective gear helps avoid injuries. By following these steps, commercial buildings can have their windows fixed and working well.

Insulated Glass Units (IGUs) for Energy Efficiency

IGUs are key in modern commercial windows, boosting energy efficiency over single-pane windows. They have two panes of tempered glass with a spacer and insulating gas like argon or krypton between them.

IGUs bring big benefits to commercial buildings. They cut down on heat loss and gain, saving on energy bills. They also block out noise, add security with safety glass, and protect against UV damage.

  • IGUs can cut energy use by 20-30% compared to single-pane windows.
  • Triple-glazed IGUs are better for energy efficiency, insulation, and security than double-glazed ones.
  • The choice of gas and glass thickness in IGUs affects their thermal performance and cost.

When replacing commercial window glass, it’s key to measure the IGU right. Note the glass thickness, spacer color, and any special coatings or tints. This makes sure the new IGU fits and keeps the building energy-efficient. Knowing the glass type, like annealed or safety glass, is also important for the replacement.

Using insulated glass units helps commercial owners save a lot on energy costs over time. High-performance IGUs can start paying for themselves in 1-3 years with lower utility bills.

Find the Right Glazier for Your Needs with FindPros

Are you in need of a skilled glazier to handle your commercial glass repair or replacement project? Look no further than FindPros, where you can get matched with top-rated local professionals who can provide the expertise and services you require. By answering a few simple questions about your project, such as the type of glass needed, the size of the pane edges, and any requirements for interior walls or weather seals, FindPros will quickly connect you with glaziers who are the best fit.

These union glaziers have the necessary training, materials, and experience to tackle any job, from installing new storefront sashes to repairing damaged building fronts. Take the stress out of finding the right person for the task by letting FindPros handle the search and provide you with competitive quotes, ensuring you get the best value for your commercial glazing needs.

Conclusion

Glaziers are key to keeping commercial buildings safe and looking good, especially tall ones. They fix and replace commercial glass with skills and knowledge. This keeps buildings safe, saves energy, and cuts down on repair costs.

Keeping commercial glass in good shape is key to a building’s upkeep. Glaziers need to keep learning to meet new trends and needs. With more jobs expected for glaziers, there’s a big demand for skilled workers.

By focusing on training and safety, the glazing industry helps glaziers tackle tough jobs safely. This makes buildings safer, more energy-efficient, and more attractive for everyone.

Frequently Asked Questions (Glaziers)

Glaziers often complete an apprenticeship program, where they receive on-the-job training and classroom instruction over several years. This allows them to gain the necessary skills and knowledge to work safely and effectively on commercial glass projects. Many glaziers also hold a high school diploma and may be certified by a union or professional organization.
Glaziers use specialized tools like glazing knives, suction cups, and plumb lines to precisely measure, cut, and install glass. They also work with glazing compounds, fasteners, and weather seals to ensure a proper fit and seal for the glass. Having the right tools and equipment is essential for glaziers to perform their work efficiently and safely.
Glaziers are responsible for a wide range of services, including installing new windows, doors, and storefronts, as well as repairing or replacing broken or damaged glass. They may also work on specialty projects like display cases, skylights, and interior glass walls. Ensuring the glass is properly sealed and protected from the elements is a critical part of a glazier’s job.
Safety is a top priority for glaziers, especially when working at heights or handling heavy pieces of glass. They use personal protective equipment, follow safety protocols, and have specialized training to work safely on construction sites. Glaziers also work closely with architectural specifications and building codes to ensure the glass they install meets all necessary standards and requirements.
Many glaziers start as apprentices and work their way up to become journeyman or master glaziers. Some may also choose to become self-employed or start their own glass installation companies. With experience and additional training, glaziers can also take on supervisory or management roles, overseeing the work of other glaziers and construction teams.