Above Ground Pool Repair

Above Ground Pool Repair Near You

Can’t find what you are looking for?

How It Works

  • Answer a few questions about your home project.
  • Within seconds, get matched with top-rated local pros.
  • Compare quotes and choose the best pro for the job.

Above Ground Pool Repair In Your Area

Above Ground Pool Repair: Expert Solutions & Tips

Meta Description: Discover expert solutions for above ground pool repair. Learn essential tips to fix leaks, patch liners, and maintain your pool’s integrity for a worry-free swimming season.

After the pandemic, backyard pools became a top choice for families wanting to staycation at home. Google searches for pools went up in May 2020. Pool makers and sellers across the U.S. saw record sales and ran out of stock. Now, with many new and old pools, maintenance issues are common. Some problems need a pro, but many can be fixed by you, saving money. So, what are the main repair issues with above ground pools, and how can you fix them yourself?

Above Ground Pool Repair

Key Takeaways

  • The pandemic caused a big jump in demand for above ground pools, leading to record sales and empty shelves.

  • Many pool problems can be fixed by yourself, like leaks, tears, clogs, and winterization issues.

  • Vinyl liners often tear but can be fixed with waterproof tape, vinyl patches, and other easy fixes.

  • Concrete pool leaks might need fittings sealed or temporary sealants, while plumbing leaks are harder to fix.

  • Clearing pool lines and skimmers is key to avoid pump damage and can be done with the right tools.

Introduction to Above Ground Pool Repair

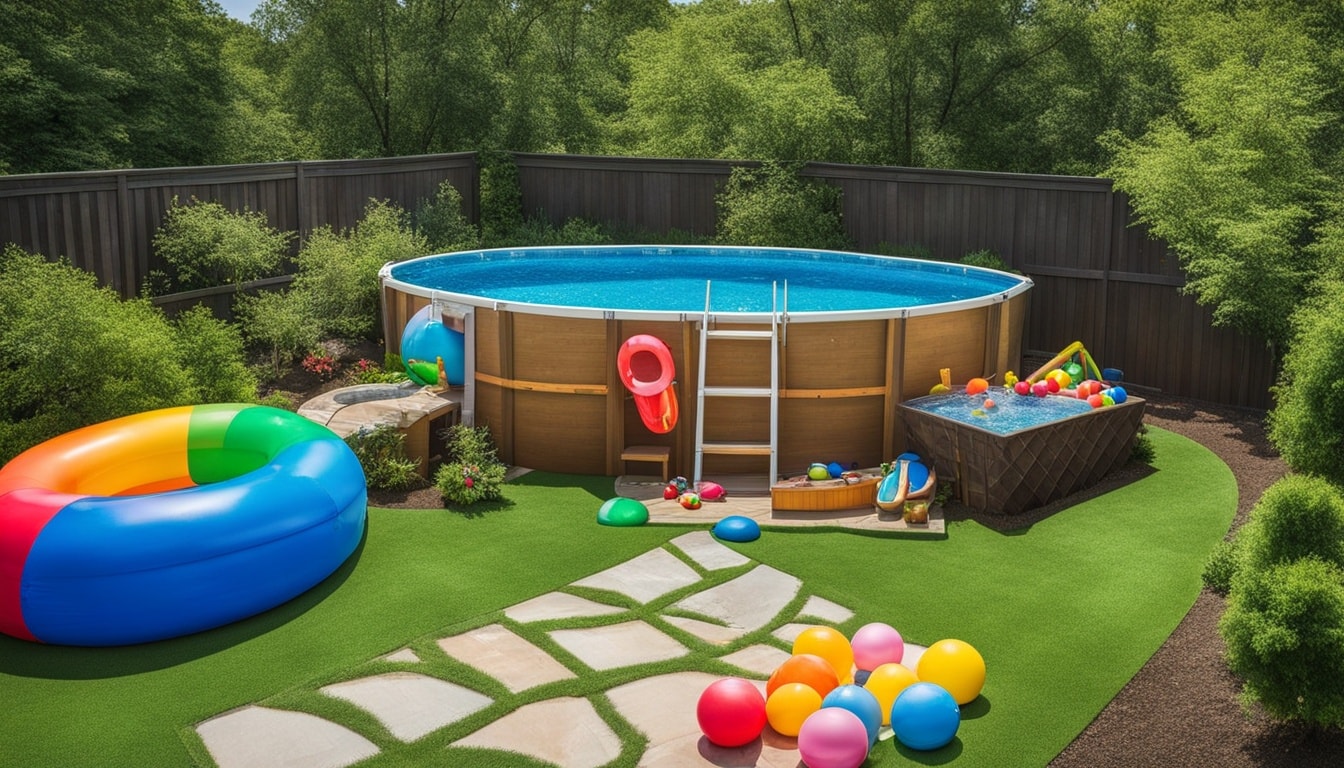
Above ground pools are now a popular choice for many homeowners. They are cheaper than in-ground pools. The COVID-19 pandemic made them even more popular as families wanted to enjoy their backyards more.

But, these pools have their own set of maintenance and repair issues.

The Rise of Above Ground Swimming Pools

Above ground pools are loved for being affordable and easy to set up. They let homeowners add a swimming area without the big costs of in-ground pools.

Common Pool Repair Issues and DIY Solutions

Some pool problems need a pro, but many can be fixed by the owner. Issues like leaks, clogged lines, bad water, and wear and tear can be handled at home. Learning DIY fixes can save time and money.

a beautiful above ground pool in a lawn

This part talks about the growing popularity of above ground pools and common repair issues. With the right info and DIY skills, owners can fix many problems themselves. This keeps their pool in great shape.

Repairing Tears and Holes in Pool Liners and Covers

Keeping your pool liner and cover in good shape is key for your pool’s safety and life. Vinyl liners are a great choice because they’re affordable. But, they can get damaged by sharp things, garden tools, or falling debris. It’s important to know how to fix these damages to keep your pool safe.

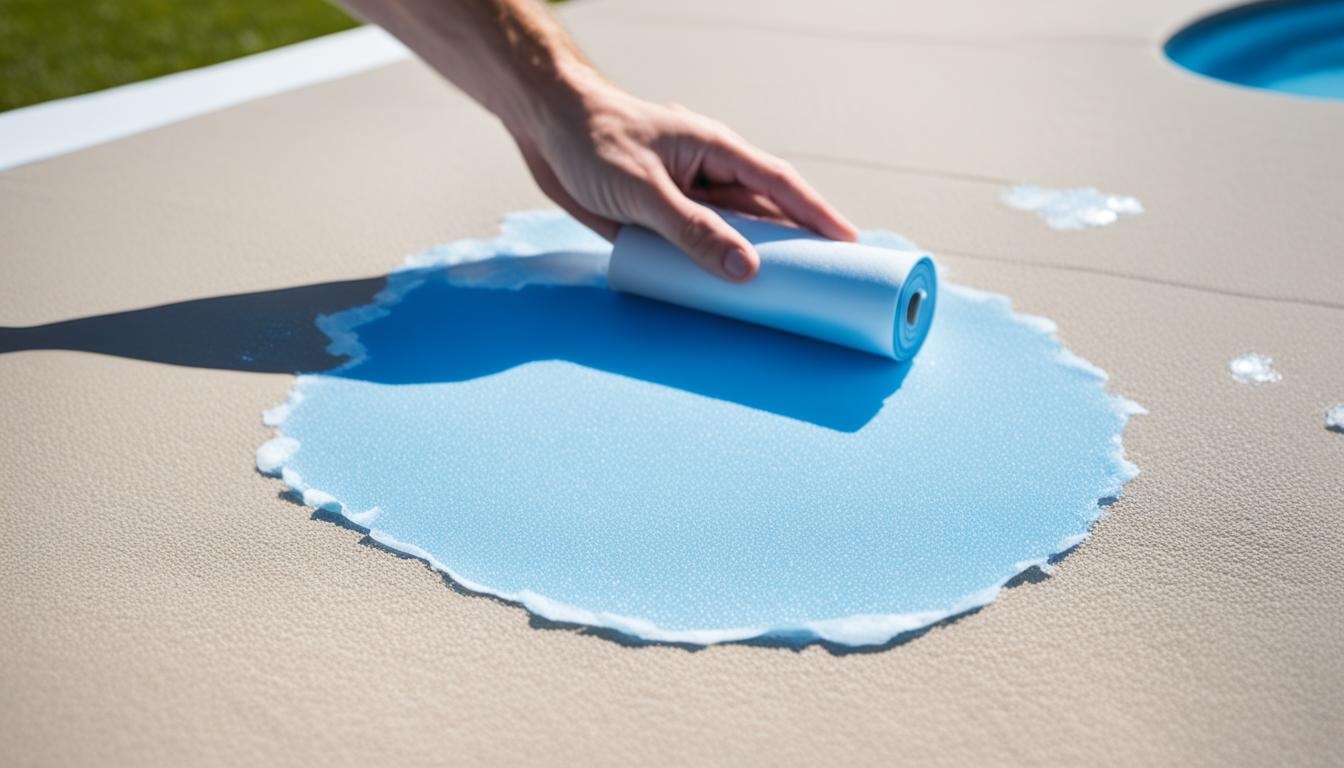
Patching Vinyl Liner Tears Above the Waterline

For tears or holes above the water, you can use a vinyl pool patch kit and clear, waterproof duct tape. These patches can seal the damage and stop more problems. But remember, these fixes aren’t permanent and might need to be replaced or strengthened later.

Fixing Underwater Liner Tears and Holes

For underwater tears or holes, you need a special fix. Use underwater pool patch kits made just for this. After applying, put a weight on the patch to keep it in place. If you have an INTEX or similar inflatable pool, you’ll need to drain the water to fix any underwater damage.

Looking after your pool liner and pool cover is key for your pool’s safety and life. Whether it’s a vinyl liner tear or a hole, acting fast with the right pool patch and vinyl adhesive can fix your pool repair easily.

Patching pool liner in an above ground pool

Addressing Concrete Pool Leaks

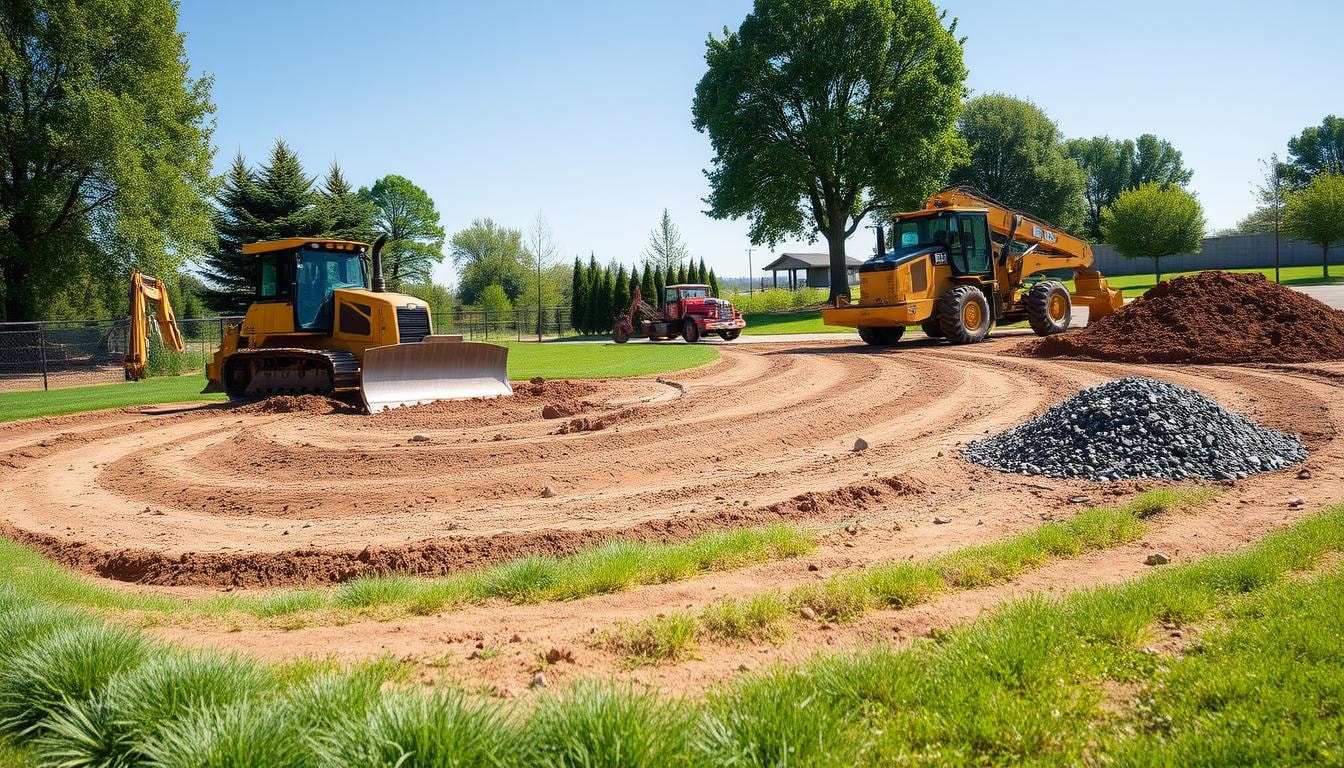
Leaks in concrete in-ground pools are harder to fix than leaks in above ground pools. Concrete pool leaks can come from issues with the pool structure, fittings, or plumbing. You can fix leaks around jets, lights, and skimmers with special silicone caulk. But, you’ll need a pro for main drain leaks.

Plumbing leaks are often the toughest, needing digging to find and fix. Some say to try a quick fix by using a sealer in the skimmer. But, this might not work every time. For concrete pool leaks, it’s smart to get help from a pro pool repair service.

  • Leaks around fittings like jets, lights, and skimmers can often be sealed with a silicone caulk specifically made for underwater use.

  • Main drain leaks typically require professional replacement.

  • Plumbing leaks can be the most complicated, potentially involving excavation to locate the source and replace pipes.

  • Some pool experts suggest trying a stopgap measure first, using a pool sealer product poured into the skimmer, but this may not always be effective.

  • For concrete pool leaks, it’s generally best to consult a professional pool repair service to properly diagnose and address the issue.

Fixing concrete pool leaks quickly saves money, water, and swimming time. It’s wise to talk to a pro for these tricky problems.

Unclogging Pool Lines and Skimmers

Keeping your pool system working right is key for a healthy and fun pool. Clogs in water intake and outtake lines, or a clogged skimmer, are common problems. These clogs slow down water flow, stress the pump, and could cause it to fail if not fixed.

Clearing Clogged Water Intake and Outtake Lines

Homeowners can often fix these clogs by themselves. Use a Drain King nozzle with a garden hose to clear the lines. High-pressure water can knock out debris, making sure water flows right. This simple fix keeps your pool lines healthy and saves you from expensive pool pump repairs later.

Resolving a Clogged Skimmer or Main Drain

A clogged pool skimmer slows down water flow and stresses the pump. To fix it, use the Drain King nozzle in the skimmer intake. For a clogged pool drain, aim the Drain King at the drain cover to clear debris.

Regular pool maintenance is key to a well-running pool. Clearing clogged pool lines and skimmers helps your pump last longer and saves you from expensive DIY pool repair costs.

Installing a Sump Pump for Leak Protection

Owning an above ground pool means you’ll face maintenance and repair challenges. Installing a sump pump in your basement or foundation is a key step. A small leak can cause big problems like water damage, mold, and mildew if not fixed.

A sump pump is vital for preventing water damage. It pumps out extra water that gets into your foundation. Experts say put in a sump pump before a leak happens, not after.

There are two main types of sump pumps:

  • Submersible pumps: These go right into the sump pit and work well at removing water. But, they cost more and can be harder to keep up.

  • Pedestal pumps: These sit above the sump pit and are cheaper. But, they might be louder and not as good in heavy water flow.

The price to install a sump pump changes based on the pump type and how hard it is to install. On average, you might pay 0 to 0 to install it yourself. Or, it could cost up to ,000 for a pro to do it, including digging a new pit and setting up a discharge system.

Keeping the sump pump in good shape is important. Make sure to pour water into the pit to check it’s working right. This way, pool owners can save their home from costly water damage.

Maintaining Proper Chlorine and pH Levels

Keeping an above ground pool clean and safe means paying attention to its water chemistry. You need to test and adjust the chlorine and pH levels often. Chlorine kills algae, bacteria, and other bad stuff. But, it can lose strength from the sun and chemicals like sunscreen.

Testing and Adjusting Chlorine Levels

Experts say to keep chlorine levels between 2-4 parts per million (ppm) in above ground pools. Doing a weekly “shock treatment” with a powdered chlorine product helps clean the water. Most pools use 2-4 of the 3-inch chlorine tablets per week in a floating chlorinator.

Testing and Balancing pH Levels

Keeping the pH level right, between 7.2-7.6, is key for pool upkeep. Wrong pH can make chlorine and other chemicals less effective. Digital water testers make it easy for homeowners to check and keep the right chlorine and pH levels.

Regular upkeep, like testing and adjusting chlorine and pH, is key for a clean, clear pool. By following these tips, pool owners can have a fun and safe swimming season.

Running the Pool Pump and Cleaning Filters

Keeping your above-ground pool clean means taking care of the pump and filters. Experts say to run the pool pump for at least 8 hours a day. This helps keep the water moving and stops algae from growing. Also, clean the pool filter every week by taking it out and rinsing it.

It’s key to change the filter cartridge when needed, as the maker suggests. A filter that’s not working right won’t catch dirt well. So, changing it keeps your pool water clean.

How you maintain your pool filter depends on its type. Here are some basic tips:

  • Sand filters need a weekly backwash and rinse to get rid of dirt.

  • Cartridge filters should be deep cleaned 2-3 times a year and replaced every 2-3 years.

  • Diatomaceous earth (D.E.) filters get deep cleaned 3-4 times a year, and grids should be replaced every 2-3 years.

By following these steps, you can keep your above-ground pool clean and ready for fun all season.

Vacuuming and Using Solar Blankets

Keeping an above ground pool clean is more than just filtering the water. You must vacuum often to remove dirt, leaves, and other stuff. This stops algae from growing and keeps the water clear. You can use a manual vacuum or a robotic one made just for above ground pools.

Regular Vacuuming for Debris Removal

Pool filters do a lot to keep the water clean, but they miss some debris. Vacuuming is key for keeping your pool clean. Some battery-powered vacuums don’t work well, leaving dirt behind.

Experts say to use a vacuum hooked up to a port or skimmer for better cleaning. Make sure the pool is filled right and use a skimmer plate to catch big debris and hold the hose.

Benefits of Using a Solar Blanket

A solar pool blanket offers many benefits for pool owners. It keeps the pool safe from rain and debris, saves on heating costs, and cuts down on water loss. It’s smart to drain most of the water from the cover before taking it off.

Fill the pool right for better vacuuming. With the right care, you can have a clean, efficient pool all season.

Winterizing Your Above Ground Pool

As cold weather comes, getting your above ground pool ready for winter is key. Doing this right keeps your pool safe from freeze damage. It also makes sure it’s ready to go when it gets warm again.

Start by giving your pool a final clean. Clean the walls, vacuum the bottom, and skim the surface to get rid of debris. Then, adjust the pool’s chemicals. Make sure the alkalinity, pH, and calcium hardness are all in the right spots.

  • Add winter chemicals to the pool. Use an algaecide and a pool closing chemical to stop algae and keep the water clear when you’re not using it.

  • Put away the pool’s accessories like the ladder, rails, and skimmer. Drain and disconnect the pool pump, filter, and other gear to keep them safe from the cold.

  • Lower the pool water level to 4-6 inches below the skimmer. This stops the water from freezing and harming your pool.

  • Put a protective air pillow over the pool and make sure the winter cover is tight. Use cable, winch, wall bags, or cover clips to keep it sealed well.

Experts say don’t drain your above ground pool fully for the winter. It can actually cause more problems. By following these steps, you keep your pool safe from freeze damage. And it’ll be ready for warm weather again.

Experience the Ease of Finding the Right Pros with FindPros!

At FindPros, we simplify the process of connecting you with top-rated local professionals for your home projects. By filling out our quick survey, you can effortlessly discover the best options tailored to your specific needs. Enjoy the competitive edge of getting the best pricing as multiple pros vie for your job, ensuring you receive quality service at an unbeatable price.

Our platform not only helps you find skilled professionals but also allows you to choose those you feel most comfortable working with. Answer a few simple questions about your project, and within seconds, you’ll be matched with trusted local pros ready to bring your vision to life. Compare quotes, read reviews, and select the perfect pro for your job with confidence!

Conclusion

Above ground pools are a great choice for those wanting a pool at home without spending a lot. They need regular pool maintenance and sometimes repairs to stay in good shape. Homeowners can do many repairs and upkeep tasks themselves, like fixing leaks and balancing chemicals, which saves money and time.

This guide gives pool owners the tools and advice they need for a worry-free pool. It helps with both simple DIY repairs and complex issues. Pool lovers can now take care of their pools with confidence and keep them looking great.

By focusing on pool pump upkeep, filtration, and winterizing, homeowners can make their pools last longer. This way, they can enjoy their backyard oasis for many years.

Frequently Asked Questions (Above Ground Pool Repair)

Homeowners often face issues like fixing liner tears, unclogging lines, and keeping water chemistry right. They also need to winterize the pool for cold weather.
Use a vinyl pool patch kit and clear, waterproof duct tape for tears above the waterline. For underwater tears, you’ll need a special underwater patch kit. Always follow the instructions and use a weight to keep the patch in place.
Clear clogs with a tool like the Drain King nozzle on a garden hose. Blast high-pressure water through the lines and skimmer. For the main drain, use the Drain King to clear it directly.
A small leak can cause big problems like water damage and mold. A sump pump keeps water out, saving you from costly repairs.
Keep chlorine at 2-4 ppm and do weekly “shock treatments” with powdered chlorine. Also, balance the pH to 7.2-7.6 to make chlorine work better.

Yard Grading

Above Ground Pool Repair Near You

Can’t find what you are looking for?

How It Works

  • Answer a few questions about your home project.
  • Within seconds, get matched with top-rated local pros.
  • Compare quotes and choose the best pro for the job.

All Service Pros

Mountain View, CA

See only Pros that service your area.

    Yard Grading In Your Area

    Hiring a Yard Grading Professional: What to Expect

    Meta Description:

    Discover what to expect when hiring a yard grading professional. Learn about costs, processes, and benefits of expert yard grading for proper drainage and landscaping. Yard Grading A flat yard might seem ideal, but it can cause drainage problems. These issues may damage your lawn and home’s foundation. A lawn sloped toward the house can also lead to water collecting around it. The best layout is a lawn that gently slopes away from your home. If your yard isn’t set up this way, you might need yard grading. This can be a big project, but it’s worth it to prevent water damage. Hiring a pro can help correct your yard’s slope for proper water flow.

    Key Takeaways

    • Proper yard grading is essential to ensure proper drainage and prevent water damage to the home’s foundation.
    • Hiring a professional yard grading contractor can streamline the process and provide expertise to ensure the job is done correctly.
    • Expect the yard grading process to involve correcting the slope of the yard to ensure rainwater flows away from the home.
    • The project can take 12-24 hours of labor over 2-3 days for a professional, or 5-7 days for a DIY project.
    • Costs can range from a few hundred dollars for a DIY project to ,000 or more for a professional job, depending on the size and scope of the project.

    Understanding Yard Grading

    What is Yard Grading?

    Yard grading shapes your yard’s slope to ensure proper drainage. It creates a gradual incline to direct rainwater away from your home. This process protects your property from water damage and soil erosion. Grading should have a downward slope of one inch per foot. This slope should extend 10 feet beyond the foundation. The maximum slope shouldn’t exceed three inches per foot. Leveling a yard involves filling holes and flattening hills. You can spot-fill holes, add new fill dirt, and flatten with a board or tiller. Grading controls water flow by adjusting the land’s slope. It prevents water from pooling around the foundation. The slope should be at least 3% away from the home’s foundation. For patio slabs and sidewalks, grading should be 1/4 inch per foot away from the home. This ensures proper drainage for these features.

    Benefits of Yard Grading

    Proper yard grading solves many problems for a home’s lawn and foundation. It prevents water runoff that can damage foundations. Yard grading addresses issues like soggy lawns, standing water, and soil erosion. Yard grading improves proper drainage, directing excess water away from homes and landscaping. This prevents water damage and standing water issues. A well-graded yard enhances the landscape’s aesthetic and makes it more functional. Proper yard leveling makes lawn maintenance easier and more effective. It addresses poor leveling and improper drainage. This helps protect a home’s value from potential water damage. Yard grading enhances outdoor spaces and prevents structural problems. It optimizes drainage, safety, and appeal. Investing in professional grading services can be a smart choice for homeowners.

    Preparing for a Yard Grading Project

    yard grading project

    Homeowners should carefully assess their property before starting a yard grading project. This approach can help ensure a smooth and successful outcome. Identifying potential obstacles is crucial for the project’s success.

    Identifying Potential Obstacles

    Check the home’s perimeter for low-lying pipes, vents, or utility lines. These could be affected by changes in the yard’s slope or grade. Protect basement windows that might be covered by soil. Install window wells to keep dirt away from the glass. Mark utility lines in the top layers of soil clearly. This prevents accidental damage during the grading process. Large yard grading projects may require permits from local authorities. This is especially true for significant changes to the yard’s slope or grade.

    • Inspect the yard for any low-lying pipes, vents, or utility lines that could be affected by the grading project
    • Ensure basement windows are protected with window wells if the grade will be raised
    • Mark all utility lines in the top layers of soil to avoid accidental damage
    • Obtain necessary permits from local authorities for major yard grading projects

    Addressing these potential obstacles helps ensure a smooth yard grading project. Taking time to prepare can save homeowners from future headaches.

    The Yard Grading Process

    Proper yard grading creates a well-drained and visually appealing outdoor space. Grading projects involve removing 4 inches of topsoil to work on the subsoil. Fill dirt builds up new high areas, and the soil is compacted using plywood and a tamper. Homeowners should remeasure the grade to confirm a 2-5% slope before planting. This gentle slope ensures proper drainage and prevents water accumulation around the home.

    1. Assess yard conditions and identify high and low points.
    2. Plan the grade and drainage system, marking key areas with flags or spray paint.
    3. Use a string level to establish grade lines and guide the process.
    4. Excavate or fill marked areas to achieve the planned grade, compacting the soil.
    5. Smooth out the surface, checking for inconsistencies and making adjustments.
    6. Clean up the site and add final touches.

    The diy yard leveling process can take 5-7 days for homeowners. Professional services may complete it in 12-24 hours. The project duration depends on the size and complexity of steep slopes. Following these steps creates a well-graded yard with proper drainage and enhanced landscape aesthetics.

    Hiring a Professional Yard Grading Contractor

    Grading your yard? Hire a skilled yard grading contractor. They have the know-how and tools to slope your space for good drainage and looks. Pick a grading company that’s licensed and insured. This protects you from accidents or damage. Ask about their experience in land grading and leveling. Get quotes from several yard grading contractors. This helps you find the best deal. You’ll also ensure you’re working with a trusted pro who can deliver results. Good yard grading keeps your outdoor space healthy and attractive. A skilled yard grading contractor will do top-notch work. This protects your investment and boosts your property value.

    Cost Considerations

    yard grading cost

    Yard grading costs vary based on project size and complexity. Homeowners typically spend 0 to ,200 for land leveling. Lawn grading can cost between ,400 and ,700. Smaller projects like pool or patio grading may run 0 to ,000. Grading an entire yard can reach ,000. Equipment rental, soil materials, and permits add to the overall price. Labor costs range from to 0 per hour. The total depends on project scope and contractor experience.

    1. The cost of resloping for landscaping typically ranges from ,500 to ,600 for a 1,000 sq.ft. area.
    2. Backyard leveling cost varies from 0 for a small 250 sq.ft. yard up to ,200 for a 2,500 sq.ft. yard.
    3. The average price homeowners pay to regrade ranges from to per sq.ft. for yards between 5,000 and 10,000 sq.ft.
    4. Land leveling costs per acre range from ,000 for a 1/5 acre up to ,000 for a full acre.
    5. The cost to level a yard varies based on the inclination degree, ranging from ,000 for a 1-foot inclination to ,400 for a 5-foot inclination.

    Existing soil condition and obstacles can affect the overall cost. Additional landscaping work may also impact the price. For an accurate estimate, consult a professional yard grading contractor.

    Maintaining Your Newly Graded Yard

    After yard grading, it’s vital to establish new grass cover. This prevents soil erosion and promotes healthy growth. Planting grass seed or laying sod can stabilize fresh topsoil and create a lush landscape. Regular watering is key for new grass. Keep the soil moist by watering daily or as needed. This encourages deep root growth and strengthens the turf. Once established, reduce watering frequency. Transition to a less frequent but deeper watering schedule. This helps maintain a healthy lawn.

    • Seed new grass or lay sod to provide ground cover and erosion control
    • Water the new grass daily or as needed to keep the soil consistently moist
    • Reduce watering frequency as the grass becomes established
    • Mow the lawn regularly to maintain a healthy, even growth
    • Consider applying a slow-release fertilizer to support the new grass

    A well-maintained graded yard with new grass prevents erosion. It also provides an attractive outdoor space. Follow these steps to enjoy your new yard for years.

    Hiring a Reputable Contractor

    Homeowners need to be picky when selecting a yard grading contractor. The right expert can ensure a successful outcome. Look for licensed, insured, and experienced professionals for your yard grading needs. Experience matters when hiring a yard grading contractor. Aim for professionals with over 40 years in the industry. Contractors familiar with local soil and climate conditions are ideal. Proper education and training are crucial for grading companies. This ensures correct drainage and structural integrity. Check the contractor’s history and quality of previous jobs. Get multiple quotes to find the best deal for your project. Compare offers from different yard grading contractors. This helps ensure you’re getting a fair price.

    Find the Right Pros for Your Yard Grading Needs

    Ensuring proper yard grading is crucial to prevent drainage issues and water damage. But finding the right landscape grading professionals for your project can be a challenge. That’s where FindPros comes in. Simply answer a few questions about your yard’s size, slope, and any uneven areas or sunken spots, and we’ll match you with top-rated local pros who can tackle your land clearing and grading needs. Whether you require a small project like fixing a French drain or need to rework your entire yard’s slope and drainage, FindPros will provide you with competitive quotes from skilled professionals. They’ll work with you to create the perfect grading plan, using the right equipment like skid steer loaders, to ensure your yard is graded correctly and prevent erosion, water pooling, and other issues, even during the rainy season. Get the best pricing when multiple pros compete for your job and find the professionals you’ll get along with best.

    Conclusion

    Yard grading is crucial for preventing water damage to your home’s foundation and lawn. It corrects the yard’s slope, ensuring runoff flows away from the house. This prevents standing water, soil erosion, and foundation cracks. Hiring an experienced contractor for yard grading can provide long-term benefits for your home. It improves water flow and protects the basement from flooding. A well-graded yard also creates a more visually appealing outdoor space. Proper drainage is vital for your home’s landscaping and structural integrity. Investing in professional yard grading services safeguards your property. It helps maintain a thriving, well-kept yard for years to come.

    FAQs

    What is proper yard grading and why is it important?

    Proper yard grading refers to adjusting the slope of your yard to ensure water flows away from your home. This is important to prevent drainage issues, water damage, and soil erosion around your property.

    How can improper grading affect my landscaping and home?

    Improper grading can lead to water pooling, breeding grounds for pests, and damage to your home’s foundation. It can also make your lawn and flower beds uneven and difficult to maintain.

    What factors should I consider when planning a yard grading project?

    When planning a yard grading project, you should consider the current slope of your yard, the size and layout of your property, and any existing landscaping features like retaining walls or French drains. It’s also important to account for the yard’s high and low points.

    How do I determine the ideal slope for proper drainage?

    The ideal slope for proper drainage is about one inch of drop for every one foot of distance, extending at least 10 feet away from your home’s foundation. This mild incline helps ensure water flows away from your house and prevents water pooling.

    When should I hire a professional for yard grading versus doing it myself?

    For larger yard grading projects that involve significant changes to the slope or the use of heavy equipment like skid steer loaders, it’s generally best to hire a professional grading contractor. They have the expertise and tools to ensure the job is done correctly and efficiently. Smaller projects with minimal changes to the yard’s grade may be suitable for a DIY approach.

    Wrought Iron Fence Repair

    Above Ground Pool Repair Near You

    Can’t find what you are looking for?

    How It Works

    • Answer a few questions about your home project.
    • Within seconds, get matched with top-rated local pros.
    • Compare quotes and choose the best pro for the job.

    Wrought Iron Fence Repair In Your Area

    Need Wrought Iron Fence Repair? Here’s What to Expect

    Meta Description: Discover expert tips for wrought iron fence repair. Learn about costs, DIY methods, and when to call professionals. Restore your fence’s beauty and durability today.

    Wrought Iron Fence Repair

    Wrought iron fences add elegance and security to your property. They can withstand harsh conditions but may need repairs over time. Regular upkeep prevents damage and extends your fence’s lifespan.

    This guide explores various repair methods for wrought iron fences. You’ll learn how to tackle common issues and maintain your fence’s beauty.

    Key Takeaways

    • Wrought iron fences require regular maintenance to prevent rust, cracks, and other damage.
    • Professional repair services can address issues like rust, bends, cracks, and worn paint to enhance the fence’s durability and aesthetics.
    • Specialized products, such as rust-resistant paint and metal fillers, are essential for maintaining the quality and appearance of repaired wrought iron fences.
    • Timely inspections and repairs can help extend the lifespan of your wrought iron fence.
    • Obtaining a precise quote is crucial to understanding the cost of wrought iron fence repair for your specific project.

    Wrought Iron Fence Repair: An Elegant Solution

    Wrought iron fences are known for their strength and durability. They can withstand harsh weather and offer design versatility. These fences provide top-notch security, acting as a strong deterrent to intruders.

    Installing a wrought iron fence can boost property value. It improves curb appeal and offers practical benefits like increased security. Iron Transformation provides various wrought iron fencing options for different needs.

    Experts at Iron Transformation ensure flawless fence installations. They can diagnose issues and provide tailored solutions to restore fence integrity. Their painting services use high-quality coatings designed for harsh elements.

    Regular maintenance prevents rust and corrosion in wrought iron fences. Iron Transformation specializes in restoring worn-down fences. This extends their lifespan and enhances their appearance.

    Property owners can choose from various designs and finishes. This allows them to match their style and complement architectural elements. Wrought iron fence gates add security and elegance to properties.

    Wrought iron fences are timeless, elegant, and secure. With Iron Transformation’s expertise, homeowners can enjoy many benefits. These include durability, customization, and enhanced property appeal.

    Rusty Wrought Iron Fence Repair: How to Do It?

    Wrought iron fences are elegant and durable. But they can rust due to weather and poor maintenance. You can fix rusty fences with the right methods.

    Identifying and Addressing Rust Issues

    First, check the whole fence for rust damage. Look closely at areas where moisture collects. Use a wire brush to remove loose rust.

    Make sure the surface is smooth for the next step. This prep work is key for a good repair.

    Preparing the Surface for Repair

    Clean the area with a degreaser or mild soap. This removes dirt that could mess up the repair. Rinse well and let it dry fully.

    Applying Rust Converter and Primer

    Use a rust converter on affected areas. It changes rust into a stable compound. Then, apply metal primer for protection.

    This creates a strong base for your repair. It also helps the fix last longer.

    Repainting for Long-Lasting Protection

    Repaint the whole fence with outdoor metal paint. Choose paint made for wrought iron. Apply thin, even coats following the maker’s instructions.

    Regular repainting keeps your fence looking good. It also stops new rust from forming.

    Fixing a rusty wrought iron fence takes time and care. But it can make your fence look new again. These steps will help your fence stay beautiful for years.

    What Stops Rust on Wrought Iron?

    Wrought iron fences need care to stay beautiful. Rust is their biggest enemy. Let’s explore ways to fight rust and keep your fence looking great.

    • Regular Cleaning and Maintenance: Clean your fence with water and mild soap often. This removes dirt that can cause rust. Check for chipped paint or cracks. These spots let moisture in and speed up rusting.
    • Applying Rust-Resistant Coatings: Use rust-resistant primer and paint to protect your fence. Choose paints made for outdoor metal surfaces. These often have additives that stop rust. Reapply these coatings every few years.
    • Minimizing Moisture Exposure: Too much moisture can make wrought iron rust. Keep your fence away from sprinklers and standing water. Use a rust inhibitor or sealant for extra protection.

    These steps will help stop rust on your wrought iron fence. Regular upkeep is key. With proper care, your fence will stay elegant for years.

    How to Repair Wrought Iron without Welding?

    Wrought Iron Fence Repair

    Minor iron fence repair doesn’t always need welding. Metal epoxy can fix small cracks or breaks. Bolting can secure loose or broken rails and panels.

    For larger breaks, use clamps or brackets as a temporary fix. These methods work until you can arrange welding for a permanent solution.

    Using Metal Epoxy for Small Cracks and Breaks

    Metal epoxy is a strong adhesive for wrought iron fence repairs. It bonds small cracks and breaks without welding. Proper surface prep ensures the epoxy sticks well.

    Bolting Loose or Broken Rails and Panels

    Metal bolts, nuts, and washers can fix loose or broken fence parts. This method works well for repairing iron fences without welding. Align the pieces correctly and tighten bolts for a lasting fix.

    Temporary Clamping and Bracketing

    Clamps or brackets can hold large breaks in place temporarily. This quick fix works until you can weld the fence. Use sturdy clamps that can support the fence’s weight.

    Wrought Iron Fence Repair Cost

    Wrought iron fence repair costs vary based on damage, materials, and labor. For an accurate quote, consult a professional fence repair company. They can assess your specific project needs.

    The national average cost to repair a metal fence is $600 to $1,000. This typically covers 50 linear feet of fencing repair. It includes rust removal, painting, and resecuring 4 posts.

    Wrought iron fences have the highest repair costs, averaging $30 to $50 per linear foot. Steel fences cost $18 to $25 per linear foot. Aluminum fences range from $25 to $40 per linear foot.

    Common repair costs for metal fences include:

    • $80 to $100 per post for resecuring a post
    • $100 to $200 per affected railing for loose or missing railings
    • $100 to $350 for repairing a hole in the fence
    • $120 to $400 per post for repairing or replacing a broken post
    • $250 to $1,000 per fence section for repairing a leaning fence

    Rust removal and painting a metal fence costs $7 to $10 per linear foot. Fixing a twisted metal fence section ranges from $150 to $400 per 6-foot section.

    Your project’s cost may differ based on its specific needs. A fence contractor can provide a personalized estimate for your wrought iron fence repair.

    Can Bent Wrought Iron Be Repaired?

    Wrought iron fences are elegant and timeless. However, they can bend due to impact damage, structural stress, or poor installation. The good news? In many cases, bent wrought iron can be fixed.

    Heat Treatment for Bending

    Heat treatment works best for severely bent wrought iron. This method softens the metal, allowing it to be reshaped. Skilled hands and special tools are needed to avoid damaging the iron.

    Cold Bending for Minor Adjustments

    Cold bending suits minor fixes. It involves carefully reshaping the iron without heat. This method works for small corrections but requires caution to prevent further damage.

    Replacing Severely Bent Sections

    Sometimes, replacing bent sections is the best option. This ensures the fence’s strength and looks. Replacement may be needed to restore the fence’s original condition.

    Understanding these repair methods helps homeowners and fence contractors make smart choices. The goal is to bring the wrought iron fence back to its former beauty.

    Does Wrought Iron Need to Be Painted?

    Wrought iron fences offer timeless elegance but require regular upkeep. Proper painting is crucial for their maintenance. Wrought iron fences can develop rust and pitting over time. This can cause color fading and overall appearance deterioration.

    Surface Preparation for Painting

    Proper surface prep is essential before painting wrought iron fences. Remove rust or loose paint with a wire brush or sandpaper. Clean the surface with a 50/50 water-vinegar solution to remove grime.

    Once clean and dry, prime the fence with a rust-inhibiting primer for metal surfaces. This step ensures better paint adhesion and longevity.

    Choosing the Right Paint for Outdoor Use

    Select a paint that can withstand outdoor elements for wrought iron fences. Oil-based paints are ideal, providing a durable, long-lasting finish. They protect the metal from sun, rain, and other environmental factors.

    Spray painting offers faster and more consistent coverage across the entire fence. It ensures an even finish for a professional look.

    Regular Repainting for Maintenance

    Repainting wrought iron fences every few years maintains their protective coating. It prevents new rust or corrosion from developing. Choose a dry, sunny day with moderate temperatures for the best results.

    Consider hiring a professional fence contractor for expert results. They can ensure the job is done correctly, saving time and money long-term.

    How Do You Fix a Crack in a Fence?

    Fixing a crack in a wrought iron fence is simple. It helps restore the fence’s structure and look. The key steps include cleaning, filling, and repainting the affected area.

    Cleaning and Drying the Cracked Area

    Clean the cracked area with a wire brush or sandpaper. Remove any rust, dirt, or debris. Make sure the surface is dry before moving on.

    This step ensures the filler or epoxy sticks well to the metal.

    Applying Metal Filler or Epoxy

    Apply a metal filler or epoxy made for iron or steel surfaces. Work it into the crack with a putty knife. Smooth it out to be level with the surrounding metal.

    This helps fill the gap and restore the fence’s strength.

    Sanding and Repainting the Repaired Area

    After the filler dries, sand the area for a smooth finish. This helps the new paint blend in with the rest of the fence.

    Apply a rust-stopping primer, then a matching topcoat of paint. This protects the repair and keeps the fence looking good.

    These steps will fix cracks in your wrought iron fence effectively. They’ll keep your fence strong and looking great for years.

    Stay safe by wearing eye protection and gloves when working on metal surfaces.

    The Importance of Timely Fence Repairs

    Your wrought iron fence needs regular care for security and looks. Quick fixes for rust, cracks, or bent parts prevent further damage. This keeps your fence strong and beautiful.

    Check your fence twice a year, in spring and fall. This helps catch seasonal damage early. You’ll save money by avoiding costly replacements later.

    • Regular maintenance can extend the lifespan of a fence, potentially saving homeowners from the need for costly replacements.
    • Inspections can help identify hazardous conditions like loose nails, sharp edges, or leaning sections that could cause injuries.
    • Preventing accidents and escapes through secure fences keeps pets and children safely within property boundaries.

    Hire pros for wrought iron fence repair. They’ll fix issues well and fast.

    A solid, well-kept fence boosts property value. It’s eye-catching for potential buyers. Quick repairs protect your investment and keep your yard secure.

    Fencing Fabric and Materials Explained

    Fencing material choice impacts appearance, durability, and maintenance needs. From wrought iron to steel and aluminum, your selection matters. Understanding different materials is key to finding the right fence for your property.

    Metal fences offer durability, security, and design versatility. Wrought iron boasts intricate charm from the 1800s. Steel and aluminum have become more popular in recent years.

    Steel fences excel in strength and ruggedness. They’re ideal for security and privacy needs. Aluminum fences are lightweight and resist rust. Both allow customization to match your property’s style.

    Chain link fences come in various heights and gauges. Common heights range from 3 to 12 feet. Material gauges include 6, 9, and 11. Vinyl coating adds protection against rust.

    Regular maintenance ensures fence longevity. This includes cleaning, rust removal, and protective coatings. With proper care, metal fences can last for decades.

    Consider security needs, property aesthetics, and local rules when choosing fencing material. Consult a professional fence contractor for informed decisions. They can ensure a successful installation that meets your requirements.

    Repairing Cast Iron Fences

    Cast iron fences offer charm and durability. Repairing them differs from wrought iron fences. Welding or metal epoxy work best for small cracks and breaks.

    Proper surface prep is crucial before repairs. Clean the area thoroughly and remove rust. Rust can weaken the fence’s structure.

    • Identify and remove all traces of rust on the cast iron surface.
    • Use a wire brush or sandpaper to clean the affected area, exposing the underlying metal.
    • Apply a rust converter or primer to prevent further deterioration and create a stable surface for the repair.

    Metal epoxy can fix small cracks or breaks. Clean the area and apply epoxy as directed. This restores the fence’s strength without welding.

    For major damage, welding may be best. Fence experts can assess the damage and choose the right method. They might replace parts or reinforce weak areas.

    Maintaining cast iron fences prevents future problems. Clean, paint, and apply rust-inhibiting coatings regularly. This protects the fence from weather damage.

    Address repairs quickly using the right techniques. This will keep your fence looking great for years to come.

    Choosing the Right Welding Method

    wrought iron fence repair

    The welding method you choose affects the quality of your wrought iron fence repair. Consider metal thickness, repair area accessibility, and cleanup needs. MIG, stick, or flux core welding can be key to success.

    Wrought iron fence railings are usually 1/8 inches thick. Fence posts near driveways are 4 or 6 inches thick. Their wall thickness is 7-gauge. Welding the rail to posts strengthens the fence but requires expertise.

    Welding a screw to the bracket needs less skill. It provides basic security by preventing tampering. Tack welding uses short welds to align metal parts during the process.

    Your choice depends on project needs, expertise, and desired outcome. Consider these factors for an effective, professional-looking repair. The right method ensures a lasting finish for your wrought iron fence.

    Choosing the Right Professional for Wrought Iron Fence Repair

    Selecting the right professional for wrought iron fence repair is vital. Look for a contractor with extensive experience and a proven track record. They should use top-quality materials and techniques to ensure proper repair.

    Expert contractors understand wrought iron’s unique challenges. They can fix issues like rust, bent bars, and loose connections. Their skills in welding and surface prep can restore your fence’s beauty.

    • Seek out fence repair companies that specialize in wrought iron and have a portfolio of successful projects.
    • Look for contractors who use high-quality rust inhibitors, primers, and paints designed for outdoor metal surfaces.
    • Verify that the contractor is licensed, insured, and follows industry best practices for safety and workmanship.

    Professional repair services can prevent costly future problems. A skilled contractor will fix current issues and offer maintenance tips. This approach protects your investment and boosts your property’s curb appeal.

    Choose a local specialist who knows your area’s climate. They can tailor their services to your specific needs. With the right pro, your fence will remain beautiful and secure for years.

    Discover FindPros: Streamlining Wrought Iron Fence Repair

    Dealing with wrought iron fence repair can be a hassle, but FindPros is here to make it easy. Whether you need to repair loose connections, remove rust, or even replace an entire panel, our network of top-rated local professionals can provide cost-effective solutions. Simply answer a few questions about your project, and we’ll match you with the best-suited pros in your area.

    Compare quotes, find the perfect fit, and get your original fence back to its former glory – all while ensuring the work is done right the first time. From applying paint to addressing holes in the ground, our experts have the skills and tools to handle any wrought iron, wood, or gate repair needed. Experience the convenience and cost-effectiveness of using FindPros for your next home improvement project.

    Conclusion

    A wrought iron fence is a beautiful and secure investment for any property. It needs care and maintenance over time. Addressing rust, cracks, and bends through timely wrought iron fence repair is crucial.

    This preserves the fence’s structural integrity, security, and visual appeal. Proper repair techniques and expert fence contractors ensure your fence enhances your property for years.

    Regular inspection, cleaning, and rust prevention maintain the durability of wrought iron fences. Rust converters, naval jelly, and rust-resistant coatings combat iron oxide and prevent corrosion.

    Addressing small dents and scratches promptly prevents bigger issues. Skilled fence repair professionals are crucial for fixing rusted wrought iron or cracks.

    They can assess damage, provide cost estimates, and perform necessary repair techniques. This ensures your fence remains secure and visually appealing for years.

    Frequently Asked Questions (Wrought Iron Fence Repair)

    Actual wrought iron is more expensive but extremely durable, while steel fencing is a more cost-effective option. True wrought iron requires specialized repair techniques, while steel panels can often be repaired or replaced more easily.
    Regular inspection and proper maintenance are key. Look for signs of rust, loose connections, cracks, or dents. Even small repairs can help maintain the fence’s integrity and prevent larger issues down the line.
    The cost of wrought iron fence repair can vary depending on the extent of the damage. Labor costs, materials, and the size of the affected area all play a role. For small repairs, a cost-effective approach may be to focus on applying a protective layer of paint. Larger repairs, like replacing an entire panel, can be more expensive.
    Removing rust from wrought iron requires the right tools and techniques. Start by cleaning the affected area thoroughly to expose the underlying metal. Then, use a rust converter or other specialized products to treat the rust and create a stable surface for repainting. Proper surface preparation is crucial for the new protective layer to adhere effectively.
    For small repairs, such as fixing loose connections or minor dents, you may be able to handle the work yourself with the right tools and approach. However, for more significant issues, like replacing sections or welding, it’s generally best to hire a professional wrought iron fence repair service. They have the expertise and equipment to ensure the repair maintains the fence’s integrity and aesthetic appeal.

    Wood Stove Repair

    Above Ground Pool Repair Near You

    Can’t find what you are looking for?

    How It Works

    • Answer a few questions about your home project.
    • Within seconds, get matched with top-rated local pros.
    • Compare quotes and choose the best pro for the job.

    Wood Stove Repair In Your Area

    Wood Stove Repair: How to Find the Right Professional

    Meta Description: Discover expert wood stove repair services to keep your home warm and safe. Learn how to choose the right professional for efficient and reliable maintenance.

    Wood Stove Repair

    Wood stoves need regular care for top performance and safety. Finding the right repair expert is key for any wood stove. These pros can spot issues and know the latest safety rules.

    Pros must stay current with changes and keep NFI certifications. They can renew by taking an exam or earning CEUs every three years. Course providers can apply for CEUs, which the CEU Committee approves.

    Continuing education is available at industry events and online. HE@RTH Online Training offers these classes for wood stove repair pros.

    Key Takeaways

    • Proper certification and ongoing education are essential for wood stove repair professionals.
    • Regular maintenance and inspections can help prevent costly wood stove repairs.
    • Choosing a reputable and experienced wood stove repair service is crucial for ensuring safe and efficient operation.
    • Understanding the common issues and repair costs can help homeowners budget for wood stove maintenance.
    • Professional wood stove repair services can extend the life and performance of your heating appliance.

    Considering the Risks and Responsibilities of Owning a Wood Stove

    A wood stove can efficiently heat your home at a lower cost. However, it comes with risks and duties. Proper upkeep is vital for safe and effective use of your wood stove.

    Fires are a major worry with wood stoves. Cracks in the stove or chimney can cause fires. Regular checks and fixes are crucial.

    The type of wood used affects creosote buildup in the chimney. This can lead to chimney fires.

    • Regularly clean the stove and chimney to prevent the accumulation of ash and soot.
    • Use well-seasoned, dry wood as fuel to minimize creosote buildup.
    • Inspect the stove and chimney for any cracks or damage and address them promptly.

    New wood stove owners should be extra careful. They need to learn about safe and efficient stove use. Proper maintenance and safety steps can reduce risks.

    Finding Reputable Repair Services

    wood stove repair

    Locating a skilled wood stove repair expert is crucial. Homeowners can use various methods to find the right service. These include personal recommendations and online reviews.

    Utilizing Word-of-Mouth and Online Reviews

    Personal referrals offer valuable insights into repair service quality. They reveal customer satisfaction and overall reputation. Online reviews provide a wider perspective on a company’s credibility.

    These reviews give detailed information that helps in decision-making. They’re especially useful for newcomers to a neighborhood. Considering both sources helps homeowners choose the best stove repair specialist.

    Repair pros who handle multiple issues save customers money. They prevent the need for hiring additional help. Services that fix various stove problems are preferred by customers.

    Identifying the Issue with Your Wood Stove

    Keep an eye on your wood stove’s performance to spot problems early. Look for weak flames, unlit burners, grease buildup, or malfunctioning parts. These signs may mean you need expert help.

    60% of wood stove issues are related to drafting problems causing excess smoke. These can come from chimney blockages, faulty door seals, clogged caps, or bad flue connections.

    20% of wood stove problems occur due to a home being too airtight. This can hinder proper drafting. In newer homes, 10% of cases may have issues from not enough internal air.

    Incorrect sizing of flues or chimneys causes about 15% of wood stove problems. Also, 90% of owners without self-cleaning glass doors need regular manual cleaning.

    Spot these issues early and call a trusted repair service. This helps prevent damage and keeps your wood stove running safely and efficiently.

    Wood Stove Repair: Brands and Types

    wood stove

    Wood stove repair services must consider your stove’s brand and type. Popular brands include GE, KitchenAid, Whirlpool, and Thermador. Wood stoves can be gas-powered or electric, each with unique repair needs.

    Repair services should have experience with many brands and types. This ensures they can fix any issues your wood stove may have. Skilled technicians can repair cracks, replace gaskets, and address chimney problems.

    Choose a repair service that knows your wood stove brand. This ensures repairs are done right the first time. It also helps your stove last longer and work better.

    A good repair service can handle simple tune-ups or complex fixes. Working with experts keeps your home warm and cozy all season long.

    Budgeting for Wood Stove Repairs

    Budgeting for wood stove repairs involves more than just the initial cost. It’s vital to assess the repair quality and long-term benefits. Quality workmanship ensures safe and efficient operation for years.

    Wood stove installation costs range from $325 to $4,000. Labor adds $250 to $800. Factors affecting price include heating capacity, chimney complexity, and stove pipe installation. Permits may cost $50 to $250 extra.

    Wood stove repair expenses vary widely. Chrome restoration can cost $1,000. Top replacement might also be $1,000. Sheet metal fabrication for restoration can add another $1,000 to your budget.

    Be prepared for wait times when sourcing rare components. These parts can be hard to find. Reputable repair services may charge more but often provide warranties.

    Opting for the cheapest repair isn’t always wise. Consider overall cost, repair quality, and potential risks. This approach helps you choose a reliable wood stove repair provider.

    Evaluating Repair Services

    Finding the right professional for wood stove repair is crucial. Careful evaluation of repair services is essential. Several key factors can help you choose the best option for your wood stove needs.

    Look for companies with proven experience in various wood stoves. Their expertise should cover cast iron wood stoves and wood burning stoves. Check if they’re skilled in wood burning appliance maintenance and repair.

    Reputable providers offer a wide range of services. These include welding, creosote removal, and seal replacement. They should handle issues like cracks, ash buildup, and fuel efficiency concerns.

    Assess the quality of repair work by checking for durable parts. Look for attention to detail and comprehensive warranties. A good company stands behind their work with guarantees.

    Responsive and professional communication shows commitment to customer satisfaction. Look for businesses that specialize in home repair. Choose companies known for clean, organized, and efficient service.

    Consider these key factors to make an informed decision. Choose a wood stove repair service that meets your needs. This approach ensures a positive and successful experience.

    Find the Right Wood Stove Pros with FindPros

    Having trouble finding the perfect wood stove repair professional for your cast iron wood stove, wood burning stove, or any other wood stove issues? Let FindPros help. Simply answer a few questions about your home project, and we’ll match you with top-rated local pros who can efficiently address concerns like fire hazards, cracks, gasket replacement, and more.

    FindPros connects you with competent technicians who can properly weld, replace parts, and get your stove functioning safely and reliably. Avoid the hassle of hunting for the right fit – let multiple qualified pros compete for your business to ensure you get the best pricing and service that fits your needs.

    Conclusion

    Proper wood stove repair and maintenance is crucial for safe and efficient home heating. It helps address issues like smoke leakage and reduced heat output early on. This can extend your wood stove’s lifespan and keep you warm for years.

    Wood stoves convert 80% of energy into heat. Keeping them in top shape is key for energy savings. About 75% of homeowners focus on maintaining their stoves for warmth and safety.

    Budget for repairs and regular upkeep to protect your wood stove. This helps avoid safety hazards and keeps heat output high. With proper care, your wood stove can be a reliable heat source for years.

    Frequently Asked Questions (Wood Stove Repair)

    The article mentions that repair services should have experience with various types of wood stoves, including cast iron wood stoves and wood burning stoves.
    The article discusses problems like smoke leakage, reduced heat output, cracks in the stove or chimney, creosote buildup, and malfunctioning parts that may need to be repaired.
    Experienced repair professionals can properly identify and fix issues, use durable replacement parts, and provide comprehensive warranties on their work. This ensures the wood stove operates safely and efficiently.
    The article explains that wood stove installation and repair costs can vary widely, with factors like brand, type, and complexity affecting the price. It’s important to consider the long-term benefits of quality workmanship over just the initial cost.
    The article advises homeowners to be vigilant for signs of problems like weak flames, unlit burners, grease buildup, or malfunctioning parts, and to contact a trusted repair service promptly to address the issue before it worsens.

    Wood Furniture Repair

    Above Ground Pool Repair Near You

    Can’t find what you are looking for?

    How It Works

    • Answer a few questions about your home project.
    • Within seconds, get matched with top-rated local pros.
    • Compare quotes and choose the best pro for the job.

    Wood Furniture Repair In Your Area

    Need Wood Furniture Repair? Here’s What to Expect

    Meta Description: Discover expert wood furniture repair techniques to restore your cherished pieces. Learn about fixing scratches, filling gaps, and matching finishes for a flawless look.

    Wood Furniture Repair

    I’ve painted many pieces of furniture over the past 8+ years. It’s great when a secondhand dresser has no broken parts or chipping veneer. However, most old furniture needs some fixing up.

    This article covers ways to repair damaged wood furniture. We’ll discuss removing contact paper and paint, fixing veneer, and eliminating odors. We’ll also explore repairing scratches, gouges, and chipped wood.

    Other topics include fixing ink-stained drawers and preventing bleed-through before painting. We’ll cover proper furniture prep and the burled wood debate. Lastly, we’ll share favorite products for DIY makeovers.

    Key Takeaways

    • Most old furniture being sold or given away has some issues that need to be addressed, highlighting the common occurrence of damaged furniture in the secondhand market.
    • The article covers a comprehensive range of wood furniture repair techniques, including removing contact paper, removing paint, repairing cracked or peeling veneer, and addressing various other types of damage.
    • The article prefers using wood filler and Bondo for repairing scratches and gouges in furniture, indicating their knowledge of effective repair materials.
    • The article provides guidance on preventing bleed-through before painting and properly prepping furniture for painting, emphasizing the importance of preparation in the restoration process.

    Common Wood Furniture Damage

    Second-hand or vintage wood furniture often has issues that need fixing. These problems include broken pieces, chipped veneer, and stuck drawers. Many of these damages can be fixed with the right methods and tools.

    Broken Pieces

    Older furniture often has broken legs, arms, or other wood parts. These can usually be fixed or replaced with some work. Strong wood glue or epoxy resin can rejoin broken parts.

    Clamp the repaired area and let it dry for a strong fix. This method works well for many broken furniture pieces.

    Chipped Veneer

    Veneer damage like blisters, cracks, and peeling is common in wood furniture. Small blisters can be flattened with heat. Larger ones may need careful slitting to fix.

    Lifted or chipped veneer can be reglued after removing old glue. This process can restore the furniture’s original look.

    Stuck Drawers

    Drawers in secondhand furniture often get stuck or hard to open. This can happen due to wood swelling or dust buildup. Cleaning the drawers thoroughly can help solve this problem.

    Applying wood lubricant or wax after cleaning can make drawers work smoothly again. This simple fix can greatly improve furniture functionality.

    Fixing these common issues can give new life to secondhand furniture finds. With proper repair techniques, your furniture can look fresh and fit your home perfectly.

    Removing Contact Paper from Wood Furniture

    Removing contact paper from wood furniture can be frustrating. This adhesive can be tough to remove without damaging the wood. However, there are effective techniques to safely remove contact paper from your furniture.

    Start by using a mild solvent like mineral spirits or rubbing alcohol. Apply it to a clean cloth and gently rub the contact paper. Work in small sections to loosen the adhesive for easier peeling.

    Be careful not to let the solvent soak into the wood. This could damage the finish. Use a plastic scraper or putty knife to gently lift stubborn edges.

    • Use a 80 grit sanding pad to remove the decoupage and original finish
    • Wipe off sanding debris with mineral spirits
    • Wait 24 hours for wood putty to set in extra holes
    • Leave 2 hours before applying another coat of Varathane classic wood stain
    • Wait 24 hours before applying Varathane Polyurethane protective finish
    • Wait 2 hours before applying a second coat of Varathane Polyurethane protective finish

    For lingering adhesive residue, use a small amount of furniture polish. You can also try contact paper remover to help break it down. Work slowly and carefully to avoid damaging the wood surface.

    With patience and the right techniques, you can remove contact paper from your wood furniture. Take your time and work carefully to restore its natural beauty without causing damage.

    Removing Old Paint from Wood

    Old paint can hide the beauty of wood furniture. Stripping it away can bring your piece back to life. There are many ways to remove paint and uncover the natural wood beneath.

    First, check if the paint contains lead. Lead-based paint is dangerous and needs special care. Use a test kit to find out. If lead is present, ask a pro for help.

    For regular paint, try a citrus-based stripper. It’s gentle and eco-friendly. Let it sit for 30 minutes to 24 hours. This makes the paint easy to scrape off.

    Other options include caustic, solvent, and biochemical strippers. These work well but are stronger. Use them with care.

    • Protect yourself with thick rubber gloves, a breathing respirator, and safety glasses.
    • Assemble the necessary tools, including a heat gun, scrapers, scrubbers, and plastic sheeting.
    • Wrap the furniture in saran wrap after applying the stripper to lock in the solution and allow the wood to absorb it.
    • Wipe down the wood with mineral spirits and sand to achieve a clean, natural finish.

    Removing old paint takes time and effort. But the result is worth it. You’ll enjoy seeing your furniture’s natural wood shine through.

    Repairing Cracked or Peeling Veneer

    Wooden furniture with wood veneer can face damage like blisters, loose veneer, and cracks. These problems can be fixed with the right tools and methods.

    Blisters

    Blisters in wood veneer result from trapped moisture or air pockets. To fix this, remove the blister using a utility knife or razor blade.

    Then, use wood glue or veneer adhesive to reattach the veneer. Clamp it in place until the glue dries completely.

    Loose Veneer

    If veneer is lifting or peeling, reattach it with wood glue or veneer adhesive. Apply glue to the underside of the veneer.

    Press it firmly back into place. Clamp it until the glue sets for a secure hold.

    Cracked or Broken Veneer

    For cracked or broken veneer, try patching the damaged area with wood filler or putty. Sand the area smooth before applying the filler.

    Let it dry completely. Once dry, stain or paint the repaired area to match the surrounding wood.

    Fixing these common veneer issues can restore your wood furniture’s beauty. With the right techniques and patience, you can revive your pieces.

    These repairs will extend your furniture’s lifespan. Your cherished wood items will look great for years to come.

    Eliminating Odors in Old Furniture

    wood furniture odor removal

    Old wood furniture often has unpleasant odors. But don’t worry! You can get rid of these musty smells with the right techniques. Wood’s porous nature traps odors over time.

    Bacteria and germs cause stale, musty smells in furniture. Up to 30% of vintage pieces may still smell after cleaning. Humidity also affects odor removal, so consider your local climate.

    Several methods can eliminate stubborn odors from old wood furniture. Try dehumidification, sunlight exposure, or odor-absorbing substances like vinegar, charcoal, or baking soda. For tougher smells, use diluted bleach or specialized deodorizers.

    Upholstered furniture needs extra care. Fabric traps moisture and breeds odors. Try steaming, using vinegar and water, or professional cleaning. Regular maintenance prevents musty smells from developing.

    Combine these strategies to refresh your old wood furniture. Be patient and persistent when tackling stubborn odors. The results are worth the effort!

    Wood Furniture Repair

    Scratches and chips can ruin your wood furniture’s beauty. But don’t worry! You can bring your favorite pieces back to life. With the right tools and methods, you can fix many problems.

    You can repair damaged dining tables, antique dressers, or scratched cabinets. There are easy solutions for most wood furniture issues.

    • Repairing Scratches and Gouges: Wood filler is great for small scratches and gouges. Choose a filler made for wood, like Bondo, which works well on bigger damages. Apply the filler and let it dry. Then, sand the area smooth. Finish by adding matching stain or paint.
    • Fixing Chipped Wood: Fixing chipped wood, like a broken drawer corner, takes more work. Clean the area and remove loose wood. Use wood glue to stick broken pieces back together. After the glue dries, use wood filler to smooth the surface. Sand, stain, and finish to complete the repair.

    With some effort, you can make your wood furniture look great again. This saves money compared to buying new pieces. Don’t be scared to fix small wood problems.

    Addressing Ink-Stained Drawers

    Ink or marker stains on wood furniture can be frustrating. But don’t worry! With the right approach, you can restore your treasured pieces’ beauty. Tackling ink stains is key for a successful wood furniture makeover.

    Ink-stained drawers are a common issue with wood furniture. These marks can make your furniture look neglected. However, you can easily address these stains with a few simple steps.

    1. Assess the Extent of the Damage: Check the drawers carefully to see how bad the ink stains are. Are they in one spot or spread out? This will help you choose the right cleaning method.
    2. Seal the Stains: Apply a primer or sealer like Shellac Zinsser primer to the stained areas. This creates a barrier and stops the stain from coming back during refinishing.
    3. Refinish the Drawers: After the primer dries, repaint or reapply a fresh finish to the drawers. Try using a tinted glaze or colorful decoupage for a unique touch.

    With care and creativity, you can transform your wood furniture into a stunning piece. The right tools and some effort can breathe new life into even tough wood furniture projects.

    Preventing Bleed-Through Before Painting

    Bleed-through can ruin wood furniture refinishing projects. It happens when wood tannins or dyes seep through paint. Proper priming is crucial to avoid this issue.

    Oak, walnut, cherry, and mahogany are prone to bleed-through. Vintage mahogany from the 1920s to 1940s is especially tricky. Water rings and burn marks can also cause problems.

    1. Shellac primer is a great solution for preventing bleed-through. Apply one or two coats before painting to seal in tannins.
    2. Water-based primers like Zinsser Bulls Eye 1-2-3 or Wise Owl’s stain-eliminating primer work well too. These options can effectively block bleed-through.
    3. Clean wood furniture with denatured alcohol first. This removes dust, polishes, or oils that could affect paint adhesion.

    Using the right preparation methods and primers is key. This approach saves time and money on wood furniture projects. You’ll achieve a flawless, professional-looking finish with these precautions.

    Proper Furniture Prep for Painting

    Preparing wood furniture for painting requires careful attention to detail. Key steps include thorough cleaning, strategic sanding, and applying a high-quality primer. These steps ensure a smooth, long-lasting finish that rejuvenates your wood furniture.

    Start by cleaning the furniture with vinegar and warm water. This removes dirt and grime that could interfere with paint adhesion. Next, assess the wood’s condition.

    If it’s in good shape, light scuff-sanding with 180-220 grit sandpaper may suffice. For damaged pieces, more extensive prep work is necessary.

    1. Sand the furniture using 80 grit sandpaper to remove existing finishes or imperfections.
    2. Smooth the surface with 220 grit sandpaper, ensuring a clean, even texture.
    3. Apply a high-quality primer, such as Zinsser Bulls Eye 1-2-3, to the furniture using a spray can for the best coverage and finish.
    4. Allow the primer to dry completely, then lightly sand the surface again to remove any remaining imperfections.
    5. For the final paint application, consider using a durable chalk-based paint, like Dixie Belle Chalk Mineral Paint, to achieve a beautiful, long-lasting finish.

    Proper prepping is crucial for a professional-looking painted wood furniture piece. Cleaning, sanding, and priming ensure a smooth, chip-resistant finish. Your efforts will result in a beautiful, durable piece.

    The Burled Wood Debate

    Burled wood furniture adds unique character to any space. Its captivating patterns make it a coveted treasure for homeowners. The wood furniture restoration community often debates how to handle these distinctive pieces.

    Burl wood furniture is rare and valuable. It results from unique growth or deformity in trees. Many experts advise against painting these prized pieces.

    Repairing damaged wood furniture, including burled wood, offers several options. Professional restorers are best for major repairs. They have the expertise to handle intricate details.

    Homeowners can tackle minor issues themselves. They can use wood cleaners and glue loose veneer. Adding wood filler and painting small chipped areas are also possible.

    For severely damaged parts, painting those areas is an option. This creates a two-tone look while preserving the rest. Skilled painters can even create faux burled wood finishes.

    The decision to refinish or paint secondhand burled wood furniture depends on personal taste. The furniture’s condition also plays a role. Opinions remain divided between refinishing and preserving the original look.

    wood furniture DIY makeovers

    Wood Furniture Maintenance Tips

    Caring for wood furniture keeps it beautiful for years. Regular dusting and protection from environmental factors are key. These tips will help maintain your wood furniture’s best look.

    Dust your wood furniture weekly with a soft, lint-free cloth. This prevents grit buildup that can dull the finish. Guardsman suggests using lemon oil-based polish yearly to nourish the wood.

    • Dust furniture weekly to prevent dirt and grime buildup
    • Apply a wood furniture polish, like Guardsman Revitalizing Lemon Oil, once a year
    • Avoid using ammonia-based cleaners, which can damage the wood
    • Use coasters and trivets to protect surfaces from water rings and heat damage

    Place wood furniture away from extreme temperatures and high humidity. These can cause swelling, warping, or cracking. Direct sunlight may fade and dry the finish.

    Use felt pads under furniture legs to prevent scratches on floors. These simple steps will keep your wood pieces beautiful for years.

    Minor Touch-Ups for Wood Furniture

    Keeping wood furniture looking great can be tricky. But with the right touch-up methods, you can fix small issues easily. Let’s explore some simple solutions for common problems.

    White rings on wood often come from hot or cold items. These can be tough to remove on modern finishes. Try rubbing alcohol or a special white ring remover. Always test in a hidden spot first.

    For deeper scratches, use wood touch-up markers and wax sticks. These come in many colors to match your furniture. Clean and lightly sand the area before using these tools.

    Chipped or peeling veneer needs expert help. A furniture repair pro can suggest the best ways to fix it. They’ll know how to restore your piece properly.

    Quick fixes and regular care keep wood furniture beautiful. By learning these easy touch-up tricks, you’ll maintain your pieces for years to come.

    Eliminating Odors from Wood Furniture

    Keep your wood furniture in top shape by dealing with lingering odors. Mix equal parts vinegar and water to tackle smelly stains. For stubborn odors, try professional bleach-based or enzymatic cleaners.

    Baking soda is great for absorbing odors in wood furniture. Cover shelves or drawers with it for a few days, then vacuum. Kitty litter, coffee grounds, and charcoal powder also work well.

    To seal odors, apply dewaxed shellac or a strong primer to interior and exterior surfaces. This helps keep odors away and deals with lingering scents.

    Odors in wood furniture often come from moisture, mold, spills, pet accidents, or old finishes. Check the furniture’s surface and gather supplies before cleaning. Use natural and chemical-based methods for best results.

    White vinegar, baking soda, and activated charcoal are effective natural odor removers. Commercial neutralizers and enzymatic cleaners also work well for tough smells.

    Prevent future odors by cleaning regularly and controlling humidity. Scented drawer liners can help too. Follow these tips to keep your wood furniture smelling fresh for years.

    Keeping Furniture from Sliding on Wood Floors

    Hardwood floors are tough and valuable. But furniture moves can cause damage. Use the right protection methods to keep your wood floors safe.

    Furniture pads are a simple way to protect floors. These felt or Velcro grippers stop sliding and scratches. Lift heavy items instead of dragging to avoid deep scratches.

    • Utilize furniture sliders with soft bases like shag or felt to allow smooth sliding without damaging the floor.
    • Consider employing moving blankets for sliding techniques to protect your wood floors.
    • Invest in on-demand services like GoShare for professional moving assistance, as their team members are trained to handle furniture and floors with care.

    Engineered wood flooring is a tough choice for floors. It resists damage better than regular hardwood. Keep humidity between 40-60% to prevent warping.

    These easy fixes can keep your furniture still. They also stop costly damage to your beautiful wood floors.

    Tips for Hiring the Best Wood Furniture Repair Experts

    Restoring beloved wood furniture requires skilled hands. Some damages need professional attention. Here are key factors to consider when seeking top wood furniture repair experts:

    1. Proven Expertise: Find specialists with extensive wood restoration experience. They should know various materials, techniques, and tools. Look for experts who can fix scratches, chipped veneer, and cracked pieces.
    2. Comprehensive Services: Reliable experts offer a wide range of repair services. These include structural repairs, refinishing, upholstery work, and custom modifications. Choose a company that can handle all your furniture needs.
    3. Customer Satisfaction: Read reviews and testimonials from previous clients. This helps gauge service quality and work standards. A reputable company will have many satisfied customers.
    4. Guarantees and Warranties: Top repair experts stand behind their work. Look for those offering warranties or guarantees on services. This ensures your furniture is in good hands.
    5. Responsiveness and Professionalism: The best experts respond quickly to inquiries. They provide clear estimates and maintain excellent communication. This professionalism ensures a smooth, stress-free repair experience.

    These tips help you find qualified wood furniture repair experts. Your prized possessions will be in safe hands. Enjoy your furniture’s beauty and functionality for years to come.

    Introducing FindPros: The Easy Way to Restore Your Wood Furniture

    Having trouble finding the right wood furniture repair expert for your project? Look no further than FindPros. Answer a few simple questions about your home project, like the type of damage (scratches, white spots, discoloration) and the furniture’s size and condition. Within seconds, we’ll match you with top-rated local pros who can provide the best pricing when they compete for your job. Compare quotes and choose the pro you get along with best to handle the corners, molding, and any other tricky areas. With FindPros, restoring your cherished wood furniture has never been easier.

    Conclusion

    This guide has given you valuable info on wood furniture repair and restoration. You now have the know-how to fix your pieces or hire pros to do it. Your cherished items can look their best for years.

    We’ve covered many tips for repairing scratches, removing paint, and restoring antiques. With the right tools and methods, you can get pro-looking results. Your prized wood furniture can have new life.

    Fixing furniture isn’t just about looks. It’s about keeping sentimental value and being eco-friendly. By repairing, you save money and reduce waste. You can enjoy your beloved items’ timeless charm for longer.

    So, dive into wood furniture repair. Unlock the full potential of your treasured pieces. It’s a rewarding journey that brings beauty and history to life.

    Frequently Asked Questions (Wood Furniture Repair)

    To find a perfect match, you can use several colors of wood filler or paint to blend perfectly with the existing finish. Try applying small test patches in inconspicuous areas until you achieve the desired color.
    For a small scratch, you can use a wood touch-up marker or wax stick that closely matches the color of your furniture. Apply a thin layer and gently buff it in until the scratch is no longer visible.
    If you’re missing a piece, you can use wood filler to fill the gap. Smooth it out and let it dry completely. Then, sand the area and apply a matching stain or paint to create a seamless look.
    To ensure a seamless finish, use masking tape to cover surrounding areas before applying any wood filler or paint. This will prevent the new material from being visible and blend it perfectly with the existing furniture.
    Absolutely! Switching out the hardware, such as knobs or handles, can give your furniture a fresh, updated look. Be sure to measure the existing holes so you can find replacement hardware that fits perfectly. You may need to fill any old holes before installing the new hardware.

    Wood Fence Repair

    Above Ground Pool Repair Near You

    Can’t find what you are looking for?

    How It Works

    • Answer a few questions about your home project.
    • Within seconds, get matched with top-rated local pros.
    • Compare quotes and choose the best pro for the job.

    Wood Fence Repair In Your Area

    Need Wood Fence Repair? Here’s What to Expect

    Meta Description: Discover expert tips for wood fence repair, from fixing broken posts to replacing damaged panels. Learn how to restore your fence’s stability and appearance effectively.

    Wood Fence Repair

    Your wooden fence is crucial for your home’s appearance and security. Over time, it may show wear and tear. You might wonder if it’s time for repair or replacement.

    The answer depends on your fence’s condition. We’ll find the best fencing solution for your budget and ensure long-lasting beauty.

    Key Takeaways

    • Wooden fences typically last about 15 years with diligent maintenance.
    • Repairing pickets is generally simpler and less costly than repairing fence posts.
    • Wooden fences are more susceptible to rot and mold compared to low-maintenance materials like vinyl and aluminum.
    • When determining whether to repair or replace a fence, consider the cost of replacement materials and the time investment for each option.
    • To repair a wooden gate that droops, installing an anti-sag kit with a turnbuckle and cable is recommended.

    Signs Your Wood Fence Needs Repair

    A wood fence boosts your property’s appeal and security. But even strong fences can wear out over time. Spotting issues early helps prevent costly repairs later.

    Let’s look at some signs that your wood fence needs attention. Catching these problems quickly can save you money and hassle.

    • Loose or Wobbly Boards: Shifting or loose fence boards may be due to weather or ground settling. Fixing loose boards quickly helps keep your fence strong.
    • Signs of Rot: Moisture can cause rot in your fence. Look for soft spots, odd colors, or musty smells. Fixing rot early stops more damage.
    • Cracked or Broken Pickets: Storms, age, and wear can crack or break fence pickets. Replacing damaged pickets improves your fence’s look and function.
    • Faded or Peeling Paint: Weather can harm your fence’s finish. Paint or stain may fade or peel. A new coat makes it look better and protects the wood.
    • Rusty Hardware: Nails, screws, and hinges can rust or loosen over time. Fixing these parts keeps your fence stable and secure.
    • Insect Damage: Wood-eating bugs like termites can hurt your fence. Watch for bugs, sawdust-like stuff, or weak wood. Catch them early to prevent big damage.
    • Sagging Gates: A sagging gate or one that won’t close right might mean uneven settling. It could also mean the hinges need fixing.
    • Warping or Bowing Boards: Moisture or temperature changes can warp or bow fence boards. This affects how your fence looks and how strong it is.

    Fix these common issues to make your wood fence last longer. It will keep looking good and protecting your property for years to come.

    When to Replace Instead of Repair

    Signs of a fence needing replacement include structural issues, widespread rot, and aging. A leaning or wobbling fence indicates serious problems. These often stem from shifting soil or deteriorating materials.

    Rot in several areas, especially posts and rails, calls for full replacement. Most wood fences last 15 to 20 years. If your fence is nearing this age, replacement may be best.

    Signs of wear include splintering, warping, and heavy discoloration. These suggest it’s time for a new fence.

    Severe Insect Damage

    Termites and wood-eating insects can quickly cause major damage. If you spot substantial insect damage, replacing the fence is usually best. This is especially true if it’s affecting the fence’s structure.

    Weather Damage

    Severe weather can destroy wood fences. It can blow down sections or cause rot through saturation. Major weather damage often makes replacement more practical than repairs.

    Cost of Wood Fence Repair vs Replacement

    The cost is key when deciding to repair or replace your wooden fence. Minor repairs can cost $100 to $300. Basic wood (Pine) costs $5 to $15 per linear foot.

    Mid-range wood (Cedar) costs $15 to $25 per linear foot. High-end wood (Redwood) costs $25 to $50+ per linear foot. Moderate repairs can cost $300 to $900.

    Extensive repairs can cost $900 to $1,500 or more. Labor costs range from $20 to $50 per linear foot.

    Replacing a 100-linear-foot fence varies in cost. Basic materials cost $1,750 to $3,000. Mid-range materials cost $3,000 to $4,500. High-end fencing costs $4,500 to $7,000+.

    You may need $50 to $200 for permits. Removing the old fence costs $300 to $500. Hiring a pro can ensure proper installation.

    Regular maintenance can reduce future repair or replacement costs. The decision depends on damage, fence condition, and your budget.

    Understanding cost of fence repair and cost of fence replacement helps you make an informed choice. Consider your needs and financial situation when deciding.

    Long-Term Maintenance Considerations

    wood fence maintenance

    Fence repairs can fix immediate issues but may not solve deeper problems. Over time, repaired sections might age differently, causing an uneven look. This could lead to more frequent touch-ups.

    A new wood fence often needs less upkeep. Modern fence materials resist rot, insects, and weather damage. These fences can stay beautiful and functional for years with minimal effort.

    Regular maintenance helps wood fences last longer. This includes cleaning, sealing, and controlling nearby plants. With proper care, your fence can enhance your property for decades.

    • Generally, cleaning a fence at least once or twice a year is advisable.
    • The lifespan of a well-maintained wood fence can range from 20 to 50 years or more.
    • Applying protective coatings, such as sealants or stains, can help protect wood fences from moisture and UV rays.
    • Proper vegetation control is crucial for maintaining fences and preventing damage over time.

    Think about long-term fence maintenance when choosing to repair or replace. This helps you make a smart choice. Your fence will look great and work well for years.

    Repairing vs Replacing

    Your wood fence may need repair or replacement. Several factors can make replacing your fence a more practical long-term solution. Let’s explore these options to help you decide.

    Repairing a damaged fence can be a temporary fix. It mixes new elements with old, aging materials. The appearance may not be seamless, and matching new materials can be tricky.

    Replacing your fence offers a fresh start with a polished look. A new fence can add value to your home and boost curb appeal. It generally lasts longer and needs less maintenance.

    Experts say replacement is better when repair costs reach 50% of new installation costs. New fences often come with extended warranties, protecting against defects and damage.

    Your decision depends on the damage extent, long-term goals, and budget. Weigh the pros and cons carefully. This will help you make an informed choice for your property’s fencing needs.

    Environmental Factors Affecting Wood Fences

    Weather and environment greatly impact your wood fence’s lifespan. Rain, snow, and intense sunlight can cause gradual damage. These factors may lead to frequent repairs or replacement.

    Weather Impact

    Rain and snow can weaken wood by causing rot and mold. Excess moisture can seep into fence boards, harming their structure. Too much sun can dry out wood, leading to cracks and warping.

    Frequent exposure to harsh weather may make replacement more practical than constant repairs. This ensures long-term durability and safety for your property.

    Harsh Weather Conditions

    Heavy rain, snowfall, and high winds can severely damage wood fences. These conditions may cause rot, mold, cracks, and warping. Addressing these issues often requires extensive repairs or complete fence replacement.

    Fixing a Leaning Wood Fence

    fixing leaning fence

    A leaning wood fence can be fixed without replacing it entirely. Common causes include rotting posts, soil erosion, poor installation, and environmental factors. Age-related damage can also make fences lean.

    There are a few ways to fix a leaning fence. You can brace sagging posts with new wood or metal posts. This provides quick stabilization and helps straighten the fence.

    Another option is to replace damaged posts. Dig out old posts and set new ones in concrete for a long-term fix.

    A professional fencing contractor can help choose the best solution. They can check the damage and suggest ways to fix or straighten your fence.

    Safety is key when fixing a leaning fence. Wear gloves and safety goggles while working. Keep the work area clear of obstacles and hazards.

    Follow best practices for fence repair and upkeep. This will help your fence last longer and prevent future leaning issues.

    Regular Inspections and Maintenance

    Keeping your wood fence in top shape is vital for its look and longevity. Smart property owners check their fences yearly. Annual inspections and upkeep help your fence stay strong for years.

    During checks, look for rot, damage, rust, and loose parts. Oil latches and hinges to prevent rust. Early problem-solving saves money on future replacements.

    Fixing the foundation, posts, and braces often straightens a leaning fence. If leaning continues, you may need to replace the entire fence.

    Regular maintenance extends your fence’s life significantly. Quick fixes prevent further damage. Proper care helps avoid costly repairs or early replacement.

    • Conduct visual inspections of your fence at least once a year to identify any signs of damage, wear, or pest infestation.
    • Apply a quality wood sealer or stain every 2-3 years to protect the wood from moisture, UV rays, and insect damage.
    • Regular maintenance can significantly extend the lifespan of your wood fence.
    • Addressing structural issues promptly prevents further damage to the fence.
    • Properly maintaining a wood fence can help avoid costly repairs or premature replacement down the line.

    Regular checks can prevent accidents by spotting loose nails or sharp edges. A well-kept fence boosts your property’s curb appeal. This can increase your home’s value on the market.

    Tips for Selecting the Right Wood Fence Repair Company

    Hiring skilled professionals can make a big difference in maintaining your wood fence. Experts can find root causes of issues and provide lasting solutions. Consider these factors to find the best provider for your needs.

    Look for a company with a solid reputation in your area. Check reviews to gauge customer satisfaction. Ask for references from past clients to understand their work quality and reliability.

    • Ensure the company is licensed, bonded, and insured to protect yourself from liability.
    • Look for a contractor that offers a warranty on their work, giving you peace of mind that any issues will be addressed.
    • Prioritize availability and responsiveness when selecting a wood fence repair company. The best providers will be able to promptly address your needs.

    Get multiple quotes from wood fence repair contractors. This helps you compare pricing and find the best value. Remember, the cheapest option isn’t always best.

    Focus on balancing quality, customer service, and fair pricing. By researching repair companies, you can ensure your fence is restored properly. This approach can prevent recurring problems and premature fence replacement.

    Need Help with Your Wood Fence Repair? FindPros Has Your Back

    Having trouble deciding whether to repair or replace your aging wood fence? FindPros can connect you with top-rated local professionals who specialize in wood fence repair and replacement. Simply answer a few questions about your fence’s condition, such as any broken posts, damaged panels, or leaning sections. Within seconds, we’ll match you with pros who can provide competitive quotes to get your fence looking its best again.

    Our network of vetted contractors use high-quality wood posts, panels, rails, and materials to ensure long-lasting results, whether you need to replace an entire fence post, fix damaged boards, or give the whole fence a refresh with wood filler and a new coat of sealant. Take the stress out of your wood fence project and let FindPros find the right pro for the job.

    Conclusion

    Wooden fences are common in many homes. They need regular upkeep to look good and work well. Understanding wood fence repair conclusion helps homeowners fix issues before they get worse.

    Regular checks and proactive care are vital for fence longevity. Timely repairs can prevent costly full fence replacements. It’s important to consider repair costs and long-term maintenance needs.

    A well-kept wood fence boosts curb appeal and home value. It also provides safety and privacy. By staying alert and fixing problems early, homeowners can enjoy their fence for years.

    How do I fix a loose fence gate?

    To fix a loose fence gate, you can install an anti-sag cable kit with a turnbuckle. This will help stabilize the gate and prevent it from sagging over time.
    If you have a broken fence post, you’ll need to replace the entire post. Use a post hole digger to create a new hole, then set the new post in concrete to provide a sturdy foundation.
    For damaged fence panels, you can try replacing the broken boards. Use wood glue and filler to fix any cracks or holes, and replace the entire panel if the damage is too extensive.
    It’s a good idea to inspect your wood fence regularly, at least once a year. Check for loose screws, rotted boards, and any other signs of damage. Perform simple repairs as needed, and clean and seal the fence every few years to keep it in good shape.
    If your fence is leaning, you may need to replace the damaged post or posts. Dig out the old post and set a new one in concrete to provide a sturdy base. You can also try bracing the leaning post with additional posts or rails to straighten the fence.

    Window Tinting Services

    Above Ground Pool Repair Near You

    Can’t find what you are looking for?

    How It Works

    • Answer a few questions about your home project.
    • Within seconds, get matched with top-rated local pros.
    • Compare quotes and choose the best pro for the job.

    Window Tinting Services In Your Area

    Need Window Tinting Services? Here’s What You Should Know

    Meta Description: Discover top-quality Window Tinting Services for your home, office, or vehicle. Enhance privacy, reduce heat, and protect against UV rays with professional installation.

    Window Tinting Services

    Luxury car sales are growing steadily, with a 6% annual increase expected from 2019 to 2025. This growth has boosted demand for premium window tint services. High-quality tinting preserves the beauty of luxury vehicles and offers many benefits.

    Tinted windows add elegance to your car and protect it from harmful UV rays. They also keep the interior cool and enhance privacy and security. These features help maintain your luxury vehicle’s value and appearance.

    Key Takeaways:

    • Luxury car sales are projected to grow at a compound annual rate of 6% between 2019 and 2025.

    • Window tinting can enhance the appearance and protect the interior of your luxury vehicle.

    • There are various types of window tint films, each with unique properties and price points.

    • Professional window tinting installation is recommended to ensure a flawless finish and avoid common issues.

    • Regulations and laws regarding window tinting vary by state, so it’s important to understand the local requirements.

    The Growing Demand for Luxury Cars and Window Tinting

    Luxury car sales are booming. The global market is set to grow 6% annually from 2019 to 2025. This reflects a rising demand for high-end, visually stunning vehicles.

    Luxury Vehicle Market Trends and Growth

    Luxury vehicles are crafted with precision. They offer powerful yet elegant designs that captivate drivers and onlookers. As this market expands, owners seek ways to maintain their cars’ striking appearance.

    Car window tinting has become a popular solution. It preserves the beauty of these prized possessions.

    The Importance of Proper Car Window Tinting for Luxury Vehicles

    Quality window tinting adds elegance to luxury vehicles. It enhances visual appeal and offers practical benefits.

    These benefits include:

    • Preventing interior fading and keeping the cabin colorful

    • Protecting occupants from harmful UV rays

    • Maintaining a comfortable cabin temperature by rejecting heat

    • Providing increased privacy and security for the vehicle’s owners

    Luxury car owners increasingly recognize the value of proper window tinting. Professional tinting services ensure vehicles maintain their stunning looks. They also provide practical benefits for years to come.

    Understanding the Different Types of Window Films

    Window films come in various materials, each with unique benefits. They can enhance protection, visibility, and energy efficiency for vehicles and homes. Let’s explore the different types available.

    • Material Options: Dyed films are affordable but less durable and fade over time. Ceramic films excel in heat rejection and UV protection. Carbon films are dense and long-lasting but may cause haze. Hybrid films combine benefits from various materials. They offer a balanced solution for those seeking multiple advantages.

    • Clarity and Visibility Considerations: Windows allow light in and provide clear views. When choosing a film, ensure it maintains excellent visibility of your surroundings.

    • Reflective vs. Non-Reflective Films: Reflective films block UV rays by reflecting sunlight. Non-reflective tints absorb sunlight to reduce light and heat entering the vehicle.

    • UV Protection Levels: The main goal of window film is protection. Consider the level of UV protection offered when choosing a film. Different films vary in their ability to block harmful rays.

    Window Tinting Regulations and Laws in Los Angeles

    Car owners in Los Angeles must know local window tinting rules. California has varying laws for window tint. Los Angeles follows its own set of guidelines.

    Los Angeles allows car window tinting with limits. Front windows can’t exceed 70% darkness. Tint can’t be more reflective than untinted windows. Tinted rear windows require dual side mirrors.

    Red, blue, and amber tints are not allowed. Following these rules helps avoid legal issues and fines.

    • Front side windows must allow at least 70% of light to penetrate through the window to comply with the window tint regulations.

    • The top 4 or 5 inches of the front windshield can be tinted to meet legal requirements.

    • There are no restrictions on the tint darkness for the rear and back side windows.

    • Reflective or mirrored tints are prohibited in Los Angeles.

    Breaking window tinting laws can lead to fines. These range from to 0, depending on the county. Car owners should ensure their tint meets local rules.

    Staying informed about Los Angeles window tinting laws is vital. Following these rules keeps your luxury vehicle safe and legal.

    DIY vs. Professional Window Tinting Services

    professional window tinting service

    Car window tinting requires precision and expertise. DIY tinting may seem cost-effective, but it often leads to more problems. Professional services ensure flawless, long-lasting results.

    The Challenges of DIY Car Window Tinting

    Car windows have curved surfaces and tight angles. This makes tinting them extremely challenging. The strong adhesive leaves no room for errors when aligning the film.

    Mistakes can cause creases, bubbles, or film replacement. This can end up costing more than professional services.

    Choosing a Reliable Professional Window Tinting Company

    For your vehicle’s looks and function, trust the experts. Find a professional tinting service with proven reliability, experience, and a service guarantee.

    A reputable professional tinting company ensures correct installation. This provides lasting UV protection, heat rejection, and glare reduction.

    • Experience – Car window tinting is a precision art, and a tiny mistake can have a significant impact on the results and effectiveness of the film. Choose a company with extensive experience to ensure you get the best value for your money.

    • Professionalism and Reliability – When you want to get your windows tinted, select a company that not only offers excellent results but also provides a professional and reliable service.

    • Service Guarantee – Look for a window tint installation company that offers a warranty covering poor installations and film replacements if the product does not match the promised performance.

    Reliable professional tinting companies offer diy window tinting benefits without the risks. You’ll enjoy expert results without any hassle.

    The Benefits of Car Window Tinting

    Car window tinting offers numerous advantages for vehicle owners. It protects against UV rays, improves energy efficiency, and reduces cooling costs. Tinting is a smart investment that enhances your driving experience.

    • UV Protection and Heat Rejection: Window tints block up to 99% of harmful UV rays. This shields your skin from damage that causes aging and skin cancer. Tinting also rejects solar heat, keeping your car’s interior cool and comfortable.

    • Improved Energy Efficiency and Reduced Cooling Costs: Tinting decreases heat entering your car, reducing strain on the air conditioning system. This leads to better energy efficiency and lower fuel costs. Your car becomes more eco-friendly while saving you money.

    • Glare Reduction and Comfort: Sun glare can cause eye strain and reduce road visibility for drivers. Window tinting effectively reduces glare, creating a safer driving experience. It improves visibility and reduces eye fatigue, making long drives more enjoyable.

    California’s Window Tinting Regulations

    California has specific rules for window tinting to ensure road safety. These regulations cover windshield and side window tinting. Let’s explore the requirements for tinting in the Golden State.

    Windshield and Side Window Tinting Restrictions

    California law allows slight tinting on front side windows. The Visible Light Transmission (VLT) must be at least 88%. Windshield tinting is only allowed on the top 4 to 5 inches.

    The tint’s lower edge must be 29 inches above the driver’s seat. Reflective tint is prohibited. The tint can’t be red, amber, or blue.

    Medical exemptions allow tint with 35% VLT. It must be green, gray, or neutral smoke in color. The tint should also be removable.

    Potential Penalties for Illegal Window Tinting

    The California Highway Patrol strictly enforces window tinting laws. Fines for illegal tint range from 0 to 0 or more per offense. Drivers may get a “fix-it” ticket, requiring tint removal within a set time.

    Some California towns or counties may have extra tinting rules. Always check local laws before tinting your car windows.

    Potential Drawbacks of Window Tinting

    Window tinting has many benefits, but it also has some drawbacks. Safety issues and visibility problems are two main concerns for drivers considering window tinting.

    Safety Concerns for First Responders

    Tinted windows can make it hard for emergency workers to help in accidents. The tinting film may change how glass breaks, making it tougher to access the vehicle.

    This can slow down rescue efforts in critical situations. First responders may struggle to quickly reach and assist people inside the car.

    Visibility and Communication Challenges

    Dark tints can reduce visibility for drivers and others on the road. This makes it harder to see and communicate with pedestrians, cyclists, and other drivers.

    At night or in low light, tinted windows may increase accident risks. Drivers might miss important visual cues or signals from other road users.

    Finding the right balance between tinting benefits and safety is key. Talk to a tinting expert to ensure your windows meet local laws and don’t compromise safety.

    Types of Home Window Tinting Films

    home window tinting

    Home window tinting offers various film options with unique benefits. Homeowners can choose from solar control, security, and decorative films. Each type meets specific needs for energy efficiency, protection, or aesthetics.

    • Solar Window Tinting: Solar window tinting improves energy efficiency in homes. These films reflect or absorb up to 99% of harmful UV rays. They help regulate room temperature and prevent furniture fading. Solar tints come in neutral tones like copper and silver. They keep homes cool in summer and warm in winter. These films also reduce glare and enhance overall comfort.

    • Security Window Tinting: Security window films are ideal for burglary deterrence and storm protection. These thick films prevent windows from shattering completely during disasters or break-ins. They provide an extra layer of protection against dangerous glass shards.

    • Decorative Window Tinting: Decorative window films primarily serve aesthetic purposes. They also offer some heat and glare reduction benefits. These films come in various colors and feature etched patterns or stained glass designs.

    Decorative tints can add privacy and enhance your home’s appearance. They’re available in clear, bold, or frosted effects to suit different styles.

    Pros and Cons of Tinted Windows for Homes

    Advantages: Energy Efficiency, Privacy, and Security

    Window tinting offers many perks for homeowners. It boosts energy efficiency by blocking up to 99.9% of harmful UV rays. This reduces the load on air conditioning systems, leading to lower utility bills.

    Tinted windows also enhance privacy and security. They make it harder for outsiders to see inside during the day. Some films can even strengthen glass, making it tougher for intruders to break in.

    Disadvantages: Warranty Issues and Potential HOA Restrictions

    Homeowners should be aware of possible drawbacks. Some window makers may limit warranties when adding film. It’s vital to check compatibility before installing tints.

    It’s also important to review Homeowners’ Association (HOA) rules. Some HOAs may have guidelines or restrictions on window tinting.

    Home window tinting can improve efficiency, privacy, and security. It’s a cost-effective home upgrade. But weigh the pros and cons before starting this project.

    Window Tinting Maintenance and Lifespan

    Quality window tint films can block up to 99% of harmful UV rays. They protect your interior furnishings from damage. Proper care can significantly extend the lifespan of your window tinting investment.

    Proper Cleaning and Care for Window Tinting

    Gentle cleaning is key for maintaining your window tint. Avoid abrasive cleaners or paper towels that can scratch the surface. Use a soft sponge and mild, ammonia-free cleaner instead.

    After cleaning, use a squeegee to remove excess water. Polish the surface with a lint-free microfiber cloth. Let the tint fully cure for 3-5 days after installation before washing.

    The Importance of Professional Installation

    Professional installation is highly recommended for optimal results and longevity. Experienced technicians know how to clean, measure, and apply tint with precision. This attention to detail prevents common issues like scratches, wrinkles, or bubbles.

    Reputable window tinting companies often offer warranties covering defects or problems. These warranties provide peace of mind for your investment.

    Following these maintenance practices and choosing professional installation can extend your tint’s life. Your tinted windows can last 10 years or more with proper care. This long-lasting protection makes window tinting a smart choice for vehicles and homes.

    Tips for Choosing the Best Window Tinting Expert

    Picking the right window tinting expert is crucial for your project’s success. These tips will help you find a reliable and professional window tinting company.

    Follow this advice for both car and home window tinting. Quality results depend on choosing the right expert for the job.

    • Check Credentials and Certifications: Seek out companies with certified installers. This ensures they have the skills to deliver top-notch results.

    • Understand Regulations: Window tinting laws vary by location. Choose a company familiar with local rules, especially in Las Vegas, Nevada, where tint darkness laws are strict.

    • Prioritize Quality over Cost: Invest in high-quality films and professional installation. Superior products offer better UV protection, heat rejection, and durability.

    • Check Reviews and Testimonials: Research the company’s reputation online. Read customer reviews to gauge the service quality and satisfaction level.

    • Inquire about Warranties: Look for warranties covering installation and tinting film. This protects you from potential issues in the future.

    • Consider Convenience: Pick a provider near your home or workplace. This makes the installation process smoother and more convenient.

    Quality should be your top priority when choosing window tinting expert. Proper installation and high-quality products ensure the best, long-lasting results.

    Remember these tips for successful window tinting projects. They apply to both car and home window tinting.

    Looking for Window Tinting Experts? Let FindPros Help

    Searching for quality window tinting services that prioritize customer satisfaction? FindPros can connect you with top-rated local professionals who understand the importance of protecting your home or vehicle from the sun’s energy and harmful UV rays. Whether you need to reduce fading, provide more privacy, or prevent shattered glass, our free consultations make it easy to compare various factors and find the perfect provider to install the ideal solution. Take the first step towards a cooler, more secure world – let FindPros match you with the window tinting experts that best fit your needs.

    Conclusion

    Window tinting enhances your car or home’s appearance, comfort, and energy efficiency. This guide covers film types, regulations, and finding the right window tinting services. Quality tinting can benefit luxury vehicles and improve home energy performance.

    Experienced technicians and quality materials ensure long-term effectiveness. Complying with local regulations is crucial for the value of your window tinting services. This summary helps you make an informed choice based on your needs.

    Window tinting is a smart investment for comfort, security, and energy savings. Choose a reputable provider to maximize the benefits of this versatile solution. You’ll enjoy the advantages of tinted windows for years to come.

    Frequently Asked Questions (Window Tinting Services)

    Decorative window films come in various styles, such as frosted, etched, and colored patterns. They can add a unique aesthetic to your home while also providing some heat and glare reduction benefits.
    Vehicle window tinting can enhance the elegance and protection of luxury cars. It blocks harmful UV rays, keeps the interior cooler, and provides more privacy – all of which help preserve the car’s condition and value over time.
    When selecting a window tinting provider, look for experienced installers, quality materials, warranties, and a good reputation for customer satisfaction. Proper installation is critical to avoid issues like bubbling, creasing, or poor visibility.
    While window tints can significantly reduce heat gain and annoying glare, homeowners should be careful not to choose a film that sacrifices too much natural light. Finding the right balance between blocking the sun’s heat and maintaining a bright, airy space is important.
    Window tints can block up to 99% of the sun’s harmful UV rays, which protects your home’s interior from fading and damage. They also help reduce heat gain, allowing your HVAC system to work more efficiently and lower your energy costs. This provides both style and substance for your home.

    Window Seal Repair

    Above Ground Pool Repair Near You

    Can’t find what you are looking for?

    How It Works

    • Answer a few questions about your home project.
    • Within seconds, get matched with top-rated local pros.
    • Compare quotes and choose the best pro for the job.

    All Service Pros

    Mountain View, CA

    See only Pros that service your area.

      Window Seal Repair In Your Area

      Need Window Seal Repair? Here’s What to Know

      Meta Description:

      Discover expert tips for window seal repair and learn when to DIY or call a pro. Save on energy costs and prevent moisture damage with our guide. Window Seal Repair 
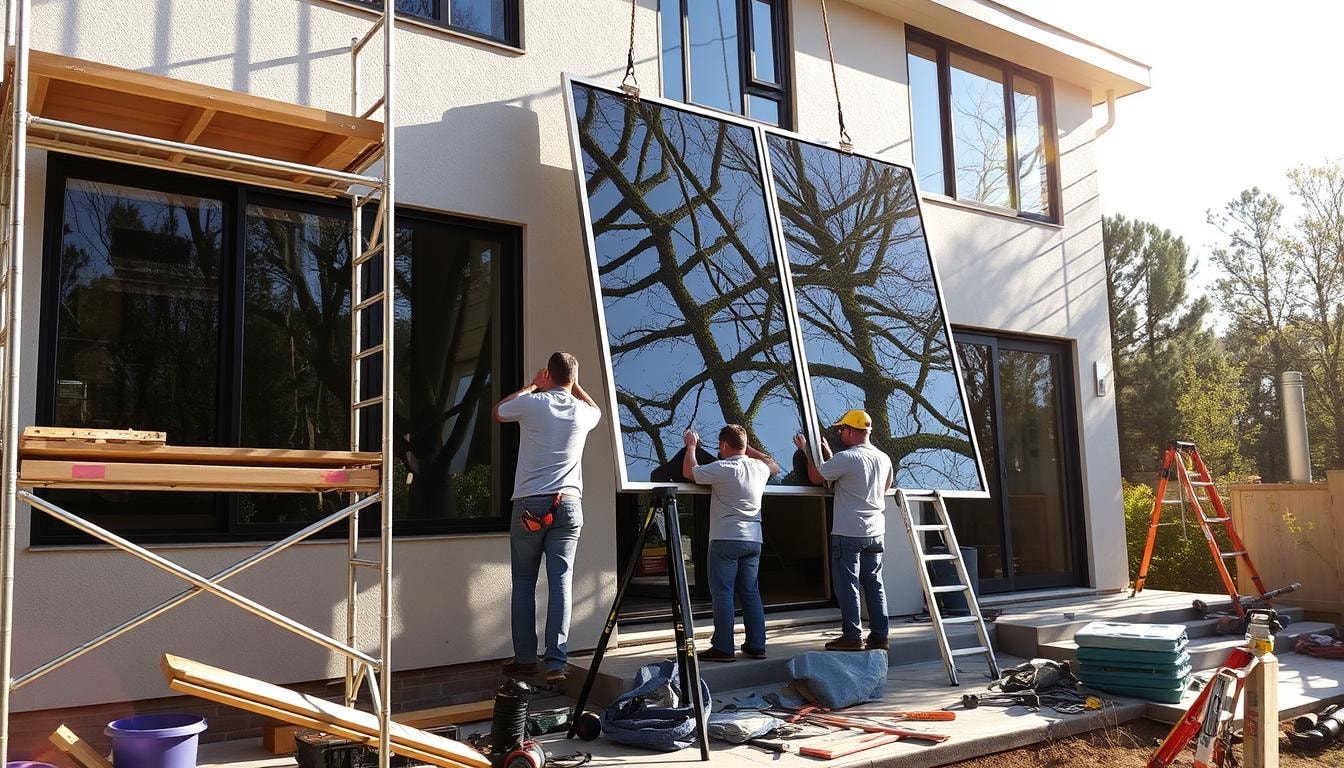
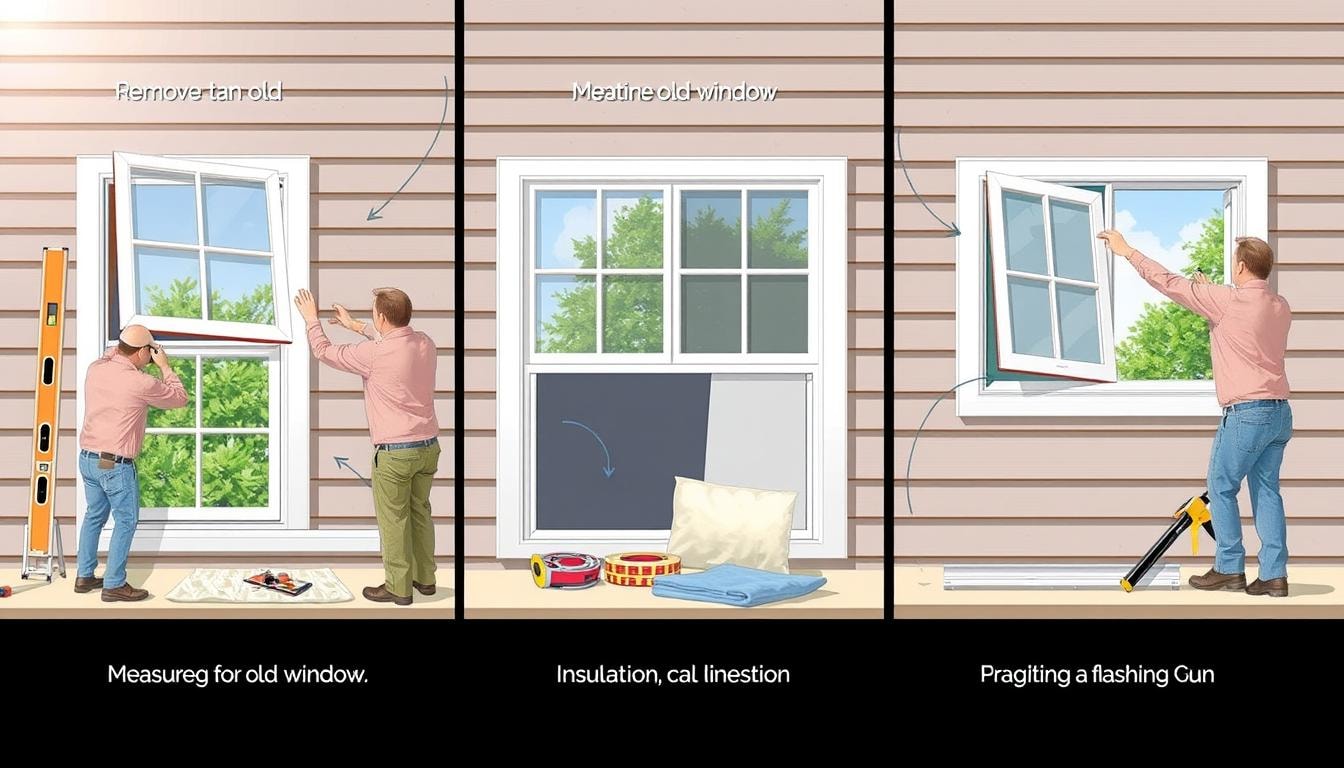
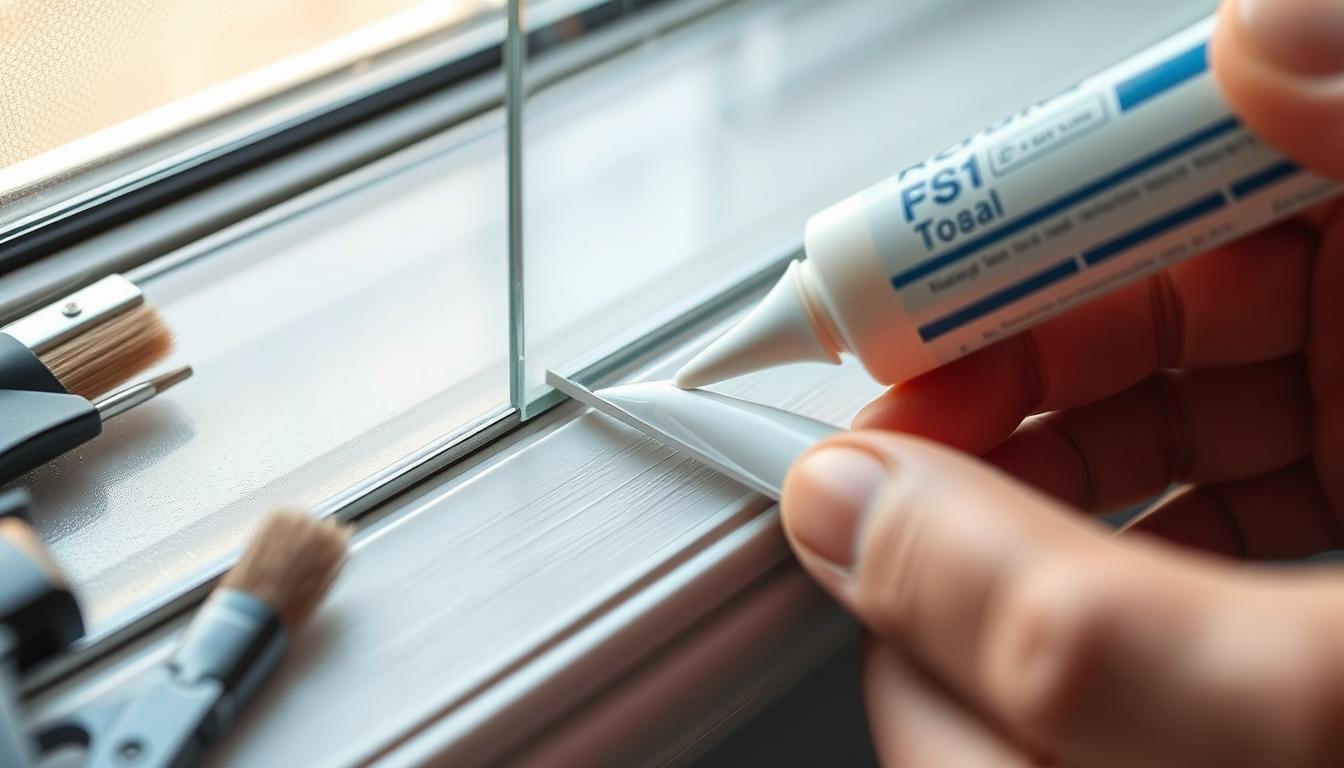
Is your home drafty despite a high thermostat setting? Do you see fog inside double-pane windows? These signs point to a broken window seal. This issue can cause high energy bills and window damage. Window seal failure is a common problem. It can make your home uncomfortable and costly to heat. This guide will help you spot early signs and find solutions.

      Key Takeaways

      • Window seal failure can lead to drafts, higher energy costs, and potential window damage.
      • Identifying signs of a broken seal, such as condensation, foggy windows, and visible damage, is crucial.
      • Understanding the basics of window seals and why they can fail is important for finding the right repair solution.
      • DIY window seal repair methods, like silicone sealant or weatherstripping, may be suitable for minor issues.
      • Professional window seal repair or full window replacement may be necessary for extensive damage or complex window types.

      Identifying Signs of a Broken Window Seal

      Spotting a broken window seal early can save you money and keep your home comfy. Look out for these warning signs to fix problems before they get worse.

      • Foggy Windows: A clear sign of seal failure is foggy windows. Hazy or cloudy panes mean moisture has seeped in. This hurts your window’s ability to insulate.
      • Drafty Windows and Cold Spots: A damaged window seal can cause drafty windows and cold spots. Air leaks lead to uneven temps and higher energy bills.
      • Condensation Buildup: Condensation buildup inside windows might mean a broken seal. Moisture can gather between the panes, causing problems.
      • Visible Seal Damage: Check your window frame for cracks, gaps, or crumbling sealant. These are clear signs of seal failure that need fixing.
      • Increased Noise Levels: More noise from outside could mean your window seal isn’t working right. This can make your home less peaceful and private.

      Watch for these signs to keep your home energy-efficient and cozy. Fixing seal issues quickly protects your home from the elements.

      Window Seal Repair: Understanding the Basics

      Window seals keep insulating gases like krypton or argon in your windows. These gases improve energy efficiency in insulated glass units. Seals can break due to temperature changes, poor installation, or low-quality materials.

      What Are Window Seals?

      Window gaskets, or seals, are vital inserts that protect homes from outside temperatures. They create barriers to reduce air leaks and moisture. This helps maintain a comfortable indoor environment.

      Why Do Window Seals Break?

      Failing window gaskets can cause foggy windows and condensation between panes. They may also lead to distorted glass, air leaks, or glass breakage. Harsh weather, poor maintenance, and faulty installation can cause seal failure. Knowing how window seals work helps identify problems. This knowledge can guide you in choosing repair or replacement options. Regular checks can prevent major issues with your windows.

      DIY Window Seal Repair Methods

      DIY window seal repair

      Minor window seal damage can be fixed with DIY repair options. These cost-effective solutions address common issues like drafts and condensation buildup. Try these before calling a professional.

      Silicone Sealant Application

      High-quality silicone sealant can fix small cracks in exterior window sealant. This flexible material creates a waterproof barrier. It prevents air and moisture from getting in.

      Clear Caulk for Interior Seals

      Clear caulk seals interior gaps around window frames. It helps reduce drafts and improves energy efficiency. Apply it to create a tight seal.

      Weatherstripping for Sash Gaps

      Weatherstripping seals gaps between window sash and frame. It stops air leaks and makes windows work better. This simple solution is easy to apply.

      Window Seal Tape

      Window seal tape is a quick fix for sealing gaps. This peel-and-stick product is durable. It creates an airtight seal around the window frame. These DIY fixes work well for small problems. Bigger damage may need professional help. A window expert can fix complex issues properly.

      When to Seek Professional Window Seal Repair

      DIY window seal repair works for minor issues. However, some situations require professional help. These include extensive seal damage, complex window types, and compromised window frames.

      Extensive Seal Damage

      Large cracks or gaps in window seals need professional repair. DIY attempts can worsen the problem. Experts have the right tools to fix complex seal issues.

      Complex Window Types

      Special windows like triple-pane or custom-shaped units need expert care. These windows are tricky to repair. DIY fixes might harm their function and energy efficiency.

      Compromised Window Frames

      Damaged or rotting window frames require professional repair. Fixing seals without addressing frame issues can be dangerous. Experts can evaluate the entire window system. Complex window seal repairs are best left to professionals. DIY attempts can lead to more problems. Skilled technicians ensure your windows’ integrity and your home’s safety.

      Window Seal Repair vs. Full Window Replacement

      window seal repair

      Homeowners often face a tough choice between window seal repair and full replacement. Both options have their merits. The best choice depends on your specific situation and needs. Multiple failed seals or extensive damage may call for full replacement. Outdated windows lacking energy-efficient features could benefit from an upgrade. Check if your warranty covers replacement costs. New, energy-efficient windows can boost comfort and cut energy bills. They’re a smart investment for many homeowners. Consider your budget and long-term goals when deciding. A window specialist can help you choose the best option. They’ll assess your windows and provide expert advice. This guidance can save you time and money.

      Key Considerations:

      • Multiple failed window seals or extensive damage may warrant a full replacement
      • Outdated windows lacking energy-efficient features could benefit from a complete upgrade
      • Check if your windows are still covered under a window warranty that could offset the cost of replacement
      • Upgrading to new, energy-efficient windows can improve home comfort and reduce long-term energy costs

      Weigh the pros and cons carefully before deciding. Consider your home’s needs and your budget. Choose between window seal repair or full window replacement wisely.

      Maintaining Your Windows After Seal Repair

      After fixing window seal issues, proper maintenance is key. Regular cleaning and good ventilation can extend seal life. This keeps your home cozy and energy-efficient.

      Regular Cleaning

      Clean your windows often to remove dirt and debris. Use a gentle cleaner and avoid harsh chemicals. Wipe down frames and tracks to prevent grime buildup. These steps help protect the window seal. They also keep your windows looking great.

      Proper Ventilation

      Good airflow around windows prevents moisture buildup. This can lead to seal failure over time. Consider using window fans or opening windows regularly. Proper ventilation helps control temperature and humidity. This can make your window seals last longer. These simple steps protect your window seal repair investment. They ensure your home stays comfortable and energy-efficient for years.

      Choosing the Right Window Seal Repair Solution

      The best window seal fix depends on damage extent, window type, and warranty coverage. DIY methods work for minor issues. These include sealant application or weatherstripping. Professional help is best for major damage or complex windows. Experts have the right tools and skills. Their work often comes with a warranty. Careful evaluation helps save costs and maintain energy efficiency. It also ensures your home stays comfortable.

      Factors to Consider When Selecting a Window Seal Repair Solution

      • Extent of the window seal damage
      • Type of windows you have (e.g., single-pane, double-pane, specialty designs)
      • Availability of manufacturer’s warranty coverage
      • DIY repair skills and tools available
      • Potential cost savings from professional window seal repair services

      Choosing the right approach pays off long-term. Quick action on window seal issues helps maintain energy efficiency. It also cuts utility costs and improves indoor comfort.

      FindPros: Your Window Seal Repair Solution

      Struggling with broken window seals, foggy windows, or other glass issues? Let the experts at FindPros help. Simply answer a few questions about your home project, and we’ll match you with top-rated local professionals who can provide the best solutions. Whether you need a silicone seal replacement, help with an insulated glass unit, or are considering replacing old, inefficient windows, FindPros connects you with qualified contractors who will compete for your business. Get the best pricing and find the perfect pro who understands your needs. Don’t let window seal failures and heat loss impact your family’s comfort – let FindPros streamline the process and make your project a breeze.

      Conclusion

      Keeping your home’s window seals in good shape is vital. It ensures energy efficiency, comfort, and long-term performance. By spotting broken seals early, you can tackle this common issue effectively. Taking action to fix seal damage is an investment in your home. Regular upkeep and quality materials can prevent future problems. Proper installation techniques also help maintain your windows’ performance. Addressing window seal issues quickly is crucial. It maintains your home’s energy efficiency and air quality. By staying alert and fixing damaged seals, you’ll enjoy a cozy, efficient home for years.

      FAQs

      What are the main signs of a broken window seal?

      The main signs of a broken window seal include foggy or cloudy glass panes, condensation buildup between the window panes, drafts or cold spots around the windows, and visible cracks or damage in the window seal.

      How can double pane windows fail and what causes it?

      Double pane windows can fail when the seal between the glass panes breaks down. This allows the insulating gas (like krypton or argon) to escape, and lets in outside air. Common causes include temperature changes, poor installation, or low-quality materials used in the window seal.

      What are some DIY methods to fix minor window seal issues?

      For small cracks or gaps in the window seal, you can try applying a silicone sealant, using clear caulk on interior seals, or adding weatherstripping to seal gaps between the window sash and frame. These DIY fixes can help stop air leaks and improve energy efficiency.

      When should you call a professional for window seal repair?

      You may need to call a professional window repair service if you have extensive damage to the window seal, such as large cracks or gaps. Experts are also recommended for complex window types like triple-paned or custom-shaped units, or if the window frame itself is damaged or compromised.

      What are the benefits of replacing old, failed window seals versus the entire window?

      Repairing just the window seal can be a more affordable option, especially for minor issues. However, if you have multiple failed seals or older, inefficient windows, replacing the entire window unit may be the better long-term investment. New, energy-efficient windows can significantly lower your heating and cooling bills and keep your family more comfortable.

      Window Screen Repair

      Above Ground Pool Repair Near You

      Can’t find what you are looking for?

      How It Works

      • Answer a few questions about your home project.
      • Within seconds, get matched with top-rated local pros.
      • Compare quotes and choose the best pro for the job.

      All Service Pros

      Mountain View, CA

      See only Pros that service your area.

        Window Screen Repair In Your Area

        Need Window Screen Repair? Here’s What You Need to Know

        Meta Description:

        Learn about window screen repair options, costs, and DIY tips. Discover how to fix torn mesh, replace frames, and maintain your screens for improved home comfort and pest protection. Window Screen Repair 
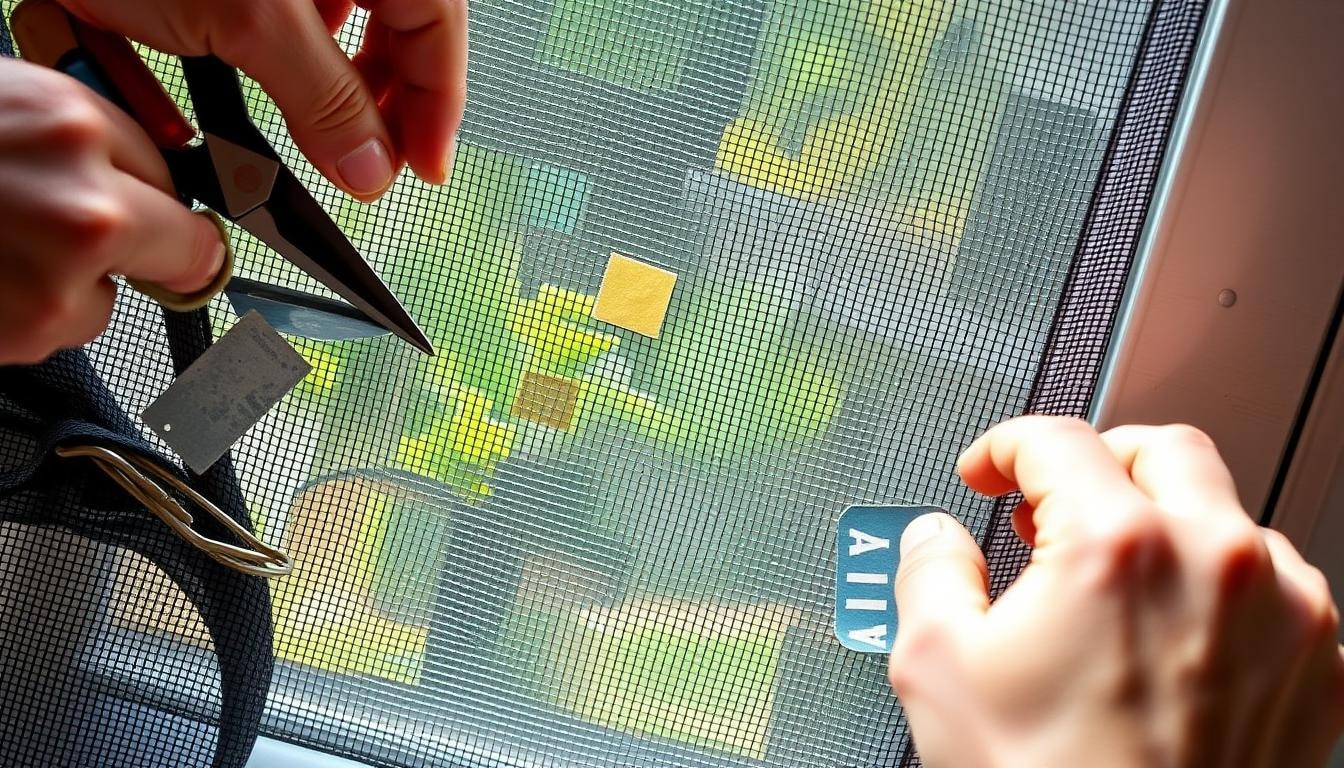
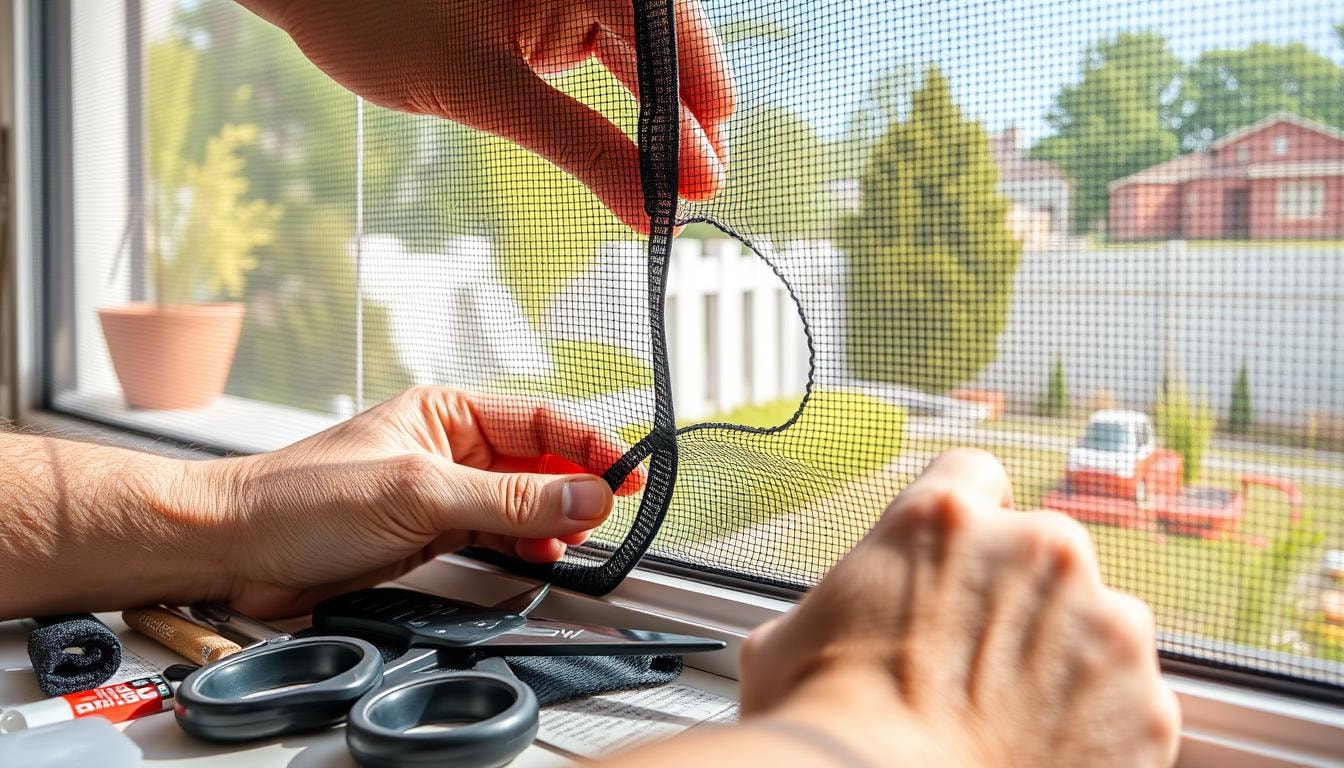
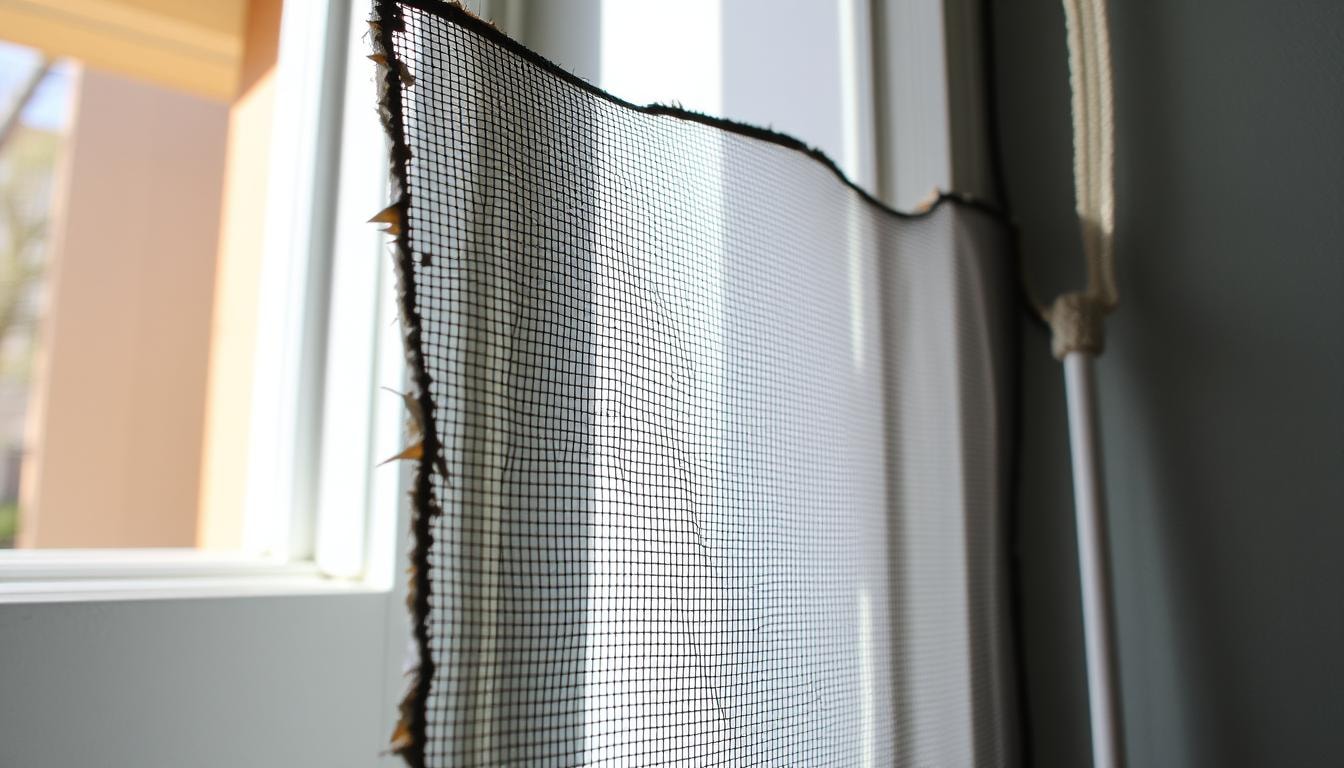
Window and door screens let fresh air in while keeping pests out. Thin screen material can rip or wear out over time. This leaves homes looking dated and allows pests to enter. Luckily, repairing or replacing window and door screens is easy. This guide covers window screen repair, including common issues and solutions. We’ll provide step-by-step instructions and tips to maintain your screens.

        Key Takeaways

        • Window screen repair is a quick and easy DIY task, taking less than 10 minutes to complete.
        • Fiberglass mesh screening is a popular and cost-effective material for window screen repairs.
        • Spline used for window screen repair is commonly available in a .157-inch diameter size.
        • DIY window screen repair can save on labor costs compared to professional services.
        • The repair process involves removing the old screen, cutting and fitting the new material, and securing it using a spline roller tool.

        Introduction to Window Screen Repair

        Window screens are crucial for home comfort and pest protection. They allow fresh air in while keeping insects out. Over time, screen material can get damaged due to sun, wear, or pets.

        Importance of Window Screens

        Window screens keep out pests and allow fresh air to flow. They improve home comfort and indoor air quality. Well-kept screens can enhance a home’s curb appeal.

        Common Issues with Window Screens

        Several problems can occur with window screens. These include tears, holes, and loose screens. Discoloration and warping of the material are also common issues. Pets, children, and outdoor elements can cause damage to screens. Quick repairs are key to maintaining screen functionality and appearance.

        • Tears or holes in the screen material
        • Loose or detached screens within the window frame
        • Discoloration or warping of the screen material
        • Damage caused by pets, children, or outdoor elements

        Repair or Replace?

        Is your window screen damaged? First, check if it can be fixed or needs replacing. Look at the screen frame. Make sure it’s in good shape to hold a new screen. Check the size of the damage. Small holes might be fixable. Larger damages may need a full replacement.

        Assessing the Condition of the Frame

        Look closely at the screen frame. Check for bending, warping, or rusting. A damaged frame may not support a new screen well. If the frame looks good, you can think about repair options.

        Size and Extent of the Damage

        • Small holes or tears may be fixed with a screen patch or glue.
        • Large stretches or rips often mean you need a new screen.
        • The screen material type can affect how easy it is to fix.

        Check the frame’s condition carefully. Look at how big and what type the damage is. This will help you decide to repair or replace.

        Window Screen Repair

        small screen repair

        Minor damage to window screens can often be fixed without replacement. Screen repair patches and tape are common methods for fixing small holes or tears.

        Small Hole or Tear Repair Methods

        Screen repair patches can be cut to size and applied with heat-activated adhesive. These patches work well for small tears or holes. Screen repair tape has an adhesive backing and screen material. It’s great for securing torn edges or covering small holes.

        Repair Patch and Tape Options

        • Screen repair patches are versatile and can be customized to fit the size of the damage.
        • Screen repair tape is a quick and easy solution for securing torn edges or covering small holes.
        • These DIY repair methods can help extend the life of a window screen and avoid the need for a full screen replacement.

        Simple screen repair techniques can fix minor issues effectively. These methods help maintain your window screens’ functionality and appearance.

        Window Screen Replacement

        Is your window screen beyond repair? It might be time for a full replacement. With the right tools and approach, you can replace it yourself. This task doesn’t require professional help. You can save money by doing it on your own.

        Tools and Materials Needed

        To replace a window screen, gather these items:

        • A new roll of screen material, such as fiberglass or aluminum
        • Screen spline, which is the flexible material that holds the screen in place
        • A spline roller tool to press the spline into the frame
        • A utility knife for cutting the screen material to size
        • A flat, clean work surface

        Step-by-Step Instructions

        Here’s how to replace a window screen:

        1. Remove the old screen from the frame by carefully prying out the spline with a utility knife.
        2. Clean the frame thoroughly, removing any debris or old spline material.
        3. Measure the frame and cut a new piece of screen material to the appropriate size, allowing a few extra inches on each side.
        4. Place the new screen material over the frame and use the spline roller tool to press the spline into the channel, securing the screen in place.
        5. Trim any excess screen material with the utility knife, ensuring a clean and tight fit.

        This process will help you replace your window screen successfully. Choose high-quality screen replacement materials for the best results. Use the right screen replacement tools to achieve a professional look. Your home will look better and function well with a new screen.

        Window Screen Repair for Specific Needs

        Window screen repair isn’t one-size-fits-all. Your home and lifestyle may need specialized screen options. Pet-owners can benefit from durable pet-friendly window screens that resist damage from claws and teeth. Homes focused on improved visibility might prefer enhanced visibility screens. These screens have finer mesh or clearer materials to boost the view.

        • Pet-Friendly Screens: Pet owners often struggle to keep window screens intact. Specialized pet-friendly screens can withstand playful pet antics. These screens use heavier-duty materials like vinyl-coated fiberglass or aluminum. Such materials resist scratches and punctures better. When fixing your screens, consider these durable options for home security and pet safety.
        • Enhanced Visibility Screens: Enhanced visibility screens can be a game-changer for those who want clear views. These screens have finer mesh or use clearer materials like acrylic or polycarbonate. They provide a more transparent barrier. This benefits homes with stunning outdoor views or those preferring an open feel.

        Consider your specific needs when choosing window screen repair options. Think about enhancing visibility or protecting against pet damage. Explore available options to find the perfect balance of function and aesthetics.

        Maintaining Your Window Screens

        window screen maintenance

        Well-maintained window screens last longer and work better. Regular cleaning and careful handling extend their life. They’ll keep insects and debris out more effectively.

        Cleaning and Care Tips

        Clean screens with a soft-bristled brush or dry cloth. Avoid touching the mesh to prevent damage. For deeper cleaning, use mild soap and warm water. Clean screens every three months. Do it more often in dusty or bug-prone areas. Remove screens during winter to protect from harsh weather. Store screens in a cool, dry place away from sunlight. Before spring, vacuum both sides to remove dirt. Avoid harsh chemicals or pressure washers when cleaning. Use mild soap, vinegar, or warm water for gentle cleaning. These simple tips will keep your screens working well for years.

        Common Mistakes to Avoid During Repair

        Window screen repair requires careful attention to detail. Improper installation, damage to materials, and wrong techniques can lead to poor results. These mistakes can cause future problems with your screens. Accurate measurement is key for a successful screen repair. Cutting the screen to the wrong size results in a poor fit. This can affect the screen’s function and look. Cleaning the frame before installing a new screen is crucial. Dirt or debris can prevent proper adhesion. This step is often overlooked but essential for a lasting repair.

        • Improper screen material measurement
        • Inadequate frame cleaning before installation
        • Use of inappropriate tools or materials during repair

        Using wrong tools can damage the screen or frame. A sharp knife might tear the screen. Too much tension during installation can warp the frame. To avoid window screen repair mistakes, follow the recommended steps carefully. Use the right tools and materials. Proper measuring, cleaning, and installation ensure a successful repair.

        Benefits of Professional Window Screen Repair

        Professional window screen repair offers many advantages over DIY attempts. Skilled technicians can assess screen conditions, pick suitable materials, and perform precise repairs. Their expertise ensures top-quality work on your screens and frames. Reputable companies often provide warranties on their services. This gives you peace of mind and protects your investment. Choosing professionals can be a smart decision for long-lasting results. Experts have the tools to fix screens in tricky spots. This saves you from potential safety risks and frustration. Their skills make repairing complex screens a breeze. Professional window screen repair can save you money over time. Quick fixes with quality materials extend screen life. This approach beats frequent replacements and proves cost-effective in the long run. Professional screen repair services offer expertise, quality, and convenience. For homeowners, it’s a hassle-free way to maintain durable window screens. These services provide a compelling solution for all your screen needs.

        • Experienced technicians with years of screen repair experience
        • High-quality materials and screen repair warranty
        • Efficient handling of complex or hard-to-reach screens
        • Cost-effective solution for long-term screen maintenance

        Tips for Finding the Best Professionals for Window Screen Repair

        Finding the right professional for window screen repair is crucial. Look for companies with a strong reputation and positive customer reviews. Verify their credentials and ask about material quality and warranties. Compare quotes from multiple providers to ensure a fair price. Consider screen repair service quality, screen repair service reputation, and screen repair service credentials when choosing a provider. Fiberglass screens are lightweight, flexible, and affordable. Aluminum screens are durable and resist rust and tearing. Pet-resistant and allergy-blocking screens are available for specific needs. Take time to find window screen repair professionals who deliver quality work at fair prices. This ensures your windows are protected and your home stays comfortable.

        Find the Best Pros for Your Window Screen Repair with FindPros

        Are you looking for reliable window screen repair professionals to fix your damaged screens or install new ones? Look no further than FindPros. Our simple survey will connect you with top-rated local pros who can provide the best pricing through our competitive bidding process. Whether you need to replace window screen mesh, re-screen a frame, or install a new screen door, FindPros can match you with the right pros for the job. Skip the hassle of searching and get personalized recommendations tailored to your specific needs. Answer a few quick questions, and we’ll handle the rest, helping you find the perfect pros you’ll be happy to work with.

        Conclusion

        Window screens are crucial for home comfort and pest protection. They can get damaged over time. Understanding repair options and screen maintenance helps homeowners keep screens in good shape. Addressing window screen issues quickly is key for window functionality. Various solutions exist, from repair tape to replacement screens. These help fix screen damage effectively. Regular window screen maintenance extends screen life and saves money. Prompt repairs maintain window aesthetics and function. This creates a comfortable and secure home environment.

        FAQs

        What are the different types of window screen materials available for replacement?

        Window screen kits come in a variety of materials, including fiberglass, aluminum, and pet-resistant screens. Fiberglass is a popular option due to its affordability and flexibility, while aluminum is durable and resists rusting.

        How do I measure my window frame to get the right replacement window screen size?

        To get the correct size replacement window screens, measure the entire window frame using a tape measure. Get the width and height measurements to ensure the new screen fits properly in the frame.

        What tools do I need to re-screen my window frames?

        For a DIY window screen re-screening project, you’ll need a new roll of screen mesh, screen spline, a spline roller tool, and a utility knife or scissors to cut the mesh to size. Having a flat, clean work surface is also helpful.

        How can I prevent small insects and bugs from getting into my home through damaged screens?

        Replacing damaged screens with new, tightly-fitted screens is key to keeping small insects and bugs out of your home. Be sure to thoroughly measure and install the new screens to create a secure seal around the frame.

        What’s the hardest part of replacing a window screen?

        The hardest part of window screen replacement is often getting the new screen material properly tensioned and secured within the frame using the spline tool. Taking the time to carefully insert the new spline can create a tight, professional-looking finish.

        Window Installers

        Above Ground Pool Repair Near You

        Can’t find what you are looking for?

        How It Works

        • Answer a few questions about your home project.
        • Within seconds, get matched with top-rated local pros.
        • Compare quotes and choose the best pro for the job.

        Window Installers In Your Area

        Hiring Window Installers: A Step-by-Step Guide

        Window Installers

        Key Takeaways

        • Reputable window installers with positive online reviews are a good choice for customers.
        • Setting a budget for a window installation project helps homeowners focus on feasible options.
        • Thoroughly researching installers’ reputation, experience, customer service, and warranties is crucial.
        • Proper licensing and insurance are essential for professional window installers.
        • Seeking recommendations and reading online reviews can provide valuable insights into an installer’s reliability.

        Determine Your Needs and Budget

        Figuring out your window needs and budget is crucial. This step helps narrow down options for your home. Let’s look at key things to consider.

        Assess Your Window Requirements

        Think about the windows you need for your home. Consider your house size, style, and local climate. Energy-efficient windows can help save on costs.

        Extreme weather may call for specialized windows. For historic homes, choose windows that match the architectural style.

        Set a Realistic Budget

        Research average window installation costs in your area. Prices can range from $450 to $1,400 per window. Vinyl windows cost $300 to $900, while wooden ones range from $700 to $1,800.

        Include labor, permits, and inspection costs in your budget. Set aside 10-15% extra for unexpected expenses during installation.

        By planning your needs and budget, you’ll find the best window company. This approach helps make smart choices and avoid overspending.

        Research Different Window Installers

        It’s time to explore window installers. Focus on finding pros with top-notch work and great customer service. Your search should match your needs and budget.

        Check for Relevant Experience

        Find installers experienced in your desired window type. Look for those who’ve handled projects like yours before. This includes energy-efficient, custom-sized, or unique home style windows.

        Look for Positive Reviews and Ratings

        Read online reviews about the window companies you’re considering. Note comments on their work quality, professionalism, and service. Choose an installer with a solid reputation and many happy customers.

        Check if the companies are certified, licensed, and insured. This ensures they follow industry standards and can protect you from issues.

        Careful research helps you hire a reliable team. They’ll handle your window installation project with skill and care. Your effort will pay off with a smooth and successful installation.

        Check for Licenses and Insurance

        Hiring licensed and insured window installers is essential. Trustworthy window installation companies will readily show their compliance documents. This proves they meet industry standards and regulations.

        Your chosen window installer needs a valid local license. This ensures they follow proper guidelines and codes. They must also have liability and workers’ compensation insurance.

        These insurances protect you from accidents or damages during installation. Always verify these credentials before hiring a window installer.

        • Verify that the window installation company has a valid license to operate in your area.
        • Ensure the window installers carry both liability insurance and workers’ compensation insurance.
        • Obtain copies of the relevant documentation to ensure the window installer is fully licensed and insured.

        Skipping these checks can make you liable for problems during installation. Work with certified installers for a safe, professional window replacement.

        Ask for References

        window installation company

        Seeking recommendations for a window installer from family and friends is invaluable. They can offer honest feedback about experiences and reliability. Online reviews can also provide insights into a company’s reputation.

        Seek Recommendations from Family and Friends

        Talking to trusted people gives a unique view on a window installation company. They can share details about the process and communication skills. This first-hand feedback helps in making an informed decision.

        Review Online Feedback

        Research a window installation company’s online presence. Check reviews on sites like Better Business Bureau, Yelp, or Google. High ratings suggest reliable service, while negative feedback may indicate potential issues.

        Combining insights from personal networks and online reviews helps you understand an installer’s capabilities. This information guides you in choosing the best window installer for your project.

        Evaluate Their Experience and Expertise

        Hiring window installers with extensive experience is vital for replacing your windows. Look for a window installation company with years of successful projects. Their track record should prove their ability to handle your window replacement.

        Skilled window installers have the right training and certifications. They know industry standards and best practices for efficient and safe window installation. Their expertise helps identify and solve potential issues during the installation process.

        • Seek window installers with over three decades of local service experience.
        • Choose a window installation company with many positive reviews from loyal customers.
        • Prefer window installers who work with top window brands like Andersen Corporation.

        Experienced window installers ensure your project meets high standards. They’ll make sure your new windows are energy-efficient and durable. This enhances your home’s overall value and appearance.

        Inquire About the Installation Process

        window installation process

        Understanding the installation process is crucial when hiring a window installation company or window installer. Asking the right questions ensures a smooth experience for homeowners. Here’s what you should ask about:

        1. Installation Timeline: Ask how long the window installation will take. Find out about potential delays due to weather or other factors. This is especially important for multiple windows or patio doors.
        2. Installation Procedure: Request a step-by-step walkthrough of the installation process. Learn about the techniques and materials the window installers will use.
        3. Workspace Protection: Discuss how the crew will protect your home during installation. Ask about drop cloths, protective sheeting, and post-job cleanup procedures.
        4. Permits and Inspections: Inquire about necessary permits or inspections for the window installation. The company should handle any specific municipal regulations.

        These questions will help you understand what to expect during window installation. A good window installation company should provide detailed information readily.

        They should address any concerns you have about the process. This ensures a successful and seamless project for your home.

        Ensure Energy-Efficient Window Installation

        Energy efficiency is crucial when replacing windows. Seek window installers who focus on energy-efficient options. This can lower your energy bills and boost home comfort.

        Proper installation is key to maximizing energy efficiency. Poorly installed windows can increase air infiltration, raising energy costs. This can also lead to mold growth and structural damage.

        Choose a certified window installation company with a proven track record. Look for positive reviews and A+ ratings from the Better Business Bureau. Ensure they use industry-standard installation practices.

        Vinyl and fiberglass are great energy-efficient window materials. Double and triple-pane windows enhance insulation and reduce heat transfer. Casement and awning windows typically provide a tighter seal than other types.

        Seek window installers certified by reputable organizations like AWDI or InstallationMasters™. Ensure they follow manufacturer’s guidelines for installation. Inspect the work for gaps, air leaks, or alignment issues.

        Obtain a Written Contract and Warranty

        A detailed written contract is essential when hiring window installers. Verbal agreements aren’t legally binding, so always insist on a written contract. This document outlines the project’s timeline, costs, and scope.

        Review the Contract Thoroughly

        Carefully read the contract before signing. Make sure all terms and conditions are clear. Ask questions if anything seems confusing or concerning.

        Pay attention to installation and material warranties, labor costs, and any exclusions. These details are crucial for protecting your interests.

        Understand the Warranty Terms

        A written warranty shows that the window installer stands behind their work. Review the warranty’s coverage, duration, and potential exclusions carefully.

        Some window installation companies offer lifetime coverage for leaks, drafts, and various window components. This comprehensive protection can be valuable.

        A detailed contract and warranty protect your window replacement project. They help address any issues that may arise. This step is key in choosing the best window installation company.

        Verify Post-Installation Support

        Quality window installers don’t stop after putting in your windows. Top window installation companies offer ongoing support and help after finishing the job.

        Reliable window installers are ready to tackle any issues with your new windows. They can handle window repairs, window replacement, and help maintain your windows’ energy-efficient features.

        When choosing window installation companies, ask about their after-service support. Look for businesses that provide excellent customer service and solid warranties.

        Great companies also help with window parts and give advice on keeping windows efficient. Some even offer financing options to make your project more affordable.

        Picking a window installer with strong post-installation support ensures long-lasting performance. This can lead to lower energy bills and boost your home’s value over time.

        • Responsive and friendly customer service
        • Guaranteed installation and material warranties
        • Assistance with window parts and window repairs
        • Advice on maintaining the energy efficiency of your new windows
        • Options for financing or cost-saving measures

        Hire the Best for Your Window Replacement with FindPros

        Need to replace your windows but unsure where to start? FindPros can help you find the perfect window installation professionals for your home. Simply answer a few questions about your project, and we’ll match you with top-rated local pros who can provide in-home estimates and material warranties. Ensure a successful window replacement that boosts your home value.

        With FindPros, you get the best pricing when multiple pros compete for your job, and find the pros you’ll get along with best. Get started today and save money on your window remodeling or repairing project in Canada or any location across the country.

        Conclusion

        This guide helps you hire reliable for a successful home window project. Professional companies offer expertise and quality craftsmanship for various window needs. They can replace old windows, boost energy efficiency, and enhance your property’s look.

        Choose a based on experience, licensing, insurance, and customer reviews. Find the best fit for your needs and budget. Keep communication open, review contracts carefully, and use available warranties.

        Frequently Asked Questions (Window Installers)

        Hiring the best window installation companies is crucial when replacing windows because they have the expertise and experience to properly install the new windows. This ensures the windows are energy-efficient, durable, and enhance the overall look of your home. Professional installers can also handle any issues that may arise during or after the installation.
        When choosing a window installer, you should look for companies that are licensed, insured, and have positive reviews from previous customers. It’s also important to check that the installer is certified and experienced in the type of windows you want to install. Additionally, be sure to review the warranty and get a detailed written contract.
        Hiring a professional window installer can save you money in the long run by ensuring the windows are installed correctly. Poorly installed windows can lead to air leaks and higher energy bills. A certified installer will also provide warranties on the installation and materials, which can save you money on future repairs or replacements.
        The main benefit of having a professional install your new windows is that they have the necessary skills and experience to do the job correctly. Attempting to install windows yourself can be costly and lead to problems like broken glass, improper sealing, and poor energy efficiency. Professional installers also have access to high-quality materials and tools that may not be available to DIY homeowners.
        Replacing old, inefficient windows with new, energy-efficient ones can significantly increase the value of your home. Modern windows are designed to be more insulating, which can lower your energy bills and make your home more comfortable. This, combined with the improved aesthetic of the new windows, can be a major selling point for potential buyers and boost your home’s overall value.