Tree Removal Services

Tree Removal Services Near You

Can’t find what you are looking for?

How It Works

  • Answer a few questions about your home project.
  • Within seconds, get matched with top-rated local pros.
  • Compare quotes and choose the best pro for the job.

Tree Removal Services In Your Area

Choosing the Best Tree Removal Services: A Guide

Tree Removal Services

Key Takeaways

  • Certification and accreditation are crucial when selecting a tree removal company.
  • Experienced and insured tree removal professionals provide greater safety and customer satisfaction.
  • Obtaining multiple quotes and reading online reviews can help you find the best value for your money.
  • Proper safety equipment and adherence to local regulations are essential for a successful and compliant tree removal project.
  • Stump grinding and landscape restoration are important considerations after tree removal.

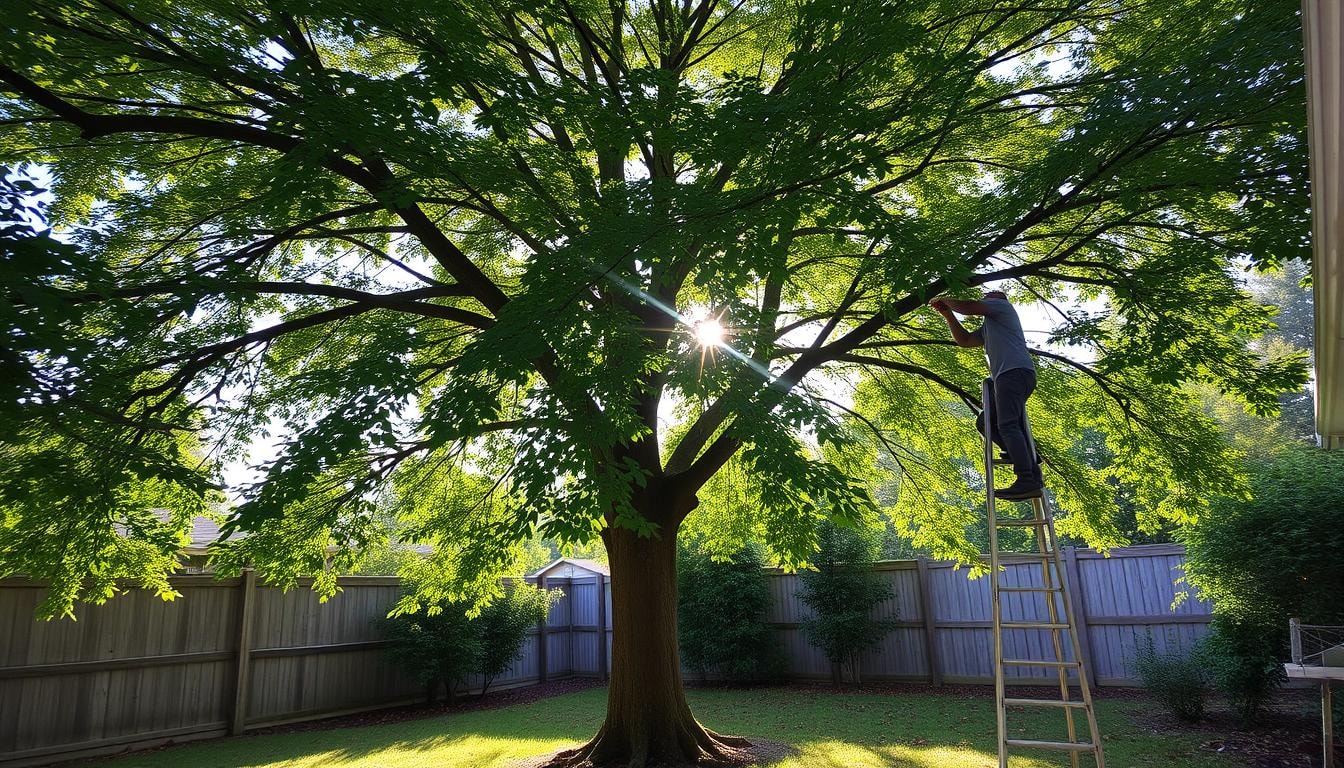
Introduction to Tree Removal Services

Tree removal involves safely extracting a tree from its location. This is often due to poor health, instability, or safety risks. Professional services are crucial when a tree becomes a hazard, is damaged, diseased, or grows in an unwanted location.

What is Tree Removal and Why is it Necessary?

Trees can threaten property and safety due to storm damage, pest infestations, or diseases. These issues can weaken their structure, making removal necessary. Removing hazardous trees enhances safety and preserves the area’s aesthetic value.

It also helps maintain property value by preventing potential damage from falling branches or collapsing trunks.

Benefits of Professional Tree Removal Services

  • Trained professionals with necessary equipment for safe and efficient removal
  • Reduced risk of property damage or personal injury during removal
  • Proper disposal and cleanup of the tree and debris
  • Expertise in identifying tree health or location issues
  • Adherence to local regulations and environmental considerations

Qualified tree removal experts ensure safe and efficient removal of problematic trees. They offer specialized knowledge to maintain landscape health and aesthetic value. Homeowners benefit from their experience in handling complex tree issues.

Assessing the Need for Tree Removal

A professional tree health assessment is vital before deciding on tree removal. This evaluation helps identify signs of decline or damage. It determines if removal is the best option.

Signs of a Dying or Hazardous Tree

Trees may show warning signs that suggest removal is needed. These include:

  • Excessive deadwood or hanging limbs
  • Storm damage, including broken or cracked branches
  • Sudden leaning of the tree
  • Severe pest infestations or disease
  • Signs of decline, such as discolored or sparse foliage

Evaluating the Tree’s Location and Surroundings

The tree’s location and its nearness to power lines and structures must be assessed. Trees risking property damage or interfering with utility lines may need removal. This applies even if they look healthy.

A thorough tree health check helps homeowners decide if removal is necessary. It guides them in taking steps to protect their property. Safety and well-being are key factors in this decision.

Legal and Environmental Considerations

tree removal regulations

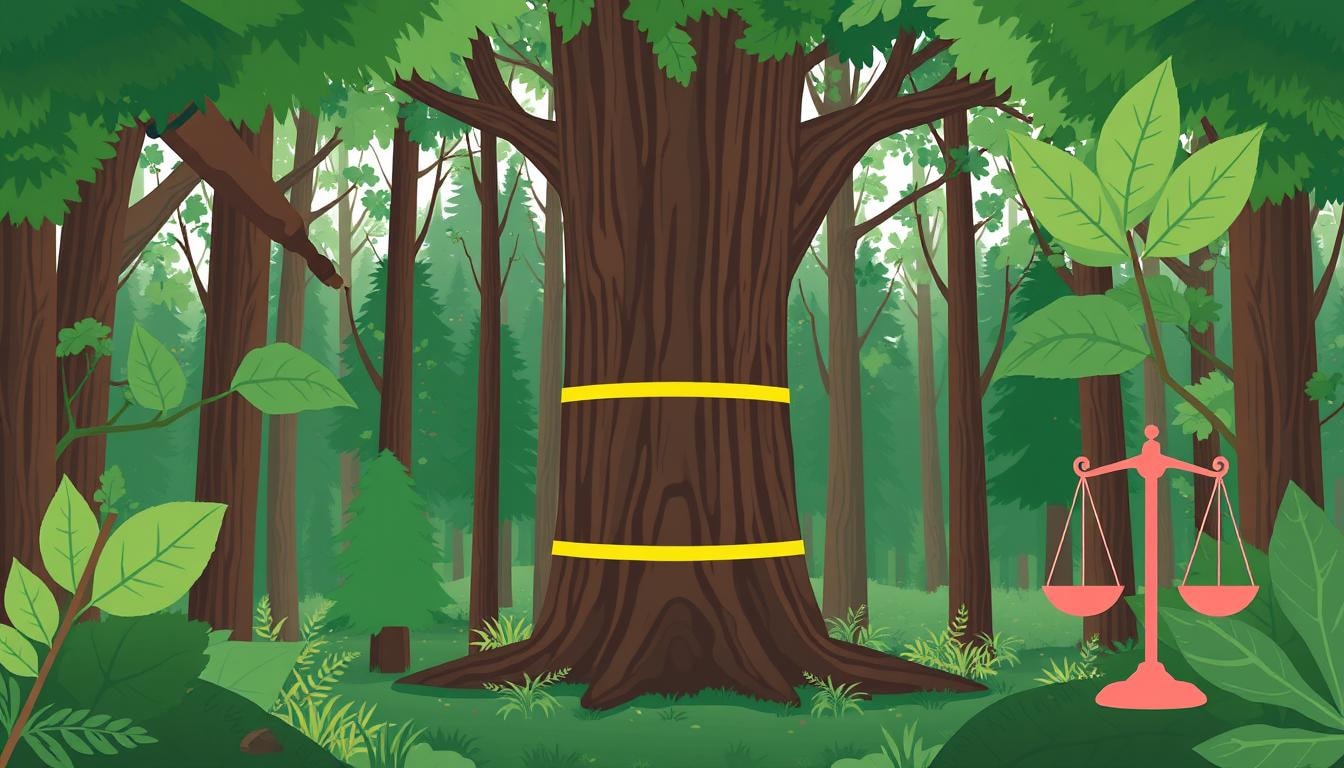
Tree removal planning requires knowledge of legal and environmental factors. Local laws may regulate tree removal, especially for shared or protected trees. Compliance with these tree removal regulations and local ordinances is essential to avoid legal troubles.

Trees offer vital benefits like oxygen production and wildlife habitat. They also provide shade, helping regulate temperatures. An arborist can assess if removal is truly necessary, considering these environmental impacts.

  • Local and state laws may have specific regulations around tree removal, particularly for trees on shared property or in protected areas.
  • Trees provide critical environmental benefits, including oxygen production, wildlife habitat, and temperature regulation through shade.
  • The environmental impact of tree removal must be carefully considered and weighed against the necessity of the removal.
  • A tree health assessment by a certified arborist can help determine the overall value and necessity of tree removal.

Understanding these factors helps make informed decisions about tree removal. Balancing property needs with ecosystem preservation is crucial. Responsible practices involve following regulations and prioritizing environmental stewardship.

Preparing for Tree Removal Services

Before hiring a tree removal company, get a certified arborist to assess the tree’s condition. This arborist assessment helps determine the best approach for tree removal. It also sets proper expectations.

Understanding the removal process is crucial. This includes knowing about equipment, safety protocols, timeline, and potential disruption. Homeowners can prepare better with this knowledge.

Getting a Professional Tree Assessment

A certified arborist’s tree health evaluation is the first step in tree removal preparation. They examine the tree’s condition and identify any issues. The arborist then recommends the best course of action.

This assessment is key for determining the safest and most effective removal process.

Understanding the Removal Process

  • The removal process usually involves cutting the tree down to a low stump. Branches are cut into firewood or removed as requested.
  • Methods vary based on available space and tree size. Options include cutting the tree down whole or removing branches individually.
  • Proper safety equipment and training are vital for the tree removal crew’s smooth operation.
  • The timeline depends on job size and complexity. Potential disruptions to the surrounding area also affect the timeline.

Knowing about the arborist assessment, removal process, equipment, and safety protocols helps homeowners prepare. This knowledge ensures a seamless and well-coordinated tree removal experience.

Choosing the Right Tree Removal Company

Picking the best tree removal company is key for a safe and smooth job. It’s vital to check potential companies carefully. This helps you find a skilled and reliable service provider.

Researching and Vetting Companies

Look for tree removal companies with good reputations and positive reviews. Check if they have certified arborists and proper licenses.

Make sure they have the right insurance coverage. This shows they care about safety and your property.

Asking the Right Questions

  • What safety measures and equipment do you use during tree removal operations?
  • Can you provide references or testimonials from previous clients?
  • How do you determine the pricing for your services, and can you provide a detailed written estimate?
  • Are your employees trained and experienced in tree removal techniques?
  • Do you have the appropriate licenses and insurance coverage, including liability and workers’ compensation?

These questions help gauge a company’s focus on safety and professionalism. They also show how open the company is about its work.

Good research helps you hire a trusted tree removal company. They’ll provide top-notch service while keeping your property safe.

A quality company will also protect the surrounding environment. This ensures a worry-free tree removal experience.

Safety Measures and Equipment

tree removal safety equipment

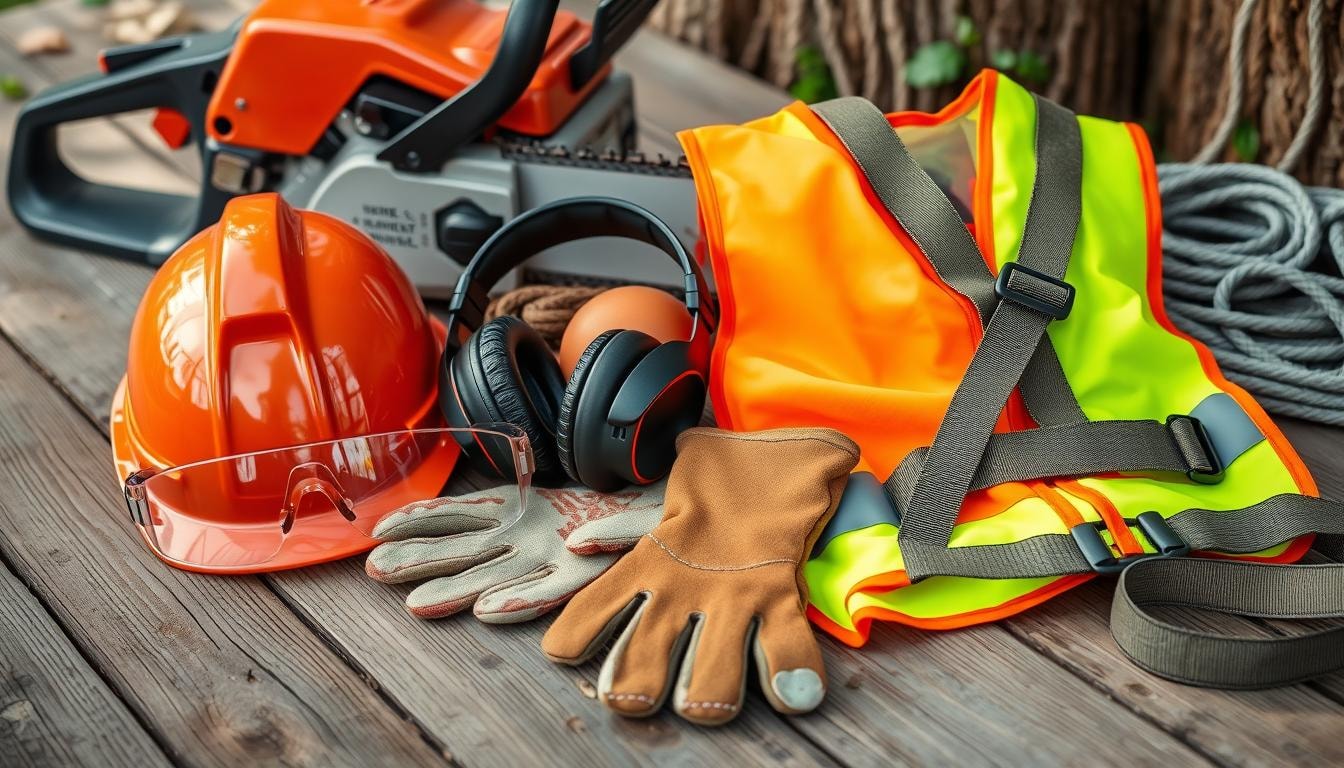
Tree removal is a high-risk job that needs strict safety rules and special tools. Good companies make sure workers wear proper gear and get thorough training. This helps reduce dangers linked to the work.

Importance of Proper Safety Gear and Training

Tree removal can be very dangerous. Workers can die from electric shocks or falling from tall trees. It’s vital that pros wear the right safety gear and get proper training.

This keeps both workers and people nearby safe. Safety gear includes hard hats, sturdy boots, gloves, and climbing equipment. It also includes chainsaw safety items like face shields and leg guards.

Workers should learn proper tree removal methods. They need to spot hazards and know what to do in emergencies. This training helps prevent accidents and injuries.

  • PPE for tree removal may include hard hats, non-slip sturdy boots, gloves, climbing equipment (ropes, belts, safety harnesses, carabiners), and chainsaw safety gear (face shield, hearing protection, goggles/safety glasses, leg protection).
  • Workers should also receive training on proper tree removal techniques, identifying hazards, and emergency procedures to minimize the risk of accidents and injuries.

Essential Equipment for Tree Removal

Tree removal companies need special tools to work safely and well. These tools help them finish the job quickly and safely.

  1. Cranes: For the safe handling and transportation of large, heavy tree sections.
  2. Chippers: To process and dispose of tree branches and debris.
  3. Stump grinders: To remove tree stumps and roots, leaving the area clear for landscape restoration.
  4. Debris removal tools: To collect and transport the remaining wood and foliage from the site.

Good tree removal companies use the right tools and train their workers well. This makes the job safer and more efficient. It also gives clients a better experience.

Stump Removal and Landscape Restoration

Tree removal leaves behind a stump that needs attention. Stump removal or grinding is crucial to prevent issues and enhance curb appeal. It prepares the area for landscape restoration.

Stump Grinding and Removal Options

Choosing between stump removal or grinding depends on various factors. These include stump diameter, tree age, root system, and soil type. Stump grinding is often more economical and produces useful mulch.

Complete stump removal may be necessary in some cases. It eliminates risks of pest infestations, decay, and other hazards.

Restoring Your Yard After Tree Removal

  • Professional replanting services: Experts can install new plants in the area where the tree stump was removed, ensuring proper placement and growth conditions.
  • Comprehensive cleanup: The service provider will handle the general cleanup, leaving the yard clean and free of tree and stump debris.

Professional stump removal services save time and money. They also prevent injuries associated with DIY efforts. Experts have the right equipment to tackle the job safely and efficiently.

Cost Considerations for Tree Removal Services

Tree removal costs can vary greatly based on several factors. Size, type, and location of the tree affect the final price. Professional tree removal services typically range from $400 to $2,000.

The average cost for tree removal is about $1,200. Cedar tree removal may cost $250 to $2,000. Mature maple tree removal can range from $1,100 to $2,000.

Tall trees (50-80 feet) usually cost $900 to $1,200 to remove. Stump grinding adds $300-$400, while debris removal costs $50-$100. Permits may cost $200-$2,000.

Emergency tree removal for fallen or hazardous trees can be pricier, often around $2,500. Neglecting dangerous trees can lead to property damage and decreased home value. Professional tree removal protects your property and maintains its value.

To find the best deal, get quotes from multiple reputable tree removal companies. Compare prices and services included in each quote. This helps you make a smart choice that balances cost and quality.

Find the Best Tree Removal Pros with FindPros

Need crane assisted tree removal or urgent removal of a fallen or diseased tree? FindPros can help you find qualified arborists and tree cutting services in your local area. Just answer a few simple questions about your tree removal project, and we’ll match you with top-rated pros who can provide free consultations and competitive quotes. Compare data rates, get the best pricing when multiple pros compete for your job, and choose the professional that’s the perfect fit. Take the stress out of removing trees safely and efficiently.

Conclusion

Choosing the right tree removal service is vital for safe and efficient landscape management. It’s important to assess removal needs, legal issues, and environmental factors. This approach protects your investment and keeps trees healthy.

Certified arborists and skilled professionals play a crucial role in tree removal. They use specialized equipment and techniques to safely remove trees. This minimizes risks to structures, landscaping, and underground utilities.

These experts offer more than just tree removal services. They can prune, control diseases, and even relocate trees. This helps conserve valuable vegetation on your property.

Hiring a reputable tree service brings many benefits. It’s cost-effective and time-efficient. They handle proper disposal and cleanup too. This investment prevents future problems and protects property value.

Professional tree care maintains an attractive, well-managed landscape. It enhances your home’s overall appeal and aesthetic.

Frequently Asked Questions (Tree Removal Services)

Professional tree service companies have trained and experienced workers, the right equipment like cranes, and adhere to safety protocols. This ensures the tree is removed safely without causing damage to your property or surrounding trees.
The size, type, and location of the tree, as well as factors like stump grinding and debris removal, can all impact the cost of tree removal. Taller, larger trees or those in difficult-to-access areas will generally cost more to remove.
A certified arborist can evaluate the tree’s health and condition, and recommend the best course of action. This helps determine if removal is truly necessary or if other options like pruning or relocation may be more appropriate.
Urgent or emergency tree removal, such as for a fallen or severely damaged tree, will likely come at a higher cost. However, it’s important to act quickly to address any significant risk to your property or safety.
Attempting DIY tree removal, especially for larger or more complicated trees, can be extremely dangerous and lead to property damage or personal injury. It’s best to hire a qualified tree service company, who have the right equipment and expertise to remove trees safely.

Trampoline Assembly

Tree Removal Services Near You

Can’t find what you are looking for?

How It Works

  • Answer a few questions about your home project.
  • Within seconds, get matched with top-rated local pros.
  • Compare quotes and choose the best pro for the job.

Trampoline Assembly In Your Area

Hiring a Trampoline Assembly Expert: Tips and Tricks

Meta Description: Discover expert tips for hiring professional trampoline assembly services. Learn how to ensure safe installation and maximize your outdoor fun with proper Trampoline Assembly.

Trampoline Assembly

Assembling a new trampoline can be challenging, even for experienced DIYers. But don’t worry! A professional trampoline assembly service can make the process easy.

This guide will show you the perks of hiring an expert. You’ll also learn useful tips for a successful trampoline installation.

Key Takeaways

  • Trampoline assembly can take 40 minutes to 6 hours, depending on size and complexity
  • Hiring a professional trampoline assembly service can save time and ensure a safe setup
  • Recommended tools for trampoline assembly include a power drill, spring pulling device, and rubber mallet
  • Proper anchoring and safety checks are crucial for the stability and safety of the trampoline
  • Consulting the manufacturer’s instructions and following safety guidelines is essential

The Importance of Proper Trampoline Assembly

Proper trampoline assembly is vital for safety and longevity. A well-assembled trampoline offers a safe, fun experience. It also prevents damage and costly repairs.

Benefits of Hiring a Professional Trampoline Assembly Service

A professional trampoline assembly service brings expertise and efficiency. They ensure the job is done right the first time. These pros have the tools and know-how to handle the assembly process.

Experts minimize mistakes that could affect safety and stability. They save you time and effort. You can enjoy your new outdoor trampoline sooner.

Professional assembly services work with all trampoline brands. They ensure proper alignment and ground securing. This provides a safe, long-lasting jumping experience for your family.

Assessing Your Trampoline Assembly Needs

Choosing a trampoline requires careful thought about assembly needs. The size and type affect how complex it is to put together. Larger models need more time and effort to assemble than smaller ones.

Some trampolines have special features like safety nets or springless designs. These may need expert help to set up properly. Consider this when picking your trampoline.

Size and Type of Trampoline

Bigger trampolines take longer to assemble due to more parts. They have larger frames and mats that need careful installation. Special features may require extra tools and know-how.

Trampoline Assembly Experience and Skill Level

Your experience with assembling trampolines matters. Skilled builders can do it faster. Beginners might want to hire a professional trampoline assembly service.

Pros ensure safe and proper installation. This is helpful if you’re unsure or lack the right tools. Think about your skills when deciding to DIY or hire help.

Consider size, type, and your skills carefully. This helps you choose between DIY assembly and professional help. Make the best choice for your needs.

Finding a Reliable Trampoline Assembly Service

Research local companies and read customer reviews to find a professional trampoline assembly service. Look for providers with experience in trampoline installation and positive client feedback. Ensure the company is licensed, insured, and follows safety protocols.

Researching Local Companies and Reviews

Explore trampoline assembly services in your area using online directories and search engines. Check websites, service offerings, and customer reviews of potential providers. Pay attention to company credentials, including licenses and industry affiliations.

Look for reviews that highlight the assembly process and quality of trampoline installation. Contact companies directly to ask about their experience and tools and equipment. Inquire about warranties or guarantees on their work.

  • Pay attention to the company’s credentials, including any licenses, certifications, or industry affiliations.
  • Look for reviews that highlight the assembly process, the quality of the trampoline installation, and the overall customer satisfaction.
  • Consider reaching out to the company directly to ask about their experience, the tools and equipment they use, and any warranties or guarantees they offer on their work.

Thorough vetting of potential trampoline assembly providers ensures a smooth installation experience. This diligence will help you enjoy your new outdoor trampoline safely and confidently.

Preparing for the Assembly Process

Trampoline assembly tools

Proper preparation is key to a successful trampoline assembly. Clear the assembly area, ensuring it’s level and obstacle-free. Gather all necessary tools and materials, like a power drill and spring puller.

Check the manufacturer’s instruction manual for specific tools needed for your trampoline model. Organizing everything beforehand will streamline the installation and reduce frustration.

Clearing the Assembly Area

Pick a suitable spot for your new outdoor trampoline. The area should be level with ample space around it. Remove any debris, rocks, or obstacles that could hinder assembly or safety.

Gathering Necessary Tools and Materials

  • Power drill
  • Screwdrivers (both Phillips and flathead)
  • Rubber mallet
  • Spring puller
  • Adjustable wrenches
  • Jump mat
  • Protective pad
  • Enclosure net
  • Trampoline ladder
  • Anchor kit

Review the instruction manual to confirm you have all needed tools and materials. The right equipment will make assembly smoother and more efficient.

Step-by-Step Guide to Trampoline Assembly

Putting together a trampoline takes time and focus. Follow the maker’s instructions closely for a safe setup. Lay out all parts first to make assembly easier.

Common Mistakes to Avoid

Don’t skip steps or leave bolts loose when building your trampoline. This can make it wobbly and unsafe. Check your work at each stage to ensure everything is secure.

Be careful when aligning the jump mat and attaching springs. Take your time and get help with heavy parts. This prevents accidents and ensures correct assembly.

  1. Carefully follow the manufacturer’s step-by-step instructions in the instruction manual or using the BILT App, which provides 3D instructions.
  2. Organize all the trampoline components, including the frame, legs, springs, jump mat, and safety net, for easy access during assembly.
  3. Assemble the trampoline frame, taking care to properly connect the legs and secure the joints with bolts and screws.
  4. Attach the jump mat to the frame, ensuring the springs are properly connected and evenly spaced.
  5. Install the safety net, securing it to the frame using the provided poles and screws.
  6. Double-check all connections and tighten any loose bolts or screws to ensure the trampoline is stable and safe.
  7. Test the trampoline by gently bouncing on it to ensure it is properly assembled and functioning correctly.

Follow these steps to build your trampoline safely. Check all parts are secure and working right. If you’re unsure, hire a pro to do it for you.

Safety Considerations

trampoline safety

Safety is crucial when assembling a trampoline. Follow the manufacturer’s instructions carefully. They guide you through proper installation and safety measures.

Secure all components tightly. Ensure bolts and screws meet recommended specifications. This step is vital for a safe trampoline setup.

Importance of Following Manufacturer’s Instructions

After assembly, do a thorough safety check. Look for loose parts and uneven surfaces. Address any issues that could make the trampoline unsafe.

Only allow using the trampoline once it’s properly installed. Your careful inspection ensures a safe jumping environment.

Safety Checks and Final Inspections

  • Verify that all bolts and screws are tightened securely.
  • Ensure the safety net and protective pads are properly installed and in good condition.
  • Check the jump mat for any tears or wear and tear.
  • Ensure the trampoline is placed on a level, stable surface and has adequate overhead clearance.
  • Double-check the assembly steps to identify and address any potential issues.

Prioritize safety during trampoline assembly. Conduct thorough inspections regularly. These steps ensure safe and fun jumping for everyone.

Maintaining and Caring for Your Trampoline

Regular maintenance is key after proper trampoline assembly. It ensures your trampoline stays safe and lasts longer. Follow the maker’s guide and these steps to keep your trampoline in great shape.

Check your trampoline often for wear, loose parts, or damage. Look closely at the frame, springs, jump mat, and safety net. Fix any issues right away to keep the trampoline assembly safe and strong.

Clean your trampoline as the maker suggests. Use gentle, non-abrasive cleaners. Get a weather cover to shield trampoline components from sun, rain, snow, and wind.

Anchor the trampoline to the ground. This stops it from moving or tipping in windy weather. It’s a simple step that boosts safety and stability.

Stay alert and follow good trampoline maintenance habits. This will help your trampoline last longer. It also keeps jumping fun and safe for everyone.

Cost of Hiring a Trampoline Assembly Expert

The cost of hiring a trampoline assembly expert varies based on several factors. These include the trampoline’s size, complexity, and location. The assembler’s experience and specialized tools also affect the price.

Factors Affecting the Cost of Assembly Services

Trampoline assembly services may charge a flat rate or use hourly pricing. Some base their fees on the trampoline’s size. Compare quotes from multiple providers to get the best value.

LoadUp’s trampoline assembly service costs 20%-30% less than the national average. They offer transparent pricing based on items assembled, not volume.

  • Traditional above-ground, spring-based trampolines cost between $200 and $3,000 or more.
  • Springless above-ground trampolines are priced between $800 and $4,000+.
  • Inground trampolines range from $1,000 to $5,000+.
  • Mini trampolines (rebounders) have a price range of $30 to $500+.
  • Water trampolines are priced between $300 and $3,000+.

Professional trampoline assembly services can be a wise investment. They have the tools and expertise to install your trampoline safely and correctly.

DIY vs. Professional Assembly

Trampoline assembly offers two choices: DIY or hiring professionals. DIY can be rewarding and cost-effective. However, mistakes could affect safety and stability.

Professional trampoline assembly ensures correct installation following safety guidelines. It provides peace of mind and efficiency. Yet, it may cost more upfront.

Your choice depends on experience, time, budget, and trampoline complexity. Consider these factors carefully. This will help you make the best decision for your needs.

A well-thought-out choice ensures safety and longevity. Your new trampoline will be ready for fun and exercise.

Discover FindPros: Your Trampoline Assembly Solution

Assembling a trampoline can be a daunting task, even for the most experienced DIYers. But with FindPros, you can simplify the process and ensure your new trampoline is installed properly. Our platform connects you with top-rated local professionals who can handle the job, whether you have a standard model or a specialized springfree trampoline.

Simply answer a few questions about your project, and we’ll match you with the best pros that fit your needs and budget. No more guessing if you have the right tools or worrying about potential safety issues. Let the experts at FindPros take care of the heavy lifting, so you and your kids can enjoy your new backyard oasis in no time.

Frequently Asked Questions (Trampoline Assembly)

Proper trampoline assembly is crucial for safety. Follow the manufacturer’s instructions closely, double-check all connections, and conduct thorough safety inspections before allowing anyone to use the trampoline. Pay close attention to securing the jumping mat, safety enclosure, and anchoring the frame to the ground.
If the trampoline parts and assembly seem overwhelming, it’s best to hire a professional trampoline assembly service. They have the expertise and tools to properly assemble even the most complex models, like square trampolines or springfree trampolines, ensuring a safe and stable setup.
The time it takes to assemble a trampoline can vary widely, from 40 minutes for a smaller model to up to 6 hours for a larger, more complex one. The final step of properly anchoring the trampoline is essential, no matter the size or brand.
If you notice any damaged or missing trampoline parts during the assembly process, stop immediately and contact the manufacturer. Do not attempt to assemble the trampoline with damaged or incorrect parts, as this could compromise the safety and stability of the final setup.
Properly anchoring the trampoline frame to the ground is crucial to prevent the trampoline from shifting or tipping over in strong winds. Look for an anchor kit recommended by the manufacturer and follow the instructions carefully. This final step will help keep your trampoline stable and safe, even in harsh weather conditions.

Toilet Installers

Tree Removal Services Near You

Can’t find what you are looking for?

How It Works

  • Answer a few questions about your home project.
  • Within seconds, get matched with top-rated local pros.
  • Compare quotes and choose the best pro for the job.

Toilet Installers In Your Area

If your Toilet Installers system is making new noises or the air isn’t the right temperature, then something is wrong. Even smaller signs like more frequent air cycles or dirtier filters are a warning about a developing malfunction. If you notice your air conditioning isn’t working as well as it usually does, find an HVAC contractor in your area who can look it over.

Most HVAC failures develop over time instead of being a sudden malfunction. The sooner a company can send a technician to your home, the more likely they are to catch an overworked motor or low coolant before it damages your system. Local contractors can provide even more services such as:

  • Convenient seasonal tune-ups.
  • Faster response time.
  • Attention during local or sudden weather fluctuations.

Enter your zip code and FindPros will connect you with prescreened HVAC companies in your area.

Tile Roofers

Tree Removal Services Near You

Can’t find what you are looking for?

How It Works

  • Answer a few questions about your home project.
  • Within seconds, get matched with top-rated local pros.
  • Compare quotes and choose the best pro for the job.

Tile Roofers In Your Area

Tile Roofers: Your Guide to Finding the Best Professional

Meta Description: Discover expert tile roofers for your project. Learn how to choose skilled professionals, understand costs, and ensure quality installation for your home’s lasting protection.

Tile Roofers

Thinking about a tile roof for your home? The right tile roofer can greatly impact your roof’s durability and look. This guide will help you choose the best professional for your project.

We’ll explore tile roofing materials, benefits, and why hiring a skilled roofer matters. Learn how to make an informed decision for your home’s new roof.

Key Takeaways

  • Tile roofing costs range from to per square foot for materials alone. It’s pricier than other options.
  • Proper installation and maintenance can extend a tile roof’s life to 50 years or more.
  • Tile roofs offer top-notch durability, fire resistance, and energy efficiency. They’re popular for their classic, long-lasting appeal.
  • Hiring a licensed, experienced tile roofer ensures quality installation and prevents costly future mistakes.
  • Thorough research helps you find the best tile roofer for your project and budget.

Types of Tile Roofing Materials

Tile roofing offers homeowners many options. Clay/terra cotta, concrete/cement, and slate tiles are popular choices. Each type has unique benefits and considerations.

Clay and Terra Cotta Tiles

Clay and terra cotta tiles are timeless and durable. They resist fire and withstand harsh weather, including Florida’s intense sun and rain. Their shapes and colors allow for customized roof designs.

These tiles can boost a property’s curb appeal. They’re a popular choice for homes in extreme climates.

Concrete and Cement Tiles

Concrete and cement tiles are cost-effective and eco-friendly. Made from sustainable materials, they provide excellent insulation. This reduces energy costs and improves home efficiency.

These tiles are highly durable and weather-resistant. They require minimal maintenance, making them practical for homeowners.

Slate Tiles

Slate tiles are prestigious and long-lasting. They’re known for their elegant look and resistance to fire, rot, and pests. However, slate tiles are heavier and more expensive.

They need specialized installation and may require roof reinforcement. Despite this, many consider them worth the investment.

Each tile type offers unique advantages for homeowners. Consider aesthetics, budget, and home needs when choosing. Your decision will impact your home’s look and function for years.

Benefits of Hiring Professional Tile Roofers

Professional tile roofers are vital for a successful and long-lasting roof installation. Their expertise makes a significant difference in your roof’s quality and performance.

  • Expertise in Installation and Repair: Tile roofing experts have thorough training in proper installation and repair techniques. They understand the challenges of working with heavy, delicate tiles. These professionals ensure every tile is correctly aligned, secured, and sealed to prevent leaks.
  • Proper Safety Measures: Tile roof installation can be dangerous. Professional roofers follow strict safety guidelines to protect themselves and your property. They use specialized equipment to minimize accidents and injuries during the process.
  • Quality Workmanship and Materials: Tile roofing experts deliver high-quality work using the best materials available. They carefully choose tiles, flashing, and other components for long-lasting durability. Many offer comprehensive warranties, giving you peace of mind.

Hiring professionals ensures your tile roof is installed correctly, safely, and with great care. This investment can lead to long-term savings. A properly installed tile roof needs minimal maintenance and is less likely to leak.

Tile Roofing Styles and Designs

Tile roofs offer many styles and designs. They complement various home architectures and personal tastes. From classic Spanish to modern Pantile options, tile roofing provides numerous aesthetic choices.

Spanish tile roofs are easily recognized by their curved shapes. These terracotta or clay tiles create a timeless, Mediterranean-inspired look. Mission roof tiles form alternating concave and convex shapes, adding depth to your roof.

Concrete tiles can mimic clay or slate, offering a cheaper, lighter option. Slate tiles are known for their natural beauty and durability. They can last up to 150 years.

Interlocking roof tiles create a strong connection and help with installation. French roof tiles have a low profile and robust interlocking design. They suit various architectural styles.

Choosing a tile roofing style balances looks, function, and budget. Homeowners can find the perfect tile roof to enhance their home’s exterior. The right choice will improve your home’s overall appearance.

Factors Affecting Tile Roofing Costs

Tile roofing costs depend on several key factors. Homeowners should understand these to budget for installation or replacement projects. Knowing these factors helps in planning for a tile roof.

Material Costs

The type of tile material significantly affects the overall cost. Here are common tile materials and their average costs per square foot:

  • Concrete: $2–$4 for materials, $7–$9 for installation
  • Clay: $3–$7 for materials, $8–$22 for installation
  • Terracotta: $5–$10 for materials, $10–$25 for installation
  • Slate: $5–$30 for materials, $10–$45 for installation

Labor Costs

Labor makes up about 60% of the total installation cost. It can range from $5 to $18 per square foot. Alternatively, labor costs can be $45 to $75 per hour.

Roof Size and Complexity

Larger roofs need more tiles and labor, increasing overall costs. Multiple roof planes, number of stories, and roof adornments add complexity. These factors can drive up the project’s cost.

Tile roofing is often pricier than other materials. Costs range from $8,000 to $90,000, with an average of $28,000. Understanding these factors helps homeowners plan their roofing project better.

Finding the Right Tile Roofing Professional

Hiring the right tile roofing pro is key to a successful project. Tile roofs need special skills, so homeowners must carefully check potential roofers. Important factors include licensing, insurance, references, reviews, and tile roofing experience.

Licensing and Insurance

Good tile roofers should be licensed and bonded where they work. This shows they can do roofing work legally and safely. They should also have liability insurance to protect homeowners from accidents or damages.

References and Reviews

  • Ask the tile roofer for references from past clients, and take the time to follow up and inquire about their satisfaction with the work performed.
  • Check online reviews from third-party sources to get a broader understanding of the tile roofer’s reputation and customer service.
  • Look for roofing professionals who have a track record of positive feedback and a commitment to customer satisfaction.

Experience with Tile Roofing

Choose a pro with lots of experience in tile roof installation and repair. Tile roofs are unique and need special methods. Ask about their experience level and completed tile roofing projects.

By checking tile roofing pros carefully, you can find the best partner. This ensures your project meets high standards of quality, safety, and service.

Qualifications and Licensing of Tile Roofers

Tile roofer qualifications

Hiring a qualified and licensed tile roofing professional is essential. Most states have strict licensing requirements for roofing contractors. These ensure tile roofers have the needed expertise and experience.

Education and Experience Requirements

States typically require roofing contractors to have two years of hands-on experience before licensing. The process often includes passing an exam. This test covers roofing practices, building codes, and safety protocols.

State Licensing and Certifications

Licensing requirements for tile roofers differ by state. They usually involve getting a business license and having liability insurance. Being bonded is also common.

Some states have extra certifications. Florida, for example, requires four years of roofing experience. Alternatively, a mix of education and experience can qualify.

Tile roofers can also get industry certifications. The National Roofing Contractors Association (NRCA) offers several options. These include CERTA and OSHA-10 safety training.

Homeowners should check local licensing requirements for tile roofers. This ensures they hire qualified professionals who deliver quality work. It also guarantees adherence to safety standards.

Preparing Your Home for Tile Roof Installation

Installing a tile roof is a big home upgrade. It needs careful planning. Tile roofs are much heavier than asphalt shingles.

Before installation, a pro must check your roof structure. They’ll make sure it can hold the extra weight. Some homes may need roof reinforcement.

A skilled contractor should do any structural work. This ensures your new tile roof will last long. Proper prep is key for a successful installation.

  1. Evaluate the roof structure and identify any areas that require reinforcement or modifications.
  2. Hire a licensed and experienced contractor to assess the home’s roof and recommend necessary structural changes.
  3. Ensure the roof can support the weight of the tile roofing material, which can be several times heavier than traditional asphalt shingles.
  4. Complete any required roof structure repairs or reinforcements before the tile roof installation begins.

Good prep leads to a smooth tile roof install. It helps your new roof work well for years. Tile roofs are tough and save energy.

Tile Roof Maintenance and Repairs

Regular inspections and prompt repairs are key to maintaining tile roofs. Annual roof inspections help spot minor issues early. This prevents costly repairs or replacements down the line.

Regular Inspections: Routine checks can catch problems like cracked tiles and weatherproofing issues early. They also spot algae, mildew, or moss buildup. Clean gutters and downspouts twice yearly and after big storms.

Common Tile Roof Issues: Tile roofs can face problems like broken tiles and frost damage over time. The fastening systems may also decay. Follow manufacturer guidelines for refurbishing tiles.

Use proper cleaning and protection products to maintain the tiles’ look. This will also extend their lifespan. With good care, tile roofs can last for decades or even centuries.

Advantages of Tile Roofing

tile roof advantages

Tile roofing offers exceptional durability and longevity. It can last over a century, outlasting all other residential roofing materials. Concrete tile roofs withstand large hailstones and winds up to 150 mph.

Tile roofs provide superior fire resistance. Clay and concrete tiles have a Class-A fire rating. This makes them safer in areas prone to wildfires.

The thermal mass of tile materials helps regulate indoor temperatures. This advantage of tile roofing can lower heating and cooling costs. As a result, homeowners may see reduced utility bills.

Tile roofing is a valuable long-term investment for homeowners. Its durability, fire resistance, and energy efficiency are clear benefits. With proper installation and maintenance, a tile roof protects your home for decades.

The FindPros Advantage

Looking to install a new concrete tile roof or need help repairing your existing one? FindPros can connect you with the best local professionals for the job. Answer a few simple questions about your project, and we’ll match you with top-rated roofers, builders, and manufacturers in your region. Get personalized quotes, compare options, and choose the pro you feel most comfortable with – all without the hassle of waiting or filling out endless forms. Our network of qualified employees stands ready to provide the knowledge and expertise you need for a successful concrete roof tile installation or repair. Contact our team today to get started.

Conclusion

Tile roofing offers long-lasting protection and beauty for your home. Hiring skilled tile roofers is crucial for proper installation, maintenance, and repairs. Homeowners should weigh roofing materials, styles, and costs to find the best fit.

Understanding tile roofing helps make smart choices for your home and budget. It can boost your property’s value and curb appeal. Tile roofs are durable, energy-efficient, and come in many design options.

Expert roofing professionals provide top-notch tile roofing services. They help homeowners achieve their desired results in home improvement projects.

Tile roofing is a smart choice for upgrading your roof and boosting property value. Working with experienced tile roofers ensures lasting benefits and enhanced home beauty.

Frequently Asked Questions (Tile Roofers)

Broken tiles, weatherproofing problems, and issues with the fastening systems are some common tile roof repair needs. Regular inspections can help catch these problems early.
If the tile roof is very old, has widespread damage, or needs extensive repairs, a tile roof replacement may be the best choice. This ensures long-lasting protection for your home.
Concrete roof tiles are a cost-effective option that provide excellent durability and insulation. They can mimic the classic look of clay or slate tiles at a lower price point.
Homeowners should have a professional inspect the roof structure to ensure it can support the weight of the new tile roof. Any necessary reinforcements or modifications should be completed before the tile roof installation.
Hiring a licensed and experienced tile roofing contractor is crucial. Look for companies with a proven track record, good reviews, and specialized expertise in tile roof installation, repair, and maintenance.

Tile Installers

Tree Removal Services Near You

Can’t find what you are looking for?

How It Works

  • Answer a few questions about your home project.
  • Within seconds, get matched with top-rated local pros.
  • Compare quotes and choose the best pro for the job.

Tile Installers In Your Area

Finding the Best Tile Installers: A Comprehensive Guide

Meta Description: Discover expert tile installers for your project. Learn key factors to consider, questions to ask, and how to ensure quality workmanship for your home renovation.

Tile Installers

Tile installation projects can be thrilling, but finding the right professionals can be challenging. This guide will help you choose the best tile installers. You’ll learn how to make an informed decision for your home renovation needs.

Great tile installation depends on the expertise of the professionals you hire. Are you ready to make the most of your tile investment? Let’s explore how to ensure a stunning, long-lasting result.

Key Takeaways

  • Hiring qualified, certified tile installers is crucial for ensuring the quality and durability of your tile project.
  • Thoroughly researching and vetting potential tile installers can save you from costly mistakes and disappointments.
  • Understanding the different types of tiles and their applications can help you make informed decisions about your project.
  • Preparing for the tile installation process and communicating clearly with your chosen contractor can help the project run smoothly.
  • Proper maintenance and care for your newly installed tiles can extend their lifespan and preserve their visual appeal.

Importance of Hiring Qualified Tile Installers

Hiring qualified tile installers is key for top-notch tile projects. These pros have proven expertise in installation techniques. They often hold certifications like the Certified Tile Installer (CTI).

Impact on Project Quality and Durability

Certified installers know how to prep surfaces and lay tiles correctly. Their attention to detail ensures long-lasting, high-quality results. Proper installation helps tiles withstand daily use over time.

Ensuring Proper Installation Techniques

Qualified installers use the right methods and materials. They understand the importance of surface prep and tile layout. These pros know how to apply grout correctly.

Their skills prevent issues like cracks or loose tiles. They also stop moisture from seeping under tiles. Hiring experts gives homeowners peace of mind about their investment.

How to Find Certified Tile Installers in Your Area

Quality tile installation requires a skilled professional. Several resources can help you find certified tile installers in your area. These experts ensure high-quality, long-lasting results for your project.

Search Tools and Resources

The Ceramic Tile Education Foundation (CTEF) website offers a handy search tool. It uses zip codes to locate CTEF Certified Tile Installers (CTIs) near you.

You can even filter for “Five Star Contractors” on the CTEF site. These are NTCA members with a proven record of successful installations.

Other resources include referrals from friends and online reviews. Industry groups like the National Tile Contractors Association (NTCA) can also help.

Use these tools to make a list of potential installers. Then, interview and evaluate them to find the best fit for your project.

Evaluating Tile Installer Credentials and Experience

tile installers credentials

Choosing the right tile installer is vital for your home project. Evaluate their credentials and experience carefully. This ensures you hire a qualified professional who delivers lasting, high-quality results.

Check if the installer is licensed, insured, and bonded. These credentials show they follow industry standards. Look for certifications like the Certified Tile Installer (CTI) from the Ceramic Tile Education Foundation.

Review the installer’s portfolio and contact their references. This provides insights into their work quality and professionalism. Hiring a tile installer with a proven track record ensures your project meets industry standards.

In 2021, flooring installers and tile setters held about 115,100 jobs. Tile and stone setters accounted for 56,700 of those positions. Specialty trade contractors employed 50% of these professionals, while 27% were self-employed.

Look for installers with advanced certifications like the Advanced Certifications for Tile Installers (ACT) program. This program tests expertise in areas such as grouts and large format tile. It’s supported by leading industry organizations.

Interviewing and Checking References

Hiring tile installers requires more than just reviewing credentials. Interviews and reference checks offer insights into professionalism and communication skills. These steps help assess an installer’s approach to customer satisfaction.

Asking the Right Questions

Homeowners should ask targeted questions during interviews. These help evaluate qualifications and project approach. Questions about experience, licensing, and problem-solving are crucial.

Key questions for tile installers include:

  • How long have you been in the tile installation business?
  • Can you provide details on your training and certifications?
  • What is your typical approach to managing a tile installation project?
  • How do you communicate with customers throughout the process?
  • How do you handle any unexpected challenges that may arise?
  • Can you provide a timeline for the completion of this project?

These questions reveal the installer’s professionalism and work quality. They also show commitment to customer satisfaction. This information helps homeowners make informed decisions.

Checking references is vital in the hiring process. It provides insights into work quality and communication skills. References offer a glimpse into overall customer satisfaction.

Key questions for references include:

  1. How easy was the installer to communicate with throughout the project?
  2. Were you satisfied with the quality of the finished work?
  3. Was the project completed on time and within the agreed-upon budget?
  4. Would you hire this installer again for a future project?

Thorough vetting helps homeowners make smart choices. It ensures hiring a pro who delivers results. A good installer maintains clear communication throughout the project.

Red Flags and Warning Signs

When choosing a tile installer, watch for red flags. These include lack of proper licensing, insurance, or certifications. Unresolved customer complaints or poor workmanship are also concerning.

Be wary of installers reluctant to provide references. Vague communication about project timelines and scope is another warning sign. Failure to obtain permits or follow building codes should raise alarms.

Recognizing these issues helps homeowners avoid subpar work. It prevents unexpected complications and ensures adherence to industry standards. This leads to a successful, stress-free tile installation project.

  • Only 2% of tile installers meet the criteria of having at least two years of experience as a lead installer setting ceramic tiles on a full-time basis.
  • 89% of dissatisfied customers leave negative reviews specifically targeting consistent issues in tile installations.
  • 74% of qualified and competent tile installers readily provide references to their past projects for verification.

Homeowners now seek Certified Tile Installers (CTIs) more often. This trend shows a 4% increase in demand. Look for certified installers who showcase professionalism and communication skills.

Preparing for the Tile Installation Project

tile installation project

Homeowners must understand project requirements and potential challenges before starting tile installation. They should assess the space’s structural integrity and address existing issues like asbestos or lead paint.

Consider how new tile will transition to adjacent flooring. Plan for downtime during installation. Obtain necessary permits to comply with local building codes and regulations.

Understanding Project Requirements

Proper preparation is key to successful tile installation. Evaluate the existing subfloor, addressing dips, cracks, or uneven spots. Mix tiles from different boxes to avoid color discrepancies.

Obtaining Necessary Permits

Securing permits is crucial for the preparation process. Confirm that subcontractors are properly licensed and insured. This ensures compliance with local building codes and protects your investment.

Types of Tiles and Their Applications

Homeowners should consider various tile characteristics when renovating. Ceramic and porcelain tiles are popular and cost-effective. They offer durability, water resistance, and slip resistance for many uses.

Natural stone tiles like granite, slate, and marble provide a unique, high-end look. However, they may need extra care to prevent damage. Glass and metal tiles create appealing designs but cost more.

The PEI rating and slip resistance are key factors to consider. They help choose the right tile for specific projects and expected foot traffic.

Tile Types and Characteristics

  • Ceramic tiles: A versatile and popular choice, ideal for any room in the house, including bathrooms, kitchens, and entryways.
  • Porcelain tiles: More durable and expensive than ceramic tiles, offering a wide variety of colors and patterns.
  • Glass tiles: Highly stain-resistant but prone to chipping and cracking, best suited for wall applications.
  • Marble tiles: Elegant and bold, but considered one of the more expensive natural stone options, requiring additional maintenance.
  • Granite tiles: Less prone to chipping and cracking than marble, waterproof, and commonly used in countertops and flooring.
  • Other natural stone tiles: Slate, limestone, travertine, and sandstone offer unique textures and appearances for various applications.

Knowing tile properties helps homeowners choose the best fit. They can make smart decisions for their residential or commercial projects.

Tile Installation Cost Factors

Tile installation costs can range from $10 to $50 per square foot. Total project costs typically fall between $1,000 and $10,000. The main factors affecting cost are project size, tile quality, and installation complexity.

Material Costs

Tile materials make up a large part of the overall budget. Tile size, type, and special features impact material costs. Basic ceramic tiles cost around $2 per square foot.

High-end porcelain or natural stone tiles can cost $10 to $40 per square foot. Decorative borders and mosaics may increase costs further.

Labor Costs

Labor costs for tile installation typically range from $4 to $14 per square foot. Factors include installer experience, project complexity, and any subcontractor work needed.

A simple bathroom floor tile job costs less than a complex kitchen backsplash. Shower enclosures requiring waterproofing and special techniques also cost more.

The total cost of a tile project varies based on specific requirements. Understanding these factors helps homeowners budget and make informed decisions.

Written Agreements and Contracts

A clear, written agreement is crucial when hiring a qualified tile installer. This document outlines project details and sets expectations for all parties involved. It ensures everyone is on the same page throughout the installation process.

Importance of Clear Communication

The agreement should cover tile selections, design options, and necessary mockups. It should also include payment schedules, timelines, and allowances for changes. Clear communication between homeowner and installer is vital to avoid misunderstandings.

A detailed contract gives homeowners confidence in their tile vision. It provides a framework for addressing issues that may arise during the project. This ensures quality craftsmanship and successful execution of the installation.

  • Advance payment requirement: 25% on start date, balance upon completion
  • Size of the job: 720 sq.ft. (small entrance landing, 2 stairs, living room, dining room, kitchen)
  • Type of tile: 13×13 glazed porcelain set diagonally on Ditra with a rectangular border around the island
  • Additional details: Schluter Dilex expansion joint in a doorway, Schluter Schiene profiles, Schluter Trep stainless steel stair tread profiles, mudded stairs and landing, grout sealed with impregnator

The agreement should address potential payment discrepancies and mention mechanic’s lien for enforcement. It should include termination terms, early payment discounts, and responsibilities of all parties involved.

Maintaining and Caring for Tile Installations

Proper maintenance is key to keeping tile installations looking great. Regular care ensures long-lasting durability and appearance. Homeowners may need to seal grout and tiles periodically.

Porcelain and ceramic tiles need less upkeep than natural stone. Natural stone can stain or scratch more easily. Follow manufacturer’s advice for best results.

By using industry best practices, homeowners can keep tiles in top shape. This ensures tiles provide value and enjoyment for years to come.

Tile Cleaning and Maintenance Tips

  • Routine cleaning of glazed tile products should be done with low VOC cleaners compatible with grout joints.
  • Regular dust mopping, sweeping, or vacuuming is recommended prior to cleaning with liquid products for tile maintenance.
  • Unglazed tile should be cleaned with concentrated tile cleaners with neutral pH for safe regular use.
  • Grout darkens over time and should be sealed regularly to preserve and protect it.
  • An annual reapplication of grout sealer may be needed depending on sealer quality, traffic patterns, and maintenance routine.

Grout Maintenance and Sealing

  1. Coverage using brown paper after installation helps protect the grout during the remaining construction process.
  2. Routine grout cleaning can be done with a concentrated household or commercial cleaner depending on the application.
  3. Grout stains are epoxy-based products designed to penetrate and seal the grout with a permanent color when needed.
  4. The grout should be sealed with a penetrating/impregnating sealer to prevent staining after installation and can be sealed 72 hours post-installation.

Clean regularly and wipe spills quickly to prevent staining and dirt build-up. Use the right cleaning products for your tile and grout types. This will help maintain your tile’s beauty for years.

FindPros: The Effortless Way to Find Top Tile Installers

Are you planning to install tile, laminate, or need a replacement? FindPros can help you find the best local professionals for the job. With our service, you can get the most competitive pricing by allowing multiple pros to compete for your project. We’ll match you with skilled installers who have the expertise, knowledge, and pride in their work to ensure a mess-free, excellent result.

Simply answer a few questions about your home project, and within seconds, we’ll provide you with top-rated local pros that fit your style and pricing needs. Choose the one you click with best, and watch your vision come to life without the hassle. Let FindPros be your mission to prove you can find the right pro to continue your home improvement project with ease.

Conclusion

This guide helps homeowners find top tile installers for renovations. It covers the importance of skilled labor and tools for identifying certified professionals. The guide also explains how to evaluate credentials and prepare for installation.

We’ve discussed various tile types, cost factors, and written agreements. We’ve also provided maintenance tips to help you make smart choices. Following these steps will help you find the right tile installer for your project.

This guide equips you with tools for a successful tile installation project. Hiring a skilled tile installer ensures a quality, lasting result. Your investment will lead to a beautiful, durable tile installation you’ll love for years.

Frequently Asked Questions (Tile Installers)

The key factors to consider when installing tile are hiring qualified and certified tile installers, understanding the different types of tiles and their applications, preparing the area properly, and ensuring clear communication with the installer throughout the project.
You can find the best ceramic tile installers in your area by searching online resources like the Ceramic Tile Education Foundation (CTEF) website, asking for referrals from friends and industry groups, and thoroughly vetting potential installers through interviews and reference checks.
Hiring a skilled tile installer is crucial for a kitchen remodel because they have the knowledge, ability, and expertise to ensure quality work. They can properly prepare the surface, install the tiles, and use the right materials to create a durable and visually appealing result that will last for years.
To ensure the tile installer will do an amazing job on your floors, make sure they are certified, have a proven track record of quality work, and are willing to provide a detailed written agreement that outlines the project scope, timeline, and expected outcome. This will help set the right expectations and hold the installer accountable for the final result.
If you need to repair or replace tile on your walls, it’s best to hire a skilled tile installer who has the knowledge and ability to remove the old tile, prepare the surface, and install the new tile in a way that seamlessly integrates with the existing walls. This will ensure a professional-looking result and prevent any future issues.

Tile Floor Cleaners

Tree Removal Services Near You

Can’t find what you are looking for?

How It Works

  • Answer a few questions about your home project.
  • Within seconds, get matched with top-rated local pros.
  • Compare quotes and choose the best pro for the job.

Tile Floor Cleaners In Your Area

Factors to Consider When Hiring Tile Floor Cleaners

Meta Description: Discover key factors to consider when hiring Tile Floor Cleaners. Ensure pristine floors with expert services tailored to your needs and budget. Make an informed choice today.

Tile Floor Cleaners

Choosing the right professional cleaner is crucial for maintaining beautiful tile floors. Several factors can impact the final results of tile floor cleaning.

These include the equipment used and the cleaning solutions employed. Let’s explore how to select the best tile floor cleaners for your needs.

Key Takeaways

  • Evaluate the type, age, and condition of the cleaning equipment used by the tile floor cleaner.
  • Ensure the tile cleaner is properly licensed, insured, and bonded to protect your home.
  • Understand the specific cleaning methods and solutions required for your tile floor type.
  • Consider the cleaner’s experience and customer reviews to gauge their expertise.
  • Prioritize clear communication and prompt responsiveness when selecting a tile floor cleaning service.

Tile Floor Cleaners: Importance of Quality Equipment

The equipment used by tile floor cleaners greatly impacts their work quality. Newer truck-mounted systems offer superior cleaning power and stronger suction. These advanced systems can effectively clean tough tile floors and natural stone tiles.

They deliver deeper, cleaner results compared to older or portable systems. Hot water and strong suction are key features of these systems.

Type of Cleaning Equipment

Ask about the specific cleaning equipment the contractor uses. Look for cleaners with high-quality, well-maintained machines for deep cleaning tile floors. Choose cleaners who use microfiber pads and pH-neutral solutions.

These tools ensure spotless floors without any residue. They effectively extract dirt, grime, and sticky residue.

Age and Condition of Equipment

The age and condition of cleaning equipment are crucial factors. Older or poorly maintained machines may not clean as effectively. They might leave behind dirt, dust, and debris.

Ask about the equipment’s age and maintenance schedule. Regular upgrades are important for optimal performance.

Truck-Mounted vs. Portable Systems

Truck-mounted systems are often better than portable ones for cleaning. They provide hotter water, stronger suction, and more powerful cleaning solutions. This results in a more thorough tile floor cleaning experience.

Portable systems may work better for smaller jobs or tight spaces. Consider the job size when choosing between these options.

Licensing, Insurance, and Bonding

Checking tile floor cleaners’ licensing, insurance, and bonding is vital. It protects homeowners and shows the cleaner’s professionalism. Always ask for proof of these credentials before hiring.

Verify that cleaners have proper licenses for your area. This proves they follow local rules. Ask to see their business license or permit.

The cleaning company should have full insurance coverage. This includes liability insurance and workers’ compensation. Request a copy of their policy to review details.

Hire cleaners who are bonded for extra protection. Bonding guarantees contract fulfillment and covers reimbursement if problems occur. It’s a small cost for peace of mind.

These checks ensure you’re working with a trustworthy cleaner. They help protect your home and ensure the job gets done right.

Understanding Your Tile Floor Type

Tile floor types

Knowing your tile floor type is key to proper maintenance. Different materials need specific cleaning methods and products. Identifying your tile type helps choose the right cleaners and techniques.

Different Types of Tile Floors

The most common types of tile floors include:

  • Ceramic and Porcelain Tiles – These tiles are known for their durability and moisture resistance, making them a popular choice for high-traffic areas like kitchens and bathrooms.
  • Natural Stone Tiles – Options such as marble, granite, slate, and travertine require special care and cleaning methods to maintain their natural beauty and prevent damage.
  • Laminate Tiles – These tiles mimic the look of natural materials but have different cleaning needs compared to their stone or ceramic counterparts.

Cleaning Methods for Various Tile Surfaces

Each tile material requires a specific cleaning approach. Ceramic and porcelain tiles often need only mild detergent and water. Natural stone tiles need pH-neutral cleaners to avoid damage.

Vinyl tile flooring should be cleaned with vinyl-specific solutions or water and vinegar. Avoid using abrasive cleaners on vinyl tiles.

Knowing your tile’s care needs is crucial for maintaining its appearance. Using the right cleaners and techniques will keep your floors looking great.

Cleaning Solutions and Chemicals Used

tile floor cleaner

The cleaning products used by professionals can greatly impact the final results of tile floor cleaning. It’s crucial to ask about the specific products tile floor cleaners use. No-residue and eco-friendly options are preferable for thorough cleaning.

No-Residue Products

Tile floor cleaners should use no-residue products. These solutions leave no sticky or soapy buildup behind. This is vital for natural stone tiles to prevent a dull, hazy appearance.

Environmentally Friendly Options

Ask about eco-friendly cleaning solutions that use plant-derived ingredients and sustainable formulas. These cleaners provide thorough cleaning while promoting a healthier home environment. They’re especially beneficial for homes with pets or young children.

Choosing the right cleaning solutions ensures your floors are treated with care. This results in sparkling, well-protected surfaces that will last for years. Your tile floors will look fresh and free of lingering chemical odors.

Pricing and Cost Considerations

The cost of tile floor cleaning varies based on several factors. These include area size, tile type, and cleaning level needed. The tile floor cleaner’s expertise also affects pricing.

Industry data shows floor cleaning prices range from $0.10 to $3 per square foot. Hardwood floor cleaning typically costs $0.20 to $0.75 per square foot. Natural stone cleaning can cost $1.20 to $3.00 per square foot.

Tile and grout cleaning averages $1.25 to $1.95 per square foot. A full job costs about $450 on average. Some cleaners charge a minimum fee of $90 to $160.

Some services may require a deposit before starting work. Tile and grout cleaning can total $250 to $750 on average. Specialized services might charge $150 to $500 for steam cleaning.

Consider more than just price when choosing a tile floor cleaner. Evaluate their work quality, experience, and customer service too. This ensures you’ll be happy with the results.

Experience and Reputation of the Cleaners

Choosing tile floor cleaners requires careful thought about their experience and reputation. Look at their years in business and customer reviews. Experienced cleaners can tackle various cleaning challenges effectively.

Years in Business

Pick tile floor cleaning companies that have been around for a while. Established businesses often have better cleaning methods and equipment. Their longevity shows they care about customer satisfaction.

Customer Reviews and Testimonials

  • Find tile floor cleaners with lots of positive reviews and testimonials. Past clients can tell you about their work quality and professionalism.
  • Notice how the company handles negative feedback. This shows how they deal with problems and try to improve.
  • Look for cleaners trusted by groups like the IICRC or BBB. These endorsements add to their credibility.

Weighing the experience and reputation of tile floor cleaners helps you choose wisely. You’ll find pros who can make your tile floors look amazing.

Communication and Customer Service

Great tile floor cleaners prioritize responsive and transparent communication. They promptly return calls or messages, even when on a job site. These professionals keep clients informed throughout the cleaning process.

Top tile floor cleaners answer questions and address concerns readily. This ensures clients feel confident and satisfied with the work being done.

  • Choose a tile floor cleaner with excellent customer service, backed by positive reviews.
  • Ensure the company communicates clearly and keeps you informed throughout the process.
  • Pick a tile floor cleaner who addresses your specific needs, avoiding a one-size-fits-all approach.

Selecting a tile floor cleaning company that values communication makes a big difference. It ensures your tile floors will be cleaned perfectly with utmost care.

Tile Floor Cleaners’ Specialization and Expertise

The company ensures high cleaning standards in every facility they service. They use top-notch equipment and leverage their extensive industry experience. This guarantees cleanliness that surpasses industry standards.

Look for a provider with a proven track record in cleaning various tile types. The right expertise can restore brilliance to your tile floors. It also protects the underlying material from damage or discoloration.

Discover FindPros: The Easiest Way to Find Top-Rated Tile Floor Cleaners

Are you looking for reliable tile floor cleaners who use the right equipment and cleaning solutions like microfiber pads and pH neutral formulas? FindPros can help. Simply answer a few questions about your home project, and we’ll match you with top-rated local pros in minutes. Compare quotes, read reviews, and select the cleaner you feel most comfortable with – all without the hassle.

Whether you need deep cleaning for tough stains or just a routine maintenance service, FindPros connects you with skilled professionals who use the right techniques, from microfiber cloths to extra elbow grease. No more guessing which cleaner uses the right solutions or worries about lingering odors or scratches. Let FindPros handle the heavy lifting and find the perfect tile floor cleaning expert for your home.

Frequently Asked Questions (Tile Floor Cleaners)

The best tile floor cleaners should use microfiber cleaning pads. These specialized pads effectively grab and lift dirt, grime, and residue from the floor surfaces.
Tile floor cleaners should use pH neutral formulas that are gentle yet effective. Solutions with a Dawn dish soap base or other concentrated formulas can properly clean tile without leaving behind residue.
Homeowners should look for tile floor cleaners who are willing to put in a little extra elbow grease. Using microfiber cloths and scrubbing with a spray mop can help tackle various stains like tomato paste or red crayon.
The price scale for tile floor cleaning can range based on the size of the area, type of tile, and level of cleaning required. Specialized services like steam cleaning or dealing with tough stains may cost more.
Reputable tile floor cleaners should be willing to perform four tests – a spray test, a wipe test, a rinsing test, and a drying test. This demonstrates their cleaning process and ensures the floors are left completely dry and free of any residue or odors.

Thermostat Installation

Tree Removal Services Near You

Can’t find what you are looking for?

How It Works

  • Answer a few questions about your home project.
  • Within seconds, get matched with top-rated local pros.
  • Compare quotes and choose the best pro for the job.

Thermostat Installation In Your Area

Thermostat Installation: Find the Right Pro for Your Home

Meta Description: Upgrade your home’s comfort with expert thermostat installation. Find the right professional to ensure optimal performance and energy savings for your heating and cooling system.

Thermostat Installation

Upgrading your home’s thermostat can boost energy efficiency and comfort. Smart thermostats are becoming popular due to their advanced features. Proper installation is key to getting the best performance from your new thermostat.

This guide will help you find the ideal thermostat installer. We’ll cover the importance of professional installation and choosing the right thermostat. You’ll learn how to make a smart choice for your home.

Key Takeaways

  • Proper thermostat installation is essential for optimal performance and energy savings.
  • Upgrading to a smart thermostat can offer advanced features and remote control capabilities.
  • Finding the right HVAC professional is crucial to ensure a successful thermostat installation.
  • Attention to system compatibility and wiring requirements is necessary for a smooth installation process.
  • Professional installation can provide expert knowledge, safety, and peace of mind.

The Importance of Proper Thermostat Installation

A well-installed thermostat helps regulate your home’s temperature accurately. This leads to reduced energy use and lower utility bills. Proper installation is key to achieving energy efficiency and cost savings.

Energy Efficiency and Cost Savings

Correctly installed thermostats monitor and control temperature precisely. This minimizes energy waste, resulting in significant savings on energy bills. It ensures your HVAC system runs at peak efficiency, maximizing your investment’s return.

Comfort and Convenience

A properly installed thermostat enhances home comfort and convenience. It creates a consistent living environment, maintaining your ideal temperature. This level of control improves your overall living experience.

  1. Professional electricians consider the thermostat as the central component of HVAC systems, emphasizing secure electrical connections for reliable operation.
  2. CrewPros employs licensed electricians with specialized knowledge to handle thermostat and electrical installations efficiently, anticipating and resolving potential issues during the process.
  3. Compatibility is a crucial factor for smart thermostat installation, with most smart thermostats being suitable only for low-voltage HVAC systems.

Proper thermostat installation is crucial for energy efficiency and home comfort. Working with a professional HVAC expert ensures correct installation. This optimizes your heating and cooling system’s performance.

Types of Thermostats

Homeowners have many thermostat options to choose from. Each type has unique features for your home’s heating and cooling needs. Let’s explore the different thermostats available.

Non-Programmable Thermostats

Non-programmable thermostats offer basic temperature control. You set the desired temperature manually. These units are affordable but lack energy-saving features.

Programmable Thermostats

Programmable thermostats allow you to set temperature schedules. They adjust automatically at different times. This helps save energy costs by running your HVAC system more efficiently.

These thermostats come in weekly, 5-2, and 5-1-1 configurations. You can choose the best option for your needs.

Smart Thermostats

Smart thermostats are the latest in temperature control technology. They offer programmable features and integrate with smart home systems. These units learn your habits and adjust temperatures accordingly.

You can control smart thermostats remotely through mobile apps. They may cost more initially but can save energy over time.

Consider your home’s needs when choosing a thermostat. Think about the level of control and automation you want. Understanding thermostat types helps you make an informed decision.

Choosing the Right Thermostat for Your Home

Thermostat

Your home’s thermostat is key to comfort and efficiency. It controls your heating and cooling system. Choose one based on your HVAC type, home size, and desired control level.

Thermostat technology varies widely. Non-programmable ones offer basic control. Programmable models allow scheduled temperature adjustments. Smart thermostats provide remote access and energy tracking.

  • Non-programmable thermostats have a temperature differential of up to 3°F, which can impact energy efficiency and comfort.
  • Programmable thermostats can save you up to $180 per year on your energy bills, according to Energy.gov.
  • Smart thermostats, while more expensive, offer the best comfort features and can save you around 8% on your heating and cooling costs, translating to an average yearly saving of $50.

Ensure your chosen thermostat works with your home’s system. Most thermostats suit low-voltage systems, which are common. Consult an HVAC pro for the right choice and proper installation.

Pick a thermostat that keeps your home cozy. It should also cut energy bills. A good choice boosts your heating and cooling system’s efficiency.

Preparing for Thermostat Installation

Start by identifying your home’s heating and cooling system details. Know your system type, wiring setup, and new thermostat requirements. This prep work ensures a smooth installation process.

Identifying Your Heating and Cooling System

Learn about your home’s heating and cooling system. Thermostat wires follow a color code: white (W) for heating, yellow (Y) for AC, green (G) for fan.

Red (Rc or Rh) is the power source, blue (C) is common, and orange (O) is for heat pumps. This knowledge helps ensure a successful installation.

Gathering Necessary Tools and Materials

  • Screwdriver
  • Wire strippers
  • The appropriate thermostat for your system
  • Cable staples
  • Cordless drill/driver
  • Hollow-wall anchors
  • Wire labeling system

Collect these tools and materials before starting the installation. This preparation will make the process smoother and more efficient. Always prioritize safety when working with electrical systems.

Benefits of Professional Thermostat Installation

Installing a new thermostat? Hire a pro HVAC technician. They have the expert knowledge and experience to do it right. They can wire it properly and handle any challenges.

  • Expert Knowledge and Experience: Pro HVAC techs know the ins and outs of thermostat installation. They can pick the perfect model for your system. Their training helps them overcome any hurdles during setup.
  • Safety and Proper Wiring: Safety is key when installing a thermostat. Pros follow strict protocols to prevent electrical hazards. They ensure correct wiring to protect your heating and cooling system.

Choosing a pro installer brings many perks. You’ll get expert knowledge and proper wiring. Your new thermostat will work seamlessly with your home’s climate control.

This smart choice can boost energy efficiency. It can also improve comfort and save you money long-term.

Finding a Reputable HVAC Professional

HVAC professional

Choosing the right HVAC professional for your new thermostat installation is crucial. Ask friends and family for recommendations. Check online ratings and customer feedback for insights into service quality.

Referrals and Reviews

Your personal network can offer valuable HVAC company insights. Ask about their experiences with local providers. Online reviews can help evaluate potential HVAC professionals’ reputations.

Look for companies with positive ratings and satisfied customer testimonials. These can indicate reliable service and quality workmanship.

Licensing and Certifications

Verify that your chosen HVAC professional is licensed and certified. In the US, HVAC contractors must meet specific requirements to operate legally.

Prioritizing referrals, reviews, and proper licensing helps find a trustworthy HVAC professional. This ensures smooth thermostat installation and optimal home climate control performance.

Working with a Professional Thermostat Installer

Teaming up with a skilled HVAC pro can make thermostat installation a breeze. These experts have the know-how and tools to meet your needs. Their experience ensures a smooth process tailored to your preferences.

Communication and Expectations

Clear communication with your thermostat installer is key. Share your goals, concerns, and specific requirements. This helps the installer understand your expectations and adjust their approach.

Set realistic expectations for the project timeline and installation method. Discuss potential challenges that may come up. This upfront alignment helps avoid surprises during the installation.

  • Discuss your preferred thermostat features and functionalities
  • Communicate any concerns or special considerations regarding your HVAC system
  • Agree on a reasonable timeline for the installation process
  • Establish a clear understanding of the installer’s approach and any potential issues they foresee

Working with a thermostat installer and maintaining open communication and expectations ensures success. Your installer will tailor the process to your home’s unique needs. This teamwork leads to a seamless installation.

Post-Installation Considerations

After installing your new thermostat, keep a few important factors in mind. Work with your HVAC pro to program and set up the thermostat. This ensures it matches your temperature preferences and schedules.

Understanding maintenance needs and troubleshooting steps will help maintain optimal performance. Your HVAC expert can guide you through these processes.

Programming and Setup

Proper programming boosts energy efficiency and comfort in your home. Your HVAC tech can help configure settings like temperature preferences and scheduling. Learn to use your thermostat’s manual and controls for future adjustments.

Maintenance and Troubleshooting

  • Regularly clean the thermostat’s exterior to maintain a clear display and sensors.
  • Check the thermostat’s batteries (if applicable) and replace them as needed to ensure uninterrupted operation.
  • Monitor the thermostat’s performance and alert your HVAC professional if you notice any issues, such as inconsistent temperature readings or unexpected temperature changes.
  • Consult your thermostat’s manufacturer or a qualified HVAC technician for guidance on more complex troubleshooting or maintenance tasks.

Stay proactive with programming, setup, and maintenance. This ensures your new thermostat provides optimal energy efficiency and comfort. Your home will benefit from these efforts for years to come.

Need Help with Your Thermostat Installation?

FindPros has you covered. If you’re upgrading your home with a new programmable or smart thermostat like the Nest Learning Thermostat, our network of experienced HVAC professionals can ensure a seamless and efficient installation. Whether you need assistance with the thermostat wiring, connecting the device to your heating and cooling systems, or handling any other challenges that may arise, our vetted pros have the expertise to get the job done right.

Simply answer a few questions about your project, and we’ll match you with top-rated local specialists who can provide competitive quotes. With FindPros, you’ll find the perfect pro to complete your thermostat installation and help you start enjoying the benefits of improved energy consumption and comfort in your home.

Conclusion

Upgrading your home’s thermostat can transform your living space. It boosts energy efficiency, saves money, and improves comfort. Working with a skilled HVAC pro ensures proper installation and integration with your heating and cooling system.

This guide has equipped you with knowledge about thermostat types and features. You now know how to choose the right HVAC expert for your needs. These tools will help you make a smart decision for your home.

Remember to maintain your thermostat and HVAC system regularly. This keeps them running smoothly and efficiently. Proper care leads to long-term savings and comfort in your home.

Frequently Asked Questions (Thermostat Installation)

A programmable thermostat allows you to set schedules and automatically adjust the temperature, while a non-programmable thermostat requires manual adjustments. Programmable thermostats can help save energy and costs compared to non-programmable models.
To ensure compatibility, you’ll need to check the wiring diagram of your current heating and cooling systems. Make sure the new thermostat matches the voltage and has the appropriate connections like the C-wire. Consulting an HVAC professional can also help determine compatibility.
Programmable thermostats offer scheduled temperature adjustments to save energy, while smart thermostats like the Nest can learn your habits and make automatic adjustments. Smart thermostats also provide remote control and advanced features, but may cost more initially. Consider your home’s needs and budget when selecting the right thermostat.
Begin by turning off power to your HVAC system at the main panel. Then, remove the old thermostat cover and label the wires before disconnecting them. Follow the manufacturer’s instructions carefully when connecting the new thermostat and ensure a secure installation. It’s recommended to have a professional installer complete the process to ensure safety and proper integration with your heating and cooling systems.
Short wires, incorrect wiring, and incompatibility with your existing HVAC system are common challenges. Carefully measure the wires and use the provided wire extenders if needed. Double-check the wiring diagram and terminal connections. If you encounter any issues, consult the thermostat’s instructions or seek the assistance of a professional HVAC installer.

Tennis Court Contractors

Tree Removal Services Near You

Can’t find what you are looking for?

How It Works

  • Answer a few questions about your home project.
  • Within seconds, get matched with top-rated local pros.
  • Compare quotes and choose the best pro for the job.

Tennis Court Contractors In Your Area

Tennis Court Contractors: Find the Best Builder for Your Project

Meta Description: Discover top-rated Tennis Court Contractors for your project. Expert builders deliver quality surfaces, from clay to hard courts. Get professional installation and resurfacing services.

Tennis Court Contractors

Looking for the perfect tennis court contractor? It can be tough to choose with so many options. This guide will help you find top tennis court builders.

Homeowners in agree on the best tennis court contractors. These builders have the skills to deliver great results. They’re known for their knowledge, experience, and communication.

They offer a wide range of services for tennis court construction. This includes site inspection, design, and subsurface preparation. They also handle surface installation and court maintenance.

Key Takeaways

  • Highly-rated tennis court construction companies offer comprehensive services, from design to maintenance.
  • Top contractors are known for their expertise, professionalism, and customer satisfaction.
  • Attention to detail and adherence to industry standards ensure long-lasting, high-performance tennis courts.
  • Affordable solutions and transparent communication are hallmarks of the best tennis court contractors.
  • Choosing the right builder can transform your tennis facility into a showpiece of the community.

Introduction to Tennis Court Construction

Building a top-notch tennis court requires careful planning and expert craftsmanship. Choosing the right contractor is crucial for success. A skilled builder ensures a durable, well-designed court that meets your specific needs.

From site selection to surface installation, the contractor’s expertise is vital. They play a key role in creating an enjoyable playing experience. Their knowledge guides every step of the project.

The Importance of Choosing the Right Tennis Court Contractor

A reputable tennis court contractor is essential for a long-lasting community asset. They offer valuable insights on design, surface options, and maintenance needs. Their expertise can make or break the project’s success.

Skilled builders ensure courts meet the highest standards. They guide the project from start to finish. Their commitment to quality sets them apart.

Key Factors to Consider When Selecting a Tennis Court Builder

  • Industry experience and a proven track record of successful tennis court construction projects
  • Reputation for delivering high-quality work and exceeding customer expectations
  • Comprehensive approach to the construction process, from site preparation to surface installation and maintenance
  • Ability to provide a range of tennis court surface options, including hard courts, clay courts, and rolled-goods surfaces
  • Commitment to using the latest materials, techniques, and equipment to ensure the best possible playing experience
  • Dedication to ongoing customer support and maintenance services to keep the court in excellent condition

Evaluating these factors helps you find the right tennis court contractor. They’ll build a high-quality court and ensure its long-term performance. This attention to detail is essential in tennis court construction.

Tennis Court Construction Process: A Comprehensive Approach

Tennis Court Construction

Building a top-notch tennis court requires careful planning and expert execution. Experienced contractors know the importance of a thorough approach. This starts with site inspection, detailed design, and engineering analysis.

Site Inspection, Design, and Engineering

Skilled tennis court builders assess site conditions and drainage needs. They engineer a solid foundation to support the court’s surface. This involves examining soil, topography, and existing structures.

These factors help determine the best layout and construction methods. A thorough evaluation ensures the court meets specific requirements and performs well.

Subsurface Preparation and Base Construction

After site evaluation, contractors start subsurface preparation. This may involve excavation, grading, and installing a sturdy base. Common base options include compacted crushed stone or post-tension concrete slabs.

This crucial step ensures the court’s long-term durability and performance. It helps meet client needs and expectations for a high-quality playing surface.

Careful planning and execution result in courts that meet high quality standards. These courts provide an excellent playing experience for tennis enthusiasts of all levels.

This ensures each tennis court project meets the client’s vision. American Athletic Track and Turf consistently exceeds expectations in their work.

Tennis Court Surface Options: Choosing the Right Fit

Picking the right tennis court surface is crucial for a great playing experience. Tennis court contractors offer many surface options. Each option has its own features and benefits.

Hard Court Surfaces: Asphalt, Post-Tension Concrete, and Cushion Systems

Hard courts are popular in the United States. They’re durable and need little upkeep. Asphalt and post-tension concrete are common hard court materials.

Cushion systems can be added to hard courts. They make the surface more comfortable and absorb shock better.

Clay Courts and Rolled-Goods Surfaces: Exceptional Playing Experiences

Clay courts offer a classic tennis experience. They’re known for slower play and higher bounces. Players with strong groundstrokes often prefer clay courts.

Rolled-goods surfaces, like Har-Tru, are similar to clay. They need less maintenance than clay courts.

Choose a surface based on use, climate, budget, and preferences. Tennis court contractors can help you pick the best option.

Understanding different court surfaces helps make a smart choice. The right surface will make playing tennis more fun and enjoyable.

Finding the Right Tennis Court Partner

Picking the right tennis court partner is key for successful construction. Experienced contractors have deep industry knowledge and technical skills. Check their past projects and client feedback for workmanship quality and customer service.

Client Testimonials and Project Portfolio

Choosing a contractor with a solid success record ensures smooth construction. Their final product should meet or exceed client expectations. Ask schools or athletic centers for recommendations about contractor performance.

Visit local facilities that worked with the contractor. This gives better insights than just looking at project photos.

Tennis court construction can take 2 to 5 months. Factors like site prep, weather, and design complexity affect the timeline. Working with experienced pros is crucial for successful project completion.

Tennis Court Maintenance: Protecting Your Investment

Maintaining a tennis court is crucial for preserving its exceptional playing experience. Regular tennis court maintenance can extend the court’s lifespan and keep it in excellent condition. This includes routine cleaning and preventative measures.

Routine Cleaning and Preventative Maintenance

Consistent cleaning is key to tennis court maintenance. Clean outdoor courts monthly and indoor courts annually with mild detergent. Remove standing water and treat mold with diluted bleach to maintain the court’s surface.

Preventative maintenance is vital for protecting your investment. Seal cracks, apply resurfacing coatings, and ensure proper drainage. Regular inspections and prompt repairs can significantly extend the court’s lifespan.

Tennis Court Repair and Resurfacing Services

Tennis courts may eventually need extensive repair or resurfacing. Experienced contractors can provide solutions for wear, damage, or changing playing preferences. Partnering with reliable providers ensures an exceptional playing experience for all skill levels.

Prioritizing routine cleaning, preventative maintenance, and timely repairs protects your investment. This approach maintains high standards for tennis facilities. With proper care, tennis courts can provide a safe, enjoyable playing surface for years.

Choosing the Right Tennis Court Contractor: Key Considerations

tennis court construction

Selecting a tennis court contractor involves more than just considering cost. Reputable tennis court builders have the necessary qualifications, certifications, and licensing. They ensure high-quality court construction.

A contractor’s communication, responsiveness, and overall professionalism greatly impact project success. These factors also influence client satisfaction.

Qualifications, Certifications, and Licensing

Seek tennis court contractors with a proven track record of exceptional service. They should have appropriate qualifications, certifications, and licensing for your area.

Reputable contractors possess expertise and knowledge for all aspects of tennis court projects. This includes site preparation and final surface installation.

Communication, Responsiveness, and Professionalism

Effective communication, responsiveness, and professionalism are crucial for project success. Look for a contractor who is available and provides timely updates.

A professional contractor ensures timely completion within budget. They strive to meet customer satisfaction in court construction services.

Choosing an excellent tennis court contractor ensures careful, detailed construction. This results in a durable and enjoyable playing surface.

Discover the Best Tennis Court Professionals with FindPros

Looking for the perfect tennis court contractor to bring your dream court to life? FindPros can help. Simply answer a few questions about your tennis court installation, resurfacing, or construction resurfacing needs, and we’ll match you with top-rated local pros who specialize in everything from clay courts to basketball and fencing. With our committed team, you can expect quality workmanship, a complete line of services, and free estimates to ensure your vision becomes a reality. FindPros connects you with the world’s best tennis court professionals, so you can focus on enjoying the game with your family, team, and community.

Conclusion: Elevate Your Tennis Experience with Expert Court Construction

Building a top-notch tennis court requires expertise from experienced tennis court contractors. These professionals have the skills to deliver an exceptional tennis court experience. They handle everything from site inspection to surface installation and maintenance.

Partnering with a trusted tennis court construction company ensures a high-quality court. This investment guarantees years of enjoyment and performance for your sports facility or community.

Top-rated tennis court contractors are ready to bring your tennis court vision to life. They offer various options, from durable acrylic surfaces to classic clay courts and specialized cushion systems.

These experts guide you through the process, ensuring your tennis court meets the highest standards. Their focus is on construction, maintenance, and performance to create the best possible playing environment.

Choosing a reputable tennis court builder elevates your tennis experience and creates a community hub. You’ll enjoy a well-designed, high-quality court for years to come.

Leading U.S. tennis court contractors prioritize safety, sustainability, and player satisfaction. They’re ready to transform your sports facility into a premier destination for tennis enthusiasts of all levels.

Frequently Asked Questions (Tennis Court Contractors)

When choosing a tennis court contractor, look for industry experience, a proven track record, a comprehensive approach to construction, a range of surface options, and a commitment to quality workmanship and customer support.
Regular cleaning, preventative maintenance, and timely repairs are crucial for preserving your tennis court’s exceptional playing experience and extending its lifespan. This includes sealing cracks, applying resurfacing coatings, and ensuring proper drainage.
Tennis court contractors offer a variety of surface options, including hard courts (asphalt, post-tension concrete, and cushion systems), clay courts, and rolled-goods surfaces. The best choice depends on factors like climate, usage, budget, and personal preferences.
Experienced tennis court contractors follow a comprehensive approach, starting with a thorough site inspection, detailed design, and engineering analysis. They then focus on proper subsurface preparation and base construction to create a solid foundation for the court’s surface.
Partnering with a reputable and experienced tennis court contractor ensures your project is completed to the highest standards. They provide expert guidance, quality workmanship, and ongoing support to create a dream court that meets your specific needs and exceeds your expectations.

Sunroom Repair

Tree Removal Services Near You

Can’t find what you are looking for?

How It Works

  • Answer a few questions about your home project.
  • Within seconds, get matched with top-rated local pros.
  • Compare quotes and choose the best pro for the job.

Sunroom Repair In Your Area

Sunroom Repair: Tips for a Successful Project

Sunroom Repair

Key Takeaways

  • Regular maintenance extends your sunroom’s lifespan and keeps it in top shape.
  • A well-kept sunroom can boost your home’s value and appeal to buyers.
  • Proper upkeep of windows and seals improves insulation and cuts energy costs.
  • Clean interior and exterior windows once per season for clear views.
  • Trim nearby trees to maintain the sunroom’s look, function, and safety.

Assessing the Sunroom’s Condition

The first step in any sunroom repair project is to evaluate its current state. A professional assessment helps identify structural issues, window and frame damage, and leaks or moisture problems. This allows for a tailored restoration plan to address the sunroom’s needs.

Identifying Structural Issues

Structural movement requires immediate repair to prevent costly future issues. This includes shifts, cracks, or instability in walls or foundation. A damaged roof can pose safety risks and reduce functionality.

Timely repairs are necessary to prevent collapse and ensure the sunroom’s safety.

Evaluating Window and Frame Damage

Cracked or foggy glass panes can lead to energy loss and discomfort. Assessing frames for rot, insect damage, cracks, or water staining is crucial.

This evaluation helps determine if reglazing is possible or if replacement is needed.

Checking for Leaks and Moisture Problems

Leaky windows and roofs can cause mold growth and wood rot. These issues can compromise the sunroom’s structural integrity, requiring professional attention.

Drafts and temperature changes can impact energy efficiency. If left unrepaired, they may lead to higher utility bills.

A thorough professional assessment helps create a comprehensive restoration plan. This ensures the sunroom’s long-term functionality and beauty.

Replacing Damaged Windows and Frames

Sunrooms often have worn-out windows and frames. This can affect how they work and look. Experts are needed to remove old parts and install energy-efficient windows.

New windows match the sunroom’s style and let in more light. They also improve air flow. This makes the space more attractive and useful.

Window replacement fixes air leaks and poor insulation. It leads to better comfort and lower energy bills. Homeowners can enjoy a more eco-friendly living space.

Experts may need to fix sunroom frames too. Bad frames can make the sunroom unsafe. Replacing these parts ensures the room lasts longer.

Replacing windows and frames needs careful planning. It also requires attention to detail. Professional contractors have the skills to do a great job.

Repairing Structural Elements

Structural integrity is vital for your sunroom’s safety and longevity. Professionals assess the framework and fix any underlying issues. This ensures a secure and durable space for years to come.

Reinforcing Weakened Supports

Older sunrooms may have minimal structural support. Experts identify and strengthen these weak areas. They might add new beams, posts, or bracing for improved stability.

Repairing Damaged Beams

Sunroom beams can suffer damage from weather, pests, or structural shifts. Skilled technicians evaluate the damage carefully. They then perform targeted repairs to ensure beam strength and support.

Ensuring a Sturdy Foundation

A solid foundation is crucial for sunroom stability. Professionals check for cracks, settlement, and other issues. They use effective repair techniques to create a reliable base for the structure.

Repair experts focus on these key structural elements. Their work reinforces the sunroom’s framework. This creates a safe, long-lasting space for all to enjoy.

Enhancing Insulation and Energy Efficiency

insulation

Building an energy-efficient sunroom can boost comfort and cut utility costs. Focus on insulation and weatherproofing to maintain consistent temperatures year-round. This approach minimizes the need for excessive heating or cooling.

Proper insulation is key to improving a sunroom’s energy efficiency. Expert contractors can add high-performance materials to walls, ceilings, and floors. This prevents heat transfer and air leaks.

Quality insulation and strategic sealing help maintain comfortable indoor temperatures. These measures work regardless of outdoor conditions. They create a cozy space for all seasons.

The choice of windows and glazing is crucial for energy efficiency. Energy-efficient windows with low-emissivity coatings reduce heat gain in summer and loss in winter. Proper ventilation also helps regulate temperature and maximize comfort.

Prioritizing these elements creates a beautiful and cost-effective sunroom addition. Your investment will pay off through lower utility bills and year-round comfort. Enjoy your new space without worrying about energy costs.

Upgrading Lighting and Electrical Systems

Upgrading lighting and electrical systems is key to a welcoming sunroom. Modern fixtures offer better illumination and a cozy feel. Updated wiring ensures safety and allows for various appliances, making the space more versatile.

Installing Modern Fixtures

Old lighting can hurt a sunroom’s look and function. New fixtures boost visual appeal and lighting quality. They provide efficient, adjustable light for relaxation, entertainment, or tasks.

Updating Electrical Wiring

A safe, working electrical system is vital for your sunroom. Pros will check and update wiring to meet current codes. This may include new outlets and stronger wiring for lights and devices.

Focusing on these upgrades makes your sunroom safe and appealing. It will blend well with your home’s design and function.

Cleaning and Care Routine

A clean sunroom looks great and lasts longer. Regular care keeps it weather-resistant and functional. Let’s explore how to clean and maintain your sunroom.

Glass Maintenance

Keep your sunroom windows sparkling clean. Use mild soap and soft cloths or squeegees for interior and exterior glass. Remove hard water stains carefully.

Check the seals and edges around the glass. Look for any signs of damage or wear. Address issues promptly to prevent further problems.

Frame Maintenance

Sunroom frames need specific care based on their material. Use mild detergent for aluminum or vinyl frames. Wood frames require special wood cleaners.

Rinse frames thoroughly after cleaning. Inspect them regularly for any damage. Proper care ensures the frames stay strong and attractive.

A consistent cleaning routine keeps your sunroom beautiful. Regular maintenance extends its lifespan. Your sunroom will remain a stunning addition to your home.

Specialized Maintenance Tasks

tree trimming

Sunroom upkeep involves more than just regular cleaning. Special tasks are vital for keeping it beautiful and functional. Let’s look at three key maintenance practices for your sunroom.

Tree Trimming

Overhanging branches can harm your sunroom’s looks and safety. Regular trimming keeps your view clear and prevents damage from falling limbs. This protects your sunroom’s structure and lets you enjoy it worry-free.

Lubrication of Moving Parts

Smooth operation of windows and doors is crucial for your sunroom. Lubricating hinges and tracks guards against rust and binding. This simple task helps keep your sunroom working well for years.

Gutter Cleaning

Clean gutters are essential for your sunroom’s health. Clogged gutters can cause water damage to the structure and foundation. Regular clearing prevents leaks and protects your sun-filled retreat.

These tasks protect your sunroom’s functionality, safety, and aesthetic appeal. By doing them, you’ll enjoy your sunroom’s beauty for years to come.

Common Sunroom Issues and Repairs

Sunrooms often face more wear and tear than other home areas. Leaky window seals and damaged screens are two frequent problems. Quick fixes are key to keeping your sunroom cozy and protected.

Leaky Window Seals

Sunroom window seals can break down over time. This lets moisture in, causing water damage and mold. Experts can spot and fix these leaks fast.

They’ll restore your sunroom’s protection against the weather. This stops more moisture problems from happening.

Damaged Screens

Weather can wear out, tear, or harm sunroom screens. This makes it hard to keep out bugs and debris. Quick screen fixes or swaps are vital.

They keep your sunroom safe and looking good. Regular checks help maintain its protective role.

Fixing these issues keeps your sunroom comfy for years. Regular checks and quick repairs are crucial. They keep your sunroom in top shape and boost its value.

Tips for Hiring the Best Sunroom Repairing Professionals

Restoring an old sunroom needs skilled experts. Look for a company with experience and top-quality service. A proven track record and specialized expertise are crucial.

Check credentials and read references before hiring. Get detailed cost estimates for your project. A reliable expert crew can fix structural issues and window damage.

Choose a contractor with great project management skills. Good communication and attention to detail are important. A reputable company will provide a thorough evaluation.

The best sunroom repair professionals ensure careful renovation. They create beautiful, functional spaces. Your sunroom will add value to your home.

Professional Sunroom Repair with FindPros

If your sunroom has fallen victim to leaks, storm damage, or other weather-related issues, the team at FindPros can help. Just fill out a simple online form, and we’ll match you with top-rated local sunroom repair experts who can address the necessary repairs and upgrades. From fixing leaky roofs and replacing damaged panels to upgrading lighting and improving insulation, our network of professionals has the skills to restore your sunroom to its former glory.

And with our platform, you can compare repair costs and labor estimates to ensure you get the best value for your money. Don’t let a leaky sunroom or similar issues block your path to a comfortable, well-maintained living space. Let FindPros connect you with the right sunroom repair professionals to get your project fixed, upgraded, and ready for you to rest and enjoy.

Conclusion

Restoring an aging sunroom can breathe new life into this cherished space. By addressing structural issues and improving insulation, homeowners can create a beautiful and functional sunroom. Upgrading key systems makes the space more cost-effective to maintain.

Professional guidance ensures the sunroom remains valuable for years to come. Regular maintenance and specialized care are crucial. These efforts unlock the full potential of this versatile living space.

A comprehensive approach to restoration yields significant benefits. Improving insulation, upgrading lighting, and fixing structural issues are key steps. This investment creates an aesthetically pleasing and energy-efficient sunroom.

The result is an enhanced living experience and increased property value. Homeowners can enjoy their revitalized sunroom for years to come.

Frequently Asked Questions (Sunroom Repair)

Homeowners may face issues like leaky window seals, damaged screens, structural problems, and issues with the roof or glass panels. These can lead to moisture damage, loss of energy efficiency, and safety concerns if not addressed.
Homeowners should schedule regular maintenance tasks like cleaning windows, lubricating moving parts, and trimming nearby trees. Addressing minor leaks or screen damage quickly can prevent more costly future repairs.
When hiring sunroom repair professionals, homeowners should check their credentials, experience, and references. Getting detailed cost estimates and discussing the repair plan is also important to ensure a successful project.
Fixing structural issues, improving insulation, and upgrading lighting and electrical systems can make the sunroom more energy-efficient, comfortable, and visually appealing. This can increase the home’s value and provide a more enjoyable living space for the family.
Homeowners should regularly inspect the sunroom for any signs of leaks, cracks, or other weather-related damage. Fixing issues like a leaky roof or replacing damaged panels or glass walls can help prevent further damage and maintain the sunroom’s integrity.

Sump Pump Repair

Tree Removal Services Near You

Can’t find what you are looking for?

How It Works

  • Answer a few questions about your home project.
  • Within seconds, get matched with top-rated local pros.
  • Compare quotes and choose the best pro for the job.

Sump Pump Repair In Your Area

Sump Pump Repair: A Guide to Choosing the Right Professional

Sump Pump Repair

Key Takeaways

  • Certified sump pump contractors are essential to ensure the job is done right.
  • Look for contractors who offer comprehensive warranty coverage and maintenance services.
  • Compare detailed quotes from multiple local contractors to find the best value.
  • Evaluate a contractor’s customer service, communication, and track record.
  • Prioritize experience and expertise in sump pump installation and repair.

Understanding the Importance of Sump Pumps

Water intrusion can wreak havoc on basements and crawl spaces. It damages the home’s structure and fosters mold growth. Sump pumps offer a solid defense against basement flooding and water damage.

How Sump Pumps Prevent Basement Flooding

Sump pumps guard against flooding from heavy rain, melting snow, and plumbing leaks. They watch the water level in the sump basin. When needed, they activate automatically to remove excess water.

This protects valuable items stored in the basement. It also stops mold and mildew growth, which can harm your health.

Types of Sump Pumps: Pedestal vs. Submersible

  • Pedestal sump pumps have the motor mounted above the sump, making them more visible but easier to access for maintenance.
  • Submersible sump pumps are fully submerged in the sump and are more discreet and quieter in operation.
  • Battery backup sump pumps offer extra safety during power outages, ensuring your basement remains dry even when the main power is disrupted.

A well-maintained sump pump safeguards your home from water damage. It can also boost your property’s value. This shows potential buyers that the home is cared for and less prone to flooding.

Warning Signs of a Malfunctioning Sump Pump

sump pump issues

Spotting sump pump issues early can prevent bigger problems. Watch for these warning signs to keep your basement dry and safe.

  • Unusual noises: Strange sounds like grinding, squealing, or rattling can signify internal component failure or motor trouble.
  • Irregular pump operation: If the sump pump cycles on and off more frequently than normal, it could indicate a problem with the float switch or other electrical issues.
  • Slow pumping: A sump pump that takes longer than usual to remove water from the sump pit may have insufficient power or be clogged with debris.
  • Water intrusion: The presence of water in the basement or around the sump pump could signal a pump failure or an overwhelmed system.

Quick action on sump pump problems can prevent basement flooding. Regular checkups help catch issues before they worsen.

Keep an eye out for sump pump warning signs. Address problems fast to avoid costly water damage.

Regular maintenance ensures your sump pump works well. Stay alert to protect your basement from water issues.

When to Call a Professional

Some minor sump pump issues can be fixed by homeowners. However, certain problems require a professional plumber for sump pump repair services. Here are common sump pump issues needing expert help:

  • A clogged pump that’s preventing proper drainage
  • A faulty float switch that’s causing the pump to turn on and off erratically
  • Power failure issues that require backup power system installation
  • The need for a pump replacement due to age or extensive damage

Hiring professional plumbers for sump pump repair offers many perks. They provide expert advice on fixing your pump issues. You’ll get quality service and warranty coverage for repairs.

  1. Expert guidance on the best course of action for your specific sump pump issues
  2. Quality service and warranty coverage for any repairs or replacements
  3. Ongoing maintenance services to keep your sump pump functioning at its best

Don’t wait for a major sump pump failure to cause costly water damage. Call a trusted professional plumber at the first sign of trouble. Protect your home from basement flooding today.

Choosing the Right Sump Pump Repair Professional

sump pump repair professional

Selecting the right sump pump repair professional is vital for protecting your home from water damage. Skilled experts can diagnose issues and provide reliable solutions. They can also help extend your sump pump’s lifespan.

Evaluating Expertise and Experience

Find a repair professional with a proven track record of successful sump pump repairs. Check their website, reviews, and references to assess their expertise. A reputable contractor should know various pump types and have excellent troubleshooting skills.

Checking for Licensing and Certifications

Hire a sump pump repair professional who is properly licensed and certified. This shows their commitment to industry standards and regulations. Verify their licensing, insurance coverage, and relevant certifications before hiring.

By considering these factors, you can trust in their ability to fix your sump pump. This will help safeguard your home and give you peace of mind.

Factors to Consider When Selecting a Sump Pump

Picking the right sump pump is vital for protecting your home from water damage. Key factors include pump type, capacity, and backup power systems.

Pump Type and Capacity

Sump pumps come in submersible and pedestal models. Submersible pumps are often preferred for their compact design. Pump capacity is measured in gallons per hour (GPH).

A 1/3 HP submersible pump suits homes with average water tables. It can handle 7 to 10 feet of vertical lift.

For above-average water tables, a 1/2 HP pump is recommended. It offers higher capacity than a 1/3 HP model.

A 3/4 HP pump is ideal for flood-prone areas or homes with high water tables. It’s also suitable for deep basements and long pipe runs.

Bigger isn’t always better for sump pumps. Oversized pumps can cycle too fast, reducing their lifespan.

Backup Power Systems

A reliable backup power system keeps your pump working during outages. Consider a pump with battery backup or a hybrid system.

Battery backup pumps turn on automatically when power fails. Hybrid systems combine electric and water-powered or battery-powered backups for extra protection.

For the best sump pump choice, consult a professional. They can help you select the right model for your home’s needs.

Maintaining Your Sump Pump for Optimal Performance

Proper sump pump maintenance protects your home from water damage. Regular checks and cleaning extend its lifespan and keep it running well. A structured routine helps address issues and reduces unexpected failures.

Regular Inspections and Cleaning

Experts suggest monthly visual checks of your sump pump system. Look for wear, debris, or corrosion on the pump, float switch, and discharge line. Every three months, clean the pump and check power connections, valves, and pipes.

Clean the sump pit and pump parts often. This prevents dirt and sediment buildup that can slow the pump. Use a hose to flush the pit and wipe the pump’s exterior.

Extending the Lifespan of Your Sump Pump

Good care helps your sump pump protect your home for years. Here are tips to make your pump last longer:

  • Perform annual maintenance, including a thorough system inspection, parts replacement, and testing of the backup power system.
  • Monitor the pump’s performance and address any issues, such as unusual noises or continuous running, promptly to prevent further wear and tear.
  • Invest in a high-capacity sump pump if your home experiences heavy annual rainfall or snow runoff, which can put additional strain on the system.
  • Ensure the sump pit and discharge line are properly sized and installed to optimize the pump’s efficiency and prevent clogs or backflow.

A regular maintenance routine helps your sump pump last longer. Address issues quickly to keep it working well for years.

Find Trusted Sump Pump Pros with FindPros

Need a reliable sump pump repair or replacement? FindPros can help. Simply answer a few questions about your home’s sump pump, and we’ll match you with top-rated local professionals. Compare quotes from multiple pros who are eager to earn your business. Find the right fit for your sump pump maintenance, repair, or installation needs, all while getting the best possible pricing. Put your mind at ease and protect your home’s foundation with the help of FindPros.

Conclusion

Sump pumps are vital for basement waterproofing. They protect homes from flooding and water damage. It’s crucial to understand their importance and spot potential issues early.

Both pedestal and submersible sump pumps stop water intrusion. They also prevent mold growth and keep your property value high. Regular maintenance helps avoid costly repairs from water damage.

Working with expert repair professionals ensures your system runs well. They can help extend the life of your sump pump. Proper care safeguards your home and family for years to come.

Frequently Asked Questions (Sump Pump Repair)

If your sump pump runs frequently, it could indicate an issue with the pump or your drainage system. Check the discharge pipe for any blockages or damage. Ensure the sump pit is free of debris. If the problem persists, you may need to consider sump pump replacement or have a professional inspect the system.
An undersized sump pump may not be able to keep up with the water inflow, causing it to run constantly. Consult a professional to assess your home’s water table and recommend the appropriate sump pump size and capacity needed to effectively remove excess groundwater.
A damaged or missing sump pump cover can allow debris and pests to enter the sump pit, leading to clogs and potential pump failure. Replace the cover promptly to keep the system functioning properly and protect the pump components.
Observe the float as the water level in the sump pit rises. The float should trigger the pump to turn on and remove the water. If the pump doesn’t activate as expected, the float switch may be faulty and require replacement.
If your sump pump is not functioning during a power outage, check the circuit breaker and ensure the GFCI outlet is not tripped. Consider installing a backup power system, such as a battery-powered sump pump or a generator, to keep your basement dry even when the main power is disrupted.