Bat Removal

Bat Removal Near You

Can’t find what you are looking for?

How It Works

  • Answer a few questions about your home project.
  • Within seconds, get matched with top-rated local pros.
  • Compare quotes and choose the best pro for the job.

Bat Removal In Your Area

Safe and Humane Bat Removal: A Guide for Homeowners

Meta Description: Learn safe, humane bat removal techniques for your home. Our guide covers effective methods, costs, and legal considerations to protect both you and these important creatures.

Imagine waking up to the sound of wings in your attic. It’s a nightmare for homeowners. Bats are good at fighting insects, but they can also be a health risk. So, how do you safely and kindly remove them? This guide will help you understand and deal with bat problems in your home.

Bat Removal

Key Takeaways

  • Bats can carry diseases and damage property, posing risks to homeowners.
  • Strict laws and regulations govern the handling and removal of bats in many states.
  • DIY bat removal methods are often ineffective and can be dangerous, requiring professional assistance.
  • Humane removal techniques are essential to protect both homeowners and bat populations.
  • Proactive prevention measures can help deter bats from entering your home in the first place.

The Risks of Bat Infestations

Bats might seem interesting, but they can be a big problem in your home. They carry diseases like rabies and histoplasmosis. Their droppings, or guano, can also harm your home’s structure.

Health Hazards and Property Damage

Rabies from bat bites or scratches can be deadly. The CDC says bats cause most rabies cases in the U.S. The fungus in their droppings can cause histoplasmosis, a lung disease.

This fungus is a big risk for people with weak immune systems. The droppings are also acidic. They can damage metal, ceilings, and walls, causing big problems.

This damage can make insulation worse, raise energy bills, and increase fire risks. It can also weaken wooden parts of your home.

Legal Concerns

Bats are often protected, so removing them can be illegal. You could face fines or other legal trouble. It’s important to know the laws about bats, carry diseases, and protected species before trying to remove them.

bats dangerous

Living with bats in your home is risky. It’s important to understand the health risks, property damage, and legal concerns of bat infestations. This helps keep your family and home safe.

Understanding Bat Entry Patterns

Typical Seasons for Bat Entry

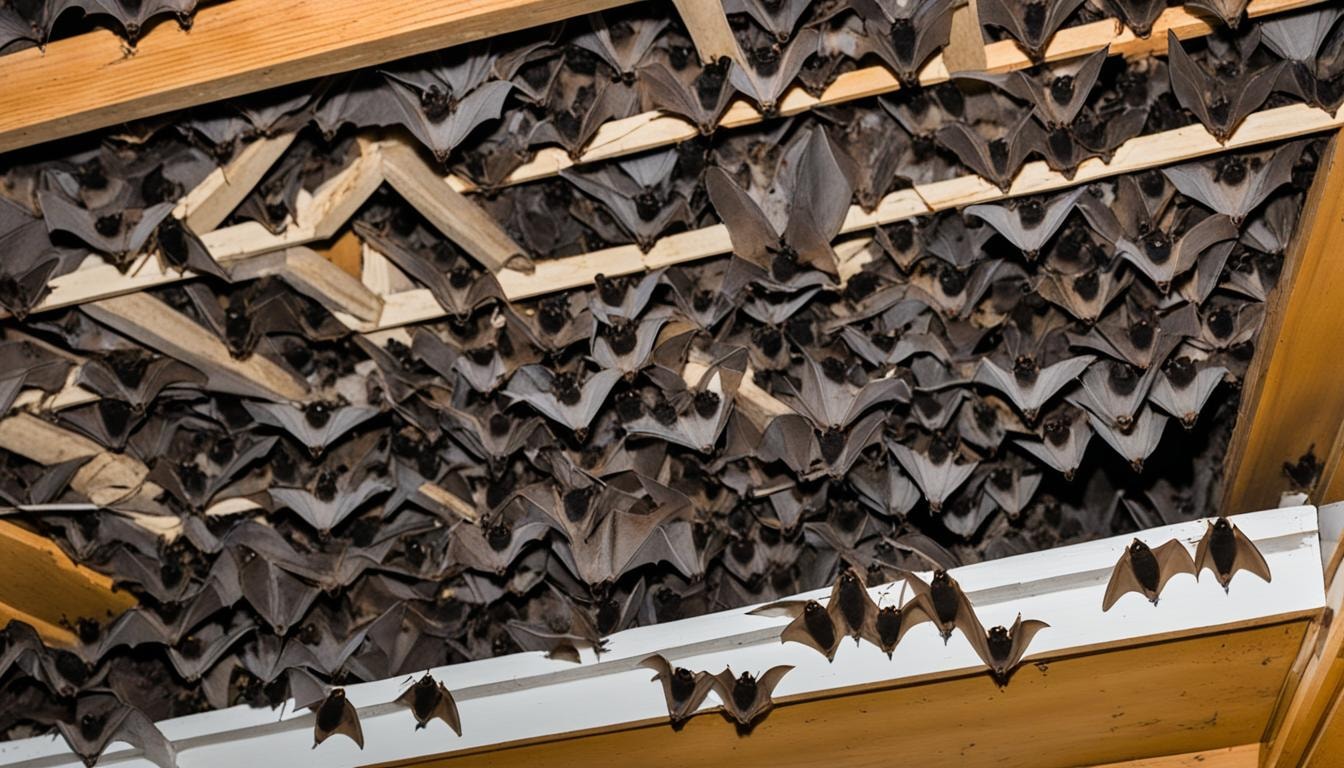
Bats look for warm, safe places like attics in certain seasons. They enter homes in late spring and early summer for the maternity season. This is when they find a place to have their babies and raise them.

In fall, bats may come back to your home for the winter. They like warm and humid places more than cold caves. So, they might come into your attic anytime if it’s cozy.

Bats like attics for many reasons. They stay warm, safe from predators, and find food there. It’s a perfect spot for them because it keeps a steady temperature. This is important for hibernation and having babies.

Attics are safe from owls, hawks, and snakes. They also have easy access to insects in gardens and near water. This makes them a great place for bats to live.

Attics are warm and safe for bats, especially in cold places. They keep away from predators and have a quiet place to rest and raise their young. They like being close to places where they can find food.

Attics are perfect for bats in the cold months. They stay safe from birds of prey. They also get to rest and have their babies in peace. Plus, they can find food easily near forests, fields, or water.

During the winter, attics are where bats hibernate. They use vents, chimneys, roof eaves, and soffits to get into buildings. They can also find weak spots in roofs to sneak in.

Bats are drawn to lights, plants, and water near buildings. They enter at different times of the year, like during maternity season, migration, and hibernation. To keep them out, seal up holes, use exclusion devices, keep your home strong, trim plants, and reduce attractants. If there are too many bats, call a professional for help.

bat entry

Why DIY Bat Removal is Not Recommended

Finding bats in your home can be worrying. You might want to try to remove them yourself. But, DIY bat removal is not a good idea. Bats are protected and need special care from experts for safe removal.

Trying to remove bats yourself can make them disoriented. They might then try to enter other parts of your home. This can start a never-ending cycle of invasion. Also, many DIY methods are not recommended and might be illegal where you live because bats are protected.

Removing bats by yourself is risky and often doesn’t work. Experts in wildlife control have the right skills, tools, and safety steps. They can remove the bats safely and without causing trouble in your home or the environment.

The Importance of Humane Bat Removal

When you find bats in your attic, remember their key role in our ecosystem. They help control insects by eating up to 4 lbs. of mosquitoes daily. They also pollinate many plants. With a million bats eating 700,000 tons of insects yearly, their help to our environment is clear.

Since some bats are protected, removing them must be done humanely. Harming them is illegal and harms our ecosystem. A pro wildlife service can safely remove bats, keeping your home safe and respecting their safety.

Respecting the Ecosystem

Bats are vital to the food chain. They keep insect populations in check and help pollinate plants. Choosing humane removal protects your home and the ecosystem. This way, these important animals can keep doing their job.

Many Indiana bats are endangered, making them more important to save. Removing bats during their young’s growing season can be very bad. A pro wildlife service can remove them safely, without hurting the local bat population.

How Professional Wildlife Control Services Help

Dealing with bat infestations needs the help of experts. These pros know how to safely and kindly remove wildlife. This keeps everyone safe, including the bats and the homeowners.

Inspection and Identification of Entry Points

The first step is to check the property for where bats might get in. Bats can squeeze through tiny openings, so a detailed check is key. The team uses their knowledge to find these spots and plan how to fix them.

Safe and Humane Removal Process

After finding where bats get in, the team removes them safely and kindly. They use one-way doors that let bats out but not back in. They pick the best time to remove bats, avoiding hibernation and baby seasons. After removing the bats, they clean up any mess, making the area safe and bat-free.

Working with wildlife control pros means a safe and right way to remove bats. These experts are licensed and trained. They offer a full solution that keeps homeowners and bats safe.

Prevention Measures for Future Infestations

Preventing bats from coming into your home is key. By sealing off possible entry spots, you make your home less inviting to them. This keeps your living space safe from future bat problems.

Sealing Entry Points

Bats can fit into tiny openings to get into your home. They can go through openings as small as 3/4 inch. So, it’s important to check your home well and seal any spots where they could get in.

Look closely at the roof, siding, and foundation. These are where cracks and gaps are often found.

  • Carefully seal any cracks or gaps in the roof and siding using a high-quality sealant or caulk.
  • Install screens or covers over vents, chimneys, and other openings that could serve as potential entry points.
  • Consider adding protective mesh or netting over larger openings, such as attic vents or soffit areas, to prevent bats from gaining access.

By doing these things, you can greatly lower the chance of bats coming back. This keeps your home safe from the health and property damage bats can cause.

Legal Considerations for Bat Removal

Home and business owners face many legal rules when dealing with bats. Bats are protected by laws because they are important to the environment. Many bat species are also in danger.

Federal Protections

The Endangered Species Act (ESA) protects endangered or threatened species. This includes the Townsend’s big-eared bat found in the western and central U.S. Removing or harming these bats without the right permits can lead to big fines.

State Regulations

States also have their own rules for bats. In California, for example, bats are seen as “nongame mammals.” They can’t be harmed or removed without the right permits and safety steps. Owners must know these laws and use legal and kind methods for bat removal.

Not following the law can result in big fines and other penalties. It’s important to work with experts in wildlife control. They know the laws well and can help with safe and legal bat removal.

Choosing a Professional Bat Removal Service

Dealing with bats can be tricky. It’s best to get help from a professional bat removal service. Trying to remove bats by yourself can be dangerous. It might also break the law, since many bats are protected.

Find a service that is licensed, trained, and experienced. They should use humane methods for removal. These experts know how to safely handle the situation. They make sure you and the bats stay safe.

  • Inspect the entry points and seal them to prevent future infestations.
  • Safely and humanely remove any existing bats, avoiding harm to these important creatures.
  • Provide decontamination services to address any health and safety concerns related to bat droppings.
  • Offer preventative measures to deter bats from returning, such as exclusion devices and habitat modification.

Choosing a professional bat removal service means the job gets done right. It’s done legally and with care for the bats and your home. Don’t take risks with your safety or the bats’ well-being. Let the experts take care of it.

Finding the Right Help for Bat Removal

If you’re facing a bat issue in your home, let FindPros connect you with top-rated local professionals who specialize in humane bat removal. Our platform allows you to fill out a simple survey about your project, ensuring that you receive the best options tailored to your needs.

By comparing quotes from multiple pros, you can secure the best pricing while finding the right expert that you feel comfortable working with. Within seconds, you can be matched with professionals who understand the importance of safe and effective bat removal methods. Protect your home and these vital creatures by choosing the best pro for the job.

Conclusion

Dealing with bats in your home can be tough, but it’s doable. By knowing the risks and legal stuff, and the need for humane bat removal, you can fix the problem. It’s key to pick a professional wildlife control service that knows how to remove bats safely and legally.

Being proactive helps keep your home, family, and local bats safe. A professional service can help with this. They make sure you follow the law and keep bats away for good.

Handling bats in your home needs careful thought. But, with the right info and help, you can solve the issue. This way, you and the bats can live together peacefully.

Frequently Asked Questions (Bat Removal)

Signs of a bat infestation include rustling noises in your attic, bats flying around your property at dusk, and the presence of bat guano (droppings). You may also notice a foul odor or see bats exit your home at night.
A bat colony can pose health risks due to diseases like rabies and fungal spores from bat guano. Bats can also cause property damage and attract other pests. However, bats are beneficial for insect control, so it’s important to remove them humanely.
Bat removal costs vary based on several factors, including the size of the colony and the complexity of the exclusion process. Prices typically range from 0 to ,000, with attic restoration potentially adding to the removal cost. Check if your homeowners insurance covers pest control services.
Yes, many species of bats are federally protected or protected by state laws. For example, the big brown bat and little brown bat (Myotis lucifugus) are protected in some areas. Always consult your state wildlife agency before attempting to get rid of bats.
To prevent bats from returning, seal all entry points after a professional bat exclusion. Install one-way valves or bat valves to allow bats to exit but not re-enter. You can also offer bat houses away from your home to attract bats to a more suitable habitat and help with insect control.

Bathtub Repair

Bat Removal Near You

Can’t find what you are looking for?

How It Works

  • Answer a few questions about your home project.
  • Within seconds, get matched with top-rated local pros.
  • Compare quotes and choose the best pro for the job.

Bathtub Repair In Your Area

Essential Tips for Bathtub Repair and Maintenance

Meta Description: Discover essential tips for bathtub repair and maintenance. Learn how to fix common issues, prevent damage, and extend the life of your tub with expert advice.

A chipped or damaged bathtub can make your bathroom look bad. But, you can fix it easily with the right steps. This guide will help you with porcelain, acrylic, or fiberglass tubs. We’ll show you how to fix chips, cracks, and other issues.

You’ll learn how to use the right repair compounds and techniques. This way, your bathtub will look great again.

Bathtub Repair

Key Takeaways

  • Most DIYers can repair bathtub chips smaller than a quarter with the right tools and techniques.
  • Surface-level chips are generally easier to fix than deeper ones, but proper preparation and application are crucial.
  • Assess your skill level before attempting bathtub repairs, and consider professional help for more complex issues near drains or faucets.
  • Use fiberglass mesh patches for large chip repairs and repair compounds that match your tub’s color and material.
  • Regularly clean your tub with non-abrasive cleaners to prevent future damage and monitor repaired areas for signs of deterioration.

Understanding Bathtub Damage

Fixing a bathtub can make your bathroom look new again without costing a lot. But first, you need to check how bad the damage is. Small chips and cracks are usually easy to fix. But bigger damage needs more work.

Assessing the Extent of Damage

Bathtub damage can be small or big. Small chips, like those less than a quarter in size, are doable for DIY fans. But big or deep damage might need a pro.

When to Call a Professional

If your bathtub has more than just small chips, think about getting help. Deep chips or cracks near the drain or faucet are tricky. They might need special skills and tools. Think about your DIY skills before deciding to fix it yourself or hire a pro.

bathtub damage

Preparing for Bathtub Repair

Fixing a bathtub needs the right tools and materials. It’s key to pick the best repair compounds and color matches. You must choose products made for your tub’s material and color.

Repair Compounds and Color Matching

Find repair kits with color matches for your bathtub. Companies like Multi-Tech Products have kits for common colors like white, biscuit, almond, and bone. These kits can fix cracks, air pockets, and deep damage.

Cleaning and Preparation Supplies

  • Degreaser to clean the damaged area
  • Lint-free cloths to wipe down the surface
  • Painter’s tape to protect the surrounding area

Application and Finishing Tools

  • Mixing stick to combine the repair compound
  • Paintbrush or putty knife to apply the compound
  • Spray bottle filled with water for misting the repaired area
  • Ultra-fine sandpaper to smooth the surface

Getting ready is key to a great bathtub fix. Clean and degrease the area well. Use the right tools to spread the repair compound right. With the right stuff and care, you can make your tub look pro and last longer.

bathtub repair supplies

Step-by-Step Guide to Repairing Bathtub Chips

If you have a small chip or a big crack in your bathtub, fix it fast. You can make the area look new with a few easy steps.

Preparing the Damaged Area

Start by cleaning the damaged spot with a degreaser. This removes dirt, soap scum, or any other residue. Make sure it’s dry before you go on.

Use painter’s tape to protect the areas around it. This makes sure your repair looks clean and sharp.

Mixing and Applying the Repair Compound

You might need a one-part or two-part repair compound, depending on the chip size and depth. Always follow the instructions from the maker. Apply the compound in thin, even layers, letting each layer dry before adding more.

Sanding and Finishing the Repair

After the last layer dries, sand the area while it’s wet. This makes it blend in with the rest of the tub. If you see any bumps, add more compound to fix them.

By doing these steps, you can fix small bathtub chips and make your tub look new. Always let each step dry properly for the best look.

Tips for a Successful Bathtub Repair

Repairing a damaged bathtub needs careful attention and the right methods. You might face deep chips, big cracks, or small scratches. These tips will help make your repair last longer.

For deep chips or cracks, put on the repair compound in thin layers. This lets it cure right and stick well to the tub. If the chip or crack is big, add a fiberglass mesh patch first. This helps strengthen the area and stops future problems.

Sanding is key to making the repair look like new. Start with rough sandpaper and move to smoother ones. Keep sanding until it matches the tub perfectly. This progressive sanding method is vital for a pro-quality fix.

After the repair, use a kitchen and bath polish a few days later. It blends the repair area well and adds shine. This makes the repair almost invisible.

By using these tips, your bathtub repair will look great and last long. You’ll enjoy a tub that looks new for many years.

Preventive Measures for Future Damage

Take steps now to lower the chance of bathtub damage. Fix small chips or cracks right away to prevent bigger problems later. Don’t drop heavy things in the tub to avoid damage.

Cleaning your bathtub often is key to keeping it in good shape. Use cleaners that are gentle on the surface. Avoid harsh chemicals that can damage it. Also, put a non-slip bath mat in the tub to protect it from scratches and chips.

  • Address small chips or cracks immediately
  • Avoid dropping heavy objects in the tub
  • Clean the tub regularly with non-abrasive cleaners
  • Use a non-slip bath mat to protect the tub’s surface

By doing these things, you can greatly lower the chance of bathtub damage. This keeps your bathroom’s centerpiece looking great and working well for a long time.

Safety Precautions After Repair

After fixing your bathtub, it’s key to follow safety steps for a good fix that lasts. The repair compound needs up to 48 hours to fully cure and harden.

Don’t use harsh chemicals or bath oils during this time. They could harm the repair. Also, don’t wax the tub yet, as it becomes very slippery.

Watch the repaired spot closely. Look for any signs of lifting or peeling. If you see these, add a thin layer of repair compound to keep it strong.

By taking these steps, you help make sure your bathtub repair works well and lasts. This way, you avoid problems from using it too soon or not taking care of it.

Bathtub Refinishing: An Overview

Bathtub refinishing, or reglazing, makes old or damaged bathtubs look new again. It puts a strong epoxy coating over the tub. Homeowners can do it themselves or hire experts, each with their own benefits.

Cost Comparison: DIY vs Professional

DIY kits for refinishing bathtubs cost between 0 and 0. This is a good choice for those watching their budget. But, professional services cost 0 to 0, giving a better look that lasts longer. Refinishing is much cheaper than replacing a bathtub, which costs ,565 to ,420.

When to Refinish Your Bathtub

Refinish your tub if it has deep stains, rust, cracks, or an old style. It’s also a good idea if your tub is rare, valuable, or hard to move. Refinishing can make your bathroom look new without the high cost of a new tub.

Choosing to do it yourself or hiring a pro, bathtub refinishing is a smart way to update your bathroom. It makes your home look better without spending a lot.

Preparing for Bathtub Refinishing

Getting your bathroom ready is key for a DIY bathtub refinishing job. First, collect all the refinishing supplies you need. This includes a refinishing kit, cleaning tools like a screwdriver and putty knife, and painting gear such as a paint roller and brush. Make sure you have rubber gloves and breathing masks for safety.

Supplies Needed

  • Refinishing kit
  • Caulk gun
  • Chemical caulk remover
  • Bleach
  • Abrasive cleanser
  • Bucket
  • Sponge
  • Wet/dry sandpaper
  • Tack cloth
  • Tub-and-tile caulk

Protecting the Surrounding Area

To keep your bathroom safe from spills, lay down a dropcloth. Use painter’s tape to cover other areas. It’s important to have good air flow when using strong chemicals. Open a window or use an exhaust fan to clear out fumes.

Step-by-Step Guide to Refinishing a Bathtub

Refinishing an old, stained bathtub is easy with the right steps. This guide will show you how to make your bathtub look new and last long.

Cleaning and Surface Preparation

Start by cleaning and getting the surface ready. Use chemical etching or sandpaper to make the tub’s surface rough. This helps the new coat stick better. Cleaning well and drying the area is key for a good finish.

Then, apply a primer coat. This step is important for a great finish. Make sure the area is clean before you start.

Applying the Primer and Epoxy Coating

Next, put on the primer and epoxy coating. Mix the epoxy resin and hardener as the instructions say. Use a roller and brush for even layers, letting each coat dry before adding more.

Keep the area well-ventilated to work safely. Let the final epoxy coat cure for 48 hours before using the tub. This time lets the coating harden and last longer.

With these steps and the right tools, your old bathtub can look new again. Remember, getting the surface ready and paying attention to details are key for a great finish.

Maintaining Your Refinished Bathtub

Keeping your refinished bathtub looking great is key. Follow these tips to make it last longer:

Use gentle cleaners like mild dish soap or products like Scrubbing Bubbles and Formula 409. Stay away from harsh cleaners like powdered cleansers and bleach. Clean with a soft sponge and rinse well to stop soap scum.

Check your refinished tub often for any damage. If needed, add a thin layer of refinishing compound every few years. This way, your bathtub can last 5-10 years or more with care.

Avoid using bath mats with suction cups on your refinished tub. They can harm the finish and might cancel your warranty. Fix any leaky faucets quickly to stop rust and damage around the drain.

By using non-abrasive cleaners and reapplying refinishing as needed, your refinished bathtub will stay beautiful. It will also last longer.

Get Matched with Top Pros for Bathtub Repair and Maintenance

Discovering the right professionals for your bathtub repair and maintenance needs is now easier with FindPros. Our service connects you with top-rated local experts who compete for your job, ensuring you get the best pricing and quality.

Simply fill out a quick survey about your home project, and within seconds, you’ll receive matched options tailored to your needs. Compare quotes from multiple pros and choose the one you feel most comfortable with. With FindPros, you can confidently tackle your bathtub repairs and enjoy a beautifully maintained bathroom without the stress.

Conclusion

This guide has given you the tips and steps to fix your bathtub. You can now repair or refinish your tub by yourself or know when to get help. It covers everything from small repairs to full refinishes.

By using the right methods and taking care of your tub, it can last longer and look great. You can make your tub look new with some effort and the right tools. But, if the damage is big or you want an expert’s touch, this guide tells you when to call a pro.

It doesn’t matter how you fix your bathtub, keeping it in good shape is key. Regular care stops problems before they start. This way, your bathtub stays beautiful and useful for many years.

Frequently Asked Questions (Bathtub Repair)

Use a tub repair kit to fill cracks and chips. Clean the area, apply the repair compound in thin layers, and sand for a smooth finish. This process can save money compared to replacement.
Call for a free estimate if you have deep damage, large cracks near fixtures, or if the project seems beyond your DIY skills. Professional services can restore porcelain tubs, fiberglass bathtubs, and ceramic components with excellent results.
Allow up to 48 hours for the repair compound or refinishing coating to fully cure. This drying time is crucial for the durability of the repair and to avoid damaging the restored surface.
Yes, refinishing can restore your tub or shower for a fraction of the price of replacement. It’s a great option to save money and update your bathroom, especially for valuable or hard-to-replace fixtures.
For repairing holes in walls or floors, use a fiberglass mesh patch for support before applying the repair compound. This process works for both shower and sink areas. Always ensure proper installation and consider the hole size when deciding between DIY repair and professional restoration.

Bathroom Tile Repair

Bat Removal Near You

Can’t find what you are looking for?

How It Works

  • Answer a few questions about your home project.
  • Within seconds, get matched with top-rated local pros.
  • Compare quotes and choose the best pro for the job.

Bathroom Tile Repair In Your Area

Bathroom Tile Repair 101: A Step-by-Step Guide

Meta Description: Learn how to repair bathroom tiles like a pro with our comprehensive guide. Fix cracks, chips, and broken tiles to restore your bathroom’s beauty and functionality.

Ever looked at your bathroom tiles and thought, “How do I fix that cracked or broken tile?” Don’t worry, this guide will show you how to repair your bathroom tiles. We’ll cover fixing cracks, chips, or even replacing a tile.

Bathroom Tile Repair

Ever thought about what it takes to make your bathroom tiles look new again? This article will show you the steps, tools, and techniques to do just that. Get ready to become a tile repair expert!

Key Takeaways

  • Understand the types of tile damage and common tile materials used in bathrooms
  • Learn the essential tools and materials needed for a successful tile repair project
  • Discover the step-by-step process for removing damaged tiles and installing new ones
  • Master the art of grouting and sealing repaired tiles for a professional finish
  • Explore expert tips for maintaining your newly repaired bathroom tiles

Understanding Tile Repair Basics

Before you start fixing your bathroom tiles, get to know the usual damage types and tile materials. This info helps you pick the right repair methods for success.

Types of Tile Damage

Tiles can face many problems, like water damage, cracks, chips, and breaks. Knowing the damage’s extent helps you decide how to fix it. Small scratches can be fixed with clear nail polish or fine-grit sandpaper.

Small chips might need epoxy resin or tile repair adhesive. Big cracks or missing pieces could require more work, like epoxy resin and re-grouting.

Common Tile Materials

  • Ceramic tiles: Durable and affordable, ceramic tiles are a popular choice for bathrooms.
  • Porcelain tiles: Hard and more water-resistant than ceramic, porcelain tiles are great for busy areas.
  • Natural stone tiles: Luxurious and unique, natural stone tiles like marble or granite offer a premium look but require more maintenance.

It’s important to know your bathroom’s tile type. This affects the repair methods and tools you’ll need. For example, fixing a cracked natural stone tile is different from fixing a chipped ceramic one.

Tile Damage Types

Understanding tile damage types and materials helps you handle repair challenges better.

Preparing for Tile Repair

Getting ready is key for fixing bathroom tiles right. Before you start, make sure you have the right tools and materials. This makes the repair go smoothly and saves you time and effort.

Tools and Materials Needed

For fixing tiles in your bathroom, you’ll need these tools and materials:

  • Grout saw – for removing damaged grout
  • Tile nippers – for cutting and shaping new tiles
  • Notched trowel – for applying thin-set mortar evenly
  • Spacers – to keep grout lines even
  • Grout float – for spreading and smoothing grout
  • Sponge – for cleaning up extra grout
  • Wet saw (optional) – for precise tile cuts
  • Safety gear – gloves and safety glasses

Having these tools and materials ready will help you fix any tile problem. You’ll be able to remove damaged tiles and install new ones correctly. Don’t forget to keep a first-aid kit and eyewash station close for safety.

tile repair tools

Removing Damaged Tiles

The first step in fixing a bathroom tile is to remove the damaged ones. You need to scrape off old grout and carefully take out the tile pieces.

Begin by using a grout saw or a tool for removing grout to scrape away the old grout. This makes the tile easier to remove. Then, use a hammer and chisel to break the tile into smaller bits. Be careful not to damage the nearby tiles or the surface below.

  • Wear protective glasses and a dust mask to prevent eye and breathing problems from tile bits.
  • Put down a dust sheet to catch any broken tile pieces and make cleaning up easier.
  • Vacuum the surface well to get rid of any leftover debris or old mortar before putting in the new tile.

After removing the damaged tile, clean the surface well for the new tile. This is key for a strong, lasting bond between the new tile and the surface.

Tile Repairing Process

Fixing damaged tile takes patience and care. First, a layer of thin-set mortar is applied to the surface. Then, a notched trowel spreads the mortar, making sure it has ridges for a strong bond.

Applying Thin-Set Mortar

The thin-set mortar is what holds the new tile down. It’s important to spread it evenly for a good grip. This part of the repair takes about 65% of the work, including cleaning and preparing the surface.

Cutting and Positioning New Tiles

For cutting the tile, use a tile cutter or wet saw. When putting in the new tile, drop it gently and press down evenly. This ensures a strong bond with the mortar. This part is about 35% of the repair work.

By following these steps, you can fix your tile well. With the right tools and techniques, even broken tiles can look new again.

Grouting and Sealing Repaired Tiles

After putting in new tiles and letting the thin-set dry, it’s time to grout. Use a rubber grout float to spread grout between the tiles. Make sure it fills the gaps well. Then, use a damp sponge to wipe off extra grout from the tiles.

Let the grout dry as the maker says. This drying time is key for a strong, lasting finish. Once dry, seal the area to keep stains and moisture out.

Use a good grout sealer with a brush or roller, covering the grout lines well. You can also seal the whole area for extra protection. This keeps the tiles and grout looking good and prevents stains and damage.

Grouting and sealing your tiles makes them look great and last longer. With the right grout and sealer, your bathroom’s tile work will stay in top shape for many years.

Tips for Successful Bathroom Tile Repair

Keeping your bathroom tiles in good shape is key to their lasting beauty and your space’s look. Here are some easy tips to keep your bathroom tiles looking great for a long time.

Maintaining Repaired Tiles

Cleaning your repaired bathroom tiles often is a must. Use a gentle, pH-neutral cleaner and a soft brush to clean them. Stay away from strong chemicals or rough stuff that could harm the tiles. Make sure to rinse well and dry the area to stop water spots or mineral deposits.

It’s also smart to protect your repaired tiles. Think about putting a sealant or grout sealer on them. This helps keep them safe from water, stains, and wear. Just reapply the sealant every one to two years to keep the tiles water-resistant.

  • Clean tiles often with a mild, pH-neutral cleaner and a soft brush
  • Put a sealant or grout sealer on the fixed areas to protect against water, stains, and wear
  • Reapply sealant as needed, usually every 1-2 years

By doing these things, you can make sure your bathroom tile repair lasts a long time. And your space will always look its best.

Let the Experts at FindPros Handle Your Tile Repair

Finding the right professionals for your bathroom tile repair project is essential for achieving the best results. At FindPros, we connect you with top-rated local experts who can handle your tile repairs efficiently.

By filling out a simple survey about your home project, you can receive multiple quotes from competing pros, ensuring you get the best pricing and find someone you feel comfortable working with. Within seconds, you’ll be matched with professionals who understand your needs, allowing you to compare quotes and choose the best option for your tile repair. Let us help you restore your bathroom’s beauty with ease.

Conclusion

This guide has given you the key knowledge and steps for fixing bathroom tile repair like a pro. You learned the tile repair basics and how to get your workspace ready. You also learned how to remove, put back, and keep the fixed tiles in place.

Now, you’re ready to handle DIY tile repair or think about tile restoration services. This guide gave you the tools and methods for a top-notch result. By working on bathroom renovation projects, you make your home look better and protect your home improvement investments for a long time.

With the right steps and focus, you can save money and make your bathroom tiles look new again. So, go ahead with those tile repair projects and show off your DIY skills. The joy of a job well done is the best reward.

Frequently Asked Questions (Bathroom Tile Repair)

For a small chip in a ceramic tile, clean the damaged area and apply a two-part epoxy or paint that matches the tile color. This simple fix can give your tile a new lease on life without needing to replace it entirely.
If you see cracked tiles in your shower, address the issue quickly to prevent water damage. Remove the cracked tiles, check for any issues with the wall or subfloor, and replace with spare tiles. If the damage is extensive, consider hiring a contractor to ensure proper installation and prevent mold.
After replacing a tile, mix unsanded grout according to the manufacturer’s instructions. Apply the grout to the tile surface using a grout float, making sure to fill all gaps. Remove excess grout with a damp sponge, and let it dry completely before sealing.
Yes, you can often repair small cracks in tile floors without full replacement. Clean the crack thoroughly, then fill it with a matching color epoxy or specialized tile repair product. This can be a cost-effective solution compared to hiring a handyman or replacing the whole floor.
Bathroom tiles can suffer from various issues including cracked tiles, chipped tiles, water damage, and loose tiles. These problems can affect both wall and floor tiles, and may be caused by age, impact, moisture, or improper installation. Regular maintenance and prompt repairs can prevent small issues from getting worse and becoming costly fixes.

Bathroom Remodelers

Bat Removal Near You

Can’t find what you are looking for?

How It Works

  • Answer a few questions about your home project.
  • Within seconds, get matched with top-rated local pros.
  • Compare quotes and choose the best pro for the job.

Bathroom Remodelers In Your Area

Beyond the Basics: Finding Perfect Bathroom Remodelers for Your Project

Meta Description: Discover expert bathroom remodelers to transform your space. Get tips on finding skilled professionals, evaluating portfolios, and ensuring quality renovations.

Ever dreamed of a bathroom that shows off your style and meets your needs? Finding the right bathroom remodelers is key to making that dream come true. But how do you pick the best ones for your project? We’ll show you how to find and work with skilled bathroom remodelers who can make your dream bathroom a reality.

Bathroom Remodelers

Key Takeaways

  • Know what you want from your bathroom remodel to find the right remodelers.
  • Check their credentials, licenses, and past work to pick a reputable team.
  • Plan the remodeling process and talk clearly with your remodelers for a smooth project.
  • Set a budget, design, and timeline to make your bathroom remodel successful and easy.
  • Choose quality materials and finishes for a bathroom that lasts and looks great.

Understanding Your Bathroom Remodeling Needs

Before you start a bathroom remodel, think about what you want and need. Look at your current bathroom and see what’s not working. Think about what you want in the new space, like more storage or updated fixtures.

This will help you talk to the remodelers better. It makes sure the new design fits what you need.

Assessing Your Current Bathroom Layout

First, draw a map of your bathroom’s layout. Notice where things like the toilet, sink, and shower are. See if some spots are too small or hard to move around in.

Think about how you can make the space better. This will help you plan a better bathroom.

Identifying Your Desired Amenities and Features

  • Make a list of what you really want, like a big shower or a double vanity.
  • Think about the style you like, whether it’s modern or traditional.
  • Do you need more storage, like cabinets or shelves, to keep things tidy?

bathroom layout

By planning carefully, you can share your ideas with the remodelers. This way, you’ll get a bathroom that you’ll love.

Researching and Selecting Bathroom Remodelers

Finding the right remodelers is key to a great bathroom project. Start by looking for local contractors with a good track record. Make sure they have the right licenses and insurance. Check out their past work and ask for references to see their quality and customer happiness.

Checking Credentials and Licenses

Before you hire anyone, check their credentials and licenses. Make sure they are licensed, insured, and bonded. This means they follow the law and protect your project. Most people read online reviews before choosing remodelers, and many trust these reviews as much as advice from friends.

Reviewing Past Projects and References

Looking at a remodeler’s past work and getting references is a smart move. It shows you their skills, quality, and how they treat customers. Most people want contractors with at least five years of experience. Seeing their past work in person can also be very helpful.

Also, getting advice from friends is very important to many people. Getting quotes from at least three companies can save you money. Most people look for the best value, but many are willing to pay more for quality.

bathroom remodelers

The best remodelers have the right skills and licenses. They also communicate well, manage projects well, and can solve problems. By doing your homework and choosing wisely, you can make your bathroom remodel a success.

Bathroom Remodelers: What to Expect

Working with skilled bathroom remodelers means a smooth and expert experience. They will help you from the start to the end of the project. They make sure everything goes well and on time.

These pros take care of important stuff like getting permits and working with other contractors. They keep your project on track and within your budget. They also offer great advice on design, materials, and how to make your bathroom both useful and nice-looking.

Labor costs for bathroom remodels are usually between to 0 an hour. This adds up to about ,000 to ,000 for the whole job. Plus, these projects are a smart choice for homeowners because they bring a good return on investment.

Be ready for some noise and mess during the remodel. Plan for ways to deal with the noise or find another bathroom if needed. Sometimes, you might need to change your plans if you find problems like needing to fix the floor or walls. This keeps your project on budget.

With the right bathroom remodelers, you get a job done right. Your bathroom will look great and work well, adding to your home’s comfort and value.

Planning for Your Bathroom Remodel

Planning is key for a successful bathroom remodel. Start by working with your chosen remodelers. Create a detailed design plan and a mood board with your style and material choices. This plan makes sure your dream bathroom fits your budget and avoids surprises.

Creating a Design Plan and Mood Board

Make a clear design plan for your new bathroom. Think about the latest trends and your style to make a mood board. This board will guide your remodelers and make sure they get your vision right.

Budgeting for Your Bathroom Remodel

Set a realistic budget for all costs, like demolition and new fixtures. Choose the remodeling level that fits your budget and needs. Always add a 10% extra for unexpected costs.

Planning your bathroom remodel well leads to a beautiful, useful space. Work with your remodelers to make your dream bathroom a reality, all while keeping to your budget.

Choosing High-Quality Materials and Finishes

Choosing the right materials and finishes for your bathroom remodel is key. It affects the look, feel, and how long things last. Working closely with your remodelers is important. They help pick tiles, fixtures, vanities, and countertops that look good and last long in a wet bathroom.

It’s smart to spend on durable, well-made products. This way, your new bathroom will look great for years. Here are some top choices to consider:

  • Ceramic, porcelain, or natural stone tiles for floors and walls, offering impressive durability and water resistance.
  • Granite, marble, quartz, or solid surface countertops for a luxurious and resilient finish.
  • Solid wood, plywood, or medium-density fiberboard (MDF) cabinets for timeless charm and strength.
  • High-quality stainless steel fixtures and faucets for a sleek, long-lasting look.
  • Taller, comfort-height toilets for enhanced accessibility and comfort.

By picking top-notch materials and finishes, you make a bathroom that looks amazing and lasts long. Talk to your remodelers about the latest trends. They can help you find the best mix of quality, style, and function for your dream bathroom.

Bathroom Remodelers and the Importance of Project Management

Skilled bathroom remodelers know how key project management is in a remodel. They work well with subcontractors, keep an eye on the timeline and budget, and make sure the work meets top standards. Their skills and project management make sure your bathroom remodel goes smoothly. This means less hassle for you and a beautiful new space.

Good project management is key to a great bathroom remodel. Remodelers who are good at this handle the project’s tricky parts, like getting permits and working with different workers. They focus on clear talks, careful planning, and solving problems fast to give you great results on time and within budget.

Working with remodelers who focus on project management has many perks. They give you clear cost estimates, detailed design plans, and manage the whole renovation smoothly. This lets you focus on what you want, not the hard parts of the project.

Choosing a remodeler with strong project management skills means your dream bathroom will come true with little trouble and lots of happiness. Their eye for detail, managing resources, and solving problems will make your old bathroom into a beautiful, useful retreat.

Connect with Top Bathroom Remodelers Through FindPros

Finding the right bathroom remodelers can transform your vision into reality. At FindPros, we simplify this process by connecting you with top-rated local professionals who meet your specific needs. By filling out a simple survey about your home project, you can receive multiple quotes from competing experts, ensuring you get the best pricing available.

This not only allows you to compare options but also helps you find professionals you feel comfortable working with. In just seconds, you can be matched with skilled remodelers ready to bring your dream bathroom to life. Let us help you make informed decisions and achieve a successful renovation.

Conclusion: Achieving Your Dream Bathroom with the Right Remodelers

Working with skilled bathroom remodelers like can make your dream bathroom come true. They know how to solve problems that might come up during the project.

It’s important to install fixtures like toilets and vanities right to avoid plumbing problems later. The wet area is the hardest part of a remodel, needing experts. Choosing the right remodeler is key for a successful project.

If you’re spending ,000 to ,000, the average is about ,500 for updates, the right team can help. They handle plumbing, electrical, and customizing your space. With their help, your bathroom will be both useful and beautiful.

Frequently Asked Questions (Bathroom Remodelers)

To find the best bathroom remodelers, check their credentials, licenses, and completed projects. Ask for references from past clients and review their portfolio of bathroom renovations. Look for contractors with expertise in custom designs and quality work on bathrooms, tubs, and showers.
When planning a bathroom renovation, assess your existing bathroom layout and identify desired features. Create a design plan and mood board for your new bath. Consider your budget, timeline, and the services offered by bathroom remodeling companies. Don’t forget to factor in flooring, wall treatments, and the bathtub or shower installation.
Project management is crucial in bath remodels. Good bathroom contractors act as project managers, coordinating with subcontractors, managing timelines, and ensuring quality work. They handle details like permits and provide a clear payment schedule. This expertise helps avoid issues and ensures a smooth renovation process.
During the bathroom remodeling process, expect some disruption to your daily life. Reputable remodelers will provide a written estimate and fixed price for the project. They’ll handle everything from demolition of the existing bathroom to installation of new fixtures. Be prepared for potential challenges, such as issues with existing tubs or bathroom walls.
Bathroom renovations can significantly impact your home’s resale value. A well-designed new bath with quality fixtures and finishes can be a selling point. Consider using an interactive design tool to visualize your new bathroom. Remember that even one-day bath updates or services like Bath Fitter can improve your bathroom’s appearance and functionality, potentially increasing your house’s overall value.

Basketball Hoop Installation

Bat Removal Near You

Can’t find what you are looking for?

How It Works

  • Answer a few questions about your home project.
  • Within seconds, get matched with top-rated local pros.
  • Compare quotes and choose the best pro for the job.

Basketball Hoop Installation In Your Area

Essential Tools and Equipment for Basketball Hoop Installation

Meta Description: Discover the essential tools and equipment needed for a successful basketball hoop installation. Learn how to set up your hoop safely and efficiently.

Are you ready to boost your basketball skills by installing your own hoop? First, you need the right tools and equipment for a smooth installation. You’ll need everything from a portable basketball kit to power and hand tools. Each piece is key to making your own court at home.

Basketball Hoop Installation

Key Takeaways

  • Assemble a comprehensive toolkit, including a screwdriver, adjustable socket wrench, power drill, mallet, level tool, and measuring tape.
  • Familiarize yourself with the components of a portable basketball hoop kit, such as the base, support braces, poles, wheel, backboard, rim, net, and hardware.
  • Follow the manufacturer’s instructions carefully to avoid common pitfalls like stripped screws or bolts.
  • Ensure a stable base by filling the hoop’s foundation with sand or water.
  • Prioritize safety by avoiding swinging or hanging from the rim during play and seeking assistance when installing the backboard and net.

With the right tools and attention to detail, you’re set for hours of backyard basketball fun. Let’s explore the different hoops and how to prepare your site for a great installation.

Types of Basketball Hoops

There are three main types of basketball hoops: portable, wall-mounted, and in-ground. Each type has its own benefits for your basketball setup.

Portable Basketball Hoops

Portable hoops are the top pick for home use. They have a heavy base filled with sand, water, or gel for stability. These hoops are easy to set up and move around. But, they might not be as stable as in-ground or wall-mounted hoops and could fall over.

Wall-Mounted Basketball Hoops

Wall-mounted hoops are great for small spaces. They stick to a wall, giving a stable and lasting setup. These hoops work well inside or outside. But, they need a pro to install them because they’re heavy.

In-Ground Basketball Hoops

In-ground hoops are super stable and feel like real game play. They go right into the ground with a concrete base for a strong setup. These hoops take more time and money to put in but are the best for serious players.

basketball hoops types

Think about your space, how often you’ll use it, the players’ ages, and your budget when picking a hoop. Portable hoops are good for beginners. But, in-ground and wall-mounted hoops are better for those who really love the game.

Site Preparation for Basketball Hoop Installation

Getting ready for a basketball hoop is a big first step. You need to pick the perfect spot. Make sure there’s enough room behind the backboard and on the sides. Experts say you should have 10-15 feet behind and 5-10 feet on each side. This keeps players safe and avoids hitting things like garage doors or cars.

Checking for Underground Utilities

Before digging for an in-ground basketball hoop, check for underground lines. Look for power, water, gas, or phone cables. It’s important to call the utility companies to mark where these lines are. This keeps you safe and avoids expensive mistakes during setup.

After picking a spot and checking for lines, start digging. The hole should be 16 inches wide and 48 inches deep. This size hole gives the hoop a strong and steady base. It makes sure the system stays stable and secure.

installation site

Tools Needed for Basketball Hoop Installation

Installing a basketball hoop needs many tools for a good and safe setup. You’ll need power tools, hand tools, and safety gear. The right tools make the job easier and safer.

Power Tools

A cordless drill/driver is key for installing a basketball hoop. It helps secure the mounting parts and put everything together. An adjustable wrench is also a must for tightening bolts and nuts.

Hand Tools

Hand tools are also important. You’ll need a level to make sure the hoop is straight. A tape measure helps with precise measurements, and a screwdriver is for extra assembly tasks. A mallet can be useful for tapping parts into place gently.

Safety Equipment

Always put safety first when installing a basketball hoop. Wear protective gloves, eyewear, and steel-toe boots to avoid injuries. You might also need a ladder to reach certain parts of the hoop.

With the right tools and safety gear, installing a basketball hoop will be easy and fun. It will give you many years of enjoyment on the court.

Step-by-Step Basketball Hoop Assembly Instructions

Putting together a basketball hoop can be fun and rewarding. But, it’s key to follow the instructions closely for a safe and successful setup. Here’s a step-by-step guide to help you:

  1. First, lay out all the parts and components of your basketball hoop. This includes the backboard, rim, net, pole, base, and support. Check the manufacturer’s guide for everything you need.
  2. Then, put together the base by attaching the support braces. Fill the base with sand or water as the instructions say for stability.
  3. Connect the pole sections and attach them to the base. Make sure the pole is at the right angle, usually about 30 degrees.
  4. Next, put the backboard on the pole. Make sure the holes line up with the extension arms.
  5. Finally, put the rim and net in place. Secure the whole thing to the ground or wall as the instructions say.

For hoops that go into the ground, you’ll need to dig a hole, mix and pour concrete, and let it set. Then, you can finish the assembly and installation. If you’re not sure, look at the manufacturer’s guide or get help from a pro.

Always follow safety rules, use the right tools, and get help for heavy parts. With care and patience, you’ll get your basketball hoop set up smoothly and correctly.

Concrete Mixing and Pouring for In-Ground Hoops

Installing an in-ground basketball hoop needs a strong concrete base. Getting the concrete mix and pouring right is key. You must make sure the concrete is the right consistency and handle cold weather issues.

Achieving the Correct Concrete Consistency

Use a high-strength concrete mix like Quikrete for in-ground hoops. Mix it with 6 pints or 2.8 L of water for an 80 lb. bag, or 4 pints or 1.9 L for a 60 lb. bag. Keep extra mix ready for any problems during setup.

Pouring Concrete in Cold Weather

Installing a basketball goal in winter needs special care. Use a fast-setting mix with hot water and accelerators in cold weather. Accelerators make the concrete set faster and get stronger sooner. Curing blankets, costing -, keep heat and moisture in and protect the concrete from freezing.

Don’t pour concrete on frozen ground to avoid cracks and uneven settling. Follow the cold weather instructions from the manufacturer for a lasting basketball hoop.

Professional Basketball Hoop Installation Services

Setting up a high-quality basketball hoop needs the help of pros. They have the right tools and safety gear for a smooth install. They know how to put together different hoops quickly and correctly, saving you time.

Advantages of Hiring Professionals

Here’s why you should choose basketball hoop installation services:

  • Experts set up the hoop right, making it safe and stable.
  • They handle tricky installs like in-ground hoops or dealing with underground wires.
  • They offer warranties and guarantees for their work, giving you peace of mind.
  • They follow safety protocols and use safety gear to protect everyone.
  • Pros can finish the job in just a few hours, saving you time.

Goalrilla says 75% of their hoops should be installed by their pros. With over 350 authorized installation services across the country, you can be sure your hoop is installed right.

If you can’t find a local dealer, Goalrilla’s national installation service can help. They have a big team of installers ready to set up your hoop safely and with expertise.

Basketball Hoop Adjustment and Maintenance

Keeping your basketball hoop in good shape is key for a safe and fun experience. Adjusting the height and checking for loose screws and bolts are important steps. This keeps your hoop working well for a long time.

Adjusting the hoop’s height is a big part of maintenance. Goalrilla hoops can be set from 7.5 feet to 10 feet tall. This lets players of all ages and skills play comfortably. It’s also key to check the hoop’s stability and tighten any loose parts for safety.

Keeping the hoop and area around it clean is also vital. This keeps the hoop looking good and safe. It makes sure your outdoor basketball setup stays reliable and fun.

Follow these easy tips for adjusting and maintaining your basketball hoop. This way, you can enjoy playing for many years.

Basketball Hoop Installation Safety Considerations

Installing a basketball hoop needs careful safety steps. Whether it’s a portable, wall-mounted, or in-ground hoop, protecting yourself and others is key.

Heavy lifting is a big safety worry during installation. The backboard, rim, and pole are heavy and hard to move. Wearing safety gear like gloves, eye protection, and steel-toe boots can prevent injuries.

  • Wear safety gloves to protect your hands from cuts or scrapes.
  • Use eye protection to shield your eyes from debris or falling objects.
  • Wear steel-toe boots for extra protection against heavy parts dropping on your feet.

Having extra help for heavy lifting and tricky parts makes installation safer. Teamwork and coordination help make the process smooth and safe.

Putting the basketball hoop in the right spot is also important for safety. Choose a spot with little traffic and away from dangers like garage doors, windows, or cars. This lowers the chance of accidents and injuries.

By following these safety tips, you can make sure your basketball hoop installation is safe and successful. Always put safety first in any DIY project.

Discover Your Perfect Baskedball Hoop Installation Pros with FindPros

With FindPros, transforming your backyard into a basketball paradise has never been easier. Our platform connects you with top-rated local professionals who can help with your basketball hoop installation. By filling out a simple survey about your home project, you can receive multiple quotes from competing pros, ensuring you get the best pricing available.

Whether you need assistance with a portable, wall-mounted, or in-ground hoop, we help you find the right professionals who match your style and needs. Compare quotes, read reviews, and choose the best pro for your installation, making your basketball dreams a reality with minimal hassle.

Conclusion

Putting together a basketball hoop can be a fun DIY project. It lets you set it up just how you like and play the sport in your own driveway or yard. But, you need to plan well, have the right tools, and focus on safety.

Follow the step-by-step guide, mix the concrete right, and think about getting professional installation if you need to. This way, your new basketball hoop will be safe and set up right.

You can pick from portable, wall-mounted, or in-groundhoops. Each type offers a durable and reliable way to play basketball for hours. This guide has given you all the info you need to pick the best backboard and rim for your basketball hoop.

With the right tools and care, you can turn your outdoor area into a great basketball court. It’s perfect for fun, exercise, and spending time with family. So, take on the DIY challenge, stick to the best methods, and feel proud of your new basketball hoop. It will be the highlight of your backyard basketball fun for many years.

Frequently Asked Questions (Basketball Hoop Installation)

The first steps involve choosing the installation location, checking for utility lines, and preparing the playing surface. If you’re replacing an existing hoop, remove it before starting the new installation.
Dig a hole with the proper diameter and depth using digging equipment. Place the anchor kit in the hole, fill with dry concrete mix, add water, and allow the cement to cure. This anchor system provides a stable base for the main pole.
You’ll need a rubber mallet, wrench set, and possibly a lift for the backboard. Support arms and a breakaway rim are crucial components. Always follow safety precautions during assembly.
The curing process typically takes 24-48 hours. It’s best to wait 3-7 days before erecting the pole and completing the final assembly. Keep an extra bag of dry mix on hand to fill voids if needed.
If the installation process seems challenging, it’s not a problem to hire a service provider. Professionals can ensure proper installation, from digging to having the net fully installed. They can also address any additional questions and schedule the installation at your convenience.

Basement Remodelers

Bat Removal Near You

Can’t find what you are looking for?

How It Works

  • Answer a few questions about your home project.
  • Within seconds, get matched with top-rated local pros.
  • Compare quotes and choose the best pro for the job.

Basement Remodelers In Your Area

The Ultimate Guide to Choosing Basement Remodelers

Meta Description: Discover expert tips for selecting the best basement remodelers. Learn what to look for in contractors and how to ensure your project’s success. Transform your space today!

Do you dream of turning your basement from dark and cluttered to bright and useful? Remodeling your basement is a great way to increase your home’s value. It also opens up new possibilities like a cozy family room, a home gym, or a cool wet bar. But finding the right contractor is key to making your dream come true.

Basement Remodelers

Key Takeaways

  • Understand the unique challenges and benefits of working with experienced basement remodeling specialists.
  • Verify licensing, insurance, and compliance with local building codes to ensure a safe and compliant project.
  • Evaluate basement remodelers’ project plans and cost estimates to find the best value for your investment.
  • Review references and online reviews to gauge a contractor’s track record of quality workmanship and exceptional customer service.
  • Prioritize clear communication and collaboration with your basement remodeling team for a seamless project experience.

Understanding the Importance of Experienced Basement Remodelers

Renovating a basement is tricky and needs special skills. Experts in basement remodeling know how to handle moisture, insulation, lighting, HVAC, and structural issues. They can make an unfinished basement into a cozy living area.

Unique Challenges of Basement Projects

Basement renovations have special challenges. These include:

  • Moisture control and waterproofing to prevent damp or mold issues
  • Ensuring proper insulation for temperature and energy efficiency
  • Designing effective lighting solutions for low-ceiling basements
  • Integrating HVAC systems to maintain comfortable indoor climate
  • Addressing structural considerations for load-bearing walls and floors

Benefits of Hiring Specialists in Basement Renovations

Choosing specialists for basement renovations means your project will be top-notch. It will also boost your home’s value. These pros have the problem-solving skills and basement-specific experience needed for these projects. Studies show you can get back 70-75% of your renovation cost. Working with a licensed contractor can also save you time and money.

basement renovation

Verifying Licensing and Insurance for Basement Remodelers

It’s key to make sure your basement remodeler has the right license and insurance. Licensed contractors show they know the rules and meet standards. They follow local building codes and are ready for your project.

Insurance is also important. It covers you from risks like accidents or damage during the work. This keeps you safe from unexpected costs.

Why Licensing and Insurance Matter

Licensed and insured remodelers lower your risks and ensure quality work. They follow building codes and protect your property and work. This means a safer and more reliable project for you and your family.

How to Validate Credentials

Checking a contractor’s license and insurance is smart. It lowers risks and keeps you calm. Make sure their license checks out with your state and their insurance is up to date.

Verified Credentials

Do your homework on a contractor’s reputation. Look at online reviews, join local business groups, and check with consumer agencies. Choose a contractor with great feedback on their work and how they talk and act.

Evaluating Basement Remodelers’ Project Plans and Cost Estimates

For basement remodeling, having a detailed plan and cost estimate is key. The plan should cover the scope of work, timeline, materials, labor costs, and payment details. It should also include cost estimates for framing, drywall, electrical, plumbing, flooring, and finishing. Don’t forget about permit fees and contingencies. This helps you keep track of your budget and avoid surprises.

The average cost for a Basement Finishing project is between ,442 and ,849. Materials make up about 70% of this cost. Labor costs can range from to 0 per hour. And, building permits usually cost between ,200 to ,000. A good project plan and cost estimate show the contractor’s professionalism and commitment. They help keep your project on track and within your budget.

  • Detailed project plan outlining the scope of work, timeline, materials, and labor costs
  • Itemized cost estimate that breaks down all expenses, including permits and contingencies
  • Transparent communication and budget management to avoid unexpected costs
  • Ensuring the project plan and cost estimate align with industry standards and local regulations

By looking closely at the project plans and cost estimates from basement remodelers, you can make a smart choice. This way, your basement renovation will likely be a success.

Reviewing References and Online Reviews

Choosing the right basement remodelers is important. It’s crucial to do your homework. Look at their client references and online reviews. This helps you see their work quality, reliability, and how they treat customers.

Insights from Previous Clients

Talking to past clients can give you real stories. You’ll learn about their experience with the contractor. They can tell you about the contractor’s communication, how they solve problems, and if they stick to deadlines and budgets.

Assessing Online Reviews

Online reviews on sites like Google, Angi, HomeAdvisor, and the Better Business Bureau are also useful. They show what customers often say. This helps you see what the contractor is good at and what they might need to work on.

Looking at a contractor’s past work through references and reviews helps you understand their skills and how happy customers are. This careful checking makes sure your basement remodel goes well.

The Value of Clear Communication and Exceptional Customer Service

For a successful basement remodel, clear communication and great customer service are key. A top contractor will make sure you both understand each other. This way, they’ll make sure your dream basement comes to life.

Find a remodeler who is good at communication skills. They should be quick to respond and explain things in simple words. A contractor who cares about customer service will make the project easy and fun.

  • Prioritize project transparency and keep you informed every step of the way.
  • Exhibit problem-solving capabilities to address any challenges that arise.
  • Foster a sense of mutual understanding and accommodate your needs with flexibility.

Choosing a basement remodeler who is great at talking and serving customers means your dream will come true. They will make sure you’re happy every step of the way.

Basement Remodelers: Expertise in Local Building Codes and Regulations

When you’re remodeling your basement, it’s key to have a contractor who knows the local building codes and rules. They should be experts in local building codes, permit requirements, and safety standards for basement work. This knowledge makes sure your project meets all the legal requirements and follows the latest code compliance and regulations.

A skilled contractor knows how to handle the permit application process and keeps up with code changes. They’ll make your basement both useful and safe, following all basement-related regulations and safety standards. Their focus on code expertise and legal issues helps avoid big mistakes or inspections failures. This means your basement will be safe, up to code, and of high quality.

  • Comprehensive understanding of local building codes and regulations specific to basement renovations
  • Expertise in navigating the permit application process and staying up-to-date on code compliance
  • Ability to design a functional and compliant basement space that adheres to all safety standards
  • Minimizing the risk of failed inspections and costly mistakes through in-depth code expertise

Choosing a basement remodeling contractor with a strong background in local building code and regulation knowledge ensures your project is done right. It’s safe, legal, and meets top standards. This special knowledge is key for a successful basement renovation.

FindPros: Your Ultimate Resource for Home Improvement Projects

Are you planning a basement remodeling project but unsure where to start? Look no further than FindPros – your one-stop-shop for connecting with top-rated local professionals. With FindPros, you can:

  • Get the best pricing when multiple pros compete for your job
  • Find pros that you get along with best by answering a few simple questions about your home project
  • Get matched with top-rated local pros within seconds
  • Compare quotes from multiple contractors to choose the best pro for the job

Don’t settle for less when it comes to your basement remodeling project. Let FindPros help you find the perfect contractor for your needs and budget. Visit our website today and fill out our simple survey to get started.

Conclusion

Finding the right contractor is key to making your basement great. Look for someone with experience, a license, and insurance. They should have a good track record in basement renovations. This ensures your project meets high standards, adding value and comfort to your home.

Check the contractor’s credentials and their plans and costs. Also, look at their references and online reviews. Good communication and customer service are important. With the right contractor, you can make your basement dream come true. You’ll get a beautiful basement that boosts your home value, makes life easier, and follows safety and code compliance.

Choosing a skilled and reliable basement remodeling contractor is a wise move. It can bring big rewards to your renovation. This guide helps you through the basement remodeling process. You’ll end up with the cozy, personalized space you want for your home.

Frequently Asked Questions (Basement Remodelers)

Popular basement ideas include creating a family room, game room, or playroom. You can brighten up the space with light paint colors, installing proper lighting, and adding windows if possible. Consider built-ins for storage and a fireplace for coziness. These ideas can transform a completely unfinished basement into a welcoming area for family and friends to spend time together.
Homeowners can maximize extra space by creating multi-functional rooms. For example, a basement family room can double as a guest bedroom with a pull-out sofa. Installing shelving and cabinets helps with storage for holiday decorations and boxes. Consider adding a bathroom for convenience. You can also create an office nook or a small gym area to make the most of your finished basement.
The first step in a basement remodeling project is to address any moisture issues. This might involve waterproofing the walls and floors. Next, focus on insulation and proper lighting to create a bright, comfortable space. Then, decide on the layout and purpose of your new space. Whether you’re creating a family room, bedroom, or playroom, planning is crucial before you start remodeling.
Basement remodels can significantly increase a house’s value in Maryland by adding usable living space. A finished basement can serve as an extra bedroom, office, or entertaining area, which is attractive to potential buyers. Remodeling services that focus on creating bright, versatile spaces with proper insulation and moisture control are particularly valuable in Maryland’s climate.
For a basement family room, consider durable and moisture-resistant options like laminate, vinyl, or carpet tiles. These materials can withstand potential moisture issues common in most basements. Laminate offers a wood-look at a lower cost, while carpet adds warmth and comfort. For a modern look, painted concrete can be an affordable option. The key is to choose flooring that complements your overall basement ideas and stands up to your family’s lifestyle.

Baseboard Installers

Bat Removal Near You

Can’t find what you are looking for?

How It Works

  • Answer a few questions about your home project.
  • Within seconds, get matched with top-rated local pros.
  • Compare quotes and choose the best pro for the job.

Baseboard Installers In Your Area

Professional Baseboard Installers: Benefits and Costs

Meta Description: Discover the benefits and costs of hiring professional baseboard installers. Get expert advice on trim installation, materials, and pricing for your home renovation project.

Are you tired of uneven, unsightly baseboards that make your home look bad? Hiring a pro for baseboard installation could be the answer. But what are the benefits, and how much will it cost?

Baseboard Installers

Baseboards are key for both looks and function in any room. They protect walls and add elegance. But installing them right needs skill and care. That’s where professional installers shine, offering big benefits to homeowners.

Key Takeaways

  • Professional baseboard installers ensure a polished, seamless look with expertly executed corners and joints.
  • Hiring a pro can save you time and effort, as they have the tools and experience to get the job done efficiently.
  • Professional installation often comes with a warranty, providing peace of mind and protection for your investment.
  • Experienced installers can provide valuable recommendations on the best baseboard materials and styles for your home.
  • While the upfront cost may be higher, professional installation can help avoid costly mistakes and ensure long-lasting results.

The cost of installing baseboards depends on many things. You might pay between $1 and $1.60 per linear foot for solid wood. MDF baseboards cost less, from 80 cents to $1.30 per square foot. The total cost for a project can be $950 to $1,700, including door casing and baseboards.

Choosing to hire a pro for baseboard installation depends on your budget, project complexity, and DIY skills. Knowing the benefits and costs helps you make a smart choice. This choice can improve your home’s look and value.

What Are Baseboards?

Baseboards are key parts of a room’s look and feel. They sit at the bottom of walls, protecting them from kicks and scuffs. They also make a room look better by matching the floors and walls.

Baseboards have many styles, from simple to fancy. They can be 3 1/2 to 6 inches tall and up to 94-1/2 inches long. Sometimes, extra details like cap molding are added for more beauty.

Baseboards

Putting in baseboards right is important. If there are big gaps, you might need to adjust the corners. After installing, you seal the edges and holes, prime, and paint for a smooth finish.

Types of Baseboards

Baseboards come in many materials, each with its own benefits. Let’s look at PVC, vinyl, and rubber baseboards.

PVC Baseboards

PVC baseboards are made of polyvinyl chloride. They are tough and versatile. They don’t chip, crack, or rot, making them perfect for wet areas like bathrooms and laundry rooms.

They are also easy to clean and last a long time. This makes PVC baseboards a smart choice for your home.

Vinyl Baseboards

Vinyl baseboards are a good alternative to PVC. They resist water and termites well. This makes them great for busy areas or places with lots of moisture, like kitchens and entryways.

They can handle a lot of foot traffic. So, vinyl baseboards give you a durable and lasting look for your home.

Rubber Baseboards

Rubber baseboards are perfect for areas with moisture and drafts. They keep moisture out and insulate well. This helps keep your home comfortable and saves energy.

They are a top pick for homes in places with changing temperatures or high humidity.

When picking a baseboard, think about the room’s use, how much traffic it gets, and if it’s near water. Choosing the right baseboard material means you get a look that’s both beautiful and long-lasting.

Baseboard types

Wood Baseboard Options

Homeowners have many wood baseboard options. Each has its own look and benefits. You can find something that fits your budget and style.

MDF Baseboards

MDF baseboards are a top pick for their price and easy setup. They don’t have the real wood look but can be painted. But, they can warp if they get wet, so they’re not great for wet areas.

Jointed Pine Baseboards

Jointed pine baseboards are the cheapest natural wood choice. They give a classic look but aren’t as strong as other woods. They work best in dry places because they can warp in damp areas.

Hardwood Baseboards

Hardwood baseboards, like oak and maple, are a top choice for lasting quality. They cost more but are very strong. You can stain or paint them to match your home’s style. They’re perfect for busy areas or where you want a fancy look.

Choosing wood baseboards means thinking about your budget, where you’ll put them, and what you like. By looking at the good and bad of each type, you can pick the best for your home.

Baseboard Installation Process

Installing baseboards needs careful work and the right tools. Pros follow a detailed plan for a smooth, good-looking finish. The steps include:

  1. Inspecting the space: The installer looks at the walls, floors, and trim for any issues that could make installation hard.
  2. Gathering the necessary equipment and materials: They get the baseboard trim, adhesives, fasteners, miter saw, caulk, and other tools needed for a good install.
  3. Preparing and protecting the area: The installer covers the floor and nearby surfaces to keep them safe during the install.
  4. Installing the baseboards: They measure, cut, and attach the baseboards to the wall for a snug fit and correct corners.
  5. Finishing touches: The installer uses caulk on the seams, sands rough spots, and cleans up for a professional look.

By choosing a pro for baseboard install, homeowners get a smooth, quick process. This leads to a beautiful, lasting finish for their home’s interior.

A 100 to 150 linear foot baseboard project usually takes 5 to 7.5 hours. Trim carpenters can install about 20 linear feet per hour. The walls’ condition, the install’s complexity, and the baseboards’ type can change the project’s time and cost.

Baseboard Repair

Baseboards can get chipped, damaged, or look old over time. Baseboard repair services can fix these problems. They can make uneven paint lines, scuffs, and dents go away.

A good technician can make the molding and trim look new again.

In Orlando, Florida, there are 29 top-rated baseboard installation services. Companies like Hernandez Interior Home Solutions and Sonshine Renovation LLC are well-known. They have been fixing baseboards for over 15 years.

Leclerc and Sons, Best Handyman Services, and Huff & Co. Carpentry, LLC are also great choices. They’re known for their great work and being professional. Just Trim Florida has over 40 years of experience in baseboard repair and installation.

Choosing a skilled professional is key for baseboard repair. They can make your molding and trim look amazing again. With the right tools and materials, your baseboards will look great for a long time.

Cost of Baseboard Installation

The cost to install baseboards changes a lot. It depends on the material, getting the site ready, and removing old materials. Knowing these costs is key for home renovation plans.

MDF baseboards are cheaper, costing $0.80 to $1.30 per foot. Solid wood baseboards are pricier, at $1 to $1.60 per foot. Installing them costs $8 to $12 per foot, covering labor and prep.

Other costs also matter. Getting rid of old baseboards costs $0.14 to $0.16 per foot. Renting special tools for the job can be $318.77 to $480.87 for 132 feet of work.

Installing baseboards in a 144-foot home costs about $1,060 on average. The cost per foot is $5.70 to $8.95. Labor to put in baseboard trim is $4.90 to $7.75 per foot.

Remember, these prices can change based on your project, location, and extra work needed. Talking to baseboard contractors in your area can give you a better idea of the baseboard installation cost.

Benefits of Professional Baseboard Installation

Upgrading your home’s look can be a big change. Professional baseboard installers can make a huge difference. They offer many benefits that go beyond what you can do yourself. Their work ensures a top-notch finish that makes your space look better.

A study by the Home Improvement Research Institute found a 22% increase in demand for professional baseboard installers in the last five years. This shows how much homeowners value their skills.

Homeowners who chose professional baseboard installers saw a big improvement in their home’s look. 87% reported their homes looked better after the work. This is thanks to the installers’ skill and eye for detail.

Also, homes with professional baseboards sell for 15% more than those without. This shows how a good baseboard installation can boost your home’s value.

When you pick professional baseboard installers, you get a smooth and lasting installation. They make sure joints fit well, corners are tight, and suggest the best materials and styles for your home. These experts can handle tough walls and give you a perfect finish that lasts.

Professional baseboard installation services cost between $2.50 to $4.50 per linear foot. This is more than doing it yourself, but the benefits and peace of mind are worth it.

The perks of hiring baseboard contractors are clear. They improve your home’s look, increase its value, and ensure a solid installation. Working with pros lets you upgrade your home’s style and enjoy it for many years.

Hire the Best Baseboard Installers with FindPros

Are you ready to transform your home with stunning baseboards but unsure where to start? Look no further than FindPros, the ultimate platform for connecting homeowners with top-rated local professionals. Simply answer a few questions about your baseboard installation project, and we’ll match you with the best pros in your area.

With FindPros, you’ll get the best pricing when multiple pros compete for your job, ensuring you find the perfect fit for your needs and budget. Don’t settle for less than the best – let FindPros help you find the ideal baseboard installer for your home renovation project today.

Conclusion

Baseboards are key to a room’s look and function. They protect walls and finish your home’s decor. Hiring baseboard installers ensures a beautiful, lasting baseboard installation that fits your style.

Choosing from solid wood, PVC, or aluminum baseboards is important. But, the real secret is to get them installed right by baseboard contractors. Professional installers make sure your baseboards look great and last long. They measure, cut, and install them perfectly, boosting your home’s value and look.

Keeping baseboards clean and fixing any damage is crucial. This keeps them looking good and working well. If you need new baseboards or just repairs, getting help from pros is key. They ensure your baseboards stay beautiful and functional.

Frequently Asked Questions (Baseboard Installers)

We would recommend contacting a few locally operated companies that specialize in interior trim work like baseboard installation contractors. Most provide free estimates to evaluate your project and suggest the best options based on your budget and style. Be sure to get free quotes from a few contractors before selecting one to ensure you get the best service.
For crooked or uneven walls, most baseboard installation contractors recommend using flexible materials like medium density fiberboard (MDF) trim which is easier to install smoothly compared to solid hardwoods. MDF baseboards are also more affordable and can be decorated to match your home’s decor. Contractors are experienced at installing trim on irregular walls to give a nice finished look.
Yes, most reputable baseboard installation contractors are fully capable of installing both baseboards and crown molding as they are experts in interior trim work projects. Having the same contractor complete both tasks ensures a cohesive, professional look. They can efficiently schedule the installing trim to minimize disruptions and complete the job from floor to ceiling. I’d recommend asking contractors about their expertise in wainscoting, windows, and doors as well.
The time it takes to complete a baseboard replacement project can vary depending on the size of your home and number of rooms. Most locally owned, experienced contractors can replace the baseboards in a typical home within 5-7 business days once starting the job. For larger or more complex projects, they may need up to 2 weeks to complete replacing all the baseboards while minimizing disruption. Be sure to get a scheduled start and finish date when getting estimates.
Yes, baseboard installation contractors are fully capable of installing new baseboards without removing any existing flooring like carpet first. They are experienced at protecting flooring during the project using shoe coverings or drop cloths. This makes it convenient to have baseboards installed as part of other remodeling or repair projects without disturbing flooring like carpet. Replacing baseboards is usually the efficient first step before associated jobs like replacing flooring or repairing water damage in the lower portion.

Barn Builders

Bat Removal Near You

Can’t find what you are looking for?

How It Works

  • Answer a few questions about your home project.
  • Within seconds, get matched with top-rated local pros.
  • Compare quotes and choose the best pro for the job.

Barn Builders In Your Area

Choosing the Right Barn Builder: Factors to Consider for Your Project

Meta Description: Discover key factors to consider when selecting barn builders for your project. Ensure quality, expertise, and customization for your ideal barn construction.

Are you dreaming of the perfect barn for your property? But, finding the right builder seems hard. With over 3.7 million construction businesses in the US, it’s a big choice. But, the key to a great barn project is finding a builder who gets your vision and has the right skills.

Barn Builders

Key Takeaways

  • Evaluate the builder’s experience and qualifications to ensure they have the necessary skills to deliver quality craftsmanship.
  • Assess both the builder’s hard skills (technical expertise) and soft skills (communication, respect for your property) to find the right fit.
  • Provide detailed project information to potential builders to receive accurate estimates and ensure your needs are met.
  • Leverage your network, online reviews, and industry directories to find reputable and reliable barn builders.
  • Ask the right questions to uncover a builder’s true capabilities and gauge their commitment to your project’s success.

Evaluating the Builder’s Experience and Qualifications

Choosing a barn builder means looking at their skills and experience. This helps you know if they can do a good job and if your project will succeed.

Assessing their Hard Skills

First, check if the builder has built barns like yours before. Ask for references and look at their past work. This shows their quality building and quality craftsmanship.

Make sure they have the right licenses and expertise for your project.

Evaluating their Soft Skills

Soft skills matter too. Think about how well you can work with the builder. You’ll be together a lot during the process.

They should be on time, easy to talk to, and have happy customers who can vouch for them. This shows their customer service and how they meet clientspecific needs.

Building a barn takes a long time. So, it’s key to work with a builder you get along with. This makes the construction go smoothly.

barn builders

Providing Detailed Project Information to Potential Builders

Before you talk to barn builders, make sure you have all the project details ready. The more info you give, the better builders can see if they can do your project.

Some key details to share with builders include:

  • Example photos of the type of structure you have in mind
  • Intended use of the barn (agricultural, storage, residential, etc.)
  • Building height and number of stories
  • Details about the build site, such as whether it’s flat, hilly, or in a tight space

Sharing these details early lets builders quickly see if they’re a good match for your project, qualitybuilding, and construction needs. This saves time and connects you with builders who can make your dreamspace real.

pole barn

Also, be ready to talk about your budget, timeline, and any special features or materials you want. Giving builders more info helps them see if they’re the right choice for your property and constructionprocess.

By sharing detailed project info, you can find the best barn builders for your needs. This way, you can create the pride of ownership you want.

Barn Builders: Where to Look for Reputable Contractors

Looking for a good barn builder means checking out different places. Start by asking people you know and those in your area.

Leveraging Your Network and Local Resources

Ask your friends, family, and neighbors for builder recommendations. Use social media and local forums for more referrals. If you don’t get leads from people you know, try government and professional services.

Places like the Better Business Bureau, your local building department, and the Chamber of Commerce can help. They offer lists of builders in your area.

Utilizing Online Review Platforms and Directories

Online reviews are also a great way to find barn builders. Sites like Home Advisor, Porch, Angi, Houzz, and Contractor Connection are useful. They let you read customer reviews, look at portfolios, and compare builders.

Using your network, local resources, and online review sites helps a lot. This way, you’re more likely to find a good barn builder. They’ll make your construction project look great with top quality and care.

Questions to Ask Potential Barn Builders and Their References

When you talk to barn builders about your project, ask important questions. This ensures you find the right one for your needs and makes the building process smooth. Key questions to ask include:

  • Do they have lots of experience with barns like yours?
  • Can they show you photos of their past work?
  • Are they licensed, bonded, and insured for your barn project?
  • What’s their payment plan, and are they clear about costs?
  • Can they give you a timeline for your project?
  • Can they give you references who praise their quality building, quality craftsmanship, and service?

Talk to these references to learn more than just the final result. Ask about their whole experience, such as:

  • Were the first buildingestimates and timelines right?
  • Was the barn builder kind, quick to respond, and easy to talk to during construction?
  • Did the builder show expertise and stick to the agreed-upon schedule and availability?
  • Would the reference suggest this barn builder for future projects?

By asking the right questions and checking out potential barn builders, you can make sure your building experience is good. And the final product will meet your needs.

Simplify Your Search for the Perfect Barn Builder with FindPros

Finding the right barn builder can be a challenging task, but with FindPros, the process becomes seamless. By filling out a simple survey about your home project, you can quickly connect with top-rated local professionals who are eager to compete for your job. This competition not only ensures you receive the best pricing but also helps you find builders who align with your vision and values. Within seconds, you can compare quotes and choose the best pro for your barn construction needs, making your dream project a reality with ease and confidence.

Conclusion

Choosing the right barn builders is key for your project’s success. Look at their skills, soft skills, and detail focus. This way, you’ll find a partner who can make your barn dream come true. It’s important for both experts and beginners to check out builders and see what they can do.

This ensures your barn is finished on time, within budget, and meets high quality standards.

With the right builders, you can make your dream barn a reality. Think about quality building and craftsmanship. Also, make sure they can meet your specific needs. This way, your project will be a success and you’ll have a space to be proud of for years.

Whether it’s for your horses, cars, or hobbies, the right builder can create the perfect space for you. They bring the skills and vision needed for your dream space.

Frequently Asked Questions (Barn Builders)

The builders have decades of experience constructing pole barns, horse barns and other agricultural buildings. They have successfully completed many projects similar to what the customer needs – a new pole barn with space for animals and a riding arena. Their expertise is in pole construction and they take great pride in quality building.
Yes, the builders are fully licensed and insured for agricultural building projects. Being fully insured is very important when working with animals or heavy equipment. It provides customers with peace of mind during the construction process.
For a standard pole barn, the builders can usually complete construction within 8-10 weeks from start to finish, including delivery of materials. This assumes good weather and no delays. They will provide a more accurate schedule once they review the specific project details and building site.
The builders have extensive experience constructing all types of structures including garages, pole buildings, horse barns and more. Pole barns are their specialty and they can design functional buildings to suit customers’ needs, budgets and property space. Their goal is efficient, quality building that customers can count on.
Absolutely. All of the builders’ structures are engineered to withstand the local weather conditions including snow loads and high winds. They only use high-quality materials to construct durable, long-lasting barns and buildings that protect animals and equipment for many years. Customer satisfaction and quality building are top priorities.

Backyard Contractors

Bat Removal Near You

Can’t find what you are looking for?

How It Works

  • Answer a few questions about your home project.
  • Within seconds, get matched with top-rated local pros.
  • Compare quotes and choose the best pro for the job.

Backyard Contractors In Your Area

Choosing the Right Backyard Contractor: Tips for a Successful Project

Meta Description: Find the perfect backyard contractor for your outdoor project. Learn essential tips to ensure success, from vetting qualifications to comparing bids and communicating your vision.

Do you dream of a peaceful and beautiful backyard oasis? The right contractor can make your dream come true. But picking the best one is key. We’ll share tips to help you find the perfect contractor for your outdoor space.

Backyard Contractor

Key Takeaways

  • Research local backyard contractors to find the best fit for your project
  • Compare services and experience to ensure you get the quality you deserve
  • Check references and reviews to verify the contractor’s reputation and expertise
  • Evaluate the contractor’s professionalism and credentials to ensure a successful partnership
  • Communicate your vision clearly and collaborate with the contractor to achieve the perfect outdoor oasis

Research Local Backyard Contractors

Choosing the right backyard contractors is key to a beautiful outdoor space. Start by looking into local landscaping and lawn care companies. Make sure they offer design, installation, and upkeep services. Also, check their past work and client feedback.

Compare Services and Experience

Look at what each contractor offers. Do they focus on landscaping, lawn care, or everything? Check their experience, certifications, and group memberships. Past projects can show their skills and quality.

Check References and Reviews

Talking to past clients and reading reviews helps you understand a contractor’s work and customer service. Find companies with lots of positive feedback and few complaints. Ask about their ability to listen to your ideas and work with you.

Researching local contractors helps you find the best one for your project. Focus on their services, experience, and how happy their customers are. This way, you’ll have a great backyard that you’ll love.

backyard contractors

Define Your Project Vision

Before you hire a backyard contractor, make sure you know what you want. Start by listing must-have features like patio covers, outdoor kitchens, or water features. These are key to making your outdoor space both useful and fun.

After that, think about what you’d like to add to make it even better. Maybe a fire pit, outdoor lights, or a cozy seating area. Having a clear idea of what you want helps you talk to contractors and makes sure they get what you’re looking for.

backyard contractors

Create a List of Must-Haves

  • Patio covers
  • Outdoor kitchen
  • Water features (e.g., fountain, pond)
  • Shade structures (e.g., pergola, gazebo)
  • Hardscaping (e.g., pavers, natural stone)

Consider Additional Wish List Items

  1. Fire pit or fireplace
  2. Outdoor lighting (e.g., path lighting, spotlights)
  3. Built-in seating areas
  4. Landscape design elements (e.g., gardens, trees, shrubs)
  5. Outdoor entertainment system (e.g., sound system, TV)

Having a clear plan, with both must-haves and wish list items, helps you work well with your contractor. Together, you can make an outdoor space that you’ll love and enjoy.

backyard features

Evaluate Professionalism and Credentials

Choosing a backyard contractor means looking at their professionalism and credentials. This makes sure you work with a skilled and trusted pro. Here are some important things to think about:

Look for Proper Licensing and Insurance

Make sure the contractor has the right license and insurance. Each state has its own rules for licenses. Also, the contractor should have insurance to protect you if accidents happen during the project.

Check for Industry Affiliations

  • Look for contractors in groups like the Association of Professional Landscape Designers (APLD) or the National Association of Landscape Professionals (NALP). This shows they keep up with the latest in their field and work hard to be the best.
  • Check if they have special certifications, like the APLD Certification. This proves they know their stuff and care about their work.
  • See what others say about the contractor on the BBB and read reviews to see how happy past clients were with their work.

Looking at a contractor’s professionalism and credentials helps you trust they can do a great job on your backyard.

Interview Potential Contractors

After you’ve picked a few contractors, it’s key to interview them well. This helps you see if they can talk well, think creatively, and work with you on the project. Look for someone who listens well, comes up with new ideas, and really cares about your project.

A good contractor should be great at talking and solving problems. This makes the whole project easier and more fun.

Assess Communication Skills

Watch how the contractor talks to you during the interview. Do they really listen and ask questions to make sure they get what you need? Can they explain tricky things in simple words? Good communication is key for a great contractor-client relationship. It helps everything run smoothly and solves problems easily.

Gauge Creativity and Willingness to Collaborate

  • Find a contractor who thinks differently and brings new ideas to your project.
  • See if they can work with you and use your ideas to find the best solutions for your backyard.
  • A contractor who likes to work together and values your thoughts is more likely to give you what you want.

By interviewing contractors well, you can find the right one. They should have the right skills and match your way of talking and project ideas. This makes the backyard renovation smooth and fun, giving you a space that shows your style and needs.

Find the Perfect Backyard Contractor with FindPros

Ready to transform your backyard into the oasis of your dreams? Let FindPros help you find the ideal contractor for the job. Simply answer a few quick questions about your project, and we’ll match you with top-rated local professionals who specialize in backyard makeovers. The best part? When multiple pros compete for your business, you get the best possible pricing. Plus, our easy survey helps you find contractors you’ll love working with. Get started today and take the first step towards creating the perfect outdoor space for your home.

Conclusion

Finding the right backyard contractor is key to a great outdoor project. This article gives you tips to pick a contractor who matches your vision and talks well with you. By doing your homework and setting clear goals, you can make your outdoor space amazing.

Remember to focus on summaryhiring the right contractor, and project planning. This will lead to a successful backyard project that boosts your outdoor living and home value. With the right steps, you’ll find a contractor who can make your dream backyard come true.

Look for a contractor who is professional, has the right skills, and talks clearly with you. They should care about doing a great job and making your outdoor space special. Your backyard should show off your style and how you live. The right contractor can make that happen.

Frequently Asked Questions (Backyard Contractors)

Research local contractors, check their website for examples of completed projects, and read reviews from other homeowners. Look for a company with knowledge in various areas like patios, pergolas, and fountains to enhance your property’s beauty.
Define your vision for both front yard and backyard. Discuss details like decks, fences, and gazebos. Consider your future needs and expectations. A good contractor will guide you through this process to turn your garden dreams into reality.
Very important. An experienced team can handle complex projects involving masonry, concrete, and plumbing. They should have a track record of completing amazing jobs and transforming properties. Look for a company with year-long experience in the craft.
Clear communication is crucial. Your contractor should understand your vision, keep you informed about the process, and manage subcontractors effectively. Good communication ensures the project meets your expectations and enhances your life and property value.
Choose a reputable business with experience in your area. Discuss your ideas for walkways, walls, and even a pool if desired. A skilled contractor will work with you to create a beautiful outdoor space that you’ll enjoy with friends for years to come.

Baby Proofing Services

Bat Removal Near You

Can’t find what you are looking for?

How It Works

  • Answer a few questions about your home project.
  • Within seconds, get matched with top-rated local pros.
  • Compare quotes and choose the best pro for the job.

Baby Proofing Services In Your Area

Why You Need Baby Proofing Services: Protecting Your Child from Harm

Meta Description: Protect your little one with expert Baby Proofing Services. Ensure your home is safe for curious explorers, giving you peace of mind as your child grows and discovers.

As a new parent, keeping your child safe is your main goal. But with a curious toddler, it can be hard to keep them safe. Over 4.5 million kids get hurt at home every year. Luckily, professional baby proofing services can help make your home safe.

Baby Proofing Services

Ever thought, “How can I keep my home safe for my little one?” The answer is to get help from baby proofing experts. They check your home, suggest the best safety gear, and make sure it’s installed right. This keeps your family safe from accidents like falls, poisonings, and drownings.

Key Takeaways

  • Professional baby proofing services can find and fix hidden dangers in your home.
  • Experts suggest and install the best safety items for your home.
  • Baby proofing stops common accidents, like falls and poisonings.
  • Custom plans make sure your home fits your child’s needs and growth.
  • Investing in baby proofing gives you peace of mind as a parent.

The Importance of Childproofing Your Home

As a new parent, making your home safe for your baby is key. By childproofing, you make a secure place for your baby to play. Unintentional injuries are the top cause of death in kids under 14, with many happening at home.

Childproofing Gives Your Baby a Safe Environment

Your baby will want to check out every corner of your home. Childproofing stops dangers like sharp corners and falls. This lets your baby play safely and learn new things.

Childproofing Helps Prevent Injuries

Every year, over 4.5 million kids get hurt at home. The main causes are drowning, poisoning, choking, and burns. With safety devices like window guards and outlet covers, you can lower these risks. Childproofing lets you relax while your baby plays and grows.

baby proofing services

Baby Proofing Services

Keeping your curious toddler safe is key for their well-being and your peace of mind. A professional childproofing service can spot dangers at home you might miss. They suggest top-notch safety products to fix these issues.

Professional Expertise in Identifying Hazards

Childproofing pros know how to check your entire house for dangers. They look at everything from safety gates to cabinet latches. They find the best safety solutions for your family.

Their sharp eyes catch risks that parents might overlook. This ensures your small children stay out of harm’s way.

Installation of High-Quality Safety Products

After finding hazards, professional installers make your home safe with top safety equipment. They have the right tools and skills for tough spots. You can be sure your home is secure, giving you peace of mind and security.

Using childproofing pros saves you time, money, and stress. They make your home safe for your little ones. This lets you spend more time with your happy families.

baby proofing services

The Risks of Not Childproofing

Not childproofing your home can be very dangerous for your kids. Accidents like falls, choking, drowning, poisoning, and burns are common. They are the top cause of death for kids aged one to four in the U.S.

More than 4.5 million kids get hurt at home every year. This makes accidents the leading cause of death for America’s kids. Without safety steps, toddlers can reach dangerous spots like sharp corners and cabinets with cleaners.

Even simple things like small toys or coins can choke them. Not childproofing can lead to huge risks. Parents might feel guilty and regretful about it.

Keeping your child safe should be a top goal for parents. You can childproof your home with professional help or by checking for hazards yourself. Using safety gates, cabinet locks, and non-slip rugs is key to making homes safe for kids.

Childproofing helps your child move safely in their world. It lets them learn and explore without fear. Protecting your child from harm is a big part of being a parent. Childproofing is a key step in doing this.

Product Knowledge and Selection

Experts in baby proofing services know a lot about safety. They can spot dangers and pick the best safety solutions. They aim to make your home safe for your kids.

Selecting the Right Safety Solutions

Professionals in childproofing services know all about the latest safety equipment. They look at your home and suggest the best safety services and safety products. They make sure every spot in your house is safe for your children.

A Wide Range of Quality Products

These childproofing service providers have many top-quality safety products. They offer durable and secure solutions. This means your children stay safe and you can relax.

If you’re a new parent or have small children, professional baby proofing services can help. They can evaluate, decide, and install the right safety equipment. You can trust them to make your home safe for your little ones.

Save Time and Money

Hiring baby proofing services can save you time and money. These pros have already checked out safety products for you. So, you don’t have to spend hours finding the right ones.

With childproofing services, you skip the hard work of finding the best safety solutions. You also won’t waste money on things that don’t fit or work right. Professional installers do the job fast and well. They make sure your child’s safety is top-notch with quality devices.

Many baby proofing services give clear prices upfront. This lets you save money and dodge surprise costs. By trusting the experts with your child’s safety, you can relax and enjoy time with your little ones. The pros take care of the baby proofing with great care.

Creating a Safer Home Environment

Professional baby proofing services make your home safer for your family. They offer customized solutions for your home’s unique needs. Experts know how to handle tricky spots like stairs, cabinets, and big openings.

They use safety products to keep your child safe in any space. They secure cabinets and drawers with childproof locks. They also install safety gates to block off stairs and doors.

They check for dangers like sharp edges and small objects that could be a choking hazard. Then, they find ways to make your home safe.

Customized Solutions for Unique Situations

Every home is different, so baby proofing needs vary. Childproofing services know this and make their safety solutions fit your home. They can handle tricky stairs, big openings, or any special safety equipment needs.

Working with baby proofing services means your home is safe for your family. They pay attention to details and aim for excellence. This lets you relax and enjoy time with your family.

Preventing Common Household Accidents

Keeping your little ones safe is key. Baby proofing services are vital in tackling common dangers at home. They help prevent falls, furniture tip-overs, choking, and strangulation risks.

Falls and Furniture Tip-Overs

Baby proofing services focus on securing big furniture and appliances. They make sure these items are tied down to walls or floors. This is crucial because kids under 1 often get hurt by falling objects or furniture.

By securing these items, child safety experts lower the chance of furniture tip-overs. This helps prevent serious accidents.

Choking and Strangulation Hazards

Childproofing services also tackle choking and strangulation risks. They make sure window coverings don’t have cords and install safety gates at stairs. These steps are key to keep kids under 1 safe from choking and suffocation.

Working with baby proofing services means your home is safe for your family. These pros spot and fix dangers. This gives you peace of mind for your loved ones.

Essential Safety Devices and Practices

Keeping your little ones safe is key. Professional baby proofing services are vital. They install safety devices and ensure your home is safe. They use window guards, safety netting, smoke, and carbon monoxide alarms to make your home secure.

Window Guards and Safety Netting

Falls are a big risk for young kids. Experts in baby proofing can put in window guards and safety netting. This stops kids from falling from windows and balconies. It gives parents peace of mind.

Smoke and Carbon Monoxide Alarms

Fires and carbon monoxide are dangers for families with young kids. Childproofing pros make sure your home has smoke and carbon monoxide alarms. They put them on every level. Keeping these alarms working means your family stays safe.

Working with childproofing services means your home gets the right safety gear and practices. They look at what you need and suggest the best solutions. They install everything professionally, so you can relax.

Peace of Mind for Parents

As parents, making sure our little ones are safe is key. Getting a baby proofing service gives us peace of mind. It lets us enjoy being parents without worrying about dangers at home.

Experts know how to check your home and put in the best safety gear. They make sure your child is safe with things like installing baby gates and securing cabinets and furniture. They work hard to make a safe place for your family.

They offer customized solutions and top-notch safety products. This means your little ones can safely explore and grow. You can relax and watch your child grow without worrying about accidents at home.

Families who’ve tried childproofing services are really happy. 100% of clients loved the care and attention they got. Their homes became safe for their babies and toddlers.

If you want a safe, worry-free place for your little ones, think about getting a great baby proofing service. They’ll give you the peace of mind you need. You can then focus on making happy memories with your family.

Let FindPros Help You Find the Perfect Baby Proofing Pro

Are you overwhelmed by the thought of baby proofing your home? Let FindPros take the stress out of the process. Simply fill out our quick survey about your home and needs, and we’ll match you with top-rated local baby proofing professionals.

Get the best pricing when multiple pros compete for your job, and find the pros you get along with best. With FindPros, you can rest assured your home will be safe for your little one to explore and grow. Get started today and take the first step towards a secure, baby-friendly home.

Conclusion

Keeping your child safe is very important as they learn about the world. Getting a professional to childproof your home is a smart move. These experts know how to make your home safe for your child. They use their skills and tools to check your home, find dangers, and put in safety devices.

This way, you can relax knowing your home is safe for your child. It lets you enjoy being a parent more.

Professional childproofing services help prevent accidents like falls and furniture tipping. They make sure your child is safe in the kitchen and bathroom too. They install safety gates and locks, and secure big furniture pieces.

By choosing childproofing services, you keep your child safe and help them grow. It also lowers stress and saves time. With these experts, your home becomes a safe place for your child to play and learn. This gives you peace of mind as a parent.

Frequently Asked Questions (Baby Proofing Services)

Professional baby proofing companies do an excellent job of spotting hidden dangers and installing safety devices. They save time for busy parents and ensure your home is safe for your baby’s reach.
Important areas to child proof include stairs, electrical outlets, cabinets, and large furniture. Don’t forget about pool safety if you have a swimming pool. A professional can help create a comprehensive to-do list.
Baby proofing services are amazing for first-time parents. They provide expert advice on child safety, professional installation of safety devices, and peace of mind. They can even help with car seat safety.
Yes, baby proofing services are worth it. They save time, ensure proper installation, and can prevent costly accidents. Many customers find the peace of mind invaluable, especially for twin girls or multiple children.
Look for a company with good reviews from friends or online. Make sure they offer a thorough home assessment, quality products, and professional installation. Don’t be afraid to push for references from satisfied customers.