Roof Pitch Calculator

Roof Pitch Calculator

Calculate roof pitch by entering the rise and run or the angle in degrees. Learn more about measuring roof pitch and the rise and run below.

  • By
    FindPros

    FindPros connects consumers with professionals in over 600 different categories.

  • Reviewed by
    Jacky L.

    FindPros connects consumers with professionals in over 600 different categories.

Find Roof Pitch From:

This field is required.
Value should be positive.
This field is required.
Value should be positive.
This field is required.
Only numbers are allowed.
Results:
{{results.pitch }}
{{results.pitch_per_foot}}
{{results.grade}}
{{results.degrees}}
{{results.radians}}

Learn how we calculated this below

Add this calculator to your site

How to Calculate Roof Pitch

All homes and buildings have roofs. They may range from flat to very steep, some may have curves, and others may have multiple peaks and valleys. All of these roofs have one thing in common; however, they all have what is known as a pitch. Roof pitch describes the slope, or angle, of the roof.

Even flat roofs have a pitch, albeit a small one, as that slope is required to prevent rain and snow from gathering.

Knowing a roof’s pitch is essential in determining what type of material should be installed on the roof, the appropriate installation method, and how much roofing material you’ll need. It’s also an important factor in cold climates for calculating snow load.

Roof pitch, or slope, is a measure of vertical rise to horizontal run expressed in inches per foot, which is referred to as rise over run.[1] Meaning that the roof is measured 12″ in from the edge in a horizontal line, then measured from this point straight up to where the roof intersects. A roof that rises 6″ vertically for every 12″ horizontally has a 6″ per foot, or a 6 in 12 pitch.

Thus, the pitch is the ratio of the rise in inches to a 12-inch run and is often expressed using a semicolon, for example, 6:12. Sometimes, the pitch is also expressed in fraction form using a fraction with a slash, such as 6/12.

You can measure roof pitch by finding the rise and run or by converting from the angle if it is known. See the chart below for the rise and run values for standard roof pitches.

We’ll cover four methods to calculate roof pitch below.

Method One: Measure From the Roof

One method to find the pitch is to climb on the roof and measure the rise for a 12″ run. You’ll need a level that is 12″ or longer and a tape measure.

On the roof, hold the level perfectly level, and measure the height from the roof to the level 12 inches away from where the level touches the surface; this will be the rise.

For example, if the end of a level is 4″ above the roof at a point 12″ away from where it meets the surface, then the pitch is 4:12.

Method Two: Measure From the Attic

Another method to find the roof pitch is to go into the attic and measure the rise over a 12″ run of the roof rafters, allowing you to find the pitch without going on the roof.

From the attic, hold a level perfectly level and touching a rafter at one end. Measure the distance from the level to the rafter 12 inches away from where the level touches the rafter.[2]

Method Three: Measure the Total Rise and Run

If you know the total height of the peak and the roof’s width, you can also find the pitch with a little math. For example, if the peak is 4 feet and the total roof width is 20 feet, then the total rise is 4 feet (48 inches).

The total run is the distance from the peak to the edge of the roof, which in this case is the total width divided in half, which is equal to 10 feet or 120 inches.

Illustration showing how to find roof pitch by measuring the total rise and total ru, then reducing to a rise over a 12 inch run.
Since the pitch is the rise over a 12-inch run, you can divide the run by 12 to get the multiplier; in this case, 120 ÷ 12 = 10.

Then, divide the rise by the multiplier to get the pitch, e.g. 48 ÷ 10 = 4.8. The pitch of this roof is 4.8:12. The calculator above can handle much of this math.

Method Four: Measure With a Speed Square

You can also use a speed square and level to quickly measure the roof’s pitch. Set the level on the edge of the speed square as shown below, then place the heel of the speed square on a rafter or gable edge of the roof.

Holding the tools level, locate the measurement on the speed square where it meets the rafter’s bottom edge to find the angle of the roof in degrees.

How to Convert Angle in Degrees to Roof Pitch

If you know the roof’s angle in degrees, you can find the roof pitch by converting the angle in degrees to a slope, then finding the rise by multiplying the slope by 12.

First, find the slope by finding the tangent of the degrees, e.g. slope = tan(degrees). Then multiply the slope by 12 to get the rise. You can then express the pitch as inches per foot.

Example: let’s find the pitch for a roof angle of 35°.

slope = tan(35°) = 0.7002
rise = 0.7002 × 12 = 8.4
pitch = 8.4:12

How to Convert Roof Pitch to Degrees

To find the angle of a roof in degrees, convert the pitch to a slope, then convert to degrees by finding the slope’s inverse tangent, or arctangent. First, convert the pitch to a slope.

To do this, simply convert the rise and run as a fraction to a decimal form, e.g. rise/run = rise ÷ run = slope. For a pitch expressed in inches per foot, convert to a fraction first, e.g. a 4 in 12 pitch becomes 4/12, then divide.

Next, find the degrees by finding the slope’s inverse tangent, e.g. degrees = arctan(slope).

For example: let’s find the angle in degrees for a roof with a 4 in 12 pitch.

slope =
4:12 =
4
12
= .333

angle = arctan(.333)
angle = 18.4178°

Standard Roof Pitches

Most roofs have a pitch in the 4:12 to 9:12 range. A pitch over 9:12 is considered a steep-slope roof, between 2:12 and 4:12 is a low-slope roof, and less than 2:12 is a flat roof.[3]

The table below shows standard roof pitches and the equivalent grade and angle in degrees and radians for each.

Pitch Grade (slope) Degrees Radians
1/8:12 1% 0.6° 0.01
1/4:12 2.1% 1.2° 0.02
1/2:12 4.2% 2.4° 0.04
1:12 8.3% 4.8° 0.1
2:12 16.7% 9.5° 0.2
3:12 25% 14° 0.2
4:12 33.3% 18.4° 0.3
5:12 41.7% 22.6° 0.4
6:12 50% 26.6° 0.5
7:12 58.3% 30.3° 0.5
8:12 66.7% 33.7° 0.6
9:12 75% 36.9° 0.6
10:12 83.3% 39.8° 0.7
11:12 91.7% 42.5° 0.7
12:12 100% 45° 0.8
13:12 108.3% 47.3° 0.8
14:12 116.7% 49.4° 0.9
15:12 125% 51.3° 0.9
16:12 133.3% 53.1° 0.9
17:12 141.7% 54.8° 1
18:12 150% 56.3° 1
19:12 158.3% 57.7° 1
20:12 166.7% 59° 1
21:12 175% 60.3° 1.1
22:12 183.3% 61.4° 1.1
23:12 191.7% 62.4° 1.1
24:12 200% 63.4° 1.1

Table showing standard roof pitches and the equivalent grade and angle in degrees and radians.

How Pitch Affects the Cost of Roofing

The pitch of a roof will have a definite impact on the cost to install or replace it. Steeper roofs cost more to install, so bear that in mind when choosing the right pitch for your project.

A low-slope roof might cost 10% more to install than a flat roof, while a steep-slope roof might cost 20-30% more. Roofs with a very steep pitch might cost even more than that to install.

Pitch Variations and Unusual Roofs

Not every roof is going to have a perfect, easy-to-measure angle. Some homes may have two different pitches for the roof.

For example, a dual-pitch gable roof has a different pitch on each side of the home. Gambrel and Mansard roofs are considered dual-angle roofs. The lower part of the roof is actually an extension of your home’s walls. This pitch is not quite vertical, but it is close.

In addition, some Mansard roofs are concave on this lower section, which can make it seem to have a different pitch. Both sections need to have their pitch calculated separately. If the roof is concave, you will need to measure from the interior if possible, as the way the roof curves outward at the bottom will give it the illusion of a less steep pitch than it truly has.

Most Gambrel and Mansard roofs are 20/12 on the front section, with a more standard 7/12 on the upper portion.

In complex roofs, such as cross gables, which may have multiple roof areas, you may need to check the pitch of each one – never assume that each section has the same pitch, as it is common for them to vary.

If you’re considering a new roof, we suggest getting several estimates to learn more about the right pitch for your roof and understand the cost of installation. We also cover more about roof replacement costs in detail in our cost guide.

Frequently Asked Questions

A standard pitch is considered anything between 4/12 and 8/12. Anything below is considered low-slope or flat, while anything above is considered a high pitch.

Anything between 4/12 and 8/12 is usually considered a strong roof pitch. However, if you live in an area with a high snowfall, you may want to consider 9/12 or over, while if you live in an area with high winds, you want to consider 7/12, as this is the strongest pitch against high wind.

A 4/12 roof pitch is equivalent to an 18.4 degree angle.

Recommended Roofing Resources

Plywood Sheathing Calculator

Plywood Sheathing Calculator

Estimate how many sheets of 4×8 plywood are needed to sheath a roof, accounting for roof pitch.

  • By
    FindPros

    FindPros connects consumers with professionals in over 600 different categories.

  • Reviewed by
    Jacky L.

    FindPros connects consumers with professionals in over 600 different categories.

This field is required.
Value should be positive.
This field is required.
Value should be positive.
find roof pitch

Plywood Estimate:

{{total_sheets}}

Learn how we calculated this below

Add this calculator to your site

Find How Many Sheets of Plywood You Need to Sheath a Roof

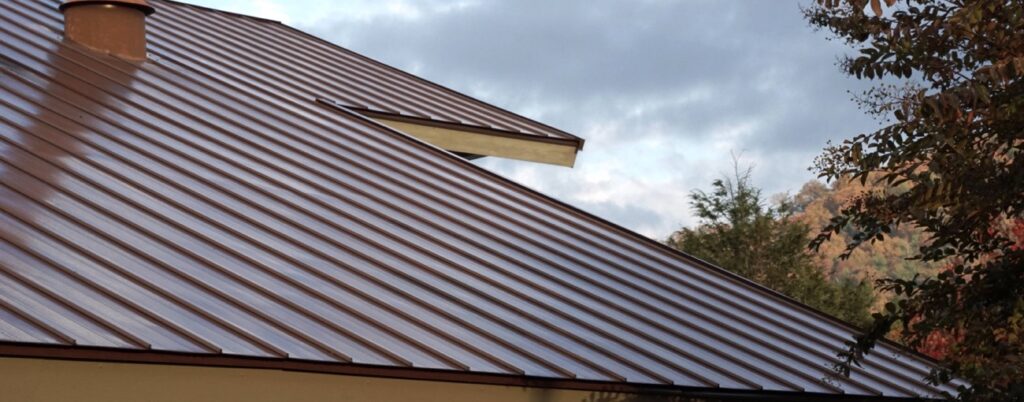
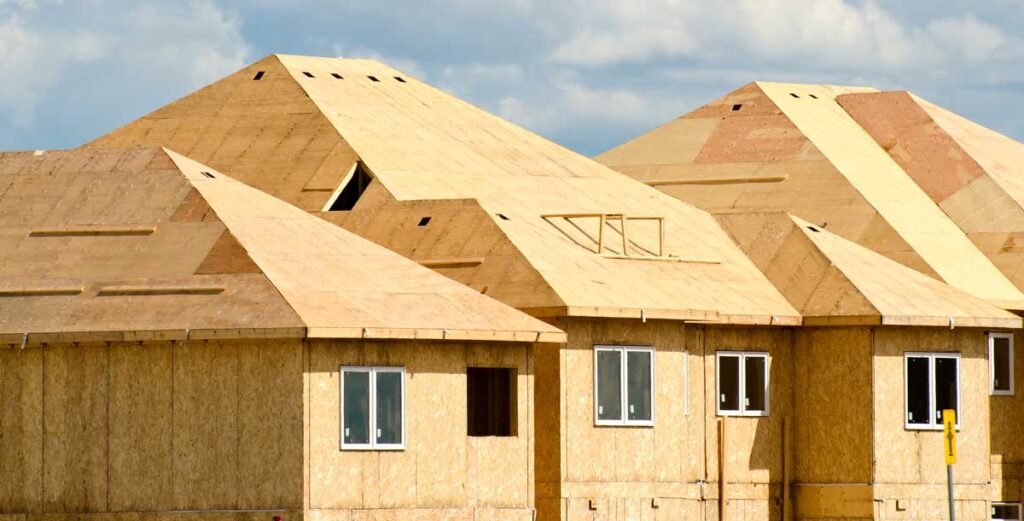
Sheathing adds structure and stability to your roof. The sheath is a layer of plywood – usually sheathing or structural plywood – that is applied to the frame of the roof.

It can be made of different materials, from fir and pine to OSB, and gives a stable surface for your roofing to adhere to. All types of sheathing plywood come in sheets that measure 4′ x 8′ nominally.

To find the amount of plywood needed to cover a roof, start by finding the area of the roof. Once the area is known, divide it by the area of a 4×8 sheet to find how much sheathing is needed.

Find the Area of a Roof

Multiply the length of each section of the roof in feet by the width of the section to find the area for that section in square feet. If you have multiple sections of roof, find the area of each and add them together to find the total area.

If your roof is not flat and you cannot climb to the peak to get accurate width measurements, then you can add a multiplier for the pitch of your roof.

Use our roof pitch calculator to find the pitch of your roof or find the pitch multiplier, then multiply the area of the footprint of your roof by the multiplier to find the actual area.

Alternatively, find the area of your roof using our roofing calculator, which can also estimate shingles and material needed for your project.

If your roof has triangles and other shapes, you’ll need to use a calculator to find the square footage.

Keep in mind that different roof shapes will have different square footages, regardless of the home size. A hipped roof will be nearly twice as large as a gable roof, even if both are on a home of the same square footage.

You will need to get the area of each section of roofing and add them together for the total. This includes dormers, cupolas, valleys, and other architectural features.

For example, if your gable roof is 30 ft by 50 ft on each side, then the area for each side is 1,500 sq ft.

30 × 50 = 1,500 sq ft

Combined, this makes your roof 3,000 sq ft.

Calculate Sheathing Needed

Once you have the size of the roof area, you can divide it by the area of a sheet of plywood to find the number of sheets needed. A 4×8 sheet of plywood is 32 sq ft. So, dividing the area of the roof by 32 will give you the number of sheets needed.

For example, if your roof is 3,000 sq ft, then it will take 94 sheets of plywood to sheath it.
3,000 ÷ 32 = 93.75 sheets

You’ll need to round up to the nearest whole sheet, so in this case, you’ll need 94 sheets.

It’s usually a good idea to get an extra few sheets of plywood when ordering to allow for waste and off-cuts. Small scraps are often unusable to span joists and effectively cover the roof, so extra material will save extra trips to the hardware store.

Metal Roofing Calculator

Metal Roofing Calculator

Estimate how many metal roofing panels you need with our panel calculator. Optionally, enter the cost per panel to estimate material costs.

  • By
    FindPros

    FindPros connects consumers with professionals in over 600 different categories.

  • Reviewed by
    Jacky L.

    FindPros connects consumers with professionals in over 600 different categories.

This field is required.
Value should be positive.
This field is required.
Value should be positive.
find roof pitch
This field is required.
Value should be positive.
This field is required.
Value should be positive.

Optionally enter the price per panel

$
Material Estimate:

Number of Metal Panels Needed

{{result.num_of_panels}}

Square Footage

{{result.sq_footage}}

Size in Squares

{{result.size_in_sq}}

Material Cost

${{result.material_cost}}

This price estimate reflects the price of the panels but does not include other material such as screws, underlayment, ridge vents, or trim panels.

Learn how we calculated this below

Add this calculator to your site

How to Estimate Metal Roofing Sheets and Panels

A metal roof is one of the most durable material options for your home. Metal roofs come in many different styles and materials.

Common types include standing seam roofs, metal shingles, tiles, and metal sheet roofing. Aluminum roofs are the most common, but roofing is also available in terne (tin), copper, steel, and zinc. Each type of metal may be available in a set type or types of roofing.

For example, copper and zinc may be available as rolled roofing, while steel can be found in sheets as well as stone-coated shakes and tiles.

Regardless of the type of metal or style of roofing, all metal roofs are sold and installed by the square, which is equal to 100 sq. ft. When ordering supplies, it is important to estimate materials correctly to allow for an efficient installation process.

Estimating the amount of metal roofing material you need starts with estimating the square footage and number of squares of the roof itself.

Steps to Estimate Metal Roofing

Measure the length and width of each roof section in feet, then multiply together to get the square footage.

For some roofs, this can be simple, but for complex roofs, you may want to hire a roofer to give you a more accurate estimate. Keep in mind that the square footage of your home and of your roof have no correlation.

The more sections a roof has, the more square footage there will be. For example, a hipped roof, which has four sides, will need twice as much material as a gable roof, which has two sides, even if both roofs are installed on identical houses with the same footprint.

If you are unable to crawl on the roof, you can estimate a simple roof by measuring the roof’s footprint and finding its square footage. Multiply the footprint square footage by the multiplier for your roof pitch to find the actual square footage of the roof. Use our roof pitch calculator to find the pitch of your roof.

Roof pitch is expressed as the number of inches the roof rises for every 12 horizontal inches. For example, if your roof rises 5″ for every 12″, then you have a pitch of 5/12.

The most common pitches are 4/12, 6/12, and 8/12. Most metal roofing does need to be installed on a roof with a pitch of 4/12 or greater, although some types may be used on lower pitches.

Use the following table to find the multiplier for your roof’s pitch. Multiply the estimated square footage by the multiplier to get a more accurate estimate.

Multipliers for common roof pitches that can be used to find the total area of a roof.

Pitch Multiplier
0/12 1
1/12 1.0035
2/12 1.0138
3/12 1.0308
4/12 1.0541
5/12 1.0833
6/12 1.118
7/12 1.1577
8/12 1.2019
9/12 1.25
10/12 1.3017
11/12 1.3566
12/12 1.4142
13/12 1.4743
14/12 1.5366
15/12 1.6008
16/12 1.6667
17/12 1.7341
18/12 1.8028
19/12 1.8727
20/12 1.9437
21/12 2.0156
22/12 2.0883
23/12 2.1619
24/12 2.2361

For more complex roofs with many peaks and sections, find the square footage of each roof section and add them all together to find the total square footage. In most cases, you will want to add about 10% to the total for waste. You may also want to have some material left over after the roof is installed.

This will allow you to have the material on hand in case of needed repairs down the road. Because roofing materials and colors can change or be discontinued, having extra material lets you make repairs that are a good match to the rest of the roof.

When you find your total square footage, divide by 100 to find the number of squares required. Round up to the nearest square. This is the total amount that you will need to cover your roof.

If the material you are pricing is shown with costs per square foot, take your total material amount and multiply by 100 to get the square footage needed. You can now multiply this times the cost per square foot of the material to get an accurate estimate of the roofing cost.

Common Metal Roof Sheet Sizes

Each type of metal roofing may come in a range of different sizes. Interlocking shingle panels, standing seam pans, flat sheets, corrugated sheets, and insulated panels may all come in a range of thicknesses and sizes.

If you are ordering your metal sheets directly from a manufacturer, you can have them cut to the exact length you need. For example, if your roof from edge to peak is 16′, you can have the sheets or pans cut to exactly 16′ so there is no seam in the center. For interlocking panels, tiles, and loose shingles, this type of sizing is not required.

Sheets typically come in widths of 26″ and 36″, while pans for standing seam roofs typically come in widths of 12″ to 18″. While sheets can be cut or trimmed to fit a roof evenly, you may want to choose a pan width for a standing seam roof that will give you a more even placement of seams across the roof for the best appearance.

Flat sheets, rolled roofing, and interlocking panels may all be trimmed to size as needed.

Metal roofs are beautiful and very durable. When installed correctly, they can last a very long time with little maintenance. See our other roofing resources for more roofing calculators and tools.

Recommended Roofing Resources

Ice & Water Shield Calculator

Ice & Water Shield Calculator

Enter the dimensions of the roof, eaves, and valleys to calculate the amount of ice and water barrier needed for a roof.

  • By
    FindPros

    FindPros connects consumers with professionals in over 600 different categories.

  • Reviewed by
    Jacky L.

    FindPros connects consumers with professionals in over 600 different categories.

find roof pitch

Eave Dimensions:

This field is required.
Value should be positive.

Exterior Wall:

This field is required.
Value should be positive.

Coverage:

Ice Barrier Estimate:

Required Coverage From Roof Edge

{{roof_edge}}”

Estimated Ice & Water Shield Required

{{water_Shield_required}} sq ft

Learn how we calculated this below

Add this calculator to your site

How to Calculate Ice Barrier Needed

Ice barrier membrane, sometimes called ice and water shield, is a self-adhesive membrane installed for protecting roof underlayment. It adds an additional barrier against ice and water being forced into an asphalt shingle roof when ice dams form or during high winds and driving rain.

In cold climates, an ice barrier is often required by local codes. For example, states such as Minnesota require that an ice barrier membrane is installed extending 24″ beyond the inside of the exterior wall.[1]

Most localities that require an ice barrier stipulate that it cover from the edge of the eave to 24″ beyond the inside of the exterior wall.

To calculate the ice and water barrier needed for a roof, you need to measure the roof pitch, overhang of the eaves, and thickness of the exterior wall.

Ice Barrier Formula

Once you have the roof pitch, eave overhang, and wall thickness, you can use the following formula to calculate the coverage needed to protect 24″ beyond the exterior wall.

Most ice and water shield is sold in rolls that are 36″ in width and with varying lengths. The 36″ width ensures that it can cover the required or recommended amount on most roofs.

run = eave overhang + wall thickness + 24″
rise = run ÷ 12 × roof pitch
ice barrier coverage = run² + rise²

Once you calculate how far up the roof needs to be covered, you can calculate the total amount of ice and water barrier needed by multiplying the coverage in feet by the length of the eaves that need to be covered in feet.

total ice barrier required = ice barrier coverage × eave length

This will give you the amount of ice barrier square footage that is required. Because most rolls are sold in 36″ widths, if you know that you will need 36″ or less in width, you can simply measure the length of the area.

Typical roll lengths can range from 36′ to 75′. Simply find the total length that you need, and you can calculate how many rolls to purchase based on their size.

However, if you need more than 36″ in width for coverage, then finding the square footage required is a better method. You can find your width in inches if needed; take your length measurement in inches as well. Multiply them both together and divide by 144 to get the square footage.

Typical roll square footages are 108 sq. ft. to 225 sq. ft. If you are close to the total square footage for a roll, you may want to purchase an additional roll. This is because you will need to make several cuts in each roll to get the additional width needed, which means that you will have a greater than average amount of waste, and may need additional product to finish the job.

The calculator above applies all of these formulas to derive the amount of ice and water shield required for a roof.

Recommended Roofing Resources

Window Air Conditioner Size Calculator

Window Air Conditioner Size Calculator

Enter the length and width of your room to find the right sized window air conditioner to comfortably cool your space. Our calculator will recommend the number of BTUs needed to cool your room and will recommend an air conditioner that is the right size.

  • By
    FindPros

    FindPros connects consumers with professionals in over 600 different categories.

  • Reviewed by
    Jacky L.

    FindPros connects consumers with professionals in over 600 different categories.

Room Size

This field is required.
Value should be positive.
This field is required.
Value should be positive.
Window Air Conditioner BTU Estimate:

Recommended BTUs for {{area}} ft 2

{{total_btu}}

Learn how we calculated this below

Add this calculator to your site

How to Calculate the Window AC Unit Size You Need

There are many window air conditioner models and sizes available on the market to help cool your home, but choosing one can be quite confusing if you don’t know what size you need to cool your space.

Air conditioners are sized in a few different ways. Large air conditioners are sized by the ton, while smaller air conditioners may be sized by the number of square feet they are designed to cool or by the BTU.

BTUs stand for British Thermal Units and are the measure of energy required to raise the temperature of one pound of water by one degree Fahrenheit. Choosing the right size air conditioner for your room is very important.

If the air conditioner is too small, then the unit will run all day and will not be able to comfortably cool the room on warm days.

If the air conditioner is too big, then the unit will move too much air, causing it to cycle on and off too frequently. This may cause discomfort due to frequent blasts of cool air, then warm air. Frequent on/off cycles will also shorten the lifespan of the unit

In either case, an incorrectly sized unit will also use more energy. This will mean that your energy bills are higher than they could be with a correctly sized unit while you stay more comfortable at the same time.

Factors to Consider When Sizing an Air Conditioner

There are many factors to consider when sizing a window air conditioner. The main factor is the size of the room.

Room Size

The size of the room is the main factor in choosing a window air conditioner size. A larger room will naturally require more energy to cool and more airflow in CFM than a smaller room.

Window AC Size Chart

The chart below from Energy Star shows how many BTUs are needed for a given room size.[1]

Room Size (ft2) Capacity Needed (BTUs)
100 – 150 sq. ft. 5,000 BTUs
150 – 250 sq. ft. 6,000 BTUs
250 – 300 sq. ft. 7,000 BTUs
300 – 350 sq. ft. 8,000 BTUs
350 – 400 sq. ft. 9,000 BTUs
400 – 450 sq. ft. 10,000 BTUs
450 – 550 sq. ft. 12,000 BTUs
550 – 700 sq. ft. 14,000 BTUs
700 – 1,000 sq. ft. 18,000 BTUs
1,000 – 1,200 sq. ft. 21,000 BTUs
1,200 – 1,400 sq. ft. 23,000 BTUs
1,400 – 1,500 sq. ft. 24,000 BTUs
1,500 – 2,000 sq. ft. 30,000 BTUs
2,000 – 2,500 sq. ft. 34,00 BTUs

These air conditioner sizes assume a ceiling height of 8ft; if your ceiling is higher than 8ft, consider increasing the size in BTUs by 10% to account for the added volume of the room.

To find the size of the room you are planning on cooling, measure the length and width of the room in feet and multiply those two numbers together. Ideally, you want to be at the low to mid range of the unit’s capacity.

For example, to cool 1,100 sq ft, you would want a unit with 21,000 BTUs.

Sunlight

If the room gets a lot of sunlight, it will require additional energy to comfortably cool the room. Consider increasing the size of the air conditioner by 10% if the room gets a lot of sun.

To do this, take the size of the room in square feet, and add 10%, then find the recommended BTU range.

Kitchens and Cooking Appliances

Kitchens require much more energy to cool and require a larger air conditioner. Appliances add a lot of extra heat to a kitchen, making them tougher to cool. Consider the added heat of the oven or stove on a warm day.

When cooling a kitchen, consider adding an additional 4,000 BTUs to the size of the air conditioner.

Number of People

Body heat can warm a room significantly. The estimates above assume two occupants in the room. If your room has more than two people on a consistent basis, consider increasing the window air conditioner size by 10% – 20%.

Window Size

Window size can dictate how large of an air conditioner can be added to a room. If your room has windows that do not allow for the right size air conditioner, consider using two smaller units if your room has two windows, or consider an in-room air conditioner instead of a window unit.

Window units are available in different configurations as well as sizes. They should fit snugly, however; if the window is larger than the unit, you may need to add insulation or another material around the unit to help hold it in place and to stop thermal transfer around the unit

Electrical Power Available

Larger window air conditioners require more power. Some units require a dedicated circuit, while others require more current to the outlet. If the unit requires more power than you are able to provide, it may continually trip your circuit breaker. For example, if it needs its own circuit, but you plug in a vacuum on the same circuit, it will trip the breaker and stop both appliances from working.

Consider the amount and type of power available to the window and choose an air conditioner that will work with the existing wiring. If you can’t afford a dedicated circuit, take care not to use other appliances at the same time you use the air conditioner to avoid overloads.

If you’re unsure what your electrical requirements are, consider a consultation with an electrician.

Operating Cost

It’s important to also consider the operating cost of an air conditioner. Larger appliances consume more electricity and thus will cost more to operate. Use our electricity cost calculator to estimate how much it will cost to run the appliance.

Keep in mind that air conditioners are available with different energy efficiency levels. These are known as SEER levels or Seasonal Energy Efficiency Ratings. The higher the SEER, the less your unit will cost to run.

However, higher SEER units are also more costly. If you live in a climate where you need the air conditioner to run all day, it may be worthwhile to invest in a high SEER unit. However, if you only plan on using it periodically, a lower SEER unit may be your best choice.

If you’re sizing a heating system, check out our heating system BTU calculator.

Water Velocity Calculator

Water Velocity Calculator

Enter the flow rate and diameter of the pipe to calculate the velocity of the water traveling through.

  • By
    FindPros

    FindPros connects consumers with professionals in over 600 different categories.

  • Reviewed by
    Jacky L.

    FindPros connects consumers with professionals in over 600 different categories.

This field is required.
Value should be positive.
This field is required.
Value should be positive.
Results:
{{velocity_ft_s}}
{{velocity_mi_h }}
{{velocity_m_s }}
{{velocity_km_h }}

Learn how we calculated this below

Add this calculator to your site

How to Calculate Water Velocity

Water velocity is a measure of the rate of water flowing through a closed pipe system.[1] Knowing the water velocity of a pipe can help determine things like pressure. Having the right velocity is important if you want to extend the life of your pipes; water velocity that is too high for your system can result in the pipes corroding faster and needing to be replaced sooner.

Water Velocity Formula

Water velocity for a pipe of any size or length can be found using a simple formula:

u =
Q
A

Thus, the velocity v is equal to the flow rate Q divided by the cross-sectional area A.

When using this formula, all units should be in the same form of measurement. If the flow rate is measured in cubic meters per second, then the area should be in square meters, and if the flow rate is measured in cubic feet per second, then the area should be in square feet.

The cross-sectional area of a pipe can be found using the formula:

A = πr²

The area A is equal to π times the radius r squared.
For example, let’s find the water velocity given a flow rate of 35 cubic feet per second and a 1″ diameter pipe.

Start by finding the cross-sectional area of the pipe. You will need to convert the diameter from inches to feet, then divide this in half to find the radius.

diameter in feet = 1″ ÷ 12 = 0.0833′
radius = 0.0833′ ÷ 2 = 0.04167′
area = π × 0.04167² = 0.0054542 sq ft

Next, calculate the velocity.

v =
35
0.0054542
v = 6417.1 ft/s

Alternative Formula

The formula above works great when the flow rate is measured in the cubic form of a standard length unit. But when the flow rate is measured in gallons per minute or liters per minute, a different method is needed.

In this case, start by converting the flow rate to cubic feet per second or cubic meters per second.

Alternatively, if the flow rate is measured in gallons per minute, the following formula can be used to calculate water velocity.

u =
0.408 × Q

Thus, the velocity v in feet per second is equal to 0.408 times the flow rate Q in gallons per minute (GPM) divided by the pipe diameter D in inches squared.[2]

For example, let’s find the water velocity given a flow rate of 15 GPM and a 0.75″ diameter pipe.

Start by finding the cross-sectional area of the pipe.

v =
0.408 × 15
0.75²
v =
0.408 × 15
0.5625
v =
6.12
0.5625
v = 10.88 ft/s

So, the velocity of water inside a 0.75″ pipe with a flow rate of 15 GPM is equal to 10.88 ft/s.

Refrigerant Line Charge Calculator

Calculate the amount of refrigerant needed to charge the lines in a split cooling system by entering the size and length of the lines below.

Refrigerant Line Charge Calculator

  • By
    FindPros

    FindPros connects consumers with professionals in over 600 different categories.

  • Reviewed by
    Jacky L.

    FindPros connects consumers with professionals in over 600 different categories.

This field is required.
Value should be positive.

Piping Diameters (OD)

Result:

{{total_pounds}}

This was found using the refrigerant line charge table below, which assume a 40° suction temp and 105° liquid temp.

Always double-check your measurements with the charge rates recommended or required by the manufacturer of the refrigerant and equipment in use.

Learn how we calculated this below

Add this calculator to your site

How to Calculate How Much Charge is Needed For a Split-System Air Conditioners and Heat Pumps

When charging a system there are a few components that need to be accounted for when estimating the amount of refrigerant needed. The manufacturer of the equipment being charged will provide specs for the amount of refrigerant to add to the system and the manual should be consulted for that information.

However, this leaves the liquid and suction lines between the units unaccounted for. The length of those lines will need to be accounted for to avoid under or over-charging the system.

To more accurately approximate the amount of charge needed, add the amount recommended by the manufacturer with the amount needed for the refrigerant lines.

Estimating Charge Needed for Refrigerant Lines

To calculate the refrigerant needed for the lines, start by noting the size of the liquid and suction lines.

Then, consult the table below to find the charge weight needed per foot of lines. Note that the amount of charge will be very different for the liquid and suction lines, and they should be added together to find the total weight per foot.

Finally, multiply the length of the lines in feet by the weight per foot to find the total charge needed. Note that you might need to convert from ounces to pounds at this point.

Charge Needed per Foot of Line

The tables below show the amount of charge needed per foot of line, for various line sizes. Always double-check your charge rates with those recommended or required by the manufacturer of the charge, equipment, and piping in use.

R-410A Refrigerant
Liquid Line Suction Line
Line Size (OD) Charge per Foot Line Size (OD) Charge per Foot
1/4″ 0.19 oz/ft 1/2″ 0.04 oz/ft
5/16″ 0.33 oz/ft 5/8″ 0.06 oz/ft
3/8″ 0.51 oz/ft 3/4″ 0.09 oz/ft
1/2″ 1.01 oz/ft 7/8″ 0.12 oz/ft
5/8″ 1.64 oz/ft 1-1/8″ 0.2 oz/ft
3/4″ 2.46 oz/ft 1-3/8″ 0.31 oz/ft
7/8″ 3.27 oz/ft 1-5/8″ 0.43 oz/ft
1-1/8″ 5.58 oz/ft 2-1/8″ 0.76 oz/ft
2-5/8″ 1.17 oz/ft

Amount of R-410A refrigerant needed per foot of liquid line. Assumes a 40° suction temp and 105° liquid temp.

R-22 Refrigerant
Liquid Line Suction Line
Line Size (OD) Charge per Foot Line Size (OD) Charge per Foot
1/4″ 0.23 oz/ft 1/2″ 0.02 oz/ft
5/16″ 0.4 oz/ft 5/8″ 0.04 oz/ft
3/8″ 0.62 oz/ft 3/4″ 0.06 oz/ft
1/2″ 1.12 oz/ft 7/8″ 0.08 oz/ft
5/8″ 1.81 oz/ft 1-1/8″ 0.14 oz/ft
3/4″ 2.688 oz/ft 1-3/8″ 0.21 oz/ft
7/8″ 3.78 oz/ft 1-5/8″ 0.3 oz/ft
1-1/8″ 6.46 oz/ft 2-1/8″ 0.53 oz/ft
2-5/8″ 0.81 oz/ft

Amount of R-22 refrigerant needed per foot of liquid line. Assumes a 40° suction temp and 105° liquid temp.

You might also be interested in our BTU heating calculator.

Pipe Volume Calculator

Pipe Volume Calculator

Calculate the volume of a pipe given its inner diameter and length. The calculator will also find how much that volume of water weighs.

  • By
    FindPros

    FindPros connects consumers with professionals in over 600 different categories.

  • Reviewed by
    Jacky L.

    FindPros connects consumers with professionals in over 600 different categories.

This field is required.
Value should be positive.
This field is required.
Value should be positive.

Pipe Volume:

{{pipe_volume}}

Water Weight

{{water_Weight}}

Did you know you can use a pipe measuring tool to accurately mark and measure pipes?

Learn how we calculated this below

Add this calculator to your site

How to Find the Volume of a Pipe

You can find the volume of fluid in a pipe using the inner diameter of the pipe and the length. To estimate pipe volume, use the following formula:

volume = π ×
d 2
4
x h

Thus, the volume of a pipe is equal to pi times the pipe diameter d squared over 4, times the length of the pipe h.

This formula is derived from the cylinder volume formula, which can also be used if you know the radius of the pipe.

volume = π × r 2 × h

You can use either formula to get the same results.

To use the formulas, start by getting the diameter and length of the pipe in inches or millimeters. Use our feet and inches calculator to calculate a length in inches or millimeters.

If you’re unsure what the inner diameter of a pipe is but you know the outer diameter, refer to the common pipe dimensions tables to find the most likely inner diameter of your pipe.

Enter the length and diameter values into the formula above to calculate the volume of the pipe.
Example: calculate the volume of a 2″ diameter pipe that is 50′ long

length = 50′ × 12 = 600″
volume = π ×
2 2
4
600
volume = 3.1415
4
4
600
volume = 3.1415 × 1 × 600″
volume = 1885 in3

Chart showing the reference angle for various angles in degrees

Angle Reference Angle
10° 10°
15° 15°
20° 20°
25° 25°
30° 30°
35° 35°
40° 40°
45° 45°
50° 50°
55° 55°
60° 60°
65° 65°
70° 70°
75° 75°
80° 80°
85° 85°
90° 90°
95° 85°
100° 80°
105° 75°
110° 70°
115° 65°
120° 60°
125° 55°
130° 50°
135° 45°
140° 40°
145° 35°
150° 30°
155° 25°
160° 20°
165° 15°
170° 10°
175°
180°
185°
190° 10°
195° 15°
200° 20°
205° 25°
210° 30°
215° 35°
220° 40°
225° 45°
230° 50°
235° 55°
240° 60°
245° 65°
250° 70°
255° 75°
260° 80°
265° 85°
270° 90°
275° 85°
280° 80°
285° 75°
290° 70°
295° 65°
300° 60°
305° 55°
310° 50°
315° 45°
320° 40°
325° 35°
330° 30°
335° 25°
340° 20°
345° 15°
350° 10°
355°
360°

Volume and Weight of Water for Common Pipe Sizes

Volume and weight of water per foot for common pipe sizes

Pipe Size Volume Weight
in in3/ft gallons/ft lb/ft
1/8″ 0.1473 in3 0.000637 gal 0.005323 lbs
1/4″ 0.589 in3 0.00255 gal 0.0213 lbs
3/8″ 1.325 in3 0.005737 gal 0.0479 lbs
1/2″ 2.356 in3 0.0102 gal 0.0852 lbs
3/4″ 5.301 in3 0.0229 gal 0.1916 lbs
1″ 9.425 in3 0.0408 gal 0.3407 lbs
1 1/4″ 14.726 in3 0.0637 gal 0.5323 lbs
1 1/2″ 21.206 in3 0.0918 gal 0.7665 lbs
2″ 37.699 in3 0.1632 gal 1.363 lbs
2 1/2″ 58.905 in3 0.255 gal 2.129 lbs
3″ 84.823 in3 0.3672 gal 3.066 lbs
4″ 150.8 in3 0.6528 gal 5.451 lbs
5″ 235.62 in3 1.02 gal 8.517 lbs
6 ″ 339.29 in3 1.469 gal 12.264 lbs

Metric Pipe Sizes

Volume and weight of water per meter for common metric pipe sizes

Pipe Size Volume Weight
mm mm3/m liters/m kg/m
6 mm 28,274 mm3 0.0283 l 0.0283 kg
8 mm 50,265 mm3 0.0503 l 0.0503 kg
10 mm 78,540 mm3 0.0785 l 0.0785 kg
15 mm 176,715 mm3 0.1767 l 0.1767 kg
20 mm 314,159 mm3 0.3142 l 0.3142 kg
25 mm 490,874 mm3 0.4909 l 0.4909 kg
32 mm 804,248 mm3 0.8042 l 0.8042 kg
40 mm 1,256,637 mm3 1.257 l 1.257 kg
50 mm 1,963,495 mm3 1.963 l 1.963 kg
65 mm 3,318,307 mm3 3.318 l 3.318 kg
80 mm 5,026,548 mm3 5.027 l 5.027 kg
100 mm 7,853,982 mm3 7.854 l 7.854 kg
125 mm 12,271,846 mm3 12.272 l 12.272 kg
150 mm 17,671,459 mm3 17.671 l 17.671 kg

You can also use our water weight calculator to estimate the weight of the water in a pipe.

Furnace BTU Calculator

Furnace BTU Calculator

  • By
    FindPros

    FindPros connects consumers with professionals in over 600 different categories.

  • Reviewed by
    Jacky L.

    FindPros connects consumers with professionals in over 600 different categories.

This field is required.
Value should be positive.
BTU Estimate:

Recommended BTUs

{{recommended_btu_range}}

Climate Zone 4 BTU Range

{{climate_zone_btu_range}}

Learn how we calculated this below

Add this calculator to your site

What Are BTUs

A British Thermal Unit, or BTU, is a unit of measurement of energy. 1 BTU is the energy needed to heat 1 pound of water by 1° Fahrenheit. We often refer to the British Thermal Unit as a BTU, but the rating used for heat measurement or furnace size is actually the BTUs per hour, or BTU/h. 1 BTU is the equivalent of 1,055 joules or 0.293 watts.

BTUs are the measurement given for furnace sizes. The more BTUs a furnace produces, the larger the space that it is capable of heating. BTUs can be influenced by the size of a home, its climate, and how well-insulated the building is.

How to Calculate Furnace Size in BTUs

It is very important to size your heating and cooling system correctly for your home. If a furnace or air conditioner is too small, it will run constantly and not be able to comfortably heat or cool the space.

On the coldest or hottest days, the system will not be able to keep up. Alternatively, if the system is sized too large, it will heat or cool the space too quickly, which will cause it to cycle on and off more frequently, causing unnecessary wear and shortening the lifespan of the system.

According to the Star Tribune, the constant cycling of an oversized furnace is less comfortable as well since certain areas of the home heat up too quickly and become too hot before the system turns off.[1] Both furnaces that are too small and too large will also cost you more to run, while still leaving your home uncomfortable. They’ll also wear out faster, costing you more in replacement costs.

There are several factors to consider when trying to figure out how many BTUs your furnace should output.

BTUs per Square Foot Based on Climate

Experts suggest between 30 and 60 BTUs of heat per square foot of living space, which is a pretty wide range.

The location of your home is a major factor in how many BTUs you’ll need. A home in the northern region of the US will require more BTUs to heat than a home in the southern region because it gets significantly colder in the north.

The table below shows how many BTUs per square foot you’ll need based on your climate zone.

Climate Zone BTU per Square Foot
Zones 1 (hot) 30-35 BTU/sq. ft.
Zone 2 (warm) 35-40 BTU/sq. ft.
Zone 3 (moderate) 40-45 BTU/sq. ft.
Zone 4 (cool) 45-50 BTU/sq. ft.
Zone 5 (cold) 50-60 BTU/sq. ft.

Table showing suggested BTU/sq. ft. of heat for various climate zones.

Based on these figures, a 2,000 sq. ft. home in a moderate climate would need a furnace with an output between 80,000 and 90,000 BTUs. When making your calculations, you may need to round up or down to the nearest furnace size. Keep things like insulation, sunlight, and the height of your ceilings in mind when choosing whether to go with a smaller or larger furnace.

Home Insulation Affects BTU Requirements

The ranges in the heating climate zone chart above assume a home with average insulation. Homes that are poorly insulated may require 10% more BTUs due to heat loss through thermal transfer.

Very well-insulated homes and homes with a tight building envelope will require 10% fewer BTUs to heat since very little heat is lost. It may be worth adding insulation to attic spaces and walls to reduce the amount of energy needed to heat the home.

An energy audit can help you determine if this is necessary, or if you have other areas of thermal transfer that can be eliminated to help lower your heating bills.

Furnace Efficiency Affects Heat Output

Furnaces are rated on their BTUs of energy consumption, not their BTUs of energy output. A more efficient furnace will output more BTUs of heat than a less efficient furnace with the same BTU rating.

For example, if a furnace is rated at 100,000 BTUs and is 80% efficient, then the heat output will be 80,000 BTUs (100,000 × .8). However, if a furnace is rated at 100,000 BTUs and is 92% efficient, then the heat output will be 92,000 BTUs (100,000 × .92). It may be worth considering a more efficient furnace as less energy will be used to achieve the same heat output.

Keep in mind that electric furnaces will use nearly 100% of the energy they receive to produce heat. Natural gas furnaces can convert up to 98% of energy into heat, while oil furnaces are generally less efficient, with the highest efficiency reaching around 92%.

The higher the efficiency, the less energy you will need to heat your home and the lower your energy bills. Most high-efficiency furnaces are more expensive to purchase, so they may not be worth the savings in hot or warm climates, but they may be worth the investment in cold climates.

While electric furnaces do convert nearly 100% of energy into heat, the cost of electricity frequently makes them costly to run. Therefore, most electric furnaces don’t come in sizes large enough to heat the entirety of a home in colder climates.

Use a Smart Thermostat

Smart thermostats can also improve the efficiency of your heating and cooling system. They can work in different ways depending on the type. Some work by learning when you’re at home and when you’re away. These thermostats can turn down the heat while you’re typically away and turn it up prior to your normal arrival. By learning your behavior, these thermostats can save you money.

Other types will pair with your smartphone or another device. When you leave a designated area, such as outside of your neighborhood, this will indicate to the thermostat to lower the heat. When you reenter this area, the thermostat will raise the heat level again.

Most smart thermostats also allow you to control your heating and cooling from your smartphone. This can allow you to make changes even when you’re at work if you want to turn the heat on for a guest or if your schedule changes and the thermostat hasn’t had time to learn your new schedule.

A popularly used option is the but there are several other great smart thermostats on the market.

As an Amazon Associate, we may earn commissions from qualifying purchases from Amazon. Learn more

Consider a Detailed Analysis

Professional heating and cooling installers can provide a much more detailed analysis of your home to select the correct furnace and air conditioning size, tailored to your needs. Consider getting a free heating and cooling estimate for your home.

Professional installers will consider your home’s insulation, door and window sizes and locations, ceiling heights, duct sizes, and other constraints that affect the choice of system. This is called the Manual J calculation. It takes into account all of these factors, as well as how many people live in the home.

The Manual J calculation can give a very accurate size for furnaces and BTUs, so if you think your current furnace may be the wrong size, consider having a professional size your home before making your next purchase. Learn more about the cost of the average furnace installation.

If you’re sizing a cooling system, check out our window air conditioner size calculator to help determine what size air conditioner you will need. If you’re charging a cooling system, check out our refrigerant line charge calculator.

Flow Rate Calculator

Flow Rate Calculator

  • By
    FindPros

    FindPros connects consumers with professionals in over 600 different categories.

  • Reviewed by
    Jacky L.

    FindPros connects consumers with professionals in over 600 different categories.

Calculate Initial Fill Volume
This field is required.
Value should be positive.
This field is required.
Value should be positive.
Calculate Resurfacing Volume
This field is required.
Value should be positive.
This field is required.
Value should be positive.
Calculated Flow Rate:
{{results.ft3s}}
{{results.ft3m}}
{{results.ft3h}}
{{results.m3s}}
{{results.m3m}}
{{results.m3h}}
{{results.gals}}
{{results.galm}}
{{results.galh}}
{{results.ls}}
{{results.lm}}
{{results.lh}}

Learn how we calculated this below

Add this calculator to your site

How to Calculate Flow Rate

If you’re installing a new filtration system, water softener, or other pipe-based system in your home or business, you will need to know your home’s flow rate to determine the right system size.

Volumetric flow rate, also referred to as volume flow rate, flow rate, or volume velocity, is defined as the volume of fluid passing a point in a given unit of time.[1] The SI unit of flow rate is cubic meters per second (m³/s).

Meaning that a system may be able to handle a given amount or volume of liquid at one time. Knowing what your plumbing flow rate is will enable you to choose a filter or other system type that will work with your plumbing.

Flow rate can be found by simply measuring the amount of fluid that fills a bucket in a given amount of time or using a formula.

Flow Rate Formula

The flow rate of a fluid can be calculated using the volumetric flow rate equation:

Q = A × v

Thus, the volume flow rate Q is equal to the cross-sectional area of the pipe A times the velocity of the fluid

To use the flow rate formula, substitute the cross-sectional area of the pipe and the velocity of the liquid. For a round pipe, the cross-sectional area can be found using the formula for circle area A = πr².
For example, let’s find the flow rate for the fluid passing through a 1″ diameter pipe at a velocity of 3 feet per second.

Start by finding the cross-sectional area of the pipe.

area = π × r²
area = 3.14 × (1 ÷ 2)²
area = 3.14 × 0.25
area = 0.785398 in²

Next, it will be easier to solve later if the velocity and the area are in the same units. Convert the area in square inches to square feet by dividing by 144.

A = 0.785398 in² ÷ 144
A = 0.00545 ft²

Finally, substitute the area and velocity in the flow rate equation and solve.

Q = 0.00545 ft² × 3 ft/sec
Q = 0.01635 cubic ft/sec

Thus, the flow rate is 0.01635 cubic feet per second.
Because most systems work in gallons per minute, or GPM, you will need to convert your cubic feet per second to gallons per minute.

Start by multiplying the cubic feet per second by 7.481, then by 60, which will give you cubic feet per gallon and per minute.

Alternate Flow Rate Formula

An alternative formula to solve flow rate is:

Q =
V
t

The volume flow rate Q is equal to the volume of liquid passed V divided by the time passed t.

To use this formula, you need to be able to measure the volume of liquid that passes in a given time.

For example, let’s find the flow rate for a garden hose that can fill a 5-gallon bucket in 3 minutes.

Q =
5
3

Average Flow Rate Chart

While water pressure and other factors can influence your total flow volume, most pipes will have general averages for flow rates. The following assumes minimum and maximum pressures on the pipe:

Pipe Diameter Average GPM
1″ 16 – 58
1 1/2″ 35 – 126
2″ 55 – 200
3″ 140 – 425
4″ 240 – 700

Table showing the average flow rate in gallons per minute for common pipe sizes.

Try our unit rate calculator to find the rate of other units.