Toilet Repair

Toilet Repair Near You

Can’t find what you are looking for?

How It Works

  • Answer a few questions about your home project.
  • Within seconds, get matched with top-rated local pros.
  • Compare quotes and choose the best pro for the job.

Toilet Repair In Your Area

How to Choose the Best Toilet Repair Service

Meta Description: Find expert toilet repair services to fix leaks, clogs, and other issues. Learn how to choose the best plumber for your needs and ensure a properly functioning bathroom.

Toilet Repair

A well-functioning toilet is vital for every home. Issues like clogging, leaking, or poor flushing can be frustrating. Picking the right repair service is key to fixing problems correctly.

This guide will help you choose the best toilet repair service. Whether you need a simple fix or a full replacement, we’ve got you covered.

Key Takeaways

  • 01Identify common toilet issues like leaks, clogs, and flushing problems to determine the best repair service.
  • 02Understand the factors to consider when deciding to repair or replace a toilet, such as cost and long-term efficiency.
  • 03Hire licensed and insured professionals to ensure proper diagnosis and effective repairs.
  • 04Explore water-efficient toilet options to save water and reduce utility bills.
  • 05Maintain your toilet regularly to extend its lifespan and prevent future issues.

Understanding the Importance of a Well-Functioning Toilet

A well-functioning toilet is crucial for a clean, efficient, and safe household. When your toilet malfunctions, it can cause water damage, health risks, and higher utility costs.

It can also lead to increased water usage and mold growth. These issues can quickly escalate if not addressed promptly.

The Role of a Toilet in Daily Life

A good toilet ensures a hygienic bathroom experience for your family. Regular flushing and proper drainage help maintain cleanliness and prevent waste buildup.

This prevents unpleasant odors and germ spread. Well-maintained toilets also break less often, reducing costly repairs and daily disruptions.

Consequences of a Faulty or Inefficient Toilet

  • Increased water usage: Leaks and inefficient flushing can waste large amounts of water, leading to higher utility bills and a negative environmental impact.
  • Water damage: Leaks and overflows can cause water damage to your bathroom and surrounding areas, leading to costly repairs and potential mold growth.
  • Health risks: Mold growth and unsanitary conditions can pose health risks, particularly for individuals with respiratory issues or allergies.
  • Higher utility costs: Inefficient toilets can significantly increase your household’s water and energy usage, resulting in higher utility bills.

Fixing toilet issues quickly is key to a comfortable, efficient, and safe home. By understanding the effects of a faulty toilet, you can take action.

This ensures your bathroom stays clean and reliable. Regular maintenance can prevent many common toilet problems from occurring.

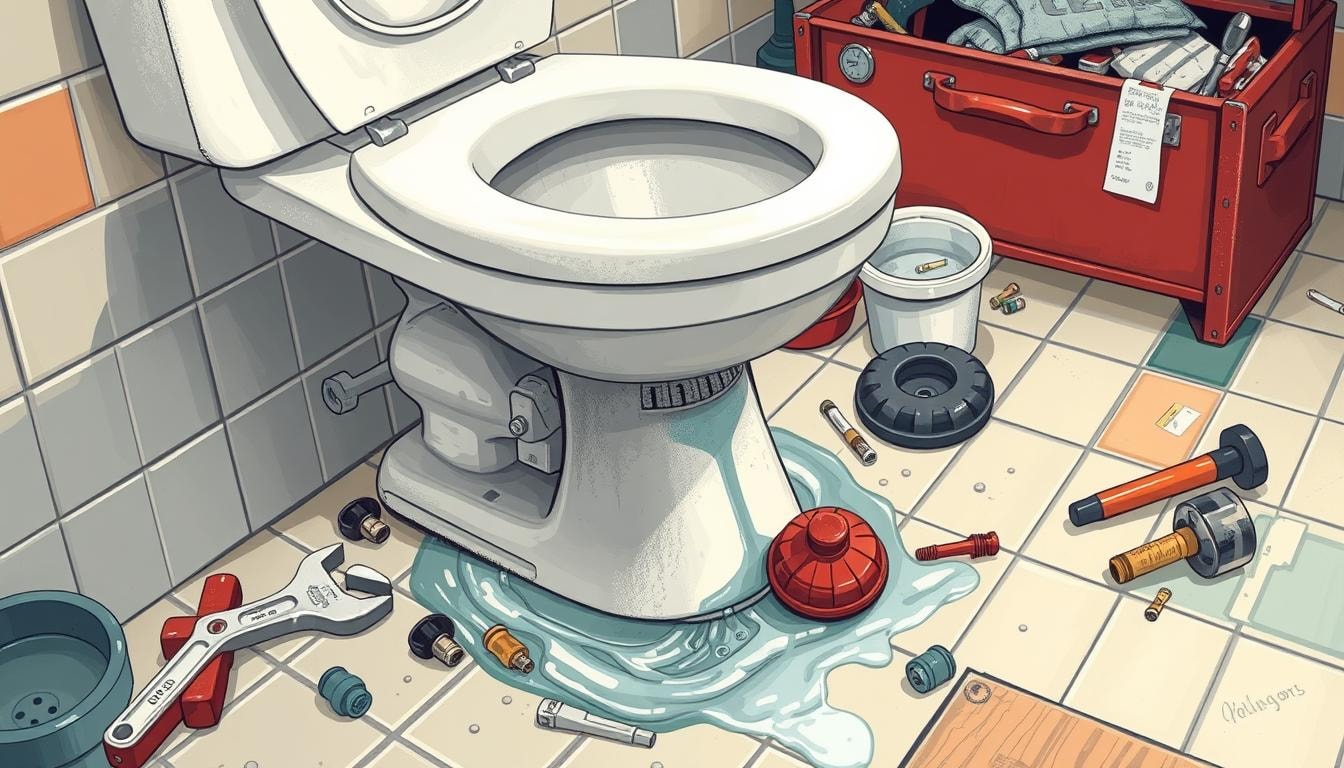
Signs Your Toilet Needs Repair

Spotting toilet issues early is key to avoiding bigger problems. Watch for frequent clogs, cracked bowls, high water bills, and wobbly toilets. These signs may mean your toilet needs professional attention.

Consistent repairs are another red flag. Don’t ignore these warnings. Quick action can save you money and prevent major headaches.

Common Toilet Issues and Their Symptoms

Toilet troubles come from various sources. Mineral buildup, faulty parts, and structural issues are common culprits. Here are some problems to look out for:

  • Persistent clogs that require multiple flushes to clear waste, which may signify an aging or outdated toilet
  • Inability to flush the toilet at all, which could indicate a more serious problem
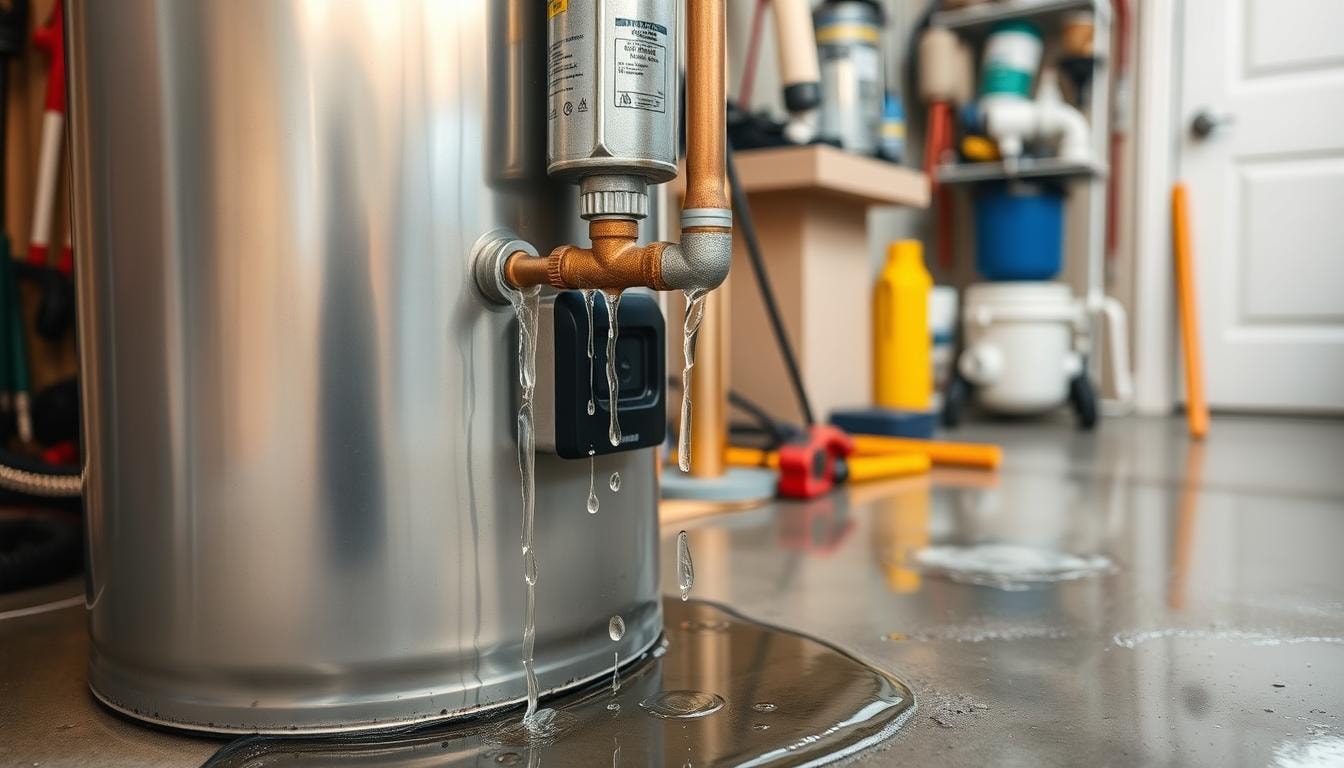
  • Recurring toilet leaks around the base, which can lead to water damage and mold growth
  • Unstable or wobbly toilets due to deterioration of the floor beneath the fixture
  • Malfunctioning flush valves or flappers that cause constant flushing and increased water usage

Identifying Leaks and Flushing Problems

Leaks and flushing issues often signal a need for repairs. Keep an eye out for these signs:

  1. Water pooling around the base of the toilet, which may signify a problem with the wax ring or other structural components
  2. Visible cracks in the toilet bowl or tank, which can cause leaks
  3. Fluctuations in the water level within the tank, which could point to a faulty fill valve or other internal issues

Quick action on these problems can prevent costly water damage. It also keeps your home’s plumbing system working well. Don’t wait to call a pro if you spot these signs.

Toilet Repair vs. Replacement

Toilet troubles force homeowners to choose between repair and replacement. The decision hinges on problem severity, toilet age, and potential cost savings. Factors like these shape the best course of action.

Factors to Consider When Deciding to Repair or Replace

Common toilet issues include frequent clogs, cracks, leaks, and wobbling. Quick action prevents further damage and high water bills. These problems often signal the need for repair or replacement.

Cost Analysis: Repair vs. Replacement

  • Major repairs can be costly. Sometimes, replacing the toilet is more cost-effective, especially when upgrading to a water-efficient model.
  • Constantly running toilets can spike water bills. Replacement might improve efficiency and lead to long-term savings.
  • Repeated clogs or porcelain cracks may require full replacement. This addresses the root cause and prevents future issues.

Weighing factors and costs helps determine the best option. You can choose between a simple repair or a full replacement. This decision depends on your specific needs and budget.

Choosing a Professional Toilet Repair Service

professional toilet repair service

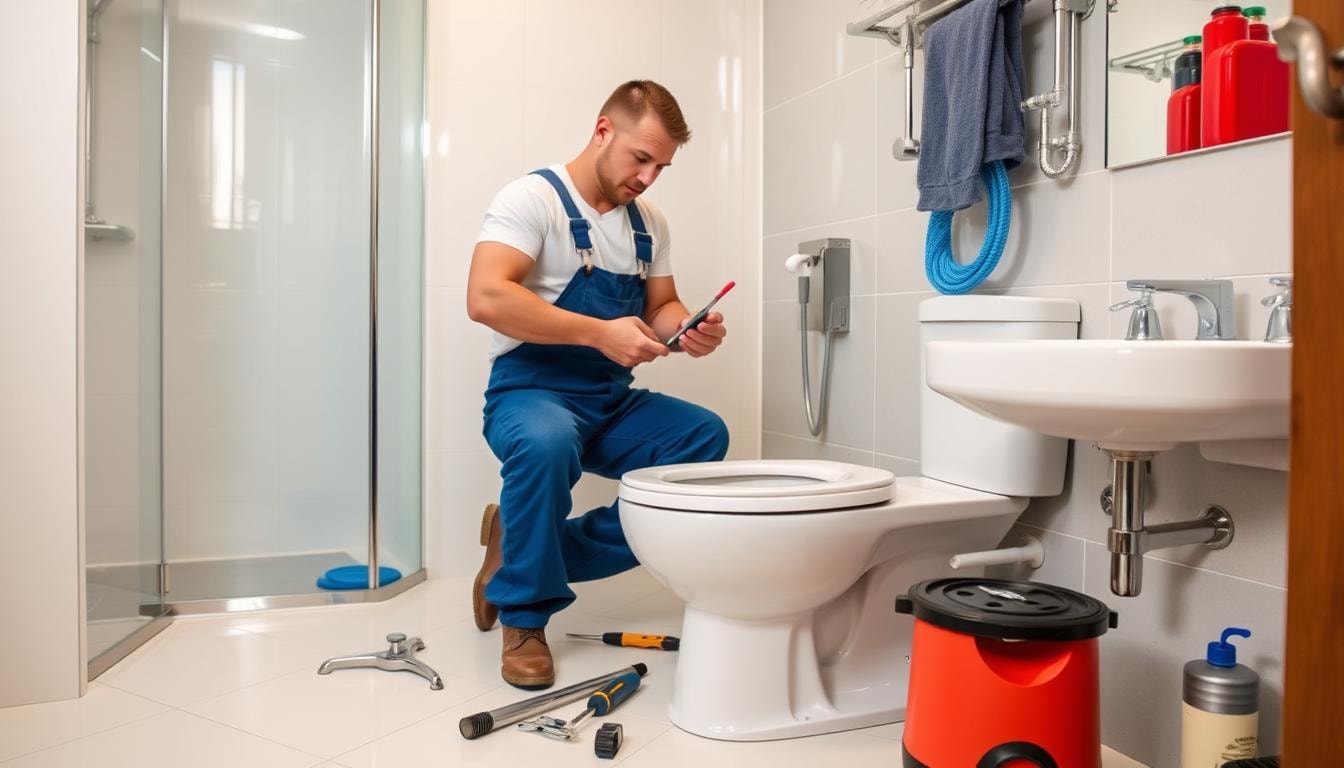
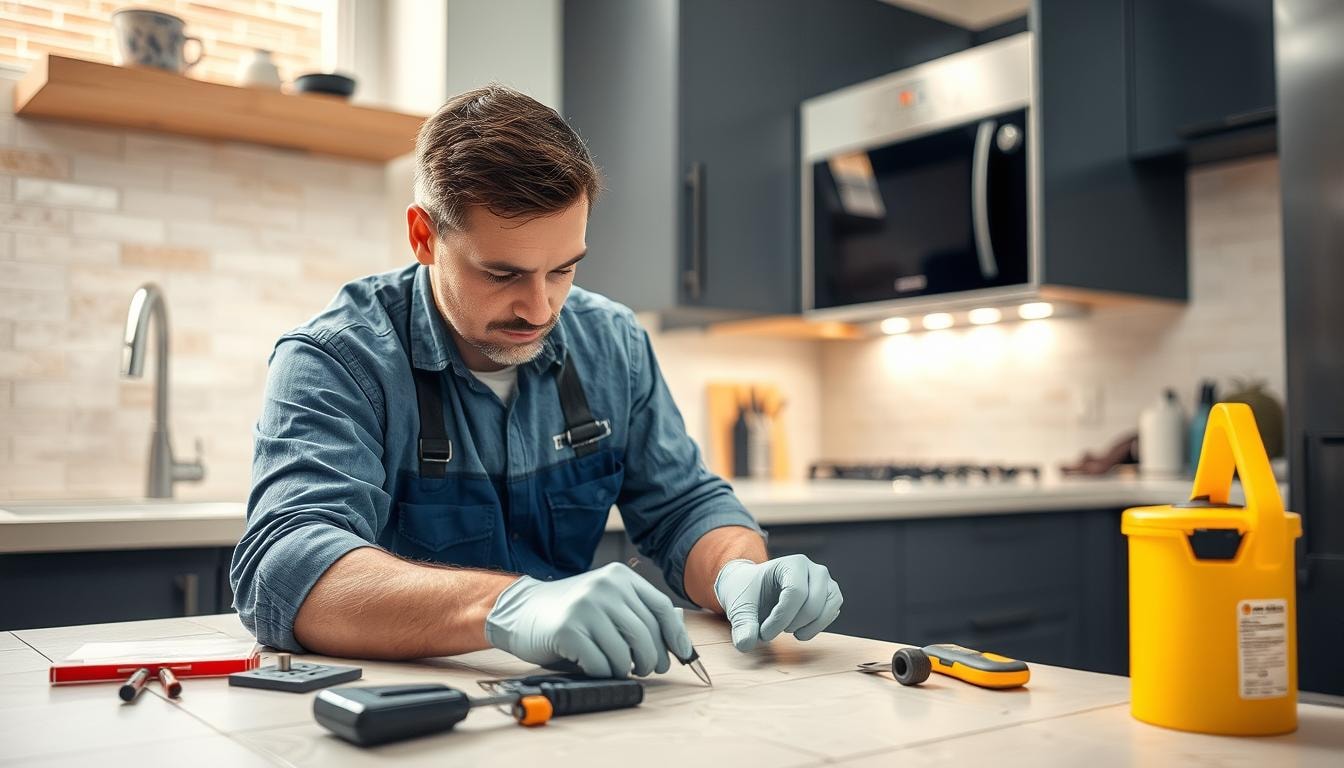
Hiring a professional toilet repair service ensures your toilet works properly. Experienced plumbers can quickly fix issues and prevent future problems. Look for licensed and insured contractors with a proven track record.

Importance of Hiring Licensed and Insured Professionals

Licensed plumbers have the qualifications to handle toilet repairs within local regulations. Insured contractors protect you from liability if accidents occur during repairs. Working with these professionals gives you peace of mind.

Evaluating Experience and Reputation

  • Consider the service provider’s years of experience in the industry. Experienced plumbers can quickly identify the root cause of the issue and provide effective solutions.
  • Check the company’s reputation by reading online customer reviews and testimonials. A reputable service with a history of satisfied clients is more likely to deliver exceptional workmanship.
  • Inquire about the qualifications and certifications of the plumbers who will be working on your toilet. Look for professionals with the necessary training and credentials.

Choose a service with proper licenses, insurance, and experience. This ensures your toilet is fixed right the first time. You’ll avoid future hassles and enjoy a well-functioning bathroom.

The Benefits of Professional Toilet Repair

Professional toilet repair offers more than just convenience. Skilled plumbers can quickly spot the problem’s cause. They recommend the best fix and perform it correctly.

Accurate Diagnosis and Proper Repair

Expert technicians have the know-how to diagnose issues accurately. They provide proper repairs, solving problems efficiently. This approach prevents future issues and costly damages like water leaks.

Preventing Future Issues and Costly Damages

Hiring pros helps avoid expensive consequences of DIY fixes. They can spot and fix underlying problems. This saves you money in the long run.

Professional repairs boost water efficiency and cut costs. They also ensure your bathroom stays safe and follows local rules.

  • Accurate diagnosis and proper repair to resolve the issue effectively
  • Prevention of future problems and costly damages, such as water leaks or structural damage
  • Improved water efficiency and cost savings
  • Compliance with local safety and building codes

Choosing pro repair gives peace of mind. Your toilet issues get fixed right the first time. You’ll also enjoy long-term savings and better water efficiency.

Toilet Installation Services

Professional plumbers can help install new toilets and repair existing ones. A new, water-efficient toilet can improve flushing performance and bathroom looks. It can also increase comfort.

Reasons to Consider a New Toilet Installation

  • Improved water efficiency, potentially saving you money on utility bills
  • Enhanced flushing power and waste removal for a more hygienic bathroom experience
  • Increased comfort with features like comfort-height bowls and soft-close seats
  • A more modern and visually appealing toilet design that complements your bathroom’s decor

Choosing the Right Toilet for Your Home

When picking a new toilet, think about its size, style, and water-saving features. Toilets come in various models, each with unique benefits. A plumber can help you choose the best toilet for your bathroom.

Toilet installation costs vary based on job complexity and toilet type. Professional plumbers usually take one to four hours to install a new toilet. This includes removing the old unit and setting up the new one.

With the right toilet and expert installation, you’ll enjoy a better bathroom for years. It will be more efficient, comfortable, and visually appealing.

Water-Efficient Toilet Options

Upgrading to a new toilet offers the chance to choose a more water-efficient model. High-efficiency toilets (HETs) and dual-flush toilets use advanced tech to reduce water use. These options use 1.28 gallons or less per flush, compared to older models using up to 5 gallons.

Water-saving toilets benefit the environment and lower your utility costs. They’re a smart and cost-effective choice for your home.

Understanding Water-Saving Toilet Technologies

Modern water-efficient toilets have innovative features that save water. Low-flow toilets use just 1.2 gallons or less per flush, much less than traditional models.

Dual-flush toilets let users pick between low-volume flush for liquid waste and higher-volume for solid waste. This optimizes water efficiency even further.

Power flush toilets use pressurized air in the tank for extra flushing force. They ensure thorough waste removal with minimal water.

WaterSense-certified and MaP PREMIUM toilets meet or exceed strict performance standards. They maintain exceptional water efficiency while doing so.

Benefits of Water-Efficient Toilets

  • Reduced water consumption: Water-efficient toilets can decrease household water usage by 20 to 60%, leading to substantial long-term water savings.
  • Lower utility costs: The reduced water consumption translates to lower water and sewer bills, resulting in significant cost savings for homeowners.
  • Environmental impact: By conserving water, water-efficient toilets play a crucial role in preserving natural resources and reducing the strain on municipal water systems.
  • Increased home value: The installation of eco-friendly fixtures, such as water-efficient toilets, can enhance a property’s appeal and value in the real estate market.
  • Reduced maintenance: Low-flow and dual-flush toilets are designed to be less prone to clogs, requiring less frequent maintenance and repairs.

Choose a water-efficient toilet that fits your household size and water usage patterns. Consider your personal preferences too.

Upgrading to a modern, high-efficiency toilet brings many benefits. You’ll save water, lower utility costs, and have a more eco-friendly home.

Routine Toilet Maintenance

toilet maintenance

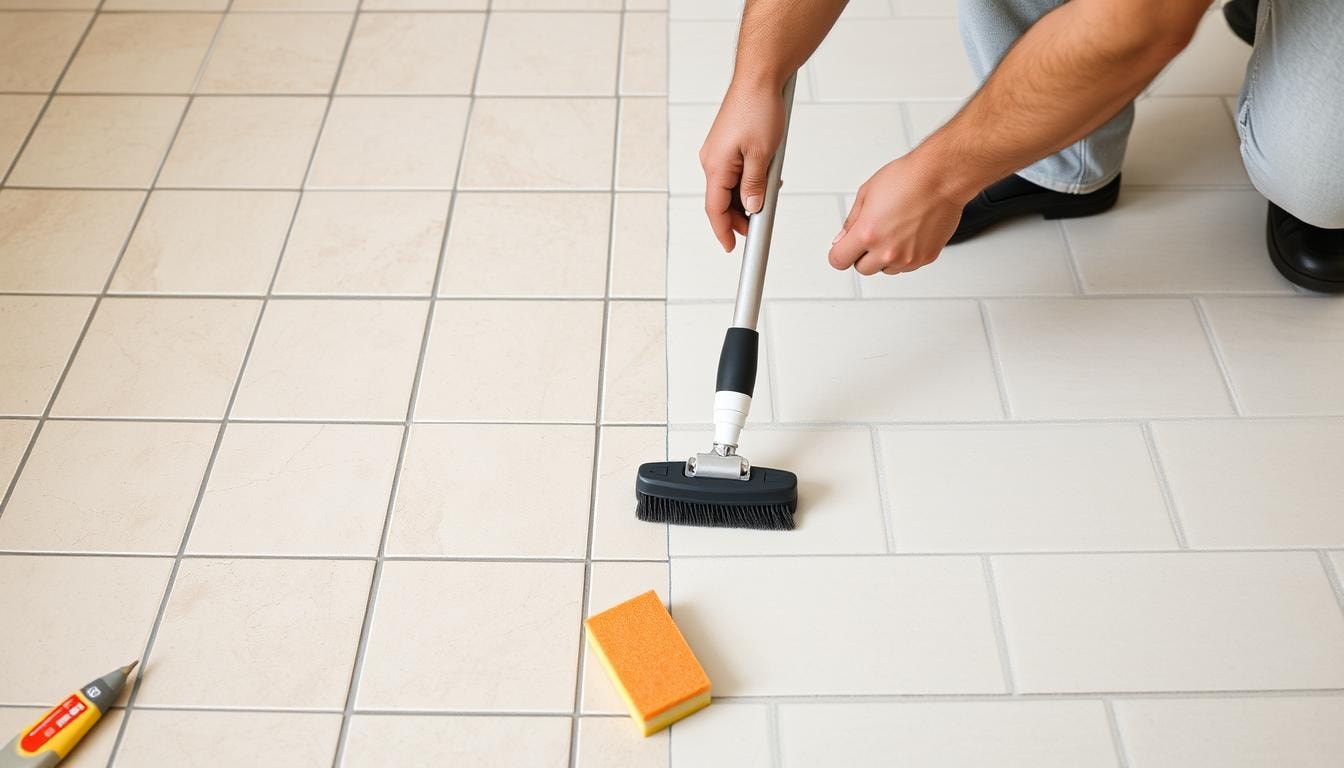
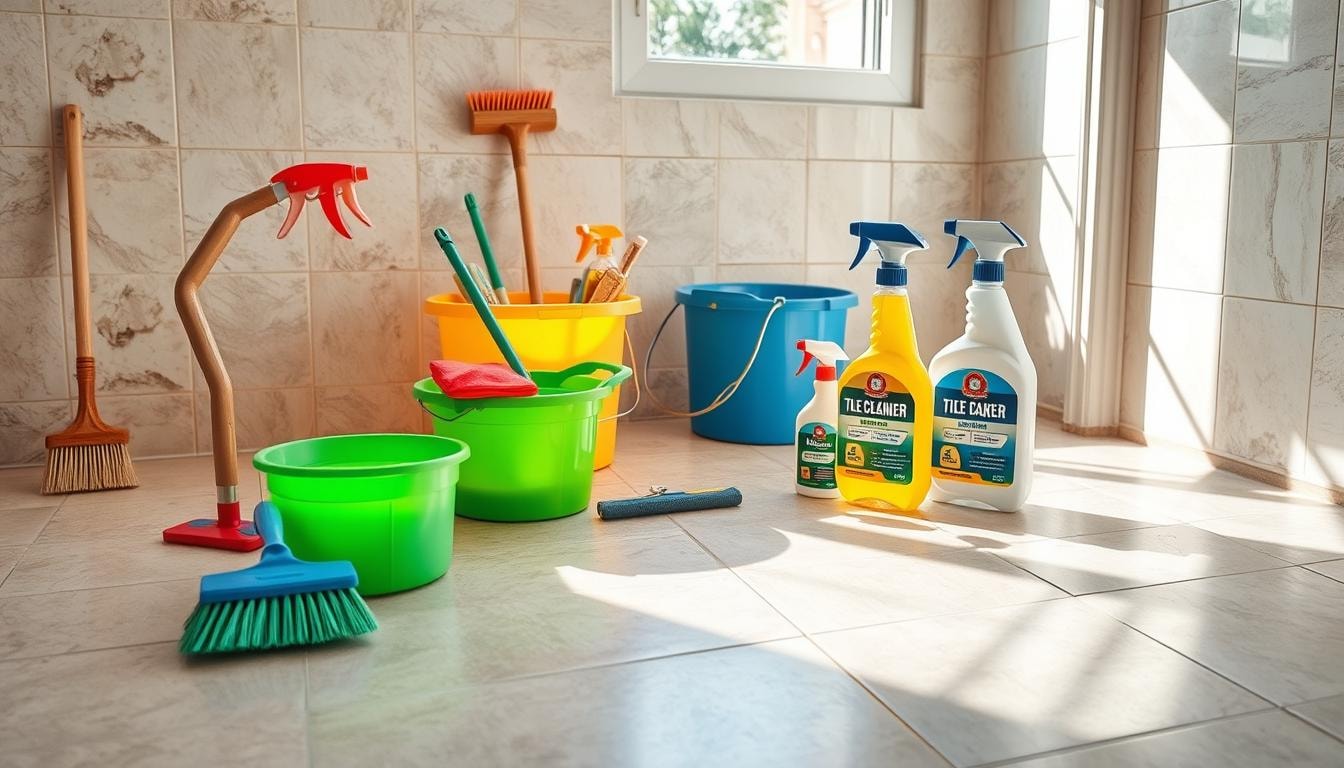
Regular toilet maintenance is key for bathroom efficiency and longevity. It involves routine cleaning to remove buildup and bacteria. Regular inspections help identify issues like water leaks, clogging, or flushing performance problems.

Addressing concerns quickly and using best practices can extend the life of your toilet. This approach helps avoid expensive repairs in the future.

Importance of Regular Cleaning and Inspection

Proper toilet maintenance reduces common toilet problems. Good disposal practices and regular cleaning prevent clogs and maintain toilet condition. Avoid harsh chemical cleaners to protect your toilet.

Check the shut-off valve monthly for proper water supply control. Schedule yearly visits from licensed plumbers for thorough inspections and maintenance.

Tips for Extending the Life of Your Toilet

  • Perform regular cleaning and inspection of your toilet to identify and address any potential issues.
  • Avoid using harsh chemical cleaners that can damage the toilet’s internal components.
  • Install a water softener to remove hard minerals that can lead to clogs and component damage.
  • Promptly address any leaks or flushing performance problems to prevent further complications.
  • Regularly check the shut-off valve to ensure proper water supply control.
  • Schedule annual maintenance visits with a licensed plumber for a comprehensive inspection and tune-up.

These routine maintenance practices help extend the lifespan of your toilet. They also prevent costly repairs or replacements in the future.

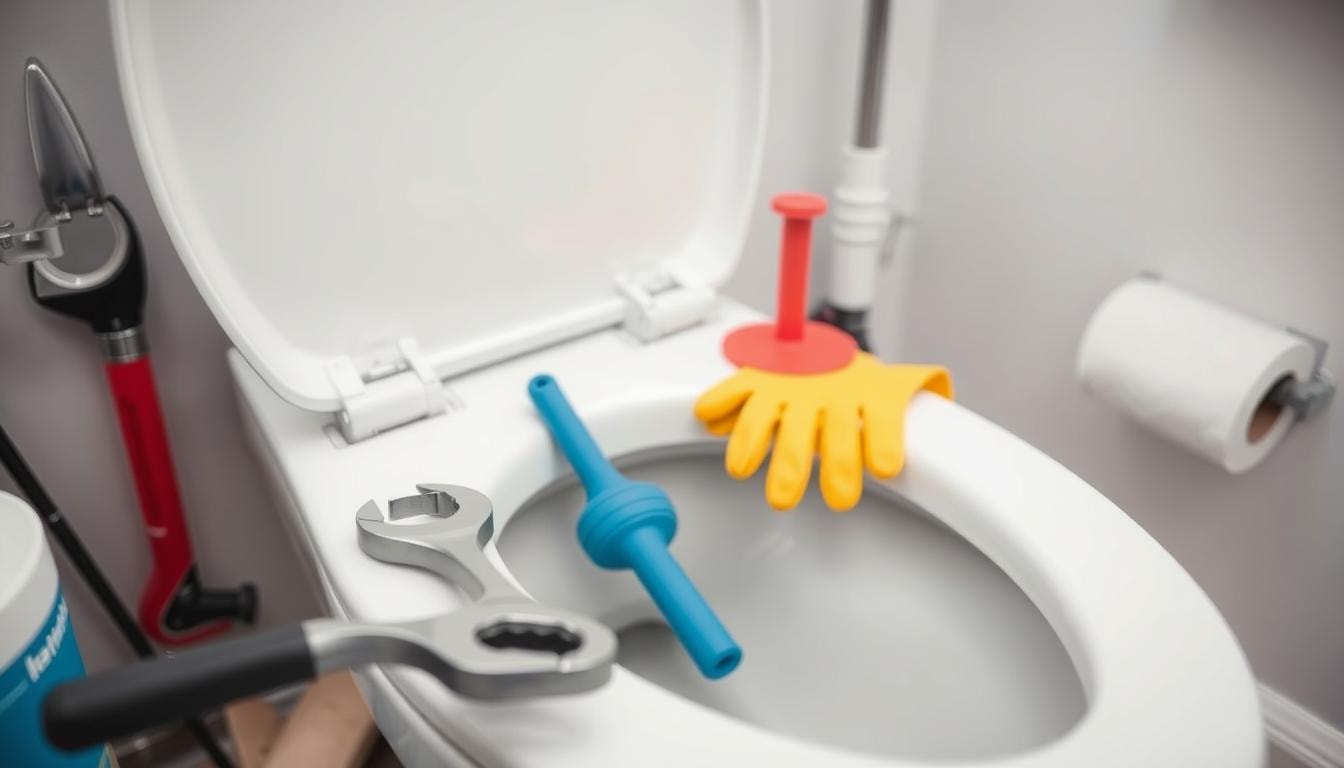
DIY Toilet Repair vs. Professional Services

Minor toilet repairs may seem easy for handy homeowners. But complex issues often need a professional plumber’s expertise. DIY repairs can be risky and may not fix the problem long-term.

When to Attempt DIY Repairs

Homeowners comfortable with basic plumbing can try simple tasks like unclogging toilets. It’s important to have the right tools and follow safety rules. Complex repairs without proper knowledge could lead to costly mistakes.

Benefits of Hiring Professional Toilet Repair Services

  • Ensure the job is done correctly, safely, and efficiently, preventing future issues.
  • Leverage the repair expertise of licensed and experienced plumbers.
  • Benefit from cost-effective long-term solutions that address the root cause of the problem.
  • Avoid the risks and potential damage associated with DIY toilet repair attempts.
  • Receive a warranty or guarantee on the work performed, providing peace of mind.

Professional toilet repair services often provide the best results. They ensure safety and cost-effectiveness. Licensed plumbers offer expertise that can save you time and money.

Their experience helps prevent recurring issues. You’ll also get peace of mind with warranties on the work done.

Choosing the Right Toilet Repair Service Provider

Selecting the right toilet repair service is crucial. Look for qualified, experienced, and licensed professionals committed to top-notch service. Evaluate their qualifications and credentials to ensure reliable and effective solutions.

  • Evaluating Qualifications and Experience: Experienced providers can quickly diagnose issues and implement the right solutions. Look for plumbers with years of experience in toilet repair and installation. Seek technicians who have undergone comprehensive training and hold relevant certifications. Check their track record of successful projects and positive customer reviews.
  • Checking for Licensing and Insurance: Proper licensing shows commitment to industry standards and local regulations. Insurance protects you from liability during repairs. Confirm the provider is licensed for toilet repair in your area. Verify they carry liability insurance to cover potential damages. Ask for proof of licensing and insurance before hiring the service.

Thoroughly vetting providers ensures you work with a qualified team. This approach helps address your toilet issues effectively and efficiently.

Bathroom Remodeling and Toilet Upgrades

Bathroom renovations offer a chance to add new toilet designs and features. These upgrades can boost water efficiency and improve your bathroom’s look. Professional installation services can help create a beautiful and practical bathroom space.

Incorporating New Toilet Designs and Features

Today’s toilet market offers many design options and advanced features. Look for toilets with a Maximum Performance (MaP) score of 500 or higher. Wall-hung toilets can save floor space in smaller bathrooms.

Bidets are gaining popularity in the US. They can improve hygiene and reduce toilet paper use. Consider these options for your bathroom remodel.

Enhancing Bathroom Aesthetics and Functionality

A bathroom remodel can improve the space’s overall look and function. Proper ventilation is key to preventing mold and mildew. Strategic lighting can create a spa-like atmosphere.

Choose the right paint finish, flooring, and cabinetry to boost your bathroom’s style. These elements can make your space more comfortable and appealing.

Professional renovation services can help you balance efficiency, comfort, and style. They can upgrade your toilet or revamp the entire bathroom to meet your needs.

Cost Considerations for Toilet Repair and Installation

Toilet repair or installation costs vary based on job complexity and materials. Prices depend on the service provider’s expertise and the specific task at hand.

Understanding Pricing Factors

Toilet repair costs range from $50 to $700. Simple fixes like flapper replacement cost $12 to $30. Complex repairs, such as fixing leaks, can cost $50 to $300.

Plumber rates vary by location. Rural areas charge around $50 per hour, while cities may charge up to $200.

New toilet installation costs $250 to $600, including labor and materials. The national average is about $375. The Home Depot offers a flat-rate installation fee of $99.

Evaluating Long-Term Cost Savings

Professional toilet repair or replacement can lead to significant long-term savings. Upgrading to a water-efficient model can reduce utility bills and provide better returns.

Proper repair and maintenance prevent costly water damage. They also extend your toilet’s lifespan, saving you money over time.

Consider pricing factors and potential savings carefully. This approach helps you make smart decisions that fit your budget and home needs.

FindPros: Your Trusted Toilet Repair Solution

Struggling with a leaking toilet, clogged drains, or constant flushing problems? Don’t let these common toilet issues disrupt your home. FindPros connects you with licensed master plumbers who can quickly diagnose and fix any toilet-related problem, from replacing flappers to installing an entire new toilet.

Simply answer a few questions about your home project, and within seconds, FindPros will match you with top-rated local professionals. Compare quotes, read reviews, and choose the pro that best fits your needs and budget. No more guesswork or hassle – let the experts at FindPros handle your toilet repair and ensure a properly functioning bathroom.

Conclusion

A well-functioning toilet is vital for home comfort and safety. Know the signs of toilet issues and weigh repair versus replacement options. Choose a reputable service provider for your bathroom needs.

The right toilet repair and installation services can improve your plumbing system. They ensure your bathroom remains reliable and enjoyable. This applies to simple fixes and complete toilet upgrades.

Proper maintenance keeps your toilet running smoothly for years. Make informed decisions to preserve your plumbing system’s integrity. This guide has equipped you with knowledge for your home’s plumbing needs.

A reliable toilet contributes to home comfort and cost-effectiveness. It’s a worthwhile long-term investment. Stay proactive and seek expert help when needed.

Prevent costly damages by addressing issues promptly. Ensure your plumbing system’s longevity with proper care. Enjoy a stress-free bathroom experience for years to come.

Frequently Asked Questions (Toilet Repair)

Toilet tank issues can include leaking from the tank, a faulty flapper, problems with the toilet float, or a malfunctioning fill valve. These can lead to running water, inefficient flushing, and increased water bills.
To fix a leaking toilet tank, you can start by checking the condition of the toilet flapper and replacing it if needed. Ensure the flapper chain is properly adjusted and the flush valve is working correctly. If the leak persists, you may need to replace the entire flush valve assembly or the fill valve.
If your toilet is continuously running, the most common issue is a faulty flapper. You can try adjusting or replacing the flapper. Check the flush valve and ensure the toilet float is moving freely. Replacing the fill valve or the entire flush valve assembly may be necessary if the problem persists.
Regular maintenance, such as checking the tank components and cleaning the toilet, can help prevent future issues. Ensure the water supply valve is working properly and the toilet float is moving freely. Consider replacing the wax ring under the toilet base if you notice any leaks around the base.
If you’re unable to fix the issue yourself or if the problem seems more complex, it’s best to call a licensed plumber. They have the expertise to diagnose and fix the issue correctly, whether it’s a clogged toilet, a leaking toilet, or the need for a full toilet replacement.

Tile Roof Repair

Toilet Repair Near You

Can’t find what you are looking for?

How It Works

  • Answer a few questions about your home project.
  • Within seconds, get matched with top-rated local pros.
  • Compare quotes and choose the best pro for the job.

Tile Roof Repair In Your Area

Tile Roof Repair: Signs You Need a Professional

Meta Description: Discover key signs indicating your tile roof needs professional repair. Learn about common issues, repair processes, and when to call experts for your tile roof maintenance.

Tile Roof Repair

Is your tile roof in need of expert care? Spotting early signs of damage can prevent expensive fixes and safety risks. Let’s explore key indicators that show you need quick tile roof repair.

By knowing these signs, you can take action to protect your home’s first defense line. This knowledge empowers you to maintain your roof’s strength effectively.

Key Takeaways

  • Tile roofs have a lifespan of 50 to 100 years, depending on material and maintenance.
  • Properly installed tile roofs can withstand sustained winds up to 180 mph.
  • Loose or missing tiles increase the risk of water damage and leaks.
  • Discoloration, sagging, or unusual noises may indicate roof damage.
  • Prompt attention to issues can prevent further deterioration and costly repairs.

The Importance of a Reliable Roof

Your roof shields your home from harsh weather. It’s vital to keep it in top shape. The climate affects how long your roof will last.

Intense sun can damage roofs over time. Severe weather like high winds or hail can age roofs faster.

Protecting Your Home from the Elements

Quality installation and upkeep impact a roof’s lifespan. A well-built roof helps your home stay energy-efficient. It controls indoor temperature and prevents heat loss.

Skilled roofers use top materials for repairs. This boosts your roof’s weather resistance and durability.

Maintaining Energy Efficiency

Hiring pros is more cost-effective than DIY repairs. They have the know-how and tools to fix roofing issues.

Regular checks, especially after storms, are key. They reveal hidden problems and keep your roof healthy.

Signs of Tile Roof Damage

A healthy tile roof shields your home from harsh weather. Tile roofs can last over 50 years, but they need regular checks. Look out for sagging surfaces and missing tiles.

Sagging or Uneven Roof Surfaces

Sagging areas on your tile roof may signal repair needs. Check for moisture and rotting boards, especially in lower spots.

Inside, look for cracks. These might show framing issues or warped sheathing.

Missing or Damaged Tiles

Roof tiles can crack or break due to bad weather or impacts. These weak spots let water in, causing more harm.

Missing or damaged tiles mean your roof needs fixing right away.

Check your tile roof often and fix problems quickly. This prevents bigger, costlier repairs later on.

Regular care keeps your tile roofing strong and your home safe for years.

Water Intrusion and Leaks

Signs of water damage inside your home can point to a failing roof. Water stains on ceilings or walls are clear red flags. Small leaks can quickly grow, causing major damage to your home’s interior.

Interior Water Stains and Moisture Buildup

Finding the source of water leaks can be tricky. Water can move in strange ways before showing up inside. Water testing helps pinpoint the problem and estimate repair costs.

Homebuyers often worry about old ceiling stains. They’re not sure if the leak is still active. A pro can help figure this out.

Identifying the Source of Leaks

Roofing experts can spot problems and offer the best fixes. They use water testing to make sure leaks are truly fixed. This is key before any finishing work begins.

Leaks can have many causes. Cracks in stucco, faulty valleys, windows, or nearby flat roofs are common culprits. A thorough inspection is crucial to find the real source.

Age and Life Expectancy of Your Roof

Knowing your roof’s age and lifespan is key for planning repairs or replacements. Roofing material affects how long it lasts. Most roofs should last 20 to 25 years, but this can vary widely.

Asphalt shingles, the most common material, typically last 15 to 30 years. Metal roofs can endure for 40 to 70 years. Clay and concrete tiles often reach 50 years or more.

Slate, copper, and tile roofs can potentially last over a century with proper care. Climate, roof slope, and installation quality also affect a roof’s lifespan.

  • Asphalt shingles: 15 to 30 years
  • Metal roofs: 40 to 70 years
  • Clay and concrete tiles: 50 years or more
  • Slate, copper, and tile roofs: over 100 years with proper maintenance

Your roof’s age and life expectancy impact long-term maintenance and replacement needs. Understanding your roofing material’s unique traits helps you make smart decisions. This ensures optimal protection for your home’s most important exterior feature.

Repair vs. Replacement Options

Your roof’s condition determines whether to repair or replace it. Asphalt shingle roofs last 15-20 years, while clay or concrete tiles endure 30-50 years. Keep a close eye on your roof’s condition as it ages.

Consider a roof replacement if your roof is over 20-25 years old. Proactive steps can prevent structural damage and save you from costly repairs later.

Not all roof issues need a complete replacement. A roofing contractor may suggest targeted roof repairs for specific problems. The choice between repair and replacement depends on your roof’s condition and roofing materials.

If many tiles are cracked or broken, repairs might not work. A full roof replacement may be more practical and cost-effective long-term. Frequent repairs might make replacement more economical.

A skilled roofing contractor can assess your roof and provide tailored recommendations. They’ll evaluate roofing costs and ensure proper roof maintenance for your home’s longevity.

Granule Loss and Curling Shingles

Granule loss on asphalt shingles

Your roof may show signs of aging like granule loss and curling shingles. These issues often mean your roof is nearing its end. Asphalt shingles are prone to these problems due to weather exposure.

Granule loss happens when protective granules wear away from asphalt shingles. Weather, debris, and poor installation can cause this. Without granules, shingles become more vulnerable to UV rays and weathering.

Curling shingles can signal an aging roof or poor ventilation. This can lead to leaks and other structural issues. Age, improper installation, and extreme temperatures may cause shingles to curl.

If you spot these problems, call a professional roofing contractor. They can find the cause and suggest repairs or replacement. Quick action can prevent more expensive damage later.

Regular roof checks can help extend your asphalt shingle roof’s life. This will maintain your home’s protection against the elements. Don’t ignore signs of wear and tear on your roof.

The Role of Professional Roofing Contractors

Roofing contractors are crucial for fixing tile roof problems. They have the skills to inspect roofs, spot issues, and offer the best solutions. Their expertise helps prevent small problems from becoming costly disasters.

Expertise in Tile Roof Repair

Skilled roofing contractors can spot hidden roof damage that homeowners might miss. They know the best tile roof repair methods to fix issues correctly. This ensures your roof stays strong and works well.

Ensuring Proper Installation and Maintenance

Good roof installation and roof maintenance are key for a lasting tile roof. A qualified roofing contractor handles these tasks properly. They can advise you on keeping your roof in top shape for years to come.

More homeowners are choosing professional roof repair services. These experts offer safety and know-how that DIY repairs can’t match. DIY repairs often lead to bigger problems like rot, mold, and fire hazards.

Certified roof repair companies follow safety rules, reducing accident risks. They also use materials with valid warranties. This protection only applies when pros do the installation.

Hiring unqualified roofing companies can cost more over time. Poor work and no warranty coverage lead to extra expenses. Choosing a trusted local roofing contractor ensures your home stays safe and dry.

Preventive Maintenance and Inspections

Regular roof checkups are crucial for your tile roof’s longevity. Early detection of minor issues can prevent costly structural damage. Proactive maintenance significantly extends your roof’s lifespan.

Regular Roof Checkups

Tile roofs are durable and can last a lifetime with proper care. Start inspections two years after installation, then every couple of years.

A professional roofer will look for damage signs during these checkups. They’ll spot missing or cracked tiles and fix minor problems quickly.

Addressing Minor Issues Early

  • Regularly clean gutters and valleys to prevent debris buildup and ensure proper water flow.
  • Inspect flashing, stacks, and vents for any signs of damage and address them promptly.
  • Replace broken roof tiles quickly to avoid water intrusion and damage to the underlying roofing system.
  • Monitor for mildew, algae, or moss growth and consult a professional for tile roof cleaning and maintenance.

Proactive roof maintenance prevents minor roof issues from becoming major problems. Regular roof inspections help avoid costly roof repairs down the line.

Early preventive maintenance is key to keeping your tile roof in top shape. It ensures your roof’s integrity and longevity for years to come.

Tips for Hiring the Best Tile Roof Repairing Professionals

Hiring Roofing Contractor

Finding the right roofing contractor is vital for your tile roof repair. Ask for client references and check certifications to ensure roofing expertise in tile roof repair. Explore weather-resistant roofing materials that suit your local climate.

Discuss additional layers or techniques to boost your tile roof’s durability. Look into local requirements or regulations to make an informed choice.

  1. Get multiple estimates from experienced hiring roofing contractor to compare prices and services.
  2. Check the contractor’s certifications and client references to confirm their quality work history.
  3. Choose high-quality, weather-resistant roofing materials for long-lasting protection against local weather conditions.

Expert advice can guide you to the best tile roof repair decision. This ensures your home’s long-term protection and the project’s success.

Find the Right Pros for Your Tile Roof Repair

Dealing with a tile roof in need of repair can be a daunting task. But you don’t have to handle it alone. FindPros can connect you with top-rated local professionals who specialize in tile roof repair. Simply answer a few questions about your tile roof repair needs, and we’ll match you with pros who can provide competitive quotes. Whether you have broken tiles, small cracks, or damage from strong winds and storms, our experts can guide you through the repair process and ensure your roof is safely and properly restored. Get the fair price you deserve by letting multiple qualified pros compete for your business. FindPros makes it easy to find the right tile roofing professional to get your roof looking brand new again.

Conclusion

A reliable tile roof repair is vital for protecting your home and boosting energy efficiency. Look out for signs of damage like sagging, missing tiles, and water intrusion. Regular inspections and maintenance can extend your roof’s lifespan.

Work with experienced roofing contractors to keep your home safe and dry. They can help with targeted repairs or full roof replacements. Addressing issues early prevents costly problems down the road.

A proactive approach is key to a successful tile roof. Regular check-ups and skilled professionals ensure your roof’s longevity. Follow these tips for a well-maintained tile roof that provides lasting protection and appeal.

Frequently Asked Questions (Tile Roof Repair)

Common signs include sagging or uneven roof surfaces, missing or damaged tiles, and water intrusion or leaks inside the home. These issues can lead to further damage if not addressed promptly.
To repair damaged tiles, the homeowner should carefully remove the broken tile, apply roofing cement to the surrounding tiles, and install a new tile that matches the existing ones. It’s important to take necessary safety precautions when working on the roof.
If there are a significant number of broken, cracked, or missing tiles, or if the tiles are showing signs of extensive damage from storms or age, it may be time to consider replacing the tiles. Replacing tiles can help prevent further water damage and maintain the roof’s structural integrity.
Hiring a professional roofer ensures the repair job is done correctly, using the right materials and techniques. They can also provide an exact color match for replacement tiles and take the necessary safety precautions to avoid further damage to the roof or surrounding areas.
Before the repair work begins, the homeowner should clear the area around the roof, ensure the necessary safety precautions are in place, and provide the roofer with all the information they need to complete the repair job, such as the tile type and color. This will help the process go smoothly and efficiently.

Tile Repair

Toilet Repair Near You

Can’t find what you are looking for?

How It Works

  • Answer a few questions about your home project.
  • Within seconds, get matched with top-rated local pros.
  • Compare quotes and choose the best pro for the job.

Tile Repair In Your Area

Need Tile Repair? Here’s What to Expect

Meta Description: Discover expert tips for effective tile repair. Learn how to fix cracks, chips, and broken tiles to restore your floor’s beauty and functionality. Professional advice inside.

Tile Repair

Tiles are beautiful, durable, and easy to clean. They’re perfect for floors, countertops, and backsplashes. But cracks, chips, or dents can ruin your space’s look.

Fixing damaged tiles is crucial. It prevents further problems and keeps your area looking great. This article offers expert tips for effective tile repair.

Ever wonder about your tile floors’ lifespan? Or how to keep them looking their best? Let’s uncover the secrets to long-lasting tile and tackle common challenges.

Key Takeaways

  • Tile damage can worsen over time if not addressed promptly, posing risks like water damage and safety hazards.
  • Cracked, chipped, or dented tiles can detract from the overall aesthetic of a space.
  • Accidents and improper installation are common causes of tile damage.
  • Professional tile repair services offer expertise and the right tools for high-quality, long-lasting repairs.
  • DIY tile repair may be suitable for minor issues, but extensive damage often requires professional intervention.

Understanding the Importance of Tile Repair

Tile is popular for flooring, walls, and countertops. It’s durable, versatile, and looks great. But tiles can get damaged over time. This includes water damage, safety risks, and ugly looks.

It’s vital to fix these issues quickly. This prevents further damage. It also keeps your tiled surfaces looking good and working well.

Worsening Over Time

Tile problems get worse if you ignore them. Cracks and chips can spread to nearby tiles. This can lead to water damage, mold, and mildew.

Ignoring these issues can be costly. You might end up needing more extensive repairs later on.

Unappealing Aesthetic

Damaged tiles can make your space look bad. This includes cracked, chipped, or missing tiles. Fixing or replacing these tiles is important.

Quick repairs can restore your tiled surfaces’ beauty. This enhances the overall look of your home or business.

Common Causes of Tile Damage

Tiles are tough but can still get damaged. Knowing why tiles break helps choose the right fix. Let’s explore the main reasons for tile damage.

Accidents Happen

Dropping heavy things or moving furniture often breaks tiles. These accidents can crack or chip your floor. Fix these problems quickly to stop more damage.

Incorrectly Installed Joists

Bad joist installation can harm tiles over time. Joists support the floor. If they’re not spaced right, the floor can sag.

This sagging makes tiles crack or become uneven. It can weaken the floor and need big repairs.

Fixing the cause is key for lasting tile repair. This applies to both accident damage and structure problems.

DIY Tile Repair Mistakes to Avoid

Tile Installation

DIY tile repair can turn into a costly nightmare if not done right. Improper installation leads to long-term issues that may need professional help. Let’s explore common mistakes to avoid in tile repair projects.

  • Cracking Tiles While Cutting to Size: Homeowners often crack tiles when cutting them to fit. This happens due to lack of proper tools and techniques. Cracked tiles look unsightly and weaken the tiled surface.
  • Messy Grout Lines and Caulking: Clean grout lines and caulking are hard to achieve without experience. Poor application or cleanup leads to an unappealing finish. This can ruin the overall look of your tile installation.
  • Improper Underlayment: The underlayment is key for stable tile installations. Skipping or wrongly installing it can cause tiles to crack or shift. This creates safety hazards and leads to expensive repairs.
  • Crooked and/or Irregularly Spaced Tiles: Even tile spacing needs a keen eye and attention to detail. DIY attempts often result in crooked or uneven tiles. This looks bad and can weaken the tiled surface.

Think carefully before trying DIY tile repair. Weigh the risks against potential savings. Hiring a pro ensures the job is done right with proper expertise.

Smaller Tile Chips or Holes: Repair Techniques

Smaller chips or holes in tiles can be fixed with simple DIY methods. Nail polish matching the tile color can be applied to damaged areas. This method blends seamlessly with the surrounding tile.

Ceramic filler is another option for small cracks or chips. Apply the putty-like material to the damaged area. Let it dry for 24 hours before sanding or buffing for a polished finish.

  • For a more durable repair, consider using a lacquer-based ceramic filler. This type of product provides a harder, longer-lasting solution.
  • To better match the color of the tile, you may need to experiment with mixing small amounts of craft or house paint into the ceramic filler base.
  • Work in a well-ventilated area, as the fumes from the porcelain glaze can be quite strong.

These repair techniques can restore your tiled surfaces with patience and care. Note the color mixing ratios for future touch-ups. Prompt repairs prevent further damage and maintain your space’s look.

DIY communities offer valuable insights for home improvement projects. Join these groups to learn new tips and tricks. You’ll find inspiration and support for your tile repair journey.

Bigger Tile Chunks: Replacement Strategies

Replacing large missing tile chunks is often the best fix. Use spare tiles if available. If not, find a matching tile from a supplier.

Here are the key steps for replacing larger tile chunks:

  1. Carefully remove the damaged tile, using a chisel and hammer to avoid further cracking or chipping of the surrounding tiles.
  2. Clean the area thoroughly, ensuring there is no debris or adhesive residue that could interfere with the new tile installation.
  3. Apply a suitable tile adhesive to the surface, following the manufacturer’s instructions for proper application and curing time.
  4. Gently press the new tile into place, aligning it with the surrounding tiles to create a consistent pattern.
  5. Once the adhesive has fully cured, apply grout to fill the gaps between the tiles, using a grout float or rubber trowel.
  6. After the grout has dried, clean the tile surface and apply a grout sealer to protect the repair.

Can’t find a matching tile? Use a similar one that blends well. This can create a nice look, even if it’s not exact.

Take your time when fixing larger tile chunks. Follow proper methods for a lasting, pro-looking repair. With care, new tiles can blend in smoothly.

Dealing with Cracked Tiles

Cracked tiles can frustrate homeowners, but they’re fixable with the right approach. Understanding the damage and choosing the proper repair technique is crucial.

For minor cracks, filling with silicone caulk is a simple, cost-effective solution. This method can hide the crack and stop it from getting worse.

The process is straightforward. Clean the damaged area, apply the caulk, and blend it with surrounding tiles.

  1. Clean the cracked tile and surrounding area thoroughly with a tile cleaner or dish detergent.
  2. Apply a thin layer of silicone caulk into the crack, ensuring it fills the entire length of the damage.
  3. Use a putty knife or your finger to smooth the caulk, blending it with the tiles for a uniform finish.
  4. Allow the caulk to fully cure, which can take anywhere from a few hours to a full day, depending on the manufacturer’s instructions.

For bigger cracks or shattered tiles, a two-part clear epoxy kit works well. The epoxy binds cracked pieces together, providing a strong, lasting fix.

Epoxy repair drying time varies from a few hours to over a day. Address cracked tiles quickly to prevent more damage.

With the right techniques, you can restore your tiled surfaces’ beauty and function.

Fixing Loose Tiles

Loose tiles can be frustrating and dangerous for homeowners. It’s crucial to fix them quickly to prevent further damage. With the right approach, you can restore your flooring’s stability and appearance.

Start by carefully prying up the affected tile. Use a chisel or putty knife to gently lift it. Be careful not to crack or damage the tile further.

Once removed, clean the surface thoroughly. Remove any old adhesive or debris from the area. This prepares the surface for new adhesive.

  • Incorrect installation due to poor application of tile adhesive during initial fitting is a common reason for tiles becoming loose.
  • Over time, the quality of the adhesive can deteriorate due to factors like moisture exposure, temperature changes, and aging, causing tiles to lose their grip.
  • Subfloor issues, such as movement or settling, can also contribute to tiles becoming loose, leading to changes in temperature, humidity, or structural problems.

Apply a new, high-quality tile adhesive suitable for your flooring material. Place the tile back in its original position. Apply even pressure to ensure a secure bond.

Allow the adhesive to cure for about 24 hours. Then, fill any gaps or cracks with matching grout. Apply a grout sealer to protect the repair and prevent future issues.

Refreshing Worn Tiles

Worn tile floors don’t always need replacement. You can refresh them by sanding lightly and applying tile paint or floor finish. This simple process can restore your tiles’ appearance effectively.

Ceramic tile refinishing can save up to 50% compared to replacing tiles. The Miracle Method uses a seven-step spray application for durability. Natural Accents™ stone finish offers a high-end makeover for various surfaces.

Professional refinishing is more durable than DIY methods for high-traffic areas. Baking soda and vinegar can clean stubborn grime on old bathroom tiles. Grout is prone to staining, mold, and mildew due to its porous nature.

Scratches, hairline cracks, and chips can be fixed with nail polish or epoxy products. Reglazing can restore tiles’ original luster. It’s a less expensive alternative to retiling for ceramic or porcelain tiles.

Refreshing worn tiles extends the life of your floors and surfaces. It saves money and time compared to full replacement. You can choose to DIY or hire a professional for tile surface renewal.

When to Hire Professional Tile Repair Services

professional tile repair

Some minor tile repairs can be DIY projects. However, it’s often wiser to hire professionals for complex or extensive damage. Professional tile technicians have the right tools, expertise, and experience to ensure flawless repairs.

Hiring professionals is crucial for larger tile chunks or complex patterns. DIY attempts can lead to costly mistakes and further damage. Skilled technicians can match new tiles seamlessly with existing layouts.

Professional tile repair services in Wichita offer expert solutions for all tile problems. They can fix a few cracked tiles or refresh entire surfaces. Their work extends the life of your tile floors, walls, and countertops.

Tips for Hiring the Best Tile Repair Services

Finding a reputable tile repair service is key to getting quality results. Do your homework by reading reviews and checking licenses. Make sure the company is insured and offers warranties for your peace of mind.

Start by researching tile repair companies in your area. Look for businesses with a solid track record and happy customers. Check online reviews on Yelp, HomeAdvisor, and Angi to gauge their reputation.

Verify the company’s licensing and insurance. This protects you from liability if accidents happen during the project. Look for certifications like the Certified Tile Installer (CTI) program, which requires two years of experience.

  • Choose tile contractors that offer warranties on their work. This ensures any issues are fixed quickly.
  • Get multiple bids and compare prices for a fair deal. Be cautious of very low prices.
  • Read the contract carefully. Check labor and material costs, project schedule, and payment terms.

Following these tips will help you hire the best tile repair services. This ensures a smooth and successful project experience.

The FindPros Advantage

Struggling with tile repair and unsure where to start? Let FindPros simplify the process. Our platform connects you with top-rated local professionals who compete to provide the best pricing and service for your project. Simply answer a few questions about your tile repair needs, from matching color tones to handling marble or wood surfaces. Within seconds, FindPros will match you with vetted pros that fit your preferences. Compare quotes, browse customer reviews, and choose the perfect fit – taking the hassle out of your home improvement. Get started today and experience the FindPros advantage.

Conclusion

Maintaining tiled surfaces is crucial for their beauty and function. Quick tile repair prevents small issues from becoming major problems. Understanding common causes of damage helps you address issues promptly.

Act fast whether you’re doing repairs yourself or hiring professionals. Regular inspections and maintenance protect your tiles from accidents and wear. Proper tile care extends the life of your ceramic tiles and avoids costly replacements.

Tile refinishing offers a quick and affordable way to revitalize your surfaces. It can be done in just one day, avoiding major renovations. Choose a trusted provider to ensure the long-term quality of your tiles.

A reliable tile repair service will maintain the integrity of your tile repair, floor tiles, backsplash, bathroom, and kitchen areas. This preserves the visual appeal of your space for years to come.

Frequently Asked Questions (Tile Repair)

Carefully remove the broken tile to prevent further damage. Clean the area thoroughly to remove any debris or adhesive residue. Apply a tile adhesive and carefully place a new tile, ensuring it is flush with the surrounding tiles. Allow the adhesive to fully cure before grouting.
For a chipped wall tile, use a tile filler or epoxy to fill the chip. Ensure the area is clean and dry before applying the filler. Slightly overfill the chip, then sand or buff it down to be flush with the tile surface. Match the color as closely as possible for a seamless repair.
Deeper cracks require a more robust repair solution. Clean the area and apply a two-part epoxy resin. This will help to bind the cracked pieces and provide a long-lasting fix. Be sure to follow the manufacturer’s instructions for mixing and application.
For the best color match, try mixing a bit of tile paint or grout in the same color as your existing tiles. Apply the mixture with an applicator brush, blending it seamlessly into the repaired area. You may need to do a few applications to get the perfect color match.
Start by thoroughly cleaning the shower tiles using a mixture of warm water and mild detergent. For stubborn dirt or grime, you can try a tile-safe cleaner. If the tiles are in good condition but look worn, consider a tile refinishing product to restore their original luster.

Tile & Grout Cleaning

Toilet Repair Near You

Can’t find what you are looking for?

How It Works

  • Answer a few questions about your home project.
  • Within seconds, get matched with top-rated local pros.
  • Compare quotes and choose the best pro for the job.

Tile & Grout Cleaning In Your Area

Professional Tile Grout Cleaning Services: Restore Your Floors Today

Meta Description: Revitalize your floors with our expert tile grout cleaning services. We use advanced techniques to remove stains, dirt, and grime, restoring your tiles to their original beauty.

Tile Grout Cleaning

Is your tile flooring looking dull and discolored? Are you noticing stains on your bathroom or kitchen grout? Professional tile and grout cleaning might be the solution you need.

Expert services offer exceptional results that last longer than DIY methods. They use advanced techniques to bring your floors back to life.

Key Takeaways

  • Professional tile and grout cleaning services use advanced equipment and techniques to restore your floors to their original glory.
  • Expert technicians can tackle even the toughest stains and grime, leaving your tile and grout looking brand new.
  • Color sealing your grout can protect it from future discoloration, making your floors easier to maintain.
  • Professional cleaning services are available for a wide range of tile materials, including ceramic, porcelain, and natural stone.
  • Businesses can benefit from professional tile and grout cleaning to maintain a clean, professional environment for their customers.

Importance of Clean Tile and Grout

Clean tile and grout are vital for residential and commercial spaces. Tile floors are durable and easy to maintain. However, tiles and grout can become discolored and stained over time.

Neglecting tile floor care can lead to unsightly appearances and health risks. Dirt, grime, mold, and mildew can build up in porous grout lines. This makes your tile floors look dingy and unappealing.

Professional cleaning services can restore the shine of your floors. They create a clean, inviting environment. These services eliminate dirt and discoloration in grout lines.

  • Improve the appearance of your tile floors and maintain their original beauty
  • Eliminate dirt, grime, and discoloration in grout lines
  • Destroy harmful bacteria, mold, and mildew that can impact indoor air quality
  • Extend the lifespan of your tile floors by preventing wear and tear
  • Promote a healthy, safe environment for your family or customers

Regular professional cleaning keeps floors in top condition. It adds to the overall cleanliness of your space. Don’t let dirty tile and grout ruin your home or business.

Why Choose Professional Tile Grout Cleaning?

Professional tile grout cleaning services can keep your tiles looking pristine. DIY cleaning methods often fall short in tackling stubborn stains and ground-in dirt. High-traffic areas need deep cleaning that’s hard to achieve without expert help.

Limitations of DIY Cleaning Methods

Household cleaners and scrubbing brushes can’t match professional-grade equipment. DIY grout cleaning might leave residue, causing faster re-soiling. Handheld tools often lack the power to handle tough cleaning jobs effectively.

Expertise and Advanced Equipment

Professional services use powerful truck-mounted cleaning systems for floors, showers, and countertops. These techniques use heat, special solutions, and strong suction to remove deeply embedded dirt. Homeowners can’t access this level of cleaning on their own.

After deep cleaning, professionals apply a protective sealer to the grout. This shield guards against future stains and mildew for up to two years.

Experts achieve a level of clean that’s impossible with DIY methods. Their advanced equipment and specialized cleaners ensure thorough, long-lasting results. This approach enhances your tile surfaces’ appearance and extends their lifespan.

The Tile Grout Cleaning Process

Clean tile and grout are vital for beautiful, hygienic floors. Professional cleaners use advanced equipment and techniques for deep cleaning. The cleaning process includes inspection, preparation, and thorough cleaning.

Inspection and Preparation

Experts start by examining your tile and grout. They spot problem areas and choose the best cleaning methods. This ensures top-notch results for your floors.

Next, the team clears away loose debris. This step readies the area for deep cleaning. It helps make the process more effective.

Deep Cleaning with Hot Water Extraction

Hot water extraction is the main cleaning method. The team uses truck-mounted gear to apply a special cleaning solution. This solution, plus hot water, removes stubborn dirt and grime.

Powerful suction then rinses and vacuums the area. This leaves your tile and grout clean and fresh. It also removes any leftover cleaning products.

This process makes your tile look new again. It also creates a healthier home by removing dirt and allergens. Regular cleaning keeps your floors looking great for years.

Grout Color Sealing

grout color sealing

After a thorough cleaning, we apply a protective grout sealant. Sears’ services include a specialized grout color sealing process. This restores the original hue and shields against future stains and discoloration.

Our grout sealing treatment uses high-quality, penetrating sealers. These create a waterproof barrier to guard your grout from damage. This grout protection maintains stain resistance, water resistance, and dirt resistance.

The treatment ensures your grout stays clean and retains its appearance for years. Our expert technicians offer grout restoration services to revive discolored grout. With our grout maintenance solutions, your tile floors will remain beautiful and protected.

Types of Tile Materials We Clean

Our tile cleaning service handles various tile materials. We tailor our cleaning process to each tile type. Our goal is to make your floors look their very best.

  • Ceramic and Porcelain Tiles: Ceramic and porcelain tiles are durable and affordable choices. We use gentle, pH-neutral cleaners to restore their shine safely. A simple mix of warm water and mild dish soap works well for these tiles.
  • Natural Stone Tiles: Natural stone tiles need special care. We adapt our cleaning process for granite, marble, slate, travertine, and Saltillo. We avoid harsh chemicals to protect these delicate surfaces.

Our professional service can revive your tile flooring. We work with ceramic, porcelain, and natural stone tiles. Contact us to schedule a consultation and restore your tile’s beauty.

Commercial Tile and Grout Cleaning

Clean, professional spaces are vital for all businesses. This includes offices, stores, restaurants, hotels, hospitals, and schools. Professional tile and grout cleaning can restore your commercial spaces’ look, hygiene, and safety.

Expert cleaners use advanced methods for all tile types. They remove stubborn stains and grime from floors. The grout lines are refreshed to their original color.

Importance of Clean Tile and Grout in Commercial Spaces

  • Enhances the overall appearance and professionalism of your business
  • Maintains high standards of hygiene and sanitation, promoting a healthy environment
  • Ensures the safety of employees and customers by preventing slip-and-fall accidents
  • Boosts employee productivity and morale by providing a clean, inviting workspace
  • Contributes to customer satisfaction and loyalty, as cleanliness is often a key factor in their decision-making

Regular commercial tile cleaning and commercial grout cleaning boost your business’s success. A clean space creates a positive impression. It fosters pride and professionalism among staff.

Clean environments drive customer satisfaction and productivity. Invest in professional cleaning to maintain your business’s appeal and hygiene.

Frequency of Tile and Grout Cleaning

Clean tiles and grout regularly to keep them looking great. How often you clean depends on foot traffic, pets, kids, and your cleaning habits.

Factors Affecting Cleaning Frequency

Most homes need a deep grout cleaning once a year. Some factors may require more frequent cleaning.

Homes with pets and kids often need cleaning twice yearly. High-traffic areas like kitchens may need more frequent professional cleaning.

Dry climates and busy areas may need more cleaning. Homes with less foot traffic might clean every other year.

  • Homes with pets and young children tend to require more frequent cleaning, often needing grout and tile cleaning two or more times per year.
  • Homes with heavy foot traffic, such as in the kitchen or entryways, may also need more regular professional cleaning.
  • Dry climates and high-use areas can contribute to the need for more frequent tile and grout cleaning.
  • Homes without pets and minimal foot traffic may be able to clean their grout once every other year.

Sweep, mop, and spot-clean regularly to keep floors looking great. Professional cleaning removes deep dirt and stains, keeping tiles in top shape.

Professional cleaning keeps tiles looking good and prevents stains. It maintains durability and stops mold and bacteria growth. Stains and discoloration signal it’s time for professional cleaning.

Regular cleaning and professional services extend your floor’s life. This helps maintain its pristine look for years to come.

Preparing for Tile and Grout Cleaning

preparing for tile cleaning

Getting ready for tile and grout cleaning is crucial. Clear the area of furniture and obstacles for full access. Protect nearby surfaces from splashes or spills to avoid damage.

Safety is important during cleaning. Talk to the cleaning team about safety rules and after-care tips. This helps make the process smooth and effective.

Book the cleaning service early. This lets the team plan their time and resources well. It also helps fit the cleaning around your schedule.

  • Clear the area of furniture and other obstacles to provide full accessibility
  • Protect nearby surfaces from potential splashes or spills
  • Communicate with the cleaning team about safety precautions and post-cleaning care
  • Schedule the cleaning service in advance to ensure proper resource allocation

Good prep creates the perfect setting for pros to work their magic. It helps bring back the beauty of your floors.

Post-Cleaning Care and Maintenance

Proper care after professional tile and grout cleaning is key. Follow these steps to keep your floors looking great. You’ll extend the life of your grout sealant too.

Recommended Cleaning Products

Use neutral cleaners that won’t harm the new sealant. Avoid harsh chemicals like bleach. They can wear down the sealant fast.

Choose gentle, pH-neutral cleaners made for tile and grout. These are safe for your newly cleaned floors.

Extending the Life of Your Grout Sealant

  • Regularly clean your tile and grout surfaces with the recommended neutral cleaners to prevent buildup and staining.
  • Reapply the grout sealant every 6-18 months, depending on the type of sealant used, to maintain the protection and appearance of your floors.
  • Address any spills or stains promptly to minimize the risk of permanent discoloration or damage to the grout.

These tips will help keep your floors looking great. You’ll protect your investment in professional cleaning. Your floors will shine for years to come.

Tips for Keeping Tile and Grout Clean

Clean tiles and grout need regular care. A consistent routine prevents discoloration and keeps surfaces pristine. Regular maintenance is key for long-lasting cleanliness.

Regular Maintenance Routines

Sweep or vacuum daily to remove surface dirt. Weekly, use a damp mop with mild, pH-neutral cleaner. Monthly, scrub with a grout brush and baking soda paste.

For deeper cleaning, try a hydrogen peroxide solution. This helps maintain the tile’s appearance between professional cleanings.

Addressing Spills and Stains Promptly

  • Clean spills quickly to prevent stains from setting into the grout.
  • Use a water and vinegar mix or a dedicated cleaner for fresh spills.
  • For tough stains, apply baking soda paste or hydrogen peroxide, then rinse thoroughly.
  • Apply grout sealant to protect the surface and ease maintenance.

A consistent cleaning routine keeps tiles looking great. Prompt stain removal ensures a beautiful, well-maintained space. Regular care extends the life of your tile and grout.

Tips for Hiring the Best Tile Grout Cleaning Services

Professional tile and grout cleaners can restore your floors’ beauty. They have the expertise and equipment to deliver exceptional results. Here are some tips to find the right service provider:

  1. Look for experienced technicians who know various tile materials and cleaning processes. This ensures they can handle your specific needs effectively.
  2. Evaluate the quality of equipment used by the cleaning company. They should have high-powered, commercial-grade tools and cleaning solutions for thorough restoration.
  3. Review the company’s cleaning process to ensure they use proven techniques. Look for methods like hot water extraction for deep cleaning.
  4. Check customer reviews and ask for references to gauge client satisfaction. This can give insights into the company’s reliability and workmanship.
  5. Confirm that the company is properly licensed, insured, and bonded. This protects you from liability in case of accidents or damages.
  6. Inquire about any guarantees or warranties they offer. This ensures the longevity of the cleaning results.

Do your research to choose a reputable tile and grout cleaning service. This will ensure your floors are restored to their former glory.

Your floors can maintain their pristine condition for years to come. A professional service can help you achieve this goal.

FindPros: Easily Find Top-Rated Tile and Grout Pros

Tired of scrubbing your tile floors and grout lines, only to see them get dirty again? Stop the hard work and let FindPros match you with pre-screened, local professionals who can restore your floors to their former glory. Simply answer a few questions about your project, and we’ll provide you with competitive quotes from the best tile and grout cleaning experts in your area. Sit back and let the pros handle the dirty work, while you enjoy the best results for your home or business.

Conclusion

Professional tile and grout cleaning services offer a top-notch solution for reviving your floors. They use advanced techniques and special equipment to remove stubborn dirt and grime. These services can even tackle mold and mildew, bringing back your tile’s original beauty.

Investing in tile grout cleaning provides lasting results for both homes and businesses. It improves your space’s appearance and cleanliness. Regular upkeep enhances floor appeal and creates a healthy environment by removing allergens and pollutants.

Professional cleaning services save you time and effort with their expertise and advanced tools. They ensure your floors get the care they need. These services prioritize floor restoration and customer satisfaction.

With professional help, you can achieve the clean, vibrant floors you’ve always wanted. This adds value and beauty to your property, making it more appealing overall.

Frequently Asked Questions (Tile & Grout Cleaning)

To make a homemade grout cleaner, mix two parts baking soda with one part hydrogen peroxide. Apply the paste to the stained grout lines, let it sit for a few minutes, then scrub with a toothbrush. This helps remove tough stains and discoloration. Always wear eye protection and work in a well-ventilated area to avoid fumes.
After professional cleaning, use a spray bottle filled with a mild, pH-neutral cleaner to spot-clean any spills or stains on your floor tiles and grout lines promptly. This helps prevent the grout from becoming stained or discolored again. Regularly sweep, vacuum, and mop the floors to keep them looking their best.
The frequency of professional tile and grout cleaning depends on factors like foot traffic, pets, and your cleaning habits. Most homes need deep cleaning once a year, but high-traffic areas or homes with pets/kids may require cleaning twice a year. Regular maintenance is key to keeping your floors looking great.
Applying a grout pen or sealer can help protect your grout lines from future stains and discoloration. The sealant creates a barrier that makes the grout more water-resistant and easier to clean. This extends the life of your grout and keeps your floor tiles looking new for longer.
Yes, a steam cleaner can be an effective way to deep clean tile floors and grout lines. The high heat and pressure of a steam cleaner can help break down and lift away stubborn dirt, grime, and stains. Just be sure to use the right tools and techniques to avoid damaging the tile or grout. Start with a small, inconspicuous area to test the results.

Thermostat Repair

Toilet Repair Near You

Can’t find what you are looking for?

How It Works

  • Answer a few questions about your home project.
  • Within seconds, get matched with top-rated local pros.
  • Compare quotes and choose the best pro for the job.

Thermostat Repair In Your Area

Thermostat Repair: Find the Best Technicians Near You

Meta Description: Experiencing thermostat issues? Find expert technicians for reliable thermostat repair near you. Get your heating and cooling system back on track quickly and efficiently.

Thermostat Repair

Is your thermostat acting up? Don’t worry! Our expert HVAC contractors are ready to help. We offer quick and efficient thermostat repair services to restore your home’s comfort.

Our professionals can fix all types of thermostats. This includes smart, digital, programmable, and older mechanical models. We provide emergency and same-day service for your convenience.

Key Takeaways

  • Expert HVAC technicians available for reliable thermostat repair services
  • Wide range of thermostat types serviced, including smart, digital, and programmable models
  • Emergency and same-day service to restore your home’s comfort quickly
  • Comprehensive solutions for a variety of thermostat issues and malfunctions
  • Ensure your heating and cooling system operates efficiently with proper thermostat maintenance

Understanding Thermostat Issues

Older thermostats often struggle with modern heating and cooling demands. This can lead to comfort issues and reduced energy efficiency. If your thermostat is over a decade old, it might be time for a replacement.

Outdated and Surpassed Lifespan

Aging thermostats may have trouble maintaining accurate temperature control. This can affect your HVAC system’s overall performance. Modern thermostats offer more precise and responsive temperature regulation.

Newer models can improve home comfort and reduce energy bills. They provide better control over your home’s climate.

Doesn’t Respond to Changed Settings

An unresponsive thermostat can be very frustrating. This issue may be caused by dead batteries, loose wiring, or dirt buildup.

If your thermostat doesn’t adjust the temperature as expected, seek professional help. An expert can identify and fix the underlying problem.

HVAC System Short Cycles

Short cycling occurs when your HVAC system turns on and off frequently. This can be a sign of thermostat problems.

Such behavior leads to higher energy use and uneven heating and cooling. Our technicians can assess your system and recommend the best solution.

Thermostat Replacement Costs

new thermostat

Replacing your home’s thermostat can cost anywhere from $15 to $250. Professional installation ranges from $100 to $350. The total cost depends on the thermostat type and installation complexity.

How Much Does a New Thermostat Cost (With Installation)?

The average national cost for thermostat replacement, including installation, is about $210. Prices typically range from $120 to $330. The thermostat type greatly impacts the overall cost.

Manual thermostats cost $40 to $150. Digital thermostats range from $60 to $350. Wi-Fi-enabled smart thermostats can cost $120 to $400.

Labor expenses for professional installation usually range from $100 to $250. This depends on the technician’s rate and job complexity. Additional factors can impact the overall replacement cost.

Investing in a quality thermostat can lead to improved energy efficiency. This may result in cost savings on utility bills. Advanced features can offer greater energy savings and convenience.

Work with a trusted HVAC professional to get a detailed estimate. They can help you explore various thermostat options. This ensures you find the best solution for your home and budget.

DIY vs Professional Thermostat Installation

Replacing a thermostat yourself can be risky. It’s safer to hire a pro. Wrong installation can cause costly errors and safety issues.

Can I Replace My Thermostat Myself?

Thermostat replacement needs expert skill. DIY attempts can lead to HVAC problems and void warranties. Our pros can swap your old thermostat quickly and correctly.

They ensure your heating and cooling system works well. Our licensed specialists have the right tools and know-how for the job.

  • Incorrect installation can lead to HVAC system short-cycling, not turning on when expected, or running continuously.
  • DIY attempts can result in injuries due to unfamiliar tools and potential electrical shocks or burns.
  • Improperly wiring the thermostat can damage circuit breakers, electrical panels, or HVAC components.
  • Incompatible thermostats may not work with your specific HVAC system, leading to operational issues.
  • DIY installation can void the manufacturer’s warranty, leaving you responsible for costly repairs.

Our HVAC pros install thermostats correctly. This saves energy and protects your investment. They know HVAC systems inside out.

Our team can help if problems occur later. They’re always ready to offer support and fix issues.

Maintaining Your Thermostat

thermostat maintenance

Proper thermostat care is key for home comfort and energy savings. Regular checks prevent high bills, uneven temperatures, and excess humidity. Taking action early keeps your HVAC running smoothly and your home cozy.

Increase in Energy Bills

A spike in energy costs may signal thermostat trouble. Faulty thermostats make HVAC systems work harder, raising energy use and bills. Clean and calibrate your thermostat often to ensure accurate control and lower costs.

Uneven Room Temperatures

Rooms with different temperatures may indicate thermostat issues. This can happen due to poor placement or faulty sensors. Regular maintenance by a pro can help fix temperature differences in your home.

Excessive Levels of Humidity in Your Home

  • High humidity makes homes stuffy and can cause mold growth.
  • Your thermostat helps control humidity by managing the AC system.
  • If you notice high humidity, have your thermostat checked for accuracy.

Regular thermostat upkeep includes cleaning, battery changes, and calibration. These steps help control humidity and boost home comfort. They also extend your HVAC system’s life.

Keep an eye on your thermostat to save energy and stay comfy. If you spot any issues, call a pro HVAC tech. They can quickly find and fix the problem.

Tips for Choosing the Best Thermostat Repair Experts

Repairing or replacing your thermostat requires skilled HVAC experts with the right experience. Certified technicians are essential for this delicate task. Here are some tips to find top thermostat repair experts:

  1. Look for HVAC companies with a proven track record of reliable thermostat repair services. Check reviews, references, and industry certifications to ensure you’re working with qualified professionals.
  2. Consider the types of thermostats the company specializes in, such as manual, programmable, or smart thermostats. Different models require specialized knowledge and tools for proper installation and repair.
  3. Inquire about the company’s response time and availability for emergency services. Thermostat issues can significantly impact your home’s comfort, so you want a technician who can address the problem quickly.
  4. Ask about the warranty or guarantee on their thermostat repair work. Reputable HVAC experts will stand behind their workmanship and provide assurance for their services.
  5. Verify that the technicians are licensed, insured, and follow industry best practices for thermostat installation and repair. This ensures your safety and the integrity of your HVAC system.

Choosing the right experts ensures your heating and cooling system works efficiently. This can save you money on energy bills. It also keeps your indoor environment comfortable.

Our HVAC professionals are here to help with all your thermostat needs. Don’t hesitate to reach out for repair or replacement services.

Finding the Right HVAC Pros with FindPros

Dealing with a faulty thermostat or other HVAC issues? FindPros can connect you with the best local professionals to get your heating and cooling system back in working order. Whether you need a smart thermostat installation or repair on an older mechanical model, our network of vetted HVAC experts can provide efficient and affordable solutions.

Simply answer a few questions about your home project, and we’ll match you with top-rated pros who can diagnose and fix any problems, from wiring issues to dirty or malfunctioning thermostats. Compare quotes and choose the pro that best fits your needs and budget. Take the stress out of HVAC repairs and maintenance – let FindPros handle it.

Conclusion

A working thermostat is key for home comfort and energy efficiency. Our expert HVAC team can help with outdated or unresponsive thermostats. We offer top-notch thermostat repair, replacement, and installation services.

Our skilled technicians can fix common thermostat issues like dust and wiring problems. We can also adjust the heat anticipator for optimal performance. A well-functioning thermostat ensures consistent comfort and better energy efficiency.

Frequently Asked Questions (Thermostat Repair)

Signs of a malfunctioning thermostat include an increase in energy bills, uneven room temperatures, excessive humidity in the home, and the HVAC unit short-cycling or not turning on when expected.
Before calling a technician, you can try a few basic troubleshooting steps. Check the thermostat batteries, ensure the device is set to the correct mode (heat or cool), and verify the wire connections are secure. If the issue persists, it’s best to call in an HVAC professional.
Upgrading to a smart or programmable thermostat can provide improved temperature control, better energy efficiency, and increased convenience. These modern thermostats allow you to easily adjust the desired temperature and schedule heating/cooling based on your routine.
It’s generally not recommended for homeowners to attempt DIY thermostat repair or replacement. Improper installation can damage the HVAC unit, void warranties, and even create safety hazards like electrical shocks. It’s best to hire a licensed HVAC technician for this job.
To maintain your thermostat, regularly clean it with a small brush to remove any dust or debris. Check the batteries and replace them when needed. Additionally, have your thermostat calibrated by a professional to ensure it’s accurately reading and controlling the home’s temperature.

Termite Inspection & Control

Toilet Repair Near You

Can’t find what you are looking for?

How It Works

  • Answer a few questions about your home project.
  • Within seconds, get matched with top-rated local pros.
  • Compare quotes and choose the best pro for the job.

Termite Inspection & Control In Your Area

Termite Inspection Control: A Comprehensive Guide

Meta Description: Discover expert termite inspection and control methods to protect your home. Learn signs of infestation, prevention tips, and when to call professionals.

Termite Inspection Control

Termites can silently destroy your home. Regular inspections are vital to protect your biggest investment. This guide covers termite inspections, warning signs, and effective protection methods.

Key Takeaways

  • 01Termite inspections should be conducted at least annually to detect early signs of activity and prevent extensive damage.
  • 02Comprehensive inspections involve specialized equipment like moisture meters and thermal imaging cameras to identify hidden termite presence.
  • 03Inspectors provide detailed reports on termite activity, damage, and recommended treatment and prevention strategies.
  • 04Recognizing common termite indicators, such as mud tubes, discarded wings, and wood damage, is crucial for early detection.
  • 05Scheduling regular termite inspections can save homeowners thousands in potential repair costs and ensure the long-term structural integrity of their property.

Understanding the Importance of Termite Inspections

Termites can wreak havoc on homes without homeowners noticing. Early detection is vital to prevent extensive damage. Regular inspections help protect properties and avoid costly repairs.

Early Detection of Termite Infestation

Spotting signs of termite activity is crucial during inspections. These include mud tubes, droppings, wood damage, discarded wings, and live termites. Identifying these signs helps inspectors recommend proper treatment and prevention measures.

Recognizing Signs of Termite Activity

  • Mud tubes on walls or foundations
  • Termite droppings (also called frass)
  • Damaged or hollow-sounding wood
  • Discarded termite wings near light fixtures or windowsills
  • Presence of live termites

Smaller infestations are usually easier to manage than large, widespread ones. Regular checks by pest control experts help identify issues early. This allows for quick action to address the problem.

Good ventilation and proper water drainage help reduce termite risks. Keeping wood away from soil is also important. Understanding these factors helps homeowners protect their properties effectively.

Benefits of Regular Termite Inspections

Warm, humid climate creates a high risk for termite infestations. Regular inspections can prevent significant damage and costly repairs to your property. Early detection of termite activity is crucial for maintaining your home’s integrity.

Professional services offer expertise and tailored solutions for effective pest control. They can spot problems early, saving you from extensive damage to your home. Regular checks provide peace of mind, ensuring your property stays protected.

Termite damage can significantly lower your home’s value. Early detection and treatment can save you money on costly repairs. Inspections help identify vulnerable areas, allowing for targeted treatment and prevention.

Many termite control methods are now eco-friendly. These options provide effective pest management without harming the environment. Annual inspections ensure your home remains protected and secure for years to come.

Tools and Techniques Used in Termite Inspections

termite inspection process

Termite infestations can be hard to spot. Professional pest control companies use careful methods to inspect thoroughly.

They use moisture meters and thermal cameras to find termite signs. These include mud tubes, droppings, and wood damage. This detailed approach helps companies give accurate results and treatment plans.

Inspectors check crawl spaces, attics, and foundations. Advanced devices like microwave sensors help pinpoint infestations. These tools ensure a thorough termite inspection.

  • Moisture meters to detect elevated moisture levels that may indicate termite activity
  • Thermal imaging cameras to identify heat signatures associated with termite colonies
  • Probing and tapping methods to detect hollow or damaged wood structures
  • Visual inspections of accessible areas, including crawl spaces, attics, and foundations
  • Advanced detection devices, such as microwave and ultrasound sensors, to pinpoint the location and extent of the infestation

Interpreting the Termite Inspection Report

A thorough termite inspection results in a detailed report. This document outlines the findings and serves as a guide for addressing termite issues. It helps protect your property from these destructive pests.

Treatment Recommendations

The report suggests specific treatments based on termite activity found. These may include chemical treatments or physical barriers. Chemical options involve targeted pesticide application. Physical barriers might include bait stations or foundation protection.

The report details the most effective plan to eliminate the infestation. It considers the unique aspects of your property and the extent of the problem.

Preventative Measures

The report also provides guidance on preventing future infestations. This may include fixing moisture issues and sealing cracks. Removing wood-to-ground contact around the property is another important step.

These proactive measures can help protect your home from termites. They create an environment that’s less attractive to these wood-destroying insects.

Homeowners can use this report to create a custom treatment plan. By understanding the recommendations, you can take action to eliminate current problems. You’ll also learn how to protect your property from future termite invasions.

Treatment Options for Termite Infestations

Termite control requires a mix of treatment methods. Chemical treatments and physical barriers are two main options. Each has its own benefits for tackling termite problems.

Chemical Treatments

Liquid termiticides are a common chemical treatment for termites. They’re applied to soil or wood to create a protective barrier. These treatments can last up to 10 years.

Pros use Integrated Pest Management to keep homes safe. This approach minimizes harm to the environment and protects people and pets.

Physical Barriers

Physical barriers stop termites from entering homes. They’re made of metal or concrete and installed around foundations. These obstacles prevent termites from reaching the structure.

Choosing between treatments depends on your property’s needs. The severity of infestation and inspection results guide this decision. Always consult a termite expert for the best treatment plan.

Types of Termites and Their Behavior

Termite types

Homeowners should know about two main termite types: subterranean and drywood. These species have different habits and living spaces. Knowing their behavior helps in spotting and controlling them.

Subterranean Termites

Subterranean termites are the most common and harmful in the United States. They live underground and build mud tubes to reach wood in homes. These pests can damage wood, paper, and even pool liners.

You can find subterranean termites in every state except Alaska. Different species live in various regions. For example, Arid-Land Subterranean termites are common in many parts of the country.

Drywood Termites

Drywood termites don’t need soil contact. They can live in attics, furniture, and other dry wood areas. Their colonies are smaller than subterranean termites, but they can still cause major damage.

These termites are often found in coastal, southern, and southwestern states. They’re hard to spot because they don’t make mud tubes. Instead, they push out tiny fecal pellets from infested wood.

Common Areas for Termite Infestation

Termites can invade various parts of your home, causing major damage if ignored. These pests are drawn to places with food and ideal living conditions. Garages, attics, and crawl spaces are often targeted.

Garages and Attics

Garages and attics often have moisture and wood-to-soil contact, attracting termites. Subterranean termites easily access these areas to build colonies. Drywood termites prefer the dry, undisturbed wood in attics.

Regular checks and preventive actions in these spots can stop termite invasions. Look for signs of infestation and address any issues promptly.

Crawl Spaces and Cracks

Termites enter homes through crawl spaces and foundation cracks. These areas often have high moisture and wood debris, perfect for nesting. Seal gaps and ensure proper ventilation in crawl spaces to keep termites out.

Wood Structures and Deadwood

Termites love wooden structures like decks, fences, and siding. They also target deadwood, such as fallen tree limbs and leaves. These materials provide food and entry points for termites.

Check wood-related issues regularly to lower the risk of termite infestations. Address any problems quickly to protect your property.

Spot and fix common termite problem areas early. This helps prevent and control infestations effectively. Remove attractants and block entry points to shield your home from these wood-eating pests.

Preparing for a Termite Inspection

Homeowners can take steps to help with termite inspections. They should ensure easy access to all areas of their home. This includes crawl spaces, basements, and attics.

Remove clutter that might block the inspector’s view. Provide a history of any past termite issues or treatments. Replace burned-out light bulbs for better visibility during the inspection.

Regular inspections help keep homes safe from termites. This is true even if you don’t think you have an infestation.

Corners and edges of walls are key areas for termite checks. Basements and attics are high-risk zones that need easy access. Storage areas under sinks should also be clear for inspection.

Windows, doors, and closets are common entry points for termites. Exterior walls with cracks are vulnerable to termite entry. Clear the outside of your home for better access during inspections.

Tips for Hiring the Best Termite Inspection and Control Professionals

Dealing with termites? Hire the right pros for the job. Orkin and Terminix offer top-notch termite services. Research local pest control options to find your perfect match.

Seek licensed termite inspectors with specialized tools and methods. They should have a proven track record of successful treatments. Expert knowledge is key for this complex task.

  • Hire licensed and experienced termite inspection professionals
  • Look for companies that use specialized equipment and techniques
  • Compare multiple termite control companies to find the best fit
  • Consider the reputation and reliability of the pest control service
  • Understand the treatment options and costs involved

Termites can wreak havoc on your home. Swift action is crucial. Expert inspectors use specialized tools for thorough assessments.

Their know-how ensures effective treatment. This protects your property from costly damage caused by wood-eating pests.

Finding the Right Termite Pros with FindPros

Dealing with termites can be a stressful and costly ordeal for any homeowner. When you suspect termites, you need to act fast to prevent further damage to your home, from drywall and door frames to utility rooms and crawl spaces. FindPros can help you quickly find the best termite inspection and treatment professionals in your area, ensuring you get the most competitive pricing and find a pro you feel comfortable working with.

Simply answer a few questions about your home and termite concerns, and we’ll match you with top-rated local experts who can provide thorough inspections, identify the signs of a brand new colony, and recommend the right termite treatments to rid your house of these destructive pests and prevent future infestations. Don’t let termites hollow out your home and your wallet – let FindPros connect you with the right professionals to keep your property damage-free.

Conclusion

Termite inspection and control are crucial for protecting your home’s structure. Regular checks help prevent costly damage. Recognizing signs of termite activity early can save you money and stress.

Working with experienced professionals is key to safeguarding your property. Regular inspections and treatments provide long-term protection. Quick action is vital, as termite problems can quickly worsen.

Termite inspection and termite control strategies are essential for home protection. These measures help maintain your property’s structural integrity. They also preserve your home’s value.

Prioritizing termite inspections safeguards your investment and family. It helps maintain your property’s value over time. Partnering with experts ensures your home has strong defenses against wood-destroying pests.

Frequently Asked Questions (Termite Inspection & Control)

During a thorough termite inspection, the inspector will look for signs of termite activity such as mud tubes, discarded wings, wood damage, and the presence of live termites. They may also use specialized equipment like moisture meters and thermal imaging cameras to detect hidden infestations.
It’s recommended to get an annual termite inspection to detect any early signs of an infestation. This can help prevent extensive damage and save you money in the long run. Regular inspections are crucial for protecting your home from future termite infestations.
If a termite inspector finds evidence of termites, they will provide a detailed report outlining the extent of the infestation and recommended treatment options. It’s important to act quickly and work with a reputable pest control company to address the issue and prevent further damage to your home.
Some pest control companies offer free termite inspections as part of their service. These inspections can be a great way to get an assessment of your home’s condition and determine if any treatment is needed. However, it’s important to research the company and ensure they use thorough inspection methods.
The cost of a termite inspection and any necessary treatment can vary depending on the size of your home, the extent of the infestation, and the methods used. It’s a good idea to get quotes from multiple pest control companies to find the best option for your budget. Remember that the cost of a professional inspection and treatment is often much less than the potential damage that termites can cause to your home.

Tankless Water Heater Repair

Toilet Repair Near You

Can’t find what you are looking for?

How It Works

  • Answer a few questions about your home project.
  • Within seconds, get matched with top-rated local pros.
  • Compare quotes and choose the best pro for the job.

Tankless Water Heater Repair In Your Area

Tankless Water Heater Repair: What to Expect and How to Find a Pro

Meta Description: Learn about tankless water heater repair, common issues, and how to find expert help. Get tips for maintaining your unit and extending its lifespan for optimal performance.

Tankless Water Heater Repair

Is your tankless water heater acting up? These systems offer efficient, on-demand hot water. But sometimes, they need expert fixes.

Let’s explore signs of needed repairs and the perks of these energy-saving systems. We’ll also guide you in finding a pro to fix your home’s hot water.

Key Takeaways

  • Tankless water heaters can save 27 to 50 percent on fuel costs compared to traditional tank-type heaters.
  • Common tankless water heater issues include little or no hot water, low water pressure, and mineral buildup.
  • Regular maintenance is crucial to prevent damage and ensure optimal performance.
  • Qualified professionals can diagnose and repair a wide range of tankless water heater problems.
  • Tankless water heaters are more energy-efficient and compact compared to traditional tank models.

Signs Your Tankless Water Heater Needs Repair

Tankless water heaters are energy-efficient and provide hot water on demand. But they can have issues that need professional repair. Here are signs your tankless water heater needs attention:

Little or No Hot Water Output

Is your hot water output decreasing? Is the water not getting as hot as it should? This could mean a problem with the heating element or fuel source.

Low Water Pressure

Blocked pipes, sediment buildup, or a failing water pump can cause low water pressure. These issues can affect your tankless water heater’s performance.

The Unit Keeps Turning Off

Is your water heater shutting down often? It might be overheating or have thermostat issues. Problems with gas or electrical supply could also cause this.

The Water Heater Is Leaking

Leaks in the unit or nearby plumbing can signal serious problems. Address these quickly to prevent water damage to your home.

Changes in Water Quality

Is your hot water discolored, cloudy, or smelly? This may indicate heat exchanger problems or sediment buildup. These issues can affect your water quality.

New, Unusual Noises

Hearing banging, popping, or strange sounds from your water heater? These noises could mean mineral deposits or other internal issues.

Other Appliances Aren’t Working Properly

Are your dishwasher or washing machine not working right? The problem might be linked to your tankless water heater.

If you notice these issues, call a professional repair technician right away. They can diagnose and fix the problem quickly. Quick action prevents further damage and costly repairs later.

Benefits of Tankless Water Heaters

Tankless water heaters are energy-efficient and space-saving. They heat water on-demand, saving homeowners 27-50% on fuel costs. These units are compact, taking up less space than bulky tank heaters.

Tankless heaters provide a constant supply of hot water. You’ll never run out unexpectedly. This is a big advantage over traditional tanks with limited storage.

These water heaters last longer, typically up to 20 years. Traditional tank-style heaters usually need replacement every 10-15 years. Tankless models are known for high performance and reliability.

They deliver consistent hot water, even with multiple fixtures in use. This makes them popular for energy-efficient homes. Homeowners value their space-saving features and uninterrupted hot water access.

Like all appliances, tankless heaters may need repairs over time. Regular maintenance is crucial for optimal performance. Flushing the unit and checking for mineral buildup helps ensure longevity.

Common Tankless Water Heater Issues and Fixes

Tankless water heaters provide efficient, on-demand hot water. However, they can face issues that affect their performance. Common problems include no hot water, overheating, and low pressure.

No Hot Water Is Coming

A tankless heater not producing hot water might have a power issue. Check if the unit is receiving electricity or gas. The problem could be a faulty heating element.

If the issue continues, call a professional plumber. They can diagnose and fix the problem correctly.

The Water Is Too Hot

Overheating can happen due to a faulty thermostat or sensor. Try adjusting the temperature settings on the unit. If water remains too hot, have a technician inspect the heater.

Low Water Pressure

Reduced pressure may result from a clogged filter or mineral buildup. Regular maintenance, like flushing the unit, can help. Clean the filter to address low pressure issues.

If problems persist, a pro should check the water supply. They can make adjustments to restore optimal performance.

Fixing these issues quickly keeps your system working well. Recognize potential problems early. Take action to maintain efficient, reliable hot water delivery.

Noisy Tankless Water Heater

Tankless water heaters usually run quietly. Sometimes, they make odd noises. This can happen due to loose parts or sediment buildup inside the unit.

Tightening loose parts or flushing the heater can often fix noisy operation. If noise continues, a pro plumber should check it out. Quick action prevents more damage to the tankless water heater system.

Common noises from tankless water heaters include:

  • Popping sounds after several years of use, indicating sediment buildup
  • Rumbling noises due to significant sediment or debris in the water
  • Crackling sounds from sediments coating tank components and affecting flow rate
  • Hissing sounds, which may indicate a leak
  • Clicking sounds as the flow switch turns on and off, a normal operation function

Regular maintenance keeps your tankless water heater quiet and efficient. Follow the maker’s advice for flushing and descaling. If problems continue, call a licensed plumber for checks and possible warranty fixes.

Discolored Water and Unpleasant Odors

Discolored water or bad smells from a tankless water heater can signal problems. These issues may stem from mineral buildup, rust, or bacteria growth. Quick action is key to keep your heater running well.

Flushing the Unit

Regular flushing helps remove sediment and boost water quality. Follow the maker’s guide to clean your tankless water heater. Use a cleaning solution to clear out mineral deposits and rust.

Water Softener Installation

Hard water areas benefit from water softeners. These devices prevent scale buildup in tankless water heaters. Softer water extends your unit’s life and keeps it working well.

Chlorine Treatment

Bad smells might come from bacteria. A chlorine treatment can fix this issue. This process cleans the system and kills germs, making your water fresh again.

Fixing water quality issues keeps your tankless heater running smoothly. Regular upkeep prevents costly repairs later on. Prompt care ensures your home always has reliable hot water.

Burner Doesn’t Ignite

Tankless water heater burner

A non-igniting burner in a tankless water heater needs quick attention. Possible causes include low gas supply or faulty igniter. Cleaning or replacing parts may fix the issue.

It’s best to have a professional handle this problem. They can safely diagnose and repair the non-functioning burner.

Common reasons for burner ignition failure include:

  • Insufficient gas supply: Ensure the gas valve is fully open and that there is adequate gas pressure to the unit.
  • Malfunctioning igniter or flame sensor: These components may need cleaning or replacement if they are not functioning properly.
  • Buildup of dirt and debris: Over time, the igniter and flame sensor can become clogged with dirt, dust, and other debris, preventing proper ignition.

Other parts like the thermostat may cause ignition problems. In such cases, professional repair services are needed.

Fixing a non-working burner is key to restoring hot water supply. Addressing the root cause ensures your heater works efficiently.

Water Temperature Fluctuation

Unstable water temperatures from tankless heaters can disrupt hot water use. This issue often stems from clogged filters, faulty thermostats, or incorrect settings. Homeowners can take steps to fix these problems and stabilize water temperatures.

Cleaning the Filter

Mineral deposits in water filters can cause temperature changes. Regular filter cleaning helps maintain steady temperatures. Follow the manufacturer’s instructions for best results.

Adjusting Temperature Settings

The ideal setting for tankless heaters is around 120°F. The minimum is about 100°F, while the maximum is 140°F. Commercial use allows up to 180°F. Proper settings prevent sudden temperature shifts.

Replacing Thermostat or Temperature Sensor

Faulty thermostats or sensors can cause ongoing temperature issues. These parts control the heater’s temperature regulation. Replacing them with quality components can restore stable temperatures.

If problems persist, seek help from a professional repair technician. They can diagnose and fix underlying causes. Proper water temperature ensures safe and efficient heater operation.

Leaking Tankless Water Heater

tankless water heater leak

Leaks in a tankless water heater are rare but concerning. Even small leaks need quick attention. They can cause water damage if left unchecked.

Hard water is a main cause of tankless water heater leaks. It’s rich in minerals that build up inside. This can lead to corrosion and tiny holes.

Regular flushing helps remove scale and prevent leaks. High water pressure can also cause leaks. It strains valves and joints, making them weak.

Installing a pressure relief valve and expansion tank helps. Improper installation is another leak source. Loose fittings or bad venting can cause water seepage.

Hire a pro plumber for correct installation. This reduces future leak risks. Watch for signs like water pooling or damp walls.

Minor leaks may be fixed by tightening valves or flushing. For persistent problems, call a professional plumber. They can diagnose and repair issues quickly.

Don’t ignore leaks in your tankless water heater. Regular upkeep prevents costly repairs. Quick action ensures reliable, efficient hot water for your home.

Cold Water Sandwich Effect

The “cold water sandwich” effect is a common issue with tankless water heaters. It happens when hot water runs out and cold water flows before reheating. This creates an unpleasant burst of cold water mid-shower.

To fix this, homeowners can install a mini tank water heater. This small storage tank holds 5-6 gallons of hot water. It acts as a buffer while the tankless heater warms up.

Another solution is to add a small recirculation pump. This helps maintain a consistent water temperature in the tankless heater. It prevents the cold water sandwich problem effectively.

Homeowners can also choose a tankless heater with a delayed shut-off feature. This feature keeps hot water flowing steadily. It minimizes temperature changes for a more comfortable experience.

FindPros: The Reliable Tankless Water Heater Solution

Looking to get your tankless water heater repaired or replaced? FindPros has you covered. Our network of specialized plumbers can handle everything from flushing and maintaining your electric units to providing cost-effective replacements when it’s time for a new water heater. Simply answer a few questions about your home project, and we’ll match you with top-rated local pros who can get the job done right, whether you need a repair or a complete overhaul. Compare quotes and find the perfect pro to keep your hot water running smoothly, without the wear and tear that comes with age. Get the answers you need, sooner rather than later.

Frequently Asked Questions (Tankless Water Heater Repair)

Regular maintenance is crucial to keep your tankless water heater in working order. This includes flushing the unit to remove mineral buildup, checking the heating elements, and ensuring the burners are functioning properly. Proper maintenance can extend the lifespan of your heater and prevent costly repairs down the line.
Signs that your tankless water heater needs repair include little or no hot water output, low water pressure, the unit constantly turning off, leaks, changes in water quality, and unusual noises. If you notice any of these issues, it’s best to call a plumbing company that specializes in tankless water heater repairs.
Common issues include broken heating elements, thermostat problems, and mineral buildup. For gas heaters, the burner not igniting can also be a problem. These issues can often be resolved by flushing the system, cleaning or replacing the heating elements, or adjusting the thermostat. In some cases, the entire unit may need to be replaced.
Newer tankless water heaters are more energy-efficient, compact, and provide a constant supply of hot water, unlike traditional tank-style heaters. They can also last up to 20 years, significantly longer than the 10-15 year lifespan of a standard water heater. The upfront cost may be higher, but the long-term savings on energy bills and reduced maintenance can make a new tankless water heater a worthwhile investment.
Look for a plumbing company that specializes in tankless water heater repairs and maintenance. They should have experience working with both electric and gas-powered units, and be able to diagnose and fix a wide range of issues, from broken heating elements to wiring and insulation problems. Be sure to get quotes from multiple providers to find the most cost-effective solution for your current heater or a new water heater installation.

Swing Set Installation

Toilet Repair Near You

Can’t find what you are looking for?

How It Works

  • Answer a few questions about your home project.
  • Within seconds, get matched with top-rated local pros.
  • Compare quotes and choose the best pro for the job.

Swing Set Installation In Your Area

Hiring a Pro for Your Swing Set Installation: A Guide

Meta Description: Discover the benefits of professional swing set installation. Ensure safety, save time, and create lasting memories for your family with expert assembly and setup.

Swing Set Installation

Thinking about a new swing set but dreading the installation? A professional installer might be your best bet. They can provide a hassle-free, quality setup that ensures safety and fun.

Professional installers offer expertise and specialized tools for correct assembly. They can save you time and reduce stress by handling the entire process efficiently.

Hiring a pro may also be necessary to maintain the manufacturer’s warranty. This investment creates a secure play area for your family to enjoy.

Key Takeaways

  • Professional installers have the expertise and specialized tools to assemble swing sets correctly and safely.
  • Hiring a pro can save you time and reduce stress, as they handle the entire installation process efficiently.
  • Professional installation may be required to maintain the manufacturer’s warranty, providing greater peace of mind.
  • Investing in a professional installer can create a secure and enjoyable play environment for your family.
  • Professional swing set assembly services are widely available across the United States.

Selecting the Ideal Location for Your Swing Set

Safety and accessibility are key when picking a spot for your swing set. Choose a flat area with plenty of space. Keep it at least six feet from power lines or tree limbs.

Avoid areas with underground utilities, sprinklers, or septic tanks. These can cause future maintenance issues. Ensure there’s enough room for kids to run around freely.

Considerations for a Safe and Enjoyable Play Area

Place the swing set where you can see it from multiple windows. This will help you keep an eye on your kids easily.

Check the area’s sun exposure. Hot metal can be dangerous for children playing. Choose a spot that balances shade and sunlight.

  • Ensure a minimum of 6 feet of open space on all sides of the swing set for safe play
  • Choose a location away from the street, providing privacy and security
  • Opt for a flat, level ground to enhance stability and safety
  • Consider future expansion or addition of accessories to prolong the swing set’s usefulness

Carefully evaluate your yard’s layout and features. This helps create a space that’s both fun and secure. Your kids will enjoy their swing set for years to come.

Choosing the Right Swing Set Size and Design

swing set

Selecting a swing set requires careful thought about size and design. It should fit your yard and match your kids’ favorite activities. The perfect swing set will keep your children entertained for years.

Swing sets come in wood, metal, and vinyl-coated frames. Each material has its own benefits and upkeep needs. Wood offers durability and looks great, but needs regular care. Metal and vinyl options usually require less maintenance.

Safety is key when choosing a swing set. Look for recessed hardware, rounded corners, and solid swing beams. Avoid trapezes, climbing walls, and firemen poles for young kids.

Instead, pick features that suit your children’s ages. These might include:

  • Swing bars at appropriate heights (5-ft for little kids, 8-ft to 10-ft for older kids)
  • Comfortable swing seats (belt, rigid, or baby/infant bucket seats)
  • Slides with deck heights ranging from 3-ft to 8-ft, suitable for different age groups
  • Monkey bars with rung heights of 5-ft or less for 2-5 year-olds and 7-ft for 5-12 year-olds
  • Climbing walls, cargo nets, and ropes for engaging physical activities

Consider your yard size when choosing a swing set. Pick a design that will grow with your kids. A deck height of at least 5 feet works well for most ages.

Metal play sets often cost less than wooden ones. Vinyl-covered wooden sets can last 15 to 20 years. Choose wisely to create a fun outdoor space your kids will love.

Preparing Your Yard for Swing Set Installation

Proper yard prep is key before installing your new swing set. Clear debris, move hazards, and measure the play area. Leveling the ground is crucial for stable playground equipment.

Remove grass and dirt where the swing set will go. Measure the depth for cushioning material like wood chips or rubber mulch. Use a carpenter’s level to ensure a flat base.

Add a DIY playground border with low shrubs or landscape accessories. This defines the play area and keeps surface material in place. It also improves the yard’s look.

  1. Clear the yard of any debris, rocks, or other potential hazards.
  2. Measure the designated area to ensure ample space for the swing set and surrounding play zone.
  3. Level the ground by removing grass and dirt, then use a carpenter’s level to ensure a flat base.
  4. Determine the appropriate depth for the cushioning material, such as wood chips or rubber mulch.
  5. Consider adding a DIY playground border to define the play area and contain the surface material.

A well-prepared yard creates a safe base for your swing set. This allows kids to enjoy outdoor fun and adventure safely.

Playground Surface Options

Choosing the right playground surface is key for your swing set’s safety. After installation, add a shock-absorbing surface to cushion falls. Protective materials should be 9 to 12 inches deep, based on deck height.

Natural grass doesn’t provide enough cushioning. Better options include wood mulch, shredded rubber, sand, pea gravel, or rubber mats and pavers. Each has unique pros and cons.

Rubber-based surfaces offer top safety and accessibility. Rubber mulch gives the best impact absorption, protecting against 10-foot falls with 6 inches of depth.

Wood mulch absorbs shock well but may pose choking risks for toddlers. It needs yearly replacement and more maintenance.

Consider safety needs, accessibility, and long-term maintenance when picking a playground surface. The surface should fit the swing set’s height and all users’ needs.

Your ideal playground surface depends on your needs, budget, and swing set design. A careful choice creates a safe, fun play area for years.

Swing Set Anchors for Stability

Proper anchoring is key for a safe swing set. Use the right system to keep it stable. Most kits include metal stakes or anchors for installation.

DIY installers can find extra anchors and hardware easily. These parts are great for replacements too.

Here are some anchor options to think about:

  • Concrete Anchors: These provide a permanent, strong base suitable for all conditions, including hard or rocky soils.
  • Metal Earth Anchors: While easy to install, these can struggle in challenging soil types.
  • Screw-in Ground Anchors: Simple to install and adjust, but they may loosen over time and offer less long-term durability.

Always follow the maker’s instructions when installing anchors. Check your swing set often to keep it safe.

Regular ground anchors or stakes cost $15 to $40. Larger swing sets might need $100 or more in anchoring materials.

Anchoring keeps your swing set from tipping or swaying. It’s a must for safety and meets ASTM playground standards.

Good anchors make your swing set safe for years. Kids can play and have fun without worry.

Tips for Choosing the Best Swing Set Installation Experts

swing set installers

Skilled installers can ensure your playset is set up safely and efficiently. Professional swing set installation services offer many benefits. They handle the job with utmost care and expertise.

Seek installers with a proven record of successful projects. They should have the right tools and equipment for the job. Look for those who understand safety protocols and liability issues.

  • Find installers with lots of experience in assembling playground equipment.
  • Make sure they have the proper tools and equipment for smooth installation.
  • Choose installers who offer warranties on their work for peace of mind.

Expert installers can give tips to customize your swing set. They can handle everything from site prep to final assembly. This allows you to relax and enjoy the process.

Picking the right experts ensures your swing set is secure and properly built. It will be ready for years of safe, fun playtime. Hiring pros can save you time and prevent safety issues later.

FindPros: Find Your Swing Set Installation Experts

Navigating the process of swing set installation can be daunting. But with FindPros, you can access a network of top-rated local professionals who specialize in this service. Simply answer a few questions about your project, and we’ll match you with the best-suited pros in your area. Get the best pricing when multiple experts compete for your job, and find the professionals you’ll get along with best.

Our streamlined process ensures a hassle-free experience, from delivery to final installation. No need to worry about access, permissions, or property removal – our pros handle it all. Get started today and let FindPros deliver the perfect swing set setup for your family.

Conclusion

Professional swing set installation offers many perks for families. It boosts safety, saves time, and gives peace of mind. Expert installers ensure proper assembly and avoid common mistakes.

They can customize your swing set and follow manufacturer rules. This creates a safe play area for your kids to enjoy. Your children can make happy memories in a secure space.

Hiring pros is smart when setting up a new swing set. It’s also wise when upgrading an old one. Your family’s safety and fun are worth the investment.

Frequently Asked Questions (Swing Set Installation)

Hiring professional installers like Gorilla Playsets is the best way to ensure your swing set is assembled and installed correctly. They have the expertise and specialized tools to follow the manufacturer’s instructions and safety protocols.
Before the swing set is delivered, you should inspect the area where it will be installed, remove any debris or obstacles, and check the dimensions to make sure it will fit properly in your backyard. You should also obtain any necessary permissions or permits from your homeowner’s association or local authorities.
If the swing set arrives with any damage or missing parts, you should immediately contact the manufacturer or the installation company. Do not attempt to assemble or install the swing set until the issue has been resolved. Refer to the manufacturer’s instructions for the proper procedure to report and address any problems.
Before the swing set is installed, you should clear the area of any trees, bushes, or other obstacles that could interfere with the installation process. You should also ensure the ground is level and firmly packed down to provide a stable foundation for the swing set.
After the swing set is installed, you should thoroughly inspect it to ensure it is secure and stable. Check all the hardware and connections, and make sure the swing set is anchored properly. If you notice any issues, such as loose parts or broken components, you should schedule a service appointment with the installation company to address the problem.

Swamp Cooler Installation

Toilet Repair Near You

Can’t find what you are looking for?

How It Works

  • Answer a few questions about your home project.
  • Within seconds, get matched with top-rated local pros.
  • Compare quotes and choose the best pro for the job.

Swamp Cooler Installation In Your Area

Swamp Cooler Installation: A Guide to Finding the Right Experts

Swamp Cooler Installation

Key Takeaways

  • Swamp coolers are a cost-effective and energy-efficient alternative to traditional air conditioners.
  • Professional installation is recommended to ensure optimal performance and proper ventilation.
  • Choosing the right size and brand of swamp cooler is crucial for maximum cooling effectiveness.
  • Proper maintenance and upkeep are essential for maintaining the efficiency and longevity of your swamp cooler.
  • Selecting experienced and reputable installation experts can make all the difference in a successful swamp cooler installation.

Understanding Evaporative Cooling Systems

Evaporative coolers, or swamp coolers, offer a natural way to beat the heat. They pass outdoor air over water-saturated pads, causing water to evaporate. This process cools the air before it enters your home.

These systems use about 25% of the energy that traditional air conditioning systems use. This makes them cost-effective and eco-friendly.

How Evaporative Coolers Work

Evaporative coolers draw in warm, dry outdoor air. They pass this air through water-saturated pads. As water evaporates, it cools the air and increases its humidity.

The cooler, more humid air then flows throughout your home. This creates a refreshing and comfortable environment.

Advantages of Swamp Coolers Over Traditional Air Conditioners

  • Energy-efficient operation, using about 25% of the energy required by traditional air conditioners
  • Provide a steady stream of fresh, outdoor air unlike recirculated air conditioning systems
  • Cost about half as much to install as central cooling systems
  • Suitable for dry climates where they can effectively lower temperatures by 5°F to 15°F
  • Require less maintenance compared to traditional air conditioning units

Swamp coolers use evaporation to cool your home. They’re simple and energy-efficient, making them popular in many regions.

Installation Methods: Roof-Mounted vs. Ground-Mounted

Swamp coolers can be installed in two main ways: roof-mounted or ground-mounted. Each method has its own benefits and considerations. Choosing the right one depends on your home and climate needs.

Roof-Mounted Swamp Coolers

Roof-mounted swamp coolers are common, especially for commercial buildings. They sit directly on the roof and use air ducts to spread cool air. These units can work well but may need more upkeep than ground-mounted ones.

Their high position can make maintenance tricky. There’s also a chance of roof leaks. Keep these factors in mind when considering roof-mounted coolers.

Ground-Mounted Swamp Coolers

Many experts and homeowners prefer ground-mounted swamp coolers. These units are placed on the ground near the building’s outside walls. They’re easier to maintain and less likely to cause roof problems.

Ground-mounted coolers work well for homes. They offer better air flow and are less noticeable than roof units. This makes them a popular choice for residential use.

Good airflow is key for any swamp cooler setup. Work with pros to ensure your system runs well and safely. Think about the pros and cons of each method before deciding.

Selecting the Best Swamp Cooler Brand and Model

swamp cooler models

Swamp coolers are a popular choice for beating the summer heat. These systems use less electricity than traditional air conditioners. To find the right cooler, consider space size, climate, and energy efficiency.

Champion, MasterCool, and Breezair offer various swamp cooler models. Portable units cool spaces up to 300 square feet. Larger models handle bigger areas.

Water capacity, CFM rating, and cooling media type affect a cooler’s performance. These factors are important when choosing a model.

Swamp coolers excel in arid climates. They can lower room temperatures by 7-10 degrees Celsius. These coolers also add helpful humidity to the air.

Using water instead of chemical refrigerants makes swamp coolers eco-friendly. This feature sets them apart from traditional air conditioning systems.

Consider your cooling needs, energy requirements, and budget when selecting a swamp cooler. Research thoroughly to find a reliable, high-quality system for summer comfort.

Cost Considerations for Swamp Cooler Installation

Swamp coolers offer a budget-friendly cooling solution. Installation costs vary based on unit size, complexity, and location. Understanding these expenses helps you plan effectively.

Initial Installation Costs

Roof-mounted swamp coolers cost $1,300 to $3,600 to install. Ground-mounted units range from $1,100 to $3,300. The national average for mounted coolers is $2,300.

Window-mounted coolers are cheaper, costing $350 to $1,100. Ducted evaporative coolers run $1,300 to $3,600, including the unit. Portable coolers are the most affordable, priced $100 to $1,500.

Operating and Maintenance Costs

Swamp coolers are energy-efficient, but ongoing costs exist. Monthly operating expenses range from $20 to $60, depending on utility rates and usage.

Regular maintenance is crucial for optimal performance. Aspen pads cost about $40, while cellulose pads range from $40 to $65. Repairs may add to overall maintenance costs.

Knowing these factors helps you budget for a swamp cooler that fits your needs and finances.

Preparing for Swamp Cooler Installation

Getting ready for a swamp cooler setup is vital. Good ventilation is key. Open windows or vents let warm air out as cool air comes in.

Working with pros is smart. HVAC contractors can guide you through prep work. They’ll handle the installation process and ensure proper setup.

Experts can help pick the right size and model for your space. This ensures the best cooling performance for your needs.

Ensuring Proper Ventilation

  • Open windows or vents to allow warm air to escape as the cooler air is brought in
  • Seal any gaps or leaks around windows to prevent cool air from escaping
  • Consider installing additional vents or fans to improve air circulation

Coordinating with Professionals

  1. Consult with experienced HVAC contractors to understand the necessary preparations
  2. Work with them to determine the right size and model of swamp cooler for your home
  3. Rely on their expertise to handle the installation process and ensure proper configuration

Prepping your home is crucial for a smooth swamp cooler installation. Working with qualified professionals ensures the best setup. This leads to effective cooling all summer long.

Swamp Cooler Maintenance and Upkeep

swamp cooler maintenance

Regular swamp cooler maintenance is key for efficiency and longevity. Clean and replace pads at least once per season. Address issues like leaks and airflow problems to keep it running smoothly.

Regular Cleaning and Pad Replacement

Remove sediment and mineral buildup by cleaning your swamp cooler regularly. Wipe the exterior with a soft, damp cloth. Clean the water reservoir with soapy water.

Replace the cooling pads at the start and midpoint of the cooling season. This ensures optimal performance of your unit.

Addressing Common Issues and Repairs

Your swamp cooler may develop leaks, malfunctioning parts, or airflow problems over time. Fixing these issues quickly is vital for maintaining cooling efficiency.

Check for and fix any leaks. Inspect and replace worn-out parts. Ensure proper airflow through the unit.

A regular maintenance routine keeps your swamp cooler running at its best. This provides cost-effective and energy-efficient cooling for your home or business.

Considerations for Humid and Dry Climates

Swamp coolers work differently in various climates. In humid areas, they may increase indoor moisture, making traditional air conditioning a better choice. Dry climates benefit more from swamp coolers, which can cool indoor temperatures significantly.

In hot, dry summers, swamp coolers shine. They can lower indoor temps by up to 30 degrees Fahrenheit. These coolers are more energy-efficient and cost-effective than traditional AC systems.

Swamp coolers also improve indoor air quality in dry climates. They add moisture to the air, maintaining comfortable humidity levels. This helps prevent dry skin, irritated sinuses, and static electricity buildup.

Climate zones play a crucial role in choosing the right cooling system. Humid regions may prefer traditional air conditioners. Dry climates can benefit from swamp coolers’ effectiveness and energy efficiency.

Finding Reliable Swamp Cooler Installation Experts

Hiring qualified professionals for swamp cooler installation is essential. Homeowners should carefully check contractors’ credentials, licensing, and expertise. This ensures the job is done right.

Checking Credentials and Licensing

Look for experts with industry certifications, licenses, and years of experience. Reputable companies often display their credentials on their website. They should also be willing to share them when asked.

Verifying these details gives you peace of mind. You’ll know your installation will be handled correctly.

Reading Customer Reviews and Testimonials

Online reviews offer insights into a contractor’s work quality and customer service. Research past clients’ feedback to understand the contractor’s performance. This helps you make an informed choice.

By vetting credentials and reviews, you can find qualified professionals. They’ll deliver a successful outcome for your cooling system installation.

The FindPros Advantage for Swamp Cooler Services

Searching for reliable swamp cooler repair or replacement experts can be a daunting task. Fortunately, FindPros can connect you with top-rated local professionals in your area who specialize in servicing old swamp coolers and heating appliances. Simply answer a few questions about your home project, and we’ll match you with the best-fit pros.

You’ll get fast access to competitive quotes, so you can find the right expert for the job without the hassle. No need to sweat over the cost – FindPros ensures you get the best pricing when multiple pros compete for your business. Don’t wait, let FindPros handle the heavy lifting and find the perfect pro to keep your home cooling efficiently.

Conclusion

Installing a swamp cooler creates a comfortable, energy-efficient home in dry climates. Understanding evaporative cooling, exploring installation methods, and choosing the right brand and model are crucial. Reliable experts ensure a successful swamp cooler installation.

Proper preparation and maintenance make a swamp cooler a cost-effective, eco-friendly cooling solution. It reduces energy consumption and greenhouse gas emissions while improving indoor air quality. This makes it a great alternative to traditional air conditioning systems.

Knowing the pros and cons of evaporative cooling helps homeowners make informed decisions. Proper installation and maintenance ensure optimal performance. Working with experienced professionals is key to tailoring your cooling system to your needs.

These insights will help you confidently start your swamp cooler installation. Enjoy the benefits of a comfortable, energy-efficient, and eco-friendly home.

Frequently Asked Questions (Swamp Cooler Installation)

An evaporative cooler and a swamp cooler are the same thing – they both use the process of evaporation to cool the air in your home. The terms are often used interchangeably.
The first sign that your swamp cooler needs repair is if it’s not functioning efficiently. You may notice reduced airflow, strange noises, or if the fan isn’t working properly. It’s important to address any issues quickly to keep your home cooling effectively.
Older swamp coolers can experience a variety of issues over time. The motor may wear out, the water pump can fail, and the cooling pads may become clogged with mineral buildup. These problems can affect the overall performance and efficiency of your swamp cooler.
Regular maintenance is key to keeping your swamp cooler functioning efficiently. Be sure to clean the water reservoir and replace the cooling pads at the start and middle of the cooling season. You should also check the belts and ductwork to ensure everything is in good working order.

Sunroom Builders

Toilet Repair Near You

Can’t find what you are looking for?

How It Works

  • Answer a few questions about your home project.
  • Within seconds, get matched with top-rated local pros.
  • Compare quotes and choose the best pro for the job.

Sunroom Builders In Your Area

Sunroom Builders: Find the Best for Your Home

Sunroom Builders

Key Takeaways

  • Identify the purpose and function of your desired sunroom to guide the design and construction process.
  • Look for sunroom builders with extensive experience, a strong portfolio, and positive customer reviews.
  • Prioritize quality craftsmanship and energy-efficient materials for long-lasting comfort and value.
  • Ensure the contractor is licensed, insured, and committed to open communication throughout the project.
  • Compare multiple estimates to find the best balance of cost, quality, and customer service.

Assessing the Sunroom’s Condition

The first step in any sunroom repair project is to evaluate its current state. A professional assessment helps identify structural issues, window and frame damage, and leaks or moisture problems. This allows for a tailored restoration plan to address the sunroom’s needs.

Identifying Structural Issues

Structural movement requires immediate repair to prevent costly future issues. This includes shifts, cracks, or instability in walls or foundation. A damaged roof can pose safety risks and reduce functionality.

Timely repairs are necessary to prevent collapse and ensure the sunroom’s safety.

Evaluating Window and Frame Damage

Cracked or foggy glass panes can lead to energy loss and discomfort. Assessing frames for rot, insect damage, cracks, or water staining is crucial.

This evaluation helps determine if reglazing is possible or if replacement is needed.

Checking for Leaks and Moisture Problems

Leaky windows and roofs can cause mold growth and wood rot. These issues can compromise the sunroom’s structural integrity, requiring professional attention.

Drafts and temperature changes can impact energy efficiency. If left unrepaired, they may lead to higher utility bills.

A thorough professional assessment helps create a comprehensive restoration plan. This ensures the sunroom’s long-term functionality and beauty.

Replacing Damaged Windows and Frames

Sunrooms often have worn-out windows and frames. This can affect how they work and look. Experts are needed to remove old parts and install energy-efficient windows.

New windows match the sunroom’s style and let in more light. They also improve air flow. This makes the space more attractive and useful.

Window replacement fixes air leaks and poor insulation. It leads to better comfort and lower energy bills. Homeowners can enjoy a more eco-friendly living space.

Experts may need to fix sunroom frames too. Bad frames can make the sunroom unsafe. Replacing these parts ensures the room lasts longer.

Replacing windows and frames needs careful planning. It also requires attention to detail. Professional contractors have the skills to do a great job.

Repairing Structural Elements

Structural integrity is vital for your sunroom’s safety and longevity. Professionals assess the framework and fix any underlying issues. This ensures a secure and durable space for years to come.

Reinforcing Weakened Supports

Older sunrooms may have minimal structural support. Experts identify and strengthen these weak areas. They might add new beams, posts, or bracing for improved stability.

Repairing Damaged Beams

Sunroom beams can suffer damage from weather, pests, or structural shifts. Skilled technicians evaluate the damage carefully. They then perform targeted repairs to ensure beam strength and support.

Ensuring a Sturdy Foundation

A solid foundation is crucial for sunroom stability. Professionals check for cracks, settlement, and other issues. They use effective repair techniques to create a reliable base for the structure.

Repair experts focus on these key structural elements. Their work reinforces the sunroom’s framework. This creates a safe, long-lasting space for all to enjoy.

Enhancing Insulation and Energy Efficiency

insulation

Building an energy-efficient sunroom can boost comfort and cut utility costs. Focus on insulation and weatherproofing to maintain consistent temperatures year-round. This approach minimizes the need for excessive heating or cooling.

Proper insulation is key to improving a sunroom’s energy efficiency. Expert contractors can add high-performance materials to walls, ceilings, and floors. This prevents heat transfer and air leaks.

Quality insulation and strategic sealing help maintain comfortable indoor temperatures. These measures work regardless of outdoor conditions. They create a cozy space for all seasons.

The choice of windows and glazing is crucial for energy efficiency. Energy-efficient windows with low-emissivity coatings reduce heat gain in summer and loss in winter. Proper ventilation also helps regulate temperature and maximize comfort.

Prioritizing these elements creates a beautiful and cost-effective sunroom addition. Your investment will pay off through lower utility bills and year-round comfort. Enjoy your new space without worrying about energy costs.

Upgrading Lighting and Electrical Systems

Upgrading lighting and electrical systems is key to a welcoming sunroom. Modern fixtures offer better illumination and a cozy feel. Updated wiring ensures safety and allows for various appliances, making the space more versatile.

Installing Modern Fixtures

Old lighting can hurt a sunroom’s look and function. New fixtures boost visual appeal and lighting quality. They provide efficient, adjustable light for relaxation, entertainment, or tasks.

Updating Electrical Wiring

A safe, working electrical system is vital for your sunroom. Pros will check and update wiring to meet current codes. This may include new outlets and stronger wiring for lights and devices.

Focusing on these upgrades makes your sunroom safe and appealing. It will blend well with your home’s design and function.

Cleaning and Care Routine

A clean sunroom looks great and lasts longer. Regular care keeps it weather-resistant and functional. Let’s explore how to clean and maintain your sunroom.

Glass Maintenance

Keep your sunroom windows sparkling clean. Use mild soap and soft cloths or squeegees for interior and exterior glass. Remove hard water stains carefully.

Check the seals and edges around the glass. Look for any signs of damage or wear. Address issues promptly to prevent further problems.

Frame Maintenance

Sunroom frames need specific care based on their material. Use mild detergent for aluminum or vinyl frames. Wood frames require special wood cleaners.

Rinse frames thoroughly after cleaning. Inspect them regularly for any damage. Proper care ensures the frames stay strong and attractive.

A consistent cleaning routine keeps your sunroom beautiful. Regular maintenance extends its lifespan. Your sunroom will remain a stunning addition to your home.

Specialized Maintenance Tasks

tree trimming

Sunroom upkeep involves more than just regular cleaning. Special tasks are vital for keeping it beautiful and functional. Let’s look at three key maintenance practices for your sunroom.

Tree Trimming

Overhanging branches can harm your sunroom’s looks and safety. Regular trimming keeps your view clear and prevents damage from falling limbs. This protects your sunroom’s structure and lets you enjoy it worry-free.

Lubrication of Moving Parts

Smooth operation of windows and doors is crucial for your sunroom. Lubricating hinges and tracks guards against rust and binding. This simple task helps keep your sunroom working well for years.

Gutter Cleaning

Clean gutters are essential for your sunroom’s health. Clogged gutters can cause water damage to the structure and foundation. Regular clearing prevents leaks and protects your sun-filled retreat.

These tasks protect your sunroom’s functionality, safety, and aesthetic appeal. By doing them, you’ll enjoy your sunroom’s beauty for years to come.

Common Sunroom Issues and Repairs

Sunrooms often face more wear and tear than other home areas. Leaky window seals and damaged screens are two frequent problems. Quick fixes are key to keeping your sunroom cozy and protected.

Leaky Window Seals

Sunroom window seals can break down over time. This lets moisture in, causing water damage and mold. Experts can spot and fix these leaks fast.

They’ll restore your sunroom’s protection against the weather. This stops more moisture problems from happening.

Damaged Screens

Weather can wear out, tear, or harm sunroom screens. This makes it hard to keep out bugs and debris. Quick screen fixes or swaps are vital.

They keep your sunroom safe and looking good. Regular checks help maintain its protective role.

Fixing these issues keeps your sunroom comfy for years. Regular checks and quick repairs are crucial. They keep your sunroom in top shape and boost its value.

Tips for Hiring the Best Sunroom Repairing Professionals

Restoring an old sunroom needs skilled experts. Look for a company with experience and top-quality service. A proven track record and specialized expertise are crucial.

Check credentials and read references before hiring. Get detailed cost estimates for your project. A reliable expert crew can fix structural issues and window damage.

Choose a contractor with great project management skills. Good communication and attention to detail are important. A reputable company will provide a thorough evaluation.

The best sunroom repair professionals ensure careful renovation. They create beautiful, functional spaces. Your sunroom will add value to your home.

Professional Sunroom Repair with FindPros

If your sunroom has fallen victim to leaks, storm damage, or other weather-related issues, the team at FindPros can help. Just fill out a simple online form, and we’ll match you with top-rated local sunroom repair experts who can address the necessary repairs and upgrades. From fixing leaky roofs and replacing damaged panels to upgrading lighting and improving insulation, our network of professionals has the skills to restore your sunroom to its former glory.

And with our platform, you can compare repair costs and labor estimates to ensure you get the best value for your money. Don’t let a leaky sunroom or similar issues block your path to a comfortable, well-maintained living space. Let FindPros connect you with the right sunroom repair professionals to get your project fixed, upgraded, and ready for you to rest and enjoy.

Conclusion

Restoring an aging sunroom can breathe new life into this cherished space. By addressing structural issues and improving insulation, homeowners can create a beautiful and functional sunroom. Upgrading key systems makes the space more cost-effective to maintain.

Professional guidance ensures the sunroom remains valuable for years to come. Regular maintenance and specialized care are crucial. These efforts unlock the full potential of this versatile living space.

A comprehensive approach to restoration yields significant benefits. Improving insulation, upgrading lighting, and fixing structural issues are key steps. This investment creates an aesthetically pleasing and energy-efficient sunroom.

The result is an enhanced living experience and increased property value. Homeowners can enjoy their revitalized sunroom for years to come.

Frequently Asked Questions (Sunroom Repair)

Homeowners may face issues like leaky window seals, damaged screens, structural problems, and issues with the roof or glass panels. These can lead to moisture damage, loss of energy efficiency, and safety concerns if not addressed.
Homeowners should schedule regular maintenance tasks like cleaning windows, lubricating moving parts, and trimming nearby trees. Addressing minor leaks or screen damage quickly can prevent more costly future repairs.
When hiring sunroom repair professionals, homeowners should check their credentials, experience, and references. Getting detailed cost estimates and discussing the repair plan is also important to ensure a successful project.
Fixing structural issues, improving insulation, and upgrading lighting and electrical systems can make the sunroom more energy-efficient, comfortable, and visually appealing. This can increase the home’s value and provide a more enjoyable living space for the family.
Homeowners should regularly inspect the sunroom for any signs of leaks, cracks, or other weather-related damage. Fixing issues like a leaky roof or replacing damaged panels or glass walls can help prevent further damage and maintain the sunroom’s integrity.