Sump Pump Installation

Sump Pump Installation Near You

Can’t find what you are looking for?

How It Works

  • Answer a few questions about your home project.
  • Within seconds, get matched with top-rated local pros.
  • Compare quotes and choose the best pro for the job.

Sump Pump Installation In Your Area

Sump Pump Installation: Protect Your Home from Water Damage

Meta Description: Discover the essentials of sump pump installation to safeguard your home from water damage. Learn costs, types, and professional tips for optimal protection.

Sump Pump Installation

Is your basement at risk of water infiltration? Heavy rainfall and rising groundwater can cause costly damage to homes. Statistics show that 98% of basements face water issues.

Excess water leads to mold, mildew, and foundation problems. But there’s a solution that can protect your home from these threats.

Key Takeaways

  • Sump pump installation is essential to prevent water damage in basements and crawlspaces.
  • Correctly installed sump pumps help maintain the structural integrity of homes, preventing costly repairs.
  • Professional installation ensures the right sump pump is chosen and set up for optimal performance.
  • Regular maintenance is crucial for sump pump effectiveness, including checking for clogs and replacing worn-out parts.
  • Backup power solutions like battery backups are vital to keep the sump pump running during power outages.

Understanding the Importance of Sump Pumps

Basements are at risk of water damage from rain, snow, or rising groundwater. A reliable sump pump prevents costly issues like flooded basements and damaged belongings. It also stops mold growth and protects your home’s foundation.

Preventing Costly Water Damage

Up to 30% of homes in flood-prone areas risk water damage. Without a sump pump, repairs can cost $2,500 to $7,500 per incident. A well-maintained sump pump system effectively removes excess water, protecting your home from flooding.

Maintaining a Healthy Indoor Environment

Excess basement moisture can lead to mold and mildew growth. This harms indoor air quality and poses health risks. Sump pumps control moisture levels, potentially reducing harmful fungi by up to 80%.

Protecting Your Home’s Foundation

Water exposure weakens a home’s foundation, causing structural issues. Sump pumps remove groundwater, preventing moisture buildup around the foundation. This protects your investment and can increase property value by 1-2%.

How Sump Pumps Work

Sump pumps protect homes from water damage. The system’s core is the sump pit and basin. These collect excess water in basements or crawl spaces.

A submersible pump with a float switch sits in the pit. When water rises, the switch activates the pump. It then pushes water out through a discharge pipe.

Sump Pit and Basin

The sump pit collects water seeping into basements or crawl spaces. The basin holds the pump and water. Together, they remove excess moisture from foundations.

This process prevents water damage and keeps indoor air healthy. It’s vital for maintaining a dry home environment.

Pump Components and Operation

  • The submersible sump pump actively removes water from the sump pit.
  • The float switch detects water levels and controls the pump’s operation.
  • Rising water triggers the switch, activating the pump to remove excess water.

Discharge and Check Valve

The discharge pipe carries water away from the home. It often leads to a storm drain or dry well.

A check valve in the pipe stops water from flowing back. This ensures the system works efficiently to keep your home dry.

Types of Sump Pumps

Sump pumps are vital for protecting homes from water damage. Two main types exist: sump pumps and submersible sump pumps. Let’s explore their differences to help you choose the right one.

  • Pedestal Sump Pumps: Pedestal sump pumps have motors mounted on top of columns. They’re compact and fit well in smaller sump pits. These pumps are often more budget-friendly than submersible options.
  • Submersible Sump Pumps: Submersible sump pumps are fully submerged in water. They’re more powerful and efficient, making them ideal for larger sump pits. These pumps offer quieter operation and can handle higher water volumes.

When choosing a sump pump, consider your basement size and water accumulation frequency. Also, think about available power sources. These factors will guide you to the best pump for your needs.

Sump Pump Installation Process

Proper sump pump installation is vital to protect your home from water damage. Professional plumbers or contractors handle this process best. Let’s look at the key stages of sump pump installation.

Site Assessment and Planning

A thorough site assessment is the first step. The technician evaluates your home’s needs and determines the right sump pump size. They also find the best spot for the sump pit.

This careful planning ensures the system fits your unique needs. It also makes sure the pump will work effectively.

Excavation and Pit Preparation

After assessment, the technician digs a hole for the sump pump basin. The pit must be wide and deep enough. They then add gravel to the bottom for a stable foundation.

Pump Installation and Wiring

Next, the submersible sump pump goes into the pit. It’s connected to the discharge pipe. The technician installs electrical wiring for the pump and float switch.

Finally, they test the entire setup. This ensures it works properly and catches any issues.

Professional sump pump installation gives homeowners peace of mind. It ensures the system is installed correctly and ready to protect against water damage. Skilled technicians focus on site assessment, excavation, pit preparation, pump installation, and wiring.

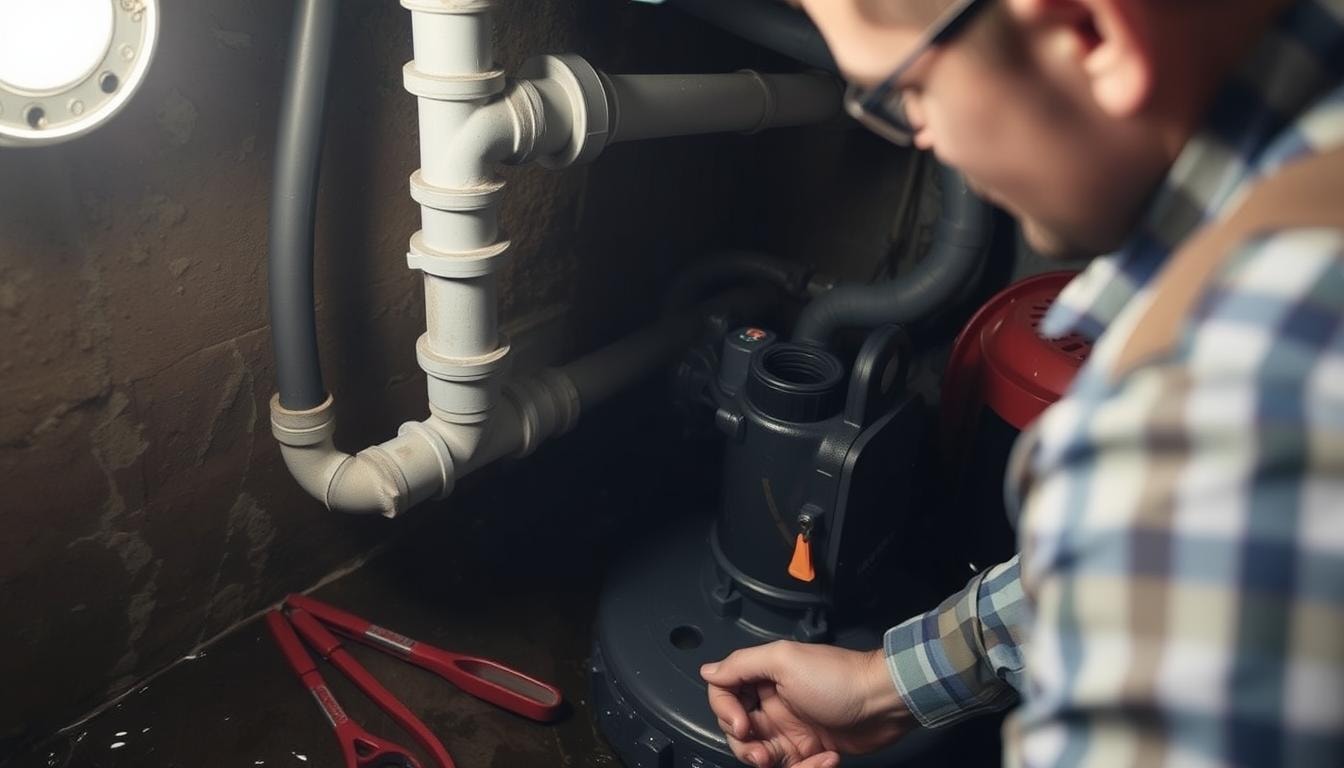
Maintaining and Troubleshooting Your Sump Pump

Regular sump pump care keeps your home safe from water damage. Check and clean it often to ensure it works well.

Regular Inspections and Cleaning

Check your sump pump once or twice yearly. Look for debris in the pit and clean the pump parts. Professional maintenance costs about $150 to $250 per year.

Testing and Monitoring Water Levels

Test your sump pump yearly by pouring water into the pit. Make sure it turns on and removes the water. Watch water levels in the pit to spot any pump issues early.

Service your sump pump at least once a year. A pro should check it during this time. Replace your pump after about 10 years, even if it still works.

If your pump runs non-stop or acts strange, it might need replacing. Keep an eye on these signs.

Good care can make your sump pump last longer. It will protect your home from water damage better. Regular upkeep helps avoid costly fixes later on.

Backup Power Solutions for Sump Pumps

Generator Backup Sump Pump

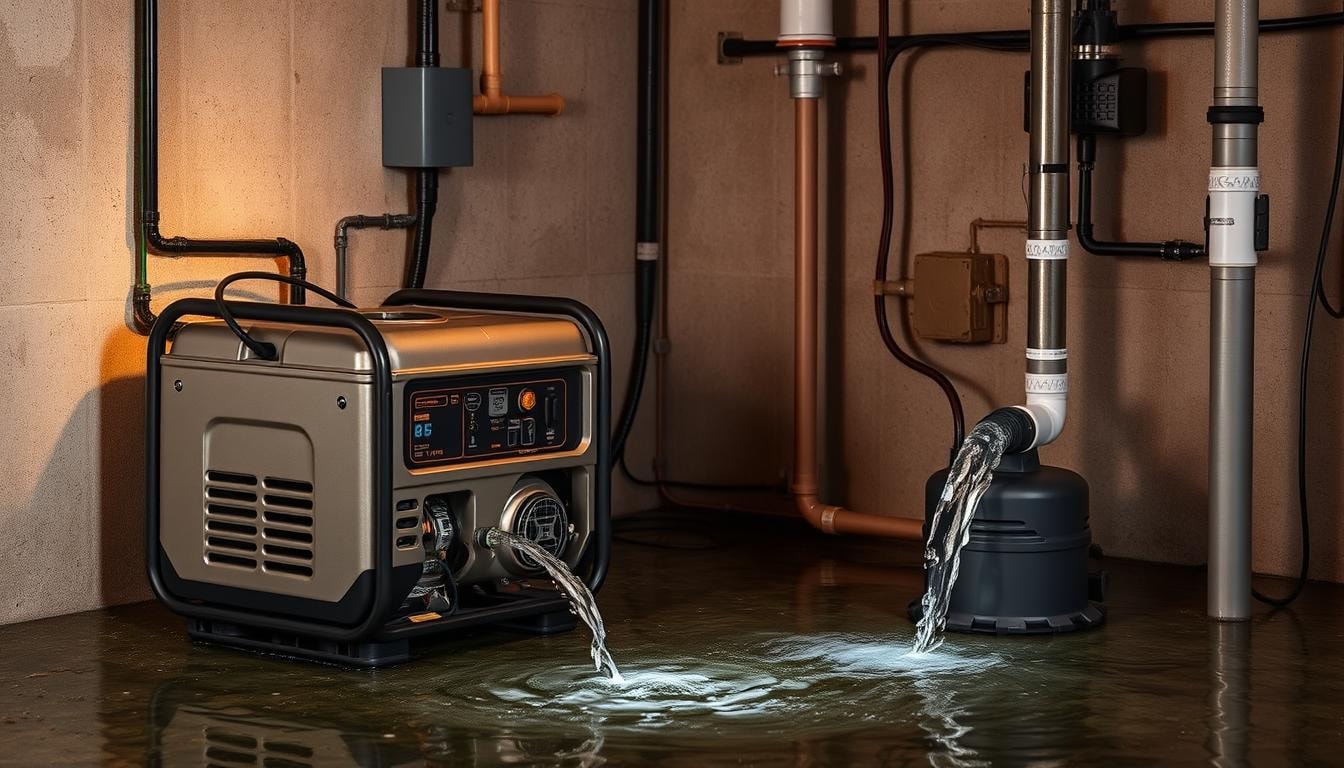
Sump pumps need reliable power sources, especially during outages when flood risk is high. Battery backup sump pumps work when the main power fails. This safeguards against flooding and water damage.

Battery Backup Sump Pumps

Battery backup sump pumps offer extra protection for homes. They have a secondary pump running on a dedicated battery. These systems can operate for hours or days during power failures.

This gives homeowners peace of mind and protects their property from water damage.

Generator Backup Systems

Connecting sump pumps to backup generators ensures protection during long power outages. This setup allows pumps to work seamlessly when main power is down. Integrating sump pumps with generators maintains reliable sump pump backup power.

Choosing between a battery backup sump pump or generator backup system depends on your needs and budget. Both options provide valuable power outage protection for sump pumps.

These solutions keep homes safe and dry during challenging weather conditions.

Sump Pump Installation Costs

Sump pump installation protects your home from water damage. Costs vary based on pump type, installation complexity, and DIY or professional approach. This investment is crucial for home safety.

Material and Equipment Costs

Sump pump installation materials typically cost $200 to $700. The pump itself ranges from $80 to $2,000, depending on horsepower and features.

Additional components like sump basin, discharge pipes, and wiring increase overall expenses. These items are essential for proper installation.

Labor and Professional Installation Costs

Professional installation adds $500 to $2,000 to the project’s total cost. Labor rates vary based on plumber’s experience, job complexity, and location.

The average cost for professional sump pump installation is around $1,200. DIY installation may save money but requires skills and proper equipment.

Incorrect installation can lead to water damage and costly repairs. Consider the risks before attempting a DIY approach.

Total sump pump installation costs range from $500 to $4,000. Factors like location, home size, and additional drainage needs affect the final price.

Budget carefully and work with a reputable professional. This ensures a successful and long-lasting sump pump installation for your home.

DIY vs. Professional Sump Pump Installation

DIY sump pump installation may seem tempting, but hiring a pro is often better. Proper setup is crucial for effective and safe sump pump operation.

Pros have the skills and tools to assess, select, and install sump pumps correctly. DIY installs risk improper setup, which can lead to water damage or safety issues.

Here are some benefits of hiring a pro for sump pump installation:

  • Experienced technicians ensure proper placement and connection of the sump pump, reducing the risk of costly mistakes.
  • Professionals have access to heavy-duty tools and equipment, making the installation process more efficient and safer.
  • Plumbers are up-to-date on local building codes and regulations, ensuring the installation meets all necessary requirements.
  • Many manufacturers offer warranty coverage that requires professional installation to be valid, protecting your investment.

DIY installation might seem cheaper, but risks often outweigh savings. Hiring a pro can protect your home from water damage.

Professional installation provides peace of mind and ensures your sump pump works properly. It’s a smart investment for your home’s safety.

When to Replace or Upgrade Your Sump Pump

sump pump replacement

Sump pumps have a limited lifespan and may need replacement over time. Homeowners should watch for signs that indicate it’s time for a new pump. Being proactive can protect your home from costly water damage.

Unusual noises like grinding or squeaking can signal wear on internal parts. This can lead to decreased efficiency or complete failure. If your pump struggles to activate or takes longer to remove water, consider replacement.

The age of your sump pump is another important factor. Most pumps last 7-10 years, with some reaching 15 years with good care. Replace your pump proactively as it nears the end of its life.

A pump running more often or using more energy might need an upgrade. Investing in a more powerful or efficient model can offer better protection. It can also provide long-term cost savings.

When replacing your pump, think about capacity, power source, and system compatibility. A professional can help you choose the right pump for your needs. They can also ensure proper installation.

Tips for Hiring the Best Sump Pump Installation Professionals

A reliable sump pump is crucial for protecting your home from water damage. Finding the right installation contractor ensures your system works effectively. Here are some tips to help you hire the best professionals:

  1. Look for Experienced and Licensed Contractors: Choose experts with a proven track record and proper certifications. This ensures they have the expertise to install and maintain your system correctly.
  2. Seek Insured Professionals: Hire installers with liability and workers’ compensation insurance. This protects you from potential damages or accidents during installation.
  3. Ask for References and Reviews: Check references from past clients and read online reviews. This helps gauge the quality of the contractor’s work and customer service.
  4. Compare Quotes and Scope of Work: Get multiple quotes and compare proposed work, equipment, and timelines. This helps you find the best value for your investment.
  5. Prioritize Quality Equipment and Adherence to Codes: Ensure the contractor uses high-quality equipment and follows local building regulations. This guarantees the safety and longevity of your system.
  6. Inquire About Warranties and After-Sales Support: Ask about sump pump warranties and ongoing maintenance services. This ensures continued support after installation.

Following these tips helps you find the best sump pump installation contractor. With the right professionals, your home stays protected from costly water damage.

You’ll have peace of mind knowing your system is installed correctly. A well-installed sump pump will perform reliably for years to come.

The FindPros Advantage

Searching for the right sump pump installation professional can be daunting. But with FindPros, you can easily find the best local pros to get the job done right. Simply answer a few questions about your project, and we’ll match you with top-rated contractors who will compete for your business, ensuring you get the best pricing. FindPros will help you find the pros you get along with best, whether you need a new sump pump, submersible or pedestal pumps, or a sump pump replacement.

With FindPros, you can be confident your sump pump installation or replacement will be done efficiently, protecting your home from water damage, clogging, and costly repairs. Get started with FindPros today and take the stress out of your sump pump project.

Conclusion

Sump pump installation is vital for protecting homes from water damage. It helps keep basements dry and maintains good indoor air quality. Understanding sump pumps and their proper care is key to safeguarding your property.

Investing in a reliable sump pump system is a smart choice. It can save you money and prevent water-related issues. Proper installation, following local codes, gives peace of mind against basement flooding.

A well-maintained sump pump prevents mold growth and protects your home’s structure. It enhances your property’s value and security. Regular upkeep ensures your basement stays dry for years to come.

Frequently Asked Questions (Sump Pump Installation)

The cost of sump pump installation can vary based on the type of pump (submersible or pedestal), the size of the sump pit, the complexity of the installation, and whether a professional is hired or it’s a DIY project. The average installation cost ranges from $500 to $4,000, including the cost of the pump, materials, and labor.
Most sump pumps have a lifespan of 7-10 years, though some can last up to 15 years with proper maintenance. Signs that it’s time to replace your sump pump include unusual noises, decreased efficiency, and the pump running more often or using more electricity. If your pump is nearing the end of its lifespan, it’s a good idea to proactively replace it to avoid potential water damage.
Submersible sump pumps are fully submerged in the water and are more powerful and efficient, making them ideal for larger sump pits. Pedestal sump pumps have the motor mounted on a column above the sump pit, and they’re more compact and often more budget-friendly, suitable for smaller spaces. The choice between the two depends on the specific needs of your home and the size of the sump pit.
To ensure your sump pump continues to operate during a power outage, consider installing a water-powered backup pump or a battery backup system. These secondary pumps can keep your home dry even when the main power is out, providing peace of mind and protection against water damage.
While a DIY sump pump installation may seem like a cost-saving option, hiring a professional installer often provides better long-term protection for your home. Experienced technicians can ensure the proper placement and connection of the sump pump, reducing the risk of costly mistakes. They also have access to the necessary tools and equipment, and they’re up-to-date on local building codes and regulations, ensuring the installation meets all requirements.

Stucco Repair

Sump Pump Installation Near You

Can’t find what you are looking for?

How It Works

  • Answer a few questions about your home project.
  • Within seconds, get matched with top-rated local pros.
  • Compare quotes and choose the best pro for the job.

Stucco Repair In Your Area

Stucco Repair Process: A Step-by-Step Guide

Stucco Repair

Key Takeaways

  • Stucco can last for several years but may eventually require repairs due to water damage, mold, or lack of gutters.
  • The stucco repair process involves removing damaged stucco, installing metal lath or mesh, applying multiple coats of stucco, and optional painting.
  • Proper surface preparation, drying, and curing are crucial for the success of stucco repairs.
  • Hiring experienced stucco repair experts can ensure a long-lasting and visually appealing finish.

Introduction to Stucco Repair

Stucco is a durable exterior finish that can last for decades. It’s made of cement or lime-based plaster and is known for its beauty. Over time, stucco can get damaged by water, mold, or weathering.

Quick repairs are key to keeping your home’s exterior in good shape. Fixing stucco problems early helps prevent bigger issues down the road.

What is Stucco?

Stucco is a mix of cement, lime, plaster, and other materials. It’s tough and long-lasting, making it great for exterior finishes.

When installed right, stucco can stand up to harsh weather. It keeps homes looking nice for many years with proper care.

Common Causes of Stucco Damage

Stucco can develop cracks, blisters, and other problems over time. Here are some reasons why damaged stucco happens:

  • Water seepage: Leaks or poor drainage can crack stucco and cause mold growth.
  • Lack of maintenance: Not checking and fixing issues can make stucco problems worse.
  • Natural weathering: Sun, wind, and temperature changes can wear down stucco.
  • Structural movement: House settling can lead to cracks in stucco.

Knowing what causes stucco damage helps homeowners prevent problems. Regular checks and fixes can keep your home’s exterior finish looking great.

Taking care of stucco ensures it stays strong and beautiful for years to come. Quick action on small issues prevents bigger, costlier repairs later on.

When to Repair Stucco

Keeping your stucco exterior in good shape is vital for your home’s look and structure. Watch for signs like visible cracks, stains, discoloration, damage, and mold. These indicate the need for repairs.

Hairline cracks under 1/8 inch wide are normal and need regular upkeep. Spider-shaped or pattern cracks may point to poor application or structural problems. Diagonal cracks wider than 1/8 inch could mean settling issues.

Stains or discoloration might show water damage. Peeling or falling stucco sections clearly need fixing. Ignoring these signs can lead to more damage and higher costs later.

  • Stains or discoloration on the wall can indicate water infiltration and the need for further inspection.
  • If your stucco is peeling or falling off in sections, it’s a clear sign that repair or replacement is necessary.
  • Ignoring these warning signs can lead to further damage and higher repair costs in the long run.

Regular home care can prevent stucco problems. Clear vegetation, paint when needed, and fix small cracks. For bigger issues, ask a stucco expert about repairs or remediation.

Tools and Materials Needed

Gather the right tools for your stucco repair project. You’ll need a drywall hawk, knife, flat trowel, and galvanized metal lath. Don’t forget gloves, grade-D builder’s paper, hammer, utility knife, and wire brush.

Organize your tools in bags for better efficiency. For the stucco mix, you’ll need portland cement, hydrated lime, and aggregate sand. Follow recommended ratios for each coat.

A wheelbarrow, water bucket, and spray bottle are crucial for mixing and applying stucco. These items will help you create the perfect mixture.

Essential Tools

  • Drywall hawk – for holding and applying stucco mix
  • Drywall knife – for spreading and smoothing stucco
  • Flat trowel – for leveling and shaping the stucco surface
  • Galvanized metal lath – for reinforcing the stucco base
  • Gloves – for protecting hands during the repair process
  • Grade-D builder’s paper – for creating a moisture barrier
  • Hammer – for securing the metal lath to the wall
  • Utility knife – for cutting and trimming materials
  • Wire brush – for cleaning the surface before application

Materials for Stucco Mix

  1. Portland cement – the primary binding agent in stucco
  2. Hydrated lime – added to improve workability and durability
  3. Aggregate sand – provides texture and strength to the stucco mix

Keep a wheelbarrow, water bucket, and spray bottle nearby. These tools are essential for mixing and applying your stucco mixture effectively.

Preparing for the Repair

weather conditions

Weather conditions are crucial for stucco repair success. Safety precautions are also important. Both freezing temps and hot, dry weather can harm the repair process.

Weather Considerations

Freezing temps can ruin wet stucco. Wait for nighttime temps to stay above 40°F before starting repairs. Hot, dry, windy weather can make stucco cure too fast.

Work in shaded areas when possible. Keep the patch moist between coats by covering it with plastic.

Safety Precautions

  • Wear protective gloves to avoid direct contact with the alkaline stucco mixture, which can cause skin burns.
  • Use tools, such as a trowel, to handle the stucco rather than your bare hands.
  • Keep a bucket of clean water nearby to quickly wash off any splashes of the stucco mixture.

Good weather conditions help ensure a lasting stucco repair. Taking safety measures protects you during the project. Follow these tips for the best results.

Step 1: Remove Loose Stucco

Start by removing any loose or damaged stucco. Use a hammer or a hammer and cold chisel to chip away the bad areas. Be careful not to harm the wood lath supports underneath.

Wear eye protection to shield yourself from flying bits. This step can get messy, so take safety measures. Removing damaged stucco exposes areas needing more work.

  1. Carefully use a hammer or a hammer and chisel to break away the loose or damaged stucco.
  2. Avoid damaging the underlying wood lath supports during the removal process.
  3. Wear eye protection to guard against any flying debris.

By removing damaged stucco, you’ll see how bad the problem is. This prepares the surface for the next repair steps.

Step 2: Chip Away at the Edges

Repairing stucco requires careful chipping of the damaged area’s edges. This step helps reach firmly adhered stucco for a strong bond. It’s crucial for a successful repair.

Use a mason’s chisel to chip away loose stucco around the damaged section. Work carefully to avoid harming intact stucco. Cut away any exposed metal mesh with snips.

Keep chipping until you reach firmly adhered stucco. This creates a smooth transition between existing and new material. Proper edge preparation ensures a durable repair.

Be patient and thorough during this step. Rushing can compromise the repair’s integrity. With care, you’ll create a seamless blend with the surrounding stucco.

Step 3: Cover Exposed Lath

To prepare for new stucco, cover the exposed wood lath. Cut grade-D builder’s paper to fit along the old stucco and exposed lath boundary. Secure the paper with roofing nails, then add a second layer for extra protection.

The builder’s paper acts as a moisture barrier. It prevents water infiltration that could harm the new stucco. This step creates a solid foundation for the stucco to adhere to.

  • Cut grade-D builder’s paper to fit the exposed lath area
  • Secure the paper with roofing nails
  • Add a second layer of paper for added moisture protection

Preparing the lath with builder’s paper is crucial for stucco repair. This protective layer ensures a strong base for the new stucco. It helps create a successful and durable repair.

Step 4: Install Metal Mesh

Installing metal mesh is crucial before applying stucco mix. This galvanized metal lath acts as reinforcement. It prevents cracks and ensures a strong, durable finish.

Here’s how to properly install the metal mesh:

  1. Cut the galvanized metal lath to size using snips with offset handles. This makes cutting easier and more precise.
  2. Place the metal lath over the builder’s paper. Make sure it fits tightly against the edge of the existing stucco.
  3. Secure the mesh with roofing nails into the wood lath beneath. Use about 50 screws per sheet, spacing them 8 inches apart.

Proper installation of the metal lath creates a sturdy foundation. This helps prevent future cracks in your stucco repair.

The metal lath ensures a long-lasting, high-quality finish for your stucco project.

Step 5: Apply First Coat

Preparing the stucco mix is vital for repair. Gather materials, including a wheelbarrow, to mix stucco using the first-coat recipe. The acrylic bonding agent helps new stucco stick to old, ensuring long-lasting repairs.

Mixing the Stucco

In the wheelbarrow, blend dry stucco mix, water, and acrylic bonding agent. Use a hoe or stucco mixer attachment on a power drill. Mix until you get a smooth, lump-free consistency.

The resulting stucco mix should have a creamy, spreadable texture.

Applying the Scratch Coat

Use a trowel to scoop fist-sized wads of wet stucco. Toss them against the wire lath until it’s fully covered. Smooth the surface with a finishing trowel.

Pack the stucco mix against the existing stucco’s edges. Once it loses its wet sheen, score the surface with “x” marks.

This first coat, called the scratch coat, creates a rough surface. It helps the next coats stick better to the existing stucco. These steps build a strong base for the rest of the repair process.

Step 6: Apply Second Coat

After seven days, it’s time to apply the second coat of stucco. Remove the plastic covering and mist the patch with water. This helps keep the stucco hydrated and improves bonding.

Prepare a batch of stucco using the second-coat recipe. Apply a 3/8-inch-thick layer, working from the bottom up. Use a brick trowel to pack down the edges for a seamless transition.

Once the wet sheen disappears, smooth the surface with a trowel. Keep it just below the level of the surrounding stucco. Cover the patch again with a plastic sheet to control moisture.

Proper misting and moisture control are key to successful stucco repair. Follow these steps for a durable and seamless finish to your project.

Step 7: Apply Finish Coat

After three days, apply the final layer – the finish coat. This step is vital for achieving the desired texture and look. It helps blend the repaired area with the surrounding stucco.

Achieving Desired Texture

The application technique depends on the texture you want. For a “dash” finish, flick wet stucco mix onto the wall. Use a brick trowel until it’s flush with the existing surface.

For a smoother finish, use a sponge or cloth to blend. This method needs practice but results in a uniform look. Work in small sections, blending each area before moving on.

Let the stucco cure for several days after applying the finish coat. Keep the area moist and protected from sunlight and harsh weather. Follow the manufacturer’s curing time recommendations.

Step 8: Curing and Painting

curing and painting

After repairing stucco, allow it to cure for at least a week. This process ensures full strength and moisture evaporation. Check with your contractor for specific curing guidelines.

Once cured, apply heavy-bodied acrylic elastomer or a suitable coating. This helps blend the repaired area with the surrounding wall. The coating provides a flexible finish that resists cracking.

Prepare the surface before painting. Address any efflorescence using a product like DRYLOK Etch. This creates a clean, paintable surface for better adhesion.

Apply two coats of acrylic latex paint for ideal coverage. Follow the manufacturer’s instructions for application and drying times. This ensures a long-lasting, professional finish.

These steps guarantee a properly cured and painted stucco repair. Your wall will look seamless and durable for years to come.

Tips for Hiring the Best Stucco Repair Experts

Hiring stucco repair experts is crucial for fixing your stucco. These professionals have the know-how and tools to ensure lasting repairs. The stucco repair cost may be higher, but it’s worth it for long-term durability.

Consider these tips when looking for a stucco repair contractor:

  • Verify that the contractor is licensed and insured in your state or city. For example, in Denver, contractors must have a license from Denver Community Planning and Development and pass a rigorous exam based on construction codes and practices.
  • Look for contractors who are certified by the Stucco Manufacturers Association (SMA) for stucco inspection, installation, repair, and maintenance.
  • Check the contractor’s experience by asking about the number of years they’ve been in the business and the number of stucco projects they’ve completed in your local area.
  • Ensure the contractor is certified to install the specific brand of stucco material you prefer, as this can affect the quality and durability of the repair.
  • Review the contractor’s insurance coverage to make sure they have adequate liability and workers’ compensation policies.
  • Carefully review the stucco repair estimate, looking for transparency in materials, subcontractor usage, and payment commitments. Beware of any illegal collection practices.

Choosing stucco repair experts who meet these standards ensures quality work. Your stucco repair will be done right, providing long-term durability for your home.

Discover FindPros for Your Stucco Repair Needs

Repairing stucco can be a complex process, involving multiple coats and careful attention to the existing texture and aesthetic appeal. If you’re dealing with larger cracks, water damage, or a cracked stucco finish on your walls, roof, or building, FindPros can help. Simply answer a few questions about your home project, and we’ll match you with top-rated local professionals who can handle the job, from the base coat to the final finish.

With FindPros, you’ll get the best pricing when multiple pros compete for your business, and you can choose the pro that best matches your needs and preferences. Don’t tackle stucco refinishing or DIY patching on your own – let FindPros connect you with the right expert to get the job done right.

Conclusion

Stucco is a popular exterior finish for homes. It’s durable but can get damaged over time. Learning how to repair stucco helps homeowners keep their home’s exterior looking great.

Stucco repair costs vary. A full repair can cost around $1,500, including materials and labor. Fixing issues like cracks or holes prevents further damage to your home.

Quick repairs keep your home’s structure safe. They also boost its looks and value. Regular checks and fixes are smart investments for homeowners.

Taking care of stucco damage is important. It keeps your home’s exterior strong and attractive. With proper care, your stucco finish will last for many years.

Frequently Asked Questions (Stucco Repair)

The first step is to remove any loose or damaged stucco. This involves carefully chipping away the broken areas to expose the underlying wood lath supports.
Covering the exposed lath with builder’s paper creates a moisture barrier. This prevents water from seeping in and damaging the new stucco patch.
To create a strong bond, it’s important to install a metal wire mesh over the builder’s paper. This wire mesh reinforces the new stucco and helps it adhere securely to the old surface.
The stucco repair process usually involves applying three different layers or coats of stucco. These include the base coat, the next coat, and the final finish coat.
Allowing the stucco to fully cure, usually for at least a week, ensures that it reaches its maximum strength and durability. This curing process also allows any excess moisture to evaporate.

Structural Engineers

Sump Pump Installation Near You

Can’t find what you are looking for?

How It Works

  • Answer a few questions about your home project.
  • Within seconds, get matched with top-rated local pros.
  • Compare quotes and choose the best pro for the job.

Structural Engineers In Your Area

Hiring Structural Engineers: A Comprehensive Guide

Structural Engineers

Key Takeaways

  • Structural engineering is a specialized field within civil engineering, with high demand for professionals in areas like structural design, analysis, and construction support.
  • Recruiting qualified structural engineers can be challenging due to a shortage of skilled professionals, requiring a strategic approach to attract and retain top talent.
  • Understanding the educational pathway, licensing process, and key responsibilities of structural engineers is crucial for effective hiring and talent management.
  • Embracing diversity, leveraging technology, and building strong employer branding can give organizations a competitive edge in the structural engineering recruitment landscape.
  • Continuous learning and professional development are essential for structural engineers to stay up-to-date with industry advancements and regulatory changes.

Understanding the Role of Structural Engineers

Structural engineers ensure the safety of buildings, from high-rises to homes. They oversee projects from design to construction. Their expertise is crucial for structural integrity throughout a building’s lifecycle.

Key Responsibilities of a Structural Engineer

Structural engineers analyze how structures behave under various loads. They design beams, columns, and foundations to withstand expected stresses. Their work ensures buildings can stand up to different conditions.

Teamwork is vital for structural engineers. They collaborate with architects to align structural design with project goals. They also ensure compliance with building codes and regulations.

During construction, engineers regularly visit sites to monitor progress. They address issues that may arise. Their expertise helps solve challenges for safe, successful construction.

Skills Required for a Structural Engineer

  • Proficiency in structural analysis and design principles
  • Strong mathematical and problem-solving skills
  • Knowledge of building codes, regulations, and construction practices
  • Ability to collaborate effectively with architects, contractors, and other project stakeholders
  • Attention to detail and a commitment to safety and quality
  • Familiarity with computer-aided design (CAD) and analysis software

Structural engineers create innovative solutions for buildings and infrastructure. They enhance structural integrity and performance. Their work shapes communities and supports people’s daily lives.

Educational Pathway for Structural Engineers

Becoming a structural engineer in the US requires a specific educational path. This includes high school prep, undergraduate studies, and possible postgraduate specializations.

High School Preparation

Future structural engineers should focus on math, physics, and design technology in high school. These core engineering principles are vital for success in undergraduate structural engineering programs.

Undergraduate Studies

Students can pursue a bachelor’s in civil or structural engineering. The coursework typically includes math, physics, structural analysis, mechanics of materials, and structural design.

Postgraduate Studies and Specializations

  • About 55% of civil engineers in the US hold a master’s degree.
  • A Master’s program in structural engineering usually takes two years.
  • Students can specialize in civil structures, aerospace structures, geotechnical engineering, or structural health monitoring.

Internships and co-op programs offer valuable hands-on experience. These opportunities help students develop essential technical skills and problem-solving abilities.

Many structural engineers pursue professional certifications and Chartered Engineer status. These credentials can enhance their career prospects in the field.

Licensing and Certification Process

Structural Engineer Licensing Process

Structural engineers need proper licenses and certifications to practice legally and ethically. The process in the U.S. involves a series of exams and requirements.

The first step is passing the Fundamentals of Engineering (FE) exam. It’s a six-hour test taken during the final semester of an ABET-accredited undergraduate program.

After gaining about 4 years of engineering experience, candidates must pass the Principles and Practice of Engineering (PE) exam. This eight-hour test is specific to structural engineering.

  1. Passing the Fundamentals of Engineering (FE) exam
  2. Gaining the required engineering experience, typically around 4 years
  3. Passing the Principles and Practice of Engineering (PE) exam

Fully licensed structural engineers must also pass the Structural Engineering (SE) exam. This 16-hour test covers vertical and lateral sections.

Some states have extra requirements. For example, California has additional exams for seismic and surveying certification.

This process ensures engineers have the right knowledge and skills. It shows their commitment to professionalism and safety in the built environment.

Importance of Professional Engineering License

A Professional Engineer (PE) license is crucial for structural engineers. It’s the gold standard in the field. This license matters for several key reasons:

  1. Regulatory Compliance: The PE license is legally required in most states. It ensures engineers follow industry rules and safety standards.
  2. Client Trust: Clients prefer licensed structural engineers. The PE shows commitment to ethics and expertise.
  3. Career Advancement: A PE license opens doors to leadership roles. It also increases earning potential in engineering.
  4. Public Safety: Licensed engineers ensure building safety. Their work protects the public.

Obtaining the Chartered Engineer (CEng) Status

Structural engineers can also pursue Chartered Engineer (CEng) status. This global credential requires high education and professional skills. It also demands commitment to ethical standards.

The CEng can boost career opportunities worldwide. It enhances an engineer’s recognition in the industry.

A PE or CEng license is a major achievement. It ensures compliance and builds trust. These credentials open doors to career growth.

Licensed engineers contribute to public safety. They show expertise and dedication to their profession.

Roles and Responsibilities of Structural Engineers

structural engineers

Structural engineers are vital in construction and engineering. They design buildings and bridges, create models with computer software, and measure loads. These experts also monitor construction and work with contractors and project managers.

Success in this field requires technical know-how and problem-solving skills. Engineers need strong math abilities and good communication. Many join the Institute of Structural Engineering to boost their credentials.

Most of their work involves analyzing goals and making calculations. They design structural elements and suggest materials. Engineers also manage projects, review drawings, and visit construction sites.

These tasks demand deep knowledge of materials and building codes. Structural engineers must ensure all projects meet safety regulations.

Career paths include project management, construction design, and teaching. New professionals earn between £19,000 and £25,000. Experienced, chartered engineers can make £45,000 to £55,000 or more.

To become a structural engineer, you can choose different education paths. Options include apprenticeships, undergraduate degrees, or specialized Masters programs. Technical skills and problem-solving abilities are key to success in this field.

Skills and Knowledge for Structural Engineers

Structural engineers ensure safety and integrity in construction. They need diverse technical, analytical, and interpersonal skills to excel in this field.

Technical Skills

Proficiency in Computer-Aided Design (CAD) software is crucial for structural engineers. They must understand structural design principles and analysis. Knowledge of building codes, regulations, and seismic design is vital.

Analytical Skills

Problem-solving is key for structural engineers. They analyze complex systems and develop innovative solutions. A strong foundation in math, physics, and engineering principles is essential.

Interpersonal Skills

  • Effective communication skills to convey technical information clearly to architects, contractors, and clients.
  • Teamwork and collaboration abilities to work cohesively with interdisciplinary teams.
  • Attention to detail to ensure the safety and reliability of engineering projects.
  • Project management and leadership skills to plan, organize, and oversee the successful completion of projects.

Structural engineers must adapt and learn continuously. They need to stay updated on new technologies and industry trends. Keeping up with evolving building codes and regulations is also important.

By improving these skills, structural engineers can tackle complex projects. They can make a significant impact on the built environment.

Finding and Hiring Structural Engineers

Sourcing qualified structural engineers requires effective strategies. Professional networks and industry associations can connect you with experienced professionals. Job boards also offer access to candidates with the right skills and experience.

Thorough evaluation is crucial in selecting the best candidate. Review resumes to assess qualifications and experience. Conduct interviews to gauge technical knowledge and problem-solving abilities.

Technical assessments and reference checks help verify candidates’ skills. These steps ensure you find an engineer who meets your project’s unique needs.

Sourcing Qualified Candidates

Start by tapping into your professional network for valuable referrals. Industry associations can provide recommendations for qualified structural engineers. Online and offline job boards are useful for finding potential hires.

Look for candidates with necessary licensing and certification. Relevant experience is also crucial when sourcing structural engineers for your project.

Evaluating Candidates

Thoroughly evaluate credentials and capabilities of qualified applicants. Review resumes to assess education, licensing, and previous project experience. Conduct in-depth interviews to gauge technical knowledge and problem-solving skills.

Assess teamwork and communication abilities during the interview process. Perform reference checks to verify the candidate’s suitability for the role.

These strategies help you find the right structural engineer for your project. Investing time in hiring ensures project success and safety. A well-chosen engineer is crucial for your construction endeavors.

Finding the Right Structural Engineer with FindPros

As you embark on your architectural design and construction projects, finding the right structural engineer is crucial. The team at FindPros can help you navigate this process with ease. With our vast network of experienced professionals, we can connect you with the perfect structural engineer for your recent projects, whether you’re working on a commercial, residential, or any other type of structure.

Simply answer a few questions about your needs, and we’ll match you with top-rated local pros who can resist the forces exerted on your building’s elements, ensuring its long-life and safety. Our platform allows you to compare quotes and find the best fit for your project, all while keeping your facilities and ground-level equipment secure. Take the guesswork out of creating your next architectural masterpiece – let FindPros guide you through the process and scale your project to success.

Conclusion

Structural engineers are vital in construction and engineering. They design, analyze, and oversee safe, durable structures. Their expertise ensures stability in buildings, bridges, towers, and dams.

These professionals optimize material use, reducing waste and costs. They enhance sustainability and collaborate with architects and contractors. This teamwork leads to efficient project execution and effective problem-solving.

Structural engineering creates lasting, safe buildings and infrastructure. It contributes to sustainable and resilient communities. The field’s importance is clear from historical incidents like the Hyatt Regency walkway collapse.

Other examples include the Quebec Bridge and Ronan Point tower block collapses. These events show the consequences of design flaws. They highlight the need for thorough structural analysis.

As construction evolves, demand for skilled structural engineers grows. These experts navigate complex challenges and use new technologies. They ensure our built environment remains safe and resilient.

Frequently Asked Questions (Structural Engineers)

Structural engineers in the traditional field are responsible for analyzing how structures behave under various loads, designing critical structural elements like beams and columns, and ensuring compliance with building codes and regulations. They work closely with architects to align structural design with the overall project goals.
The increasing complexity of modern structures and the use of innovative structural materials require structural engineers to have a deeper understanding of advanced analysis techniques and design principles. They must stay up-to-date with the latest research and advancements in the field to effectively address the structural challenges posed by these complex projects.
Structural engineers play a vital role in providing construction phase support. They regularly visit the site, monitor progress, and address any issues that arise to ensure the successful and safe execution of the design. Their expertise helps solve challenges and maintain the structural integrity of the building throughout the construction process.
Effective collaboration between structural engineers, architects, and other team members is essential for the successful design and construction of buildings. Structural engineers work closely with architects to incorporate the structural design into the overall architectural vision, while also ensuring compliance with building codes and regulations. This teamwork allows for the creation of innovative, functional, and safe structures.
Structural engineers are increasingly focused on addressing challenges related to corrosive environments, embodied carbon, and the need for more flexible and adaptable structures. They must have a deep understanding of these issues and explore new design and construction methods to create buildings that are resilient, sustainable, and responsive to the needs of the community and the occupants, such as hospitals, schools, and commercial offices.

Storm Door Repair

Sump Pump Installation Near You

Can’t find what you are looking for?

How It Works

  • Answer a few questions about your home project.
  • Within seconds, get matched with top-rated local pros.
  • Compare quotes and choose the best pro for the job.

Storm Door Repair In Your Area

Storm Door Repair: Tips for Finding the Right Professional

Storm Door Repair

Key Takeaways

  • Storm doors protect your main door from harsh weather and boost energy efficiency.
  • Regular maintenance and timely repairs are crucial for optimal performance and longevity.
  • Choosing the right repair pro saves time, money, and ensures quality work.
  • Look for experience, quality workmanship, and commitment to customer satisfaction.
  • Proper installation and care extend your storm door’s life and maintain its appeal.

What Is a Storm Door?

A storm door is an extra exterior door. It’s installed in front of your main door. This door adds protection and serves several important purposes for homeowners.

Definition and Purpose of Storm Doors

Storm doors shield your main entry door from harsh weather. They help insulate your home by blocking cold air in winter. In warmer months, storm doors with screens allow more air to circulate.

This keeps your home comfortable and can improve energy efficiency. Storm doors are a valuable addition to many homes.

Difference Between Storm Doors and Screen Doors

Storm doors and screen doors are both installed in front of exterior doors. However, storm doors are sturdier and more durable than screen doors.

Storm doors often have removable glass and panel inserts. You can switch these out depending on the weather. This feature gives storm doors better protection and insulation than standard screen doors.

When to Use a Storm Door

Storm doors offer year-round benefits in various weather conditions. They protect homes from cold, rain, wind, and sun. These versatile additions can be a valuable asset to any house.

Benefits of Storm Doors in Different Seasons

In cold months, storm door glass panels shield exterior doors from harsh weather. This helps reduce energy loss and lower heating costs. On cool, sunny days, open the main door while keeping the storm door closed.

Storm doors with screen panels are great for warmer seasons. They let in cool, fresh air while keeping insects out. This allows homeowners to enjoy the outdoors bug-free.

Storm doors add an extra layer of security to homes. They have solid key locks for protection even when the main door is closed. These doors are a cost-effective way to preserve exterior doors.

They shield main doors from the elements, extending their lifespan. Storm doors enhance comfort and safety in any home, no matter the season.

Types and Features of Storm Doors

Storm doors offer various styles and features to match different homeowner needs. They range from full-view glass panels to partial-view models. Some have retractable screens, while others focus on ventilation.

  • Full-View Storm Doors: Full-view storm doors have a large glass panel for maximum visibility and light. They often include a removable screen panel. This screen can replace the glass in warmer weather for protection and ventilation.
  • Partial-View Storm Doors: Partial-view storm doors have less glass and more solid panel area. They still allow plenty of light and airflow. These doors balance visibility and privacy for homeowners.
  • Retractable or Self-Storing Screen Storm Doors: These doors have screens that easily retract into the frame when not needed. You can enjoy the benefits of a storm door year-round. There’s no need to remove and store a separate screen panel.
  • Ventilating Storm Doors: Ventilating storm doors have fixed screens instead of removable panels. They provide continuous airflow and ventilation. These doors are perfect for maximizing air circulation without panel swapping.

Storm doors come in aluminum, fiberglass, and wood materials. They’re available in various colors to match your home’s exterior. You can choose from different hardware options like handles and locks.

How to Buy a Storm Door

Precision is key when buying a storm door. Measure the existing door casing carefully. This ensures your new storm door will fit perfectly.

Check if you need a left-hand or right-hand opening door. Make sure the frame is solid without splits or dry rot.

Many storm doors come pre-hung on a frame with installation kits. This makes the process easier. Consider how you’ll transport the door home from the store.

A car with a hatchback and folding seats might work. You may need delivery or shipping options instead.

Measuring for the Right Size

Accurate measurements are crucial when buying a storm door. Measure the width, height, and depth of the existing door frame. This ensures your new storm door will fit properly.

Note whether the door needs a left-hand or right-hand opening. This detail is important for a correct installation.

Choosing the Appropriate Style

Several storm door styles are available. These include full-view, partial-view, retractable/self-storing screen, and ventilating options.

Consider your needs when selecting a storm door style. Think about desired visibility, airflow, and insulation for your home.

Storm Door Installation

Storm door installation can be a manageable project for homeowners with basic DIY skills. Most storm doors come pre-hung on a frame with all necessary hardware included. Required tools include a drill, screwdriver, measuring tape, level, and safety gear.

Professional storm door installation is also available. It generally costs between $70 and $200. Proper installation ensures the door functions well and provides energy efficiency and weather protection.

Measuring the existing door frame accurately is crucial. Selecting a storm door that fits properly is essential. Consulting a specialist or manufacturer guidelines can help ensure successful installation.

Key Steps for DIY Storm Door Installation

  1. Measure the door frame carefully to find the right storm door size.
  2. Gather the necessary tools, including a drill, screwdriver, level, and safety gear.
  3. Unpack the storm door and familiarize yourself with the installation instructions.
  4. Secure the frame to the existing door opening, ensuring it is level and plumb.
  5. Attach the storm door panel to the frame, adjusting the hinges and hardware as needed.
  6. Test the door’s operation and make any final adjustments for smooth opening and closing.

Reliable storm door installation services are readily available for those who prefer professional help. These experts can handle the entire process from measuring to final installation.

Storm Door Maintenance

storm door maintenance

Storm door upkeep is simple and crucial. Regular cleaning and proper panel storage extend its life. These steps protect your entryway and keep your door functional.

Cleaning Storm Door Panels

Clean your storm door with a soft cloth. This removes dirt, spider webs, and debris. For deeper cleaning, use mild soap and water.

Regular cleaning maintains your door’s appearance. It removes storm door, dirt, debris, glass buildup that could make it look unappealing.

Storing Storm Door Panels

  • Store storm door, screen, glass panels safely when switching for seasons. This prevents damage.
  • Keep panels in a dry place like your garage or basement. This protects them from weather and potential harm.
  • Handle storm door, panels with care to avoid scratches. Use protective covers if stacking them for storage.

These basic storm door, maintenance steps ensure lasting protection. They also boost your home’s curb appeal for years to come.

Storm Door Repair: Common Issues and Troubleshooting

Storm doors can face various problems that need fixing. These issues range from worn weatherstripping to broken hinges. Homeowners can often tackle minor repairs themselves, saving both time and money.

Damaged weatherstripping is a frequent storm door problem. It can crack or detach over time, causing air leaks. Replacing the weatherstripping is an easy DIY fix that can improve the door’s performance.

Loose or broken hinges can make the storm door sag or misalign. This makes opening and closing difficult. Tightening or replacing hinges can restore smooth operation.

  • Torn or damaged screen panels can let pests in. Repairing or replacing the screen is a simple fix.
  • Cracked or shattered glass inserts pose a safety risk. These require professional replacement.
  • Faulty hardware like handles or locks can affect the door’s function. They may need repair or replacement.

Some storm door problems are easy to fix yourself. However, complex repairs may need a professional’s help. Regular maintenance can extend your storm door’s lifespan.

Taking care of your storm door ensures it keeps protecting and serving you well. Don’t hesitate to seek help for issues beyond your DIY skills.

Finding a Professional for Storm Door Repair

Storm door issues can be tricky to fix on your own. It’s best to find a reliable professional repair service. Start by contacting the storm door manufacturer or retailer. They might suggest approved repair providers.

Online reviews can help you find high-quality local door repair businesses. These companies can assist with your storm door problems.

Mr. Handyman of Keller, Roanoke, and Alliance offers expert storm door repair in Keller, TX. They focus on quick and precise repairs. Their technicians are transparent about their findings during inspections.

Screenmobile is another great option for storm door repair. They fix most screen doors on-site. Their services include rescreening, replacing parts, and adjusting doors without removal.

  • Screenmobile provides a comprehensive range of services for sliding screen door repairs, including rescreening, handle replacement, wheel replacement, track cleaning and lubrication, and adjustments for peak performance.
  • Screenmobile’s service vehicles are equipped with a variety of replacement parts, such as screen door handles, wheels, and springs, to address different screen door needs effectively.
  • Screenmobile specializes in repairing and replacing various types of screen doors, including swinging, sliding, retractable, French, custom, patio, security, and storm screen doors.

Professional storm door repair services ensure your doors work perfectly. They restore your doors to top condition. This helps maintain your home’s integrity and enhances its overall appeal.

Qualities to Look for in a Repair Service

Storm Door Repair

A reliable storm door repair service should exhibit key qualities. These include professionalism, extensive experience, comprehensive warranties, and outstanding customer service. These attributes ensure a smooth repair process for your storm door.

Look for a service that quickly diagnoses the issue. They should provide a fair, upfront estimate. Technicians should complete the job promptly, following manufacturer’s instructions.

  • Professionalism and Expertise: Look for a repair service with a proven track record of delivering high-quality work. Experienced technicians should be well-versed in repairing various storm door materials, including wood, steel, and aluminum.
  • Comprehensive Warranties: Inquire about the service’s warranties or guarantees on their repair work. A reliable provider should stand behind their repairs and offer protection for the homeowner’s investment.
  • Excellent Customer Service: Assess the repair service’s responsiveness, communication, and overall commitment to customer satisfaction. A reputable company will prioritize the homeowner’s needs and ensure a stress-free experience.

Choose a repair service that showcases these key qualities. This will help ensure your storm door is restored properly. A well-repaired storm door provides lasting functionality and improved home security.

FindPros: The Easiest Way to Tackle Storm Door Repairs

Struggling with storm door issues and not sure where to turn? Let the experts at FindPros lend a hand. With our service, you can save time by getting connected with top-rated local professionals who specialize in storm door repair and installation. Simply answer a few quick questions about your project, and we’ll pull the best matches for you.

No need to carry heavy storm doors or search high and low for the right pro – we’ll do the legwork and help you find someone you can trust to get the job done right, whether it’s fixing a loose hinge, replacing torn weatherstripping, or installing a brand-new storm door to enhance your home’s interior and exterior. Skip the hassle and let FindPros handle the details so you can enjoy a smooth, stress-free storm door repair or replacement.

Conclusion

Storm doors are valuable assets for any home. They provide extra protection and let homeowners enjoy their exterior door year-round. While these doors need little upkeep, occasional repairs keep them working well.

Finding the right repair service ensures your storm door works efficiently. It also maintains your home’s entryway appeal. With proper care, storm doors offer long-term advantages.

These versatile doors enhance insulation and improve air circulation. They also increase protection from the elements. Proactive maintenance and professional help extend a storm door’s lifespan.

Storm doors are worthwhile additions to any home. They improve a property’s function and appearance. With the right tools and guidance, storm door repair becomes manageable.

Frequently Asked Questions (Storm Door Repair)

A storm door helps protect your front door from harsh weather conditions and can improve energy efficiency in your home.
If the weather stripping is cracked or the door is not closing properly, it may be time to consider storm door repair. Noticing any gaps around the frame is also a sign that repairs are needed.
Hiring a professional can save you time and ensure the repair is completed correctly. A reputable business will have the experience and tools to properly fix any issues with your storm door.
You can start by contacting the manufacturer or retailer where you purchased the storm door. Reading online reviews can also help you find a business that is committed to customer satisfaction.
Before the repair, you’ll want to measure the existing door frame and decide if you need a left-hand or right-hand opening. Also, consider your budget and the material you prefer for the new storm door.

Stamped Concrete Patio Contractors

Sump Pump Installation Near You

Can’t find what you are looking for?

How It Works

  • Answer a few questions about your home project.
  • Within seconds, get matched with top-rated local pros.
  • Compare quotes and choose the best pro for the job.

Stamped Concrete Patio Contractors In Your Area

Hiring Stamped Concrete Patio Contractors: A Guide

Meta Description: Discover the benefits of hiring stamped concrete patio contractors. Learn about design options, costs, and how to choose the right professional for your outdoor project.

Stamped Concrete Patio Contractors

Stamped concrete patios can turn plain outdoor spaces into stunning oases. Expert contractors make this transformation possible. This guide helps you find the right professionals for your project.

We’ll cover key factors to consider when hiring a stamped concrete patio contractor. You’ll learn what questions to ask and how to evaluate potential candidates.

Key Takeaways

  • Stamped concrete is a popular choice for its versatility and aesthetic appeal, offering a wide range of customization options.
  • Finding a reliable and experienced residential concrete contractor can be challenging, as it requires sorting through companies with varying levels of expertise.
  • Reputation, licensing, insurance coverage, and guarantees are crucial factors to consider when hiring a stamped concrete patio contractor.
  • Concrete project costs can vary significantly, with factors such as materials, labor, and delivery affecting the final price.
  • Asking the right questions and understanding the contract details are essential to ensure a successful and satisfactory concrete project.

Introduction to Stamped Concrete Patio Contractors

Concrete is a versatile choice for many home projects. It can be used for driveways, patios, floors, and decorative finishes. With the right techniques, concrete can mimic various materials at a lower cost.

Homeowners like concrete for its strength and customization options. It’s also cost-effective, making it a popular choice for many projects.

The Versatility of Concrete

Stamped concrete offers affordable paving with many pattern choices. These include natural stone, brick, wood, and cobblestone. Basic designs cost $8 to $12 per square foot.

Mid-range designs are $12 to $18 per square foot. High-end custom projects start at $18 per square foot. Stamped concrete lasts longer than natural stone or pavers.

It’s a great option for patios, pool decks, and driveways. Its durability makes it ideal for walkways too.

The Challenges of Finding a Reliable Contractor

As concrete projects become more popular, finding good contractors can be tough. It’s important to screen professionals and get guarantees. This helps avoid working with inexperienced contractors.

Many companies may lack the expertise for your specific job. This guide will help you find the right expert for your project.

What Do Concrete Contractors Do?

Professional concrete contractors offer specialized services beyond basic pouring and finishing. These include creating decorative surfaces, pumping, delivery, and cutting. Knowing these roles helps homeowners pick the right team for their projects.

Concrete Finishers and Their Role

Concrete finishers are skilled craftsmen crucial to the concrete work process. They set forms, ensure smooth pours, and add edges or decorative elements. These services are often part of residential concrete work packages.

A high-quality finish is vital for visible concrete surfaces like driveways and patios. Finishers are essential for stained and decorative concrete projects too.

Concrete Pumping and Delivery

Concrete pumping uses special equipment to move mixed concrete from trucks to job sites. Some contractors handle this, while others work with dedicated pumping operators for larger projects.

Concrete delivery is also important. Costs can range from $1,500 to $6,200, depending on project size and location.

Concrete Cutting Services

Concrete cutting is a specialized skill offered by some contractors. Experienced operators use diamond-blade saws to cut through existing concrete. This may be needed to remove old material or create joints to prevent cracking.

Homeowners might need to hire a dedicated concrete cutter for specific tasks. These include finishing driveway or patio edges.

Types of Residential Concrete Projects

Homeowners can choose from various concrete projects to improve their homes. A concrete driveway is a popular option. It costs about $3,900 or $6 per square foot.

This price includes removing existing material, delivering new concrete, and preparing the surface. It also covers leveling and pouring the new driveway.

A stamped concrete driveway offers a more custom look. It adds a textured finish that mimics materials like flagstone or brick. This option enhances curb appeal and costs about 10% more.

Stamped Concrete Services

Stamped concrete isn’t just for driveways. It’s also great for patios and indoor projects. It provides a high-end look at a lower cost than stone or tile.

You can use it for floors, countertops, and furniture inside. Outside, it works well for pool decks and patios.

Patio and Walkway Installation

Concrete patios are durable and versatile. They typically cost between $1,500 and $3,800, depending on size and finish. This includes all materials and labor.

Contractors who do patio installation can also help with walkways. The process is similar. Look for local installers who provide quality work.

Hiring the Right Stamped Concrete Patio Contractors

Choosing the best contractor for your stamped concrete patio is vital. Look for companies with at least 5 years of experience. Review their portfolio and ask for references from recent clients.

This will help you gauge their workmanship and customer service. A successful project depends on finding a skilled and reliable contractor.

Evaluating Reputation and Experience

A top-notch stamped concrete patio contractor should have a solid track record. Check their website, online reviews, and industry ties to assess their contractor reputation.

Ensure they specialize in your type of concrete project. Their expertise can greatly impact the final result.

Checking Licenses and Insurance

Proper licensing and insurance are crucial when hiring a concrete contractor. Verify they’re licensed in your area and have adequate liability coverage.

This protects you if accidents or property damage occur. Take time to review their credentials thoroughly.

By evaluating contractors, you can pick one who’ll create a stunning, long-lasting outdoor space. Their contractor reputation and contractor experience are key factors to consider.

Cost Considerations for Concrete Projects

Concrete projects can be thrilling, but costs need careful thought. Concrete delivery can cost $1,500 to $6,200. Installation ranges from $1,000 to $9,000, based on project complexity.

Homeowners must grasp the total cost, including materials, labor, and delivery fees. Larger projects may benefit from concrete’s economies of scale. Smaller jobs might find brick or stone more cost-effective.

Basic stamped concrete costs $9 to $13 per square foot. Complex projects can reach $20 per square foot. A 288-square-foot stamped concrete patio averages $2,592 to $3,744 for basic designs.

Mid-range options cost $4,032 to $5,472. High-end choices start at $5,760. A typical 640-square-foot U.S. driveway costs $5,760 to $8,320 for basic designs.

Mid-range driveway options range from $8,960 to $12,160. High-end stamped concrete projects start at $12,800. Stamped concrete is cheaper than natural stone, flagstone, brick, or precast pavers.

Labor costs are lower for stamped concrete, typically $9 to $22 per square foot. Other paving materials need individual placement, increasing labor costs.

Sealing costs range from $0.10 to $0.20 per square foot. Labor for installing a stamped concrete patio is usually $2 to $3 per square foot.

Understanding these costs helps homeowners make smart decisions. They can ensure their investment matches their budget and desired outcome.

Questions to Ask Potential Contractors

Choosing the right concrete contractor is vital for your project’s success. Ask about their experience and specialization to ensure quality work. Understanding project timelines and estimates will help you make an informed decision.

Verifying Experience and Specialization

Ask about the contractor’s past projects and types of concrete work they usually do. Inquire about their experience with your specific project type, like stamped concrete patios or driveways.

This will ensure they have the skills needed for high-quality results. Their expertise should match your project requirements.

Understanding the Project Timeline and Estimates

Ask about the expected timeline for your project. Request a detailed, binding estimate from potential contractors. Inquire about their availability and ability to meet deadlines.

Find out what’s included in the quoted price. Clear communication about timelines and costs helps avoid unexpected surprises.

The right concrete contractor is key to your project’s success. Asking these questions ensures you choose someone with the right qualifications.

Contracts and Warranties for Concrete Work

concrete contracts

A well-crafted contract is vital for concrete projects. It outlines the work scope, timeline, and payment terms. This document serves as a project blueprint for both homeowner and contractor.

Review the contract carefully to understand all terms and conditions. Pay attention to warranties or guarantees provided by the contractor. A solid contract protects your interests and ensures project completion as agreed.

Concrete Contracts and Warranties

Concrete contracts typically include provisions for:

  • Scope of work, including materials and labor
  • Timeline for project completion
  • Payment terms and schedule
  • Warranties and guarantees
  • Dispute resolution procedures

Many contractors offer warranties ranging from one to ten years. These may cover color delamination, surface spalling, and significant cracking. Review warranty terms carefully to understand any exclusions or limitations.

Proper maintenance is often key to keeping warranty coverage valid. This may include sealing the concrete, preventing stains, and addressing cracks promptly. Follow the maintenance steps outlined in your contract.

Understanding contracts and warranties helps protect your concrete project investment. It ensures timely and efficient resolution of any issues that may arise.

DIY vs. Hiring a Professional

Homeowners often wonder if they should do concrete projects themselves or hire a professional. DIY might seem cheaper, but hiring a pro can be more beneficial.

Professional concrete contractors have the right tools and know-how to do the job well. They handle permits, inspections, and cleanup, saving homeowners time and effort.

DIY concrete work can be risky. It may lead to costly mistakes that need expensive repairs or redoing the entire project.

  • Professional contractors have specialized tools and equipment, like concrete mixers, that homeowners may not have access to or be able to easily obtain.
  • Experienced concrete professionals can properly assess the site, account for factors like drainage and underground utilities, and develop a comprehensive plan to ensure the project’s success.
  • Hiring a professional concrete contractor can provide peace of mind, as they are licensed and insured, protecting the homeowner against accidents or damages during the installation process.

DIY concrete projects can save money on labor. However, the risk of mistakes and time needed should be carefully thought about.

Homeowners should weigh the pros and cons of DIY work versus hiring a professional concrete contractor. This helps make an informed choice that fits their concrete project considerations.

Benefits of Hiring a Professional Concrete Contractor

Hiring a professional concrete contractor offers many advantages. They bring expert workmanship to your project. Skilled contractors have the know-how and tools to create durable, attractive concrete work.

A reputable contractor will meet or exceed your expectations. They ensure proper mixing, pouring, and finishing of concrete. This results in a high-quality final product you’ll love.

Professional contractors save you time and effort. Concrete projects can be labor-intensive and require special equipment. Contractors have the resources to complete jobs efficiently.

Quality Workmanship

Professional concrete contractors deliver top-notch quality. They possess the skills to mix, pour, and finish concrete properly. This ensures a durable and visually appealing result.

Choosing a skilled contractor gives you peace of mind. You can trust that your project will meet or surpass your expectations. Their expertise guarantees a superior outcome.

Time and Effort Savings

Hiring professionals saves you significant time and effort. Concrete work can be demanding, especially for larger projects. Contractors have the tools and manpower to complete jobs quickly.

This efficiency frees you up for other tasks. You can focus on different aspects of home improvement or daily responsibilities. Let the experts handle the concrete work for you.

Maintaining Your Stamped Concrete Patio

Stamped Concrete Patio Maintenance

Keep your stamped concrete patio beautiful and lasting with proper care. Follow these simple steps to maintain your outdoor oasis for years to come.

Clean your patio weekly by sweeping and rinsing. This removes dirt, debris, and stains from spills or bird droppings. For tough stains, use mild detergent and warm water.

Protect your patio by resealing every two to three years. This preserves color and prevents fading or damage from harsh weather. Avoid harsh chemicals or power washers that can harm the sealant.

In winter, use plastic shovels or snow blowers to clear snow and ice. Skip de-icing salts, which can cause flaking or peeling. Instead, use a pet-friendly snow melter made for stamped concrete.

  • Clean the patio weekly by sweeping and rinsing
  • Spot clean stains with mild detergent and warm water
  • Reseal the patio every 2-3 years to maintain protection
  • Use plastic shovels or snow blowers to clear snow and ice
  • Avoid de-icing salts and use a stamped concrete-safe melter

These easy concrete patio maintenance tips will keep your patio looking great. Your outdoor space will stay beautiful and enjoyable for many years.

Find Top Concrete Pros with FindPros

Looking to transform your outdoor living space with beautiful stamped concrete, color concrete, or exposed aggregate? FindPros can help you connect with top-rated cement contractors in your area. Simply answer a few questions about your home project, and we’ll match you with the best pros who can provide a free quote. Compare multiple options, find the perfect fit for your needs and budget, and turn your dream of a gorgeous new patio, pool deck, or walkway into a reality. Get started with FindPros today.

Conclusion

Choosing the right stamped concrete patio contractor is key for a successful residential concrete work project. Evaluate their reputation, experience, licensing, and insurance. Ask about their specialization and project timeline to avoid issues.

Good concrete project planning is vital. Stamped concrete patios can last decades when installed correctly. They may need regular cleaning and resealing to look their best.

These patios might fade or crack over time, especially in areas with big temperature changes. Consider the initial cost and upkeep against their long-term durability and low maintenance needs.

Hiring a skilled concrete contractor can create a stunning outdoor space. It can boost your property’s value and appeal. A well-done stamped concrete patio is a smart investment.

Frequently Asked Questions (Stamped Concrete Patio Contractors)

When hiring a stamped concrete contractor, look for companies with at least 5 years of experience, a solid reputation, proper licensing and insurance coverage. They should also specialize in decorative concrete work like patios, pool decks, and seat walls.
Reputable concrete companies will provide design consultations to help you choose the right colors, patterns, and textures that complement your home’s style. They can show you sample installations to ensure the final product matches your vision for a beautiful, aesthetically pleasing outdoor space.
The cost of a stamped concrete patio can vary widely, from to per square foot, depending on the complexity of the design, materials used, and labor required. Homeowners should get free quotes from multiple concrete contractors to compare pricing and find the best value.
To keep your stamped concrete looking its best, regular cleaning, sealing every 2-3 years, and careful snow/ice removal in winter are essential. Avoid harsh chemicals or power washers, and use pet-safe de-icers to prevent damage to the surface.
Stamped concrete offers a versatile, durable, and cost-effective solution for patios, pool decks, sidewalks, and driveways. It can be customized to mimic the appearance of natural stone, brick, or wood, providing an aesthetically pleasing and long-lasting option for your home’s exterior.

Stair Lift Repair

Sump Pump Installation Near You

Can’t find what you are looking for?

How It Works

  • Answer a few questions about your home project.
  • Within seconds, get matched with top-rated local pros.
  • Compare quotes and choose the best pro for the job.

Stair Lift Repair In Your Area

Need Stair Lift Repair? Here’s What to Expect

Meta Description: Learn about stair lift repair services, costs, and what to expect. Get expert tips on maintaining your stairlift and when to call professionals for efficient repairs.

Stair Lift Repair

Is your stair lift acting up? It can be frustrating when it stops working. Let’s explore when to call for repairs and what to expect.

We’ll cover common issues, troubleshooting tips, and the importance of regular maintenance. These insights will help keep your stair lift running smoothly and safely.

Key Takeaways

  • Stair lift repairs are crucial for maintaining safety and accessibility in your home.
  • Common issues include sluggish or stalling movement, battery problems, and strange noises.
  • Properly diagnosing and addressing problems early can prevent further damage to the stair lift.
  • Professional stair lift technicians have the expertise and tools to efficiently restore your lift.
  • Regular maintenance is key to extending the lifespan of your stair lift and identifying issues early.

Signs Your Stair Lift Needs Repair

Is your stair lift moving slowly or stalling? This signals it needs attention. These issues often stem from internal batteries needing replacement. A beeping alert usually means low battery or power supply problems.

Listen for scraping or grinding noises from your stair lift. These sounds may indicate worn rollers or misaligned components. Quick action prevents further damage and ensures safe operation.

Sluggish or Stalling Movement

Is your stair lift slow or stopping mid-way? This likely means the internal batteries are dying. These batteries power the lift. Regular replacement keeps your lift running smoothly.

Beeping Alerts for Low Battery

A beeping stair lift often means batteries aren’t charging properly. This could be due to power supply issues or a faulty charger. Quick action prevents your lift from becoming unusable.

Scraping or Grinding Noises

Unusual noises from your stair lift may indicate various problems. These could include worn rollers or misaligned internal components. Address these issues quickly to maintain safe operation.

Common Stair Lift Issues

stairlift issues

Keeping your stair lift parts in good shape is key for safe use. Some covers should move to spot objects. But they shouldn’t be loose, broken, or missing fasteners. A lift might run with a broken part, which can be risky.

A broken seat spring can stop the lift from moving right. It’s vital to fix these issues fast.

Loose, Broken, or Missing Covers

Stair lift covers guard inner parts and help the device run smooth. Loose, broken, or missing covers can cause problems.

These issues can harm inner parts and create safety risks. They can also make the stair lift work less well.

Broken or Damaged Parts

Stair lifts have many moving parts, both electric and mechanical. Though they’re usually reliable, broken parts can cause issues.

You might notice slow movement or stalling. The lift may beep to warn of a low battery. Scraping or grinding sounds are also signs of trouble.

Quick action on these problems keeps your stair lift safe and working well. Don’t wait to fix issues when you spot them.

Troubleshooting Stair Lift Problems

Stair lift issues need quick attention. Common problems include damaged tracks, exposed wiring, strange noises, vibrations, and intermittent operation. Addressing these promptly keeps your stair lift running smoothly.

  • Damaged Track or Exposed Wiring: Missing gear rack sections or exposed wiring can cause malfunctions. These issues need professional attention. Don’t try to fix them yourself without proper training.
  • Strange Noises or Vibrations: Odd sounds or vibrations often mean worn parts, bushings, or fittings. These problems can get worse over time. Have a qualified technician inspect and repair your stair lift.
  • Intermittent Operation: Random stops could mean electrical shorts, broken wires, or safety issues. Don’t try to fix these problems yourself. Call a professional stair lift repair service instead.

Your stair lift’s safety and reliability are crucial. Always get help from a qualified technician. Proper care extends your stair lift’s life and keeps it running smoothly.

When to Call a Professional for Stair Lift Repair

Rely on professional stairlift technicians for repairs. DIY attempts may damage the lift and compromise safety. Common issues needing expert help include unusual noises, jerky movements, or power supply problems.

Schedule regular maintenance with certified technicians. These factory-trained experts can diagnose and fix stairlift problems effectively. Call a repair service immediately if you notice any issues.

  • Priority service is offered for code red emergencies, with call-outs within a few hours, usually on the same day.
  • An emergency repair service is available 24/7, 365 days a year, particularly for out-of-hours callouts, with night repairs exclusively for contract customers under warranty.
  • The service employs expert, fully qualified engineers equipped to handle stairlift faults and servicing, who have been manufacturer-trained on the specific products.
  • Vans are stocked with commonly used spare parts, backed up by a parts store in the warehouse for additional needs.
  • Repair services are not limited to specific stairlift models, covering both installed models and those not originally installed by the company.

Importance of Regular Stair Lift Maintenance

Regular stairlift servicing keeps your stairlift safe and reliable. It helps spot and fix issues quickly, preventing bigger problems. Most makers suggest servicing every 12 months.

More frequent checks may be needed for used or heavily used models. Regular maintenance extends the lifespan of your stair lift. It lets certified technicians catch problems early, saving you money.

Extending the Lifespan of Your Stair Lift

Preventative maintenance keeps your stairlift in top shape. Regular checks by factory trained pros ensure all parts work well. This approach can make your stairlift last longer.

It saves you from costly stairlift repairs or early replacement. Taking care of your stairlift now pays off in the long run.

Identifying Issues Early

  • Regular stairlift maintenance lets techs spot problems early.
  • Quick fixes prevent bigger issues and costly repairs later.
  • Routine checkups ensure safety features work right, protecting users and equipment.

Regular stairlift maintenance gives you peace of mind. It keeps your mobility solution working well for years to come.

Tips for Finding a Reliable Stair Lift Repair Service

Stairlift Repair Service

Choosing a repair service with certified, factory-trained technicians is vital for your stair lift’s upkeep. These experts know leading brands like Bruno stairlifts inside out. They can quickly spot and fix any problems that arise.

Look for a company offering great customer service and clear pricing. Comprehensive warranties or extended service plans are also important. These features ensure your stair lift stays in top shape for years.

To find a reliable stair lift repair service, consider the following tips:

  • Seek out a provider with certified, factory-trained technicians who can expertly service and repair your stair lift.
  • Choose a company that offers prompt, responsive customer service and is available to address your needs in a timely manner.
  • Look for a repair service that provides transparent pricing, detailed estimates, and comprehensive warranties or extended service plans.
  • Ensure the technicians have extensive knowledge of leading stair lift brands, such as Bruno, and can diagnose and resolve a wide range of issues.
  • Prioritize providers that maintain a commitment to customer satisfaction and have a proven track record of reliable stairlift repair and stairlift service.

A trustworthy repair service with certified technicians will give your stair lift expert care. This attention ensures your stairlift works safely and efficiently for years. It can also extend your stair lift’s lifespan.

Proper stairlift maintenance keeps your device reliable. You can count on it when you need it most.

Cost Considerations for Stair Lift Repairs

Stair lift repair costs can vary greatly. The average servicing cost in the U.S. is about $220. This may cover one-time maintenance or be part of a regular servicing plan.

The type of stairlift affects repair costs. Straight stairlifts are usually cheaper to service than curved models. Reconditioned or heavily used stairlifts might need more frequent, costly servicing.

Consider aftercare services and warranty options when buying a stairlift. An extended warranty can help protect your investment and reduce future repair costs.

Repair costs can range from a few hundred to several thousand dollars. The extent of damage, replacement parts needed, and labor required influence the final price.

Understanding typical stairlift repair cost, stairlift service cost, and maintenance cost helps you plan for upkeep. This applies to straight stairlift, curved stairlift, or reconditioned stairlift models.

Regular maintenance and quick repairs can extend your stairlift’s lifespan. This approach can also minimize future pricing for repairs.

Need Help with Your Stair Lift? FindPros Can Assist

Looking for reliable stair lift repair services but unsure where to start? FindPros can help. Our team connects you with top-rated local professionals who can stock the right replacement parts and handle the fixing of your stair lift efficiently. Simply answer a few questions about your home project, and we’ll match you with experts who can provide competitive pricing. You can compare quotes and choose the pro that best fits your needs and budget. Take the guesswork out of finding the perfect stair lift technician – let FindPros do the work for you.

Conclusion

Proper stair lift maintenance is key for your safety and independence at home. Know the signs of stairlift issues and be proactive about regular maintenance. Work with reliable repair professionals to extend your lift’s lifespan and avoid costly breakdowns.

Professional care for straight or curved stairlifts offers peace of mind. It allows safe access to all levels of your home. Your stair lift can be a lasting accessibility solution with proper support.

Experienced stairlift installation companies and factory-trained technicians ensure proper setup and maintenance. They provide warranty and cost-effective solutions for your needs. Prioritizing safety lets you enjoy the freedom a working stairlift offers.

Investing in professional stairlift service and maintenance is smart for repairs or upkeep. With expert support, your stairlift remains a reliable asset. It helps you access your entire home confidently and easily.

Frequently Asked Questions (Stair Lift Repair)

Certified, factory-trained technicians who are experts on leading stairlift brands like Bruno can provide the best stairlift services. These technicians have in-depth knowledge of the inner workings of these stairlift models and can quickly diagnose and fix any issues.
Look for a stairlift repair company that offers prompt, responsive customer service. You can contact them to schedule maintenance services or request a service call if you’re experiencing any problems with your stairlift. They should have the expertise to service various stairlift brands.
Regular maintenance by certified technicians is crucial for extending the lifespan of your stairlift. The article emphasizes that preventative maintenance can help identify and address issues early, preventing bigger problems and costly repairs down the line. This ensures your stairlift remains reliable and safe for residents to operate.
The article recommends looking for a stairlift repair service that employs factory-trained technicians and keeps their service vans stocked with commonly used spare parts. This allows them to efficiently fix your stairlift chair or unit on-site, without having to order parts and come back later.
When installing a new stairlift, the article advises choosing a provider with certified technicians who can properly position and install the unit. They should have experience with various stairlift models and brands, and offer comprehensive warranties or extended service plans to ensure you’re paying for quality work and can get prompt fixes if needed.

Stair Companies

Sump Pump Installation Near You

Can’t find what you are looking for?

How It Works

  • Answer a few questions about your home project.
  • Within seconds, get matched with top-rated local pros.
  • Compare quotes and choose the best pro for the job.

Stair Companies In Your Area

Stair Companies: Find the Perfect Fit for Your Home

Meta Description: Discover top-rated stair companies for your home renovation. Expert craftsmen, custom designs, and quality materials ensure the perfect staircase for your space.

Stair Companies

Home renovation can be tricky, especially when it comes to staircases. Finding the right company to create your dream staircase is crucial. Top-tier stair companies specialize in crafting custom staircases for homeowners like you.

These companies offer a wide range of options to suit your space and style. They work closely with clients to ensure the perfect fit for any home.

Introduction to Stair Companies

Picking the right stair company is key for your home’s new staircase. Top companies offer expert knowledge and great products. They work with homeowners to create custom staircases that go beyond expectations.

The Importance of Finding the Right Stair Company

Your chosen stair company affects your custom staircase design’s quality and look. A good company knows building codes and safety rules. They’ll make sure your staircase is safe and matches your vision.

Factors to Consider When Choosing a Stair Company

When picking a stair company, think about these important things:

  • Design Capabilities: Look for a stair company with many custom staircase design choices. They should create a unique staircase that fits your home.
  • Customization Options: Make sure the company lets you pick different materials and finishes. This helps you make the staircase your own.
  • Installation Services: A good stair company should offer full installation services. This ensures your staircase is set up right and safely.
  • Warranty Coverage: Choose a company that backs its work with a strong warranty. This protects your investment and gives peace of mind.
  • Reputation and Customer Service: Check the company’s reputation and customer service. Good support from design consultants makes the process better.

By looking at these factors, you can find a great stair company. They’ll help create a beautiful and useful staircase for your home.

Types of Staircase Designs

Staircases can transform your home and set the tone for the entire space. Companies offer various designs to suit different home styles and needs. Options range from classic straight staircases to space-saving spirals and graceful curved designs.

Straight Staircases

Straight staircases are popular due to their simplicity and versatility. They provide a direct path between levels, making them practical and efficient. These staircases can be made from wood, metal, or a combination of materials.

Straight staircases can include additional storage or design elements. This enhances their functionality and aesthetic appeal, making them even more attractive to homeowners.

Spiral Staircases

Spiral staircases are perfect for those seeking a space-saving solution. They revolve around a central point, making them ideal for efficient use of square footage. These staircases are popular in city apartments and coastal condos.

With over 5,000 design options, homeowners can customize their spiral staircase. This allows them to match their personal style and meet specific home requirements.

Curved Staircases

Curved staircases create an elegant look, often used in traditional or luxury homes. They feature a gentle arc, adding sophistication to the space. These staircases are particularly striking when placed near the foyer or entryway.

Stair companies work closely with clients to understand their style preferences. This helps them recommend the ideal staircase design that fits seamlessly with the overall home aesthetic.

Stair Materials and Finishes

stair materials

Stair companies offer many materials and finishes for custom staircases. You can choose from warm wood or modern metal options. Each material brings its own unique style to your home.

Wood Staircases

Wood staircases give a classic and inviting look. Oak, maple, and cherry are popular choices. StairSuppliesTM offers wood stair parts like handrails, treads, and balusters.

Metal Staircases

Metal staircases make a bold statement in modern homes. Steel and wrought iron are common choices. iStairs provides stainless steel railing parts made from high-quality materials.

Custom Finishes and Accents

Stair companies offer custom finish options like powder coatings and stains. These allow you to match your staircase to your home’s design.

Decorative accents such as ornate balusters can add visual interest. These details help personalize your space and make it unique.

Working with experienced stair companies ensures a perfect blend of form and function. They can create a staircase that enhances your home’s overall look.

Safety and Building Code Compliance

Safety and building code compliance are crucial in stair design. Companies ensure their products meet all safety standards and local regulations. This covers requirements for railings, balusters, tread dimensions, and riser heights.

Stair Railing and Baluster Requirements

Stair railings and balusters must provide adequate support to prevent falls. The International Residential Code (IRC) requires a minimum railing height of 36 inches for residential stairs. The International Building Code (IBC) specifies 34 to 38 inches for commercial stairs.

Balusters must be spaced no more than 36 inches apart for safety. These rules ensure a secure environment for stair users.

Tread and Riser Dimensions

Stair tread and riser dimensions are strictly regulated for safe use. The IRC allows a maximum riser height of 7.75 inches, with minimal variation.

Tread depth must be at least 10 inches with nosing, or 11 inches without. Commercial stairs under the IBC require a minimum tread depth of 11 inches.

Following these requirements, stair companies provide safe and compliant staircases. This ensures both beauty and safety for homeowners and businesses alike.

Installation and Construction Process

stair company installation

Reliable stair companies offer seamless installation and construction. Skilled craftsmen handle the entire project, from design to final installation. They work closely with clients to ensure smooth timelines and clear communication.

The process involves delivering pre-fabricated stair components to the site. Installers then assemble and integrate the staircase into the home. This expertise ensures a successful installation that meets client expectations.

  1. Stair company installation experts work closely with clients to coordinate the project timeline.
  2. Skilled craftsmen from the stair company handle the entire construction process, from delivery to final assembly.
  3. Clear communication between the stair company and the client ensures a seamless installation experience.
  4. The stair company’s expertise in project management guarantees a successful staircase integration into the home.

Reputable stair companies execute installations with care and professionalism. This results in a stunning addition to your living space. Trust the experts to create your dream staircase.

Cost Considerations

Budgeting for a new staircase is crucial in home improvement. Costs vary based on stair company pricing, stair cost factors, and stair customization needs. Understanding these elements helps homeowners plan their stair budget effectively.

Homeowners can find affordable solutions that meet their needs by considering these factors. Proper planning ensures a balance between desired features and financial constraints.

Factors Affecting Stair Cost

The material cost is a key factor. Options range from wood and metal to premium materials like stone or glass. Stair installation cost also impacts the overall price.

Design complexity and necessary construction work can increase expenses. The stair company’s value proposition, including expertise and customer service, influences pricing too.

Budget Planning Tips

  • Collaborate with the stair company to explore options that fit your budget while still achieving your desired aesthetic and functional goals.
  • Consider the long-term cost of ownership, including maintenance and potential future upgrades, when setting your stair budget.
  • Investigate any available financing options or payment plans offered by the stair company to help manage the upfront costs.

Understanding stair cost factors helps in planning your stair budget. Work with a reputable stair company to find a solution that fits your needs and budget.

Maintenance and Care

A high-quality staircase needs proper care to last. Stair company maintenance, stair care, and regular stair cleaning keep your staircase in top shape. Leading stair companies offer guidance to help homeowners maintain their staircases.

These companies provide stair cleaning methods and stair repair tips. They empower customers with knowledge to keep staircases beautiful and functional. Many offer lifetime guarantees on metal fabrication, ensuring excellent customer support and after-sales service.

Working with a trusted stair company helps protect your investment. Annual inspections and adjustments preserve the stair warranty and extend your staircase’s life.

For stair cleaning or stair repair, rely on a reputable stair company. They maintain your staircase’s integrity and beauty. Proper care ensures your staircase remains elegant and functional for years.

The Advantage of FindPros

Looking to take your home renovation project to the next level? FindPros can help. Our team of experienced professionals is ready to carry out your vision with expert techniques. Our portfolio of top-rated artisans is here to bring your dreams to life. Simply click to answer a few questions about your project, and we’ll match you with the best local pros that you can love working with. No hassle, just the perfect fit for your home. Get the best pricing when multiple pros compete for your business – let FindPros be your partner in taking your project forward.

Conclusion

Finding the right stair company is crucial for designing and installing a new staircase. Companies offer expertise, customization options, and exceptional service. They ensure the perfect fit for your space and style.

A reputable stair company helps create a unique and functional staircase. They enhance your home’s beauty while meeting safety and building code requirements. Quality, craftsmanship, and customer satisfaction are their focus.

Custom stair companies offer one-of-a-kind designs and industry standard compliance. Their expertise guides you through design and installation. They ensure your aesthetic and functional needs are met.

Stair companies with a strong reputation provide seamless and enjoyable experiences. Their commitment to customer service and attention to detail is invaluable. They help turn your staircase dreams into reality.

Investing in a reputable stair company enhances your home’s value. It provides a stunning focal point for years to come. The right stair company helps you achieve the perfect solution for your needs.

Frequently Asked Questions (Stair Lift Repair)

Certified, factory-trained technicians who are experts on leading stairlift brands like Bruno can provide the best stairlift services. These technicians have in-depth knowledge of the inner workings of these stairlift models and can quickly diagnose and fix any issues.
Look for a stairlift repair company that offers prompt, responsive customer service. You can contact them to schedule maintenance services or request a service call if you’re experiencing any problems with your stairlift. They should have the expertise to service various stairlift brands.
Regular maintenance by certified technicians is crucial for extending the lifespan of your stairlift. The article emphasizes that preventative maintenance can help identify and address issues early, preventing bigger problems and costly repairs down the line. This ensures your stairlift remains reliable and safe for residents to operate.
The article recommends looking for a stairlift repair service that employs factory-trained technicians and keeps their service vans stocked with commonly used spare parts. This allows them to efficiently fix your stairlift chair or unit on-site, without having to order parts and come back later.
When installing a new stairlift, the article advises choosing a provider with certified technicians who can properly position and install the unit. They should have experience with various stairlift models and brands, and offer comprehensive warranties or extended service plans to ensure you’re paying for quality work and can get prompt fixes if needed.

Stained Glass Companies

Sump Pump Installation Near You

Can’t find what you are looking for?

How It Works

  • Answer a few questions about your home project.
  • Within seconds, get matched with top-rated local pros.
  • Compare quotes and choose the best pro for the job.

Stained Glass Companies In Your Area

Stained Glass Companies: Your Guide to Finding the Best

Meta Description: Discover top-rated stained glass companies offering quality supplies, tools, and resources for your projects. Find expert craftsmen and unique designs for windows and art.

Stained Glass Companies

Stained glass art has a timeless beauty that captivates many. Finding the right company is crucial for bringing your vision to life. This guide will help you navigate the world of stained glass companies.

We’ll cover the history of stained glass and how to choose the perfect supplier. You’ll gain knowledge to make informed decisions about your stained glass project.

Key Takeaways

  • Stained glass crafting involves a medium to high start-up cost, with glass being the most expensive investment.
  • The essential tools and materials for stained glass projects include transparency sheets, scissors, X-acto knife, ruler, glass running pliers, soldering iron, and safety goggles.
  • Carefully evaluating stained glass companies’ reputation and customer reviews is crucial to ensure a successful partnership.
  • Understanding your project requirements and the design consultation process is key to selecting the right stained glass company.

Understanding the Art of Stained Glass

stained glass techniques

Stained glass is a captivating art form with a rich history. It has evolved over time, showcasing various techniques and styles. This unique medium is cherished for both personal and commercial projects.

History and Significance of Stained Glass

The earliest known stained glass dates back to the 7th century. Fragments were discovered at St. Paul’s Monastery in Jarrow, England. Over time, various cultures influenced this art form.

The Moors’ filigree windows made their way into Europe. During the Romanesque era, stained glass often depicted saints and biblical stories. The Virgin Mary was particularly revered in these works.

Stained glass carries cultural and religious significance. European kings and bishops sent emissaries to acquire holy relics. They brought back small works of art incorporating precious glass.

Types of Stained Glass Techniques

Stained glass comes in three basic forms: leaded, art, and faceted. Leaded stained glass is held together by lead “cames”. Art-glass was popularized by Louis C. Tiffany.

Tiffany used colored enamels and opalescent glass in his work. Faceted windows are made from thick slabs of glass. These can range from one-half inch to several inches thick.

Stained glass-making has evolved significantly over time. Advancements include the use of copper foil and lead came methods. These techniques allow artists to create intricate, visually stunning works.

Stained glass has an enduring popularity and cultural significance. It continues to captivate and inspire people around the world. This cherished art form remains a beautiful medium for artistic expression.

DIY Stained Glass Projects

DIY stained glass projects

DIY stained glass projects offer exciting opportunities for crafters of all levels. Beginner-friendly kits provide a great starting point. These kits include supplies and instructions to create unique pieces.

Beginner-Friendly Stained Glass Kits

Stained glass kits include essential tools like glass cutters, pliers, and soldering irons. They also come with colorful glass pieces and patterns. These kits help you learn techniques like glass cutting and copper foiling.

The initial investment for tools can range from $200 to $400. Local studios may offer classes where tools are provided or rented.

Online Resources and Tutorials

  • Explore a wealth of online tutorials that guide you through the stained glass making process, from pattern selection to glass cutting and soldering.
  • Learn at your own pace, with step-by-step instructions and video demonstrations covering the fundamentals and advanced techniques.
  • Discover a plethora of free resources, including instructional blogs, forums, and video channels, to hone your stained glass crafting skills.

DIY stained glass projects offer endless chances to learn and create. Try different techniques and let your imagination soar. Craft your own unique stained glass masterpieces and enjoy the process.

Criteria for Evaluating Stained Glass Companies

Choosing the right stained glass company requires careful evaluation. Research their reputation, expertise, and customer service. Look into their track record, reviews, and portfolio for insights into their work quality.

Reputation and Customer Reviews

Check the company’s reputation and customer reviews. Look for feedback about their quality, service, and reliability. A company with a solid reputation and positive customer reviews is likely to deliver great results.

Review the company’s portfolio to assess their expertise in various stained glass techniques. A diverse portfolio shows the company’s ability to handle different project requirements.

Consider the company’s pricing and how it matches their work quality and service level. Don’t just go for the cheapest option. Look for fair pricing and a commitment to customer satisfaction.

Selecting the Right Stained Glass Company

Picking the perfect stained glass company requires careful thought about your project’s needs. Consider the size, complexity, design, style, and budget of your project. The company’s communication and customer service also play a big role.

These factors can greatly impact your collaboration and the final result. A good match will ensure your stained glass project turns out beautifully.

Assessing Your Project Requirements

Before choosing a company, get clear on your project requirements. Think about the size and scope of your project.

Consider the custom design and style you want. Also, keep in mind your budget and any time limits you have.

Lastly, decide how much you want to work with the company during the design process.

  • The size and scope of your project, such as the number of windows or panels required
  • The desired custom design and style of the stained glass
  • Your budget and any timeline constraints
  • The level of collaboration you expect with the stained glass company during the design and consultation process

Communication and Customer Service

Good communication and customer service are key when working with a stained glass company. Look for a company that answers quickly and clearly.

They should try to understand your needs and work to meet them. A smooth design process is also important.

Lastly, make sure they offer good customer service from start to finish.

  1. Responds promptly to your inquiries and provides clear, detailed information
  2. Demonstrates a willingness to understand your project requirements and work with you to achieve your desired outcome
  3. Offers a seamless design and consultation process, ensuring your vision is brought to life
  4. Provides reliable customer service throughout the project, from start to finish

By thinking about your project requirements and valuing good communication, you can find the right company. They’ll bring your vision to life and create a stunning result.

Working with a Stained Glass Company

Teaming up with a top-notch stained glass company brings your vision to life. They guide you through design, consultation, installation, and maintenance. A skilled team ensures your project’s success from start to finish.

Design and Consultation Process

During design and consultation, the company works with you to grasp your unique vision. They offer design ideas and customize to match your expectations. This teamwork is key to creating a one-of-a-kind stained glass masterpiece.

Installation and Maintenance

After finalizing the design, the company handles production, including glass cutting and assembly. Proper installation techniques ensure the piece’s longevity and structural integrity. They also guide you on care to keep your stained glass beautiful.

A reputable stained glass company offers top-notch design, consultation, installation, and maintenance services. This ensures a successful custom collaboration and project management experience. Their quality craftsmanship and care let you enjoy your stunning stained glass for years.

Finding the Best Stained Glass Pros with FindPros

Looking for the perfect stained glass company to bring your vision to life? FindPros can help! Simply answer a few questions about your home project, and we’ll instantly match you with top-rated local professionals. Get the best pricing when multiple pros compete for your job, and find the experts you click with best. Compare quotes, pick the ideal pro, and watch your stained glass dreams become a reality. Get started today – just add your project details to your cart and click to get connected with the right stained glass business for your needs.

Conclusion

Stained glass companies turn creative visions into stunning art. They blend rich history with modern techniques. You can start your own artistic journey with DIY projects that match your style.

Choose a company with a solid reputation and great customer service. Look for experts who listen to your needs. They should offer thorough design consultation and top-notch installation services.

The right company will guide you through custom home pieces or large projects. They’ll help you create something that goes beyond your dreams. Stained glass adds beauty to your space and keeps this timeless craft alive.

Frequently Asked Questions (Stair Lift Repair)

Certified, factory-trained technicians who are experts on leading stairlift brands like Bruno can provide the best stairlift services. These technicians have in-depth knowledge of the inner workings of these stairlift models and can quickly diagnose and fix any issues.
Look for a stairlift repair company that offers prompt, responsive customer service. You can contact them to schedule maintenance services or request a service call if you’re experiencing any problems with your stairlift. They should have the expertise to service various stairlift brands.
Regular maintenance by certified technicians is crucial for extending the lifespan of your stairlift. The article emphasizes that preventative maintenance can help identify and address issues early, preventing bigger problems and costly repairs down the line. This ensures your stairlift remains reliable and safe for residents to operate.
The article recommends looking for a stairlift repair service that employs factory-trained technicians and keeps their service vans stocked with commonly used spare parts. This allows them to efficiently fix your stairlift chair or unit on-site, without having to order parts and come back later.
When installing a new stairlift, the article advises choosing a provider with certified technicians who can properly position and install the unit. They should have experience with various stairlift models and brands, and offer comprehensive warranties or extended service plans to ensure you’re paying for quality work and can get prompt fixes if needed.

Sprinkler Winterization

Sump Pump Installation Near You

Can’t find what you are looking for?

How It Works

  • Answer a few questions about your home project.
  • Within seconds, get matched with top-rated local pros.
  • Compare quotes and choose the best pro for the job.

Sprinkler Winterization In Your Area

Sprinkler Winterization: Protect Your System from Freezing

Meta Description: Learn how to properly winterize your sprinkler system to prevent freezing and costly damage. Protect your investment with expert tips for Sprinkler Winterization.

Sprinkler Winterization

Worried about frozen pipes and costly sprinkler repairs? Cold weather is coming, so it’s time to protect your lawn investment. Sprinkler winterization is key to prevent damage from freezing temperatures.

Let’s explore expert tips to get your sprinkler system ready for winter. These steps will help your system withstand the cold and avoid costly repairs.

Key Takeaways

  • Winterizing your sprinkler system is essential to prevent costly repairs from frozen pipes.
  • Proper water removal methods, such as manual drain or compressed air blowout, are crucial for protecting your system.
  • Insulating exposed components and managing valves can further safeguard your sprinkler system.
  • Monitoring weather forecasts and taking immediate action during unexpected freezes can save your system from damage.
  • Regular maintenance and professional winterization services can ensure your sprinkler system is ready for the cold season.

Understanding the Importance of Sprinkler Winterization

Cold weather demands sprinkler system winterization. This vital task prevents costly repairs and protects your lawn investment. Proper winterization stops pipes from freezing, avoiding major issues come spring.

Preventing Costly Repairs from Frozen Pipes

Skipping winterization can lead to cracked and burst pipes. This often results in expensive replacements and time-consuming repairs. Frozen water can also break sprinkler heads, causing irreparable damage.

Safeguarding Your Investment in Lawn and Landscape

Winterization protects your lawn and landscape investment. Freezing water can damage the sprinkler system manifold, which controls water flow. This can crack valves and require costly replacements.

Proper winterization helps avoid these expensive problems. It ensures your lawn stays healthy and beautiful for years to come.

Shut Off the Water Supply

Shutting off the water supply is crucial for winterizing your sprinkler system. Find the main shut-off valve and turn off the backflow preventer. This stops water from staying in the system and freezing.

  • Locating the Main Shut-Off Valve: The main shut-off valve is usually near the water meter or on a pipe outside. It controls water flow to your entire property. Turn the valve a quarter turn right to shut off the water.
  • Turning Off the Backflow Preventer: The backflow preventer stops contaminated water from flowing back into the main supply. It’s typically outside or in the basement. Find the two pipes connected to it and turn off one.

Shutting off the water supply and backflow preventer is a key winterization step. It keeps water out of the sprinkler system and prevents costly freeze damage.

Draining the Sprinkler System

Drain sprinkler system

Properly draining your sprinkler system is crucial after shutting off the water supply. This protects pipes from freezing and bursting during winter. Several methods can effectively remove remaining water from your system.

These include manual drain valves, automatic drain valves, and compressed air blow-outs. Each method has its advantages for winterizing your sprinkler system.

Manual Drain Valve Method

This method requires opening each zone’s drain valve manually. Water gradually drains out, preventing freezing inside the pipes. Ensure all valves are fully open for maximum water removal.

Automatic Drain Valve Method

Sprinkler systems equipped with automatic drains offer a convenient solution. As water pressure drops, these valves open automatically. This allows the system to drain itself without manual intervention.

Compressed Air Blow-Out Method

This method uses high-pressure air to expel water from sprinkler lines. It’s often considered the most thorough winterization technique. However, use appropriate air pressure to avoid damaging the system.

Proper drainage is key to protecting your sprinkler system. It helps prevent costly repairs in the future. Choose the method that works best for your system and needs.

Insulating Exposed Components

Protect your sprinkler system from winter’s chill. Insulating exposed parts prevents freezing, which can cause costly damage. This simple step is a smart investment for your home.

Look for exposed pipes, valves, and sprinkler heads. These parts are at risk in cold weather. In Michigan, temperatures can drop below freezing from November through March.

Use foam insulation tape or tubes to wrap exposed components. Find these materials at home improvement stores. Wrap them tightly around the parts for a snug fit.

Consider using special covers for extra protection. These products are made to withstand harsh weather. They add another layer of insulation to important areas.

Proper insulation is key to winterizing your sprinkler system. This task helps you avoid expensive repairs later. Take action now to protect your system all winter long.

Protecting Valves and Backflow Preventers

Safeguarding valves and backflow preventers is vital for your sprinkler system. Proper winterization prevents costly repairs from frozen pipes and water damage. Let’s explore how to protect these crucial components effectively.

Using Insulation Tape and Covers

Use high-quality insulation tape and covers for valves and backflow preventers. This helps keep heat in and stops freezing. Cover every part of the valve for maximum protection.

Thermacel Foam Pipe Insulation and Backflow Armor Insulated Pouch are great options. Don’t just insulate the valve or brass part. Cover everything to avoid freeze damage.

Ensuring Proper Ventilation

Insulation is crucial, but so is proper ventilation. Poor airflow can lead to moisture buildup and damage the system. Position insulation and covers to allow air circulation.

This balance between insulation and ventilation protects your sprinkler system from harsh winter conditions. Take care to maintain this balance for optimal protection.

Preparing for Unexpected Freezes

Prepare for unexpected freezes

Unexpected freezes can damage your sprinkler system even after winterizing. Stay alert and ready to act quickly. This can save you from costly repairs and protect your investment.

Monitor Weather Forecasts

Keep an eye on local weather reports. Watch for sudden temperature drops during fall and winter. This helps you address potential freezing issues before they happen.

Take Immediate Action

  • If a freeze is coming, protect your sprinkler system further. Drain it more thoroughly or add extra insulation to vulnerable parts.
  • Act fast to prevent frozen pipes from bursting. Quick action can save you from expensive repairs.
  • Keep supplies like foam insulation and pipe wrap tape on hand. These items help you address freezing concerns quickly.

Stay alert and act fast to protect your sprinkler system from unexpected freezes. This helps safeguard your lawn and landscape investment.

Sprinkler System Maintenance

Proper upkeep is vital for your sprinkler system’s effectiveness. Spring brings warmer weather, making it the perfect time for a thorough inspection. Check for any winter damage or issues during this startup process.

Spring Startup and Inspection

Carefully examine all parts of your sprinkler system after winter. Look for signs of damage, wear, or potential problems. This includes checking pipes, connections, valves, and sprinkler heads.

Ensure proper water pressure and flow. Address any necessary repairs or adjustments. This thorough check helps identify issues before they worsen.

  • Cracks or leaks in pipes and connections
  • Proper operation of valves and sprinkler heads
  • Adequate water pressure and flow
  • Any necessary repairs or adjustments

A thorough spring startup keeps your sprinkler system maintenance on track. It helps you spot and fix problems early, ensuring smooth operation during growing season.

Routine Checks and Repairs

Regular checks throughout the year are crucial. Address any routine checks and repairs as needed. This includes fixing leaks and broken sprinkler heads.

Adjust sprinkler heads for proper coverage. Prevent overspray to save water. Clean and maintain the backflow preventer and other system parts.

  1. Checking for and repairing any leaks or broken sprinkler heads
  2. Adjusting sprinkler heads to ensure proper coverage and prevent overspray
  3. Cleaning and maintaining the backflow preventer and other system components
  4. Monitoring the system’s spring startup and inspection for any changes or issues

Regular maintenance keeps your sprinkler system running smoothly. It helps prevent costly repairs in the future. Stay on top of these tasks for an efficient system.

Hiring Professional Winterization Services

Preparing your sprinkler system for winter is crucial. Professional winterization services can help avoid costly repairs. Experienced technicians have the skills to protect your system from harsh weather.

Many companies offer thorough winterization services. They inspect, turn off water, and empty the system. Some even provide a No Freeze Damage Guarantee™.

These services go beyond just winter prep. Many offer year-round maintenance packages. They can spot issues and suggest spring repairs.

Professional winterization services can save you time and money. They protect your lawn and landscape investment. Trusting experts ensures your system is ready for winter.

Find Pros for Your Sprinkler Winterization Needs

Don’t let the hassle of winterizing your sprinkler system leave you frustrated. FindPros can connect you with top-rated local professionals who specialize in preparing your irrigation system for the cold months. Simply answer a few questions about your sprinkler system and project needs, and we’ll match you with pros who can provide competitive quotes. Compare options, choose the best fit, and get your system properly insulated and winterized before the first freeze. Take the stress out of maintaining your sprinkler system with FindPros – the easy way to find skilled service providers for all your home projects.

Conclusion

Winterizing your sprinkler system protects your lawn and landscape investment. Follow these steps to shut off water, drain the system, and insulate exposed parts. This shields your sprinklers from freezing temperatures.

Skipping winterization can lead to costly damages and plumbing issues. Stay alert for surprise freezes. Regular maintenance keeps your system ready for warmer weather.

Sprinkler winterization is crucial for your outdoor space. It helps protect your sprinkler system and prevent freeze damage. Take action now to safeguard your investment for the next growing season.

Frequently Asked Questions (Stair Lift Repair)

Certified, factory-trained technicians who are experts on leading stairlift brands like Bruno can provide the best stairlift services. These technicians have in-depth knowledge of the inner workings of these stairlift models and can quickly diagnose and fix any issues.
Look for a stairlift repair company that offers prompt, responsive customer service. You can contact them to schedule maintenance services or request a service call if you’re experiencing any problems with your stairlift. They should have the expertise to service various stairlift brands.
Regular maintenance by certified technicians is crucial for extending the lifespan of your stairlift. The article emphasizes that preventative maintenance can help identify and address issues early, preventing bigger problems and costly repairs down the line. This ensures your stairlift remains reliable and safe for residents to operate.
The article recommends looking for a stairlift repair service that employs factory-trained technicians and keeps their service vans stocked with commonly used spare parts. This allows them to efficiently fix your stairlift chair or unit on-site, without having to order parts and come back later.
When installing a new stairlift, the article advises choosing a provider with certified technicians who can properly position and install the unit. They should have experience with various stairlift models and brands, and offer comprehensive warranties or extended service plans to ensure you’re paying for quality work and can get prompt fixes if needed.

Sprinkler Installation

Sump Pump Installation Near You

Can’t find what you are looking for?

How It Works

  • Answer a few questions about your home project.
  • Within seconds, get matched with top-rated local pros.
  • Compare quotes and choose the best pro for the job.

Sprinkler Installation In Your Area

Need Sprinkler Installation Services? Here’s What You Should Know

Meta Description: Discover the essentials of installing a Sprinkler System. Learn about costs, types, and DIY options to keep your lawn lush and save water. Expert tips inside.

Sprinkler Installation

A reliable sprinkler system is key for a healthy lawn and garden. Installing one can seem overwhelming, but it doesn’t have to be. This guide will help you make smart choices about your sprinkler system needs.

Want to know how a sprinkler system can improve your outdoor space? Curious about its parts and installation process? You’ve come to the right place.

This article offers valuable tips for both DIY fans and those who prefer professional help. You’ll learn how to make your sprinkler system investment a success.

Key Takeaways

  • Sprinkler systems save time by automating irrigation. This lets you focus on planting and pest control instead.
  • These systems offer precise watering control. This is great for lawns needing different amounts of water as they grow.
  • Sprinkler systems are water-efficient. They deliver water directly to plants, reducing waste through runoff and evaporation.
  • The system mimics natural rainfall. It sprays water through pipes and sprinklers for even distribution.
  • Before spring startup, check all sprinkler parts for damage. This includes heads, pipes, and valves.

What is a Sprinkler Irrigation System?

A sprinkler irrigation system efficiently waters lawns, gardens, and outdoor areas. It uses pipes, valves, and sprinkler heads to spread water evenly. This system automatically gives plants and grass the right amount of water for optimal growth.

Definition and Overview of Sprinkler Irrigation

Sprinkler irrigation systems copy natural rainfall through strategically placed sprinkler heads. They are known for efficient water use and precise targeting of specific areas. These systems help improve plant and herb growth and yield.

Sprinkler irrigation is used in agriculture, homes, and industries. It has various applications like cooling, dust control, and crop watering. Systems range from simple hose-end sprinklers to advanced underground setups with electronic controls.

These systems work with different water pressure and water flow levels. This makes them suitable for various terrains and landscape needs.

Benefits of Sprinkler Irrigation

Sprinkler irrigation systems offer many advantages for homeowners and farmers. They provide efficient water use by delivering water directly to plant roots. This minimizes waste and evaporation, saving water compared to manual methods.

These systems also offer precision irrigation. They deliver the exact amount of moisture plants need. This prevents over or under-watering, leading to improved plant growth and yield.

Sprinklers help maintain lush green landscapes in areas with low rainfall. Homeowners can customize systems based on climate, design, and terrain. Automated sprinklers use sensors to avoid over-watering and optimize water usage.

  • Sprinkler systems help maintain a lush green landscape in areas with insufficient rainfall.
  • Homeowners can customize sprinkler systems based on climate, landscape design, and terrain for optimal watering.
  • Automated sprinkler systems help conserve water by using sensors to avoid over-watering and optimize water usage.

Sprinkler irrigation benefits go beyond water conservation. They contribute to plant health and productivity. This makes them valuable for homeowners and farmers alike.

Major Components of a Sprinkler System

A sprinkler system has several key parts. These include pipes, control valves, risers, sprinkler heads, and an automatic timer. Together, they deliver water to your lawn and garden.

Pipes move water from the source to control valves. These valves manage water flow to different zones. Risers link pipes to sprinkler heads, which spread water across your landscape.

  • PVC pipe: Durable and flexible, PVC pipes form the backbone of the sprinkler system, carrying water to the desired areas.
  • Control valves: These valves control the flow of water to specific zones, allowing you to water different parts of your property independently.
  • Risers: Vertical pipes that connect the underground pipes to the sprinkler heads, elevating them for optimal coverage.
  • Sprinkler heads: The final component that disperses water onto the lawn and plants, coming in various types and patterns.
  • Automatic timer: An essential piece that allows you to schedule and automate the watering schedule, ensuring your plants receive the right amount of moisture.

Knowing each part’s role helps keep your landscape healthy. Regular checks and upkeep are vital. This ensures your sprinkler system works well.

Types of Sprinklers Based on Precipitation

sprinkler types

Sprinkler systems have different types of heads. These heads control water patterns and rates. The main types are rotary, impact, fixed spray, and pop-up sprinklers.

  • Rotary Sprinklers: Rotary sprinklers use rotating parts to spread water. They cover large lawn areas evenly. These sprinklers are popular for their efficiency.
  • Impact Sprinklers: Impact sprinklers have a moving arm for water distribution. They cover wide areas with high water output. Farmers often use these sprinklers.
  • Fixed Spray Sprinklers: Fixed spray sprinklers create a fan-like water pattern. They offer targeted watering for small areas. These work well for specific plant needs.
  • Pop-Up Sprinklers: Pop-up sprinklers hide in the ground when not used. They create a clean look for yards. These are great for homes and businesses.

Knowing sprinkler types helps design better watering systems. Each type has its own strengths. Choose the right one for your landscape needs.

Factors Affecting Sprinkler Installation Cost

Sprinkler system installation costs vary based on several factors. These include area size, sprinkler head types, and water tap requirements. Understanding these factors helps homeowners plan and budget effectively.

Area

Yard size is a major factor in sprinkler installation cost. Larger yards need more piping and sprinkler heads, increasing expenses. The average U.S. lawn size is 1/4 acre.

Installation costs range from $0.20 to $1 per square foot. This depends on the project’s complexity and specific requirements.

Types of Sprinkler Heads

Sprinkler head types also impact installation costs. Basic fixed spray heads cost $3 to $20 each. Advanced rotary or gear-driven models range from $10 to $40 per head.

Choosing the right sprinkler heads for your yard can greatly affect the overall project cost.

Type of Water Tap Required

The water tap type needed for your sprinkler system affects installation cost. A simple outdoor faucet may work for above-ground systems. In-ground systems often need a direct connection to the main water line.

Complex water tap installations can increase the total project cost significantly.

Considering these factors helps homeowners estimate sprinkler installation costs accurately. This allows for better budgeting and planning for their specific needs.

Preparing for Sprinkler System Installation

Get ready to install your sprinkler system by finding key parts and checking permit rules. Look for the main control valve in your basement or near the foundation. Find the vacuum breaker and control panels too.

Call 811 to mark underground utilities before you start. This helps avoid damage during installation. Check if you need a permit from your local building department for the sprinkler system installation.

Locate Sprinkler System Components

Finding sprinkler system components is key to a good setup. Here’s what to look for:

  • Main control valve: Typically located in the basement, crawl space, or near the home’s foundation.
  • Vacuum breaker: Prevents backflow and contamination of the water supply.
  • Control panels: Manage the timing and operation of the sprinkler system.

Locate these key components before you start. Address any underground utilities or permit requirements. This ensures a smooth sprinkler system installation process.

Turning On Your Sprinkler System in Spring

Spring is here, and it’s time to reactivate your sprinkler system. This process involves crucial steps for a smooth startup. Proper activation helps maintain system longevity and ensures your landscape gets enough water.

Step-by-Step Guide

First, locate the main control valve and close it. Set the system to manual mode on the control panel. Close the vacuum breaker screws and open the large valves for water flow.

Slowly open the main valve to fill the system gradually. This prevents water hammer damage, which can burst fittings or pop off sprinkler heads. Check valves and vacuum breaker for leaks or issues.

Test each irrigation zone one by one. Look for malfunctioning sprinkler heads or low water pressure. Once all zones work properly, program the automatic watering schedule.

The best date to turn on your system varies. April 15th suits early planters. May 2nd is safest to avoid frost damage. If spring is rainy, you might wait until June.

Fire Sprinkler System Basics

fire sprinkler system

Fire sprinkler systems protect buildings from fires. They use pipes and sprinkler heads to quickly spread water and stop flames. You’ll see them in offices, factories, malls, and some high-rise homes.

The National Fire Protection Association (NFPA) sets strict rules for these systems. They must meet tough safety and performance standards. NFPA 13 guides the design of commercial fire sprinkler systems.

These systems need an automatic water supply. Flow rate, pressure, and duration are key factors. NFPA 13 groups buildings by fire risk, from light to extra hazard.

Designers often have NICET Level III certification. They pick the right system parts based on the building’s needs. They work with owners to create safe fire protection solutions.

These pros make sure systems meet NFPA standards. Their goal is to provide reliable protection against fires. They choose wet pipe, dry pipe, or pre-action systems as needed.

Fire sprinkler systems save lives worldwide. They quickly put out or contain fires. This gives people time to escape and firefighters time to respond.

These systems can use different water sources. They might tap into city water, tanks, or private reservoirs. This ensures a steady supply for fighting fires.

NFPA 13 Guidelines for Sprinkler Systems

NFPA 13 guidelines are the gold standard for fire sprinkler systems. The National Fire Protection Association (NFPA) created these rules. They cover design, installation, and maintenance for commercial and residential buildings.

These guidelines address sprinkler components, water supply, pipe sizing, and head placement. They also consider building types, occupancy hazards, and environmental factors. This ensures system effectiveness during fires.

Following NFPA 13 is crucial for buildings with fire sprinkler systems. It ensures proper function and protection in emergencies. Compliance safeguards lives and property while meeting fire safety regulations.

Key aspects of NFPA 13 guidelines include:

  • Plan submittal requirements, such as providing electronic plans, hydraulic calculations, and manufacturers’ material information sheets.
  • Limiting sprinkler system design to 90% of the available water supply to ensure adequate capacity.
  • Minimum sprinkler system density requirements for different building types and occupancies.
  • Mandatory use of intermediate temperature-rated sprinklers in electrical and meter rooms.
  • Restrictions on the storage of certain hazardous materials, such as exposed plastics and intermediate bulk containers (IBCs).

NFPA 13 is updated regularly, with the latest edition released in 2022. The next version is expected in 2025. Staying current with fire sprinkler standards is vital for building professionals.

Sprinkler System Design and Configuration

Sprinkler system designs come in three main layouts: tree, loop, and grid. Each offers unique benefits for water distribution, coverage, and efficiency.

Tree Configuration

The tree configuration has a central main line with lateral branches. It works well for irregular-shaped properties. This layout allows targeted watering of specific areas.

Its radial design ensures even water distribution. Many homeowners choose this option for their landscapes.

Loop Configuration

The loop configuration uses a continuous pipe to distribute water. It provides uniform coverage as water flows evenly through the system. This layout works best for rectangular or square properties.

Grid Configuration

The grid configuration creates a pattern of intersecting perpendicular lines. It suits properties with symmetrical designs. This layout ensures comprehensive coverage and efficient water distribution.

The grid pattern allows precise control over watering. It’s popular for larger landscapes and commercial properties.

Your property’s shape and size influence the best sprinkler system design. Consider your landscape’s specific irrigation needs when choosing a layout. A well-designed system ensures a thriving, well-watered outdoor space.

Factors to Consider When Hiring Sprinkler Installation Professionals

Choosing the right professionals for your sprinkler system installation is vital. Several key factors can help you make the best decision.

  1. Experience and Reputation: Seek a company with a solid history of quality work.
  2. Customized Estimates: Look for installers offering free, tailored estimates. This helps you compare costs and make smart choices.
  3. Licensing and Insurance: Choose a properly licensed and insured installer. This protects you from liability if accidents occur during installation.
  4. Customer Recommendations: Read online reviews and ask for references. Creative Irrigation’s high recommendation rate speaks to their quality service.
  5. Scheduling and Availability: Check the installer’s responsiveness and availability. Find a company that fits your timeline needs.

These factors will guide you to reliable sprinkler installation professionals. A good team ensures your lawn thrives with proper irrigation for years.

Need Help Finding the Right Pros for Your Sprinkler System Install?

Take the guesswork out of your sprinkler system project with FindPros. Simply answer a few quick questions about your home and needs, and we’ll match you with top-rated local professionals. Compare competitive quotes from multiple pros, then choose the one that fits your budget and preferences best. FindPros makes it easy to find the right sprinkler system experts, whether you need a simple add-on or a larger underground installation. Get started today and take the stress out of your next home improvement project.

Conclusion

A high-quality sprinkler system offers many benefits for your lawn and garden. It conserves water, provides precise irrigation, and boosts plant growth. Understanding key components and maintenance is crucial for a successful system.

Consider factors that affect installation costs when hiring professionals. A well-designed system can create a lush outdoor space while reducing water use and maintenance work.

Irrigation experts can help tailor your system to your yard’s needs. They’ll consider your climate, plants, and water usage patterns. A properly maintained sprinkler system can save water and improve soil health.

Frequently Asked Questions (Stair Lift Repair)

Certified, factory-trained technicians who are experts on leading stairlift brands like Bruno can provide the best stairlift services. These technicians have in-depth knowledge of the inner workings of these stairlift models and can quickly diagnose and fix any issues.
Look for a stairlift repair company that offers prompt, responsive customer service. You can contact them to schedule maintenance services or request a service call if you’re experiencing any problems with your stairlift. They should have the expertise to service various stairlift brands.
Regular maintenance by certified technicians is crucial for extending the lifespan of your stairlift. The article emphasizes that preventative maintenance can help identify and address issues early, preventing bigger problems and costly repairs down the line. This ensures your stairlift remains reliable and safe for residents to operate.
The article recommends looking for a stairlift repair service that employs factory-trained technicians and keeps their service vans stocked with commonly used spare parts. This allows them to efficiently fix your stairlift chair or unit on-site, without having to order parts and come back later.
When installing a new stairlift, the article advises choosing a provider with certified technicians who can properly position and install the unit. They should have experience with various stairlift models and brands, and offer comprehensive warranties or extended service plans to ensure you’re paying for quality work and can get prompt fixes if needed.