Range Hood Installation

Range Hood Installation Near You

Can’t find what you are looking for?

How It Works

  • Answer a few questions about your home project.
  • Within seconds, get matched with top-rated local pros.
  • Compare quotes and choose the best pro for the job.

Range Hood Installation In Your Area

Hiring a Professional for Range Hood Installation: What to Expect

Meta Description: Discover what to expect when hiring a pro for range hood installation. Learn about costs, timelines, and key considerations for a successful kitchen upgrade.

Range Hood Installation

Installing a new range hood might seem like a DIY project. But hiring a pro HVAC contractor can make it easier. Let’s explore what to expect when getting help with your range hood installation.

A professional can ensure a smooth and efficient process. They bring expertise that can save you time and hassle. Plus, they can handle any unexpected issues that may arise.

Key Takeaways

  • Range hood installation costs can vary widely, from $175 to $3,150, with an average of around $750.
  • Basic installation typically takes 2-4 hours, with labor costs averaging $50-$100 per hour.
  • Additional factors like ventilation method, local labor rates, and brand/style can impact the overall cost.
  • Hiring an HVAC contractor is recommended for a successful and safe range hood installation.
  • HVAC contractors offer expertise, efficient service, and potential warranty coverage.

Different Types of Range Hoods

Range hoods are essential for clean and comfortable kitchen spaces. They come in various styles to fit different layouts. Let’s look at the main types and their features.

Under-Cabinet Range Hoods

Under-cabinet range hoods save space and are budget-friendly. They cost between $75 and $500. These hoods fit beneath hanging cabinets, right above the stovetop.

Their compact size works well in kitchens with limited cabinet space. They provide efficient ventilation for your cooking area.

Wall-Mounted Range Hoods

Wall-mounted range hoods offer style and versatility. They typically cost $160 to $700. These hoods mount on the wall above your cooktop.

They can save cabinet space and add a modern look. Make sure the hood matches your kitchen’s design.
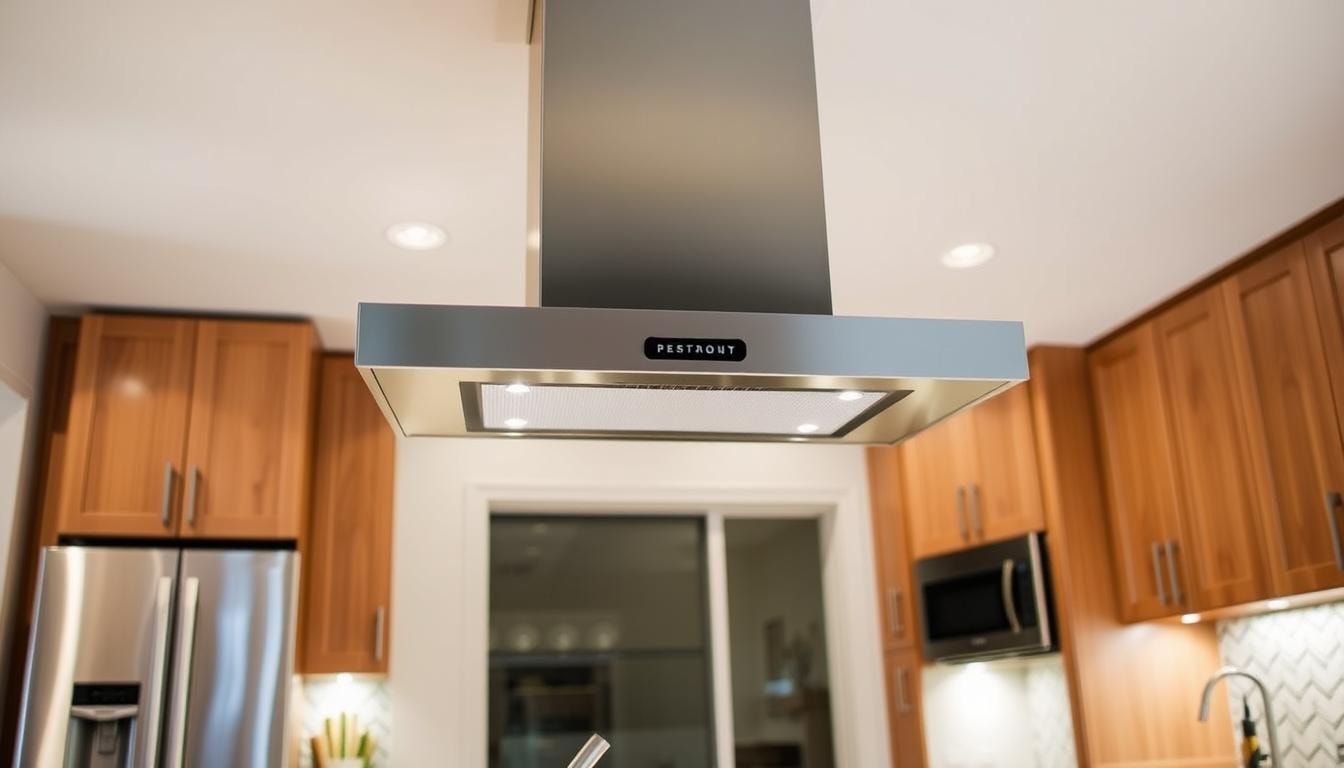
Island Range Hoods

Island range hoods are perfect for cooktops on kitchen islands. They hang from the ceiling, becoming a focal point.

Prices range from $320 to $1,000, with high-end models costing more. They ensure good ventilation but can be complex to install.

Ventilation Methods: Ducted, Ductless, and Convertible

Convertible Range Hood

Range hoods come in three main types: ducted, ductless, and convertible. Each type has its own pros and cons for homeowners.

Ductless Range Hoods are the cheapest, costing $75 to $300. They don’t need ductwork, which cuts down on labor costs. But they’re not as good at removing pollutants and hot air.

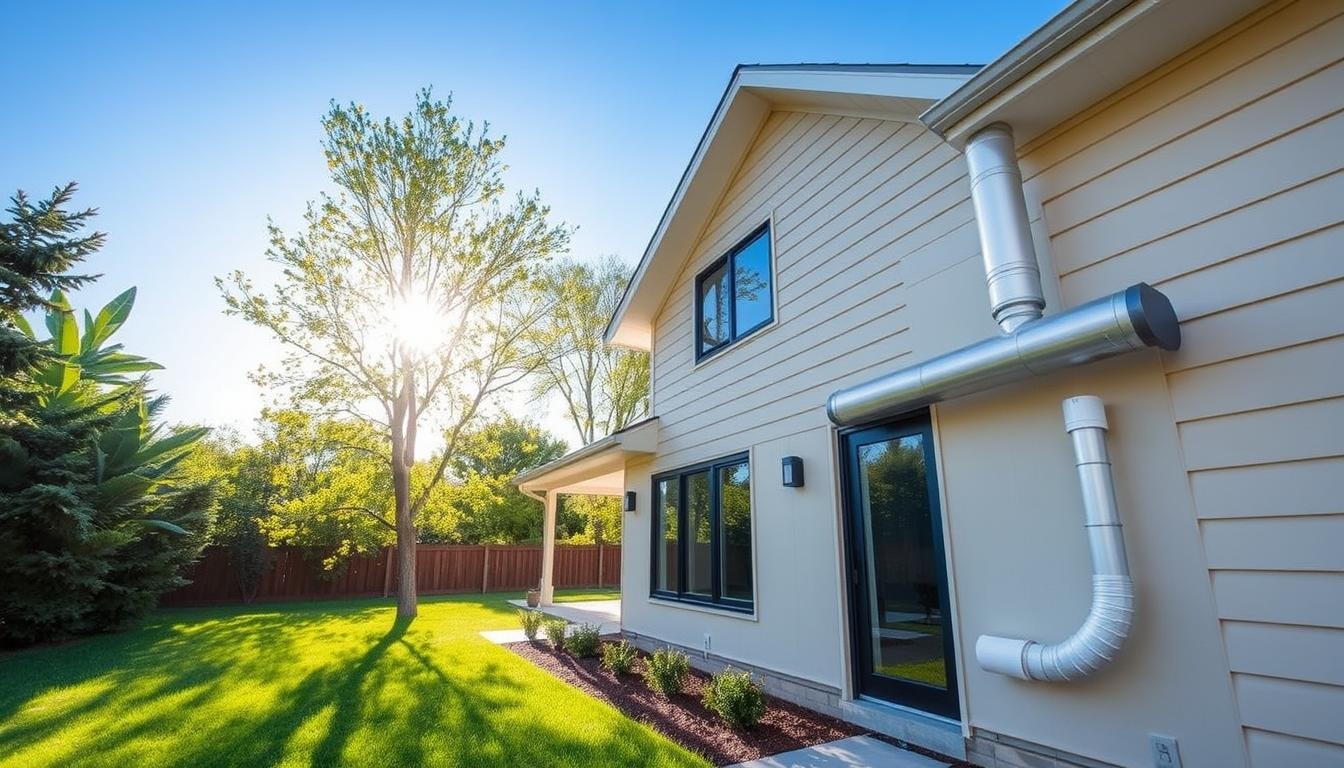
Ducted Range Hoods push air outside and cost $200 to $500. Ductwork installation adds $100-$600 more. These hoods are stronger and better at getting rid of smells and heat.

Convertible Range Hoods can switch between ducted and ductless modes. They cost $300 to $1,000. These hoods give you more options for your kitchen ventilation needs.

When picking a range hood, think about venting power, noise, heat tolerance, and cooking surface size. Good ventilation keeps your kitchen fresh and comfy.

Whirlpool® convertible range hoods have cool features like LED lights and quiet technology. They can work with or without ducts. These hoods let you choose the best way to vent your kitchen.

Cost Factors for Range Hood Installation

Installing a new range hood can cost different amounts. The price depends on the hood type, ventilation method, and labor needs.

Type of Range Hood

Range hood types affect installation costs. Under-cabinet hoods are cheapest, costing $700 to $1,000 for unit and installation.

Wall-mounted and island hoods range from $700 to $1,400. Downdraft hoods are pricier, with installation costs between $1,500 and $3,000.

Ventilation Method

Your chosen ventilation system impacts the overall cost. Ductless systems recirculate air and cost $100 to $300 to install.

Ducted systems vent air outside. They cost $100 to $1,000 to install, depending on ductwork complexity.

Labor Requirements

Labor costs make up a big part of the total expense. Basic installation takes 2 to 4 hours at $50 to $100 per hour.

Extra tasks like ductwork or electrical work can add $100 to $600 more. Electrical work might cost an additional $100 to $450.

Why Hire an HVAC Contractor for Range Hood Installation

HVAC contractors are experts in ventilation systems and electrical wiring. They ensure safety standards and building codes are met during range hood installation. Their specialized knowledge makes them ideal for this job.

These professionals simplify the installation process, guaranteeing a safe and effective setup. They handle permits and integrate the ventilation system into your home’s ductwork.

  • HVAC contractors are state-qualified technicians who specialize in installing HVAC systems, including range hoods, in homes and businesses.
  • They offer superior and stress-free services compared to general contractors, providing warranty services for the installation and ensuring compliance with safety standards and building codes.
  • HVAC contractors handle the entire process, from measuring and sizing the range hood to integrating the ventilation system with the home’s ductwork and electrical system.

Hiring an HVAC contractor costs more than DIY or using a general contractor. However, it’s a smart investment for long-term benefits. Their expertise helps avoid costly mistakes.

HVAC contractors ensure your range hood works efficiently and safely for years. Their attention to safety and specialized knowledge make them the best choice.

Selecting the Right HVAC Contractor

Hiring an experienced HVAC contractor is key for installing a new kitchen range hood. These experts know heating, ventilation, and air conditioning systems well. Their skills make them perfect for range hood installations.

Experience and Expertise

Find an HVAC contractor with a solid record of range hood installations. Ask for references and check their licenses and permits. Make sure they have the right skills for the job.

Clear Communication

Good communication with your HVAC contractor is vital. Talk about your installation needs, timeline, and pricing. This ensures everyone agrees and the project goes smoothly.

Pricing and Timeline

Set a fair price and timeline with the HVAC contractor. This helps avoid surprises and keeps the project on track. It also ensures the work is done efficiently.

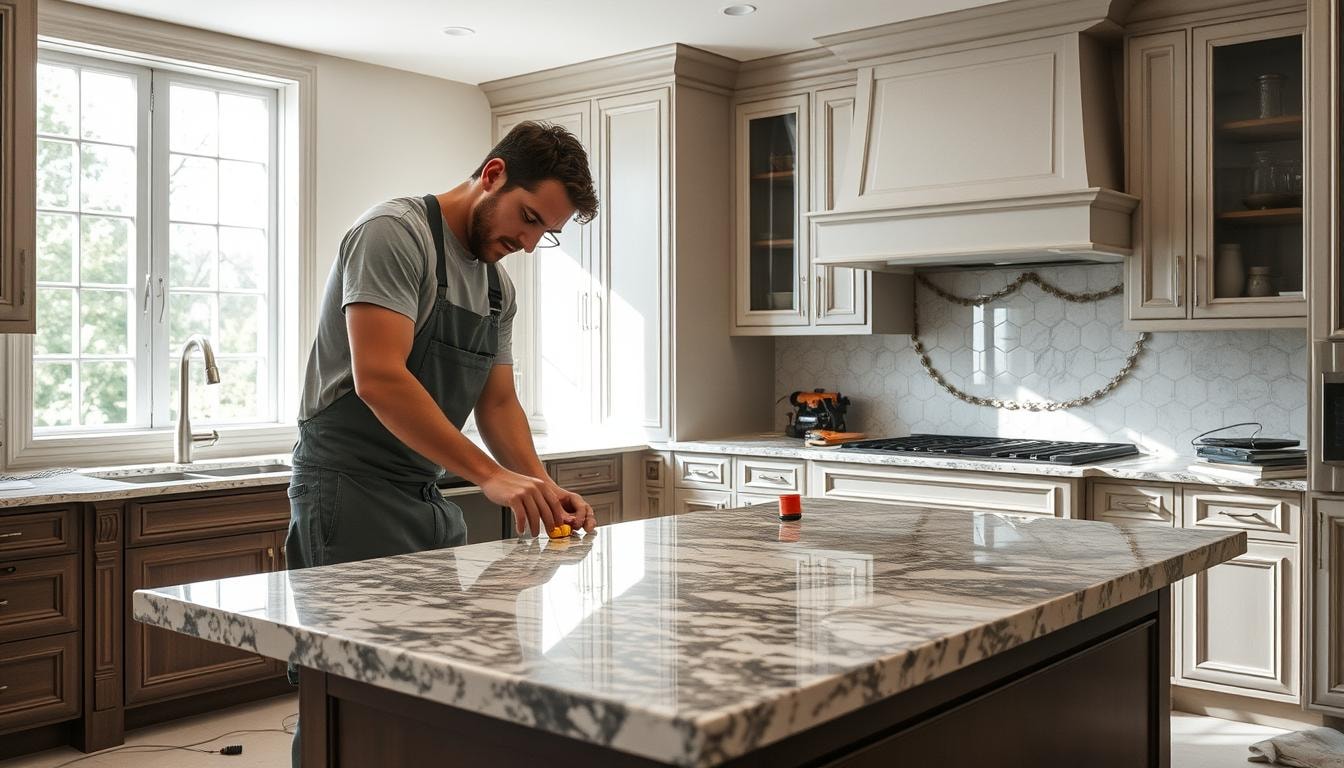
Preparing for Range Hood Installation

range hood installation

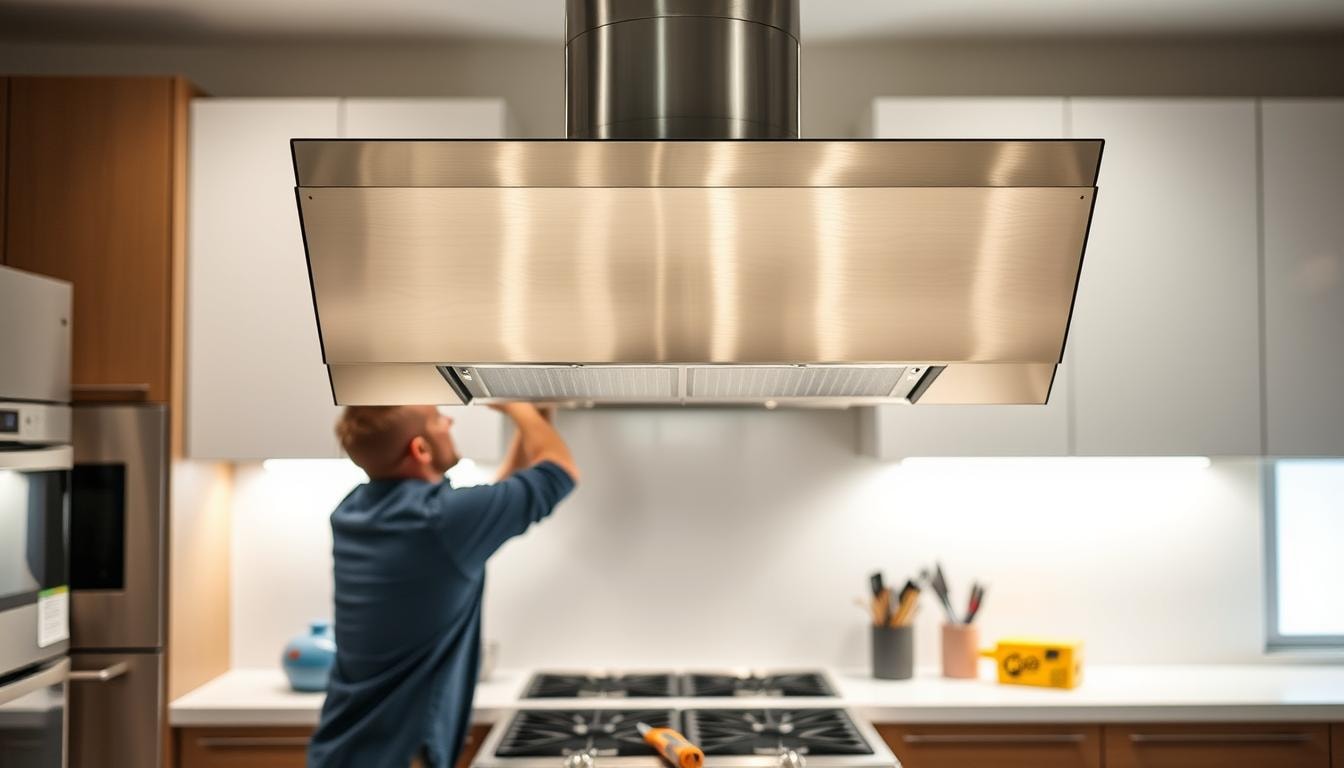
Get ready for your new range hood installation by taking a few steps. These will ensure a smooth process and contribute to the project’s success.

Inspect the installation site and remove any potential obstructions. This includes shelves, cabinets, or other items that could interfere. Your HVAC contractor will have a clear workspace to efficiently complete the task.

Turn off the power supply to the range hood before installation begins. This prevents electrical accidents and ensures safety for the contractor and your home.

These proactive measures set the stage for a successful installation. They pave the way for a seamless and efficient process from start to finish.

Proper preparation is key to a stress-free range hood installation. Clearing the area and shutting off power create an efficient experience. The result? A beautifully installed range hood that enhances your kitchen’s functionality and aesthetics.

Common Installation Challenges

Range hood installation can be tricky. It requires a skilled HVAC contractor’s expertise. Proper range hood size and placement are vital for optimal performance and safety.

Improper sizing can reduce airflow and effectiveness. Wrong placement may compromise ventilation and increase fire risks. Addressing ventilation issues is another common hurdle.

Ducted installations offer better performance than ductless systems. They require careful duct sizing and routing for efficient airflow. Incorrect duct sizing can cause airflow and static pressure problems.

Proper electrical wiring is crucial for range hood installation. A dedicated electrical line prevents interference and ensures appliance longevity. Following local building codes and safety standards is essential.

  • Ensuring the correct range hood size and placement
  • Addressing ventilation challenges, such as duct sizing and routing
  • Properly wiring the electrical components
  • Complying with local building codes and safety standards

Partnering with an experienced HVAC contractor is key. They can help navigate these installation challenges effectively. This ensures a safe range hood setup that meets cooking needs and local requirements.

Finding the Right Pro for Your Range Hood Installation

Hiring the right professional for your range hood installation is crucial. That’s where FindPros can help. Simply answer a few questions about your project, and we’ll match you with top-rated local pros who can get the job done right. With FindPros, you’ll get the best pricing when multiple pros compete for your business, and you can find the pro that you get along with best.

Whether you need to install a range hood through an interior wall, attach mounting brackets, or deal with complex ducting, FindPros has you covered. Take the stress out of your range hood project and let our network of qualified professionals handle the hood fan, electrical work, and proper installation from start to finish.

Conclusion

Hiring a pro HVAC contractor is best for range hood installation. It costs more than DIY, but ensures safety and proper function. Their expertise guarantees a smooth process that meets local building codes.

The average range hood installation cost starts at $100. Installation usually takes 2 to 3 hours. A moderate skill level is needed, so a pro HVAC contractor is your best bet.

A pro range hood installation offers many benefits. You’ll enjoy cleaner air and a tidier kitchen. It also reduces heat and humidity in your home.

An HVAC contractor’s expertise makes the cost worthwhile. You’ll get a properly working, long-lasting range vent hood system. This can even boost your home’s value.

Frequently Asked Questions (Range Hood Installation)

A vented range hood (also called a ducted range hood) is connected to ductwork that vents the air outside, while a ductless range hood recirculates the air back into the kitchen. Vented range hoods are more effective at removing cooking odors, smoke, and grease, but require more complex installation involving ductwork.
The size of the range hood should be based on the size of your cooktop or stove. A good rule of thumb is to choose a range hood that is 3-6 inches wider than your cooktop. The hood’s CFM (cubic feet per minute) rating should also match the size of your cooking area to ensure proper ventilation.
Installing a vented range hood that goes through an exterior wall requires cutting a hole in the wall to accommodate the vent pipe. This involves locating studs, cutting the vent hole, running the ductwork, and sealing around the vent cap on the outside wall. An HVAC contractor can ensure this is done properly and safely.
Before the installation, clear the area around the cooktop and turn off the power to the existing range hood (if present). Measure the space carefully to ensure the new range hood will fit properly. Gather all the necessary tools and hardware, and have the owner’s manual on hand to reference the step-by-step installation guide.
Proper safety is crucial when installing a range hood. Be sure to shut off power to the area at the breaker box. Use the right tools for the job, including a drill and proper drill bits for making holes in walls. Wear eye protection and gloves, and ensure the range hood is securely mounted with the right hardware and a tight seal around the vent pipe.

Radon Mitigation

Range Hood Installation Near You

Can’t find what you are looking for?

How It Works

  • Answer a few questions about your home project.
  • Within seconds, get matched with top-rated local pros.
  • Compare quotes and choose the best pro for the job.

Radon Mitigation In Your Area

Radon Mitigation: Protecting Your Home and Family

Meta Description: Discover effective radon mitigation techniques to safeguard your home and loved ones. Learn about professional solutions and DIY options to reduce radon levels and protect your health.

Radon Mitigation

Radon is a silent, odorless killer that can seep into your home. This radioactive gas increases the risk of lung cancer over time. Radon mitigation systems can protect your family’s health and help you breathe easier.

This guide explores radon dangers, testing importance, and effective ways to fight this invisible threat. You’ll learn how to keep your loved ones safe from this hidden hazard.

Key Takeaways

  • Radon is the leading cause of lung cancer for non-smokers and the second leading cause for the general population.
  • EPA recommends fixing homes with radon levels at 4 pCi/L or higher, with the goal of reducing levels to 2 pCi/L or below.
  • Properly designed radon mitigation systems can reduce radon levels in homes by up to 99%.
  • Hiring a qualified radon mitigation contractor is essential due to the technical expertise required.
  • Maintaining and monitoring your radon reduction system is crucial to keep radon levels low.

What is Radon and Why is it Dangerous?

Radon is a radioactive gas from uranium breakdown in soil, rock, and water. It sneaks into homes through foundation cracks, trapping radiation indoors. Radon is colorless, odorless, and tasteless, making detection difficult without proper testing.

Radon as a Silent Killer

Radon is the second leading cause of lung cancer in the United States. The EPA estimates 21,000 people die yearly from radon-induced lung cancer. In 2005, the U.S. Surgeon General issued a national health advisory on radon.

Health Risks of Prolonged Radon Exposure

Long-term exposure to high radon levels raises lung cancer risk, even for non-smokers. At 1.3 pCi/L, two non-smokers out of 1,000 may develop lung cancer from radon exposure.

Radon exposure is the second most common cause of lung cancer after smoking. Studies show children may face higher risks from radon exposure.

Daycares and schools are important areas to check for radon. Fixing radon issues at home is vital for your family’s health and safety.

Testing for Radon in Your Home

Checking your home for high radon levels is vital for health safety. There are many types of radon tests for homeowners. Each test has its own benefits.

Different Types of Radon Tests

Short-term radon tests measure levels for 2-90 days, giving quick results. Long-term tests check radon for over 90 days, showing a more accurate yearly average.

Continuous radon monitors offer daily measurements. These help you track changes in your home’s radon levels closely.

When to Test and How Often

The EPA suggests testing for radon every few years. This applies even if initial levels are below 4 picocuries per liter.

Radon levels can change due to weather and home updates. It’s important to test after installing a radon mitigation system too.

Regular testing helps protect your home and family from this hidden danger. Follow proper testing methods and act if high levels are found.

Understanding Radon Mitigation Systems

Radon mitigation systems reduce radon levels in homes. They minimize exposure to this odorless, radioactive gas. The most reliable method is active soil depressurization (ASD).

Active Soil Depressurization (ASD)

ASD systems use a plastic pipe connected to soil beneath the home’s foundation. A fan creates a vacuum, drawing radon-laden soil gas from under the home.

The gas is exhausted outside, away from windows and openings. This prevents radon from building up indoors, where it can be harmful.

  • Sub-slab depressurization is widely used for homes with basements or slab-on-grade foundations.
  • Other variants include drain tile, sump hole, and block wall depressurization for different home designs.
  • These systems are energy-efficient, using low-wattage fans that consume less power than a standard light bulb.
  • Regular monitoring and maintenance ensure the system keeps radon below the EPA’s recommended 4 pCi/L level.

An effective radon mitigation system reduces health risks from radon exposure. It creates a safer home environment for families.

Key Elements of Effective Radon Mitigation

Proper installation of a radon mitigation system is vital. It ensures long-term effectiveness in reducing radon levels in your home. Contractors must follow industry standards and best practices for correct design and installation.

Industry Standards and Best Practices

Three main standards guide radon mitigation installation. These include the US EPA’s 1994 Radon Mitigation Standards and the ASTM Standard Practice E2121. The AARST’s 2006 ASD Radon Mitigation Standards is also widely used.

These guidelines cover crucial aspects of mitigation systems. They address exhaust pipe placement, foundation sealing, and proper materials. Following these standards ensures effective long-term radon reduction in homes.

Homeowners should retest their homes after system installation. The first test should be done between 24 hours and 30 days. Further testing every two years helps monitor ongoing effectiveness.

Some homes may need special attention during mitigation. For example, homes with sub-floor ducts might require extra care. Well-designed systems can also prevent radon gas intrusion and reduce soil moisture vapor.

Costs and Factors Affecting Radon Mitigation

Radon mitigation system costs vary widely. They range from $700 to $4,000, with a national average of $1,000. These figures come from Forbes, HomeAdvisor, and National Radon Defense.

Home size, design, foundation type, and local market conditions affect radon mitigation cost. Large homes over 4,000 square feet may need more complex systems. Older homes can also be more expensive to treat.

Building materials impact costs too. Specialty siding like Dryvit or flagstone can increase expenses. Tall buildings or large basements might need extra suction points and sealing.

Soil condition and unique home features also influence costs. Ductwork in slabs, crawl spaces, or high water tables may require special equipment. These factors can raise the overall radon reduction system cost.

Understanding these factors affecting cost helps homeowners prepare for this investment. Radon mitigation protects families from a serious health risk. It’s crucial, as radon is the second leading cause of lung cancer in the U.S.

Radon Mitigation for Different Home Types

radon mitigation crawl spaces

Radon mitigation systems can be tailored to various home designs. Two common home types needing special radon reduction are those with crawl spaces and slab-on-grade foundations.

Crawl Spaces

Radon mitigation for crawl spaces uses a high-density polyethylene sheet over the soil. The sheet’s edges are sealed to foundation walls. A perforated pipe or drain mat is placed under the plastic.

This setup connects to a fan system. It creates a vacuum that draws radon-laden air from the crawl space. The harmful air is then safely exhausted outside the home.

Slab-on-Grade Homes

For slab-on-grade homes, holes are drilled through the concrete slab. A PVC pipe is inserted into a pit beneath the slab. This pipe connects to a fan system.

The fan creates negative pressure to pull radon gas up. It then vents the gas outside, keeping it from entering living spaces.

Effective radon mitigation requires proper system design, installation, and maintenance. Following industry standards helps homeowners reduce radon levels. This protects families from the radon reduction hazard.

Special Considerations for Radon Mitigation

Radon mitigation is vital for homeowner safety. It needs special care when dealing with existing drainage systems or under-slab ductwork. These factors can affect the success of radon reduction techniques.

Drainage Systems and Under-Slab Ductwork

Homes with sumps or French drains can use these to collect radon from the soil. Skilled contractors can combine the radon system with existing drainage for better results.

Under-slab ductwork can create a vacuum effect. This draws radon into the living space for removal. It’s crucial to avoid interfering with the home’s drainage or HVAC systems.

Expert planning is needed to address these issues. Experienced professionals can handle these complex situations and find the best solutions.

  • Homes with finished basements may require custom pipe placement and runs during radon mitigation installation.
  • Slab-on-grade homes without unfinished areas along the perimeter can present challenges for the radon mitigation process.
  • Larger homes with over 2,000 square feet on the lowest level may necessitate custom pipe runs for effective radon reduction.

Addressing these issues ensures effective radon reduction. It also helps the system work well with existing home features. This approach creates a safe and healthy living space.

Maintaining and Monitoring Your Radon System

Regular upkeep of your radon mitigation system is key to its long-term success. Routine checks help keep radon levels low in your home. Proactive steps ensure the system works well over time.

After installation, retest your home within 30 days to confirm radon reduction. Keep testing every two years to make sure levels stay low. This ongoing monitoring helps catch any issues early.

System maintenance is vital. Replace the radon fan about every 10 years. Check the warning device often to ensure it can alert you to problems.

  • Check the radon warning device every 1-3 months to ensure proper functioning
  • Replace the radon fan every 5 years on average
  • Conduct a radon test every 2 years to verify the system is working effectively
  • Seal any cracks or gaps in the system to improve energy efficiency
  • Consider a maintenance plan from a licensed professional for ongoing monitoring and upkeep

These practices help keep your radon system in top shape. They ensure your home stays protected from harmful radon exposure. Regular care means a safer environment for you and your family.

Choosing a Qualified Radon Mitigation Contractor

radon mitigation contractor

Protecting your home from radon requires a skilled radon mitigation contractor. Look for state-certified professionals or those with national proficiency certifications. These experts have the training to design and install effective radon reduction systems.

State Certification and National Proficiency Programs

Many states lack licensing for radon contractors. Seek professionals certified by national programs like NRPP or NRSB. These certifications prove the radon mitigation contractor has the needed skills and knowledge.

Ask about state certification or national proficiency credentials when hiring. Reputable contractors will readily provide this information. They should show commitment to meeting top industry standards.

  • Look for contractors who are certified by the NRPP or NRSB
  • Ensure the contractor carries liability insurance to protect you and your home
  • Request references and check the contractor’s track record of customer satisfaction
  • Obtain a detailed scope of work and cost estimate before commencing any radon mitigation project

Choosing a certified radon mitigation contractor ensures proper system installation. This gives you peace of mind about your family’s safety. A well-installed system effectively reduces radon in your home.

FindPros: Your Trusted Partner for Radon Mitigation

Dealing with a radon problem in your home? FindPros can help you find the best local radon professionals to reduce radon concentrations and protect your family’s health. Our nationwide network of national radon proficiency program certified contractors ensures you get top-quality service at about the same cost as other options. Simply answer a few questions about your home’s indoor radon levels, and we’ll match you with the most qualified radon professionals in your area. Compare quotes, read reviews, and choose the perfect fit to mitigate radon and give you peace of mind. Don’t wait – take the first step toward a healthier, safer home today.

Conclusion

Radon mitigation protects your home from this dangerous radioactive gas. Radon testing and choosing the right system are crucial steps. Working with qualified contractors can reduce the risk of exposure significantly.

Radon is the second leading cause of lung cancer in the US. It results in thousands of deaths annually. Mitigating radon involves sealing cracks and installing ventilation systems.

Regular testing ensures the effectiveness of radon reduction methods. By taking these steps, you can protect your family and create a safer home.

Radon mitigation may increase utility bills due to air loss and fan power. However, the benefits of fixing radon problems outweigh the costs. Professional help can ensure effective radon mitigation for years to come.

Frequently Asked Questions (Radon Mitigation)

The EPA recommends fixing homes with radon levels at 4 pCi/L or higher, with the goal of reducing levels to 2 pCi/L or below.
Homeowners should retest their homes every 2 years after installation to monitor the system’s ongoing effectiveness and ensure radon levels remain low.
Homeowners should hire contractors certified by national proficiency programs like NRPP or NRSB, as this ensures the contractor has the necessary skills and knowledge to properly install a radon reduction system.
Standard radon reduction systems, such as soil suction systems and drain tile suction, are most commonly used to lower radon levels significantly in homes.
Homeowners may be able to access funds through community development block grants, urban development programs, or environmental justice grants to help cover the cost of radon mitigation.

Quartz Countertop Installation

Range Hood Installation Near You

Can’t find what you are looking for?

How It Works

  • Answer a few questions about your home project.
  • Within seconds, get matched with top-rated local pros.
  • Compare quotes and choose the best pro for the job.

Quartz Countertop Installation In Your Area

Quartz Countertop Installation: A Guide to Choosing the Right Installer

Meta Description: Discover expert tips for selecting the right quartz countertop installation professional. Ensure a flawless finish for your kitchen or bathroom upgrade.

Quartz Countertop Installation

Quartz countertops can transform your kitchen or bathroom with timeless elegance. The success of this upgrade depends on choosing the right material and installer. How can you ensure a flawless quartz countertop installation?

This guide offers expert insights on quartz countertop selection and installation. We’ll cover color options, pattern choices, and evaluating qualified installers. Our goal is to help you make an informed decision for your space.

Key Takeaways

  • Understand the importance of choosing the right quartz countertop material and color to complement your space.
  • Explore digital visualization tools that allow you to preview quartz samples in your home before committing.
  • Discover why professional quartz countertop installation is essential for a flawless finish and long-term durability.
  • Learn how to evaluate the experience and expertise of potential quartz countertop installers.
  • Uncover the comprehensive installation process and budget considerations for your quartz countertop project.

The Importance of Selecting the Right Quartz Countertop Material

Picking the perfect quartz countertop can make or break your kitchen or bathroom design. Quartz offers a wide range of colors and patterns to match your vision. You’ll find options from classic neutrals to bold, vibrant hues.

Exploring Different Quartz Countertop Colors and Patterns

Quartz is an engineered stone made of 90% natural quartz crystals and 10% resins and pigments. This mix allows for a variety of colors and patterns to suit different tastes. You can choose from marble-inspired looks or modern solid colors.

Utilizing Digital Tools for Visualizing Quartz Countertops in Your Space

Digital tools can help you pick the right quartz countertop for your room. Many quartz brands offer online visualizers to test different options. You can upload photos of your space and see how various colors look.

Explore the many quartz countertop colors and patterns available. Use digital tools to see how they’ll look in your space. This approach will help you choose a material that transforms your kitchen or bathroom.

Why Professional Quartz Countertop Installation is Essential

Installing quartz countertops requires professional expertise. DIY attempts can lead to costly mistakes and damage. Professional quartz countertop installation ensures a successful and long-lasting outcome.

Specialized tools and skills are crucial for perfect results. Quartz needs precise cutting, shaping, and handling for a flawless finish. Quartz countertop installers have the expertise to navigate this complex process.

Accurate measurements are vital for a successful quartz countertop project. Pros can identify potential issues and make necessary adjustments. This prevents gaps, uneven surfaces, and other problems that affect appearance and function.

Professional installation preserves the warranty and longevity of your countertop. Improper installation can void the manufacturer’s warranty. Experienced professionals ensure a flawless installation and a long-lasting, high-quality product.

Evaluating the Experience and Expertise of Quartz Countertop Installers

Quartz Countertop Installers

Choosing the right quartz countertop installer is key to a flawless installation. Experienced installers have the know-how to ensure great results. Check their portfolio and knowledge of countertop materials to make a smart choice.

Reviewing Their Portfolio and Track Record

Look through the installers’ portfolio to see their past work. This shows their skill with different countertop materials and attention to detail. Ask about their success rate with quartz countertop installations.

Assessing Their Knowledge of Different Countertop Materials

  • A skilled quartz countertop installer should know about various materials like quartz, granite, marble, and soapstone.
  • They should guide you on the best countertop materials for your needs, considering durability and style.
  • Their expertise ensures a top-quality installation that lasts for years.

By carefully evaluating installers, you’ll find the right fit for your project. A good installer will enhance your kitchen or bathroom’s beauty and function.

Quartz Countertop Installation: A Comprehensive Process

Installing quartz countertops requires careful planning and execution. Each step is vital for achieving the best results. This process involves precise measurements, templating, and room adjustments.

Precise Measurements and Templating

Accurate measurements are key to a perfect quartz countertop fit. Installers often use graph paper or plywood strips to create exact molds. This approach ensures quartz slabs fit perfectly, reducing the need for major adjustments.

Precise measurements and templating are crucial for off-site fabrication. Quartz slabs are cut, shaped, and polished at the factory. This process guarantees a high-quality finish for your new countertops.

Navigating Room Modifications and Adjustments

Installing quartz countertops may require some room changes. Base cabinets often need reinforcement to support the heavy quartz slabs. Each square foot can weigh up to 25 pounds.

The process might involve disconnecting and reconnecting various service lines. This includes water, drainage, electrical, and gas connections. Careful planning prevents costly delays or damage to the quartz surface.

Budgeting and Pricing Considerations for Quartz Countertop Installation

New quartz countertops can be a big investment. Knowing the costs is key to staying within your budget. Quartz countertop installation typically costs between $1,500 and $12,000, with a national average of $4,500.

Quartz countertops cost $50 to $200 per square foot, including labor and materials. The average price is $125 per square foot. Installation labor costs range from $35 to $85 per hour.

Edge treatments for quartz countertops can cost $5 to $60 per linear foot. The price depends on the design’s complexity. Consider material, labor, and additional services when budgeting for your project.

Quartz brand prices vary from $35 to $400 per square foot. Compare costs of different countertop materials to find the best option. Explore DIY options like pre-fabricated butcher block to save on labor costs.

Understanding pricing helps you make an informed decision and create a realistic budget. Remember, new countertops are a long-term investment. Factor in the lasting benefits when planning your budget.

Warranties and Peace of Mind for Your Quartz Countertop Investment

quartz countertop warranty

Quartz countertops are a big investment. Good installers offer solid warranties to protect your purchase. These warranties ensure quick fixes for any problems that may arise.

It’s vital to know what your warranty covers. Quartz warranties differ from those for granite or marble. Learn about coverage duration, inclusions, and conditions that might void it.

No warranty may mean low product confidence. Warranties tied to certified installations offer extra assurance. This ensures proper setup and expected performance of your quartz countertop.

Q Premium Natural Quartz offers a full warranty. It’s valid for homes and businesses if registered within 30 days. These countertops resist stains, scratches, and heat, all covered by warranty.

Lead times for quartz countertops matter too. Custom features may take longer to produce. Clear talks with suppliers help plan your project better.

Choose a trusted installer and know your warranty. This way, you’ll enjoy your beautiful, durable quartz countertops worry-free.

Choosing the Right Quartz Countertop Installer: Key Factors to Consider

Picking the right quartz countertop installer is vital for your project’s success. Their expertise can make or break your kitchen or bathroom upgrade. Let’s look at what to consider when choosing a quartz countertop installer.

Reputation and Customer Reviews

A quartz countertop installer’s reputation shows their work quality and service. Good installers have many happy customers with positive feedback. Check quartz countertop installer reviews for insights on their skills and customer care.

Communication and Project Management Skills

Great communication and project management are key for smooth installation. Look for installers who are clear and responsive throughout the process. They should manage the project well and work well with other tradespeople.

By weighing these factors, you can pick a quartz countertop installer who’ll do a great job. The right installer will give you the attention and skill you need.

They’ll help you get the stunning results you want for your kitchen or bathroom. Your new quartz surface will look amazing and last for years.

Preparing Your Space for Quartz Countertop Installation

Getting ready for quartz countertop installation is key to a successful transformation. Quartz is popular for its durability and low maintenance. Proper prep helps ensure a smooth and efficient project.

Check if your cabinets can support the quartz countertops’ weight. Ask your installer if any changes are needed for a stable foundation.

  1. Clear the area: Remove existing countertops and move appliances away. This gives the installation crew a clear workspace.
  2. Address room modifications: You may need to adjust cabinet heights or fix uneven surfaces. Work with your installer to handle these issues.
  3. Protect your belongings: Empty your cabinets before installation to prevent damage to dishes and glassware.

Good preparation is crucial for a successful quartz countertop installation. Taking these steps helps ensure a smooth process.

You’ll end up with a beautiful and long-lasting new countertop surface. Your efforts will pay off with a stunning kitchen or bathroom upgrade.

Maintenance and Care Tips for Your Quartz Countertops

Quartz countertops are popular for their durability and easy upkeep. Follow these expert tips to keep your quartz countertops looking great. These tips cover quartz countertop maintenance and quartz countertop care.

Quartz is highly scratch-resistant, ranking 7 on the Mohs Hardness Scale. This makes it tougher than many other materials. Still, avoid cutting directly on the surface to keep your knives sharp.

Unlike granite or marble, quartz is non-absorbent and stain-resistant. To clean quartz countertops, use a mild cleaner like Mr. Clean or Simple Green. Wipe up spills quickly to prevent staining.

Avoid harsh chemicals or abrasive scrubbers. These can damage or discolor the surface. Be careful with heat exposure when preserving quartz countertops.

Use trivets or heating pads to prevent cracks from direct heat. Quartz is non-porous, so it doesn’t need sealing like natural stone surfaces.

  • Use gentle, pH-neutral cleaners to clean quartz countertops
  • Wipe up spills immediately to prevent stains
  • Avoid cutting directly on the quartz surface
  • Use trivets or heating pads to protect against heat damage
  • Do not seal quartz countertops as they are naturally non-porous

By following these quartz countertop maintenance and care tips, your countertops will stay beautiful. They’ll keep working well for many years to come.

Finding the Right Pros for Your Quartz Countertop Installation

Are you planning to install quartz countertops in your kitchen or bathroom? FindPros can connect you with the best local professionals to ensure a flawless quartz installation. Simply answer a few questions about your project, and we’ll match you with top-rated pros in your area. Get multiple competitive quotes and find the perfect installer who fits your needs and budget. With FindPros, you’ll enjoy the best pricing and a hassle-free experience from start to finish.

Conclusion

Choosing the right quartz countertop material and installer is key to transforming your kitchen or bathroom. This guide helps you navigate the quartz countertop installation process with confidence. You’ll achieve the look and function you want for your home.

Focus on quality, detail, and customer service when picking your quartz countertop installer. This ensures a smooth project. With the right quartz countertop selection and expert installation, you’ll enjoy long-lasting beauty and easy maintenance.

The quartz countertop industry is growing fast. Stay informed and work with trusted providers like Leo’s Marble & Granite. Smart choices will boost your home’s value and appeal.

Create a stunning kitchen or bathroom that wows you and your guests. With the right quartz countertop, you’ll have a space that’s both beautiful and practical.

Frequently Asked Questions (Quartz Countertop Installation)

To choose the right quartz slab, consider the color, pattern, and veining that complements your space. Use digital visualization tools to preview how different quartz slabs will look in your room. Pick a quartz that reflects your personal style and ties in with your existing decor.
The key steps include accurate measuring and templating, making necessary room modifications, dry fitting the quartz slab, cutting openings for the sink and plumbing, applying silicone adhesive, and carefully installing the quartz slab. Using the right tools like a diamond masonry blade, straight edge, and electric drill is also crucial.
For a seamless installation, work with an experienced quartz installer who can precisely measure, cut, and fit the quartz slab. They should use silicone adhesive and properly install ledgers to support the slab’s weight. Paying attention to details like aligning the edges and seams is key for a flawless finish.
To maintain your quartz countertops, use gentle, pH-neutral cleaners and wipe up spills immediately to prevent staining. Avoid cutting directly on the surface and use trivets or heating pads to protect against heat damage. Quartz is highly durable, but proper care will keep it looking its best for years.
Quartz countertops typically cost $50 to $200 per square foot, including labor and materials. Factor in the cost of the quartz slab, installation labor, edge treatments, and any necessary room modifications. Get quotes from multiple installers, compare prices, and create a realistic budget that accounts for the complete cost of the project.

Privacy Fence Installation

Range Hood Installation Near You

Can’t find what you are looking for?

How It Works

  • Answer a few questions about your home project.
  • Within seconds, get matched with top-rated local pros.
  • Compare quotes and choose the best pro for the job.

Privacy Fence Installation In Your Area

Privacy Fence Installation: A Step-by-Step Guide

Meta Description: Learn how to install a privacy fence with our comprehensive guide. From materials to post-setting, we cover every step of privacy fence installation for your yard.

Privacy Fence Installation

Want to boost your outdoor privacy and security? Learn how to build a stunning privacy fence. This guide will help you create the perfect blend of style and function.

Privacy fences offer many benefits to homeowners. They can increase property value, improve outdoor privacy, and enhance security. This guide will help you tackle your own fence project.

Key Takeaways

  • Privacy fences can significantly enhance outdoor privacy and security for homeowners
  • Wood is a popular choice for privacy fences, offering a range of styles and durability
  • Proper planning, tool selection, and attention to local regulations are crucial for a successful fence installation
  • Concrete and gravel are essential for securing fence posts and preventing wood rot
  • Regular maintenance is key to extending the lifespan of your privacy fence

Understanding the Purpose and Planning

Decide why you want a privacy fence. It could be for boundaries, security, privacy, or pet containment. Your choice will guide material, height, and design decisions. Check local building codes and HOA guidelines before starting.

Your property’s size and layout affect fence design. Measure the perimeter and note any slopes or elevation changes. This info helps determine fence length, height, and special installation needs.

  • Determining the Purpose of the Fence: Your property’s features impact fence design. Measure where you’ll install the fence. Note slopes and other elements affecting placement. This helps plan fence length, height, and special considerations.
  • Choosing the Right Fence Type: Various fence materials offer different benefits. Wood fences look classic but need more upkeep. Vinyl resists weathering and needs little maintenance. Metal fences look stately but may rust.

Chain-link is practical and cheap but less private. Composite fencing mixes wood fibers and plastic for durability. Consider cost, durability, and maintenance when choosing your fence type.

Researching Local Building Codes and Regulations

Check local building codes before installing your fence. Many areas require permits for fence construction. There may be rules about fence height and placement. Learn these regulations to avoid fines or removal later.

Gathering Tools and Materials

Successful privacy fence installation starts with the right tools and materials. Quality equipment ensures a smooth and efficient process. Each component is crucial for creating a durable and attractive fence.

Essential tools include a tape measure, post hole digger, auger, and level. You’ll also need a saw, hammer, and screwdrivers. Don’t forget safety gear like gloves and eye protection.

For materials, gather pressure-treated fence posts, rails, and pickets or panels. You’ll also need concrete mix, gravel, and corrosion-resistant fasteners. Measure your fence area carefully to determine the right sizes.

Having all fence installation tools and fence construction materials ready ensures a smooth process. This preparation helps create a privacy fence that meets your needs and looks great.

Measuring and Marking Post Locations

Measuring the fence length is crucial for your privacy fence project. Use a tape measure, staying 30 centimeters from obstacles. Record measurements for each fence section to ensure you have enough materials.

Next, mark the post locations. Space posts 6 to 8 feet apart, following local codes. Use stakes, string lines, or spray paint to mark post holes clearly.

Purchasing Fence Supplies

Now, buy the supplies for your privacy fence installation. Get posts, rails, pickets, concrete, fasteners, and any needed tools. Find these at home improvement stores or online.

Buy extra materials for possible errors or challenges during installation. Check local building codes before finalizing your fence design and buying supplies.

Digging Post Holes

post hole digging

Digging post holes is crucial for a sturdy fence. It sets the foundation for a long-lasting structure. Let’s look at key points for digging holes for your privacy fence.

Preparing for Digging

Safety comes first when digging post holes. Wear safety gear like gloves and a hard hat. Check for underground utilities and remove large tree roots near the fence line.

Post hole depth depends on local codes and fence height. Generally, dig holes a quarter to third of the fence height. This ensures a secure base for your privacy fence.

Digging Holes and Setting Gravel Base

  • Use a manual post hole digger or power auger to create holes.
  • Dig 16 to 24 inches deep and add gravel at the bottom.
  • Gravel provides drainage and prevents post rot.
  • Call 811 to check for underground utility lines before digging.

Proper ground prep and hole depth are vital. They ensure your privacy fence stays stable for years to come.

Setting Fence Posts

It’s time to set the fence posts after preparing the holes. Start by positioning the first post. Use a post level to make sure it’s perfectly vertical.

Brace the post to keep it aligned while pouring concrete. Use string lines to position and align the other posts. Check each post with a level to keep them straight.

Pouring and Setting Concrete

Now, it’s time to pour the concrete. You can use regular-set or fast-set concrete. Follow the maker’s instructions for mixing and pouring.

For regular-set concrete, mix it to a thick, cake-like texture. Fill the holes around each post, leaving a few inches at the top.

With fast-set concrete, pour the dry mix around the posts and add water. Let the concrete harden for at least 24 hours before removing braces.

Proper post placement, plumbing, and bracing are key to a sturdy fence. These steps ensure your fence posts are secure and ready for the next phase.

Installing Fence Rails

Now that fence posts are secure, let’s focus on horizontal rails. These rails support fence pickets or panels. Proper placement and spacing are vital for stability and appeal.

Position the top rail 7-8 inches from the fence top. Place the bottom rail 7-8 inches from the ground. For a 6-foot fence, use three rails per bay.

For a 4-foot fence, two rails per bay will do. Cedar is less likely to bow than treated or pine alternatives.

Cut rails to size, extending fully between posts. Attach them to post outsides using corrosion-resistant screws. Stagger rail joints on different posts for stability.

Create support boards for gate openings. Trim post tops flush with the top rail. This improves the fence’s look and prevents potential hazards.

Consider rail placement, rail spacing, and rail joints carefully. This will create a sturdy, appealing fence that lasts long.

To ensure proper gate support and post trimming, follow these additional guidelines:

  • Position fence posts every 6-8 feet along the fence line.
  • Use two 16-penny nails to install the rail where it covers the post.
  • Allow the rails to flow with the grade of the land when the installation is complete.
  • Treat the base of the posts with a wood preservative to prevent rot.

Follow these best practices for a durable, long-lasting privacy fence. It will enhance your property’s look and provide privacy and security.

Attaching Fence Pickets or Panels

Installing fence pickets is key to privacy fence construction. Start with the exterior side. Align the first picket flush with rail ends and secure it.

Use a pneumatic nailer, stapler, or screws. Keep 3.5-inch spaces between pickets. A 2×4 board works great as a spacer and guide.

Make sure pickets are plumb and level. Check alignment often with a level as you go along the fence.

Installing Pickets on the Exterior Side

For a shadowbox design, install pickets on the interior side too. Alternate their placement with exterior pickets for a decorative look.

Use the 2×4 board spacer again. This helps keep spacing and alignment consistent on both sides.

Attaching Interior Pickets

At the fence’s end, adjust final picket spacing. Make sure they fit flush with rail ends. This creates a uniform height and appealing look.

The skill level for this task is moderate. It takes about 2 hours to install an 8-foot section with 2 posts.

Good planning, right tools, and best practices will make your project a success.

Adding Gates and Finishing Touches

Now it’s time to install your gate. Use the right hinges, latches, and hardware. Make sure there’s enough space for the gate to swing freely.

Add decorative elements like top trim or lattice. Paint or stain the fence to match your home’s exterior. This will give your fence a polished look.

Installing the Gate

Attach gate hinges to the posts. Make sure they’re properly aligned. Hang the gate and test its movement.

Check that it swings smoothly without binding. Install the gate latch or other hardware to secure it in place.

Decorative Touches

  • Add a decorative top trim or lattice to the fence for visual interest.
  • Paint or stain the fence to complement your home’s exterior color scheme.
  • Consider installing decorative gate hardware like custom-made hinges or latches.

These finishing touches will transform your privacy fence. They’ll make it both functional and attractive. Your gate and decorative elements will enhance your outdoor space.

Maintenance and Upkeep

Keeping your privacy fence in top shape is key to its long-lasting appeal. Regular cleaning, repairs, and care against weather and pests can make a big difference. These steps will help your fence look great for years.

Clean your fence once or twice a year to remove dirt and mildew. Use a power washer every two years for a deeper clean. This helps keep your fence looking good and staying strong.

Check your fence often for loose or damaged parts. Fix any issues quickly to avoid more weather damage. Look out for pest problems like woodpecker holes or termites. Take pest control steps to protect your fence.

You may need to paint or stain your fence every few years. This keeps it looking nice and protected. Use UV-stabilized wood sealants to slow down color fading.

Regular care can help prevent wood defects like warping and splitting. A good fence cleaning routine will keep your privacy fence looking great. It will also help it last for decades.

Tips for Hiring Privacy Fence Installation Experts

fence installation

Installing a privacy fence can be a DIY project. However, some homeowners prefer hiring professional fence installation experts. Look for licensed, experienced professionals who provide detailed estimates, timelines, and warranties.

Ask for references and check reviews to ensure quality work. Hiring licensed contractors saves time and ensures correct installation. It typically costs more than DIY approaches.

Fence installation labor costs range from $30 to $80 per hour. Permits can cost between $400 to $800. Materials and labor make up to 50% of overall costs.

Chain-link fences are budget-friendly. Iron fences tend to be more expensive. Ensure the fence contractor has at least ten years of experience.

  • Ensure the fence contractor has at least ten years of experience to obtain a license, and look for the Certified Fence Contractor (CFC) designation, which is valid for three years.
  • Verify that the contractor has general liability insurance to protect homeowners from liability in case of property damage or injuries during the job.
  • Handypersons are not legally allowed to install fences without proper certification and licensing in most states.

Most fencing contractors offer free estimates after on-site assessments. Industry training programs involve a week of combined classroom and hands-on installation training.

Professional fence companies ensure expert workmanship for durable fences. They save time by completing installations quickly. They also provide expert advice on design, materials, and maintenance.

When researching contractors, focus on expertise, work ethic, and reputation. Don’t just consider cost estimates and project timelines. Look for companies offering warranties and exceptional customer service.

Simplify Your Privacy Fence with FindPros

Are you ready to install a new wood fencing, fence gate, or picket fence, but feeling overwhelmed by the process? FindPros can help. Simply answer a few questions about your backyard, desired height, and location, and we’ll match you with top-rated local pros who can provide competitive quotes. No more guessing about the right materials, from pressure-treated wood to concrete for securing those posts.

Let the professionals handle the labor-intensive tasks, from digging holes to ensuring the dry concrete hardens properly. With FindPros, you can sit back and compare options to find the perfect pro who fits your needs and budget, whether it’s a simple DIY project or a complex vinyl fence installation. Get started today and simplify your privacy fence journey.

Conclusion

Installing a privacy fence can boost your home’s value, security, and appeal. With the right tools and preparation, homeowners can install a fence themselves. Alternatively, they can hire professionals for the job.

Careful planning ensures your new fence will last and enhance your outdoor space. Privacy fences offer many benefits, including protection for families with children and pets.

These fences can also increase property value and curb appeal. They act as sound barriers, creating a peaceful environment within your property.

For garden enthusiasts, a well-designed fence can protect their outdoor oasis. Success in privacy fence installation depends on thorough project planning.

Consider the privacy fence benefits that match your needs. By following this guide, you can transform your outdoor space and enjoy your new fence.

Frequently Asked Questions (Privacy Fence Installation)

Wood fences offer privacy, security, and can increase property value. They come in a variety of styles like picket fences and can provide complete privacy from neighbors.
Pressure-treated wood is the most durable and recommended choice for a long-lasting privacy fence. Pressure-treated lumber resists rot, insects, and weather better than untreated wood.
Digging the post holes to the correct depth, adding gravel, and pouring concrete are crucial for securing the posts. Following the manufacturer’s instructions for concrete mixing and hardening is important.
Privacy fence installation can be a DIY project, but it is labor-intensive. Hiring a licensed and experienced fence contractor may be the better option, especially if you need a permit or have complex property lines.
Regular cleaning, inspecting for damage, and repainting or staining the wood every few years will help preserve the look and longevity of your fence. Addressing any issues quickly, like loose boards or pests, is important.

Powder Coating

Range Hood Installation Near You

Can’t find what you are looking for?

How It Works

  • Answer a few questions about your home project.
  • Within seconds, get matched with top-rated local pros.
  • Compare quotes and choose the best pro for the job.

Powder Coating In Your Area

Powder Coating: A Guide for Hiring the Right Service

Meta Description: Discover the benefits of powder coating and learn how to choose the right service provider for your project. Expert tips for durable, cost-effective finishes.

Powder Coating

Powder coating transforms metal surfaces with superior results. It offers a durable, textured finish that beats traditional paint. Choosing the right service provider is key to getting the best outcome.

What sets top powder coating companies apart? Let’s explore the factors that make a difference in quality and service.

Key Takeaways

  • Powder coating provides superior protection against weather elements, ensuring the durability of outdoor metal fixtures.
  • Powder coating is an environmentally friendly option, releasing no harmful solvents or VOCs.
  • While the upfront cost may be higher, powder coating proves cost-effective in the long run with reduced maintenance.
  • Experienced powder coating companies offer a range of services, including custom finishes and color matching.
  • Customer reviews and testimonials are crucial indicators of a company’s quality and reliability.

What is Powder Coating?

Powder coating is a unique finishing process that enhances surface protection. It uses electrostatically charged powder made of resins and pigments. The powder is heated to melt and fuse onto metal or other materials.

The Process of Powder Coating

The powder coating process involves key steps. First, the workpiece undergoes thorough surface preparation for optimal adhesion. Next, the powder is electrostatically applied to create an even layer.

Finally, the coated item is heated in an oven. This causes the powder to melt and cross-link, forming a tough, protective finish.

Benefits of Powder Coating

  • Exceptional durability and resistance to chipping, fading, and damage from impacts and scratches.
  • Energy-efficient application process, with minimal waste and no volatile organic compound (VOC) emissions.
  • Versatile finishes that can be customized with a wide range of colors and textures.
  • Thicker coatings can be achieved, resulting in enhanced protection and longevity.
  • Powder coatings are suitable for a variety of materials, including metals, plastics, and even medium-density fiberboard (MDF).

The powder coating industry keeps growing with new materials and processes. These changes create tougher and greener finishes. Powder coating is now the top choice for many uses.

It’s used in cars, planes, household items, and buildings. Its popularity continues to rise across various industries.

Importance of Hiring the Right Powder Coating Service

Powder coating

Selecting a top-notch powder coating service is key for outstanding project results. A skilled provider ensures a durable finish that enhances metal products and offers long-lasting protection. Choosing poorly can lead to subpar outcomes and costly setbacks.

Powder coating provides superior durability, scratch resistance, and diverse color options. The process’s success hinges on the provider’s expertise and attention to detail. The right company delivers flawless, enduring coatings.

Quality and customer service are vital in powder coating services. Look for a provider with consistent results and dedication to your needs. They should collaborate closely throughout the process, ensuring your satisfaction.

Careful selection of a powder coating service guarantees optimal protection and aesthetic appeal for your metal products. The right partner completes your project to the highest standards. Trust in their expertise to achieve the results you need.

Questions to Ask When Hiring a Powder Coating Service

Choosing a powder coating service requires careful consideration. Ask about their experience and expertise in metal finishing. Check their track record and request samples of previous work.

Ask for references from satisfied customers. This helps you gauge their capabilities and customer service quality. A thorough review ensures you make an informed decision.

Experience and Expertise

Seasoned powder coating service providers often deliver superior quality work. Ask how long they’ve been in business. Inquire about the number of jobs they’ve completed.

An experienced team increases the chances of a successful powder coating project. Their expertise can make a significant difference in the final result.

Portfolio and Samples

  • Ask to see a comprehensive portfolio of their previous work. This showcases their expertise and the projects they’ve handled.
  • Request sample pieces or swatches to assess their powder coating finish quality.
  • Ask about their equipment and skilled labor to ensure consistent quality work.

Thoroughly examining a powder coating service’s experience and portfolio is crucial. It helps you choose confidently. You can trust their ability to deliver exceptional metal finishing results.

Customer Reviews and Testimonials

Customer Reviews

Customer reviews offer valuable insights into a powder coating company’s quality and reliability. These real-world experiences help you choose the right provider for your needs. Reading testimonials ensures you partner with a company that meets your expectations.

The company handles various projects, from bike frames to car parts. Customers express delight with the finished products. Final Touch has a 100% satisfaction rate and many loyal, repeat clients.

Understanding the Company’s Personality

A powder coating service’s personality is key. Look for transparency and responsiveness in providers. Their communication style reflects expertise and customer experience quality.

Customer Service and Communication

Great customer service builds trust. It ensures a positive working relationship. Evaluate the company’s responsiveness and attention to detail.

Check how well they explain the powder coating process. A company valuing customer service and communication likely delivers reliable, professional work.

  • Choose a provider who answers questions openly.
  • Check the company’s professionalism in interactions.
  • Expertise and trust lead to better customer experiences.

A company’s personality affects your decision. Providers valuing communication often meet expectations. They ensure successful projects through customer satisfaction.

Checking for Industry Accreditations and Certifications

Look for powder coating providers with industry-recognized accreditations and certifications. These credentials show a company’s commitment to quality and expertise. Reputable companies often have memberships with organizations like the Powder Coating Institute (PCI).

PCI offers two types of certifications: PCI 3000 for custom coaters and PCI 4000 for manufacturers. Industry experts with at least 10 years of experience conduct the PCI Certification audit.

  • The audit process includes nine competencies with specific assessment points ranging from three to 32 under each competency.
  • Certified coaters undergo an annual Certification Maintenance Audit for the next two years following the initial certification.
  • PCI Certification can lead to an improvement in powder-coating operation efficiencies by focusing on weaker competencies for enhancement.

The International Organization for Standardization (ISO) offers certifications like ISO 9001. These show a company’s dedication to quality management systems. Small businesses may find it challenging to obtain ISO certification.

However, the demand for such standards is growing in the market. Many customers prefer working with ISO-certified providers for quality assurance.

When choosing a powder coating service, ask about their industry accreditations and certifications. These credentials offer insights into the company’s expertise and quality standards. They also show commitment to best practices in the powder coating industry.

Evaluating Cost and Turnaround Time

Choosing a powder coating service requires balancing cost and expected turnaround time. Don’t just go for the cheapest option. Consider quality and the provider’s ability to meet your timeline.

Ask for detailed quotes and inquire about additional fees or charges. Discuss the company’s typical turnaround time and how flexible they are with your schedule and budget.

  1. Compare pricing and value from multiple services to find the best fit for your needs.
  2. Focus on quality and reliability over the lowest price for long-lasting results.
  3. Check if the company can deliver within your timeframe to ensure project success.

By weighing both cost and turnaround time, you’ll find the right balance. Look for quality, value, and efficiency in your chosen powder coating service.

Simplify Your Powder Coating Journey with FindPros

Navigating the complexities of powder coating can be daunting. But with FindPros, you have access to a network of top-rated local professionals who can guide you through the process. From surface preparation to the latest powder application techniques, our experts can help you achieve the perfect finish, whether you’re working with metal, aluminum, glass, or even wood.

Simply answer a few questions about your project, and we’ll match you with the best-fitted pros who can provide competitive quotes and ensure your powder coating adheres seamlessly. Take the guesswork out of your project and let FindPros connect you with the right solutions, from pre-treatment to electrostatic application and temperature-controlled curing.

Conclusion

Choosing the right powder coating service is vital for your metal products. It ensures a top-quality, long-lasting finish that looks great and protects against the elements. Consider factors like experience, portfolio, and customer reviews when making your decision.

A reputable powder coating service can save you money over time. This eco-friendly option offers superior durability and cost-effectiveness for metal finishing. With the right provider, you’ll achieve the look and protection your products need.

For your next metal finishing project, focus on finding a service that meets your standards. This approach will help you get the best results. You’ll enjoy the long-term benefits of a high-quality powder coating solution.

Frequently Asked Questions (Powder Coating)

Powder coating is a unique finishing process that uses electrostatically charged powder made of resins and pigments. The powder is applied to a metal or other material surface, then heated to melt and fuse onto the material, creating a tough, protective finish.
Powder coated finishes offer exceptional durability and resistance to chipping, fading, and damage from impacts and scratches. It is an environmentally friendly process with minimal waste and no volatile organic compound (VOC) emissions. Powder coatings also allow for versatile finishes with a wide range of colors and textures.
The powder coating process involves thorough surface preparation for optimal adhesion, followed by the powder being electrostatically applied to create an even layer. The coated item is then heated in an oven, causing the powder to melt and cross-link, forming a tough, protective finish.
When hiring a powder coating service, consider their experience and expertise, portfolio of previous work, customer reviews and testimonials, industry accreditations, and their ability to meet your timeline and budget requirements. Choosing the right provider is crucial for achieving a high-quality, long-lasting finish.
Compared to traditional paint, powder coating provides superior protection against weathering, scratches, and other forms of wear and tear. It is also a more environmentally friendly option, as it does not release harmful solvents or VOCs. While the upfront cost may be higher, powder coating proves cost-effective in the long run with reduced maintenance and longer-lasting results.

Possum Removal

Range Hood Installation Near You

Can’t find what you are looking for?

How It Works

  • Answer a few questions about your home project.
  • Within seconds, get matched with top-rated local pros.
  • Compare quotes and choose the best pro for the job.

Possum Removal In Your Area

Safe and Humane Possum Removal: What to Expect

Meta Description: Discover safe and humane possum removal techniques. Learn what to expect during the process and how to effectively manage opossums on your property.

Possum Removal

Possums aren’t always the pests we think they are. These unique marsupials can help control ticks and rodents. But when they invade our homes, they can become a problem.

Possums may burrow into properties, causing issues. In such cases, careful and ethical removal becomes necessary. It’s important to balance their benefits with potential property damage.

Key Takeaways

  • Possums are typically the size of a large cat and are related to kangaroos and other marsupials.
  • Possum removal services often use live cage traps to capture and relocate possums safely.
  • Possums are immune to snake venom and are effective tick hunters, making them helpful creatures.
  • Proper possum removal is crucial to prevent new possums from moving in and causing further damage.
  • The average cost of safe and humane possum removal ranges from $200 to $400, with most homeowners paying around $250.

Understanding Possums

Possums, or opossums, are fascinating creatures often misunderstood. These large, rodent-like animals are marsupials, related to kangaroos. They have white, gray, or brown fur, long tails, beady eyes, sharp teeth, and pointed snouts.

Characteristics and Behaviors

Possums are excellent climbers and use their tails for stability. When threatened, they “play possum,” falling over and secreting a foul odor. Mothers carry 6 to 20 babies in a pouch, like kangaroos.

Possums as Helpful Creatures

Possums can be quite beneficial despite their pest-like appearance. As scavengers, they eat various foods, helping clean up roadkill and control pest populations.

Interestingly, possums are immune or resistant to poisonous snake venom. This makes it easier for them to hunt these animals. They’re also excellent tick hunters, helping to control tick populations.

Possums are one of the few mammals resistant to rabies. This makes them a desirable creature to have around your property.

When Possums Become Pests

Opossums can turn into opossum pests when they cause problems on properties. They love opossum garbage and pet food in urban areas. These critters may even attack small livestock like chickens on farms.

Opossums can burrow under buildings, leading to opossum property damage. They carry opossum fleas, opossum ticks, and opossum mites that might enter homes. Although not rabid, their opossum bites can be painful and risky.

  • Attracted to opossum garbage and pet food in urban areas
  • Known to attack small livestock like chickens on hobby farms
  • Can burrow under homes and structures, causing opossum property damage
  • Carry opossum fleas, opossum ticks, opossum mites, and other opossum ectoparasites
  • Opossum bites can be painful and dangerous, though they are not susceptible to rabies

Property owners often want to remove opossums using humane methods. Understanding opossum pests helps people prevent and solve problems. Taking action early can keep these critters from becoming a nuisance.

Possum Removal Regulations and Laws

opossum removal regulations

Opossum removal laws vary by state. Some states ban trapping and releasing opossums. Others require euthanasia or prohibit trapping entirely. Some allow live trapping with specific permits.

Check your local and state opossum removal laws before taking action. Working with a licensed opossum wildlife management company ensures compliance with all opossum removal regulations.

California law prohibits keeping non-releasable native wildlife. The CDFW may consider captive placement at restricted species facilities. Opossum trapping laws in California ban relocating trapped wildlife.

Traps must be checked daily. Opossum euthanasia laws in California forbid using poison. Healthy trapped wildlife must be released where caught or disposed of as authorized.

Always consult local and state regulations. This ensures compliance with opossum control permits and opossum relocation laws when handling opossum issues.

Removing Possums from Specific Areas

Garage

Possums often enter garages in search of food. Open the garage door to let them leave on their own. For nesting possums, more action is needed.

Check local rules before using a live trap with bait. Place it near the possum’s hiding spot. Check the trap often and relocate the caught possum quickly.

After removal, fix any entry points. This stops possums and other pests from coming back.

Under the House

Quick action is vital if a possum burrows under your home. Review local laws, then set a baited live trap near the entry point.

Watch the trap regularly and move the possum once caught. Fill in burrows and block access points after removal.

Sealing off potential entries is key to prevent possums from returning.

Removing Possums from Crawl Spaces

Possums often seek shelter in crawl spaces. These uninvited guests can cause problems like nesting and spreading diseases. It’s important to remove them safely and humanely.

Check local rules about possum removal first. Many areas prefer live trapping and relocation. Set up live traps near entry points inside and outside the crawl space.

Use canned pet food as bait to attract the possum. This will help lure them into the trap.

  1. Inspect the crawl space for access points. Seal them off to stop possums from coming back.
  2. Be ready for noise once the possum is trapped. They may get upset. Quickly move the trapped animal to a release site.
  3. Clean the crawl space after removing the possum. This gets rid of smells and health risks.

Possums might also get into attics. You may need special traps or removal services for this. Always put safety first when dealing with possums.

Ask local wildlife experts or pest control pros for help. They can ensure successful and kind removal of possums from your home.

Removing Possums from Inside the House

Possums may sometimes enter living spaces, especially attics. Removing them involves checking regulations, setting traps, and relocating the animal. After removal, repair entry points to prevent future infestations.

Attic

First, identify and seal off entry points in the attic. Repair holes, gaps, or damaged areas in the roof, soffits, or walls. Set up a baited live trap to capture the possum.

Monitor the trap closely and remove the captured possum quickly. Handle with care, as possums can be risky. Release the animal in a suitable location, following local wildlife rules.

Living Spaces

Use a live trap with proper bait to remove possums from main living areas. Monitor closely and relocate the animal fast. Seal off entry points to prevent future access.

In some cases, professionals may need to remove possums using special tools. This should only be done by experts or as a last resort.

Clean and disinfect the area where the possum was found. This prevents the spread of diseases or parasites. Take proactive steps to avoid future possum problems in your home.

Identifying and Preventing Opossum Damage

opossum damage

Opossums can cause major property damage, becoming a headache for homeowners. These clever animals burrow under structures and create entry points into buildings. Their sharp claws and teeth can damage siding and insulation.

To stop opossum damage, find and seal all possible entry points around your home. Check for openings in the foundation and gaps near utility pipes. Look for weak spots in crawl spaces and attics.

  • Opossum property damage: Opossums can burrow under structures, compromising foundations and creating entry points.
  • Opossum structural damage: Their sharp claws and teeth can damage siding, insulation, and other structural components.
  • Opossum entry points: Identifying and sealing off potential access points is key to preventing opossum infestations.

Professional wildlife control experts can assess your property and keep opossums out. They may install special fencing, fix damaged areas, and use proven opossum-proofing methods. Addressing the root causes of opossum activity can protect your property from costly repairs.

Possum Identification and Habitat

Possums, or opossums, are easy to spot. They have gray or white fur, pointed snouts, and long, rat-like tails. These night creatures weigh 8 to 14 pounds, similar to a house cat.

Their five-toed feet have an opposable “thumb” on the back. This helps them climb well in cities and forests. Virginia opossums live in many places, from woods to city parks.

These animals often use existing dens. They might live under sheds, in rock piles, or tree holes. Knowing how possums look and live helps spot them on your property.

  • Possums are generally around the size of a domestic cat, with size variation based on food availability.
  • Possums have a distinctive gray or white fur, pointed snout, beady eyes, and a long, rat-like tail.
  • Possums have five-toed feet with an opposable “thumb” on the hind feet, which aids in their excellent climbing abilities.
  • Possums are nocturnal and solitary animals, except when raising young.
  • Possums are found throughout the United States, commonly inhabiting wooded areas, suburban neighborhoods, and urban landscapes.

Learning about possums helps homeowners spot problems. They can then take steps to deal with any issues that come up.

DIY Possum Removal Steps

Professional wildlife control is often the best choice for possum removal. However, some homeowners might try DIY methods. The most common technique uses a live cage trap with irresistible bait like fish or cat food.

When setting up a trap, use one at least 32 inches long. Check it regularly to ensure humane treatment. Once trapped, relocate the possum at least 150 feet away in a wooded area.

After removal, seal off entry points to prevent possums from returning. This may involve possum exclusion or proofing measures. Here are some steps to take:

  • Repairing holes or gaps in the foundation, walls, or roof
  • Installing possum-proof fencing or wire mesh around the perimeter
  • Removing food sources, such as pet food or garbage, that may attract possums
  • Using possum repellents like ammonia, garlic, or predator urine to discourage return visits

DIY possum removal can work, but follow local rules and prioritize the animal’s welfare. For tough cases, seek help from a licensed possum trapping professional.

Professional Possum Removal Services

Many property owners opt for professional wildlife control companies to handle possum problems. These companies employ trained technicians who use advanced techniques for humane possum removal. They also inspect properties, identify access points, and prevent future infestations.

Professional services often include repairing damage caused by possums. Hiring a licensed wildlife control specialist ensures safe and legal possum removal.

  • Trained, licensed technicians use advanced techniques to humanely trap, remove, and relocate possums
  • Comprehensive inspection and identification of access points to prevent future infestations
  • Restoration of property by repairing any damage caused by the possum’s presence
  • Legally compliant and safe possum removal services

For possum problems, it’s best to trust a licensed wildlife removal expert. A reputable animal control services provider ensures safe and effective possum handling. They also address issues that may have attracted the animal.

Hiring Licensed Possum Catch and Release Operators

Dealing with possums requires licensed catch and release operators. Possum removal rules differ by location. In many areas, homeowners can’t legally trap and move possums themselves.

Licensed wildlife pros have the right permits and training. They ensure possums are removed and relocated legally. Homeowners should check local rules and hire operators with proper credentials.

Licensing Requirements

Possum removal licensing varies by location. Some areas need general trapping licenses. Others have strict opossum control rules.

Homeowners should research their state or county’s specific requirements. This ensures they hire fully licensed and compliant professionals.

Releasing Possums Safely

Trapping a possum is just the first step. The animal must be released safely to survive. Licensed operators follow strict protocols for safe possum relocation.

They release possums at dusk, within 150 feet of the original spot. The release site should have a tree or tall fence for climbing.

Proper timing and guidelines are crucial for the animal’s welfare. This prevents the possum from becoming a problem elsewhere.

FindPros: Your Solution for Possum Removal and Beyond

Dealing with a possum infestation or other wildlife problems in your home can be a real hassle. Whether you need outdoor possum removal, professional opossum removal services, or help with securing pet doors and preventing future infestations, FindPros can connect you with the right pest control companies and animal control specialists in your area.

With FindPros, you can quickly get matched with top-rated local pros who can humanely remove opossums, address issues caused by missing pet food or garbage cans that may attract these wild animals, and provide comprehensive solutions to get rid of possums and prevent future opossum problems. Don’t risk dealing with dangerous wildlife or the potential spread of diseases like Chagas or spotted fever – let FindPros find the best professionals to handle your opossum problem safely and effectively.

Conclusion

Possums can be a nuisance and cause property damage. They can be removed safely and humanely with the right possum removal summary. Key steps include finding entry points, using live traps, and relocating the animal.

Professional wildlife management solutions offer comprehensive services for possum removal. They can help prevent future issues using opossum control best practices. Homeowners can reclaim their property while respecting these unique creatures.

With the right possum prevention tips, homeowners can coexist with these wildlife neighbors. Taking steps to make property less appealing to possums is crucial. This helps maintain a safe and pest-free environment.

Humane animal removal techniques and animal exclusion methods are important. They allow for effective possum control while following local regulations. This approach balances human needs with respect for wildlife.

Frequently Asked Questions (Possum Removal)

The virginia opossum is a large, rodent-like marsupial with distinctive gray or white fur, a pointed snout, beady eyes, and a long, rat-like tail. They have five-toed feet with an opposable “thumb” on the hind feet, which aids their excellent climbing abilities.
Possums can cause property damage by burrowing under structures and creating entry points into homes. Their sharp claws and teeth can also damage siding, insulation, and other structural components. Possums may also be attracted to pet food or garbage, leading to infestations and the potential spread of diseases.
Possums are immune or resistant to snake venom, making them effective hunters of snakes. They are also excellent tick hunters, helping to control tick populations. As scavengers, possums can help clean up roadkill and control pest populations, such as rodents. This can make them a desirable creature to have around the property.
The most common method for humane opossum control is the use of a live cage trap with irresistible bait, such as fish or cat food. Once trapped, the possum should be relocated at least 150 feet away in a wooded area, following local regulations. Homeowners should also seal off any entry points to prevent possums from returning, such as repairing holes or gaps in the foundation, walls, or roof.
Hiring a licensed and trained animal control specialist is often the best choice for possum removal, as they have the necessary permits and expertise to ensure safe and legal handling of the animal. Professional services may also include repairing any damage caused by the possum’s presence and addressing the root causes that attracted the animal in the first place, such as securing pet doors or removing food sources.

Porch Contractors

Range Hood Installation Near You

Can’t find what you are looking for?

How It Works

  • Answer a few questions about your home project.
  • Within seconds, get matched with top-rated local pros.
  • Compare quotes and choose the best pro for the job.

Porch Contractors In Your Area

Hiring Porch Contractors: A Step-by-Step Guide

Meta Description: Learn how to hire reliable porch contractors for your project. Our guide covers essential steps, from planning to execution, ensuring your new porch meets your expectations.

Porch Contractors

Want to create a stunning new porch? Finding the right porch contractors can be tricky. But with a smart plan, you can make your dream come true.

This guide will help you find skilled porch builders. We’ll show you how to work with them to create your perfect outdoor space.

Key Takeaways

  • Hire porch contractors with a positive local reputation and experience navigating local building codes and weather conditions.
  • Thoroughly research potential porch contractors by reviewing online reviews, client references, and their portfolio of past work.
  • Obtain multiple bids and compare them based on the scope and quality of work to make an informed decision.
  • Ensure that your chosen porch contractor is licensed, insured, and offers comprehensive warranties.
  • Collaborate closely with your porch contractor to define your budget, vision, and project timeline for a successful outcome.

Introduction to Porch Contractors

Porch contractors are experts in designing and building enclosed porch spaces. They blend functionality with visual appeal. Their skills include ensuring proper ventilation, structural integrity, and seamless integration with existing home designs.

Creating an Outdoor Living Space

Porch contractors can transform your outdoor space into a captivating retreat. They help you design the perfect screened porch. This can enhance your home’s curb appeal and expand your living area.

Understanding the Role of Screen Porch Contractors

Screen porch contractors bring your outdoor living dreams to life. They plan and build porches that meet local codes and use durable materials. Their work blends seamlessly with your home’s architecture.

These experts ensure your screen porch looks great and lasts for years. They build structures that can withstand the elements and provide long-lasting enjoyment.

Benefits of Hiring Professional Screen Porch Contractors

  • Access to specialized knowledge and high-quality materials
  • Time and cost efficiency in the construction process
  • Customization options to meet your specific needs and preferences
  • Assurance of a durable and aesthetically pleasing final product

Experienced porch contractors and porch builders can transform your outdoor spaces. They create stunning screened porches that extend your home. These spaces become comfortable and inviting outdoor living space.

Defining Your Vision and Budget

Before hiring screen porch contractors, define your project vision. Think about size, style, and materials you want. Consider special features like lighting, fans, or custom seating. A clear vision helps communicate expectations effectively.

Establish a realistic budget for your project. Allocate 10-15% of your home’s value for the renovation. Include a 10-20% contingency fund for unexpected expenses during construction.

Get at least three estimates from reputable contractors. This gives you a good view of market prices. Consider a Home Equity Line of Credit (HELOC) to finance your project.

Defining your vision and budget ensures your dream screen porch becomes reality. It helps you stay within budget. This prep work also aids in effective communication with contractors.

Researching and Shortlisting Potential Contractors

screen porch contractors

Finding the right local contractors is key to building a beautiful screen porch. Research reputable screen porch contractors in your area. Look for companies with solid reputations, extensive portfolios, and positive online reviews.

Local Reputation and Recommendations

Ask friends, family, and neighbors about their screen porch project experiences. Their recommendations can offer valuable insights into a contractor’s work. They can tell you about work ethic, craftsmanship quality, and customer service.

Online Reviews and Portfolio

Use Yelp, Angie’s List, and Houzz to check local contractors’ reputations. Read customer reviews about timeliness, communication, and final results. Look at their portfolio to see their design skills and attention to detail.

By researching local contractors, checking online reviews and portfolios, you can create a solid shortlist. Seek recommendations from trusted sources too. This helps you find experienced pros for your screen porch project.

Conducting Interviews and Requesting Quotes

Interviewing screen porch contractors is vital for making an informed decision. Ask about their experience, approach, and pricing. This helps ensure your vision and budget align with their capabilities.

Discuss the contractor’s background and their plan for your project. Ask about materials, timelines, and potential challenges. A reputable contractor will provide clear answers to your questions.

Request detailed quotes that break down the scope of work. Compare materials, labor costs, and project timelines. Remember, the lowest bid isn’t always the best choice.

Check for liability insurance and workers’ compensation coverage. Look out for any hidden costs or additional fees. A trustworthy contractor will provide this information upfront.

By carefully reviewing interviews and quotes, you’ll find the right contractor. This process ensures you get the best value for your screen porch project.

Verifying References and Credentials

Thoroughly vetting screen porch contractors’ references and credentials is crucial. This ensures you work with reputable professionals who meet industry standards. Contact previous clients to learn about their experience with the contractor’s services.

Check if contractors are licensed, insured, and in good standing with local regulators. This protects you from potential liabilities during the project. Look for necessary licensing, bonding, liability insurance, and worker’s compensation insurance.

  • Check the contractor’s references and ask about their satisfaction with the completed work, communication, and adherence to budget and timelines.
  • Ensure the contractor is properly licensed, bonded, and insured to mitigate risks and liabilities.
  • Confirm the contractor’s standing with local regulatory bodies to ensure they operate within industry standards.

Verifying a contractor’s references, credentials, license, and insurance builds trust. It shows their reputation and ability to deliver a great customer experience.

Reviewing the Contract

contract review

Your chosen porch contractor will provide a detailed contract. Review it carefully to ensure it covers all agreed-upon details. Look for the scope of work, payment schedule, timelines, and warranties.

Discuss any concerns with the contractor before signing. This step ensures clarity and prevents future misunderstandings.

Understanding the Permitting Process

Screen porch projects usually need building permits from local authorities. Your contractor should handle this process for you. They’ll ensure the project follows all building codes.

Obtaining necessary permits is crucial for safety and legality. This step must be completed before construction begins.

  • Review the contract carefully to understand the terms and conditions of the project.
  • Ensure the contract covers the scope of work, payment schedule, timelines, and warranties.
  • Discuss any concerns or clarifications with the contractor before signing the contract.
  • Verify that the contractor will handle the permitting process and comply with all building codes.

A thorough contract review and understanding of permits pave the way for success. These steps help ensure a smooth porch construction project.

Construction Phase

The construction phase of a screen porch project is exciting and transformative. It starts with site preparation. The contractor gets the area ready for the new structure.

  • Site Preparation: Careful site preparation is vital for the porch’s stability and alignment. The contractor assesses the site and addresses uneven surfaces. They lay the foundation for a sturdy, level structure.
  • Building the Frame: Next, the contractor builds the frame of the screen porch. The frame provides support and shape for the entire structure. It may be made of wood, aluminum, or steel.
  • Installing Screens and Roof: After framing, the screens and roof are installed. Roofing options include asphalt shingles, metal, and polycarbonate panels. The screens create a comfortable, insect-free outdoor living space.

Careful planning during construction ensures a successful screen porch project. The contractor’s expertise is key to bringing your vision to life. Their commitment to quality craftsmanship transforms your outdoor space.

Finishing Touches and Final Inspection

Your screen porch construction is nearly complete. It’s time to add final touches to enhance its look and functionality. This includes painting or staining the frame and installing trim.

Additional features like lighting, fans, or decorative elements can be incorporated. These finishing touches improve the porch’s visual appeal and ensure comfort. After completion, a thorough final inspection is necessary.

Review the work with your contractor during the final inspection. Ensure everything meets your expectations and complies with local building codes. Address any lingering issues before deeming the project complete.

  1. Painting or staining the frame to achieve the desired aesthetic
  2. Installing trim and molding to create a polished, finished look
  3. Incorporating lighting fixtures, ceiling fans, or other decorative elements
  4. Verifying that all necessary permits have been obtained
  5. Ensuring the porch meets all local building code requirements

A meticulous inspection ensures your screen porch is beautiful, safe, and up to code. With final touches and a successful inspection, you’re ready to enjoy your new outdoor space.

Maintenance and Care

Keep your screen porch clean and well-maintained to preserve its look and lifespan. Regular cleaning and seasonal checks will keep your outdoor space in top shape.

Regular Cleaning

Sweep the floor and wipe down screens often. Clean all surfaces to remove dirt and debris. Check screens for rips or tears and fix them quickly.

Seasonal Maintenance

  1. Check for winter damage in spring. Look for cracks or loose boards and fix them before warm weather arrives.
  2. Clean and store removable furniture before cold weather sets in. This protects items from harsh elements and keeps them in good shape.
  3. Inspect the roof, screens, and structure to ensure they can handle upcoming weather patterns.

A regular upkeep routine helps maintain your screen porch’s appearance and longevity. This ensures a cozy outdoor space for years to come.

Address any issues quickly to keep your porch in great condition. Your efforts will pay off with a comfortable outdoor living area.

Let FindPros Help You Hire the Right Porch Contractor

Are you ready to turn your porch dreams into reality? FindPros can connect you with professional contractors in your local area who can make it happen. Simply answer a few quick questions about your home project, and we’ll match you with top-rated pros that fit your needs and budget. Get free quotes from multiple contractors, compare their expertise, and choose the one you feel most satisfied working with. FindPros takes the hassle out of your porch installation, helping you protect your investment and explore the possibilities. Don’t settle for anything less than the perfect professional contractor for your job.

Conclusion

Hiring the right screen porch contractor is key to creating a beautiful outdoor space. Follow these steps to ensure your project meets your expectations. A well-built screen porch adds value and provides a relaxing retreat for your family.

Screen porch contractors bring expertise to transform your vision into reality. They know local building codes and recommend suitable materials. Their skills ensure efficient construction and a successful project that enhances your outdoor area.

A well-executed screen porch can elevate your property’s value and appeal. It creates an inviting space for entertaining guests or family gatherings. Take time to research and communicate with your chosen contractor.

By doing so, you’re on your way to creating a stunning outdoor oasis. Your new screen porch will be the envy of your neighborhood. It will provide years of enjoyment for you and your loved ones.

Frequently Asked Questions (Possum Removal)

The virginia opossum is a large, rodent-like marsupial with distinctive gray or white fur, a pointed snout, beady eyes, and a long, rat-like tail. They have five-toed feet with an opposable “thumb” on the hind feet, which aids their excellent climbing abilities.
Possums can cause property damage by burrowing under structures and creating entry points into homes. Their sharp claws and teeth can also damage siding, insulation, and other structural components. Possums may also be attracted to pet food or garbage, leading to infestations and the potential spread of diseases.
Possums are immune or resistant to snake venom, making them effective hunters of snakes. They are also excellent tick hunters, helping to control tick populations. As scavengers, possums can help clean up roadkill and control pest populations, such as rodents. This can make them a desirable creature to have around the property.
The most common method for humane opossum control is the use of a live cage trap with irresistible bait, such as fish or cat food. Once trapped, the possum should be relocated at least 150 feet away in a wooded area, following local regulations. Homeowners should also seal off any entry points to prevent possums from returning, such as repairing holes or gaps in the foundation, walls, or roof.
Hiring a licensed and trained animal control specialist is often the best choice for possum removal, as they have the necessary permits and expertise to ensure safe and legal handling of the animal. Professional services may also include repairing any damage caused by the possum’s presence and addressing the root causes that attracted the animal in the first place, such as securing pet doors or removing food sources.

Pool Tile Companies

Range Hood Installation Near You

Can’t find what you are looking for?

How It Works

  • Answer a few questions about your home project.
  • Within seconds, get matched with top-rated local pros.
  • Compare quotes and choose the best pro for the job.

Pool Tile Companies In Your Area

Looking for Pool Tile Companies? Here’s What You Need to Know

Meta Description: Discover top pool tile companies offering stunning designs and durable materials. Transform your pool with expert advice and quality products. Find your perfect style today.

Pool Tile Companies

Want to turn your pool into a stunning oasis? The right tiles can make a lasting impression. This guide will help you find perfect tiles for your dream pool.

We’ll cover waterline tiles, types of pool tiles, and popular designs. You’ll also learn about installation and hiring the right company. Get ready to explore endless possibilities for your backyard oasis.

Key Takeaways

  • Pool tiles offer customizable colors and styles to create a unique pool design
  • 02Waterline tiles are crucial for preventing scum lines and maintaining pool cleanliness
  • 03Glass tiles provide a luxurious and easy-to-clean option, while ceramic tiles offer affordability and durability
  • 04Pool tile installation and replacement can vary in cost depending on the project scope and damage extent
  • 05Factors like safety, durability, and long-term maintenance should be considered when choosing pool tiles

The Importance of Waterline Pool Tiles

Waterline pool tiles are vital for pool maintenance and appearance. They sit 3 inches above and below the water level. These tiles prevent scum lines from pollen, sunscreen, and body oils.

Why Waterline Tiles are Crucial for Your Pool

Waterline tiles protect the pool’s liner or shell from damage. They guard against erosion, cracking, and freezing water issues. Without these tiles, pools can develop discoloration and hard-to-clean yellowish scum.

Preventing Scum Lines and Maintaining Cleanliness

Waterline tiles around the pool’s perimeter act as a barrier. This makes cleaning and maintaining the pool easier. Ceramic tiles are popular for their durability and affordability.

Glass tiles offer various colors, designs, and shapes like hexagons. These can give your pool a more modern look.

Waterline tiles also boost a pool’s visual appeal. Carefully chosen tile material, size, and design can create an attractive border. This enhances the overall pool environment.

Types of Pool Tiles

Pool tiles are key in creating a stunning and practical swimming pool. They come in various materials, each with unique benefits. From luxurious glass to affordable ceramic, there’s a tile for every style and budget.

  • Glass Tiles for Luxury and Sparkle: Glass tiles offer a high-end, shimmering look for pools. They come in many colors and sizes, from 0.5×0.5 inches to 12×12 inches. These tiles are elegant and low-maintenance, resisting stains and algae buildup.
  • Ceramic Tiles: Ceramic tiles are budget-friendly and come in various sizes and designs. They offer matte, glossy, and textured finishes, suiting both modern and traditional pools. Ceramic tiles are tough and can handle water, chemicals, and foot traffic.

The right pool tile can transform your outdoor space. It can reflect your personal style and preferences. Choose wisely to create your perfect poolside paradise.

Popular Pool Tile Designs and Colors

pool tile designs

Pool tile designs and colors can transform your pool into a stunning oasis. Trendy shapes like hexagons and subway tiles are gaining popularity. These tiles blend well with various pool styles, from classic to modern.

Trendy Shapes: Hexagons and Subway Tiles

Hexagon tiles create eye-catching geometric patterns in pools. They can be arranged in many ways, adding visual interest to the surface.

Subway tiles offer a timeless look with their elongated rectangular shape. They complement both modern and traditional pool designs beautifully.

Choosing the Right Color Palette

Pool tile colors come in endless options. Many prefer calming shades of blue, gray, and white for a luxurious feel.

These colors are also low-maintenance, hiding dirt and discoloration well. Bold colors like vibrant greens or deep blues can add unique flair.

Your pool tile choices should reflect your personal style and desired pool aesthetics. Careful selection of shape and color can turn your pool into a masterpiece.

Pool Tile Installation and Cost

New pool tiles can transform your pool’s look. It’s a worthwhile investment for pool renovation. Standard pool tile installation costs about $2,000 to $2,500 on average.

Premium options like glass tiles can cost up to $100 per square foot. Complete pool tile replacement costs vary based on pool size and project complexity.

Professional installers are crucial for long-lasting results. They ensure proper surface preparation, tile application, and grouting.

Careful installation prevents water leaks, cracking, and discoloration. Experienced professionals can enhance your outdoor living space’s beauty.

Understanding costs helps you make informed decisions. You can align your budget with design preferences. This knowledge helps create a stunning, functional pool oasis.

Factors to Consider When Choosing Pool Tiles

Selecting pool tiles requires careful thought. Safety, durability, and aesthetics are crucial for a functional and stunning pool area. These factors ensure a great swimming experience.

Safety, Durability, and Attractiveness

Swimmer safety is vital. Choose anti-slip tiles for secure footing when wet. Ceramic and porcelain tiles are popular for tile safety and tile durability.

Glass tiles offer tile attractiveness but may not suit high-traffic areas. Consider tile longevity and tile quality for long-term benefits. High-quality tiles cost more but save money on tile maintenance.

Budget and Long-Term Maintenance

  • Set a realistic pool tile budget that matches your desired tile attractiveness and tile durability.
  • Think about tile maintenance needs for different materials. Some tiles require more frequent cleaning.
  • Compare initial pool tile selection cost with tile longevity and tile quality for the best value.

Balancing these factors helps you choose great pool tiles. You’ll enhance your pool’s tile attractiveness while ensuring tile safety and tile durability for years.

Pool Tile Replacement: Signs and Process

pool tile replacement

Even well-maintained pools may need tile replacement due to wear and tear. Calcium buildup, chipping, or cracking can signal it’s time for new tiles. Recognizing these signs helps preserve your pool’s appearance and functionality.

White, chalky deposits on the waterline often indicate calcium buildup on tiles. This can make them look dull and unattractive. Chipped, cracked, or falling tiles can compromise the pool’s structure and safety.

Homeowners have several options for pool tile replacement. Glass tiles offer a luxurious look, while ceramic tiles provide durability. The process involves removing old tiles, cleaning the surface, and installing new ones.

Costs vary based on pool size, tile type, and project complexity. Standard tiles like stone or ceramic average $17 per square foot. Glass tiles may cost more but offer a high-end appearance.

For pool tile restoration, work with experienced professionals for the best results. They can guide you through the process and ensure long-lasting beauty. Addressing tile issues promptly keeps your outdoor oasis in top shape.

Tips for Hiring the Right Pool Tile Installation Company

Selecting a top-notch pool tile installation company is key to revamping your pool. Skilled professionals can transform your outdoor oasis with a stunning, durable installation. Here are some tips for finding a pool tile expert:

  1. Verify their experience: Seek a pool tile contractor with a solid history of successful pool renovations. Check their portfolio and ask for references to gauge their expertise.
  2. Understand the installation process: Ask about their pool tile installation methods and recommended materials. A reputable pool tile service should explain the process clearly.
  3. Investigate warranties and guarantees: Look for a pool construction company that offers a comprehensive warranty. This protects your investment and gives you peace of mind.

By following these tips, you’ll find experienced pool tile experts for your project. They’ll ensure your pool looks fantastic for years to come.

Discover the FindPros Advantage

Looking to transform your pool, deck, or spa with the perfect tiles? FindPros can help you find the right professionals for the job. Simply answer a few questions about your home project, and we’ll match you with top-rated local pros who can provide expert advice and competitive pricing. Compare quotes from a variety of skilled tradespeople, from tile installers to mosaic artists, and find the perfect fit for your unique style and budget. Take the hassle out of your pool renovation and let FindPros be your trusted source for all your home improvement needs.

Conclusion

Choosing the right pool tiles is crucial for creating a stunning outdoor oasis. Experienced pool tile companies can help transform your pool. Factors like waterline tiles, materials, and design trends are vital for long-term beauty.

Waterline tiles prevent scum lines and enhance pool aesthetics. Modern pool tiles offer durability and easy maintenance. Glass and ceramic tiles are popular choices for their unique qualities.

Investing in quality pool tiles can boost your property value. It also improves your outdoor living experience. Consider your preferences, budget, and maintenance needs when selecting tiles.

With the right tiles and expert help, you can create a functional pool design. This guide provides insights for making informed decisions. Use these tips to start your successful pool renovation project.

Frequently Asked Questions (Pool Tile Companies)

The article mentions that pool tiles come in various materials, including glass tiles, ceramic tiles, and stone tiles. Each type has its own unique benefits in terms of luxury, durability, and affordability.
The article suggests considering trendy shapes like hexagons and subway tiles, as well as popular color palettes such as blues, grays, and whites. Choosing the right color and design can greatly enhance the overall aesthetic of your pool.
The article recommends looking for a company with extensive experience, understanding their installation process, and ensuring they offer warranties and guarantees on their work. This can help ensure a successful and long-lasting pool tile installation.
The article suggests that homeowners can browse through the portfolios and websites of reputable pool tile companies to explore so many options and find the perfect tiles for their home and outdoor living space.
The article provides information on the average cost of pool tile installation, as well as the long-term maintenance requirements for different materials like glass and ceramic tiles. Homeowners can use this information to make an informed decision that fits their budget and lifestyle.

Pool Replastering

Range Hood Installation Near You

Can’t find what you are looking for?

How It Works

  • Answer a few questions about your home project.
  • Within seconds, get matched with top-rated local pros.
  • Compare quotes and choose the best pro for the job.

Pool Replastering In Your Area

Pool Replastering: A Guide to Revitalizing Your Pool

Meta Description: Discover the essentials of pool replastering to restore your swimming pool’s beauty and functionality. Learn about costs, process, and benefits for a refreshed pool.

Pool Replastering

Pool replastering can transform your backyard oasis. It restores the pool’s surface, fixing cracks, chips, and stains. This process creates a refreshed and rejuvenated look.

Our guide covers key aspects of pool replastering. We’ll discuss how to assess resurfacing needs and choose the right plaster material. We’ll also explain how to hire professional contractors.

With replastering, your pool will look great and last longer. It’s a smart way to enhance your pool’s appeal and functionality.

Key Takeaways

  • Pool replastering is a comprehensive solution to revitalize the pool’s surface, addressing issues like cracks, chips, and stains.
  • Assessing the condition of the pool and identifying the need for resurfacing is the first step in the replastering process.
  • Selecting the right plaster material, such as premium plaster mix with customizable finishes, is crucial for achieving the desired pool appearance.
  • Hiring a professional pool replastering contractor ensures the project is completed with expert craftsmanship and attention to detail.
  • The replastering process involves meticulous preparation, plaster application, and thorough testing to ensure the pool’s functionality and longevity.

Assessing the Need for Replastering

The first step in pool replastering is a thorough check of the pool’s condition. This involves examining the surface for wear and tear signs. Identifying these issues is crucial to prevent water seepage and safety hazards.

Signs of Wear and Tear

Pool surfaces can develop flaws that signal the need for replastering. These may include cracks, chips, and stains. Such issues can affect the pool’s look and structure.

  • Cracks in the plaster
  • Chipped or flaking surfaces
  • Visible stains or discoloration
  • Signs of water seepage

These problems can harm the pool’s appearance and structure. It’s important to fix them quickly.

Identifying Structural Issues

Checking the pool’s underlying structure is vital. Look for irregularities or cracks that need fixing before replastering. This ensures a successful and lasting pool restoration.

A careful assessment helps decide the best action for pool restoration. It may be simple replastering or a bigger renovation. This evaluation is key to reviving the pool for years of fun.

Planning and Preparation

The planning phase starts after confirming the need for pool replastering. This step involves draining the pool to access the surface. Specialized equipment is then used to remove the old plaster carefully.

Tools like sandblasting or chipping tools help eliminate worn-out material. This process ensures a clean slate for the new plaster application.

Draining and Removing Old Plaster

Pool plastering begins with draining and power washing the surface. This removes residues, dust, and grime. Levco Pools technicians assess pools thoroughly to ensure they’re ready for plastering.

Addressing Structural Repairs

Any cracks or damage are fixed during this stage. This creates a solid base for the new plaster. It also helps prevent future problems.

Pool plaster is typically made of white cement, limestone/marble sand, water, and bonding agents. This mixture creates a smooth, waterproof surface. Quartz or pebble finishes are newer options that offer durability and visual appeal.

The right consistency of pool plaster mix is crucial. If it’s too dry or wet, it can cause application or cracking issues.

Choosing the Right Plaster Material

Pool replastering offers various options for pool owners. White plaster gives a serene and elegant look. Colored plaster adds a vibrant, personal touch to your pool’s surface.

Pebble finishes create a natural, textured look. They’re more durable and can last longer than other options. Consider durability, aesthetics, and budget when choosing your plaster material.

  • White plaster for a classic and elegant look
  • Colored plaster to add a touch of personality
  • Pebble finishes for a natural and durable surface

Your pool’s needs, personal taste, and budget are key factors. Carefully weigh these to enhance your pool’s appeal and value. The right choice will ensure long-lasting beauty and durability.

Hiring a Professional Contractor

professional contractor

Pool replastering requires expert skills and specialized equipment. Experienced contractors are best suited for this complex task. Research reputable companies, read client testimonials, and verify credentials before making a choice.

Researching and Vetting Companies

Create a list of potential professional contractors in your area. Ask friends and family for recommendations to find suitable options. Research each company’s licensing, insurance, and certifications thoroughly.

Read client testimonials and reviews carefully. These provide valuable insights into a company’s workmanship and customer service quality.

Obtaining Quotes and Estimates

Get multiple quotes from different contractors to make an informed decision. Compare estimates based on work scope, materials used, and budgetary constraints.

Conduct a price analysis to ensure fair market rates. Discuss payment schedules and potential additional costs for delays or supply shortages.

Choosing the right professional contractor is crucial for a successful pool replastering project. Research companies, get multiple quotes, and consider your budget carefully. This approach helps ensure satisfaction with the final result.

The Replastering Process

Pool replastering involves two key steps: applying the bond coat and spreading the plaster mixture. This process transforms your pool, giving it a fresh, new look.

  • Applying the Bond Coat: The first step is applying a special bond coat. This adhesive layer ensures strong bonding between the old pool surface and new plaster. It takes 8 to 10 hours to dry before plaster application.
  • Applying the Plaster: Skilled technicians then apply the plaster mixture using specialized tools. They work to achieve uniform coverage and smooth out any imperfections. This step is crucial for a flawless finish.

The pool’s transformation is remarkable. As the new plaster is applied, the pool emerges with a fresh, elegant look. This new appearance will impress both homeowners and guests.

Curing and Filling the Pool

The curing process is crucial for a long-lasting, newly replastered surface. Curing times depend on plaster type and weather conditions. Patience is key during this important stage.

After curing, the pool is filled with water. This marks the end of replastering. The chemical composition of the water is carefully adjusted for optimal water balance and quality.

Statistics highlight the importance of proper curing:

  • Sixty percent of the curing process happens in the first 4 weeks.
  • The remaining 40% occurs over the next 8 to 10 months.
  • Proper curing procedures reduce imperfections like staining and discoloration.
  • Keeping water balanced is crucial in the first 4 weeks.

Good communication between pool owners and companies ensures proper maintenance. Choose a professional pool company that’s a National Plasters Council (NPC) member for quality work.

Poor curing can lead to roughness and staining, shortening the pool surface’s life. The NPC certification for pool curing work is called “Start Up Technician.”

Types of Pool Finishes

Pool finish choice affects both looks and function of your space. Options range from classic plaster to vibrant aggregate and upscale tile finishes. Each type offers unique benefits for pool owners.

Plaster Finishes

Plaster finishes offer classic, elegant appeal. They cost $2,500 – $5,000 or $4 per square foot and last five to seven years. White plaster is cheapest, while colored plaster adds depth to pool water.

Aggregate Finishes

Aggregate finishes mix materials like pebbles, glass beads, and quartz. They cost around $15,000 or $5 per square foot and last up to 30 years. Polished aggregates are luxurious and chemical-resistant.

Pebble finishes create a rustic look. Glass bead finishes offer a 3D effect with light-reflecting properties.

Tile Finishes

Tile finishes use porcelain, stone, or glass for an upscale, personalized look. They’re the most durable but expensive, costing $5 to $50 per square foot.

Ceramic and porcelain tiles are popular and affordable. Stone tiles create a natural look, while glass tiles offer a clear shimmer effect.

Choosing the right pool finish balances looks, durability, and budget. Each option offers unique advantages to enhance your outdoor living experience.

Signs Your Pool Needs Resurfacing

Is it time to resurface your pool? Look for these key signs. Stubborn stains, rough texture, and persistent leaks all point to needed action. These issues signal that your pool’s surface needs attention.

Pools over ten years old may show stains on walls or floors. This often means resurfacing is necessary. pH imbalances or low calcium can cause plaster to flake or peel.

Copper, calcium, and salt deposits can discolor pool surfaces. These stains may require resurfacing to fix. Prompt action can restore your pool’s look and function.

If you spot these signs, talk to a pool expert. They can assess the situation and create a plan. Resurfacing can extend your pool’s life and improve its appearance.

The Pool Resurfacing Process

pool resurfacing

Pool resurfacing breathes new life into your pool. It starts with draining the pool. This step allows full access to the pool’s surface.

  • Draining the Pool: Emptying the pool is the first step. It reveals the existing surface. This allows for a thorough check and identification of needed repairs.
  • Surface Preparation: Preparing the surface is key for successful resurfacing. Old or damaged materials are removed. Techniques like sandblasting create a clean base for the new surface.
  • Tile and Masonry Installation: After surface prep, new decorative features can be added. Skilled workers install tiles or coping. These elements enhance the pool’s look.
  • Sealing and Washing: The plumbing is sealed first. Then, the pool shell gets a thorough wash. This creates a clean canvas for the new finish.
  • Applying the New Surface: Installing the new surface requires precision. Plaster, aggregate, or tile are common choices. The finish affects the pool’s look and durability.
  • Initial Water Treatment: The final step is treating the water. This ensures proper curing and balance. It supports the new surface’s longevity and safe pool use.

Lifespan of Pool Surfaces

Pool surface lifespans vary based on materials, installation, and maintenance. Different finishes have unique lifespans. Understanding these can help plan upgrades and maintain your pool’s beauty.

White plaster surfaces last 5 to 15 years. They can stain, crack, and discolor, needing replastering. Durable finishes like white quartz and exposed pebble last 10+ years with proper care.

Polished finishes like Hydrazzo and Wet Edge Primera Stone last 5 to 15 years. They offer a smooth, high-gloss look and resist wear and tear.

Proper maintenance extends any pool surface’s life. Regular cleaning and chemical balancing are crucial. Proactive repairs also help prolong surface beauty and function.

Knowing finish lifespans helps owners make smart decisions. It allows for better planning of future resurfacing projects.

Post-Resurfacing Maintenance

Keeping a newly resurfaced pool in top shape is key for long-term enjoyment. A proactive approach to post-resurfacing maintenance is vital. This includes regular cleaning, watching water chemistry, and using gentle cleaning agents.

For the first four weeks, brush the new plaster surface daily. This prevents staining, discoloration, scaling, pitting, and gray streaks. Test and adjust pH, alkalinity, and calcium levels often to maintain water chemistry balance.

The plaster matures over 8-10 months, with 60% happening in the first month. Consistent water stabilization is needed during this time. Test pH and alkalinity levels regularly.

Work with NPC-certified start-up technicians for the best post-resurfacing care. Following these proactive repairs and best practices protects your pool’s new surface. Your backyard oasis will stay pristine for years.

Regular cleaning, careful water chemistry monitoring, and timely proactive repairs are crucial. These steps ensure a beautiful, revitalized pool. Invest in proper care for years of fun and relaxation.

Tips for Hiring Pool Replastering Experts

Hiring experienced professionals for pool replastering is often the best choice. They have the right tools and know-how for long-lasting results. To find the right experts, research, check credentials, and get multiple quotes.

Get quotes from different companies to make an informed decision. This helps you find a contractor that fits your budget and needs.

Look for contractors with specialized equipment and expertise. Good companies have the right tools to deliver high-quality work.

Ask detailed questions about the replastering process. Open communication helps you understand the project and set realistic expectations.

Following these tips will help you hire experts who can revitalize your pool professionally. Remember to get a building permit from before starting.

  1. Obtain multiple quotes from different pool replastering companies to facilitate an informed decision-making process. This will help you select the most suitable contractor aligned with your budgetary constraints and specific requirements.
  2. Pay close attention to the specialized equipment and expertise the contractors possess. Reputable companies will have the necessary tools and knowledge to deliver high-quality workmanship, ensuring a seamless pool replastering experience.
  3. Engage in open communication with potential contractors, asking detailed questions about the replastering process to understand it better. A transparent and collaborative approach will help you make an informed decision and set realistic expectations for the project.

Finding the Right Pro for Pool Replastering with FindPros

Are you considering replastering your pool, but unsure about the process or costs involved? Look no further than FindPros, the premier service that connects you with the best local professionals for your remodeling projects.

By filling out a simple survey about your pool and needs, FindPros will match you with top-rated pool replastering experts in your area. These pros have the specialized equipment and expertise to handle tasks like removing the existing layer, addressing structural cracks, and applying a smooth, durable new plaster finish – all while ensuring the process is completed efficiently and cost-effectively.

With FindPros, you’ll get the best pricing when multiple pros compete for your job, and you can choose the one you feel most comfortable working with. Say goodbye to the hassle of managing plaster dust, acid washing, and hydrostatic pressure – let FindPros handle the heavy lifting and provide you with a revitalized, beautiful pool you can enjoy for years to come.

Conclusion

Pool replastering transforms backyard oases. It restores pool surfaces and enhances functionality. This process invites endless seasons of relaxation and cherished memories.

Assessing the pool’s condition is crucial. Selecting the right plaster material and hiring skilled professionals ensure success. The result is a long-lasting, revitalized swimming experience.

A revitalized pool boasts pristine plaster and resplendent waters. It becomes a renewed backyard sanctuary, embodying the allure of outdoor living spaces.

Pool restoration unlocks the potential of your backyard oasis. It creates a hub for year-round enjoyment. The process elevates the value and functionality of your outdoor area.

A replastered pool becomes a timeless centerpiece. It sets the stage for unforgettable moments. Your backyard transforms into a captivating space for making memories.

Frequently Asked Questions (Possum Removal)

The virginia opossum is a large, rodent-like marsupial with distinctive gray or white fur, a pointed snout, beady eyes, and a long, rat-like tail. They have five-toed feet with an opposable “thumb” on the hind feet, which aids their excellent climbing abilities.
Possums can cause property damage by burrowing under structures and creating entry points into homes. Their sharp claws and teeth can also damage siding, insulation, and other structural components. Possums may also be attracted to pet food or garbage, leading to infestations and the potential spread of diseases.
Possums are immune or resistant to snake venom, making them effective hunters of snakes. They are also excellent tick hunters, helping to control tick populations. As scavengers, possums can help clean up roadkill and control pest populations, such as rodents. This can make them a desirable creature to have around the property.
The most common method for humane opossum control is the use of a live cage trap with irresistible bait, such as fish or cat food. Once trapped, the possum should be relocated at least 150 feet away in a wooded area, following local regulations. Homeowners should also seal off any entry points to prevent possums from returning, such as repairing holes or gaps in the foundation, walls, or roof.
Hiring a licensed and trained animal control specialist is often the best choice for possum removal, as they have the necessary permits and expertise to ensure safe and legal handling of the animal. Professional services may also include repairing any damage caused by the possum’s presence and addressing the root causes that attracted the animal in the first place, such as securing pet doors or removing food sources.

Pool Removal

Range Hood Installation Near You

Can’t find what you are looking for?

How It Works

  • Answer a few questions about your home project.
  • Within seconds, get matched with top-rated local pros.
  • Compare quotes and choose the best pro for the job.

Pool Removal In Your Area

The Pool Removal Process: Step-by-Step

Meta Description: Discover the step-by-step process of Pool Removal, from planning to completion. Learn about costs, permits, and methods to transform your backyard effectively.

Pool Removal

Is your old pool causing maintenance headaches and safety worries? Pool removal can transform your backyard into a more functional space. This guide will help you navigate the process with confidence.

We’ll cover everything from reasons for removal to getting permits and executing the demolition. This information applies to both above-ground and in-ground pools.

Key Takeaways

  • Gain insights into the common reasons for pool removal, such as high maintenance costs, safety concerns, and lack of usage.
  • Explore the different methods of pool removal, including partial and complete removal, and understand the associated costs and timelines.
  • Learn about the importance of obtaining the necessary permits from local authorities before initiating a pool removal project.
  • Discover the step-by-step process of draining the pool, breaking up the structure, backfilling the area, and final grading and seeding.
  • Understand the options for repurposing the pool area, such as converting it into a patio, garden, or deck, and the potential increase in property value.

Reasons for Pool Removal

Owning a pool can be costly. Cleaning, treatments, and repairs add up quickly. Safety worries, like drowning risks, trouble many homeowners. Some pools go unused, leading to removal decisions.

High Maintenance Costs

Pools need lots of time and money. Chemicals, electricity, and cleaning all cost money. These costs can be too much for infrequent pool users.

Safety Concerns

Pools can be dangerous, especially for kids and older folks. Drowning risks worry many homeowners. Some choose safety over pool convenience.

Lack of Usage

Unused pools become eyesores. This can hurt home value and appeal to buyers. Some owners decide to remove pools and use the space differently.

Consider these factors when deciding about pool removal. The process can be tricky. A pro pool removal contractor can help make it smooth.

Types of Pool Removal

Homeowners have two main options for pool removal: partial or complete. Each has its own benefits and considerations. Understanding the differences is crucial for making the best decision.

Partial Pool Removal (Filling In)

Partial pool removal keeps the existing structure and fills it with approved materials. This method is faster and less expensive than complete removal. It typically takes 2-5 days, not including prep time.

The cost is about half of a full removal. However, the area may still be non-buildable, affecting future use or resale value. There’s also a risk of sinkage or seepage issues later on.

Complete Pool Removal

Complete pool removal involves taking out the entire pool structure, including concrete and plumbing. This method fully integrates the area into the landscape, increasing future development options. It usually takes 2-3 days for in-ground pools.

Full demolition is more extensive and costly, ranging from $5,000 to $20,000 for in-ground pools. However, it ensures the area won’t cause issues for future buyers or homeowners. This can significantly boost the property’s resale value.

Obtaining Necessary Permits

Getting permits is crucial for pool removal projects. A demolition permit ensures proper removal and disposal. It also guarantees correct filling and grading according to local rules.

Working with your local building department is key. They guide you through the permit process. This ensures your project follows all codes and standards.

  • Obtaining the necessary permits can take 2-4 weeks, so it’s important to factor this into your project timeline.
  • The demolition and removal process can vary from several days to weeks depending on the size and complexity of the pool.
  • Heavy equipment such as excavators and jackhammers are commonly used for pool demolition and debris removal.

Skipping permits can lead to fines or project stops. Understand all local rules that apply. This helps avoid delays and problems.

Following regulations ensures a safe and legal project. It helps complete your pool removal efficiently. Your local building department can provide valuable assistance.

Explore our comprehensive pool removal guide to learn more about the entire process, from obtaining permits to the final backfilling and landscaping.

Draining the Pool

pool water drain

Proper pool water drainage is vital before demolition. This step ensures safe disposal of water with chemicals or debris. Pool owners can choose sewer system drainage or holding tank disposal.

Sewer System Drainage

Clean pool water can often be drained into the municipal sewer system. This method is simple and cost-effective. Always check local regulations and get necessary permits before draining.

Holding Tank Disposal

Pools with chemical-treated water require pumping into a temporary holding tank. This water can’t go into the sewer system. A licensed waste company must transport it to an approved facility.

Responsible water disposal ensures a smooth, eco-friendly pool removal process. This approach helps protect the environment and comply with local regulations.

Breaking Up the Pool Structure

Demolishing a pool involves multiple steps. Breaking up the pool structure is crucial. Heavy machinery and specialized tools are used to break apart the pool materials.

Jackhammers and excavators are essential for this task. They break the pool into manageable pieces. This step is vital for both partial and complete pool removal.

The pool’s surface is systematically fractured. It’s reduced to smaller chunks. This process prepares the pool for removal or backfilling.

  1. Drill holes at the bottom of the pool to aid drainage and compaction during the backfilling process.
  2. Use a jackhammer attachment or other heavy machinery to break the concrete or pool materials into smaller pieces.
  3. Carefully remove and dispose of the broken concrete and other pool materials in an environmentally responsible manner.

Demolition can be time-consuming. Partial pool removal typically takes one to two weeks. Complete pool removal often requires more time and resources.

The choice between partial and complete removal depends on several factors. These include land stability, future space use, and overall cost.

Backfilling the Pool Area

After breaking up the pool structure, backfilling the pool area is crucial. This step fills the pool cavity with suitable materials like soil or gravel. Proper backfilling prevents future issues such as sinkage or instability.

Experts suggest using a mix of 80% dirt and tailings with 20% topsoil. This blend provides a stable foundation and allows proper drainage. Gravel is also excellent, offering instant compaction and superior drainage properties.

  • Gravel is the preferred backfill material due to its self-compacting nature and efficient drainage capabilities.
  • Pea stone is another viable option, as it is self-compacting and requires less labor-intensive compaction efforts.
  • Dirt should be avoided as a sole backfill material, as it can take a long time to settle and may lead to instability in the long run.

Proper compaction of the backfill material is vital to prevent future problems. This can be done using specialized equipment like plate compactors or walk-behind rollers. Ensuring adequate compaction creates a stable, level surface for future use.

Backfilling is necessary for both partial and complete pool removals. It prepares the site for its next purpose. Carefully selecting the right materials and compacting them properly creates a safe foundation for future projects.

Final Grading and Seeding

After pool demolition and backfilling, the last step is grading and seeding. This restores the area for its new purpose, like a patio or garden.

Final grading levels the space and ensures proper drainage. A demolition company or landscaper usually handles this task. Grass seeding or sod laying follows, creating a green lawn.

  1. Level the backfilled area to ensure proper drainage and prevent water pooling.
  2. Spread a layer of topsoil or a suitable planting medium over the backfilled area.
  3. Seed the area with a high-quality grass seed blend or lay sod to establish a new lawn.
  4. Water the seeded or sodded area regularly to encourage growth and establishment.
  5. Monitor the area for any settling or uneven surfaces, and make additional adjustments as needed.

Careful grading and seeding transforms the former pool area into a beautiful yard space. This final step creates a clean, finished look ready for the next project phase.

Pool-to-Deck Conversion

pool-to-deck conversion

Homeowners can transform their empty pool space into an inviting outdoor area. This change can boost property value and make the backyard more useful. A pool-to-deck conversion is a popular choice for many.

Patio Conversion

Turning a pool into a patio is both practical and attractive. By filling the pool, you create a flat surface for outdoor entertainment. Add comfy seating, a fire pit, or an outdoor kitchen to blend indoor and outdoor living.

Garden Conversion

Green-thumbed homeowners might prefer a lush garden in place of their pool. The pool structure can become a raised planter bed for various plants and flowers. This change creates a peaceful backyard retreat for nature lovers.

Deck Construction

Building a deck is another great option for the former pool area. This wooden or composite structure extends your living space outdoors. It’s perfect for dining, relaxing, or hosting gatherings with friends and family.

Cement Pond Conversion

Some homeowners choose to create a cement pond in their old pool space. By adding water, plants, and fish, you can make a calm water feature. This unique transformation complements your backyard’s overall design.

Repurposing your pool area can give your backyard new life. It creates a functional and beautiful space for everyone to enjoy. Choose the option that best fits your family’s needs and style.

Pool Removal Costs

Pool removal costs can vary greatly depending on several factors. These include the pool type, size, and removal method. Homeowners should carefully consider these costs before deciding to remove their pool.

Above-Ground Pool Removal

Above-ground pool removal is typically less expensive than in-ground pool removal. Costs range from $300 to $800 on average. This includes disassembling the pool, hauling away materials, and filling the hole.

The size of the pool can affect the final cost. Removing a deck or enclosure may also increase expenses.

In-Ground Pool Removal

Removing an in-ground pool is more complex and costly. Prices range from $4,000 to $16,000 on average. The pool material, removal method, and additional work needed impact the cost.

Partial in-ground pool removal typically costs between $4,000 to $10,000. Full in-ground pool removal can range from $7,000 to $16,000.

  • Partial in-ground pool removal typically costs between $4,000 to $10,000.
  • Full in-ground pool removal can range from $7,000 to $16,000.
  • The cost of removing a fiberglass pool ranges from $6,000 to $16,000.
  • Vinyl liner pool removal costs can vary from $4,000 to $11,000.
  • Concrete pool removal can range from $4,000 to $16,000.

The overall pool removal costs may include additional expenses. These can be filling in the pool and landscaping the area. Removing a deck or enclosure might also add to the cost.

Recycling Pool Materials

Recycling pool materials is crucial when removing a pool. Work with your contractor to handle concrete, metal, and plastic sustainably. This ensures responsible disposal of all pool components.

Pool dismantling methods depend on the pool’s type and size. Metal, plastic, or mixed material pools need special removal techniques. The pool’s depth affects water drainage and material volume.

  • Protective gear like gloves, goggles, and sturdy footwear are essential for personal safety during the pool removal process.
  • Specialized equipment, such as heavy-duty cutters or a crane, may be necessary for larger or more complex pools.
  • Consult local regulations for guidance on the proper disposal of pool water to prevent environmental harm.

Some areas offer recycling for vinyl pool liners, reducing environmental impact. Metal parts can often be recycled, promoting sustainable waste practices.

Inflatable pools and accessories usually can’t be recycled. They need proper disposal methods. Removal costs vary based on pool size, accessibility, and local regulations.

Professional services ensure proper pool dismantling and site restoration. They follow sustainable practices, reducing the environmental impact of your pool removal project.

Hiring a Professional Pool Removal Contractor

Hiring a professional pool removal contractor is essential for a safe and efficient job. These experts have the skills and tools to remove pools properly. They also ensure compliance with local regulations.

Licensed and Insured

Choose a licensed and insured pool removal contractor for your project. This protects you from potential liabilities during the work. It also guarantees that qualified professionals will handle the job.

Site Plan Evaluation

A thorough site plan evaluation is crucial for successful pool removal. Reputable contractors examine the pool’s location, size, and surrounding structures. They develop effective removal strategies based on this assessment.

Contractors also consider site access, drainage, and potential obstacles. This careful planning ensures a smooth removal process. It helps avoid unexpected issues during the project.

A licensed and insured pool removal contractor with a detailed site plan evaluation ensures high-quality work. This approach guarantees a seamless and successful pool removal project. Homeowners can feel confident in the outcome.

The FindPros Advantage

Are you considering removing your old swimming pool? Navigating the pool demolition process can be daunting, but FindPros is here to help. Our network of top-rated local pool removal contractors can provide you with competitive quotes, ensuring you get the best possible price for your project. Simply answer a few questions about your inground pool or above-ground swimming pool, and we’ll match you with experienced professionals who can handle the full removal, from draining the pool to backfilling the area. Take the stress out of pool removal and let FindPros connect you with the right contractors for the job, whether you need a partial or complete pool removal. Get started today and find the perfect fit for your home improvement needs.

Conclusion

Pool removal involves crucial steps for homeowners to navigate. These include understanding removal reasons, selecting methods, obtaining permits, and disposing of the structure properly. The process can be complex, but it’s manageable with proper guidance.

Working with a professional pool removal contractor ensures a smooth outcome. They offer valuable guidance, handle permits, and execute the project safely. Cost savings from pool removal include reduced expenses and potential property value increases.

The decision to remove a pool is personal. It depends on usage, maintenance needs, and future space plans. Careful consideration of pros and cons helps homeowners make informed choices.

Removing a pool can enhance property value and functionality. It’s a significant decision that requires thorough evaluation of individual circumstances and goals.

Frequently Asked Questions (Possum Removal)

The virginia opossum is a large, rodent-like marsupial with distinctive gray or white fur, a pointed snout, beady eyes, and a long, rat-like tail. They have five-toed feet with an opposable “thumb” on the hind feet, which aids their excellent climbing abilities.
Possums can cause property damage by burrowing under structures and creating entry points into homes. Their sharp claws and teeth can also damage siding, insulation, and other structural components. Possums may also be attracted to pet food or garbage, leading to infestations and the potential spread of diseases.
Possums are immune or resistant to snake venom, making them effective hunters of snakes. They are also excellent tick hunters, helping to control tick populations. As scavengers, possums can help clean up roadkill and control pest populations, such as rodents. This can make them a desirable creature to have around the property.
The most common method for humane opossum control is the use of a live cage trap with irresistible bait, such as fish or cat food. Once trapped, the possum should be relocated at least 150 feet away in a wooded area, following local regulations. Homeowners should also seal off any entry points to prevent possums from returning, such as repairing holes or gaps in the foundation, walls, or roof.
Hiring a licensed and trained animal control specialist is often the best choice for possum removal, as they have the necessary permits and expertise to ensure safe and legal handling of the animal. Professional services may also include repairing any damage caused by the possum’s presence and addressing the root causes that attracted the animal in the first place, such as securing pet doors or removing food sources.