Spider Exterminator

Spider Exterminator Near You

Can’t find what you are looking for?

How It Works

  • Answer a few questions about your home project.
  • Within seconds, get matched with top-rated local pros.
  • Compare quotes and choose the best pro for the job.

Spider Exterminator In Your Area

Need a Spider Exterminator? Here’s What to Look For

Meta Description: Discover how to choose the right Spider Exterminator for your home. Learn about effective methods, safety precautions, and when to call professionals for spider control.

Spider Exterminator

Is your home overrun by eight-legged roommates? Spiders can become a real bother if not dealt with quickly. Let’s explore when it’s time to call in the pros.

We’ll look at signs of spider infestations and how to get rid of these unwanted guests. Though not usually dangerous, spiders can still be a big nuisance.

Key Takeaways

  • Identify the presence of spider webs, egg sacs, and increased activity of other insects as signs of a spider infestation.
  • Understand the importance of sealing entry points and eliminating moisture sources to deter spiders.
  • Recognize the limitations of DIY spider control methods and the benefits of professional extermination.
  • Familiarize yourself with the average costs and pest control plans for effective spider management.
  • Ensure landlords fulfill their responsibility in addressing spider infestations in rental properties.

Common Signs of Spider Infestation

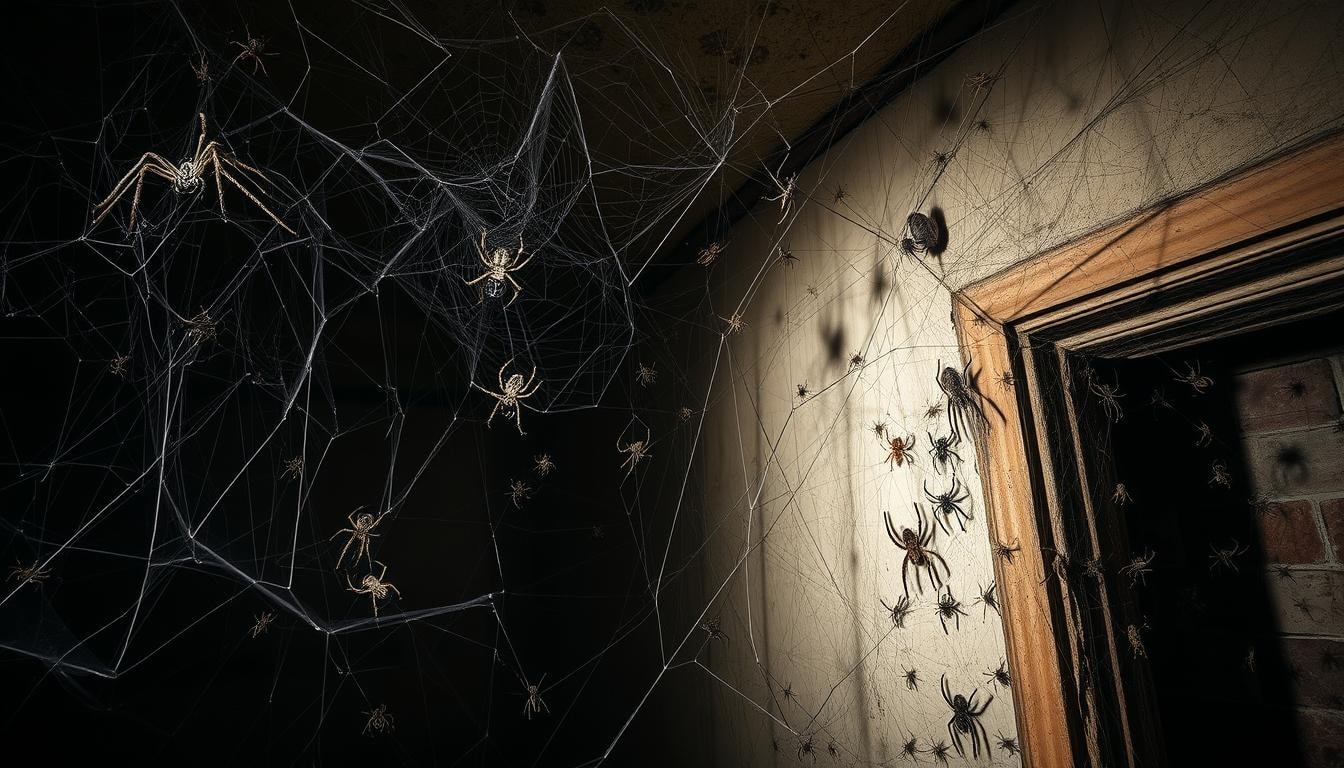
Spider Webs and Egg Sacs

Spider webs are often the first visible sign of a spider problem. These intricate structures are typically found high up in homes. Spiders build them to catch flying insects for food.

Spider egg sacs are another alarming indicator of infestation. These thick pouches are made from webbing. They’re usually hidden in crevices or neglected corners of your home.

A large number of webs, cobwebs, and egg sacs point to a serious spider issue. Look out for these signs and increased insect activity. They all suggest spiders have made your home theirs.

  • Spider webs are often the first visible sign of a spider infestation, as spiders build them high up to catch flying insects.
  • Spider egg sacs, made from webbing and found in crevices or neglected corners, indicate an impending spider problem.
  • A large number of spider webs, cobwebs, and egg sacs can be a clear sign of a serious spider infestation.
  • Besides cobwebs, increased insect activity can also signal the presence of spiders.

Presence of Other Insects

An increase in flying insects or pests in your home might signal a spider problem. Spiders mainly eat other insects, including mosquitoes, gnats, and cockroaches. Their presence often indicates a larger pest issue.

Research shows that insect infestations can help spiders thrive. With more food, spiders can multiply and spread quickly. Dealing with both insects and spiders is often necessary to solve the problem.

Unusual numbers of flies, ants, or moths may mean spiders have moved in too. Tackling these pests can help control spider infestations. It’s important to address both issues for effective pest management.

  • Spiders prey on a variety of household pests, including mosquitoes, gnats, cockroaches, and more.
  • An increase in other insects can provide a food source that allows spiders to multiply and spread.
  • Addressing the presence of other pests is an important step in controlling a spider infestation.

Cluttered and Dark Areas

spider hiding spots

Spiders love cluttered and dark spaces. These areas offer perfect spots for nesting and hunting. Clutter provides hiding places where spiders can build webs undisturbed.

Dark, damp corners become breeding grounds for spiders. Basements, attics, and unused rooms are often their favorite spots. Spider nests hide in sneaky places like behind furniture or in stored items.

To prevent infestations, keep your space clutter-free and well-lit. Regular cleaning makes areas less appealing to spiders. Fix moisture issues and seal cracks to make your home unwelcoming to arachnids.

Understanding spider preferences helps homeowners take action. Creating an unfriendly environment for spiders is key. A clean, organized living space can keep your home spider-free.

Identifying Spider Entry Points

Spiders sneak into homes through tiny openings, cracks, and gaps. These entry points are often overlooked by homeowners. Common access areas include gaps under doors and cracks in foundations.

Other entry points are tears in screens and spaces around windows. Openings around plumbing fixtures also provide easy access for spiders.

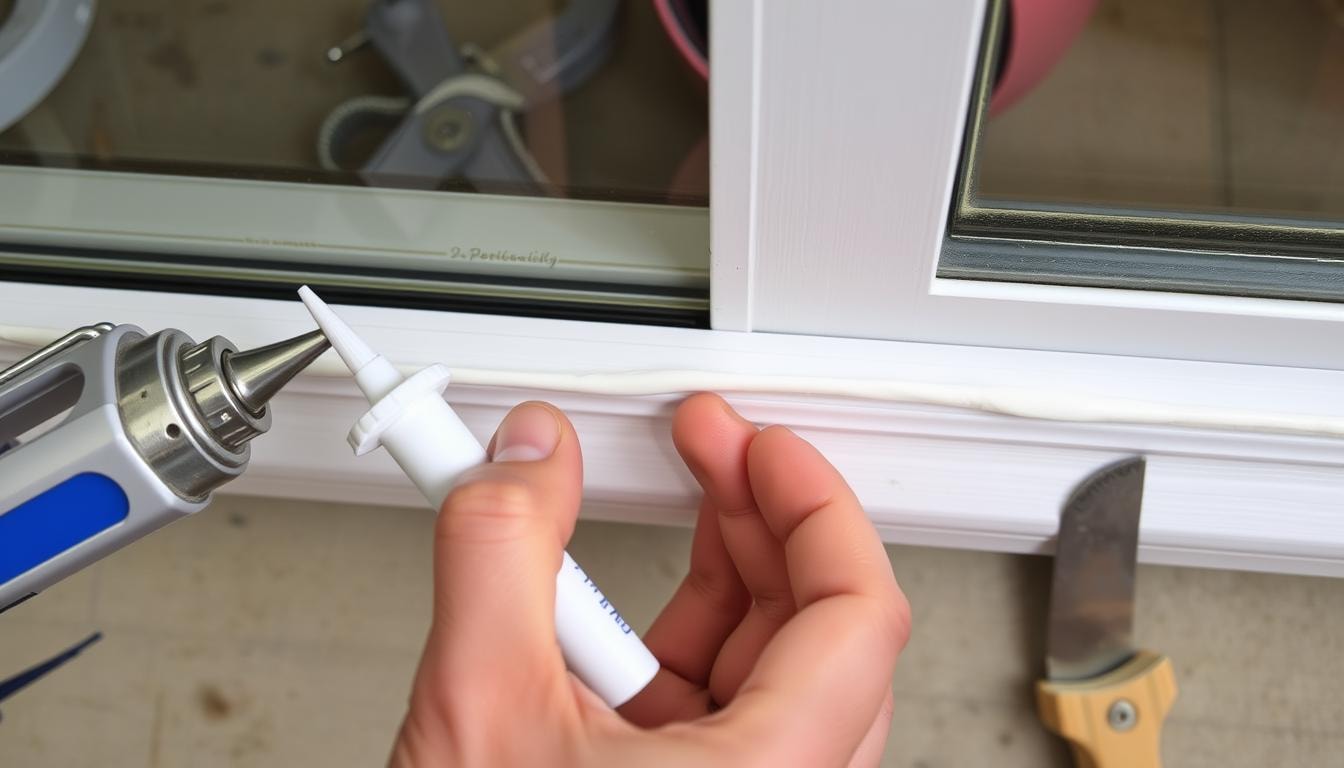
Sealing Cracks and Gaps

Inspect your home for cracks or gaps to keep spiders out. Check windows, doors, and vents for openings. Install new screens, door sweeps, and weather stripping as needed.

Use soft cement, steel wool, or caulk to seal spider entry points. These materials effectively block small openings that spiders use to enter.

Sealing access points is crucial for keeping spiders outside. Taking these steps can greatly reduce spider infestations in your home. If you still see many spiders, it might be time to call a professional spider exterminator.

DIY Spider Control Methods

Spiders in your home? Try these DIY methods before calling an exterminator. Spider traps and natural repellents can help keep these eight-legged creatures away.

Use sticky traps with non-toxic bait to catch spiders. Remove webs with a broom handle wrapped in paper towels and sprayed with mild insecticide.

Mix peppermint oil and water in a spray bottle as a natural repellent. Plain vinegar can also work to deter spiders.

Keep your yard well-maintained to eliminate spider hiding spots. Plant chrysanthemums, which contain natural pesticides, to repel spiders. Close windows and doors to stop spiders from entering.

Combining these methods can effectively control spider populations. For dangerous species like black widows or brown recluses, consult a professional exterminator.

Importance of Professional Spider Extermination

professional spider extermination

A spider infestation can pose serious risks. Venomous black widows and brown recluses can cause severe medical issues. Professional pest control experts are vital for safe and effective spider elimination.

Spiders can harm pets through bites and poison. Their webs can clog drains and gutters. Spider bodies and webs can stain surfaces around the home.

Professional exterminators offer the best solution to these problems. They have access to specialized products and methods. Their training allows for safe and effective spider elimination.

  • Professional exterminators have access to specialized products and methods that are more effective than DIY solutions available to the general public.
  • They are equipped with the necessary training and experience to safely and effectively eliminate spiders from homes, using targeted treatments tailored to the specific spider species present.
  • Professionals can also provide long-term protection by identifying the root causes of spider infestations and implementing preventive measures to deter future infestations.

DIY spider control can be risky. Toxic products can be harmful if misused. Professional services ensure safety for your family and pets.

They provide a thorough solution to eliminate the problem. Experts can also prevent future infestations through targeted treatments.

Average Cost of Spider Extermination

Spider extermination costs typically range from $300 to $500. A one-time visit and spray treatment for a 2,500 square foot home averages around $400. Pricing generally falls between $0.10 to $0.20 per square foot.

Professional exterminators may charge $100 to $250 for spider dust treatments. Spider traps, inspections, and treatments can cost $100 to $300. Extensive infestations might require fumigation services, ranging from $300 to $1,000.

Recurring treatments are available, with costs varying based on frequency. The location of the infestation can affect pricing. Decks and patios often cost less, while garages may be pricier.

Terminix charges $300 to $650 for spider extermination. Orkin’s prices range from $350 to $700. Western Exterminator offers services between $250 and $500.

Costs vary based on infestation severity, home size, and required services. It’s best to get quotes from multiple pest control companies. This helps find the most cost-effective solution for your needs.

Pest Control Plans for Ongoing Spider Control

Homeowners with ongoing spider issues often choose pest control plans. These plans include regular inspections and treatments by professionals. They monitor spider activity and apply preventive measures.

Many pest control companies offer subscription-based services. They provide quarterly or annual spider control. Prices typically range from $350 to $750 per year.

Some providers, like Western Pest, offer pest control guarantees. This ensures quick resolution of any issues that arise.

A pest control plan can be valuable for persistent spider problems. It offers regular inspections to eliminate existing infestations. These plans also include preventive spider treatments to stop future invasions.

  • Pest control plans typically include quarterly or annual inspections and treatments
  • Average cost of these plans ranges from $350 to $750 per year
  • Some pest control companies offer pest control guarantees for added peace of mind
  • Pest control plans can be beneficial for homes with recurring spider problems

A pest control plan provides ongoing spider control and preventive spider treatments. This keeps your property free from unwanted arachnid visitors.

Landlord Responsibilities for Spider Infestations

Spider infestations in rental properties are typically the landlord’s responsibility. Most state laws require landlords to maintain habitable properties. This includes addressing pest control issues like spider infestations.

Tenants should quickly report signs of spider infestations to their landlord. These signs include webs, egg sacs, or prey insects. The landlord must then act swiftly to solve the problem.

Usually, this means hiring a professional exterminator or pest control company. They can safely and effectively eliminate the spider population.

  • Landlords are legally obligated to provide pest-free rental properties in most states.
  • Tenants should report any spider infestations to their landlord immediately.
  • Landlords must then take responsibility for hiring professional pest control services to address the issue.

The landlord covers the cost of pest control treatment. However, tenants also help maintain a spider-free environment. They should keep the rental unit clean and tidy.

Removing clutter and properly storing food helps deter spiders and other pests. Landlords and tenants working together can create a safe, pest-free living space.

Discover FindPros for Your Spider Pest Control Needs

Are you dealing with a spider pest control problem in your home? Whether it’s wolf spiders, jumping spiders, or even the dreaded black widow, FindPros can help. Our free service connects you with top-rated local professionals who can provide a free inspection and give you a free quote to get rid of those unwanted eight-legged guests. Don’t worry about most types of spiders – our experts can determine if they’re harmless or require specialized treatment.

Simply answer a few questions about your home and interior, and we’ll match you with the best pros to safely and effectively trap and remove the spiders. No more DIY struggles or worrying about the structure and venom – let the professionals at FindPros take care of your spider pest control needs.

Conclusion

Spotting spider infestation signs is crucial. Look for webs, egg sacs, more insects, and increased spider sightings. DIY methods can help with minor issues. For severe cases, call a professional exterminator.

Dangerous species like black widows need expert handling. Professional spider extermination costs vary. Ongoing pest control plans can be a smart choice for recurring problems.

Quick action is key to a pest-free home. Use DIY or professional services to address spider infestations promptly. This ensures a safe living space for everyone.

Being proactive and getting expert help when needed is important. This approach helps manage spider infestations effectively. With the right tools, you can overcome arachnid challenges and maintain a secure home.

Frequently Asked Questions (Spider Exterminator)

Common signs of a spider pest control problem in a house include the presence of spider webs, egg sacs, increased insect activity, and finding spiders in dark, cluttered areas.
Hiring a professional spider pest control service is important because they have access to specialized products and methods that are more effective than DIY solutions. They are also trained to safely and effectively eliminate spiders, including dangerous species like the black widow, which can pose serious health risks to humans and pets.
The average cost for professional spider pest control services ranges from 0 to 0 for a one-time visit and treatment. However, the exact cost can vary depending on factors like the size of the home, the severity of the infestation, and the specific services required.
To prevent future spider infestations, homeowners can take steps like sealing cracks and gaps, eliminating clutter and undisturbed areas, and maintaining a well-lit and clean home. Removing sources that attract other bugs, which spiders feed on, can also help deter spiders from taking up residence in the house.

Soundproofing

Spider Exterminator Near You

Can’t find what you are looking for?

How It Works

  • Answer a few questions about your home project.
  • Within seconds, get matched with top-rated local pros.
  • Compare quotes and choose the best pro for the job.

Soundproofing In Your Area

Need Soundproofing? Here’s What You Should Know

Meta Description: Discover effective soundproofing techniques to reduce unwanted noise in your space. Learn about materials, methods, and expert tips for a quieter environment.

Soundproofing

Noise is everywhere in our busy world. The need for effective soundproofing has grown. You might want peace from traffic, construction, or noisy neighbors.

Soundproofing can help you regain the quiet you deserve. It’s important to understand what soundproofing is. Knowing how to shield your space from unwanted noise is key.

This guide explores sound science and soundproofing techniques. We’ll cover materials for transforming your home or office. You’ll learn how to create a peaceful haven.

Ready to control the noise disrupting your life? Let’s uncover the secrets of effective soundproofing.

Key Takeaways

  • Noise pollution is a growing concern in urban areas, impacting the quality of life for many homeowners and renters.
  • Soundproofing involves techniques and materials that can effectively reduce the transmission of unwanted sound into a living space.
  • Understanding the science of sound waves and their propagation is crucial for implementing successful soundproofing solutions.
  • Choosing the right soundproofing materials, such as acoustic foam, mass loaded vinyl, and insulation, is essential for effectively absorbing and blocking sound.
  • Proper soundproofing techniques, including wall and ceiling construction, can significantly improve the acoustic environment of a room or building.

Understanding Sound and How it Travels

Sound is energy created by vibrating air molecules. These vibrations form sound waves that travel through the air. Our ears can detect these waves, allowing us to hear.

What is Sound?

Sound is a vibration that moves through matter. It travels through solids, liquids, and gases. The medium’s properties determine sound’s speed.

A sound’s pitch depends on its wavelength. Shorter wavelengths create higher pitches. The strength of a soundwave determines its loudness, not its wavelength.

How Sound Waves Propagate

Sound waves travel through various mediums but lose energy in solids. Low-frequency sounds with longer wavelengths lose less energy in solids.

Thicker soundproofing barriers can improve sound reduction by 30-40%. Doubling an acoustic barrier’s weight can improve sound reduction by 6dB.

Knowing how sound works helps choose the best soundproofing for your home. This applies to airborne sound from electronics and impact sound from footsteps.

The Importance of Soundproofing

Soundproofing creates a peaceful living environment. It reduces unwanted noise, improving well-being, sleep quality, and productivity. Effective soundproofing can also increase your home’s value and enhance your family’s quality of life.

Enhanced privacy is a key benefit of soundproofing. It reduces sound transmission between rooms, allowing for private conversations. This is crucial in shared living spaces or home office setups.

Soundproofing helps reduce noise pollution by preventing sound transmission. This benefits those living in urban areas or near constant noise sources. It creates a calmer, more relaxing atmosphere in your home.

Better sleep quality is another advantage of soundproofing. A quiet environment promotes better sleep, leaving you refreshed upon waking. This can lead to improved overall health and well-being.

Soundproofing can increase your home’s value. It creates additional usable space, like a home theater or music room. Buyers often seek properties with quiet, well-soundproofed spaces, making your home more attractive.

Soundproofing significantly impacts your quality of life and property value. It reduces noise levels and creates a peaceful living environment. Investing in effective soundproofing is a smart choice for enhancing privacy and creating versatile spaces.

Types of Soundproofing Materials

Choosing the right soundproofing materials can greatly improve your space’s acoustics and noise control. Acoustic foam, mass loaded vinyl (MLV), and soundproofing insulation are effective solutions for reducing noise levels. These materials enhance sound absorption in living or work areas.

Acoustic Foam

Acoustic foam is a popular soundproofing material with impressive sound-absorbing capabilities. Its unique open-cell structure traps and dissipates sound waves, minimizing echoes and reverberation. Music studios, home theaters, and spaces needing optimal acoustic control often use this material.

Mass Loaded Vinyl (MLV)

Mass Loaded Vinyl (MLV) is a dense, rubber-based material that blocks airborne and impact sound. It increases the mass and density of walls, floors, or ceilings. This reduces noise penetration through structures, making it ideal for sound isolation applications.

Soundproofing Insulation

Fiberglass or mineral wool insulation can significantly reduce noise levels. These materials absorb and trap sound waves, preventing them from traveling through building structures. Soundproofing insulation often works with other materials for better acoustic performance.

Consider your space’s unique needs, budget, and installation preferences when choosing soundproofing materials. Careful evaluation of different options helps create a custom solution for your noise-related concerns.

Soundproofing for Different Room Types

Soundproofing needs vary based on room type and purpose. Bedrooms and living rooms need quiet for relaxation. Home theaters and music rooms require specialized techniques to enhance audio and prevent sound leakage.

Bedrooms and Living Rooms

Creating a peaceful atmosphere in bedrooms and living rooms is vital. These spaces should block out external noises like traffic or neighbors. Acoustic foam, mass-loaded vinyl, and soundproofing insulation can effectively absorb and block sound waves.

Home Theaters and Music Rooms

Home theaters and music rooms need specialized soundproofing. These spaces provide immersive audio experiences and must prevent sound from escaping. Rubber gym flooring, acoustic wall panels, and ceiling clouds can maximize sound absorption.

A comprehensive soundproofing approach uses techniques tailored to each space. The right solutions create a peaceful living environment. Homeowners can enjoy a harmonious home free from unwanted noise intrusions.

Soundproofing Walls and Ceilings

staggered stud wall

Walls and ceilings are key areas for soundproofing. They’re the main paths for sound between rooms. Good soundproofing can lower noise and create a calmer home.

Staggered Stud Wall Construction

Staggered stud walls are great for soundproofing. This method offsets wall studs, blocking sound waves. It can cut sound by up to 80% compared to regular walls.

Foam insulation in walls boosts soundproofing. It helps absorb and block noise effectively.

Soundproofing Ceilings

Ceiling soundproofing is crucial too. Sound easily travels through timber joists. Use at least 100mm of acoustic insulation between joists for best results.

The Acousticlip system works well for timber ceilings. It cuts down on impact and airborne noise transfer.

Acoustic drywall or panels also help soundproof ceilings. The Noisestop 1 Plus Panel is a good choice. It combines acoustic plasterboard with mass loaded vinyl.

Soundproofing Floors and Basements

Floors and basements are key areas for home soundproofing. They can be major sources of noise transfer, especially for impact sounds. Luckily, there are effective ways to tackle these soundproofing issues.

Floating Floors for Soundproofing

Floating floors are a top choice for reducing noise from floors. They’re separated from the subfloor, creating a barrier that absorbs impact noise. This method can greatly improve your home’s overall soundproofing.

Basement Soundproofing Challenges

Basements have unique soundproofing needs due to their ground-level location. Sound can leak through the foundation, making careful planning crucial. This is especially true for basements used as home theaters or practice rooms.

Mass-loaded vinyl, special insulation, and airtight sealing are key strategies for basement soundproofing. These methods help create a more peaceful living space. They reduce noise impact on your daily life and well-being.

Soundproofing Windows and Doors

Windows and doors often let unwanted noise in or out of a space. Proper soundproofing creates a quiet and peaceful environment. There are several ways homeowners can improve soundproofing for windows and doors.

Mass loaded vinyl (MLV) or acoustic panels work well for soundproofing windows. These materials reduce sound transmission and prevent sound leakage. Ensuring a tight seal around windows is crucial to minimize gaps.

  • Soundproof window seal kits offer a budget-friendly option for improving sound insulation and reducing heating/cooling costs.
  • Acoustic caulk is an affordable choice for sealing gaps and reducing outside noises, with the flexibility to be painted over.
  • Sound-dampening curtains and double-cell shades provide cost-effective sound absorption and light blocking properties.
  • Replacing weather stripping tape is a simple and cost-effective way to enhance the soundproofing quality of windows.
  • DIY soundproof window plugs made from materials like wood, acoustic foam, and soundproofing material can be a temporary, inexpensive solution.
  • Window shutters are a cheap and effective method of soundproofing that also offer additional privacy and protection.

For soundproofing doors, the main goals are increasing mass and closing gaps. Weak seals, poor thresholds, and gaps around the door frame cause sound leakage. Acoustic doors with high Rw values block noise effectively.

Dealing with HVAC and Ductwork Noise

A quiet indoor space is vital for comfort. HVAC systems and ductwork can be noisy. Fixing this is key for a peaceful living or working environment.

HVAC noise comes from vibrating furnaces and air conditioners. Airflow in ductwork also causes noise. Use vibration mounts or isolation pads to reduce energy transfer.

Wrap HVAC units with sound-damping materials to contain vibrations. This helps lower overall noise levels in your space.

Ductwork needs attention too. Wrap ducts with sound-damping materials or acoustic insulation. This absorbs sound waves inside ducts while maintaining air quality.

Place duct silencers at key points in the system. This prevents sounds from entering the ductwork. It helps control noise levels within the HVAC system.

For best results, use multiple soundproofing strategies. Build an HVAC closet with dense walls and a heavy door. Upgrade to newer, quieter HVAC systems.

Remove or cover non-HVAC vents to block outside noises. Ask professionals to identify specific issues and recommend soundproofing products.

Soundproofing your HVAC system creates a more peaceful environment. It enhances well-being and maintains high-quality audio for various purposes.

Soundproofing for Specific Noise Sources

Certain noise sources need specialized techniques to reduce their impact. Traffic noise and machinery or industrial equipment noise often require targeted soundproofing solutions.

Soundproofing for Traffic Noise

Traffic noise can be tough to tackle due to its varied sound spectrum. Mass loaded vinyl (MLV) blocks sound transmission effectively.

Sound-absorbing barriers help trap and dissipate traffic noise energy. These methods can significantly reduce noise before it enters your living space.

Soundproofing for Machinery and Equipment

Industrial machinery can produce unwanted noise, from deep rumbles to high-pitched whines. Vibration isolation techniques, like rubber pads, prevent noise transmission from equipment to structures.

Sound-damping coatings on equipment or enclosures absorb and dissipate noise. These methods effectively reduce overall noise levels in industrial settings.

Targeted soundproofing strategies can mitigate external soundproofing traffic noise and soundproofing machinery noise. This creates a more peaceful and comfortable environment for living or working.

The Role of Insulation in Soundproofing

soundproofing insulation

Insulation absorbs and traps sound waves, stopping them from traveling through walls, floors, and ceilings. The density and type of insulation material greatly affect its soundproofing ability. Fiberglass and mineral wool are common choices.

Good insulation installation also boosts a building’s energy efficiency. The Sound Transmission Class (STC) rating measures soundproofing effectiveness. Higher numbers mean better sound blocking.

Blown-in insulation is often more effective. It fills gaps and cracks in walls or ceilings better. Denser materials are superior at absorbing and blocking sound waves.

Insulation creates a barrier between rooms, reducing noise transmission. It also improves energy efficiency, leading to lower utility bills. Proper insulation cuts external noises and improves temperature control.

  • Proper insulation reduces external sounds such as traffic noise, improves temperature control, and prevents drafts and heat loss.
  • Soundproofing with insulation is a non-invasive and eco-friendly solution for noise reduction.
  • Insulation helps with fire protection by slowing down the spread of flames and with moisture control by preventing mold growth.

Expert advice helps in choosing the right insulation and ensuring proper installation. Common mistakes include using the wrong type or not enough insulation. Failing to seal air gaps or using low-density materials can also cause problems.

For successful soundproofing, plan well and choose high-quality insulation. Seal air gaps and consider additional methods. Professional guidance can make a big difference.

Common Soundproofing Mistakes to Avoid

Soundproofing can be tricky. Knowing common mistakes helps you get better noise reduction. Let’s explore some pitfalls to avoid in your soundproofing project.

Using the wrong insulation is a big error. Not all materials block sound well. Mattresses, cardboard, and egg cartons don’t work for soundproofing.

Another mistake is not using enough insulation. This leaves gaps that let sound through. Measure carefully and use high-density materials like mass-loaded vinyl for best results.

  • Failing to seal air gaps and leaks is a significant soundproofing mistake. Sound can easily travel through even the smallest cracks and openings, undermining the effectiveness of your soundproofing measures.
  • Choosing low-density materials for soundproofing is another common pitfall. These materials simply don’t have the mass and sound-blocking capabilities required for effective noise reduction.

Picking low-density materials is also a problem. They can’t block sound well. Ask a pro for help choosing the right stuff.

Getting expert advice is smart. They know what works best. A pro can help you avoid mistakes and get great results.

Combining Soundproofing Techniques for Best Results

Optimal soundproofing often needs a multi-pronged approach. Combining various soundproofing techniques creates a more effective noise-reduction solution. This multi-layer soundproofing process uses different materials to address various sound control aspects.

An effective strategy combines sound-absorbing, sound-blocking, and vibration-damping materials. Sound-absorbing materials like acoustic foam panels reduce sound reflections. Sound-blocking elements, such as mass-loaded vinyl, block sound transmission through surfaces.

Vibration-damping solutions, including specialized underlayments, minimize impact and structure-borne noise transfer. These methods work together to create a more comprehensive soundproofing system.

  • Acoustic foam panels with NRC values around 0.7 can absorb up to 70% of the sound that strikes their surface.
  • Carpet flooring with an NRC value of around 0.4 can absorb approximately 40% of the sound, making it a suitable option for noise control.
  • Ceiling tiles with NRC values between 0.5 and 0.6 can absorb 50 to 60% of the sound, helping to reduce sound reflections and control reverberation.

Combining these soundproofing techniques creates a comprehensive solution for sound control. This approach results in a more peaceful and acoustically-optimized environment.

DIY vs. Professional Soundproofing

Soundproofing can be a DIY project or a job for experts. DIY methods are cheaper but may not solve big noise problems. Professional soundproofing often gives better results for tougher issues.

DIY techniques include using acoustic sealant, rugs, or drapes. These can work for small projects. Professionals use stronger methods like insulation and specialized panels.

Professional soundproofing costs $1,000 to $2,400 per room. DIY methods can be much cheaper. However, pros can reduce up to 95% of outside noise.

Your choice depends on the project size and noise level. It also depends on your skills and time. For complex needs, soundproofing experts ensure the best results.

They provide lasting soundproofing installation that makes your home more peaceful. Consulting professionals can help you decide the best approach for your situation.

Tips for Hiring the Best Soundproofing Professionals

Choosing the right soundproofing expert is crucial for your project’s success. Seek contractors with extensive experience and access to top-quality materials. Ensure they’re licensed, insured, and can provide a detailed project plan.

Research and compare quotes from different soundproofing specialists. Don’t just pick the cheapest option. Evaluate each provider’s experience, expertise, and proposed solutions for your space.

Be cautious of DIY soundproofing attempts. They may seem cheaper at first but can cost more if results are poor. Hiring a professional may cost more initially but can offer long-term savings.

A pro ensures effective soundproofing measures in your home or commercial space. This investment leads to better results and peace of mind.

Need Help with Soundproofing? FindPros is Here

Are you struggling with soundproofing challenges in your home or office? FindPros can help you find the best local professionals to absorb sound, block exterior noise, and reduce overall noise levels. Simply answer a few questions about your project, and we’ll match you with top-rated pros who can provide custom solutions using the right materials, from solid core doors to soundproofing foam and green glue. With multiple providers competing for your job, you’ll get the best pricing and find the perfect pro that you work well with.

Take control of those sound problems and sound pressure issues, whether it’s for a recording studio, conference room, or your own living space. Get started with FindPros and enjoy a quieter, more peaceful environment with effective, low-cost soundproofing projects using heavy materials and multiple layers to stop noise from traveling through walls, ceilings, and the outside world.

Conclusion

Soundproofing is vital for a peaceful home. It reduces unwanted noise and improves life quality. Understanding sound basics, materials, and techniques helps avoid common mistakes.

Humans hear between 20 Hz and 20,000 Hz. Effective soundproofing addresses all frequencies. This includes low rumbles and high-pitched sounds.

High-performance materials are key. Soundproof curtains can weigh 2,600 grams per square meter. Regular curtains only weigh about 400 grams, making them less effective.

Soundproofing benefits go beyond noise reduction. Studies show unwanted noise affects cardiovascular health. It can also increase type-2 diabetes risk. A quieter home contributes to better overall well-being.

Soundproofing is a worthwhile investment. It enhances comfort and increases home value. Many options fit different budgets. Take control of your space and enjoy a quieter environment.

Frequently Asked Questions (Spider Exterminator)

Common signs of a spider pest control problem in a house include the presence of spider webs, egg sacs, increased insect activity, and finding spiders in dark, cluttered areas.
Hiring a professional spider pest control service is important because they have access to specialized products and methods that are more effective than DIY solutions. They are also trained to safely and effectively eliminate spiders, including dangerous species like the black widow, which can pose serious health risks to humans and pets.
The average cost for professional spider pest control services ranges from 0 to 0 for a one-time visit and treatment. However, the exact cost can vary depending on factors like the size of the home, the severity of the infestation, and the specific services required.
To prevent future spider infestations, homeowners can take steps like sealing cracks and gaps, eliminating clutter and undisturbed areas, and maintaining a well-lit and clean home. Removing sources that attract other bugs, which spiders feed on, can also help deter spiders from taking up residence in the house.

Soil Testing

Spider Exterminator Near You

Can’t find what you are looking for?

How It Works

  • Answer a few questions about your home project.
  • Within seconds, get matched with top-rated local pros.
  • Compare quotes and choose the best pro for the job.

Soil Testing In Your Area

How to Find a Reliable Soil Testing Company

Soil Testing

Key Takeaways

  • Soil testing is essential for understanding your soil’s nutrient levels and optimizing plant growth
  • Not all soil testing companies are created equal, with some still relying on outdated chemical-based methods
  • Look for soil testing providers that utilize preferred methodologies, such as base saturation testing and Lamotte testing
  • Recommended soil testing labs offer accurate results and valuable recommendations
  • Investing in professional soil testing can lead to a more abundant harvest, making it a worthwhile investment

Understanding Soil Testing

Soil analysis is key for land health and productivity. It reveals soil properties, helping you make smart decisions about amendments and management. This optimization boosts plant growth.

Why Test Your Soil?

Soil testing reveals nutrient deficiencies and contaminants. It helps determine the right amendments and fertilizers to use. This knowledge creates ideal conditions for plants to thrive.

Benefits of Soil Testing

  • Identifies nutrient imbalances and deficiencies
  • Detects the presence of soil contaminants
  • Determines the appropriate amendments and fertilizers to apply
  • Helps to optimize plant growth and yield
  • Improves soil health and fertility
  • Saves money by preventing over-fertilization
  • Ensures environmental sustainability by reducing the risk of nutrient runoff

Soil testing enhances land management and productivity. It helps you make smart choices for your soil’s health. Regular testing maintains a thriving, sustainable soil ecosystem.

Types of Soil Tests

Soil testing companies offer many services to check soil quality. These tests fall into two main groups: nutrient analysis and contaminant testing.

Nutrient Analysis

Nutrient analysis checks levels of key plant nutrients in soil. It looks at nitrogen, phosphorus, potassium, and other important elements. This test helps optimize plant growth and garden health.

Contaminant Testing

Contaminant testing finds harmful substances in soil. It checks for heavy metals, pesticides, and other pollutants. This test is vital for areas exposed to industrial or urban activities.

Some labs also test soil texture, structure, and pH levels. These tests give insights into soil suitability for various uses.

Choose a soil testing company with a wide range of services. Look for accurate methods and proper certification. A good lab will provide reliable results for informed decisions.

Choosing a Soil Testing Company

Certification and accreditation are key when picking a soil testing company. Look for labs certified by the USDA, EPA, or state agencies. These labs follow strict quality control and use standard testing methods.

Certification and Accreditation

Two main accreditation programs exist for U.S. soil testing labs. The NAPT-PAP is managed by the Soil Science Society of America. The ALTA-SAC is a private certification initiative.

Choose soil testing companies accredited by these well-known organizations. This ensures reliable and accurate results for your soil samples.

  • Look for soil testing labs that are accredited by the NAPT-PAP or ALTA-SAC programs.
  • Ensure the lab provides information on the specific testing methods used, as these may differ from the recommended methods for your local area.
  • Consider labs that participate in proficiency testing programs like NAPT and Agricultural Laboratory Proficiency, even if they are not formally accredited, as these aim to improve soil analysis quality.

Stick with one accredited lab over time. This helps you track soil composition changes more effectively.

Factors to Consider

Choosing a soil testing company involves more than just certifications. Look for experienced staff and up-to-date equipment. Seek a company known for clear, thorough soil test reports.

  • Laboratory Qualifications: Pick a lab with skilled professionals like soil scientists and agronomists. They should use modern techniques for accurate results. Look for certifications from organizations like NAPT or USDA’s AMS.
  • Test Methods and Reporting: The lab’s testing methods affect result accuracy and relevance. For example, Mehlich-3 extraction works well for acidic Alaskan soils. However, it may not suit alkaline soils in western states.

Ensure the lab uses methods suitable for your soil and crops. The soil test report should be clear and detailed. It should include results and recommendations for soil improvements.

Collecting Soil Samples

Accurate soil testing requires proper sample collection. Follow the instructions given by your chosen soil testing company. This involves taking multiple samples from different areas and sending a mixed sample to the lab.

Collect 10-15 soil cores from various spots in your yard or garden. This ensures a representative sample. For larger areas, collect and test samples from different sections separately.

  1. Take 10-15 soil cores or samples from various locations within your yard or garden. This ensures you get a representative sample.
  2. For larger areas, collect samples from different sections and test them separately.
  3. Sampling depths can vary, but generally, you’ll want to collect samples from 6-8 inches deep for gardens and shrub beds, 3 inches deep for turf areas, and up to 12 inches deep for tree root zones.
  4. Mix the collected soil samples together in a clean container, and then take a pint-sized portion to send to the testing laboratory.
  5. Dry the soil samples at room temperature before sending them off.

Use these soil sample collection techniques for accurate test results. This will help you make smart choices about amendments and fertilizers. Your garden or lawn’s health will improve as a result.

Interpreting Soil Test Results

Soil test results provide crucial information about your land. They show soil pH, nutrient levels, and potential contaminants. To understand these results, work with the testing company or a local expert.

Understanding the Report

Soil test reports can be confusing at first glance. But with help, you can make sense of the data. This information will guide you in improving your soil.

The report usually includes these key details:

  • Soil pH: Most plants thrive in a pH range of 6.0 to 7.5. pH affects how plants absorb nutrients.
  • Nutrient levels: The report shows levels of nitrogen (N), phosphorus (P), potassium (K), and other nutrients. These are rated as low, medium, or high.
  • Contaminants: The report lists any harmful substances found in your soil. This may include heavy metals or pesticides.

With this knowledge, you can create a plan to boost your soil’s health. You might need to add specific amendments or change your farming methods.

Recommendations and Amendments

Soil test results come with tailored recommendations for improving your soil. These suggestions address nutrient deficiencies and imbalances. Following these recommendations is key to optimizing plant growth and health.

Soil amendments may include lime, fertilizers, or organic matter. These improve soil pH, nutrient levels, and structure. The suggested amendments depend on your soil’s unique characteristics.

  1. Lime addresses acidic soil. Sulfur and organic matter correct alkaline soil.
  2. Blood meal, guano, and composted manure boost nitrogen for vegetable gardens.
  3. Rock phosphate and bone meal promote strong root growth.
  4. Greensand, kelp, and hardwood ash enhance fruit production and disease resistance.

Recommendations may include beneficial microorganisms to improve nutrient absorption. Proper watering is crucial for soil health and supporting these organisms.

Apply soil amendments carefully. Using the right type and amount can greatly impact your garden’s productivity. It also enhances the sustainability of your landscape.

Cost of Soil Testing Services

Soil testing costs

Soil testing costs vary based on several factors. The national average is $1,399, with a typical range of $672 to $2,155. Garden soil tests cost $10 to $200 each.

Environmental and soil contamination tests range from $15 to $400 per test. These tests provide crucial information about soil quality and potential issues.

Factors Affecting Cost

Several key factors influence soil testing costs. These include the number and type of tests, analysis detail, and additional services like interpretation and recommendations.

Test type impacts overall cost. Nutrient analysis, contaminant testing, and soil composition analysis are common test types.

The number of soil samples affects the total cost. More samples mean higher expenses for testing and analysis.

  • Test type: The specific tests required, such as nutrient analysis, contaminant testing, or soil composition analysis, can impact the overall cost.
  • Number of samples: The more soil samples that need to be tested, the higher the overall cost will be.
  • Laboratory fees: Different soil testing laboratories may charge varying rates for their services.
  • Specialized testing: Advanced or specialized soil testing, such as heavy metals or microbiology analysis, can be more expensive.
  • Onsite services: If a technician needs to visit the site to collect samples, the labor costs can add to the overall expense.
  • Reporting and interpretation: Soil test reports that include detailed analysis and recommendations may carry a higher price tag.

Consider these factors when budgeting for soil testing services. This ensures accurate and comprehensive results for your specific needs.

Local vs. National Soil Testing Companies

Soil testing services are offered by both local and national companies. Each option has its own benefits. Let’s explore the key differences to help you choose.

Local companies know regional soil conditions better. They can give advice tailored to your area’s needs. These firms understand local farming and gardening challenges well.

They can help with soil nutrient levels, pH, and contaminants. Their expertise is valuable for specific local concerns.

National soil testing companies offer more testing options. They provide standardized reports for easy comparison with national data. These companies often have advanced lab equipment.

Their large expert staff can handle various soil testing needs. This is great for comprehensive analysis or comparing with national benchmarks.

Your choice depends on your specific needs. Consider the detail level, cost, and result turnaround time. Weigh the pros and cons to make the best decision.

Common Soil Testing Mistakes

Accurate soil testing is crucial for successful gardening and farming projects. Mistakes in testing can lead to poor results and bad decisions. Two common errors are improper sampling and providing inaccurate information.

Improper Soil Sampling

Collecting a good soil sample is key for reliable test results. Errors in depth, size, and location can affect the accuracy. These mistakes can misrepresent the soil’s nutrient content and strength.

Soil cross-contamination is another issue to watch out for. It’s often caused by not cleaning equipment between samples. This can lead to wrong readings.

Inaccurate Information

Giving the lab incomplete details about the sample can lead to misleading results. Consider the site’s history, like past land use or construction. Neglecting to restore the sampling site can be costly later.

To get accurate results, follow proper sampling methods. Give complete information about the sample to the lab. Work with a trusted soil testing laboratory for best outcomes.

By avoiding these soil testing mistakes, you can make smart choices. This helps with soil fixes, crop picks, and other practices. Your soil will be healthier and more productive.

Organic and Sustainable Soil Testing

Specialized soil testing services cater to organic and sustainable practices. These labs focus on soil biology and ecosystem health. They go beyond just measuring nutrient levels.

Organic soil testing assesses the soil microbiome and carbon sequestration. Sustainable testing looks at long-term fertility and environmental impact. Both methods offer a comprehensive view of soil condition.

  • Organic soil testing evaluates soil biology and ecosystem health
  • Sustainable soil testing focuses on long-term fertility and environmental impact
  • These specialized tests offer a more holistic view of soil condition

Organic soil testing and sustainable soil testing help make informed decisions. They enhance eco-friendly soil analysis for gardeners and farmers. These methods support healthy, productive, and environmentally responsible growth.

Best Time for Soil Testing

Soil testing timing varies by location and land use. Michigan State University Extension suggests testing every 2-3 years. Fall or early spring are ideal, before planting or adding amendments.

Fall is often best for soil testing. It allows more time for sample collection and fertilizer decisions. Fall applications of phosphorus and potassium work well for crops like corn and soybeans.

Fall is perfect for applying phosphorus and potassium to winter wheat. Dry fertilizer can be safely applied with tillage to reduce runoff water phosphorus concentration.

  • Fall applications of dry fertilizer can be safely and quickly done with some tillage to reduce runoff water P concentration.
  • Weather conditions in the fall are typically more favorable for collecting soil samples compared to spring.
  • Fall is the best opportunity to apply lime to neutralize soil acidity.
  • Soil testing laboratories are less busy in the fall, resulting in quicker turnaround times than in spring.

Testing soil every three years helps track fertility changes. Soil pH is crucial for plant growth. Maine soils are often acidic.

Soil tests check for Nitrogen, Potassium, Phosphorus, Calcium, Magnesium, and Sulfur. Lead contamination testing is standard for home gardens and lawns.

Soil test results guide lime, fertilizer, and amendment additions. Testing at the right time prepares land for growing and helps with soil management.

Soil Testing for Specific Crops

soil testing for crops

Knowing your soil’s needs is key for great plant growth. Special soil tests can help you understand what veggies, fruits, or flowers need. These tests look at more than just basic nutrients.

Crop soil tests check many things like nutrients, pH, and texture. They also look at organic matter and soil life. With this info, you can make your soil perfect for your plants.

How often to test depends on what you’re checking. Some tests are yearly, while others can wait 2-6 years. Watching your soil change helps you make smart choices about plant care.

Pick a soil testing company that gives full reports and personal advice. Good soil tests can lead to healthier plants and bigger harvests. They also help create a better garden system.

  • Presidedress soil nitrate test for commercial agronomic or vegetable crops
  • Saturated media analysis for commercial greenhouse growers
  • Textural analysis to determine sand, silt, and clay percentages
  • Organic matter and biological activity measurements

Soil testing helps you understand what your crops need. It keeps your soil healthy for a long time. A good soil testing company can help you grow amazing plants.

Ongoing Soil Monitoring

Regular soil testing is crucial for effective soil management. It helps track changes in soil properties over time. This allows for informed decisions about amendments, fertilizers, and other practices.

Test soil every 1 to 5 years, depending on your crops. Specialty crop growers should test more often, every 2-3 years. High-value production environments may need annual testing.

Perennial crops like berries, orchards, and grapes need testing every 3-5 years. Take 15-30 subsamples across the area when collecting soil samples. This ensures accurate results reflecting overall soil condition.

Create a soil testing schedule to track changes over time. This helps understand nutrient levels, pH, and other important factors. Use this info to adjust soil management practices and improve land productivity.

New soil health monitoring tech, like electrochemical sensors, enhances test accuracy. These sensors provide real-time data on soil parameters. This helps farmers make better decisions to improve soil health and productivity.

Continuous soil testing can revolutionize your agricultural operation. It optimizes land potential and boosts crop yields. This approach also contributes to sustainable farming practices.

Introducing FindPros – Your Gateway to Reliable Soil Testing Experts

Having trouble interpreting your soil test results or finding the right professionals to address your soil-related issues? Look no further than FindPros, your one-stop-shop for connecting with top-rated local soil testing experts.

With FindPros, you can quickly and easily get matched with professionals who specialize in soil analysis, nutrient recommendations, and soil amendment solutions. Simply answer a few questions about your soil testing needs, and we’ll provide you with a list of qualified pros who can help you achieve optimal plant growth, manage soil moisture and pH levels, and ensure proper nutrient availability.

The best part? Our platform allows multiple pros to compete for your job, ensuring you get the most cost-effective and tailored solutions for your specific soil testing requirements. Whether you’re tending to a vegetable garden, fruit trees, or your general landscape, FindPros can connect you with the right experts to help you make the most of your soil.

Conclusion

Soil testing is crucial for optimizing plant growth and yields. It helps determine soil composition and nutrient levels. This information allows you to address deficiencies and improve soil health.

Finding a reliable soil testing company is essential. Look for certifications, accreditations, and a history of quality service. The testing process duration may vary, but the insights are valuable.

Investing in soil testing can boost productivity and reduce costs. It also promotes eco-friendly land management. With accurate results, you can make smart decisions about soil amendments.

Soil testing is a key tool for understanding your land. It enables effective soil management strategies. By partnering with a trustworthy company, you can unlock your land’s full potential.

Frequently Asked Questions (Soil Testing)

A soil testing lab can provide valuable insights to optimize plant growth. They can identify nutrient deficiencies, detect contaminants, and recommend the right amendments like lime or fertilizers. This helps create the ideal soil conditions for your plants to thrive.
It’s generally recommended to test your soil every 2-3 years, with the best time being in the fall or early spring before planting. This allows time to apply any necessary lime or fertilizer amendments before the growing season.
Look for a lab that is certified and uses up-to-date testing methods. They should have experienced staff who can provide clear, detailed reports with actionable recommendations for improving your soil’s nutrient levels and pH.
Take 10-15 soil cores from different areas of your garden or lawn, mixing them together in a clean plastic bucket. Avoid contaminating the samples, and be sure to follow the instructions provided by the soil testing lab.
Soil test results provide information on the pH, nutrient levels, and other properties of your soil. This allows you to select plants that are well-suited to the specific conditions of your garden or landscape, ensuring optimum plant growth and health.

Sod Companies

Spider Exterminator Near You

Can’t find what you are looking for?

How It Works

  • Answer a few questions about your home project.
  • Within seconds, get matched with top-rated local pros.
  • Compare quotes and choose the best pro for the job.

Sod Companies In Your Area

Sod Companies: Find the Best for Your Lawn

Sod Companies

Key Takeaways

  • Sod installation costs can range from .90 to .80 per square foot for materials and labor.
  • Experienced sod companies offer warranties and guarantees to ensure the long-term success of your lawn.
  • Choosing a locally-sourced sod provider can optimize grass variety for your climate and soil conditions.
  • Sod installation involves precise site preparation and laying techniques for optimal results.
  • Proper post-installation care, including consistent watering and mowing, is crucial for a thriving lawn.

Understanding Sod: Types and Benefits

sod varieties

Sod offers a quick way to create a beautiful lawn. It’s pre-grown grass transplanted onto your property. Let’s explore sod types and benefits to help you choose wisely.

Warm-Season Sod

Warm-season sod thrives in hot, sunny climates. Varieties like Zoysia, Bermuda, and St. Augustine are popular in southern regions. These grasses have excellent shade tolerance and withstand heavy foot traffic well.

They’re often used on golf courses and residential lawns. Their durability makes them ideal for high-traffic areas.

Cool-Season Sod

Cool-season sod performs best in areas with cold winters and moderate summers. Kentucky Bluegrass, Fescue, and Ryegrass are common cool-season varieties.

These grasses create a lush, beautiful lawn. They’re frequently used in northern and midwestern regions.

Advantages of Sod Installation

  • Immediate results: Sod provides an instant lawn solution. You’ll enjoy a lush, green grass cover right away.
  • Reduced weed growth: Sod establishes quickly, outcompeting weeds. This creates the right sod for your outdoor space.
  • Lower maintenance: Sod lawns typically need less mowing, watering, and care than seeded lawns.

Different sod varieties offer unique benefits. Choose wisely to create your dream beautiful lawn.

Choosing the Right Sod Companies

sod companies

Picking the best sod company is key for great outdoor spaces. Several factors matter for a successful sod installation. Let’s look at these important elements.

Service Area and Scheduling

First, check if the sod company works in your area. Some providers may have limited delivery and installation services. Make sure they can reach you.

Good sod companies offer various booking options. These include online, phone, and email scheduling. Flexible timing helps your project succeed.

Pricing and Quotes

Sod prices vary based on grass type, quality, and project size. Most companies give upfront pricing and free estimates. Be careful of firms that won’t share clear pricing info.

Guarantees and Additional Services

Look for a sod company with a satisfaction guarantee. This often includes free replacement of bad sod within 14 days. Some companies also offer extra services.

These might include lawn care, landscaping, or snow removal. Such options provide complete outdoor solutions for homes and businesses.

Consider these factors to choose a top-notch sod company. You’ll get quality sod, smooth installation, and great service. This ensures a lush, family-friendly lawn for years.

Sod Installation Process

Transform your outdoor space with a lush, green lawn through sod installation. This approach ensures a smooth outcome for a vibrant, healthy turf. Let’s explore the key steps involved.

Site Preparation

Start by scheduling an 811 Dig to mark underground utility lines. Test the existing sprinkler system and note any broken parts. Mark valve boxes and items that could be damaged during installation.

If there’s an existing lawn, scalp it and rake out the grass. Till the marked areas and edge them properly. This creates a tapered, flush surface for the sod.

Sod Laying Techniques

Begin laying sod along the longest straight line, using a staggered placement to avoid gaps. Water the sod thoroughly as you lay it to prevent drying.

Set sprinklers to soak the sod for 25 to 40 minutes per zone, twice daily. Do this for 14 days. Keep the job site clean by clearing debris and trash regularly.

Caring for Newly Installed Sod

Newly installed sod needs special care to grow into a lush lawn. The first few weeks require a unique routine. This differs from caring for established lawns.

Watering and Mowing Guidelines

Water the new sod 3-4 times daily for 5-10 minutes in the first week. This keeps it from drying out. Avoid evening watering to prevent fungal issues.

In week two, water once a day for about 30 minutes. Mow the sod for the first time around 14 days after installation.

Keep the mower deck high when cutting. Remove no more than 1/3 of the grass blade length. This reduces stress on young sod.

Fertilization and Maintenance

  • Approximately 6 weeks after installation, the newly installed sod should be fertilized to promote continued root establishment and growth.
  • Ongoing maintenance, such as regular mowing, watering, and fertilization, is crucial for the sod to become fully established and thrive.
  • After the initial 3-4 weeks, gradually reduce the watering frequency but increase the duration to encourage deep root growth.

Follow these guidelines for newly installed sod, watering, mowing, fertilization, and maintenance. Your new lawn will start strong and become a beautiful addition to your property.

Simplify Your Sod Journey with FindPros

Finding the right sod company for your lawn can be a daunting task. Let FindPros take the hassle out of the process. Simply answer a few questions about your sod installation needs, and we’ll match you with top-rated local providers. Get competitive quotes from sod farming professionals, ensuring you get the best value for your investment. Whether you need to install sod, spread mulch, or revitalize your lawn this spring and summer, FindPros connects you with the right experts for the job.

Skip the guesswork and let our network of reliable, vetted pros handle the hard work, from crop selection to sod delivery and installation. Achieve the lush, healthy lawn you desire without the headache.

Conclusion

Choosing a top-notch sod company is key to getting a lush, healthy lawn. Consider factors like service area, scheduling, and pricing when selecting a provider. Look for guarantees and extra services to ensure you’re getting the best value.

The sod installation process requires careful attention to detail. Proper care for newly laid sod is crucial for its success. With the right approach, you’ll enjoy a beautiful lawn for years.

Sod offers instant results and boosts curb appeal. It’s perfect for those wanting a quick outdoor makeover. Understanding its benefits helps homeowners make smart choices for their yards.

Investing in professional sod companies pays off in the long run. It ensures a vibrant, thriving lawn that lasts. With proper care, your new sod can become the highlight of your property.

Frequently Asked Questions (Sod Companies)

Sod farming is the process of growing and harvesting pre-cut pieces of grass, known as turfgrass sod, for easy installation. Turfgrass sod provides an instant, mature lawn compared to seeding a lawn from scratch.
Sod delivery is crucial for a successful installation. A great sod company will ensure the sod is delivered fresh and in perfect condition, ready to be installed on your property. This helps the sod establish quickly and thrive.
Choosing a top-quality sod company provides many benefits over seeding a lawn yourself. They offer expertise, warranties, and a mature lawn that can be installed quickly. This saves time and ensures a lush, healthy lawn from the start.
Experienced landscapers can help customers select the perfect sod variety for their climate, soil conditions, and intended use of the lawn. They can also provide advice on proper installation and maintenance for the sod to thrive.
When choosing a sod company, homeowners should consider the company’s service area, scheduling flexibility, pricing, guarantees, and additional services like lawn care or landscaping. This ensures they get a great company that delivers top-quality sod and a smooth installation process.

Smartphone Repair

Spider Exterminator Near You

Can’t find what you are looking for?

How It Works

  • Answer a few questions about your home project.
  • Within seconds, get matched with top-rated local pros.
  • Compare quotes and choose the best pro for the job.

Smartphone Repair In Your Area

Need a Smartphone Repair? Here’s What to Know

Meta Description: Expert smartphone repair services for cracked screens, battery issues, and more. Fast, reliable fixes for all major brands. Get your device working like new today.

Smartphone Repair

Is your smartphone showing signs of wear? Many face issues like cracked screens or faulty batteries. Don’t assume your phone is beyond repair.

Understanding common signs can help you decide when to seek professional smartphone repair services. These services can often save you money and time.

Key Takeaways

  • Smartphone repair is often more cost-effective than replacing the entire device.
  • Certified technicians can diagnose and fix a wide range of smartphone issues, from water damage to broken hardware.
  • Reputable repair shops use genuine parts and provide a warranty, ensuring the quality of their work.
  • Prompt smartphone repair can prevent further damage and keep your device in optimal working condition.
  • Choosing a reliable, local phone repair service can save you time and money compared to mailing your device to a distant repair center.

Common smartphone problems can be fixed by professionals. Don’t let a broken device disrupt your life. Explore your options for repairing your smartphone today.

Signs Your Phone Needs Repair

Your smartphone is crucial for daily life. It’s important to spot signs it needs repair. Early detection prevents small issues from becoming big problems.

Various issues can arise, from water damage to cracked screens. Catching these early can save you time and money.

Water Damage

Liquid exposure can harm your phone’s internal parts. This can cause corrosion and short-circuiting. Major repairs or part replacements may be needed.

Broken Hardware

Malfunctioning buttons signal broken hardware. A cracked screen or distorted speakers are also signs. Address these issues quickly to avoid further damage.

Lack of Memory

Frequent lagging or crashing might mean low internal memory. Slow performance is another sign. Upgrade memory or remove unused apps to fix this.

Short Battery Life

Phone batteries can degrade over time. If your battery drains faster than before, it may need replacement.

Broken Camera

Blurry or low-quality photos could indicate hardware issues. Address this problem before it causes more complications.

Recognizing these signs helps you act fast. Early action extends your device’s life. It also helps avoid costly replacements.

When to Repair or Replace Your Phone

Deciding to repair or replace a damaged smartphone can be tough. The extent of damage, device age, and your budget are key factors. Sometimes, replacing is smarter, especially for severe damage or older phones.

A good rule: replace if repair costs exceed 50% of a new phone’s price. This is especially true for older models. Repair costs vary based on phone age and model.

For minor issues or newer devices, professional repairs can be affordable. Fixing a cracked screen or battery is often cheaper than buying new.

Other factors include spare part availability and potential performance gains. The environmental impact of e-waste is also important. Weigh repair costs against new device benefits.

Choose a reliable repair service provider. Look for good reviews, recommendations, and certifications. Expert diagnosis helps make informed decisions about repairs.

Carefully consider the pros and cons of repairing or replacing. Factor in cost, lifespan, and performance to make the best choice for you.

Phone Battery Draining Fast

phone battery

Is your phone’s battery draining faster than before? This could indicate battery degradation. Smartphone batteries lose their charge-holding ability over time. This usually occurs after about two years of use.

Battery degradation may require repair or replacement. A technician can assess the battery’s condition and recommend the best solution.

Signs of Battery Degradation

Look out for these signs of battery degradation:

  • Rapid battery drain, even with minimal use
  • Inability to hold a charge for a full day
  • Reduced battery life compared to when the phone was new
  • Overheating or swelling of the battery

Options for Battery Repair or Replacement

An expert can fix your battery or suggest a full replacement. This will restore your phone’s performance. They may replace the battery or fix issues causing rapid drain.

Regular maintenance can extend your phone’s battery life. Proper care prevents early degradation. Address battery issues quickly to keep your smartphone working well.

Smartphone Slowing Down

Is your smartphone sluggish? Apps taking forever to open? Low storage space might be the culprit. A cluttered phone can slow down like a messy hallway.

To speed up your device, try deleting unnecessary apps, files, and data. You can also disable motion effects and other visual enhancements to save resources.

Low Storage Space Causes Lags

Common issues that slow down phones include low storage space and too many open apps. Poor battery health, outdated operating systems, and spotty internet can also cause problems.

Performance issues may arise if less than 10% of your phone’s storage is free. Keep an eye on your available space.

Tips to Speed Up Your Phone

  • Close open apps to free up memory
  • Restart your phone to clear temporary files and processes
  • Check for software updates to improve device performance
  • Disable live wallpaper and other resource-intensive features
  • Clear app cache to reclaim storage space
  • Remove rarely used apps to declutter your device

If these tips don’t help, your phone may need professional repair or replacement. Hardware or software issues could be the root cause.

Sudden Shutdowns or Reboots

Unexpected phone shutdowns or restarts can signal serious hardware or software problems. These issues can stem from various sources, including overloaded storage and software crashes. Hardware problems like failing batteries or loose connections may also cause sudden shutdowns.

Overcrowded storage often leads to constant phone restarts by affecting short-term operating memory. An aging battery can cause overheating and restarting issues. Outdated apps or software bugs might trigger unexpected restart problems too.

To fix sudden shutdowns, try updating your phone’s operating system or clearing the cache partition. Boot into safe mode to check if a specific app is causing trouble. If these steps fail, seek professional help for diagnosis and repair.

Recurring crashes may indicate it’s time to replace your device. Repairs might only offer temporary solutions. An expert technician can pinpoint the root cause of shutdowns using specialized tools. They’ll recommend whether to repair or replace your phone.

Camera Issues

phone camera

A smartphone’s camera is often its key feature. But camera problems can be very frustrating. Blurry photos and slow shutter speeds may signal issues with the lens or internal parts.

Blurry Photos and Slow Capture

Blurry images or slow capture times might need expert help. These could be due to dust or scratches on the camera lens. A skilled technician can check if cleaning or repairs are needed.

They can determine if a thorough cleaning will fix the issue. Sometimes, more extensive repairs like lens replacement are necessary to restore camera performance.

Lens Cleaning or Replacement

  • Camera lens issues can often be resolved with a simple cleaning by a professional.
  • In cases where the lens is damaged, a replacement may be necessary to bring your phone’s camera back to its best.
  • Choosing original spare parts for camera repairs can help prolong the device’s lifespan and enhance its overall performance.

Don’t let camera problems spoil your smartphone experience. Seek help from a trusted repair service to fix your phone’s camera issues.

They can diagnose and address any problems. This ensures you can take clear, high-quality photos once again.

Smartphone Repair Tips

Smartphone repair involves key considerations. For minor issues like cracked screens, try DIY repair at home. Use a replacement screen and repair kit with tools like screwdrivers and a suction cup.

Cracked Screen Repair

DIY screen repair can save money but requires technical skills. Follow kit instructions carefully to avoid further damage. If unsure, seek a professional repair service for screen replacement.

Dealing with Water Damage

Water damage is serious for smartphones. While drying methods exist, professional help is recommended. DIY attempts risk harming internal components.

Fixing Broken Ports

Broken headphone jacks or charging ports are tricky to fix at home. Minor port issues may be fixable with a kit. For safety, consult a professional repair service.

Consider risks and benefits of DIY fixes versus professional repair. For complex issues, seek expert help to ensure proper and safe repairs.

When to Take Your Phone to Professionals

Some minor phone repairs can be done at home. However, severe damage requires professional help. For shattered screens or water damage, seek a certified repair shop.

Professional technicians have the right tools and know-how. They can assess damage and perform safe repairs. Their advice on repair or replacement is valuable.

  • Professional repair services offer quick turnaround times, ensuring minimal downtime and inconvenience for users.
  • Reputable repair shops use high-quality replacement parts that meet industry standards, contributing to the longevity and performance of the repaired devices.
  • Professional repair services often provide warranties on their work, offering customers peace of mind and recourse in case of issues.

The complexity of smartphone issues affects repair choices. DIY repairs can be cheap, but risky. 70% of DIY attempts cause more damage.

85% of users choose professional repairs for damaged phones. 90% of warranties are voided by DIY attempts. This leaves users responsible for full repair costs.

Need Smartphone Repair? Try FindPros

Having issues with your device like a dead battery or water damage? Don’t fret – FindPros can help. Our network of top-rated local professionals can provide affordable, same-day repairs for all major smartphone brands, including Google Pixel, iPhone, and more. Simply answer a few questions about your repair needs, and we’ll match you with the best pros who can get your device back in good hands at a reasonable price. No appointment necessary – walk-ins welcome at our conveniently located stores. Whether you need screen, battery, or water damage repairs, trust the experts at FindPros to keep your essential electronics, like tablets and laptops, in working order.

Conclusion

Your smartphone might need repair if you notice water damage, cracked screens, or battery issues. Some minor problems can be fixed at home. For complex damage, seek help from professional smartphone repair services.

Quick action can restore your phone’s performance and avoid costly replacements. Professional repairs can extend your device’s life and save you money. These services offer cost-effective solutions and help reduce electronic waste.

Investing in phone repairs is smart and eco-friendly. It keeps your device running smoothly for longer. By choosing repairs, you enjoy your smartphone while helping the environment.

Frequently Asked Questions (Smartphone Repair)

Common signs include water damage, broken hardware like a cracked screen or malfunctioning buttons, lack of storage space, short battery life, and camera issues. These indicate the need for professional cell phone repair.
For minor issues like a cracked screen, you can attempt a DIY repair using a repair kit. But for complex problems like water damage or broken ports, it’s best to take your broken phone to a professional repair service. Expert technicians have the right tools and expertise to safely fix electronic devices.
Look for a repair shop with good reviews, certifications, and a reputation for quality work. They should use genuine replacement parts and provide a warranty on their repairs. Convenient same-day or walk-in services are also helpful.
The cost varies based on the type of repair, your device model, and the repair shop. Generally, professional cell phone repair is more affordable than replacing the entire device, especially for issues like a battery replacement or back glass repair. Reputable services offer reasonable prices.
Yes, many smartphone repair shops provide fast, same-day services. They have expert technicians who can diagnose and fix your device quickly, so you can get your phone back in good working order the same day. This is convenient if you rely on your mobile device for everyday use.

Sliding Door Installation

Spider Exterminator Near You

Can’t find what you are looking for?

How It Works

  • Answer a few questions about your home project.
  • Within seconds, get matched with top-rated local pros.
  • Compare quotes and choose the best pro for the job.

Sliding Door Installation In Your Area

Sliding Door Installation: A Simple Guide for Homeowners

Meta Description: Learn how to install sliding doors with our step-by-step guide. Enhance your home’s functionality and aesthetics with expert tips for Sliding Door Installation.

Sliding Door Installation

Ready to add a sliding door to your home? This guide will help you through the process. You’ll learn how to install a sliding door step-by-step.

This guide works for both DIY fans and new homeowners. You’ll discover how to transform your space with a beautiful sliding door.

Key Takeaways

  • Understand the essential measurements and preparation needed for a seamless sliding door installation.
  • Explore the different styles and features to choose the perfect sliding door for your home.
  • Learn the step-by-step process of securing the door frame, insulating, and adding the finishing touches.
  • Discover the benefits of hiring a professional installer and how to find the right one for your project.
  • Gain practical tips and expert advice to ensure a smooth and successful sliding door installation.

Sliding Door Installation Preparation Phase

Proper preparation is key for a smooth sliding door installation. Measure the opening’s height and width accurately. Include the track hardware at the top in your measurements.

Consider a prehung door option. It comes with the jamb attached, saving time and effort. Review manufacturer’s instructions and local building codes for compliance.

Measure the Opening

Use a reliable tape measure for the door opening. Record the height and width at top, middle, and bottom. This accounts for any frame irregularities.

Purchase Door and Hardware

Buy the sliding door and required hardware with your measurements. Choose a door that fits snugly but allows smooth operation. Remember to factor in the track hardware size.

Gather Tools and Safety Gear

  • Drill and screws
  • Shims
  • Level
  • Tape measure
  • Caulk gun
  • Safety gloves and eye protection

Collect necessary tools like drill, screws, shims, level, and caulk gun. Don’t forget safety gear such as gloves and eye protection.

Thorough preparation sets the stage for a successful installation. It ensures your sliding door meets your needs and local building requirements.

Choose the Right Size Sliding Door

Picking the perfect sliding door size is key for a smooth install. Standard doors are 80 inches tall. Widths range from 60 to 72 inches or more.

Two-panel doors come in 60, 72, and 96-inch widths. For bigger openings, three-panel doors offer 108 and 144-inch widths.

  • Remove the Old Door Frame: Take off the casing from the existing frame to find the studs. This gives you a clear view of the opening. You’ll be able to figure out the best size for your new sliding door.
  • Measure the Rough Opening: After removing the old frame, measure the opening’s width and height. Use the smallest measurements to find the best-fitting sliding door. Larger doors cost more due to materials and upgrades. Keep your budget in mind when choosing.
  • Consider Door Style and Features: Pick a style that matches your home’s design. Safety glass is best for sliding doors. It doesn’t break into sharp pieces. Look for energy-efficient options like low-E glass and double-pane glass. Doors with internal blinds offer extra security and privacy.

Prepare the Opening

Before installing your sliding door, prepare the opening properly. Inspect the rough opening for size, condition, and structural soundness. Check if the sill is level and the opening is plumb and square.

Fix any issues before moving on to the next steps. This ensures a smooth installation process.

Create a Drip Edge and Sill Pan

Create a drip edge and sill pan to protect the door frame. Cut flashing to fit the rough opening.

Apply silicone caulk between the siding and house wrap. This drip edge will guide water away from the frame.

Build a sill pan using roll flashing. It will collect and redirect any water entering the opening.

Preparing the opening ensures a secure, watertight installation for your sliding door. This helps prevent structural decay and other future problems.

Caulk the Opening

Caulk the opening

Properly caulking the opening is crucial before installing your new sliding door. This ensures a secure, weather-tight seal, preventing air leaks and moisture intrusion. Apply high-quality silicone caulk where the siding and house wrap meet.

Pay extra attention to the bottom edge, as it needs a tight seal. Press the sill pan firmly into the caulk to create a sturdy foundation.

The sill pan helps direct water away from the opening, protecting your home. Apply another caulk bead along the bottom edge for a secure barrier.

Use high-quality exterior silicone caulk for flexibility and durability. Take your time to apply it evenly and smoothly for the best results.

Proper caulking creates a tight seal, boosting energy efficiency and protecting your home. This crucial step deserves your full attention during installation.

Position the New Door

Get ready to place your new sliding door. Tilt it from the outside, bottom first. This makes installation easier.

Insert the door into the opening. Make sure you have all your tools and materials handy.

Use Shims for a Secure Fit

Add shims around the door frame edges and top. Place them every 12 inches for proper alignment. Adjust as needed for a perfect fit.

Attach Hinges

Now it’s time to secure the hinges. Use a drill to fasten them to the door and frame. Check that they’re aligned for smooth operation.

You’re making great progress on your sliding door installation. Take your time to ensure everything is aligned correctly. This will help your door work well and look great.

Secure the Door

After positioning the sliding door and frame, it’s time to secure it firmly. This step ensures stability and security for your home.

Nail the Brick Mould

Check if the brick mould is flat against the frame outside. Use 10d finishing nails every 12 inches to secure it.

This creates a seamless connection between the door and surrounding structure. It helps make the door more stable and secure.

Secure the Frame with Nails

Inside the house, use 10d finishing nails to secure the frame. Drive nails outward through shims into the framing.

Remember to countersink the nail heads. This creates a flush surface for a cleaner look.

Trim Excess Shims

Use a utility knife to cut any excess shims. Trim them so they don’t stick out beyond the door frame.

A flush finish is key for smooth door operation. It also improves the overall look of your sliding door.

These steps will give you a secure sliding door. It will protect your home and work smoothly for years to come.

Secure the Threshold

Securing the threshold is crucial for sliding door installation. Attach it firmly to the door, hiding screws for a clean look. Use foam insulation to seal any gaps between the door frame and wall.

After the foam dries, remove excess with a putty knife. This step ensures a tight seal and improves energy efficiency.

Insulate and Caulk

Cover the foam insulation with trim for a seamless look. Apply silicone caulk to the joint between trim and interior wall.

This step helps insulate the door and prevent air leaks. It also improves your home’s energy efficiency.

Add Trim and Spackle

Fill nail holes in the door frame with spackle. This creates a finished look and enhances your home’s overall appearance.

Following these steps ensures a durable and visually appealing sliding door installation. Your new door will be both functional and attractive.

The DIY Approach

Sliding door installation

Installing a sliding door yourself can be done step-by-step. Start by taking out the old door frame and sliding door. This gives you a clean space to work with.

Remove Old Door Frame

Carefully pry away the old door frame. Be sure not to damage the surrounding wall. Once it’s out, you can get ready for the new sliding door.

Install Bottom Track

First, level the floor where the door will go. Make the surface smooth by scraping or sanding. Use shims if needed to fill gaps or level uneven spots.

Next, place the bottom track and mark where to secure it. Attach the track with screws for a strong base.

Hang and Adjust Door

Now it’s time to hang the sliding door. Lift the door into the track and place it in the opening.

Install side jambs around the door. Secure them to wall studs with shims to keep the door straight. Adjust the roller height for smooth sliding.

These steps will help you install a new sliding door. You’ll create a great addition to your home.

Finishing Touches

Now that your new sliding door is installed, let’s focus on the final details. These steps ensure your door looks great and works well for years.

  • Install Locks and Hardware: Start by adding handles, locks, and latches. Make sure the lock lines up with the strike plate. This will give your door a professional look.
  • Caulk and Weatherstrip: Caulk the exterior jamb and where it meets the wall. This seals gaps and stops air and water from getting in. Add weatherstripping for better energy efficiency and comfort.
  • Paint or Stain: Paint or stain the wooden door and jamb to match your home. Use the right primer and finishing coats for a lasting look. Clean the glass before painting or staining.

Check that the door slides smoothly. Adjust rollers or lubricate parts as needed. Your new sliding door is now ready to use and looks great.

Benefits of Professional Sliding Door Installation

Hiring a professional contractor for sliding door installation is highly recommended. Professional installers have the expertise to position, seal, and secure doors properly. They can guide you on advanced sliding door technologies and specialized installation techniques.

A professional sliding door installation offers several benefits to homeowners:

  • Improved Thermal Efficiency: Experts ensure proper installation and sealing. This enhances energy-efficiency and lowers energy bills.
  • Increased Accessibility: Professionals guarantee smooth operation and ease of use for all family members.
  • Structural Stability: Reliable installation techniques by professionals boost stability and longevity.

Investing in professional sliding door installation brings peace of mind. You’ll get a quality, durable, and energy-efficient patio door that meets your needs.

Tips for Hiring the Right Professionals

Hiring skilled professionals is crucial for sliding door installation. Find a reputable company with a proven track record. Check their licenses, insurance, and warranties before hiring.

Discuss your design preferences during the consultation. A reliable partner will guide you through product selection and installation. This ensures a smooth and successful project.

Here are some tips to help you hire the right professionals:

  1. Check for licensing and insurance. Reputable companies will have the necessary licenses and insurance to protect you and your home.
  2. Ask about warranties and guarantees. A good company will stand behind their work and offer warranties on the products and installation.
  3. Seek out experienced and reliable professionals. Look for a team with a history of delivering quality results and excellent customer service.
  4. Schedule a consultation to discuss your custom needs and design preferences. A professional installer should be able to provide personalized recommendations.
  5. Compare quotes and estimates from multiple providers to ensure you’re getting the best value for your investment.

Follow these tips to find the best professionals for your project. You’ll enjoy a seamless sliding door installation experience.

FindPros: Your Trusted Partner for Sliding Door Installation

Searching for the right professionals to handle your sliding door installation can be a daunting task. That’s where FindPros steps in to simplify the process. By answering a few questions about your home project, you’ll be quickly matched with top-rated local pros who can provide the best pricing through our competitive bidding system.

Compare quotes, read reviews, and choose the pro that you feel most comfortable with to ensure your sliding door is installed securely and efficiently. Whether you’re looking to replace an existing door or explore other options like wood, windows, or screen grilles, FindPros has you covered. Don’t leave the rest of your home project up to chance – let us connect you with the perfect professional to get the job done right.

Conclusion

Sliding door installation can greatly improve your home’s functionality and looks. This guide offers a step-by-step approach to the process. It covers key aspects from preparation to finishing touches.

Following expert tips helps homeowners make smart choices about their sliding door project. These doors offer many benefits. They improve energy efficiency, reduce noise, and increase natural light.

Careful planning is crucial for successful sliding door installation. Pay attention to details, whether you choose DIY or hire pros. This approach ensures your project reaches its full potential.

By using this guide, you can create a more inviting and efficient living space. Your new sliding door will transform your home’s look and feel.

Frequently Asked Questions (Sliding Door Installation)

Sliding patio doors provide improved energy efficiency, increased natural light, and better access to outdoor spaces. They can enhance the overall look and functionality of a room.
Sliding doors are available in a variety of materials, including wood, aluminum, and vinyl. Each option has its own advantages in terms of durability, energy efficiency, and maintenance requirements.
Proper preparation is crucial for a successful installation. This includes measuring the opening accurately, creating a drip edge and sill pan, and properly caulking the area to ensure a tight, weather-resistant seal.
While a DIY approach can be a cost-effective option, hiring a professional installer ensures the job is done correctly, with proper sealing and alignment for optimal performance and longevity. Professionals also have the expertise to guide you on the best sliding patio door options for your home.
Regular maintenance, such as cleaning the tracks, lubricating the moving parts, and inspecting the weatherstripping, is important to keep your sliding doors functioning smoothly. Additionally, addressing any issues like sticking or difficulty opening/closing promptly can help extend the life of your investment.

Slate Roofers

Spider Exterminator Near You

Can’t find what you are looking for?

How It Works

  • Answer a few questions about your home project.
  • Within seconds, get matched with top-rated local pros.
  • Compare quotes and choose the best pro for the job.

Slate Roofers In Your Area

Slate Roofers: A Guide to Hiring the Right Professional

Meta Description: Discover the expertise of slate roofers and learn how to choose the right professional for your roofing project. Get insights on quality, durability, and craftsmanship.

Slate Roofers

Slate is a top choice for roofing due to its beauty and durability. It resists weather and lasts for generations. A slate roof can be a great investment for your home.

But what makes a slate roof truly special? How can you make sure your investment pays off?

The key is hiring expert slate roofers. They know how to work with this unique stone. Their skills can unlock your roof’s full potential.

The right roofer will ensure your slate roof lasts. They’ll also make sure it looks great on your home.

Key Takeaways

  • Slate roofs are renowned for their durability, fire resistance, and energy efficiency, making them a popular choice among homeowners.
  • Proper installation by a professional slate roofer is crucial for the longevity of a slate roof.
  • Slate roofing requires specialized knowledge and skills that most homeowners do not possess, making it essential to hire an experienced and certified slate roofer.
  • Regular inspections and maintenance by a slate roofer can help preserve the longevity and aesthetic appeal of a slate roof.
  • Hiring a competent roofer can save time and money by ensuring a long-lasting roof through regular inspection and maintenance.

The Durability and Aesthetics of Slate Roofs

Slate roofs are known for their exceptional durability and striking visual appeal. This natural material can last for centuries, often outliving the buildings they protect. Slate offers impressive longevity, fire-resistance, and excellent insulation capabilities.

A slate roof can enhance a home’s aesthetic, adding timeless elegance. Its natural color and texture variations create a unique, visually stunning appearance. This makes slate a top choice for homeowners who value both function and beauty.

Slate roofs offer practical benefits beyond their looks. They’re highly water-resistant, providing superior protection against the elements. Their fire-resistant qualities make them a safe, eco-friendly option for various buildings.

The insulation properties of slate help regulate indoor temperatures. This can lead to reduced energy costs, making slate an attractive choice. Homeowners can improve energy efficiency while maintaining a classic, appealing roof.

Slate roofs’ durability, aesthetics, and practical benefits make them highly sought-after. They provide a long-lasting, visually striking option for homeowners. Slate can enhance a property’s character and value for generations to come.

The Importance of Quality Installation for Longevity

slate roof installation

Slate roofs need expert installation for lasting durability. Even with tough slate tiles, poor installation can shorten a roof’s life. Hiring certified pros is key for a long-lasting slate roof.

Good installation boosts both looks and performance. Poorly laid tiles can cause leaks and damage. Expert roofers ensure your slate roof investment pays off for years.

Slate roofs can last up to 150 years with proper care. This impressive lifespan depends on quality installation. Certified experts help you enjoy the full benefits of a slate roof.

When choosing a contractor, check their experience and reviews. A reputable team ensures your roof’s long-term performance. They’ll also enhance its visual appeal for years to come.

Finding a Concerned and Experienced Expert

Hiring a knowledgeable professional is crucial for slate roof installation. Homeowners must choose experts who specialize in slate roofs. The techniques for slate differ from those for other roof types.

Distinguishing Between Tile and Fresh Roof Installations

A well-installed slate roof can last about 100 years. This makes it a great investment. Look for certified and experienced slate roof experts who know the latest methods.

  1. Choose roofers with a proven record of successful slate roof installations.
  2. Make sure the roofing contractor and staff have proper training and trade memberships.
  3. Beware of contractors who only accept cash payment. This might signal an unprofessional business.

Expert roofing companies should offer thorough roof inspections. They assess slate roofs and provide custom solutions. Quality replacement involves inspection, old material removal, and new roof installation.

Top roofing companies provide quick emergency services. They assess and repair slate roofing issues 24/7. Professional roofers give advice on making slate roofs last longer.

Choosing a concerned and experienced slate roof expert ensures a lasting investment. Your roof will be durable and beautiful for years to come.

Selecting the Right Type of Slate Tile

Slate roofing offers homeowners various options, each with unique benefits. Welsh slate tiles are known for durability and timeless beauty. Spanish slate provides a cost-effective choice, while reclaimed slate adds historic charm.

Professional installation is crucial for maximizing a slate roof’s longevity and performance. Homeowners should seek reputable contractors like JP Carroll Roofing in Connecticut. They ensure proper installation with care and attention to detail.

  • Welsh slate tiles are prized for their exceptional longevity, often lasting over 100 years with proper maintenance.
  • Spanish slate tiles offer a cost-effective option, while still providing the classic charm and durability of slate.
  • Reclaimed slate tiles can add a unique, historic flair to any home, while also promoting sustainability.
  • Proper installation by experienced professionals is crucial to ensure the long-term performance and aesthetics of a slate roof.

Choosing the right slate tile and expert installation ensures long-lasting beauty. Homeowners can enjoy the unmatched durability and cost-effectiveness of slate roofing. The result is a stunning and enduring roof.

Slate Roofers: The Professionals You Need

Slate roofs offer timeless beauty and durability for all types of buildings. However, installing them can be tricky and complex. That’s why you need experienced slate roofers from a trusted slate roofing company.

Installing a slate roof requires special skills and modern tools. Experts know how to prepare the roof deck and install underlayment properly. They also excel at flashing and laying slate tiles for a weather-resistant roof.

It’s smart to get quotes from multiple qualified slate roofing contractors. This helps ensure fair and clear pricing for your project.

Factors to Consider When Hiring a Roofing Contractor

slate roofing contractor

Selecting a reliable roofing contractor for your slate roof requires careful consideration. Several key factors ensure a successful and long-lasting roofing project. These include experience, licensing, and insurance coverage.

Choose a roofing contractor with extensive experience in slate roof installations and repairs. Look for a team with a proven track record of high-quality work. Their expertise in handling slate roofing challenges is crucial for your roof’s durability and aesthetics.

  • Verify the roofing contractor’s licensing and insurance coverage to protect your investment.
  • Check their customer reviews and seek out referrals from past clients to gauge their level of professionalism and communication.
  • Assess the contractor’s knowledge of slate roofing materials and their ability to assist with material selection that complements your home’s architectural style.

Consider the contractor’s local presence and understanding of specific building codes in your area. This local expertise ensures a smooth installation process and adherence to all requirements.

Pay attention to the warranties offered by the roofing contractor. A reputable slate roofer should provide comprehensive coverage on their workmanship and materials used. This protects your investment for years to come.

By evaluating these factors, you can hire a contractor who will deliver an excellent slate roof. They’ll meet your aesthetic preferences and create a roof that lasts.

Conducting a Thorough Contractor Search

Finding the right roofing contractor is key for a long-lasting slate roof. Ask friends and neighbors for referrals to local roofing pros. Check online reviews for insights into a contractor’s reputation and work quality.

Verify the contractor’s licenses and insurance coverage. Look for certifications in slate roof installations and repairs. Meet potential contractors in person to assess their skills and communication.

Evaluating Potential Contractors

Notice how contractors respond to your questions and concerns. Good contractors are open about their work process. They provide detailed written contracts and don’t ask for big upfront payments.

Be cautious of contractors offering the lowest bid based only on price. This could mean poor workmanship or low-quality materials.

  • Check the contractor’s license and insurance coverage
  • Arrange in-person interviews to assess their professionalism and expertise
  • Obtain a comprehensive written contract that covers all project details
  • Avoid contractors who demand large upfront payments or offer the lowest price solely based on cost

A thorough search helps you find a skilled slate roofing pro. This ensures your home’s roof will be beautiful and long-lasting.

Weighing Quality Over Cost

Cost is important when hiring a roofing contractor. But don’t sacrifice quality for the lowest price. A reputable contractor may charge more, but offers long-term value and peace of mind.

Slate roof costs range from $14,000 to $60,000. The average homeowner pays about $37,000 for 2,000 square feet of materials. Quality should be your top priority.

A skilled roofing contractor uses top-notch materials and follows best practices. This ensures your slate roof lasts for decades, giving excellent value and peace of mind.

Consider the contractor’s reputation, warranty, and workmanship quality. A reputable contractor with a strong reputation and comprehensive warranty is worth the investment.

Research potential roofing contractors thoroughly. Look into their reputation, warranties, and work quality. The long-term benefits of an experienced contractor can outweigh the initial cost.

Finding the Right Slate Roofing Pros with FindPros

Are you looking to install a durable and visually striking slate roof for your home? FindPros can help you find the best local roofing professionals for the job. Simply answer a few questions about your project, and we’ll match you with top-rated slate roofers in your area. These experienced charter members of the industry can provide custom solutions for your soft slate, hard slate, or other roofing material needs. Get competitive quotes from multiple pros, compare their expertise and pricing per square foot, and choose the perfect match for your renovations.

FindPros takes the guesswork out of finding reliable roofers who can handle the extra weight and installation complexity of slate shingles. Our customers enjoy the convenience of quickly connecting with qualified rafters, nailing experts, and professionals who can prevent leaking and ensure a complete, long-lasting roof. Take the first step towards your dream slate roof by letting FindPros begin the process today.

Conclusion

Investing in a slate roof needs careful thought, but the benefits can be significant. Slate roofs offer exceptional durability, aesthetic appeal, and energy efficiency. They’re a top choice for homeowners seeking long-lasting, striking roofing solutions.

The success of a slate roof project depends on expert installation and quality. Hiring experienced slate roofers and focusing on craftsmanship ensures long-lasting protection. It also enhances your home’s beauty and potentially increases property value.

A well-maintained slate roof can last over a century with skilled professional guidance. Consider the costs, benefits, and importance of quality installation when choosing a slate roof. Working with reputable slate roofers helps you make an informed decision.

Prioritizing long-term performance and aesthetics will serve homeowners well for generations to come. A slate roof is an investment that can provide value and beauty for decades.

Frequently Asked Questions (Slate Roofers)

Natural slate roofing offers exceptional durability, fire resistance, and energy efficiency compared to synthetic slate, asphalt shingles, or a flat roof. It can last over a century with proper maintenance, providing long-term value and a classic look for a house.
Installing natural slate roofing requires specialized skills and techniques. Slate roofs need a sturdy roof deck, proper underlayment, and careful tile placement to ensure a weather-resistant, long-lasting structure. Hiring experienced slate roofers is crucial for a successful construction and renovation projects.
There are several options for natural slate roofing, each with unique characteristics. Welsh slate from North Wales is renowned for its hard slate and durability, while Spanish slate offers a more cost-effective choice. Reclaimed slate can add historic charm to a house. The selection should consider the customer’s budget and the property’s architectural style.
Proper installation is critical for the longevity and performance of a natural slate roof. Experienced slate roofers have the necessary skills, knowledge, and industry membership to ensure a weather-tight, aesthetically pleasing roof. They can also provide guidance on material selection and maintenance to maximize the roof’s lifespan.
When selecting a slate roofing contractor, homeowners should consider factors such as experience, licensing, insurance coverage, and customer reviews. It’s also important to obtain detailed written contracts, avoid contractors with the lowest bids based solely on cost, and prioritize quality over price to ensure a successful slate roofing project that provides long-term service and value.

Skylight Installers

Spider Exterminator Near You

Can’t find what you are looking for?

How It Works

  • Answer a few questions about your home project.
  • Within seconds, get matched with top-rated local pros.
  • Compare quotes and choose the best pro for the job.

Skylight Installers In Your Area

Skylight Installers: Find the Best for Your Home

Meta Description: Discover top-rated skylight installers for your home. Enhance natural light, boost energy efficiency, and transform your space with expert installation services.

Skylight Installers

Skylights can add more natural light to your home. Picking the right installer is crucial for your project’s success. This guide will help you find the best professional for your needs.

We’ll cover key factors to consider when choosing a skylight installer. This ensures you get the perfect fit for your home’s unique requirements.

Key Takeaways

  • An extensive network of skylight installation companies is available, trained to install various products.
  • Homeowners can use an installer search tool to find local professionals for their specific project needs.
  • This network stands behind their products with industry-leading quality and craftsmanship.
  • Certified installers are highly skilled and ensure long-term performance and customer satisfaction.
  • Homeowners can explore installer ratings and reviews to make informed decisions about the best fit for their skylight installation.

What Are Skylight Installers?

Skylight installers are experts in fitting skylights into homes. They bring natural light and energy efficiency to houses. These pros can measure, fit, and install various skylight types.

Certified Installers

Certified installers have special training and follow top industry standards. They guide homeowners on product choice and placement. Their skills ensure leak-free, seamless skylight installations.

Skylight Specialists

Hiring professional is key for proper . They ensure top-notch throughout the project. These experts can transform homes with natural light.

Skylight pros understand design, placement, and integration. They help improve energy efficiency in homes. Their skills make skylight addition smooth and effective.

Importance of Hiring Professional Skylight Installers

professional skylight installers

Hiring certified skylight installers is vital for top-notch performance and customer satisfaction. These experts have special training and provide excellent installations that meet high-quality standards.

Certified installers save time and reduce hassles for homeowners. They know how to install skylights for long-term, leak-free performance, bringing peace of mind to customers.

Professional installation ensures proper placement and leak prevention. It also optimizes energy efficiency, which is hard to achieve with DIY efforts.

All instances of professional skylight installations have a lower rate of water leaks compared to DIY installations.

Homes with professionally installed skylights enjoy up to 40% more energy efficiency due to proper sealing.

Professional installation offers a 70% increase in the lifespan of skylights due to proper techniques.

DIY skylight installation can lead to costly mistakes, including leaks, structural damage, or voided warranties. Professional services offer warranties on both product and installation.

They also cover accidental home damage during the process, providing homeowners additional peace of mind.

Investing in a certified skylight installer is a smart choice. It ensures long-term performance, energy efficiency, and satisfaction with your skylight investment.

Types of Skylight Installers

Homeowners can choose from various skilled professionals for skylight installation. These installers have different expertise, certifications, and specializations. Let’s explore the types of skylight installers and their qualifications.

Specialized Skylight Installers

Some installers focus on specific skylight and Sun Tunnel installations. They offer full-service projects with high expertise and have extensive training and credentials for their respective products.

Independent Skylight Specialists

These specialists concentrate on particular skylight products and have the highest certification as independent installers. Their skills ensure proper installation of skylights.

Certified Installers

Certified installers work with various roofing products, including skylights. They have completed a certification program that ensures they possess the necessary knowledge for skylight projects.

Choosing an installer with the right skylight installation expertise and credentials is essential. Look for appropriate skylight installation services to meet your needs. A qualified professional will ensure quality installation of your skylight.

Benefits of Hiring Professional Skylight Installers

Professional certified installers bring many perks to skylight installation. They ensure top-notch work for long-term, leak-free performance. Homeowners can rest easy knowing their skylights are in expert hands.

Proper Installation

Expert skylight installation is key to avoiding leaks and structural damage. Pros know the ins and outs of flashing and sealing to keep water out.

They also ensure proper structural support for skylights. Their expertise helps homeowners pick the right size and number of skylights for optimal light and efficiency.

Energy Efficiency

Poorly installed skylights can hike up energy bills and reduce efficiency. Certified pros guide homeowners to energy-smart skylight choices.

They install skylights correctly, leading to long-term savings and better comfort. This expertise is crucial for maximizing the benefits of skylights.

Skylights do more than save energy. They fill homes with natural light and fresh air, boosting ambiance and market value.

Working with pros helps homeowners enjoy these perks without future costly issues. It’s a smart investment for both comfort and home value.

Choosing the Right Skylight Installer

Finding the right skylight installer is key for homeowners. They can explore customer ratings and contact certified experts. These specialists help determine the best skylight size, quantity, and accessories.

Research and Reviews

Homeowners can check customer ratings and reviews of installation companies in Chicago. Visiting the installer’s website offers insights into their expertise and services.

Consider licensing, insurance coverage, and warranties when picking a skylight installer. A professional contractor should have a roofing license at minimum. Some states may require additional licenses.

Check for proper insurance and warranty coverage to protect your investment. This gives peace of mind during your home improvement project.

Research thoroughly, read customer reviews, and talk to certified installers. This helps homeowners make smart choices for their skylight installation needs.

Installation Process and Considerations

skylight installation process

Skylight installation needs careful planning and execution. Professionals assess the home’s ability to support the skylight. They evaluate the roof’s structural soundness before proceeding.

Installers measure the area and decide on the skylight’s size and placement. This step impacts the space’s look, ventilation, and energy efficiency.

  1. If necessary, the installers will add extra structural support to the roof to accommodate the skylight’s weight and size.
  2. They will then properly install the skylight, taking into account factors such as the type of skylight (glass or plastic, ventilating or fixed), any additional features like insulated glazing, louvers, shades, or UV blocking properties.
  3. Proper sealing and weatherproofing are crucial to prevent leaks and ensure the skylight’s long-term performance.

The installation process requires expert skills to maintain roof integrity. Hiring a professional installer is recommended. This ensures the job is done right the first time.

A well-installed skylight offers natural light and ventilation benefits. Working with skilled professionals helps homeowners enjoy these advantages.

Maintenance and Care for Skylights

Proper maintenance ensures your skylights last longer and work better. Follow the manufacturer’s advice for cleaning and upkeep. Check for leaks, clean the glass, and fix issues quickly.

Wood-finished skylights may need treatment every four years. Use soft water for cleaning. Add a bit of detergent in hard-water areas. Avoid abrasive cleaners that can damage the glass.

  • Exterior glass cleaning is best left to professional window cleaning companies for safe access to the roof.
  • Regularly clearing leaves and debris around the skylights helps prevent water flow blockage and potential leaks.
  • Proper ventilation and maintaining consistent room temperature can help control condensation on skylights.

Clean skylights once or twice yearly to remove dirt and dust. Get a professional inspection annually. This can spot hidden issues and save money on repairs.

Follow the maker’s advice and use professional services. This will keep your skylights giving you natural light for years to come.

Let FindPros Find the Ideal Skylight Installers for You

Searching for the right skylight installers can be a daunting task. But with FindPros, you can easily connect with licensed professionals in your local area who specialize in skylights, vented skylights, and traditional skylight installations. Simply answer a few questions about your skylight needs, and we’ll match you with top-rated local pros who can provide free, competitive quotes. Our network of certified installers and experienced roofing contractors are extremely knowledgeable, ensuring a complete, cost-effective, and satisfactory skylight installation process – from deck-mounted to curb-mounted skylights.

Homeowners can compare labor costs, skylight installation costs, and customer reviews to find the perfect fit for their home improvement project, whether it’s a single new skylight or replacing multiple existing skylights. Get started with FindPros and let our services take the hassle out of finding the best skylight installers in your area.

Conclusion

Hiring professional, certified skylight installers is crucial for a successful installation. These experts ensure long-term performance, energy efficiency, and customer satisfaction. Our network of trained installers helps homeowners find the right professionals.

Proper maintenance is vital for keeping skylights functional. Experienced installers can guide homeowners in transforming their spaces. They help maximize the benefits of natural light and energy-efficient skylights.

Installing skylights is a smart investment for homeowners. Working with certified skylight installers unlocks the full potential of this upgrade. Quality installation and maintenance lead to long-lasting benefits.

Skylights provide abundant natural light and improved air circulation. They also increase property value. With expert help, homeowners can enjoy these advantages for years to come.

Frequently Asked Questions (Skylight Installers)

Homeowners should look for certified, licensed professionals with experience in skylight installation. They should check reviews, insurance coverage, and warranties to ensure a quality installation. The installer’s expertise in selecting the right skylight size, type, and placement is also crucial.
The national average cost for skylight installation can vary depending on factors like the skylight size, type (fixed or vented), and the complexity of the project. Most homeowners can expect to pay between $800 to $2,500 for a single skylight installation, including the cost of the skylight and labor. Larger projects with multiple skylights will be more expensive.
Professional skylight installers have specialized training and expertise to ensure proper placement, flashing, and sealing of the skylight. This helps prevent costly issues like leaks or structural damage down the line. Certified installers also guide homeowners on energy-efficient skylight choices to maximize long-term savings.
Choosing a reputable company with experienced, licensed professionals is key. Homeowners should discuss their specific needs, such as the desired skylight type, size, and placement, to ensure the final installation matches their goals. A complete walkthrough of the entire process, from start to finish, helps homeowners feel confident and satisfied with the outcome.
Proper maintenance is crucial for the long-term performance of new skylights. Homeowners should follow the manufacturer’s recommendations for cleaning the skylight glass, checking for leaks, and addressing any issues promptly. Annual inspections by a professional can also help identify and resolve any problems before they become more costly.

Sink Repair

Spider Exterminator Near You

Can’t find what you are looking for?

How It Works

  • Answer a few questions about your home project.
  • Within seconds, get matched with top-rated local pros.
  • Compare quotes and choose the best pro for the job.

Sink Repair In Your Area

Sink Repair: What to Expect from a Professional Plumber

Meta Description: Discover expert sink repair services from professional plumbers. Learn what to expect, common issues addressed, and how to ensure your sink functions flawlessly again.

Sink Repair

Professional plumbers can fix many sink issues. They handle leaks, clogs, and faucet problems with skill. Their expertise sets them apart for sink repairs.

Plumbers diagnose and solve various sink concerns. They have the know-how to tackle simple fixes and complex replacements. Hiring a pro ensures quality work.

Key Takeaways

  • Professional plumbers have extensive experience in handling various sink-related issues, from simple fixes to complete replacements.
  • Plumbers can efficiently detect and repair leaks, unclog drains, and address low water pressure problems in sinks.
  • Specialized tools and techniques are used by plumbers to ensure proper alignment, connections, and long-lasting performance of sinks and fixtures.
  • Regular preventive maintenance by a professional can help keep sinks in optimal condition and prevent future problems.
  • Hiring a professional plumber can provide additional benefits, such as warranties, priority scheduling, and expert advice on sink selection and installation.

Understanding Common Sink Problems

Sink repair

Sink issues can come from under-sink leaks, clogged drains, and faucet problems. These can cause water pooling and slow draining. Knowing these issues helps homeowners fix their sinks better.

Leaks and Clogs

Under-sink leaks can start in supply hoses, drainpipes, or faucets. These leaks can cause big water damage if not fixed quickly.

Clogs often happen because of grease, hair, and debris buildup. Data shows clogged drains are a top kitchen sink problem.

Don’t put fat, grease, oil, bones, coffee grounds, or eggshells down the drain. This helps stop future clogs.

Faucet Issues

Faucet problems can come from worn-out O-rings or other parts inside. Leaky faucets waste water and can be annoying.

Low water pressure in sink taps is also common. It might be due to a clogged disc cartridge or mineral buildup.

Signs Your Sink Needs Repair

Your sink might need repair if it’s not working properly. Watch for water pooling around the sink or slow draining. These can be caused by clogs or leaks in the plumbing system.

If left unfixed, these problems can damage your sink, countertops, and cabinets. Water pooling around the sink is a common sign of trouble.

Water Pooling

Standing water around the sink means something’s wrong. It could be a clogged drain, bad seal, or plumbing leak. Ignoring this can lead to water damage and mold growth.

It might even cause structural problems in your kitchen. Act quickly to prevent these issues.

Slow Draining

A slow-draining sink often points to a blockage in the pipes. This problem can get worse over time. It may lead to complete clogs or even overflows.

Call a professional plumber to fix slow draining. They can prevent further damage to your plumbing system.

Don’t ignore these warning signs. Fix them quickly to avoid costly repairs later. Addressing these issues helps your sink last longer.

It also protects your kitchen from water damage and plumbing problems. Keep your sink in top shape for a worry-free kitchen.

Repair vs. Replacement

Sink Repair vs. Replace

Choosing between sink repair and replacement affects your plumbing system’s functionality and longevity. Most sink problems are fixable. However, sometimes replacement is the better option.

When to Repair

Minor issues like leaks or clogs are often repairable by skilled plumbers. A professional can identify the problem’s source and suggest the best solution.

For small cracks, plumbers may use special sealants or epoxy. This can extend your current sink’s life.

When to Replace

Replacing the sink might be better for deeper cracks, significant corrosion, or permanent staining. These issues can cause further damage or look unappealing.

A sink replacement can update your space’s look and function. This is especially true if you’re planning a larger remodel.

Consult a professional plumber to decide between repair and replacement. They’ll assess the damage and consider the sink’s age and condition.

A plumber can guide you to the best solution. They’ll help restore your plumbing and meet your design goals.

The Benefits of Hiring a Professional Plumber

A professional plumber offers many perks for sink repair. These trained and licensed experts provide lasting solutions to various sink problems. They know plumbing systems, codes, and rules inside out.

Plumbers have the right tools to finish jobs quickly. They often offer satisfaction guarantees and focus on excellent customer service. This gives homeowners peace of mind about their plumbing work.

Hiring a pro can save time and money. DIY projects may lead to bigger, costlier issues. Plumbers can handle complex repairs or suggest replacements when needed.

Water damage affects 14,000 Americans daily. Quick, reliable plumbing is crucial. Pro plumbers make homes safer for insurance firms. They also guide remodeling projects involving water fixtures.

Pro plumbers bring expertise, guarantees, punctuality, and great service. They’re the smart choice for sink repairs and other plumbing needs.

Discover FindPros – The Sink Repair Solution

Having trouble finding the right plumber for your sink repair? Look no further than FindPros. Our service makes it easy to get competitive quotes from top-rated local professionals, ensuring you get the best pricing and the perfect fit for your project. Simply answer a few quick questions about your sink issues, and we’ll match you with reliable pros who can handle everything from leaks and clogs to drying time, chip repairs, and supplying the right materials. No more guesswork – let FindPros take the hassle out of your sink repair and help you find the expert that’s just right for the job.

Conclusion

Sink repair is a common household plumbing issue. Problems can range from simple fixes to complex ones. Understanding causes and warning signs helps homeowners address sink issues effectively.

Weighing repair versus replacement options is crucial. Hiring a professional plumber often ensures lasting solutions. Regular maintenance and small repairs can prolong the lifespan of a sink.

Prompt action is key for leaky faucets, clogged drains, or cracked basins. Quick fixes maintain your bathroom or kitchen’s functionality and look. Expert help ensures sinks stay in top shape.

Sink repair is vital for home plumbing maintenance. Stay alert and take necessary steps. This approach keeps sinks pristine and prevents bigger plumbing headaches later on.

Frequently Asked Questions (Spider Exterminator)

Common signs of a spider pest control problem in a house include the presence of spider webs, egg sacs, increased insect activity, and finding spiders in dark, cluttered areas.
Hiring a professional spider pest control service is important because they have access to specialized products and methods that are more effective than DIY solutions. They are also trained to safely and effectively eliminate spiders, including dangerous species like the black widow, which can pose serious health risks to humans and pets.
The average cost for professional spider pest control services ranges from 0 to 0 for a one-time visit and treatment. However, the exact cost can vary depending on factors like the size of the home, the severity of the infestation, and the specific services required.
To prevent future spider infestations, homeowners can take steps like sealing cracks and gaps, eliminating clutter and undisturbed areas, and maintaining a well-lit and clean home. Removing sources that attract other bugs, which spiders feed on, can also help deter spiders from taking up residence in the house.

Sink Installation

Spider Exterminator Near You

Can’t find what you are looking for?

How It Works

  • Answer a few questions about your home project.
  • Within seconds, get matched with top-rated local pros.
  • Compare quotes and choose the best pro for the job.

Sink Installation In Your Area

Sink Installation: A Guide for Homeowners

Meta Description: Discover the essentials of sink installation with our comprehensive guide. Learn step-by-step techniques, tool requirements, and expert tips for a successful DIY project.

Sink Installation

Ready to upgrade your kitchen sink? This guide will help you through the process. We’ll cover everything from tools to techniques for a successful installation.

Don’t worry if you’re new to this. Our step-by-step instructions will make the task manageable. We’ll help you transform your kitchen with a new sink.

Key Takeaways

  • Sink installation is a moderately skilled DIY project, typically taking 4-6 hours to complete.
  • Costs can range from $500 to $1,500, depending on the size and type of sink.
  • Accurate measurement and preparation are critical for a seamless installation process.
  • Proper plumbing connections and leak testing are essential for a fully functional new sink.
  • Hiring a professional plumber is recommended for significant plumbing modifications or if you lack prior experience.

This guide suits both experienced DIYers and homeowners new to upgrades. You’ll find expert tips for a successful sink installation project. Let’s explore how to transform your kitchen with a high-quality sink.

Benefits of Installing a New Kitchen Sink

A new kitchen sink can boost your space’s look and function. It can transform your kitchen’s appearance and make daily tasks easier.

Enhances Kitchen Aesthetics

A new sink can instantly elevate your kitchen’s visual appeal. Undermount sinks create a sleek, modern look by blending with countertops.

They maximize counter space and give your kitchen a clean appearance. This seamless integration can dramatically improve your kitchen’s overall aesthetics.

Improves Functionality

A new sink can greatly improve your kitchen’s functionality. It can restore water pressure and reduce clogs, making tasks more efficient.

Deeper basins and better drainage make washing dishes more convenient. These features can make your daily kitchen activities more enjoyable.

A new sink can enhance the kitchen aesthetics and improve the overall functionality. It creates a more practical and visually appealing space for your daily activities.

Types of Kitchen Sinks

Kitchen sinks come in various styles, each with unique features. The most common types are drop-in/top mount, undermount, and farmhouse sinks. Let’s explore these options to help you choose the best one.

Drop-in/Top Mount Sinks

Drop-in sinks are the most popular choice for kitchens. They fit into a pre-cut hole in the countertop, making installation easy. These sinks offer a classic look that suits many kitchen styles.

Undermount Sinks

Undermount sinks are installed below the countertop for a seamless look. They make it easier to wipe spills directly into the sink. These sinks are often chosen for their modern aesthetic.

Undermount sinks work well with solid surface countertops like granite or quartz. They create a clean, uninterrupted appearance in your kitchen.

Farmhouse Sinks

Farmhouse sinks, also called apron-front sinks, have gained popularity recently. They feature a large, exposed front wall that extends beyond the countertop. These sinks offer a classic, rustic look to your kitchen.

Farmhouse sinks are known for their generous size. They’re perfect for washing large pots and pans with ease.

Consider your kitchen’s style, countertop space, and personal needs when choosing a sink. The right sink can enhance your home and make kitchen tasks more enjoyable.

Tools and Materials Required

sink installation tools and materials

Installing a new kitchen sink needs specific tools and materials. Having the right equipment ready helps ensure a smooth installation process. Let’s look at what you’ll need for this project.

Here are the essential tools for installing a kitchen sink:

  • Tubing cutter
  • Jigsaw
  • Drill
  • Screwdriver
  • Pliers
  • Adjustable wrench
  • Tape measure
  • Hacksaw
  • Utility knife
  • Straight edge
  • Spade bit

Now, let’s go over the materials you’ll need:

  1. The new kitchen sink
  2. Sink installation kit
  3. Plumbing tape
  4. Putty knife
  5. PVC piping
  6. Circular saw or reciprocating saw (if you need to modify the countertop opening)

Getting these items ready beforehand will make your sink installation go smoothly. You’ll be well-prepared to tackle the project with confidence.

Planning and Preparation

Proper planning is key for a smooth sink installation. Measure your countertop space carefully. Choose the right sink size for your kitchen to ensure a perfect fit.

  • Measuring the Countertop Space: Start by measuring your existing countertop space. Include dimensions for the sink, surrounding cabinet, and plumbing. Accurate measurements help you avoid costly mistakes during installation.
  • Choosing the Right Sink Size: With your measurements, explore different sink options. Consider your kitchen size, household members, and personal preferences. The right sink size will contribute to a successful installation.

Good planning sets the stage for a successful sink installation. Careful measurements and the right sink size are crucial. These steps will help ensure a seamless process.

Step-by-Step Installation Guide

A new kitchen sink can transform your kitchen’s look and function. The process may seem tough, but with the right tools, you can do it. Let’s explore the key steps for step by step sink installation.

Removing the Old Sink

Start by taking out the old sink. This can be tricky, especially for under-mount sinks. Disconnect the plumbing and any fasteners holding the sink in place.

Gently lift the sink out of the opening. Be careful not to damage the countertop during this process.

Cutting the Countertop Opening

You might need to cut a new opening for the new sink. Measure the new sink’s dimensions carefully. Use a jigsaw to cut the opening, making sure it fits perfectly.

Installing the Faucet and Sink Components

Now you can start installing the faucet and sink parts. Follow the maker’s instructions to secure the sink properly. Make sure everything fits tightly before moving on.

By following these steps, you can replace your kitchen sink successfully. You’ll soon enjoy a beautiful new addition to your kitchen space.

Always put safety first during the installation process. Follow the manufacturer’s guidelines for a successful and lasting installation.

Connecting the Plumbing

Connecting the plumbing is vital for a leak-free, functional sink. This step involves hooking up water supply lines and drain pipes correctly. Let’s dive into these two key plumbing aspects.

  • Water Supply Lines: First, attach faucet tailpieces to water supply lines. These connect to shut-off valves that control water flow. Make sure all connections are tight to avoid leaks.
  • Drain Pipes: Assemble drain pipes from the sink’s tailpiece down to the P-trap and waste line. This requires measuring, cutting, and gluing PVC pipes for a proper fit. If you’re unsure, consider hiring a pro plumber.

Proper water supply lines and drain pipes connections are key to successful sink installation plumbing. Follow the right steps and take precautions for a smooth connect plumbing process.

Sealing and Securing the Sink

Sealing and securing the sink is crucial after plumbing connections are made. Silicone caulk is the top choice for plumbing fixtures. It creates a waterproof seal and is easy to apply.

Apply a continuous bead of silicone caulk around the sink’s lip. Lower the sink into the countertop cutout, ensuring proper alignment. Install mounting clips if required by the sink model.

Wipe away excess caulk and let it cure. Different sink types may need specific sealants. Stainless steel sinks can use silicone or plumber’s putty.

Porcelain sinks require non-silicone acrylic latex caulk. For kitchens and bathrooms, use mold and mildew-resistant sealant. Sealing plumbing pipes under the sink prevents potential leaks.

Inspect seals under the sink yearly to maintain installation integrity. If unsure about sealing, seek professional help. Proper sealing ensures a leak-free installation.

Regular maintenance of sink plumbing prevents major issues. This ensures the longevity and safety of your plumbing system. A well-sealed sink enhances your kitchen’s appearance and functionality.

Testing and Finishing

After sealing and securing the sink, it’s time to test it. Turn on the water supply valves slowly. Check all connections for leaks.

If you spot any leaks, tighten the connections carefully. Fill the sink with water to check for drain leaks. Ensure proper drainage too.

Checking for Leaks

  • Turn on the water supply valves slowly
  • Inspect all connections along the supply and drain lines for leaks
  • Tighten any connections that are leaking to resolve the issue
  • Fill the sink with water and check for leaks around the drain

Final Touches

Now, it’s time for the finishing touches. Reinstall the aerator and clean up any excess caulk. Make sure the sink is level and properly aligned.

These final steps will make your new sink installation look great. It will also help it work well for years to come.

Thorough testing ensures your new sink will provide reliable service. With final touches done, your sink installation is ready for use.

Maintenance and Care

Sink Maintenance

Proper sink care is vital for long-lasting, optimal performance. Clean regularly with mild soap and water. Avoid harsh chemicals that can damage the finish.

Clean the aerator every few months to maintain good water flow. Check under the sink for leaks periodically.

Use a sink grid to protect the bottom from scratches. These simple steps will keep your sink looking and working great.

Cleaning and Care Tips for Different Sink Materials

  • Stainless steel sinks require daily rinsing with mild soap and warm water to prevent water spots and mineral buildup.
  • Granite composite sinks can be cleaned with a 50% bleach solution for stubborn stains.
  • Porcelain enameled steel sinks should be cleaned with a 50/50 water and bleach solution for harder stains.
  • Fireclay sinks should be cleaned with gentle, non-abrasive cleaners to avoid damaging the surface.
  • Hand-hammered copper sinks need regular application of beeswax to maintain their beautiful finish.

Wipe faucets with a soft, dry cloth to prevent mineral scale buildup. Gently disassemble and rinse the aerator periodically.

Follow the manufacturer’s cleaning and maintenance guidelines. This ensures your sink’s beauty and functionality. With proper care, your sink will serve you well for years.

Tips for Hiring the Best Sink Installation Professionals

Professional help is often the best choice for kitchen sink installation. This is especially true if your project requires major plumbing changes. Experts ensure a smooth and successful installation process.

Follow these tips to find a qualified and cost-effective sink installation professional:

  • Research local kitchen sink installation professionals and read reviews to assess their expertise and customer satisfaction.
  • Request quotes from multiple providers to compare services, costs, and warranties.
  • Look for licensed and reputable plumbers who understand your specific needs and can provide a detailed installation plan.
  • Ask potential contractors about their qualifications, experience, and to provide examples of their previous work.
  • Ensure the selected professional is capable of handling any necessary plumbing or carpentry work for a seamless sink installation process.

Hiring an expert can save you time and money. They can help source materials and connect pipes properly. This ensures your new kitchen sink meets the highest standards.

Let FindPros Handle Your Sink Installation

Are you looking to install a new drop-in sink, but unsure about the labor costs and process? FindPros can help. We’ll connect you with top-rated local professionals who can handle the entire sink installation, from the initial measurements to the final plumbing connections. Save money by letting multiple pros compete for your job and find the one you get along with best. Simply answer a few questions about your home project, and within seconds, we’ll match you with the perfect contractor for the task. No more guesswork on pricing or struggling to DIY the installation. Let the pros at FindPros handle your new sink, faucet, and all the necessary fittings, washers, and debris cleanup. Get started on your budget-friendly bathroom or kitchen upgrade today.

Conclusion

A new sink can boost your kitchen’s style and function. With proper prep and care, you can install a sink successfully. This guide helps homeowners confidently install a new kitchen sink that looks great and works well.

The right tools, materials, and patience lead to professional-quality results. Your new sink will enhance your kitchen for years to come. This guide covers everything from sink selection to plumbing connections.

A new sink can make your kitchen more appealing and efficient. With these sink installation tips, you can tackle this project with confidence. Enjoy your beautifully updated kitchen for years to come.

Frequently Asked Questions (Sink Installation)

To remove your existing sink, first disconnect the plumbing, including the water lines and drain pipe. Then, locate and remove any screws or clips holding the sink in place. Carefully lift the existing sink out of the countertop opening.
When choosing a new kitchen sink, consider the size and shape that will fit your existing countertop opening. Also, decide on the type of sink, such as a drop-in, undermount, or farmhouse style. Think about features like the number of bowls, the depth of the sink basin, and if you want a built-in garbage disposal or soap dispenser.
To install a new kitchen sink, start by measuring the countertop opening and cutting a new hole if necessary. Follow the manufacturer’s instructions to properly secure the sink, making sure it is level and aligned correctly. Then, reconnect the water lines and drain pipe, testing for any leaks.
You’ll need basic tools like a wrench, pliers, screwdriver, and a silicone caulk gun. You’ll also need the new sink, a sink installation kit, plumber’s putty, and any necessary plumbing supplies like new water lines or a slip nut for the drain pipe.
Many homeowners choose to hire a licensed plumber for a kitchen sink installation, especially if it involves significant plumbing work or access to the pipes and drains underneath the sink. A professional can ensure the job is done correctly and safely, which can save you money in the long run compared to attempting a DIY installation.