Estimate the vinyl fence material needed for your project, including vinyl panels, posts, and concrete. The calculator will also generate a price estimate for the materials and locate post center measurements.
Author: Findpros
Fence Stain Calculator
Fence Stain Calculator
Use the calculator below to estimate how much material you’ll need to paint or stain a fence.
-
By
FindPros

FindPros connects consumers with professionals in over 600 different categories.
-
Reviewed by
Jacky L.
FindPros connects consumers with professionals in over 600 different categories.
Paint/Stain Estimate:
{{stain_needed}}
{{stain_needed_per_quote}}
{{total_sq_ft_area}}
How to Estimate Paint or Stain for a Fence
Over time, a wooden fence can become weathered and dull, and you’ll need to paint or stain it to restore its beauty and protection. Both paint and stain need to be reapplied periodically to help protect your fence from the elements and UV rays. Stain ideally needs to be reapplied every other year, while paint may last three to five years, although there is some flexibility for both.
Before you start the painting or staining process, it’s crucial to estimate how much paint or stain you’ll need to complete the project.
There are a few things you need to do to estimate paint or stain.
Step One: Measure the Fence
Measure the length and height in feet of each fence panel, then multiply them together to find the total square footage of the fence. Repeat this process for each section of the fence, remembering to measure the gates as well.
If you’re finishing both sides of the fence, you’ll need to double your square footage measurement. Keep in mind that your fence style can influence the amount of paint.
Picket fences with a lot of spaces between the pickets will require less paint than a solid fence, while fences that have a lot of extra posts, rails, and decorative areas may require more paint.
Because paint and stain can have a range of coverage, keep in mind that for fences that have more surface area to cover, you will be at the lower end of the coverage range, while fences with less area to cover may be at the higher end.
Step Two: Note the Type of Wood
The type of wood you’re trying to finish will determine how much paint or stain you need to cover it fully. Softwoods, such as pine or cedar, will absorb more paint or stain than hardwoods, such as oak or mahogany.
Most fences are made of softwoods, with the most common materials being redwood, cypress, pine, and cedar. However, some fences can be made of oak, teak, or mahogany. It is important to know the material of your fence, if possible, as it can affect not only how much paint or stain it absorbs, but also whether a primer is necessary as well.
A new fence constructed using new, unfinished lumber will also absorb more finish than one that has already been finished, painted, or primed. Some fence installers recommend letting your fence weather for a season before applying stain or paint for this reason.
The age of the fence will also play a role. Significant weathering causes the grain of the wood to open and will require much more paint or stain to get full coverage than wood that is not heavily weathered.
Most experts also suggest using a semi-transparent or solid stain for wood that is weathered to avoid a blotchy, uneven look that results from using clear or translucent stains.
If there are any sections of the fence that are beyond repair, then it’s best to replace them before you apply the new finish so they blend with the rest of the fence. Learn more about how much it costs to repair a fence.
Step Three: Choose a Paint or Stain Product
The color and type of paint or stain you use also affects how much is needed to fully cover the fence. For example, very light or very dark colors may require additional coats to evenly and completely cover the fence.
This is particularly true if you are changing the color of the fence. Going from dark to light or light to dark may require additional coats of paint or stain.
Each type of paint or stain varies in how much square footage it will cover per coat. Check the can to find the coverage rate for the specific product you intend to use.
Typically, one gallon of paint or stain covers 250-350 square feet of fence. Your coverage rate will vary depending on the type of wood, its condition, and the type and style of fence. Fences that have more surface area to cover, such as a shadowbox fence will need more material to cover than a panel fence, for example.
Step Four: Calculate the Amount of Paint or Stain Needed
Once you have the measurements of the fence and the coverage rate for the product you’re using, it’s time to calculate how much paint or stain you need.
Start by dividing the square footage of the fence from step one by the coverage rate of the product you’re using.
Then, multiply that by the number of coats you want to apply. Typically, two coats are required to get a good finish, but keep in mind that very light or dark colors may require an additional coat.
If the wood is new and has not been finished before, or if it’s very weathered, then you’ll need to account for this and add a bit to your estimate.
You should also consider adding an extra 10% of additional paint or stain to account for spillage, overspray, etc.
In general, refreshing a fence with a few coats of paint or stain is a cost-effective way to restore its beauty and protect it from the elements. Over time, these costs can add up, however, which is an important consideration when choosing a new fence, and why many choose to install a vinyl fence instead of wood.
You might also be interested in calculating the amount of stain needed for a deck.
Recommended Fence Resources
Concrete Driveway Calculator
Concrete Driveway Calculator
Estimate the concrete, rebar, gravel, and form material needed for a concrete driveway installation and get a price estimate by planning the location on a map or entering the length and width.
-
By
FindPros
FindPros connects consumers with professionals in over 600 different categories.
-
Reviewed by
Jacky L.
FindPros connects consumers with professionals in over 600 different categories.
Material Estimate:
{{concrete}} yds³
{{forms_stakes}}
{{rebar}} ft
{{crushed_stone_base}} yds³
{{forms}} ft
Estimated Material Cost:
${{concrete_cost}}
${{rebar_cost}}
${{crushed_stone_base_cost}}
${{forms_cost}}
${{forms_stakes_cost}}
${{total_cost}}
Installation Overview:
{{driveway_area}} ft²
{{driveway_perimeter}} ft
Learn how we calculated this below
Direct Link to Results:
How to Estimate Material for a Concrete Driveway

Concrete is a beautiful, long-lasting, and maintenance-free choice for a driveway. There are many steps in preparing for a driveway project, and one of the most important is having the right materials ready for the job.
Of course, you need to order the right concrete for your driveway, but before that, you also need to have a proper base prepared, a rebar grid installed, and forms ready to contain the concrete while it hardens.
All of these materials need to be ordered in the correct amounts for the project to be completed successfully. Concrete, in particular, must be poured at once; if you don’t order enough for the single pour, your driveway may not last.
How Much Concrete Do You Need for a Driveway?
Concrete is sold by the cubic yard, which is a measure of volume. To find the amount of concrete needed for a driveway, you simply find the volume of the space to fill in cubic yards.
Start by finding the area of the driveway in square feet. Multiply the length by the width in feet to find the square footage.
Next, multiply the area in feet by the depth of what you want the concrete to be in feet. Since the depth of a driveway is commonly measured in inches, divide the inch measurement by 12 to find the depth in feet.
Multiply the square footage by the depth in feet to find the volume in cubic feet. You can find the volume by measuring length × width × depth.
Finally, divide the cubic footage by 27 to find the volume in cubic yards. This is the amount of concrete needed.
Let’s illustrate this using an example of a driveway that is 20’ wide by 50’ long and has a depth of 8″.
20 × 50 = 1000 ft2
8” ÷ 12 = .66666667′
1000 × .66666667’ = 666.67 ft3
666.67 ÷ 27 = 24.69 yds3
Our concrete calculator makes it easy to estimate concrete, and you can use it instead of the equations above.
How Much Rebar Do You Need
When installing a new concrete driveway, it is essential to add reinforcement to prevent major cracking as the driveway shifts. You can do this by adding a grid of rebar or by adding wire mesh to the concrete mix.
Mesh is used if your driveway is 4″ to 5″ thick, while rebar is needed for driveways that are 5″ thick or thicker. If you choose to use rebar, most professionals recommend using a #3 or #4 rebar installed in a grid spaced 12″ apart.

Estimating Rebar for a Rectangular Driveway
To estimate rebar for a regular driveway that is a standard rectangle, you’ll need to know the length and width. You’ll need a row or column every 12″ of the driveway, spaced about 3″-6″ from the edge. Subtract 6-12″ from the length and width measurements to get the length and width of the rebar grid.
To find the rows of rebar in the grid, find the length of the grid in feet to find the number of rebar pieces, and they should be equal to the width of the grid in length. To find the columns of rebar in the grid, find the grid’s width in feet to find the number of pieces of rebar, and the length of the grid is the length of the rebar pieces.
Estimating Rebar for an Irregular Driveway
To estimate rebar for an irregular driveway, you’ll need to know the area of the driveway in square footage and the perimeter of the driveway in feet. The perimeter is the measurement around the driveway and is taken in linear feet, meaning that you only need the total length around the driveway and no other measurements.
Multiply the square footage by 2 and add that to the perimeter divided by 2.
(square feet × 2) + (perimeter ÷ 2) = rebar length in feet
How Much Base Gravel do You Need
Most concrete contractors recommend installing a base of compacted gravel that is 4″ to 12″ deep below the driveway. It is essential to add a base to prevent settling and erosion and assists with drainage beneath the driveway.
Most driveways will use around 6″ of crushed, compacted gravel beneath the concrete.
Gravel is often sold by the cubic yard, so you can use the method we showed above for finding the cubic yards of concrete to find the yards of gravel. Use our cubic yardage calculator to find the amount of gravel needed for your driveway project.
Keep in mind that compacted gravel takes up less space than loose gravel. To ensure you have enough gravel, always order about 20% more than the loose gravel amount.
Planning Forms for Concrete Driveway Pour
When installing a concrete driveway, it will be important to set up forms to contain the concrete while it cures. A form is commonly a board secured to stakes that are driven into the ground and installed in the shape of the driveway.
For straight sections, you can use 2×4 or 2×6 pieces of dimensional lumber. For curved areas, hardboard siding makes a nice flexible form and is easily attached to wooden stakes. The amount of form material needed is equal to the perimeter of the driveway.
Measure the perimeter in feet, and round up to the nearest whole foot if between measurements. You will order this many linear feet of dimensional lumber to create the form.

There are two forms of stakes that can be used to secure the forms to the ground. Most professionals use steel concrete pins, which are basically large metal stakes with nail holes and are intended to be reused on many projects. A second and more cost-effective option is to use long wooden stakes, which can usually be used only once.
As an Amazon Associate, we may earn commissions from qualifying purchases from Amazon. Learn more
Summary
Installing a concrete driveway usually costs $4,000 – $8,500 and requires several materials that you’ll need to plan out in detail before starting the project. Use our calculator above to help plan out your driveway project.
See our gravel driveway calculator if you are exploring using gravel as an alternative option for your project.
Recommended Driveway Resources
Gravel Driveway Calculator
Gravel Driveway Calculator
Find the amount of gravel needed for a driveway by entering the dimensions of the driveway below. Add the price per cubic yard to estimate the cost of the stone.
-
By
FindPros
FindPros connects consumers with professionals in over 600 different categories.
-
Reviewed by
Jacky L.
FindPros connects consumers with professionals in over 600 different categories.
Crushed Stone Material Estimate:
{{cubic_yards}}
{{tons}}
*Estimate only – weight varies by material type.
Estimated Material Cost
{{cost}}
How to Estimate a Gravel Driveway
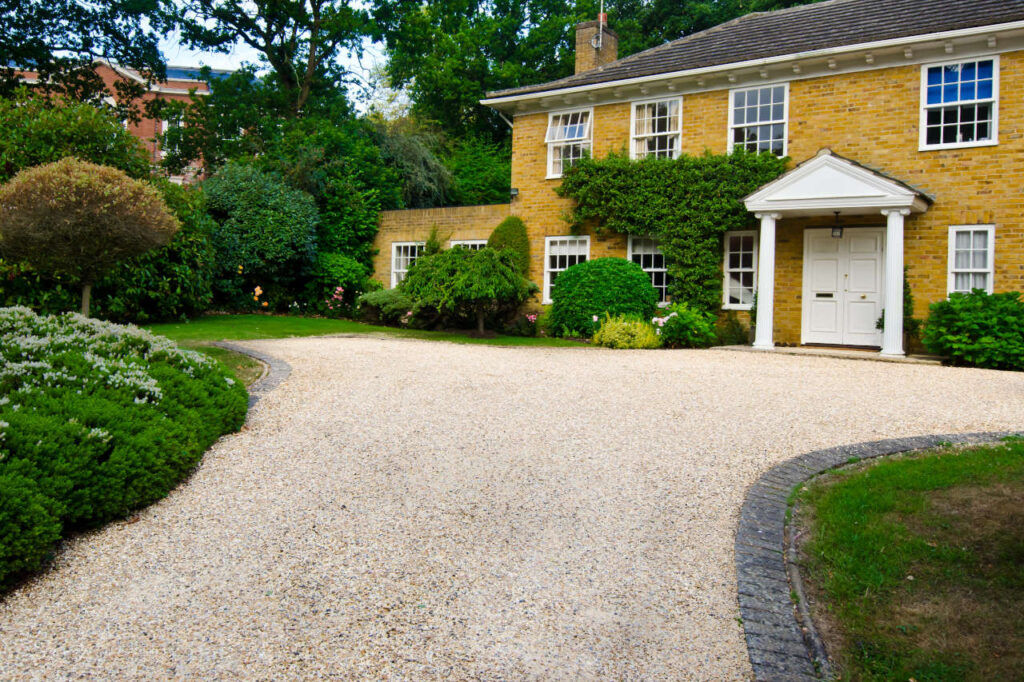
Crushed stone is a common material to use for a driveway because it offers a nice clean look, resists weeds, and is easy to install. Gravel driveways are also one of the most affordable types, making them a good choice for homeowners that have large driveways or who are on a budget.
Gravel does have a tendency to migrate, however, so many people with gravel driveways need to order new material every few years to keep the driveway looking its best. Gravel is commonly sold by the cubic yard, so to find the material needed for a driveway, you need to find the volume in yards.
Calculate How Many Cubic Yards of Gravel You Need
Estimating gravel driveway materials is as simple as estimating the cubic yards of volume the driveway needs to be. Cubic yards are found by multiplying the length by the width by the depth in yards.
Find the driveway’s length and width in yards by dividing the measurement in feet by 3. A 100′ measuring tape or measuring wheel may be needed to find these measurements depending on how long the driveway is.
Divide the measurement in inches by 36 to find the driveway’s depth in yards.
Most driveways should have a depth of 6″-8″ of gravel, but the entire driveway should be between 12″ to 18″ deep, made up of several different layers of material.
The top layer can be anywhere from 4″ to 8″ depending on your preferences and the type of gravel being used.
In most cases, you will have three layers of gravel: a sub-base that will be 6″ deep, a base that is 6″ deep, and a surface that is 6″ deep.
Each type of gravel will be different, with the sub-base being made of #3 gravel. This is a mixture of crushed stone up to 2″ in size.
The base layer or middle layer is usually made of #57 crushed stone. These stones are round but rough and are about the size of golf balls.
The final layer or surface layer can be made of smaller, more attractive gravel, including pea gravel, Jersey shore gravel, river rocks, or marble chips. Because this layer is finer, it is more likely to migrate and is the layer that most commonly must be replenished periodically.
The formula to find volume is length × width × depth. Multiply the width by the length by the depth in yards to find the cubic yards of gravel needed.
For example, if you are creating a driveway that is 30′ long and 12′ wide, and will use 18″ of total material, your calculations will look like this:
10 × 4 × .17 = 6.8 cu yds per layer
Round up to the nearest full yard for 7 cubic yards of each type of gravel used.
You will need to take this step for each layer if you are creating a new driveway. If you are replenishing the top layer, you will only need to do this once.
It’s a good idea to make sure that you have at least some extra gravel for each layer. Gravel can shift and you may lose some during the transfer from the truck to the driveway. By ordering roughly 10% more, you can mitigate any losses and ensure that you have enough material for the project.
Calculate How Many Tons of Gravel are Needed
Gravel is sometimes sold by the ton instead of the cubic yard. If you know how many cubic yards of gravel are needed, then find the number of tons needed by multiplying the cubic yards by 1.35.
For example, let’s calculate how much 50 cubic yards of gravel weighs using this formula.
50 cu yds × 1.35 = 67.5 tons
Note that different materials have different weights. Crushed gravel weighs about 1.35 tons per cubic yard, but other materials may vary in weight.
You can learn more about this on our gravel calculator.
Keep in mind that there are many types of crushed stone and rock that can be used on a driveway. Depending on your area and how much rain you get, you may use different base layers to facilitate drainage.
The larger the rocks used, the less volume you get per ton. Small rocks and gravel will shift together more tightly, so you can get a lot more volume per ton, and therefore have different weights.
Gravel driveways can range in price depending on their size and the type of gravel used, learn more about what impacts the cost.
Keep in mind that while most gravel driveways are more affordable than other driveways, they do require a lot more upkeep and maintenance. This includes adding additional material to the driveway periodically. The more costly your top surface layer, the more expensive your upkeep.
See our concrete driveway calculator if you want to compare to using concrete for your project.
Recommended Driveway Resources
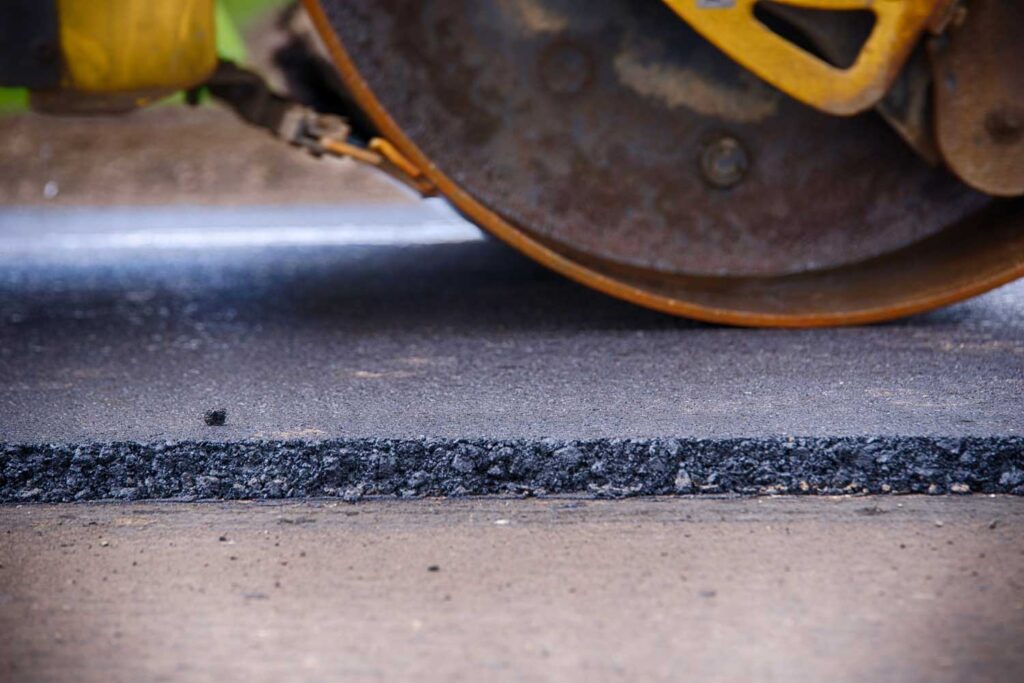
Asphalt Calculator
Asphalt Calculator
Estimate the amount of asphalt and base needed for a driveway parking lot, or small road and estimate the price of material using our calculator below.
-
By
FindPros
FindPros connects consumers with professionals in over 600 different categories.
-
Reviewed by
Jacky L.
FindPros connects consumers with professionals in over 600 different categories.
Material Estimate:
{{ hot_mix_asphalt_tons}} tons
{{ crushed_stone_base_min}} – {{crushed_stone_base_max }} yds³
Estimated Material Cost:
{{ hot_mix_asphalt_display_price}}
$
{{ crushed_stone_base_min_price}} – {{crushed_stone_base_max_price }}
$
{{ equipment_min_price}} – {{equipment_max_price }}
$
{{ estimated_total_min_cost}} – {{estimated_total_min_cost }}
$
*Estimate only – costs vary by location/vendor, selected material, and quantities.
Installation Overview:
{{driveway_area}} ft²
{{driveway_perimeter}} ft²
Learn how we calculated this below
Direct Link to Results:
How to Estimate Asphalt
Asphalt is a cost-effective and attractive option for a driveway or parking lot compared to alternatives, such as concrete, and requires little maintenance. Its dark color gives it an attractive appearance and hides imperfections.
Blacktop is a popular material in the north and areas where freeze/thaw conditions may cause materials like concrete to crack. Asphalt is made of a mixture of aggregates, including sand, crushed stone, or gravel held together with a binder made of bitumen.
Different grades and types of asphalt are available, which can influence things like cost and usage. When preparing for a new driveway, it’s essential to estimate the asphalt and other materials needed and be armed with a realistic labor cost to ensure you get a fair price.
How Much Asphalt Do You Need?
Hot mix asphalt is most often sold by the ton, and coverage varies based on the mix of aggregate and binder. Most asphalt mixes used for driveways and parking lots will weigh 142-148 pounds per cubic foot of coverage, with 145 being the average.
Using this formula, it is possible to find out how much asphalt you’ll need for a project.
To find the cubic footage of the project, multiply the length by the width by the depth in feet, then by the depth of the asphalt, or just use a cubic footage calculator. For example, 3” of asphalt is equal to 0.25 feet.
For example, a 10′ wide x 20′ long driveway with a depth of 3″ would be 50 cubic feet.
10′ × 20′ × 0.25′ = 50 ft3
To find the amount of asphalt needed, multiply the cubic footage by 145 to find the total weight needed, then divide by 2,000.
50 ft3 × 145 = 7,250 lbs
7,250 lbs ÷ 2,000 = 3.625 tons
You might also be interested in our asphalt sealer calculator.
Frequently Asked Questions
You can install asphalt in different thicknesses, but 3″ is the minimum thickness you should install. Residential driveways should be a minimum of 3″ thick with a 2″ thick base layer of asphalt and a 1″ thick top-wearing surface.
However, in cold climates, it is frequently recommended that you go thicker, using between 4″ and 6″ of full-depth asphalt. This will ensure that your driveway will be less likely to crack or develop frost heaves over time.
Parking lots expecting light-duty usage should be a minimum of 4-5″ thick, while parking lots designed for heavy-duty or truck use should be at least 7-8″ thick.
Most professionals suggest installing asphalt over a base of compacted crushed rock. Residential driveways installed over a sandy surface should have a 4″ compacted crushed gravel base, and driveways installed over clay should have an 8″ compacted crushed gravel base. Parking lots should also have an 8″ crushed gravel base.
Using a base can help you reduce the amount of asphalt needed. A base of crushed gravel that is 4” to 6” deep with a 3” base of asphalt on top can be a good option for many homes and may save over using a full thickness of asphalt.
Asphalt driveways typically cost $4,000 – $8,000 to install, depending on the size, local labor rates, and amount of prep work needed. If you need to remove an existing driveway, the costs could increase. Labor rates vary in different regions, and the overall cost will vary significantly with the cost of labor.
Recommended Driveway Resources
Asphalt Sealer Calculator
Asphalt Sealer Calculator
Use the calculator below to estimate how many gallons of sealer you’ll need to seal an asphalt driveway.
-
By
FindPros
FindPros connects consumers with professionals in over 600 different categories.
-
Reviewed by
Jacky L.
FindPros connects consumers with professionals in over 600 different categories.
Sealer Needed:
{{coverage_area}}
{{gallons}}
${{cost}}
How to Calculate How Much Asphalt Sealer You Need
Adding a fresh coat of sealer every few years is the best way to maintain your asphalt driveway’s appearance and protect the surface from water penetration, oxidation, and cracks. Calculating how much sealer you need is essential to ensure you have the right amount for your application.
You can calculate the amount of sealer required for an asphalt driveway in a few easy steps.
Step One: Determine the Coverage Rate
The coverage rate of an asphalt sealer is a critical factor in determining how much product you need. This rate indicates the area that can be covered by a certain amount of sealer under specific conditions. Manufacturers typically provide this information on the product label, and it is expressed in square feet per gallon (sq ft/gal).
The coverage rate can vary depending on several factors:
- Type of sealer: Different formulas (e.g., acrylic, coal tar, asphalt emulsion) have different consistencies and spreading capabilities.
- Application method: Sprayer, squeegee, or brush applications can affect how thinly or thickly the sealer is applied.
- Surface condition: Rough, porous surfaces require more sealer than smooth surfaces, so if your driveway is in poor condition, it will likely require more sealer to cover.
- Number of coats: Applying multiple coats will obviously require more product.
In our experience, most products cover around 100 square feet per gallon, but some products cover more or less. We’ve also found that when applying multiple coats, the second coat uses far less sealer than the first since the first coat absorbs more sealer.
Step Two: Calculate Sealer Needed
Once you know the coverage rate, you can calculate the amount of sealer needed for your driveway. Here’s the formula:
sealer needed (gallons) =
driveway area (sq ft)
coverage rate (sq ft ⁄ gallon)
The amount of sealer required in gallons is equal to the area to be sealed in square feet divided by the product’s coverage rate in square feet per gallon.
Keep in mind that sealer is usually sold in five-gallon buckets, so if you’re project needs 7 gallons, you’ll likely need to purchase two five-gallon buckets of sealer (10 gallons total) for the job.
For example, let’s apply the above formula to a driveway that is 50 feet long and 25 feet wide, using a sealer with a coverage rate of 100 sq ft per gallon for the first coat and 150 sq ft per gallon for the second coat.
Start by calculating the driveway’s area in square feet. You can use our square footage calculator to find this, or use the area formula like this:
area = 50 ft × 25 ft = 1,250 sq ft
Then, calculate the amount of sealer needed for the first coat.
first coat =
1,250 sq ft
100 sq ft ⁄ gal
= 12.5 gallons
You can repeat this to find the amount of sealer needed for the second coat.
second coat =
1,250 sq ft
150 sq ft ⁄ gal
= 8.3 gallons
And finally, add them together to find the total amount of sealer needed for the job.
total sealer needed (gallons) = 12.5 + 8.3 = 20.8 gallons
Therefore, for a 50 by 25 foot driveway, you would need approximately 21 gallons of sealer to apply two coats. You would likely need five buckets of sealer for this project.
You can use our guide to calculating sealer cost to estimate how much this project will cost.
Recommended Driveway Resources
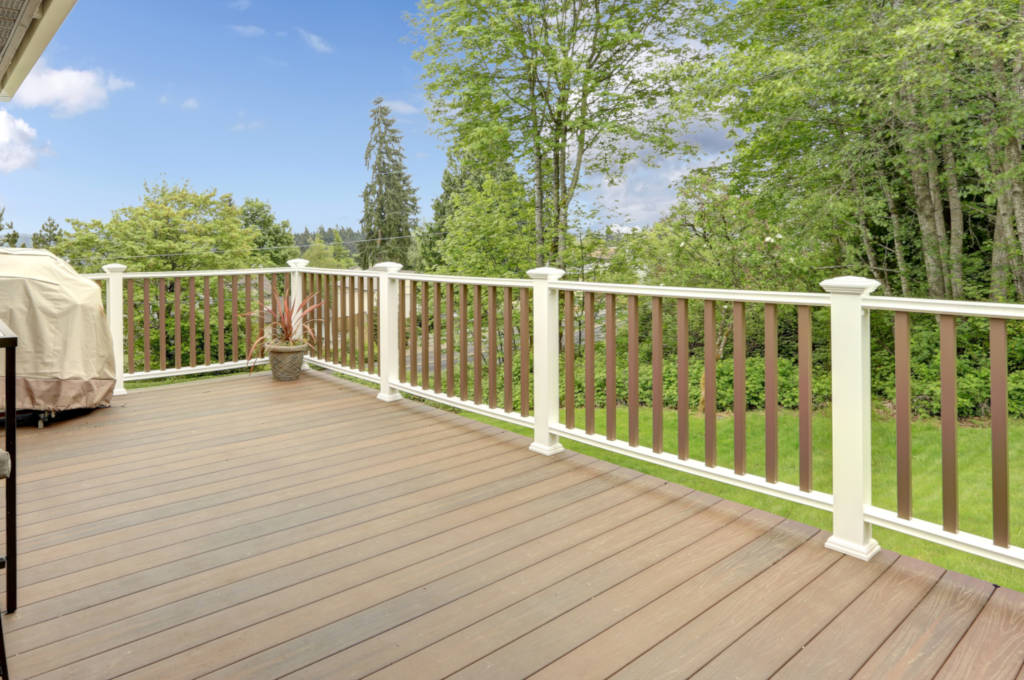
Deck Board Material Calculator
Deck Board Material Calculator
Calculate how many deck boards, hidden fasteners, and screws you need for a deck, given the deck’s size and preferred board length. Estimate the cost of decking, hidden fasteners, and screws by entering a price per board.
-
By
FindPros
FindPros connects consumers with professionals in over 600 different categories.
-
Reviewed by
Jacky L.
FindPros connects consumers with professionals in over 600 different categories.
Material Estimate:
{{total_deck_boards}}
{{total_hidden_fasteners}}
{{total_screws}}
Estimated Material Cost:
${{deck_board_cost}}
$
${{total_hidden_fasteners_cost_min}} – ${{total_hidden_fasteners_cost_max}}
$
${{total_screws_cost_min}} – ${{total_screws_cost_max}}
$
*Estimates only – costs vary by location/vendor, selected material, and quantities.
Installation Overview:
{{total_deck_boards}}
{{total_area_sq_ft}}
{{total_lineal_board_footage}}
How to Estimate Decking
Decks are a great way to add usable outdoor space to your home. There are many flooring surface options, including composite decking, cedar lumber, pressure-treated lumber, and exotic hardwoods. Before you can estimate materials for your project, you’ll need to gather some information about your deck.
Step One: Select Your Material
The first thing to do when estimating decking is to select the decking material you want to use. Consider budget, durability, and maintenance when choosing the flooring material for your project.
- Composite Decking: Composite decking is virtually maintenance-free, but it carries a higher cost than pressure-treated or cedar lumber. Some composites can get very hot in the sun, however, which may make them a poor choice for hot climates.
- Cedar Decking: Cedar makes a good choice for those that like natural colors and stains, but can be pricey depending on where you live, and if you paint it, it will require a primer to avoid cedar bleed.
- Pressure-Treated Decking: Pressure-treated lumber is a low-cost option, but will require you to use galvanized screws, nails, and fasteners to avoid rust over time. It can also be higher in maintenance than either cedar or composites.
Step Two: Measure the Deck Area
To estimate deck flooring materials, you need to find the square footage of your project. You’ll need to know your deck’s size in both length and width.
Multiply the deck’s length in feet times the width in feet to find the square footage. For example, a deck that is 10′ wide by 20′ long has 200 sq ft (10 × 20 = 200).
If your deck has a triangular section, multiply the length and width of two sides, then divide in half. If your deck is L-shaped or U-shaped, divide the deck into sections, get the square footage of each, then add them together for the total square footage.
Check out our square footage calculator for tips on calculating the square footage of oddly shaped areas.
Step Three: Determine Joist Spacing
You’ll need to know the joist spacing you are planning to use in order to determine the ideal board length and the number of fasteners you need, most commonly 12″, 16″, 20″, or 24″.
While joint spacing may not directly impact the number of boards you need, it can affect how many fasteners you use, and may help determine the correct length of boards for the project. Shorter joint spacing will require additional fasteners, but gives you more flexibility with board length, so you may be able to avoid having as many cuts.
Step Four: Determine Deck Board Sizes
Most boards are available in 3 ½” or 5 ½” widths and 8′, 10′, 12′, 16′, or 20′ lengths. The widely available selection is 5 ½” widths and 12′ or 16′ lengths.
Step Five: Find Board Area
Once you have selected your board length and measured the deck’s square footage, you need to find the square footage of the board. To find this, multiply the width of the floorboard in feet times the length in feet.
Try our feet and inches calculator to convert the board width in inches to feet, or measure both the width and the length of the board in inches, multiply them together, then divide by 144 to get the square footage of the board.
For example, if your boards are 5 ½” x 16′, you would multiply 5.5 × 192, then divide by 144 to get 7.34 sq ft per board.
Step Six: Calculate the Number of Boards
To find the number of boards you need, divide the total deck square footage by the board square footage. Use the following formula.
deck boards needed =
total sq ft
board sq ft
If you want a deck flooring price estimate when using the calculator, include the price per board. If you need to estimate your railing balusters use our baluster calculator.
If your deck measures 10′ wide by 20′ long, and you are using 5 ½” wide, 16′-long boards, your formula would look like this:
200 sq ft ÷ 7.34 sq ft = 24.25 boards
Round up to the nearest full board, in this case, 25 boards.
Deck Flooring Estimation Tips
Now that you’re a pro at estimating deck boards, consider the following tips as you continue to plan your project.
Remember the Stairs
In addition to measuring the deck area, measure how much lumber you’ll need for stairs as well. Use the same method to calculate your boards: get the length and width of each step in inches, multiply them together, and divide by 144 to get the square footage for each step.
Add them up to get the total square footage of stairs, then divide by the square footage of one board.
Order Extra Material
It’s also a good idea to order 10% additional lumber to account for waste and off-cuts. Ideally, you should also have a plank or two left over at the end of the project. Store these in case of needed future repairs. If you are installing your deck planks on a diagonal or in a pattern, order 20% extra material, as patterns require additional cuts and waste.
Order Extra Fasteners
Also, don’t forget to order enough fasteners for your project, such as hidden fasteners or stainless or galvanized screws. Make sure you order the correct fasteners for the type of decking you’re ordering. Some products, such as composite boards, may require a specific type of hidden fastener or screw.
Because composite boards are made by several manufacturers, always refer to the manufacturer’s installation guide for the type of composite you are using to get the right material. As with the decking, make sure you order at least 10% more fasteners to account for any that get bent or lost during the project.
Different Decking Materials are Sold Differently
While most composite, pressure-treated, or softwood decking (e.g. cedar or redwood) is sold by the board, some hardwood or exotic options are sold by the board foot. If that’s the case, use a board footage calculator to estimate how much lumber you’ll need for the project.
Board feet are calculated by the volume of each board, so you will need to know the decking thickness as well; most deck planks are 1 inch thick, but this can vary, so always check to be sure.
Estimate the Total Cost
Before you start your project, check out our deck cost calculator to get an idea of how much it costs to build a deck and what options are available.
Get Professional Estimates in Addition to Research
We have several great resources to help with your deck project. Get a free estimate from a local contractor if you’re interested in having someone else quote the project. Estimate how much concrete you need for your posts with our concrete footing calculator.
Recommended Deck & Patio Resources
Deck Stain Calculator
Deck Stain Calculator
Use the calculator below to estimate how much material you’ll need to paint or stain a deck.
-
By
FindPros
FindPros connects consumers with professionals in over 600 different categories.
-
Reviewed by
Jacky L.
FindPros connects consumers with professionals in over 600 different categories.
Stain Estimate:
{{total_stain_needed}} gallons
{{stain_needed_per_coat}} gallons
{{total_square_footage}} sq ft
How to Estimate Paint or Stain for a Deck
Over time, wooden decks can become weathered and dull, and they’ll need a fresh coat of paint or stain to restore their beauty and protection. Stain does more than simply make your deck look beautiful; it also helps protect your deck from the elements and UV rays. Stain ideally needs to be reapplied every other year, while paint can last three to five years before you need to repaint.
Before you start the staining process, you need to estimate how much paint or stain you’ll need to complete the project.
There are a few things you need to do to estimate stain for a deck.
Step One: Measure the Deck
Measure the length and width of the deck, then multiply these measurements together to find the total square footage. Repeat this process for each rectangular section of the deck.
If you’re finishing the stairs, then you’ll need to measure the width and depth of each tread, and multiply them together to find the square footage. Then multiply this by the number of steps. Repeat this for each riser on the stairs as well.
If you’re finishing the railing, then you’ll need to measure the length and height of the railing, and multiply together to approximate the square footage. The railing square footage will be a rough estimate, but since the balusters need to be coated on four sides, this should be reasonably close.
Remember that many decks have additional areas that may require stain. This may include the trim around the edge, posts or poles, the stringers on the sides of the stairs, as well as features like built-in benches. Be sure to measure each of these areas as well to ensure you have enough stain for the entire project.
Add all of these square footage measurements together to estimate the total square footage. Most deck stains can cover between 150 and 300 sq. ft. per gallon.
If your deck is older and extremely weathered or if it’s very new and has never been stained before, you may need additional stain. If you are getting close to the top range of what a gallon can cover, make sure that you purchase an additional gallon.
Step Two: Note the Type of Wood
The type of wood you’re trying to finish will determine how much stain you need to cover it fully. Softwoods, such as pine or cedar, will absorb more than hardwoods, such as teak.
A new deck constructed using new, unfinished lumber will also absorb more finish than one that has previously been stained. Keep in mind that prior to staining, the deck should be pressure washed, which will remove any old and loose stain. Don’t count on there being a solid coat of stain in place that you will be covering over.
The age of the deck will also play a role. Significant weathering causes the grain of the wood to open and will require much more stain to get full coverage than wood that is not heavily weathered.
If there are any sections of the decking that are beyond repair, then it’s best to replace them before you apply the new finish so they blend with the rest of the deck. Learn more about how much it costs to repair a deck.
Step Three: Choose a Stain Product
Each type of paint or stain varies in how much square footage it will cover per coat. Check the can to find the coverage rate for the specific product you intend to use.
Typically, one gallon of paint or stain covers around 175 square feet of decking.
Keep in mind that if you are using a solid stain or a paint, and you have a cedar or redwood deck, you may need to prime it first. Both cedar and redwood will discolor paint. This is known as cedar bleed, and a good primer will stop it from discoloring the paint.
Step Four: Calculate the Amount of Stain Needed
Once you have the measurements of the deck and the coverage rate for the product you’re using, it’s time to calculate how much stain you need.
Start by dividing the square footage of the deck from step one by the coverage rate of the product you’re using.
Then, multiply that by the number of coats you want to apply to get the total number of gallons of stain needed. Typically, two coats are required to get a good finish, but keep in mind that very light or dark colors may require an additional coat.
This is particularly true if you are switching deck stain colors and moving from light to dark or dark to light. Stains have different amounts of coverage, from semi-translucent to opaque.
Therefore, the rate that they can cover will also differ. Opaque stains may cover more completely in one coat than a semi-translucent stain.
You should also consider adding an extra 10% of additional stain to account for spillage, drips, waste, etc.
In general, refreshing a deck with a few coats of stain is a cost-effective way to restore its beauty and add a layer of protection.
You might also be interested in calculating the amount of stain needed for a fence.
Recommended Deck & Patio Resources
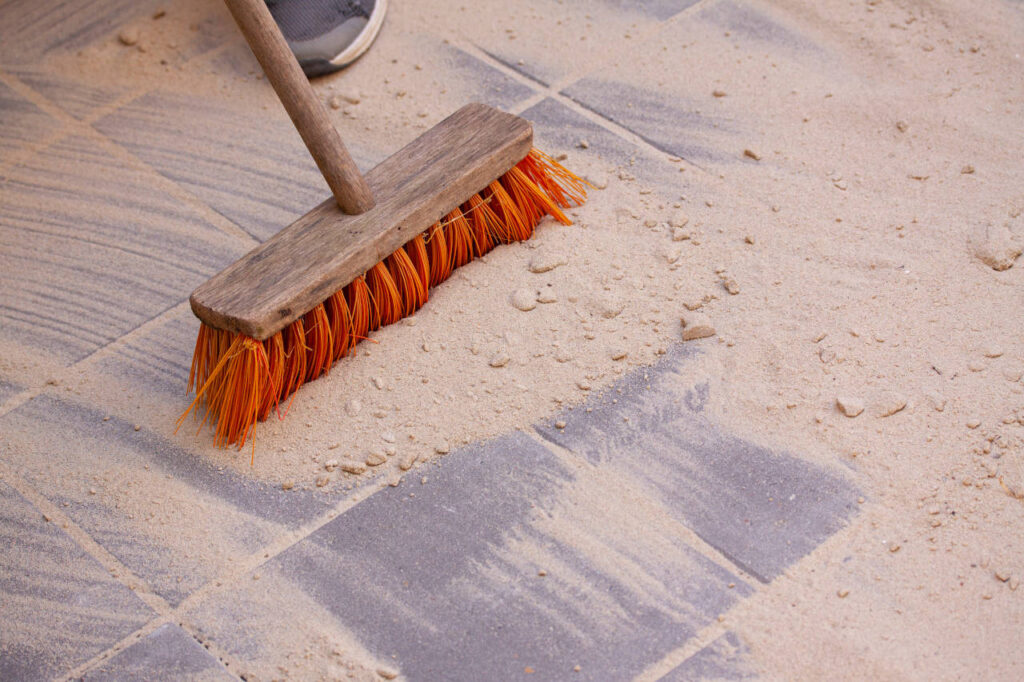
Polymeric Sand Calculator
Polymeric Sand Calculator
Find how much polymeric sand or jointing sand you need for your paver patio, walkway, or driveway project by entering the size of the installation below.
-
By
FindPros
FindPros connects consumers with professionals in over 600 different categories.
-
Reviewed by
Jacky L.
FindPros connects consumers with professionals in over 600 different categories.
Polymeric Paver Sand Estimate:
Bags Needed
{{bags_needed}}
Total Area
{{total_area}}
{{total_area}}
What is Polymeric Sand?
Polymeric sand, or jointing sand, is a fine sand bound with polymers that is used to fill joints between pavers.
It’s often swept into the joints and then sprayed with water, which activates the polymers and causes the sand to harden. This makes polymeric sand more durable and longer lasting than some alternatives. Polymeric sand is added after the pavers are installed to finish the project.
After hardening, it is resistant to washing out, prevents ant hills and weed growth, and locks the paver installation, preventing pavers from coming loose and making the patio or driveway more durable. Having material between the joints of the pavers also protects them from damage.
The sand is able to flex and move, so if there are upheavals or movement in the ground, the paver edges do not hit one another. This keeps the pavers from chipping on the edges or cracking.
How to Estimate Polymeric Sand Coverage
Polymeric sand coverage will vary slightly from product to product, and is largely determined by the thickness of the gap between the pavers, as well as the size and depth of the pavers you are using. Installations with a large gap between pavers or when using a paver with a tumbled edge will require more polymeric sand to fill the gaps. Pavers with straight edges or that have vitrified edges – edges that have been machined to be very straight – will need less sand.
When filling small gaps, a 50lb bag of polymeric sand will usually cover 75-100 sq ft. When filling wide gaps of 1/4″ to 3/8″ a 50lb bag will usually cover 30-60 sq ft.
Accounting for Wide Joints
Wider gaps, for example, when using flagstone pavers, will require even more sand to fill, even if the depth and size of the pavers remain the same. A flagstone installation with large or irregular gaps may need a 50lb bag for every 8-10 sq ft.
It is important to verify the coverage for the material you’re using, the amount of coverage is often labeled on the package.
Accounting for Paver Size
Keep in mind that the overall size of your pavers will also influence the amount of sand needed. Small pavers have more joints than large pavers, so they need more sand per square foot than larger pavers may. Depth will also play a role; a brick paver that is 3″ thick will require more sand than a flagstone paver that is 1″ thick.
After identifying the polymeric sand coverage for your patio, simply divide the square footage of the area by the coverage of the sand to find how many bags are needed.
Alternatives to Polymeric Sand
Polymeric sand is only one material that can be used to fill the joints between pavers. Other materials are also available that allow for more water drainage, such as fine, dry sweeping sand.
While polymeric sand is designed to harden with water and doesn’t wash out as easily, dry sweeping sand and other alternatives can allow for better drainage, which may be a better choice in wet climates.
Keep in mind that polymeric sand does last longer than dry sweeping sand. However, even polymeric sand can wash out over time, and may need to be replaced for older paver installations.
If you prefer wide spaces between pavers, such as a 2″ to 6″ gap, you can also use gravel or stone to fill the space and lock them together.
See our paver calculator to find how many pavers you need to install a patio.
Recommended Deck & Patio Resources
Paver Calculator and Price Estimator
Paver Calculator and Price Estimator
Calculate how many pavers are needed for your patio project by entering your patio dimensions and paver size. Estimate the cost of your project by entering a price per paver below.
-
By
FindPros
FindPros connects consumers with professionals in over 600 different categories.
-
Reviewed by
Jacky L.
FindPros connects consumers with professionals in over 600 different categories.
Material Estimate:
Material Estimate:
{{total_paver}}
{{ gravel_volume_yd}} cu yd
{{ gravel_volume_m }} cu m
{{ sand_volume_yd}} cu yd
{{ sand_volume_m }} cu m
{{ total_polymeric_sand}} bags
Estimated Material Cost
${{paver_cost}}
${{total_crushed_stone_cost}}
${{total_sand_cost}}
${{total_polymeric_sand_cost}}
${{estimated_total_cost}}
Estimates only – costs vary by location/vendor, selected material, and quantities. Material estimates assume a 4″ stone base, 1″ sand base, and 50 lb bags of polymeric sand
Installation Overview:
{{ total_sq_footage }} ft2
{{ total_sq_meter }} m2
Learn how we calculated this below
Direct Link to Results:
How to Calculate Pavers
This calculator is great for determining the amount of material needed for any paver installation.
Pavers are blocks made of brick, stone, or concrete that can be installed to create walkways, patios, and driveways, amongst other things.
They come in several sizes and colors, as well as shapes, allowing you to customize your project.
To calculate how many pavers you’ll need, simply enter the patio’s size and the paver’s dimensions, and the calculator will find the number of pavers needed.
Enter the price per paver to get a material cost estimate. If you’re planning on installing the pavers yourself, check out this guide on how to install a paver patio to prepare for your installation.
How to Find the Number of Pavers Needed
An important component in planning your project is to determine how many pavers you need. Follow the three simple steps below to easily estimate your materials.
Step One: Calculate Patio Size
The first step to estimate how many pavers you need for any patio, walkway, or driveway installation is to measure the area of the project; you’ll need to measure the length and width of the area in feet.
Calculate the square footage by multiplying the width by the length, or use a square footage calculator to find the square footage of areas that are not rectangular.
Patio Square Footage Formula:
sq ft = length(ft) × width(ft)
Thus, square footage is equal to the length in feet multiplied by the width in feet.
Step Two: Calculate Paver Size
The next step is to find the square footage of the paver you want to use. Measure the dimensions of the paver in inches, then apply a variation of the square footage formula above.
Paver Square Footage Formula:
Since the measurements of the pavers are in inches, you can use the following formula to find their square footage.
paver sq ft =
length(in) × width(in)
144
So, the square footage of the pavers is equal to their length in inches multiplied by their width in inches, divided by 144.
For example, if you are using 4″ x 8″ pavers, multiply these measurements together to get the number of square inches in one paver.
Then, divide this by 144 to get the number of square feet in one paver.
For a paver of this size, it would be equal to 0.23 square feet per paver. There are just over four pavers of this size in one square foot.
paver sq ft =
4″ × 8″
144
= 0.23 sq ft
After you have found the square footage of both the project and the paver, determining the number of pavers needed is as simple as dividing the patio’s square footage by the paver’s square footage.
Formula to Estimate Pavers:
pavers needed =
patio sq ft
paver sq ft
For example, if your installation area is 600 sq ft and you are using a 4″ x 8″ paver, then you would need 2,609 pavers. Recall that a 4″ x 8″ paver is 0.23 sq ft.
pavers needed =
600 sq ft
0.23 sq ft
2,609
When the result is not even, always round up to the nearest full paver.
Most experts suggest ordering at least 10% more pavers to account for broken pavers or cuts if you are installing the pavers in a straight pattern. If you install them on a diagonal (e.g. herringbone), then you should order at least 20% more pavers to accommodate the extra cuts required by the pattern.
How to Estimate Pavers When Using a Multi-Piece Pattern
Because patterns can consist of different shaped pavers, using one of these patterns can impact how you calculate the number you’ll need.
When the pattern forms a repeating square or rectangle, you can calculate the square footage of this pattern easily by getting the length and width of the total pattern, then multiplying together, and dividing by 144 to get the total square footage of the full pattern.
In some cases, the pattern will not make a square or rectangle, such as a 3-piece pattern using two 4″ x 8″ pavers and one 8″ x 8″ paver, then calculate the square footage of each one individually, and add them together – in this case, 0.89 sq ft per pattern repeat.
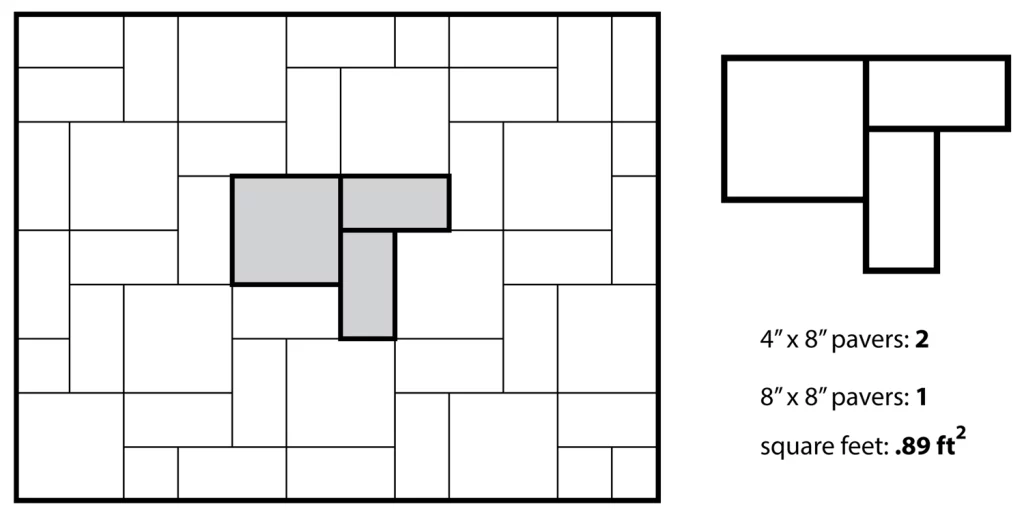
Then, divide the total area in square feet by the size of the pattern to find the total number of pattern repeats you’ll need. Then you can multiply that by the number of pavers in the pattern to find the total of each size needed.
As with patterns made of a single size, always order at least 20% more material to account for waste. Keep in mind that patterns sold in multiple pieces like this may require you to order minimums, in which case, it’s often enough to round up to the nearest full pattern required.
You can learn more about the various patterns available in our list of paver layout patterns.
How to Estimate the Base for a Paver Installation
When installing pavers, you must have a solid base to support the patio and prevent settling over time. We recommend starting with a base of 4″ to 6″ of compacted gravel topped with 1″ of sand, which is an industry-standard for most patio installations.
To estimate the amount of gravel and sand required, you must find the sq ft of your patio and then find the volume necessary for a 4″ to 6″ layer of compacted gravel and a 1″ layer of sand. Use our paver base calculator to estimate the amount of gravel and sand you need for the base of your paver project.
Polymeric Sand
In most paver installations, you’ll need to add polymeric sand to fill in the joints between the pavers. Adding polymeric sand locks them together so they don’t move, and also prevents weeds and plants from growing in the joints.
A 50lb bag of polymeric sand typically covers 25-50 square feet. Use our polymeric sand calculator to estimate how much you need for your installation.
Common Paver Sizes
Common paver sizes and dimensions in inches and centimeters and the quantity needed to cover a 10′ x 10′ patio (100 square feet).
| Paver Size in Inches | Paver Size in Centimeters | Pavers per 100 sq ft |
|---|---|---|
| 4″ x 8″ | 10cm x 20cm | 450 |
| 6″ x 6″ | 15cm x 15cm | 400 |
| 6″ x 9″ | 15cm x 23cm | 267 |
| 8″ x 8″ | 20cm x 20cm | 225 |
| 12″ x 12″ | 30cm x 30cm | 100 |
| 14″ x 14″ | 36cm x 36cm | 74 |
| 12″ x 18″ | 30cm x 46cm | 67 |
How to Estimate the Cost of a Paver Patio
The average cost to have a professional install a paver patio is $8 – $20 per square foot. If you have the tools necessary, it is possible to install them yourself. Keep in mind that if you do not already own the tools, you will need to take the cost of their rental or purchase into account for the full installation cost.
To estimate how much your pavers will cost, multiply each paver’s cost by the number required for your patio. You can do this for your base materials and sand once you have those measurements as well.
Keep in mind that sometimes it can be less expensive to have one company purchase materials and install them for you, than it is to do it yourself if you do not already own the necessary equipment.
Frequently Asked Questions
The number of individual pavers on a pallet will vary by size. Generally, a pallet will hold between 78 and 160 sq ft of pavers, depending on size and shape.
Concrete pavers are the least expensive type of paver, while stone and brick cost more. Poured concrete is generally the least expensive material, though, while stamped concrete can be amongst the most expensive, often costing more than brick or stone pavers.
This can vary depending on the type of paver and your climate. Porous stone and concrete pavers don’t do well in freeze/thaw climates and may crack, while concrete pavers may be easily stained.
Bricks are one type of paver, but not all pavers are bricks. A paver is an individual construction unit, and may be made of clay brick, concrete, or natural stone.
In general, the answer is yes, but this will vary depending on the type of paver, how it’s laid out and installed, and what area you are installing them on. Patios tend to get the most value, while in the south, a paver driveway can add more value than poured concrete.
Next Step – Once you’re done laying out the patio or driveway, it’s time to begin the installation. Learn more about how to install a paver patio or driveway before you start.